
FlavorSmoke 450 - Industrial oven Blodgett - Free user manual and instructions
Find the device manual for free FlavorSmoke 450 Blodgett in PDF.

| Product Type | Smoker Controller for Commercial Oven |
| Brand | Blodgett |
| Model | FlavorSmoke 450 |
| Category | Commercial Oven Accessory |
| Supply Voltage | 120 V AC |
| Frequency | 60 Hz |
| Phase | Single-phase |
| Rated Current | 7 A |
| Usage | Cold smoking with wood chips |
| Maximum Operating Duration | 60 minutes per cycle |
| Timer Type | Adjustable Digital |
| Display | Screen with hour adjustment |
| End-of-Cycle Signal | Two beeps |
| Operating Indicator | Flashing during timer operation |
| Housing Material | Stainless steel |
| Cleaning | Housing, lid and deflector dishwasher safe |
| Mounting | Side or top mounting on oven panel |
| Included Accessories | Mounting plate, fixing screws |
| Safety | Automatic shut-off after 60 minutes; mandatory 60-minute cooling |
| Switch Type | On/Off (ON/OFF) |
Frequently Asked Questions - FlavorSmoke 450 Blodgett
User questions about FlavorSmoke 450 Blodgett
0 question about this device. Answer the ones you know or ask your own.
Ask a new question about this device
Download the instructions for your Industrial oven in PDF format for free! Find your manual FlavorSmoke 450 - Blodgett and take your electronic device back in hand. On this page are published all the documents necessary for the use of your device. FlavorSmoke 450 by Blodgett.
USER MANUAL FlavorSmoke 450 Blodgett
WARNING: IMPROPER INSTALLATION, ADJUSTMENT, ALTERATION, SERVICE OR MAINTENANCE CAN CAUSE PROPERTY DAMAGE, INJURY OR DEATH. READ THE INSTALLATION, OPERATING AND MAINTENANCE INSTRUCTIONS THOROUGHLY BEFORE INSTALLING OR SERVICING THIS EQUIPMENT.
FOR YOUR SAFETY - Do not store or use gasoline or other flammable vapors or liquids in the vicinity of this or any other appliance.
The information contained in this manual is important for the proper installation, use, and maintenance of this device. Adherence to these procedures and instructions will result in satisfactory baking results and long, trouble free service. Please read this manual carefully and retain it for future reference.
Errors: Descriptive, typographic or pictorial errors are subject to correction. Specifications are subject to change without notice.
ELECTRICAL RATINGS - 120VAC, 60 Hz, 1 phase, 7 amps.
ELECTRICAL CONNECTIONS
Before making any electrical connections to these appliances, check that the power supply is adequate for the voltage, amperage, and phase requirements stated on the rating name plate mounted on the unit.
The circuit breaker that is used to provide power to this appliance must have a minimum of .076" (3mm) contact spacing. The circuit breaker must meet all Local and National installation standards.
All appliances must be installed in accordance with Local or National Electrical codes.
WARNING!! - Improper installation may invalidate your warranty.
U.S. and Canadian Installations - A power cord is supplied with a plug attached. Plug the power cord into the appropriate receptacle.
WARNING!! - If the supply cord is damaged, it must be replaced by a special cord or assembly available from the manufacturer or its service agent.
INSTALLATION
- The smoker controller is to be attached to a panel of the oven.
- Use the mounting plate as a drill jig template for drilling 3/16 holes to mount the plate. The mounting plate should be located at a proper height for easy access. Note orientation of the mounting plate.
- Attach the mounting plate to the inside of the body panel using the 4 screws provided (2 screws for top mount).
- Once attached, reattach the body panel to the oven. The smoker controller can now be attached to the oven by means of the keyhole slots.
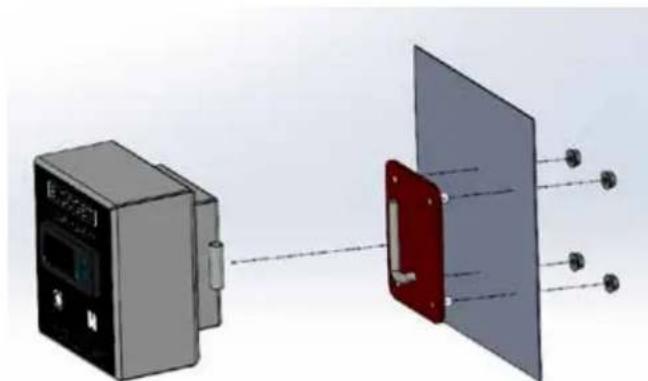
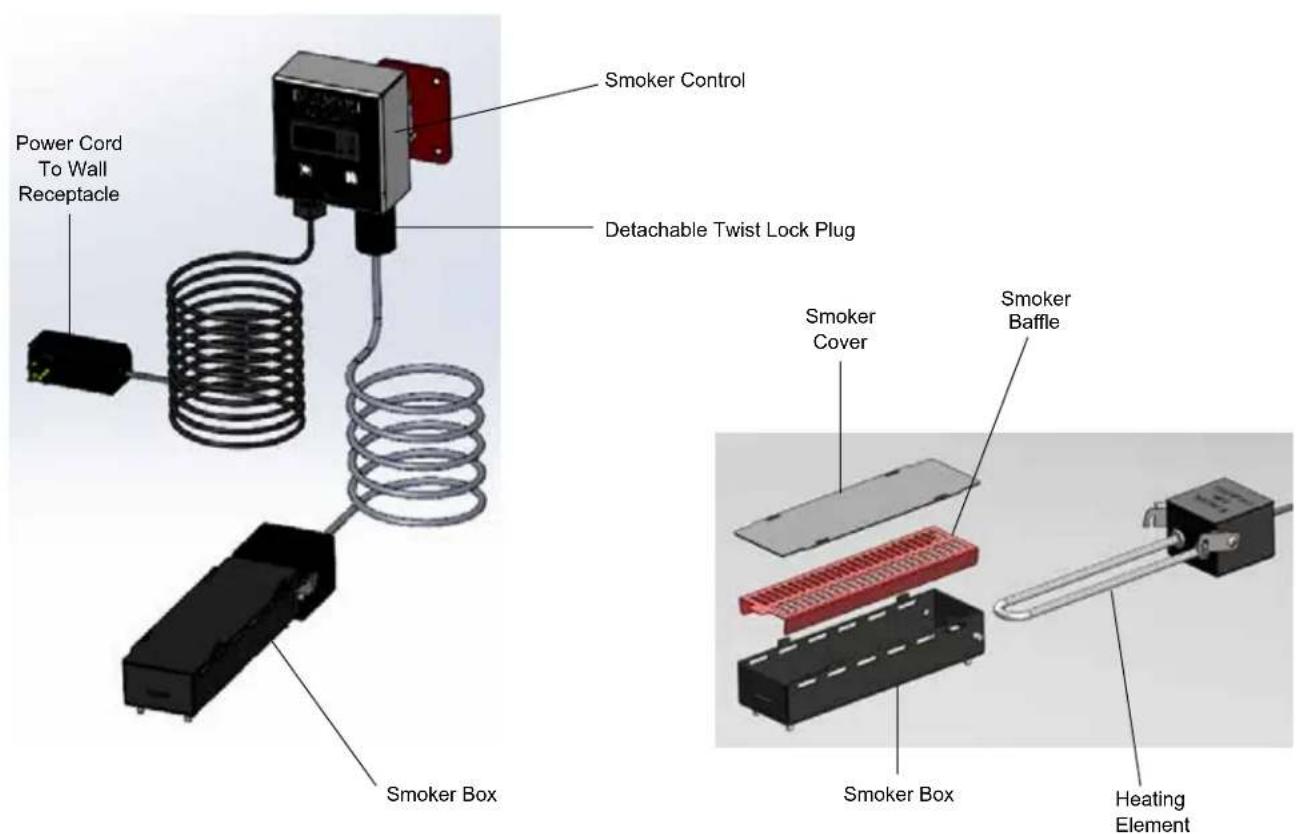
EXLODED VIEW-SIDE MOUNT
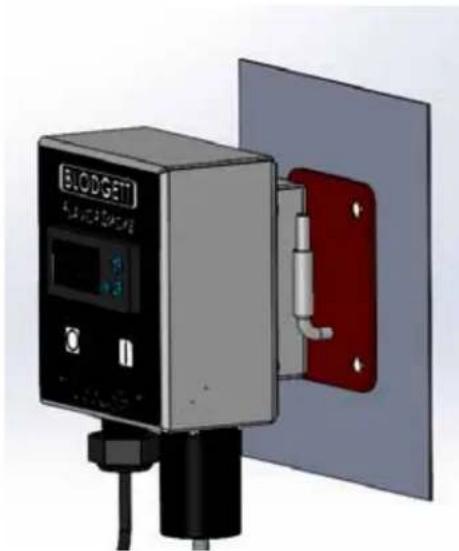
FINISHED VIEW-SIDE MOUNT
EXLODED VIEW - TOP MOUNT FINISHED VIEW - TOP MOUNT
OPERATION
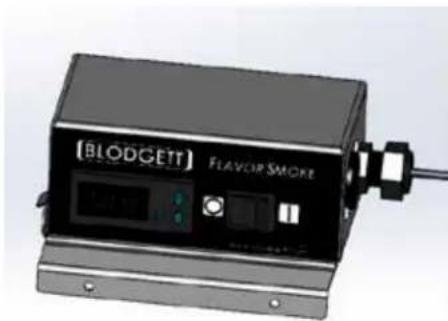
- ON/OFF Switch - Turns power on to the unit.
- DIGITAL CONTROL - Press SET button and use arrows to set the desired time. Press the SET button again to start timer.
- TIMER LIGHT - Flashes while timer is running.
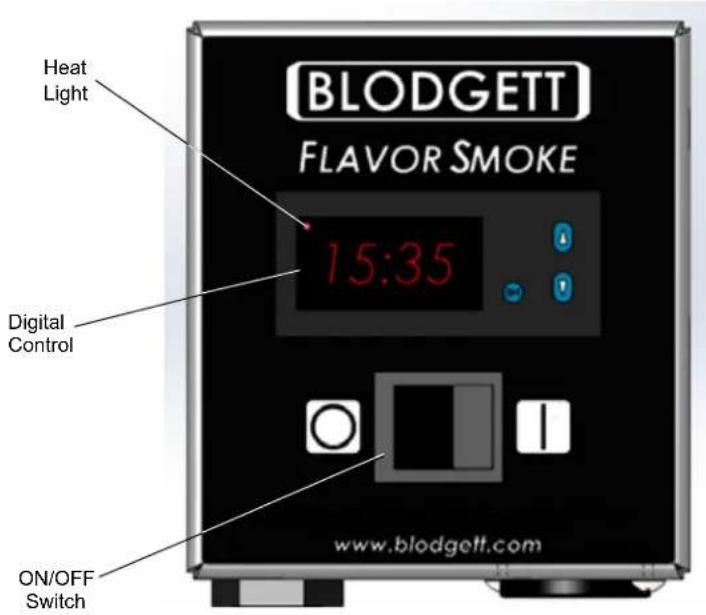
CONTROL-SIDE MOUNT
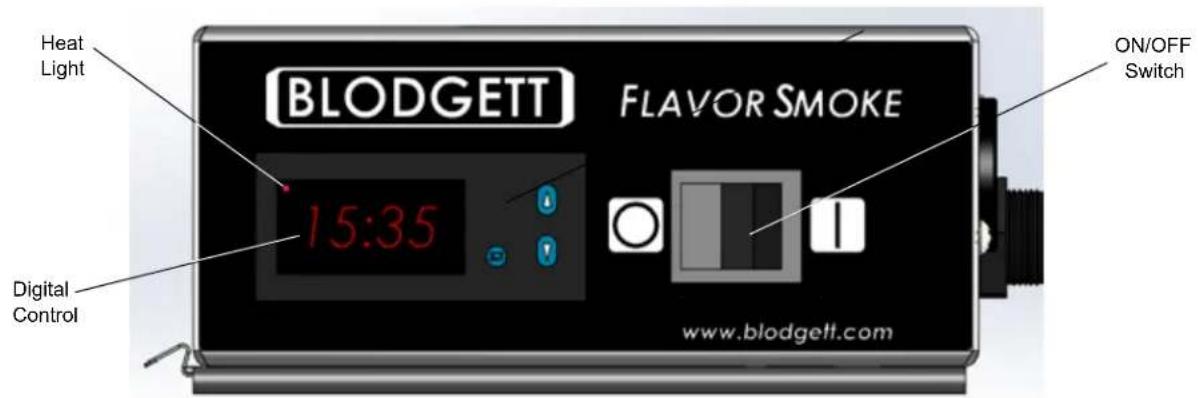
CONTROL-TOP MOUNT
The smoker is designed for wood chips only. Please follow wood chip manufacturer's tips on how long to soak them before use.
WARNING: The Smoker is designed to operate a MAXIMUM of 60 minutes at a time. Operator must allow the Smoker to cool off for a minimum of 60 minutes before using again.
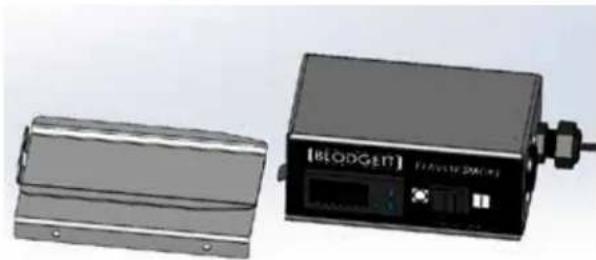
- Assemble the smoker box and baffle. Place the soaked wood chips onto the baffle then put the cover on the box.
- Slide the element into position. Place the whole assembly into the cold oven. Please note the smoker is not designed to be used while the oven is on.
- Arrange product to be smoked in the oven.
- Turn power switch on and press SET. Use the UP and DOWN arrows to set desired time. Press SET again to start timer. The TIMER LIGHT will flash while the timer is running, and the control will beep twice when time is up and return to standby mode.
- Remove the smoker from the oven. CAUTION: The box will be extremely HOT. Take precaution when removing.
- Cook your product.
MAINTENANCE
The smoker box, cover, and baffle may be cleaned in the dishwasher.
5 FLAVORSMOKE 450
IMPORTANT
AVERTISSEMENT : UNE INSTALLATION, UN AJUSTEMENT, UNE MODIFICATION, UN ENTRETIEN OU UNE RÉPARATION INCORRECT(E) POURRAIT CAUSER DES DOMMAGES MATériELS, DES BLESSURES OU MÉME LA MORT. VEUILLEZ LIRE ATTENTIVÉMENT LES INSTRUCTIONS D'INSTALLATION, D'UTILISATION ET D'ENTRETIEN AVANT D'INSTALLER OU DE RÉPARER CET APPAREIL.
Brand : Blodgett
Model : FlavorSmoke 450
Category : Industrial oven