SDPF1087 - Digital photo frame SYLVANIA - Free user manual and instructions
Find the device manual for free SDPF1087 SYLVANIA in PDF.


| Product Type | Digital Photo Frame |
| Brand and Model | Sylvania SDPF1087 |
| Screen Size | 10.1 inches (25.6 cm) with 1024 x 600 pixel resolution, 16:9 ratio |
| Power Supply | AC/DC adapter: input 100-120V 50/60Hz, output DC 5V/1.5A |
| Supported Image Formats | JPEG |
| Supported Audio Formats | MP3, WMA |
| Supported Video Formats | MPEG-1, MPEG-2, MPEG-4, M-JPEG, AVI |
| Compatible Memory Cards | SD, MS, MMC, SDHC |
| Connectivity | USB 2.0 (host), Mini USB, headphone jack |
| Main Functions | Automatic slideshow with background music, calendar, clock, alarm, automatic image rotation, brightness/contrast/saturation settings, zoom (up to 6x), manual rotation, file copy and deletion, display modes (1, 2, 4 or 3 windows) |
| Remote Control | Yes, with included CR2025 battery |
| Multilingual Menus | English, French, Italian, German, Spanish, Portuguese, Swedish, Dutch |
| Package Contents | Photo frame, AC/DC adapter, remote control, instruction manual, warranty card, stand |
| Maintenance and Cleaning | Use a soft LCD screen cloth; if necessary, dampen with suitable cleaning solution. Do not use abrasive products. |
| Safety | Do not expose to moisture or water. Do not obstruct vents. Do not disassemble the device. Indoor use only. |
| Operating Temperature | 0 °C to 40 °C, humidity 10-85% |
Frequently Asked Questions - SDPF1087 SYLVANIA
User questions about SDPF1087 SYLVANIA
0 question about this device. Answer the ones you know or ask your own.
Ask a new question about this device
Download the instructions for your Digital photo frame in PDF format for free! Find your manual SDPF1087 - SYLVANIA and take your electronic device back in hand. On this page are published all the documents necessary for the use of your device. SDPF1087 by SYLVANIA.
USER MANUAL SDPF1087 SYLVANIA
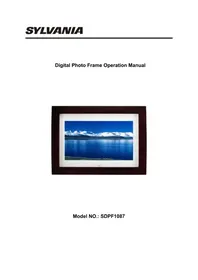
Digital Photo Frame Operation Manual
natural_image
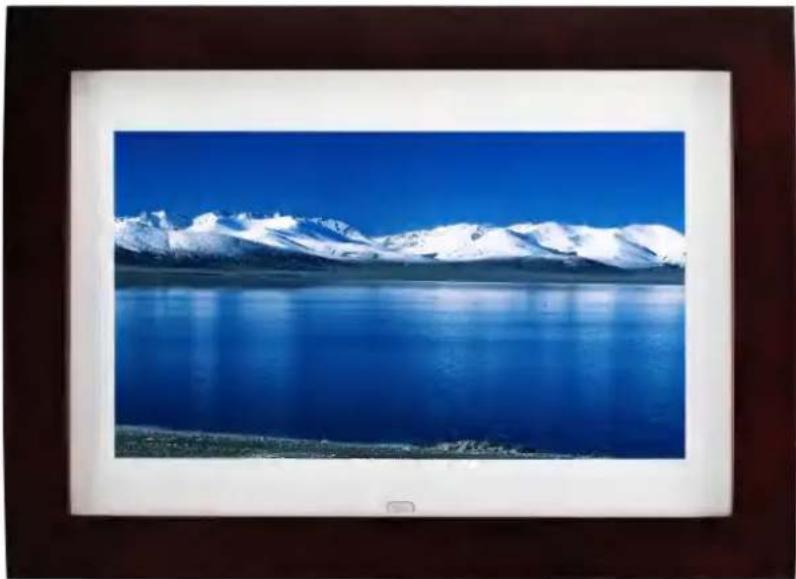
Scenic view of a snow-covered lake under a clear blue sky, framed within a dark border (no text or symbols visible)Model NO.: SDPF1087
Cautions
Precautions and maintenance
- For indoor use only
- To avoid risk of fire or electric shock, do not expose the unit to moisture or condensation.
- To avoid overheating, do not block the ventilation holes on the back of the Digital Photo Frame.
- Keep the Digital Photo Frame out of direct sunlight.
- Do not dismantle the Digital Photo Frame. There is a risk of electric shock and there are no user-serviceable parts inside. Dismantling the Digital Photo Frame will void your warranty.
Cleaning the LCD Screen
- Treat the screen carefully. Because the screen of the Digital Photo Frame is made of glass and it would easily be broken or scratched.
- If fingerprints or dust accumulate on the LCD screen, we recommend using a soft, non-abrasive cloth such as a camera lens cloth to clean the LCD screen.
- Moisten the cleaning cloth with the cleaning solution and apply the cloth to the screen.
WARNING:
To reduce the risk of fire or electric shock, do not expose this appliance to rain or moisture.
Note: This Device is for private use only and not designed for commercial utilization.
Introduction:
Thank you for your purchase of the Digital Photo Frame. It is designed to allow quick and easy view of photos taken from your digital camera, mobile phone, or from a memory storage card. Please read this User Manual carefully to learn the correct way to use the Digital Photo Frame.
Features:
- Support picture format: JPEG
- Support audio format: Mp3& WMA
- Support video format: MPEG-1, MPEG-2, MPEG-4, M-JPEG and AVI
- Support memory card: SD/SDHC/MMC/MS.
- USB connection: Mini USB & USB 2.0
- Auto Slideshow with background music
- Built-in Clock and Calendar with slideshow window, Schedule Auto Power On/Off
- Adjustable slideshow speed and above 8 kinds of transition effects
- Auto-rotation function: orientation of the images changes, when the frame is upended.
- Adjustable Brightness, Contrast, Saturation
- Copy the files to the Built-in Memory and delete the files in the built-in Memory /Card/USB
- Slideshow Mode: Single window, Two windows, Triple windows and four windows
- OSD languages: English, French, Italian, German, Spanish, Portuguese, Swedish, Dutch
Packaging Check List:
- 10.1 inch digital photo frame 1 piece
- AC/DC adapter 1 piece
- Remote control 1 piece
- Use manual 1 piece
- Warranty card 1 piece
- Bracket 1 piece
CONTENTS
1. Product Diagram ...... 4
1.1 Remote Control 4
1.2 Back side Buttons 5
1.3 Left Side of Frame 5
2. Installing & Replacing the Battery....5
3. Getting Started....5
4. Operating Instruction....6
4.1 Card and USB 6
4.2 Picture Mode 6
4.3 Music Mode 7
4.4 Video Mode 8
5. Calendar 8
6. File 8
7. Setup 9
8. Stand instruction ......9
9. Technical Specifications .... 10
10. Troubleshooting Guide....10
1. Product Diagram
1.1 Remote Control
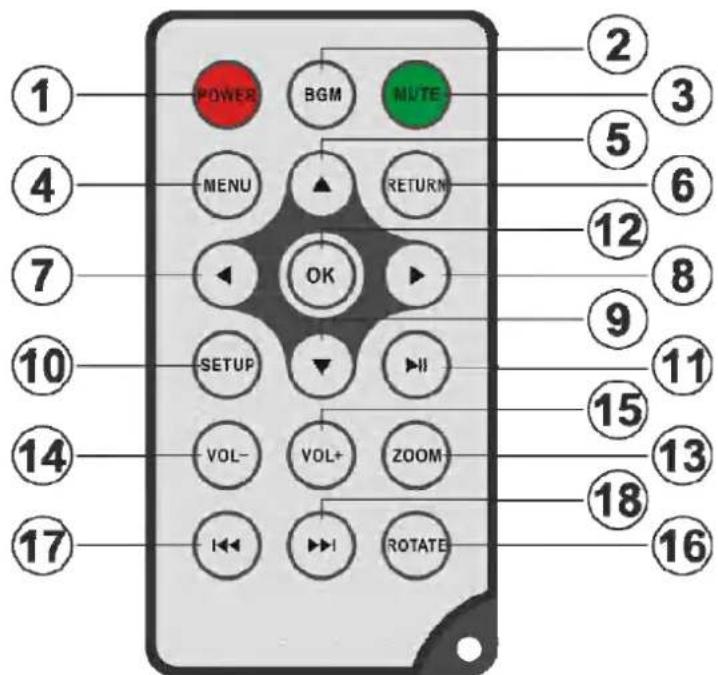
1) POWER — Switch On/Off.
2) BGM — Slideshow with background music.
3) MUTE — Press Mute button to silence the voice temporarily.
4) MENU — Enter into Main Menu.
5) ▲ — Functional selection button from the bottom to the top cursor.
6) RETURN — Return to upper page.
7) ← — Functional selection button from right to left cursor.
8) ▶ — Functional selection button from left to right cursor.
9) ▼ — Functional selection button from the top to the bottom cursor.
10) SETUP — Go to Setup mode.
11) ▶II — Press it to Play under stop or pause Status / Press it to Pause on playing Status.
12) OK — TO Confirm or Switch Pause /Play Function.
13) ZOOM — Change magnification 6 times In the single picture pause mode.
14/15) VOL +/- — Turn up/down the volume.
16) ROTATE — Counterclockwise 90°In the picture pause mode each time.
17) — Move back to previous music or video file.
18) ▶▶ — Move forward to next music or video file.
1.2 Back side Buttons
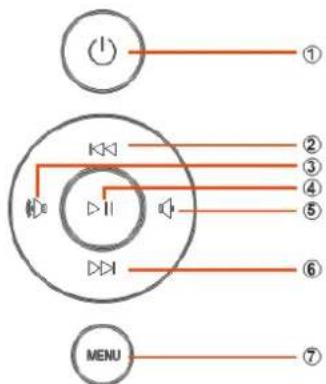
- Power on/off
- Up
- Vol +/Right
- Play/Pause/OK
- Vol -/ Left
- Down
- Menu
1.3 Left Side of Frame
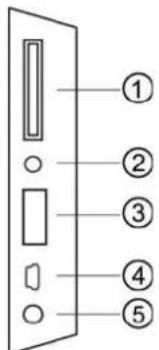
- SD/MMC/MS Card
- Earphone Jack
- USB
- Mini USB
- DC in
2. Installing & Replacing the Battery
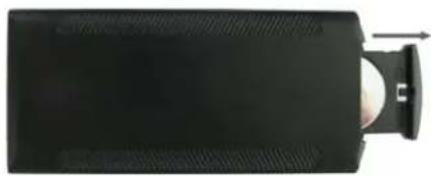
Place the upside of the remote control down, press down on the ridged area of the battery cover and pull towards you to remove the tray. Place one CR2025 lithium button-cell battery on the tray with the positive "+"side facing you. Reinsert the tray
natural_image
Top-down view of a black rectangular electronic device with a small white component and a small arrow pointing to it (no visible text or symbols)3. Getting Started
3.1 Put the digital photo frame with installing bracket on a flat position stability, then plug one end of the AC adapter into a standard 100-120V AC electrical outlet and the other end into the DC IN slot on the left side of the frame. Note: The installing and standing method refer to "Stand Instruction".
3.2 Remove the protective film covering the LCD.
3.3 Remove the plastic battery insulator from the battery compartment and make sure the remote control has a battery inside. Please refer to "Installing & Replacing Battery" if you need a new battery.
3.4 Press the Power Button on the Remote Control to Switch On/Off.
4. Operating Instruction
4.1 Card and USB
It supports SD /SDHC/MMC/MS and USB 2.0. After inserting a card or USB device, slideshow will play automatically, then press RETURN to access to Photo, Music, Video, File, Calendar and Setup. Press OK to confirm.
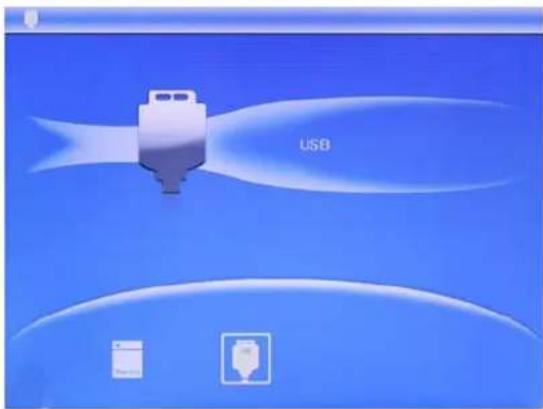
Note:
1) Make sure there are supported Picture, Music and Video files in the Card or USB device.
2) If there are supported picture and music files in the Card or USB Device, slideshow will play automatically with background music
4.2 Photo Mode
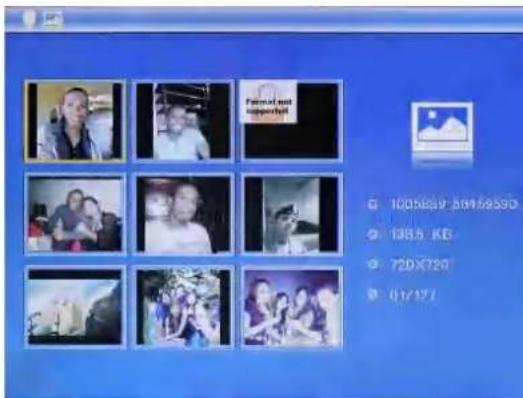
Press RETURN to choose Storage Device. Press "OK" to enter into the main menu, choose Photo and press OK to start slideshow, press Return to enter into the 9-Pictures Mode, use ▲to choose the picture and press OK to play. it will auto slideshow with background Music and the music must be stored in the same memory device! you can use VOL+/VOL- to turn up /down the volume
Save/Copy & Delete function
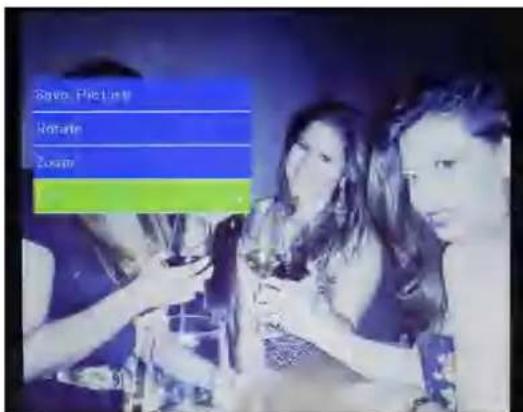
Save/Copy pictures to built-in memory: In the pause state of single picture, press SETUP in the control to enter copy interface, press OK to copy the picture to built-in memory.
Note: System will show "Memory Full" if remaining built-in memory size is not enough to store the photo.
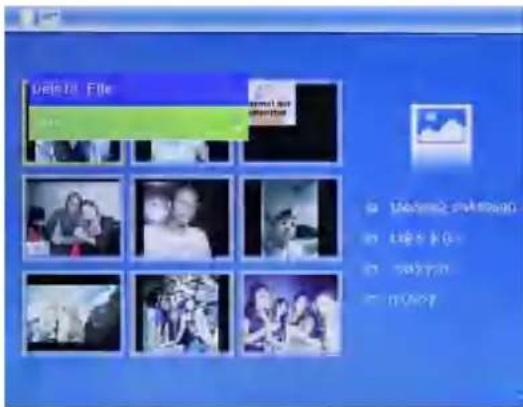
Delete pictures on built-in memory or memory card:
In preview mode, use ▲ to select the picture you want to delete, then press SETUP to enter the delete interface, press OK to confirm.
4.3 Music Mode
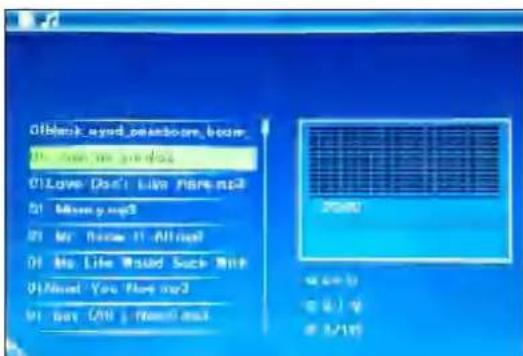
Press RETURN to choose Storage Device. Press "OK" to enter into the main menu. Select Music Icon and press OK to enter. Press ▲ select the music in the playlist, then press OK to Play/Pause. Press VOL+/- to turn up/ down the volume.
4.4 Video Mode
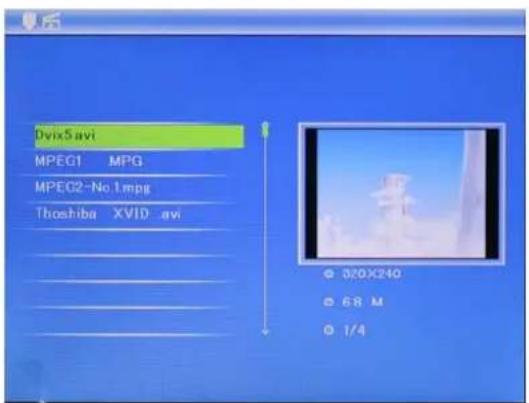
Press RETURN to choose Storage Device. Press "OK" to enter into the main menu, choose Movie Icon and press OK to enter. Press ▲to select the video from the playlist, then press OK to Play. Press VOL+/- to turn up/ down the volume.
In the video playing mode, press SETUP, Then press ▲▼ for fast forward and fast backward. Press ▶ll to pause, repress again continue playback. Press << >> to enter the previous or next video playing directly.
5. Calendar
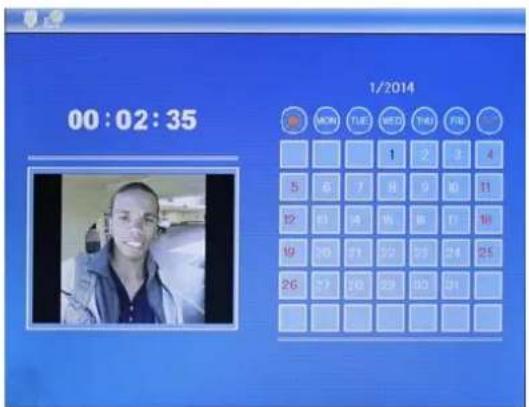
Select Calendar in the Main Menu, press OK to enter. It will show calendar with a window on the left with slideshow. Supported files must be stored in the selected storage device. Adjust date with ▲If you have set alarm in Calendar setup, there will appear the alarm and time icon.
If you want to set the date/time, press Setup, You can enter into the Calendar Setup menu, press OK to enter the sub-menu items. Press ◀▶ to set the Value and press ▲▼ to confirm. The set time will be shown in the Calendar Interface.
6. File
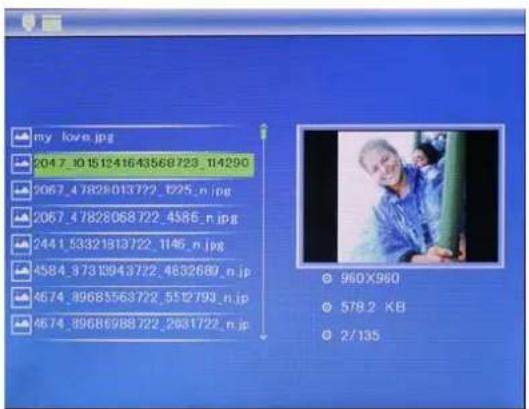
Select File in the main menu and press OK to enter. You can browse all files on your selected storage device. Press ▲▼ to choose the file and press OK to open the file.
Delete function
Use the direction buttons to the desired file. Then press SETUP in the control to enter delete interface, select the desired function and confirm your selection with OK. Note: Files can be copied to the internal memory.
7. Setup
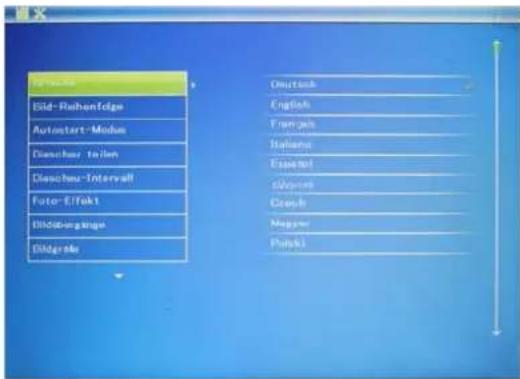
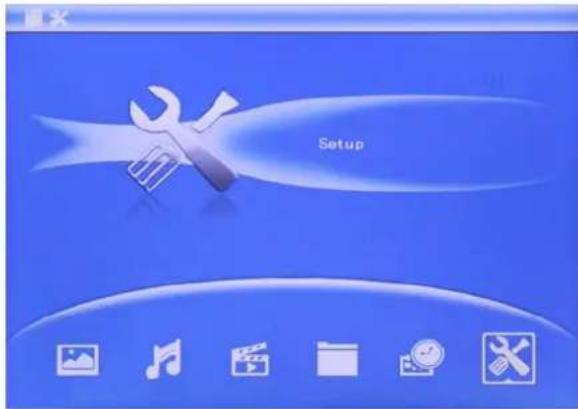
Select Setup in the main menu, press OK to enter the Setup interface and press ▲ to highlight the main item and press OK to enter the sub-menu items. Press ◀▶ to set the Value and press ▲ to Confirm.
Note: After you set an item and enter into the next item, the set mode/data will auto saved.
You could select language, set time, choose picture mode/music mode/video mode and so on.
8. Stand Instruction
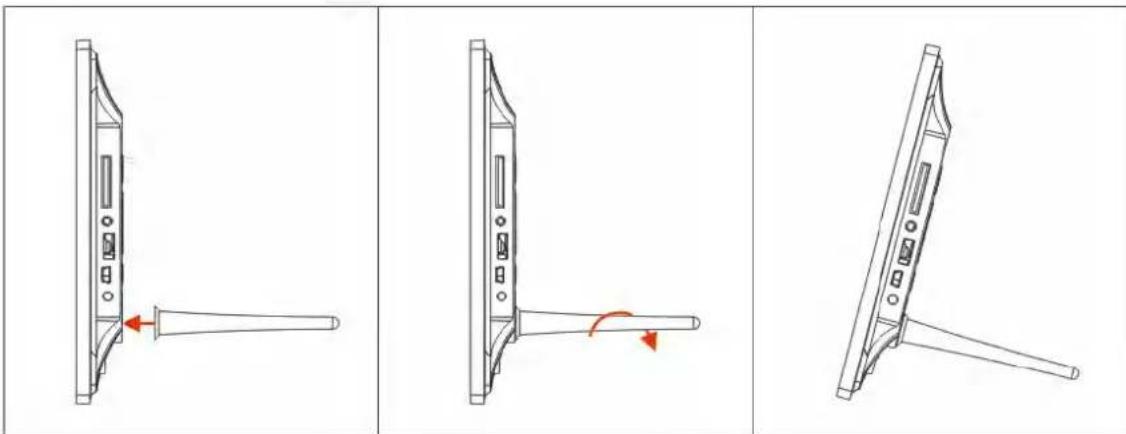
Insert the bracket into the slot of the digital photo frame and rotate the bracket clockwise. Please make sure the stand is locked before you put it on the table steadily .Please refer to the illustration showing below.
natural_image
Three technical line drawings of a device with a handle, showing different angles and orientations (no text or symbols)9. Technical Specifications
● Adapter: Input: AC 100-120V 50/60HZ Output: DC 5V/1.5A
● Picture Format: JPEG
● Audio Formats: Mp3& WMA
● Video Formats: MPEG-1, MPEG-2, MPEG-4, M-JPEG and AVI
● Memory Cards: SD /SDHC/MMC/MS
- USB:USB Host and Mini USB
- Screen Parameter:
Screen Size: 10.1 inch TFT
Resolution: 1024*600 Pixel
Aspect Ratio: 16:9
Brightness: 200-300cd/m2
Contrast: 400:1
Response Time: 20ms
Viewing Angle: 60^ (left/right/vertical), 40^ (horizontal)
Working Temperature: 0°C\~40°C, Humidity: 10-85%
10. Troubleshooting Guide
If you are having problems with your player, please consult both this guide and manual. If you need further assistance, please contact Technical Support.
- No power:
Please check whether the plug is inserted correctly.
- Remote control no function:
Please check whether the battery has power (the battery can be used for half a year in normal conditions). Replace with new battery if necessary.
- Can not read the CARD or USB:
Please confirm whether there is storage in the card or USB device.
Empty devices cannot be read.
- Can not play the file:
Please confirm if the file format is compatible with the player.
● Display too bright or too dark:
Please adjust the brightness or contrast in the setup menu.
● The color is light or no color:
Please adjust the color and contrast setup.
- No sound:
Please check whether the volume is correct and the player is not in Mute mode.
natural_image
Scenic view of a large blue lake with snow-capped mountains in the background under a clear blue sky (no text or symbols visible)1) POWER — Allumer ou éteindre l'appareil (on/off).
natural_image
Black rectangular device with a white cylindrical body and a small protruding knob, no visible text or symbols.3. Démarrage
natural_image
Illustration of a USB device emitting fluid, with two battery icons below (no text or symbols on the diagram itself)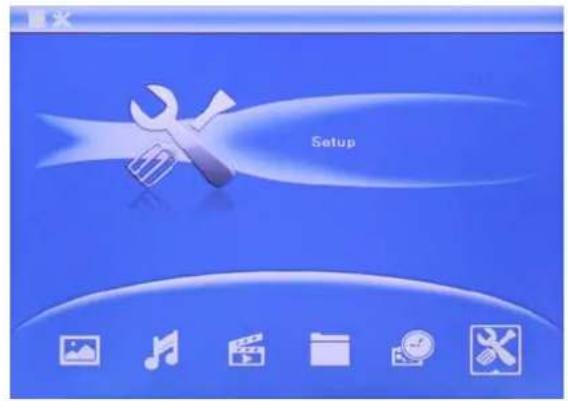
Remarque :
natural_image
Three technical line drawings showing a device's internal structure before and after assembly, with no text or symbols present.Dimension: 10.1" TFT
Empty devices cannot be read.

- Digital Photo Frame Operation Manual
- Cautions
- Precautions and maintenance
- Cleaning the LCD Screen
- WARNING:
- Introduction:
- Features:
- Packaging Check List:
- CONTENTS
- Product Diagram ...... 4
- Installing & Replacing the Battery....5
- Getting Started....5
- Operating Instruction....6
- Calendar 8
- File 8
- Setup 9
- Stand instruction ......9
- Technical Specifications .... 10
- Troubleshooting Guide....10
- Product Diagram
- Remote Control
- Back side Buttons
- Left Side of Frame
- Installing & Replacing the Battery
- Getting Started
- Operating Instruction
- Card and USB
- Note:
- Photo Mode
- Save/Copy & Delete function
- Music Mode
- Video Mode
- Calendar
- File
- Delete function
- Setup
- Stand Instruction
- Technical Specifications
- Troubleshooting Guide
- Démarrage
- Remarque :
Brand : SYLVANIA
Model : SDPF1087
Category : Digital photo frame