
HHOOD 300 DECOR HDG6DCK3B - Basket HOOVER - Free user manual and instructions
Find the device manual for free HHOOD 300 DECOR HDG6DCK3B HOOVER in PDF.
User questions about HHOOD 300 DECOR HDG6DCK3B HOOVER
0 question about this device. Answer the ones you know or ask your own.
Ask a new question about this device
Download the instructions for your Basket in PDF format for free! Find your manual HHOOD 300 DECOR HDG6DCK3B - HOOVER and take your electronic device back in hand. On this page are published all the documents necessary for the use of your device. HHOOD 300 DECOR HDG6DCK3B by HOOVER.
USER MANUAL HHOOD 300 DECOR HDG6DCK3B HOOVER
| CROATIAN | UPUTE ZA UGRADNJU I UPORABU |
| CZECH | NÁVOD K POUŽITÍ A INSTALLACI |
| ENGLISH | INSTALLATION AND USER'S MANUAL |
| FRENCH | NOTICE D'INSTALLATION ET D'UTILISATIO |
| GERMAN | BEDIENUNGS- & INSTALLATIONSANLEITUNG |
| GREEK | ΟΔΗΓΕΣ XPHΣΕΩΣ |
| ITALIAN | MANUALE D'ISTRUZIONE |
| POLISH | INSTRUKCJA OBSŁUGI I MONTAZU |
| PORTOGUESE | MANUAL DE INSTALLação E UTILIZAGão |
| ROMANIAN | MANUAL DE UTILIZARE SI INSTALARE |
| SLOVENIAN | NAVODILA ZA PRIKLJUCITEV IN UPORAB |
| SPANISH | INSTALACION Y MANUAL DEL USUARIO |
| DUTCH | GEBRUIKSAANWIJZING |
| Russl | الترجمة وترجمة |
| Български | Инhoeчкция за inhjectацьи вЕКСПLOATAЦЯ |
UPUTE ZA UGRADNJU I UPORABU
SADRžAJ
UVOD 2
SIGURNOSNE NAPOMENE 2
UGRADNJA (NA ZID/VANJSKA VENTILACIJA) 6
UGRADNJA (UNUTARNJA VENTILACIJA) 17
OPIS DIJELOVA 18
RUKOVANJE 18
CIscENJE I ODRZAVANJE 23
UKLANJANE MANJIH PROBLEMA U RADU 24
TEHNICKI PODACI 25
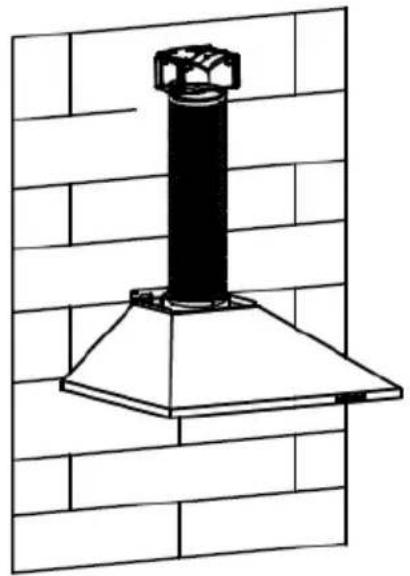
Zanagnutipanel model
- potrebno izbušiti 2x8mm dodatne rupe i pričvrsne vijke i zaporne vrijke prije ugradnje
- Podignite napu i objese je na zidni nosač pomócu kuke.
INSTALLATION AND USER'S MANUAL
CONTENT
INTRODUCTION 52
SAFETY PRECAUTION 52
SPECIFICATION 55
INSTALLATION (VENT OUTSIDE) 56
INSTALLATION (VENT INSIDE) 67
DESCRIPTION OF COMPONENTS 68
OPERATION 68
MAINTENANCE 73
TROBULESHOOTING 74
CONFORMITY WITH DIRECTIVES 74
ENVIRONMENTAL PROTECTION 75
INTRODUCTION
Thank you for choosing this cooker hood.
This instruction manual is designed to provide you with all required instructions related to the installation, use and maintenance of the appliance. In order to operate the unit correctly and safety, please read this instruction manual carefully before installation and usage.
The cooker hood uses high quality materials, and is made with a streamlin design. Equipped with large power electric motor and centrifugal fan, it also provides strong suction power, low noise operation, non-stick grease filter are easy assembly installation.
SAFETY PRECAUTION
Never let the children operate the machine.
The cooker hood is for home use only, not suitable for barbecue, no shop and other commercial purpose.
The cooker hood and its filter should be clean regularly in order to keep in good working condition.
Clean the cooker hood according to the instruction manual and keep the unit from danger of burning.
Forbid the direct baking from the gas cooker.
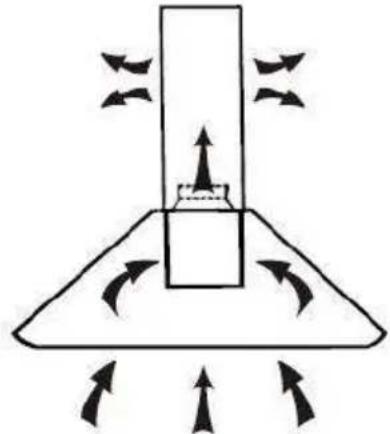
Please keep the kitchen room a good convection.
Before connecting this appliance check that the power supply cord is not damaged. A damage supply cord must be replaced by qualified service personnel only.
There shall be adequate ventilation of the room when the range hoc is used at the same time as appliances burning gas or other fuels;
he air must not be discharged into a flue that is used for exhausting fumes from appliances burning gas or other fuels;
Regulations concerning the discharge of air have to be fulfilled.
This appliance if not intended for use by persons(including children) with reduced physical, sensory or mental capabilities, or lack of experience and knowledge, unless they have been given supervision or instruction concerning use of the appliance by a person slide for their safety.
Children should be supervised to ensure that they do not play with appliance.
Do not flambe under the range hood.
CAUTION: Accessible parts may become hot when used with cooking appliance
-
These shall be adequate ventilation of the room when the range hood is used at the same time as appliances burning gas or other fuels(not applicable to appliances that only discharge the air back into the room);
-
the details concerning the method and frequency of cleaning.
- there is a fire risk if cleaning is not carried out in accordance with the instructions; - do not flame under the range hood;
- CAUTION:Accessible parts may become hot when used with cooking appliances.
Electrical Shock Hazard
Only plug this unit into a properly earthed outlet. If in doubt seek advice from a suitably qualified engineer.
Failure to follow these instructions can result in death, fire, or electrical shock.
The lamp used in this product is not suitable for use in the lighting of a room.
The purpose of this lamp is to provide illumination for using the product.
Electrical Installation
All installation must be carried out by a competent person or qualified electrician. Before connecting the mains supply ensure that the mains voltage corresponds to the voltage on the rating plate.
Direct Connection
The appliance must be connected directly to the mains using an omnipolar circuit breaker with a minimum opening of 3mm between the contacts.
The installer must ensure that the correct electrical connection has been made and that it complies with the wiring diagram.
The cable must not be bent or compressed.
Regularly check the power plug and power cord for damage. If the supply cord is damaged, it must be replaced by a special cord or assembly available from the manufacturer or its service agent.
WARNING: This is a Class I appliance and MUST be earthed
This appliance is supplied with a 3 core mains cable coloured as follows:
Brown = L or Live
Blue = N or Neutral
Green and Yellow = E or Earth
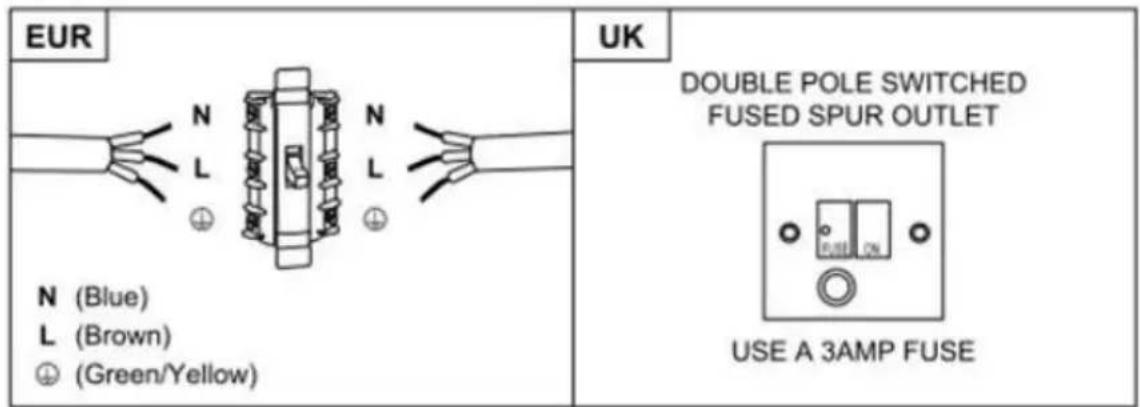
The fuse must be rated at 3 Amps.
Standard Installation Accessories List
| Spec. | Illustration Picture | Qty |
| Casing | 1 | |
| Upper Chimney | 1 | |
| Lower Chimney | 1 | |
| Lower chimney bracket | 1 | |
| Upper chimney bracket | 1 | |
| Hanging Board | 1 | |
| φ8 rawl plugs φ8×φ6 white color | 9 | |
| Screws ST4.0×30 | 9 | |
| φ7.2screws ST4.0×8 | 2 |
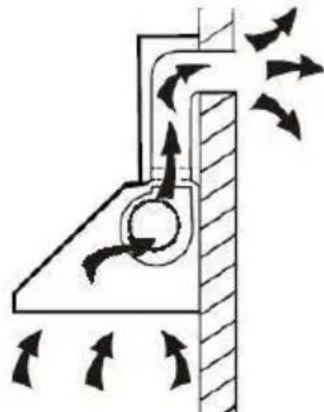
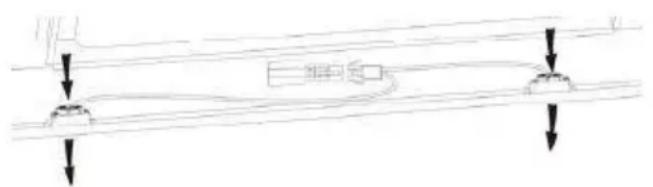
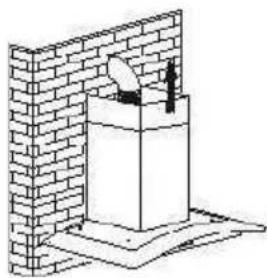
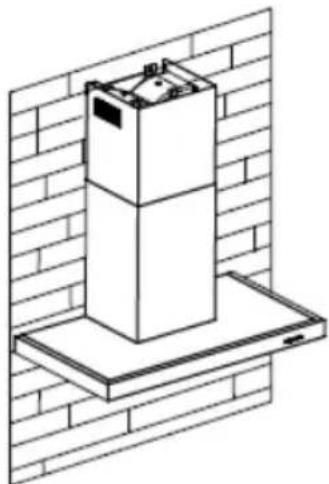
If you have an outlet to the outside, your cooker hood can be connected below picture by means of an extraction duct (enamel, aluminum, flexible pi inflammable material with an interior diameter of 150mm)
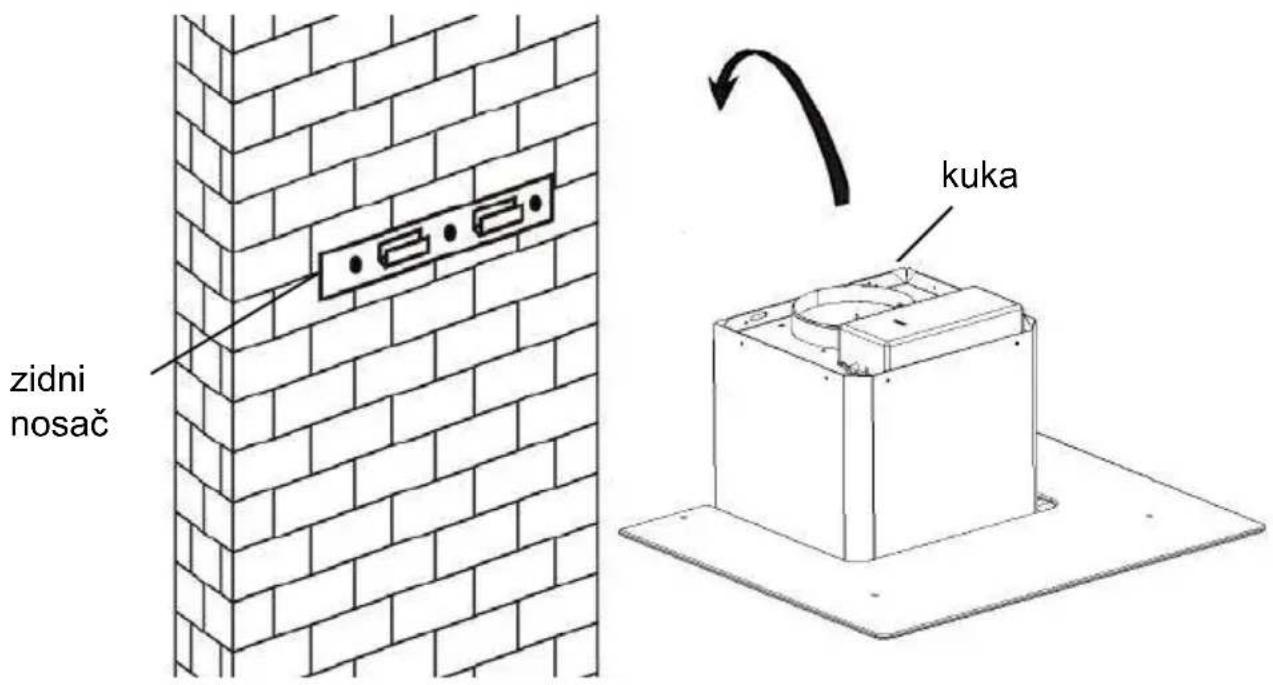
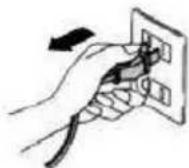
- Before installation, turn the unit off and unplug it from the outlet.
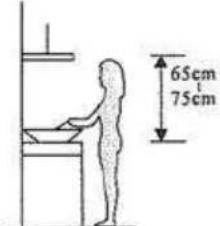
- The cooker hood should be placed at a distance of 65 75cm above the cooking plane for best effect.
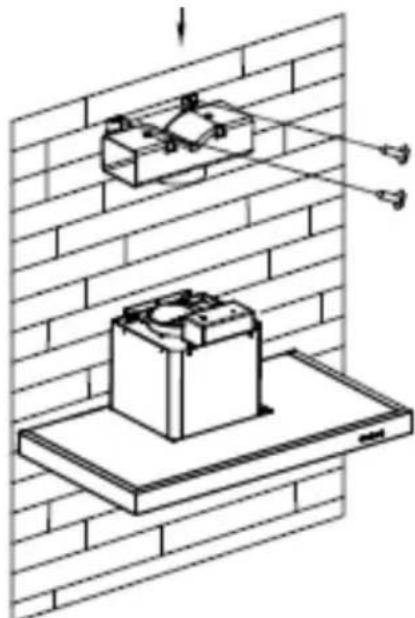
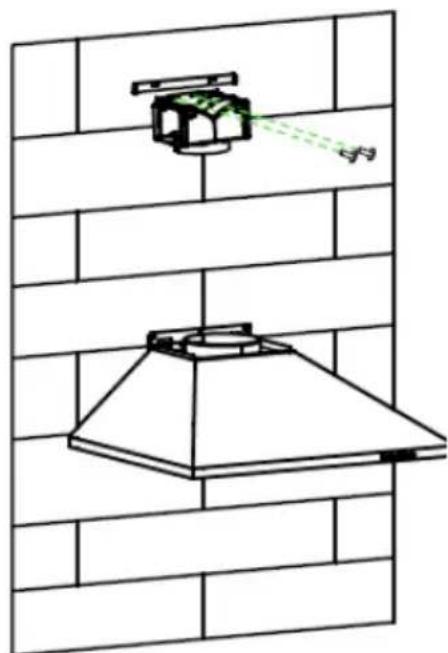
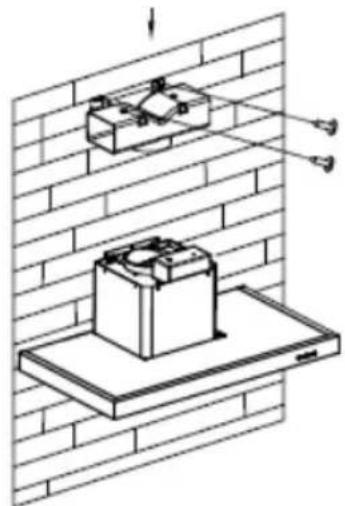
- Drill 3 × 8mm holes to accommodate the bracket. Screw and tighten the bracket onto the wall with the screws provided.
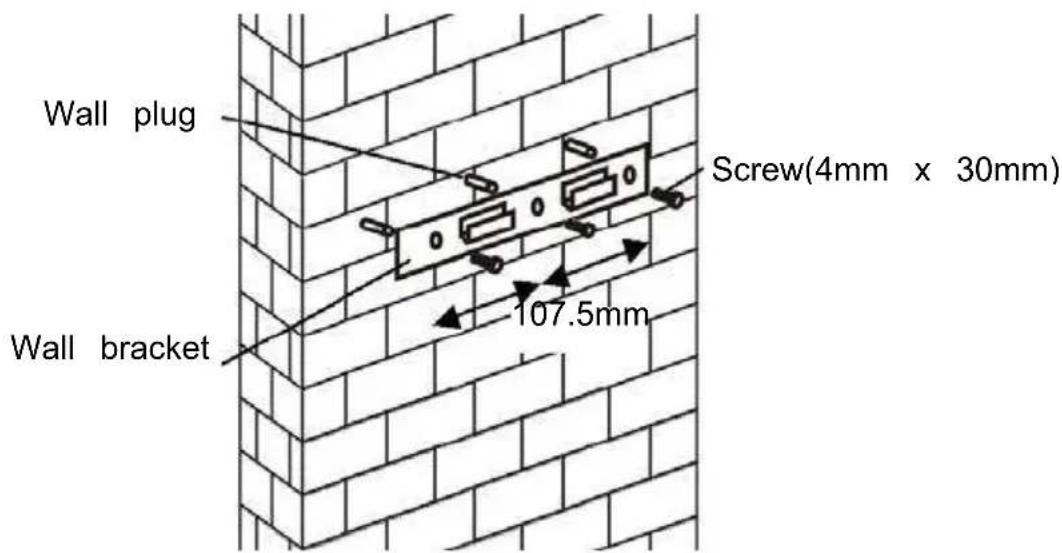
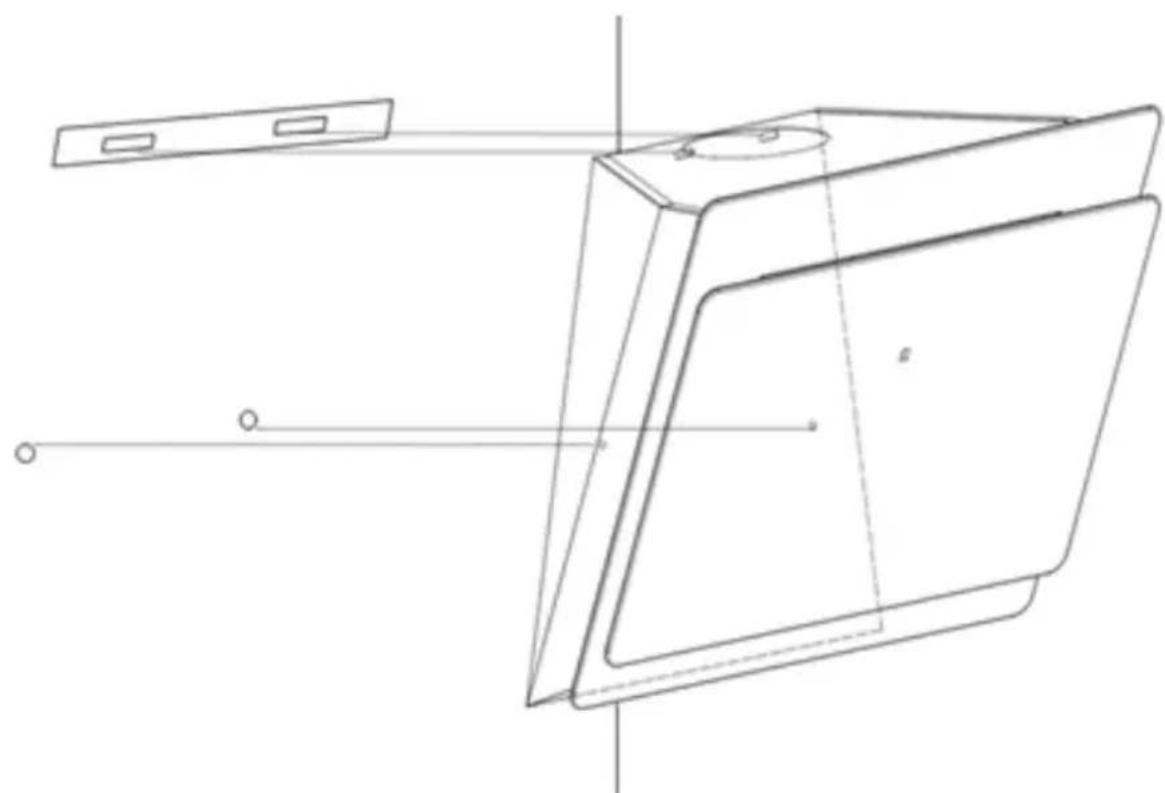
For inclined panel Model
- eed to drill 2x8mm extra holes & fixing screws & screw plugs before installation. Voor schuine modellen

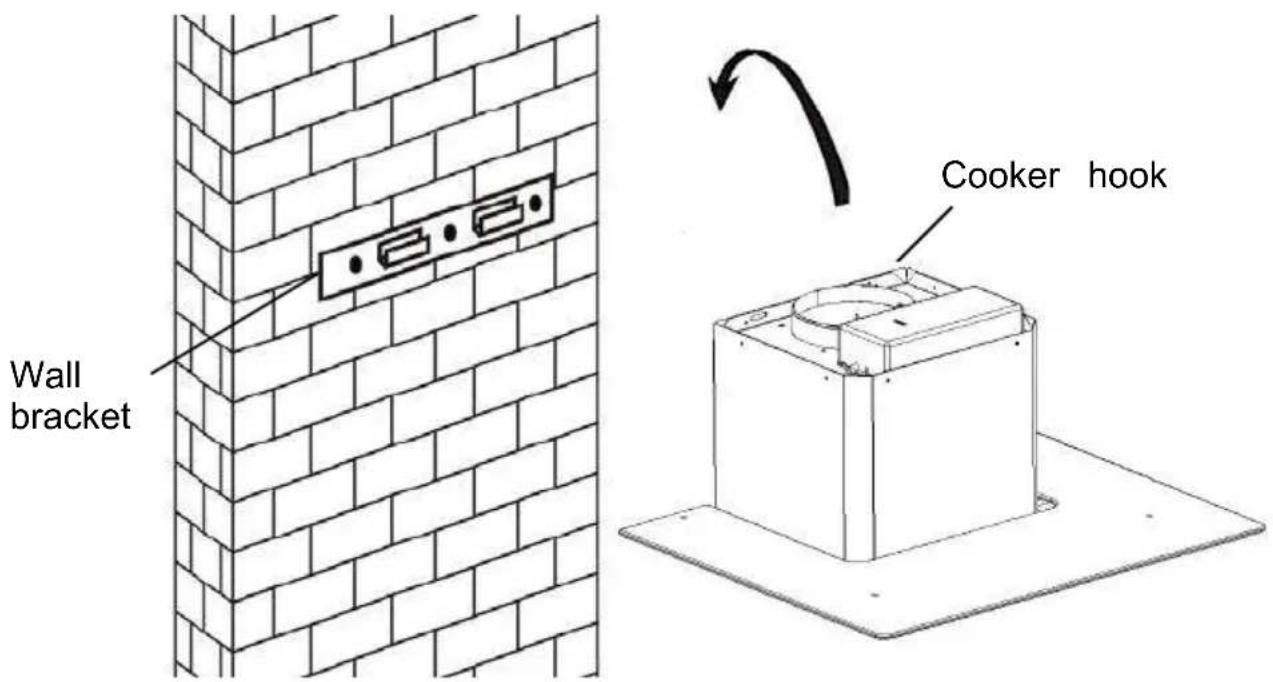
- Leave up the cooker hood and hang onto the wall bracket hook.
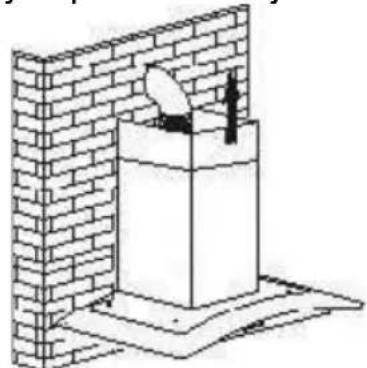
- Fix the one-way-valve to the air outlet of the cooker hood. Then, attached the exhaust pipe onto the one-way-valve as shown below.

Exhaust pipe
Cooker hood
6.
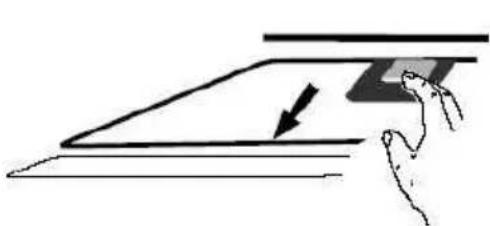
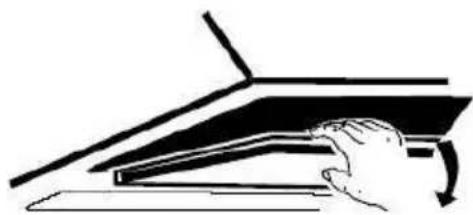
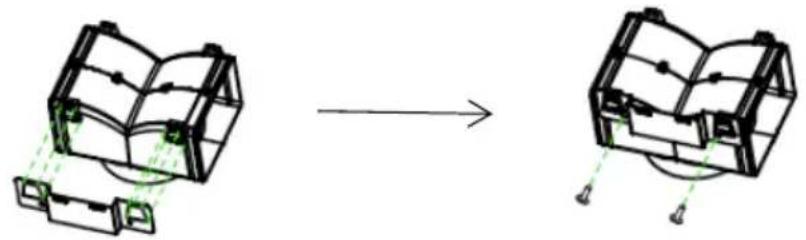
i. Place the glass in appropriate position on the top the cooker hood
ii. Fix with 4 screws and washer. In order to avoid the glass cracking, please do not tighten the screws too strongly.
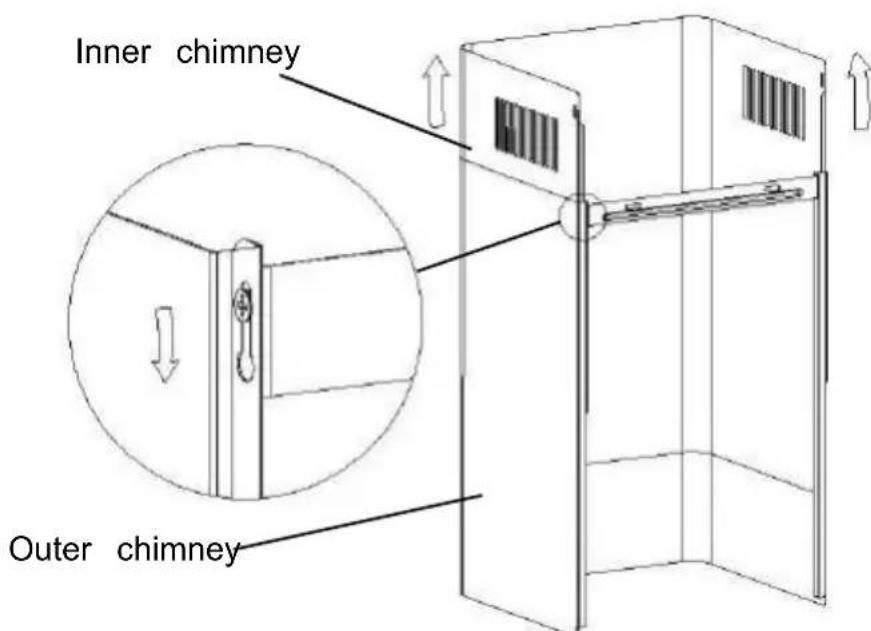
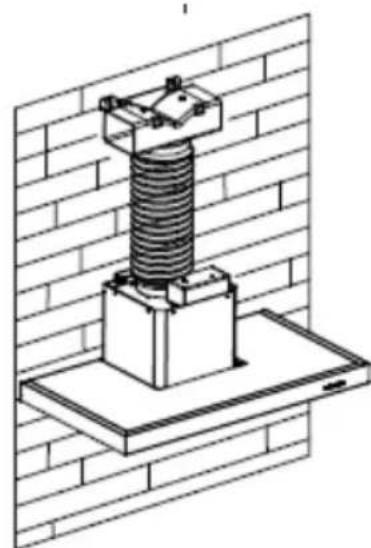
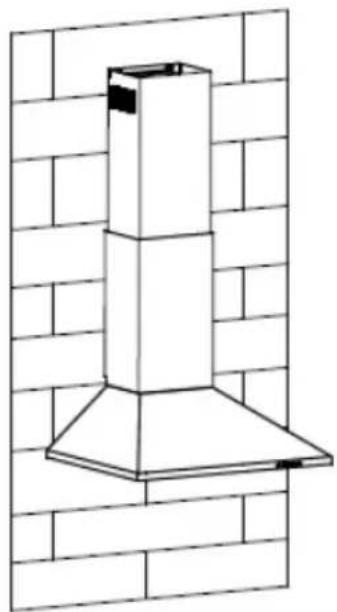
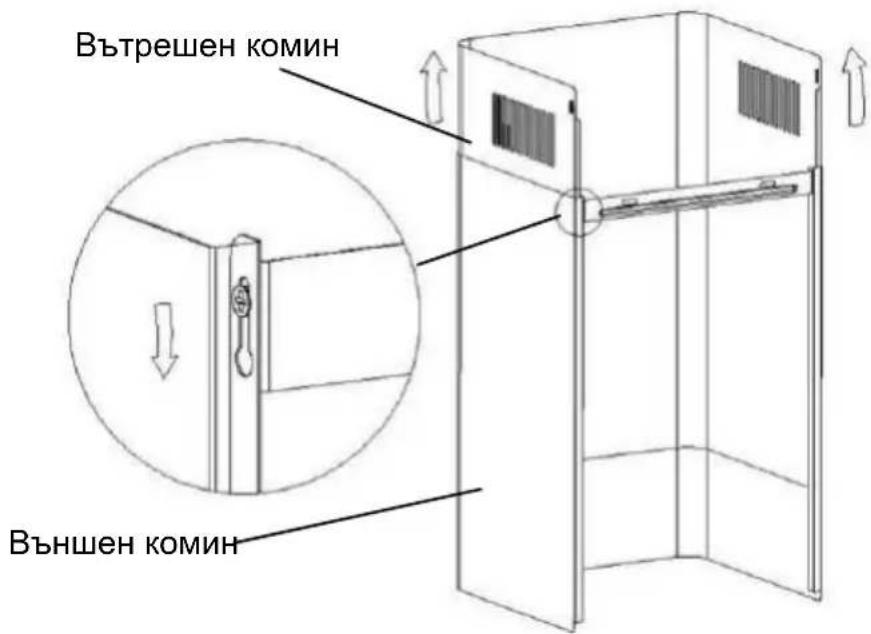
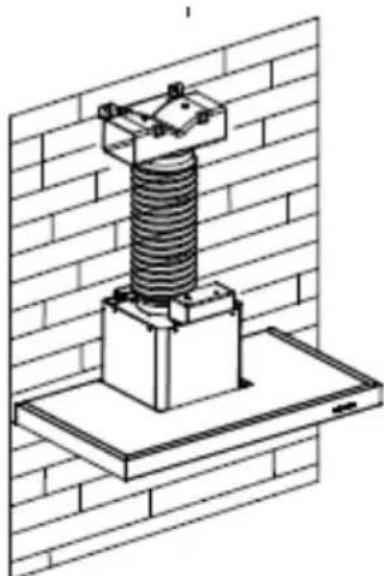
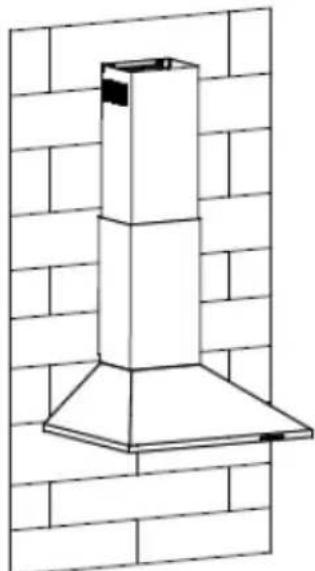
i. By Put the inner chimney into outer chimney .Then pulling out the inner chimney upwards. Adjust to reach the height required
ii. Sliding the chimney to adjust the chimney height. When the height you required is reached, then hang the fixing hole to the screws as showed in below pictures.
8.
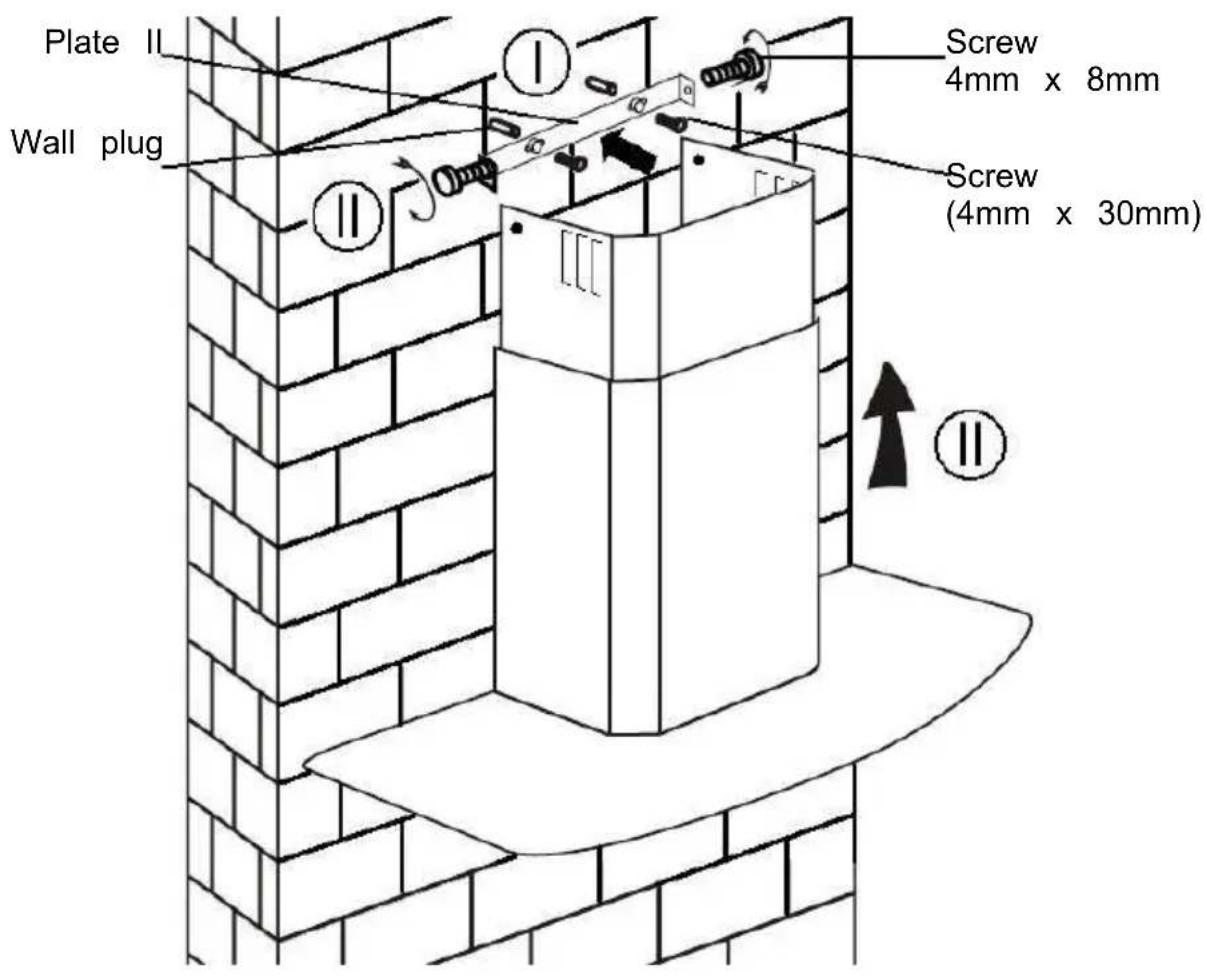
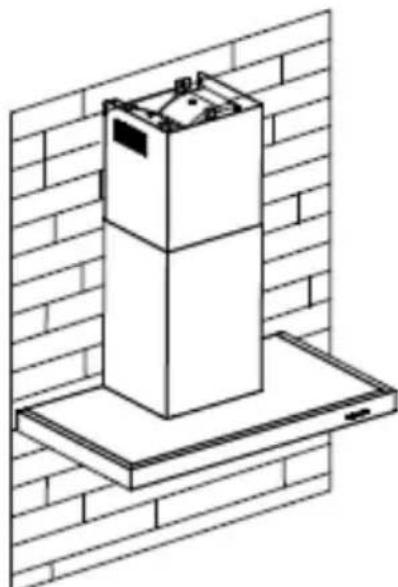
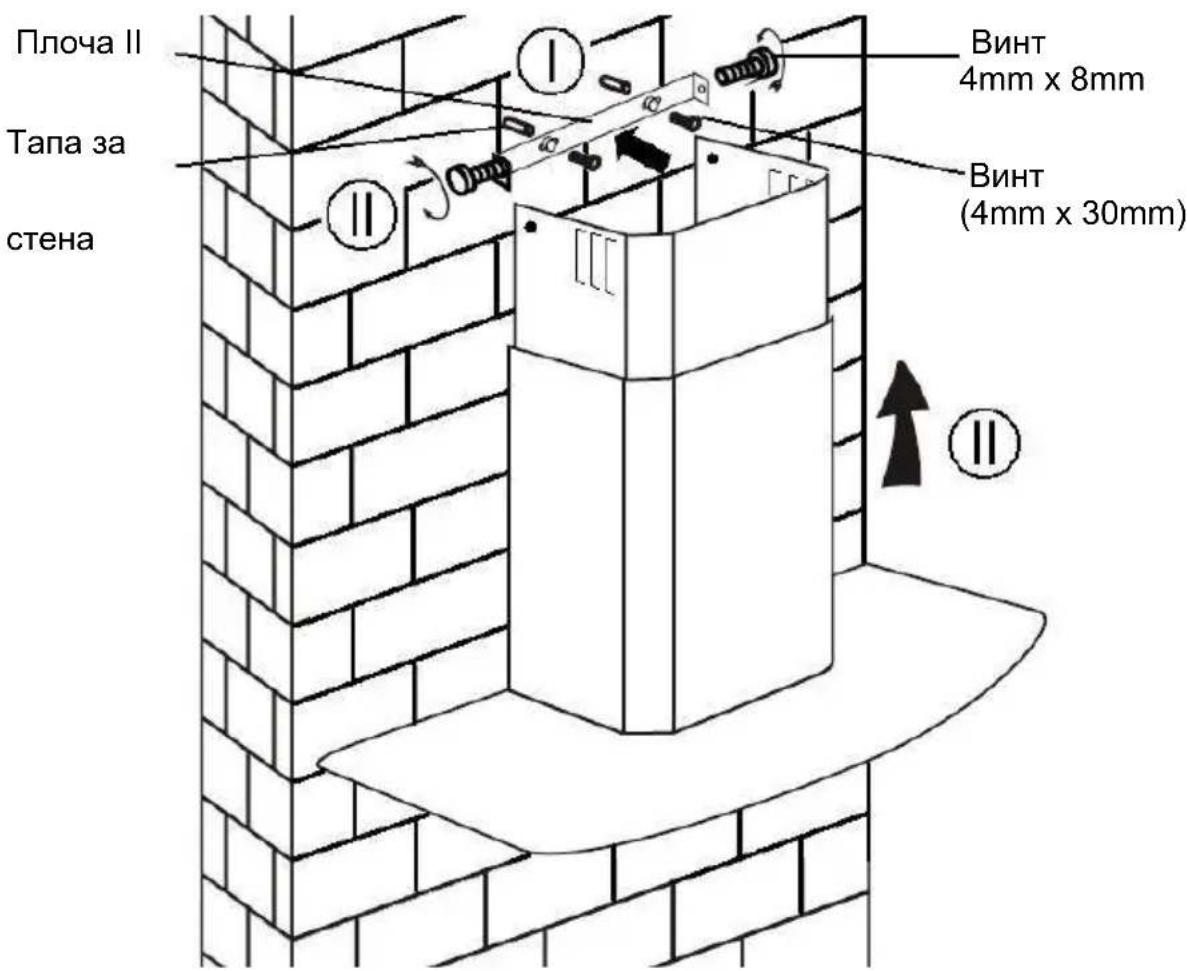
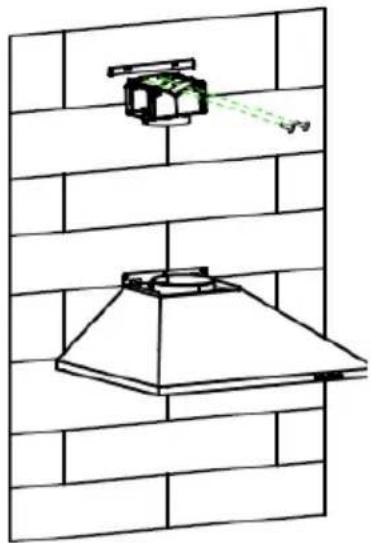
i. Drill 2 x 8mm holes to accommodate the plate II. Screw and tighten the plate II onto the wall with 2 screws provided.
ii. Assembly the chimney onto the unit and fix it with 2 screws.
StandardInstallationAccessoriesList
| Spec.Illustration | PictureQty | |
| AirDeflector | 1 | |
| Bracket | 1 | |
| φ8rawlplugs φ8×φ6 white color | 2 | |
| Screws ST4.0×30 | 2 | |
| Screws ST3.5×12 | 2 |
INSTALLATION(AIRDEFLECTORFORT-SHAPE, CURVEDGLASS, FLAT GLASSMODELS):
Airdeflectorismentionedasincludedandnotoptional.
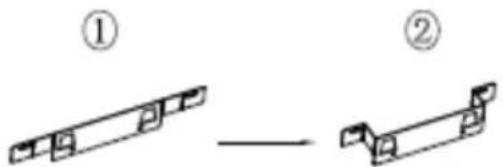
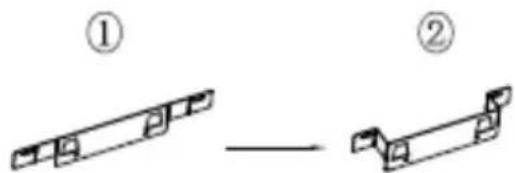
1.Beforeinstallation,curvebothendsofthebracketasshownbelow:
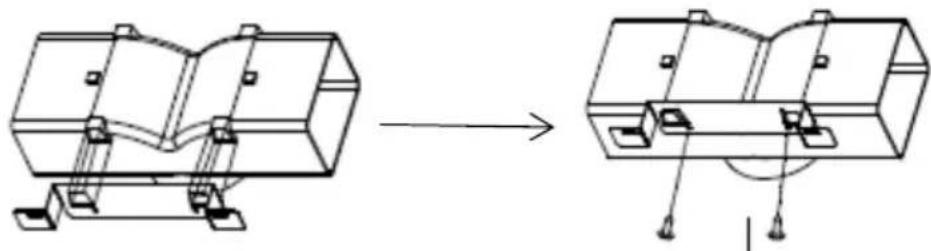
2.FixthebrackettotheT-shapedplasticoutletwith2pcsST3.5x12mmscrews provided.
3.Drill2holestoaccommodatethewallplugs,thenscrewandtightenthe bracketontothewallwith2pcsST4x30mmscrewsprovided.
- Attachthe exhaustpipe onto the airoutlet of the cookerhood as shown below:
5.Installthechimneytotheunitandfixit.
o"Pleasekindlybenoted:T-shapedplasticoutletandv-flapscannotbeused at the same time. You can use them in two ways: 1) Add v-Floridalet;2) Use T-shapedplasticoutlet, noaddv-flap."
o“Note:Theproductisprovidedwithv-flapaccessory.Thisaccessoryisnot mandatoryforinstallation,operationanduseoftheproduct.”
StandardInstallationAccessoriesList
| Spec.Illustration | PictureQty | |
| AirDeflector | 1 | |
| Bracket | 1 | |
| φ8 rawlplugs φ8×φ6 white color | 2 | |
| Screws ST4.0×30 | 2 | |
| Screws ST3.5×12 | 2 |
Airdeflectorismentionedasincludedandnotoptional.
1.FixthebrackettotheT-shapedplasticoutletwith2pcsST3.5x12mmscrews providedasshownbelow:

2.Drill2holesonthewalltoaccommodatethewallplugs,then screwand tightenthebracketontothewallwith2pcsST4x30mmscrewsprovided.
- Attach the exhaust pipe onto the air outlet of the cooker hood as shown below:
4.Installthechimneytotheunitandfixit.
o"Pleasekindlybenoted:T-shapedplasticoutletandv-flapscannotbeused at the same time. You can use themtwoways:1) Add v-Floridalet;2)UseT-shapedplasticoutlet,noaddv-flap."
o“Note:Theproductisprovidedwithv-flapaccessory.Thisaccessoryisnot mandatoryforinstallation,operationanduseoftheproduct.”
INSTALLATION (VENT INSIDE)
If you do not have an outlet to the outside, exhaust pipe is not required. The installation is similar to the one show in section "INSTALLATION (VENT OUTSIDE)".

Activated carbon filter can be used to trap odors.
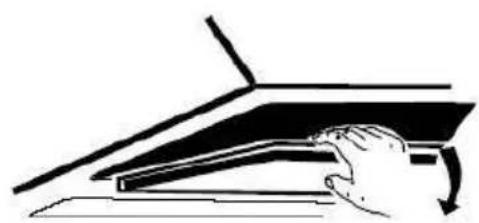
In order to install the activated carbon filter, the grease filter should be detached first. Press the lock and pull it downward.
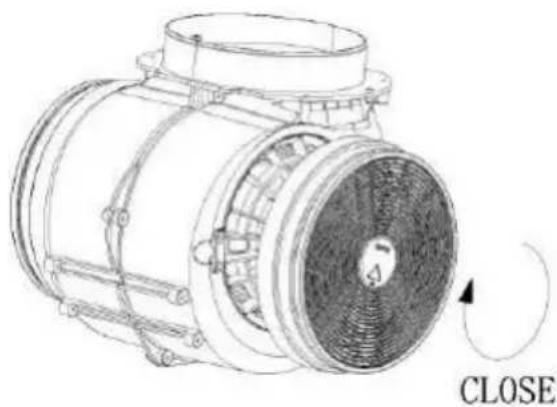
Plug the activated carbon filter into the unit and turn it in clockwise direction. Repeat the same on the other side.

NOTE:
o Make sure the filter is securely locked. Otherwise, it would loosen and cause dangerous.
o When activated carbon filter attached, the suction power will be lowere
CONFIGURATION 1
1
2
3

OPERATION
Button 1
The button is with indicate backlit, when you press the button, the backlit will be turned on and the fan will be turned on at low speed. When press again, it will turn off the fan.
It's used for Ventilation on the kitchen. It is suitable for simmering and cooking which do not make much steam.
Button 2
The button is with indicate backlit, when you press the button, the backlit will be turned on and the fan will be turned on at Medium Speed. When press again, it will turn off the fan.
Airflow speed is ideally for ventilation in standard cooking operation.
Button 3
The button is with indicate backlit, when you press the button, the backlit will be turned on and the fan will be turned on at High Speed. when press again,. it will turn off the fan.
When high density of smoke or steam produced, press high-speed button for highest effective ventilation.
NOTE: If Low / Medium / High speed buttons are press at the same time, the unit will only operate at the highest speed.
Light button

CONFIGURATION 2
0 1 2 3
OPERATION
Off button 0
It's used for turning off the fan.
Low Speed button 1
It's used for Ventilation on the kitchen. It is suitable for simmering and cooking which do not make much steam.
Medium Speed button 2
Airflow speed is ideally for ventilation in standard cooking operation.
High Speed button 3
When high density of smoke or steam produced, press high-speed button for highest effective ventilation.
NOTE: If Low / Medium / High speed buttons are press at the same time, the unit will only operate at the highest speed.
Light button
CONFIGURATION 3


On/Off button
It's used for turning on/off the fan.

Speed plus button
For increasing the speed of the fan

Speed decrease button
For decreasing the speed of the fan.

Light button

Digital display
Fan speed display:"1" for Low speed, "2" for Medium speed, "3" for High speed, "4" for Booster function.
Quick timer: Press & hold for 1 second, Digital display will flashing & into 5 minutes count down, after 5 minutes motor & will turn off automatic & Buzzer sound for 1 second.
Booster function
This hood has a booster function. To activate the booster, Press + to speed 4, enter into highest speed while the hood is in use and it will increase speed for 5 minutes, before slowing down again.
CONFIGURATION 4


Timer button
- Setting the time of the day
When hood in standby mode (motor not working), press the timer button to enter the time setting.
Press the 'Fan speed' key to set the hour of the day and press the
Light key to set the minute.
- Setting the Timer
When the hood is in operation mode, press the timer button to set the countdown.
Press the timer button one timer then the countdown will increase one minute. The max countdown is 60 minutes.
— Speed decrease button
For decreasing the speed of the fan.

Speed plus button
For increasing the speed of the fan

LIGHT Button
For lighting ON & OFF.
LCD display
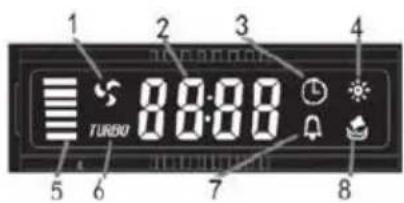
- Motor symbol, will rotate when the motor is working:
- Time display;
- Timer symbol, will appear when timer is setting and counting:
- Light symbol;
- Motor speed;
- Turbo speed symbol, will appear when the speed is highest setted:
- Alarm symbol, will appear 5 seconds when the counting down of timer is over.
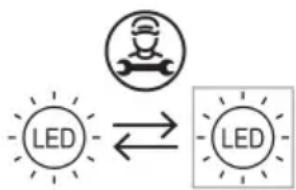
- Cleanning alarm, appear when total working time up to 14 hours or at the first time using after plugging.
CONFIGURATION 5
1 2 3 B
STANDBY MODE.
After plug in, all lighting, system in STANDBY MODE.
1 Low Speed button
It's used for Ventilation on the kitchen. It is suitable for simmering and cooking which do not make much steam.
2 Medium Speed button
Airflow speed is ideally for ventilation in standard cooking operation.
3 High Speed button
When high density of smoke or steam produced, press high-speed button for high effective ventilation.
B Booster function
This hood has a booster function. To activate the booster, Press
B to speed 4, enter into highest speed while the hood is in use and it will increase speed for 5 minutes, before slowing down again.

Light
For lighting ON & OFF.
MAINTENANCE
Before cleaning switch the unit off and pull out the plug.
I. Regular Cleaning
Use a soft cloth moistened with hand-warm mildly soapy water or household cleaning detergent. Never use metal pads, chemical, abrasive material or stiff brush to clean the unit.
II. Monthly Cleaning for Grease Filter
ESSENTIAL: Clean the filter every month can prevent any risk of fire.
The filter collects grease, smoke and dust.... so the filter is directly affecting the efficiency of the cooker hood. If not cleaned, the grease residue (potential flammable) will saturate on the filter. Clean it with household cleaning detergent.
III. Annual Cleaning for Activated Carbon Filter
Apply SOLELY to unit that installed as a recirculation unit (not vented to the outside). This filter traps odors and must be replaced at least once a year
depending on how frequent the cooker hood used.
IV. Changing a light bulb
Remove the screws on the glass, take off the hood glass. Find the bulb that requires replacement, you will find it located in the light fixture which is inside the exposed section of the canopy.
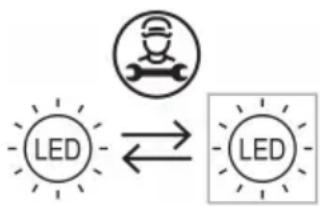
Disconnect the light wiring point and remove the bulb holders and wiring from the hood. Important: It's not possible to replace the bulbs individually, it will be necessary to obtain the bulbs, bulb holders and wiring as a complete part. (LED light: MAX 1.5W)
Fit the replacement bulbs, bulb holders and wiring in the same manners as the originals. Then reconnect the light wiring point.
Refit the hood glass and fasten the glass screws. Make sure the screws fully tightened.
TROBULESHOOTING
| Fault | Cause | Solution |
| Light on, but fan does not work | The fan blade is jammed. | Switch off the unit and repair qualified service personnel only. |
| The motor is damaged | ||
| Both light and fan do not work | Halogen light bulb bur | Replace the bulb with correct rating. |
| Power cord looses. | Plug in to the power supply ag | |
| Serious Vibration of the unit | The fan blade is damaged. | Switch of the unit and repair b qualified service personnel only. |
| The fan motor is not fixed tightly. | Switch off the unit and repair i qualified service personnel only. | |
| The unit is not hung properly on the bracke | Take down the unit and check whether the bracket is in proper location. | |
| Suction performance not good | Too long distance between the unit and the cooking plane | Readjust the distance to 65-75c |
CUSTOMER ASSISTANCE SERVICE
If you cannot identify the cause of the operating anomaly, switch off the appliance and contact the Assistance Service.
PRODUCT SERIAL NUMBER. Where can I find it?
It is important you to inform the Assistance Service of your product code and its serial number (a 16 character code which begins with the number this can be found on the guarantee certificate or on the data plate located on the appliance.
It will help to avoid wasted journeys to technicians, thereby (and most significantly) saving the corresponding callout charges.
ENVIRONMENTAL PROTECTION
Waste electrical products should not be disposed of with household waste. Please recycle where facilities exist. Check with your Local Authority or retailer for recycling advice.
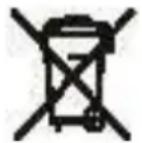
This appliance is marked according to the European directive 2012/19/EU on Waste Electrical and Electronic Equipment (WEEE).
By ensuring this product is disposed of correctly, you will help prevent potential negative consequences for the environment and human health, which could otherwise be caused by inappropriate waste handling of this product.
The symbol on the product indicates that this product may not be treated household waste. Instead it shall be handed over to the applicable collection point for the recycling of electrical and electronic equipment Disposal must be carried out in accordance with local environmental regulations for waste disposal.
For more detailed information about treatment, recovery and recycling of this product, please contact your local city office, your household waste disposal service or the shop where you purchased the product.
NOTICE D'INSTALLATION ET D'UTILISATION
Sommaire
The appliance must be connected directly to the mains using an omnipolar circuit breaker with a minimum opening of 3mm between the contacts.
The cable must not be bent or compressed.
For decreasing the speed of the fan.

Bouton d'éclairage

Digital display
Fan speed display:"1" for Low speed, "2" for Medium speed, "3" for High speed, "4" pour la fonction Booster.
Quick timer: Press & hold for 1 second, Digital display will flashing & into 5 minutes count down, after 5 minutes motor & light will turn off automatic & Buzzer sound for 1 second.
Fonction booster
Blau = N Oder Neutral
Installation (Wandmontage)
(Waste Electrical and Electronic Equipment - WEEE).
MONTAZ (WERSJA WYWIEWOWA) 181
MONTAZ (WERSJA Z RECYRKULACJA) 192
PANEL STEROWANIA 193
DZIAŁANIE 193
OBSLUGA 198
MOZLIWE USTERKI 199
OCHRONA SRODOWISKA 200
WPROWADZENIE
Paraacularly, the ventricular septal thickness is a function of the diameter of the ventricle and the number of ventricles.

Paraacularly, the ventricle is a large, rectangular body of muscle cells that is composed of numerous myofibroblasts and epithelial cells.

Botón LUZ
INSTALLATIE (VENTILATIE BUITEN) 306
INSTALLATIE (VENTLATIE BINNEN) 317
BESCHRIJVING VAN DE COMPONENTEN 318
WERKING 318
ONDERHOUD 323
PROBLEM OPLOSSEN 324
OVEREENSTEMMING MET RICHTLIJNEN 324
MILIEUBESCHERMING 324
INTRODUCTIE
Blauw = N of Neutrale
J 1 J 1 J 1 J 1 J 1 J 1 J 1 J 1 J 1 J 1 J 1 J 1 J 1 J 1
J 1
y
g g
J 1
aXuili ciblui
Jabj 1
ylll jg g yjll lal aol i g g jiall piau u
()
Jae aee e ae balee Jn n paae y aes
j 1
.
iabwBlll aillbll 1jI jIy. 11 11 11 11 11 11 11
b0g Jgo a0
J 1 J 1 J 1 J 1 J 1 J 1 J 1 J 1 J 1 J 1 J 1 J 1 J 1 J 1 J 1 J 1 J 1 J 1 J 1 J 1 J 1 J 1 J 1 J 1 J 1 J 1 J 1 J 1 J 1 J 1 J 1 J 1 J 1 J 1 J
i 111111111111111111111111111111
ED = 2L
,
y
1
1 2 3
J
1
eL 11 11 11 11 11 11 11 11 11 11 11 11 11 11 11 11 11 11 11 11 11 11 11 11 11 11 1
2
Jy 1000000000000000000000000000000000000000000000000000
3
Hnkora He octabrai Te deaTa da pa6otr C MaunHaT.
KyxHencknay abcop6aTop cneBa da ce n3noJ3Ba camo 3a domaunha ynotpe6a, He e noDxOJa3a bap6eku nn 3a dpyrn TbproBcN uei. KyxHencknay abcop6aTop n fntbpa Tp8ba da ce nouchBat peIOBHO, 3a da noDlbpxkat ypeDa B do6po CbCTOHNHe.
IouncBaIte a6cop6aTopa cnopeI pBkoBOdCTBOTO C INHCTpyKcIIIN Ia3eTe ypeDa daJeU OT onaCHOCTn IJIr rOpHe.
He neyeTe dIupeKTHO OT r3OBnKOTNoH. MoJ, NOdIbPkaIte Do6pa KOHBeKuN B KxHra.
Ipei Da CbpxKeTe ypeia, npOBepTe daJI 3axpaHbaunr Ka6eI He e Nobpeien. NObpeHnrt Ka6eI Tp6Ba da ce nOdmehra camo OT KBAJIINΦnucnpaHO Jnue.
HyЖнБи e NOДхОДЯШа BeHTиlaць B CTЯТа, КьДeTO e MOHTИран abcop6aTopa n KьДeTO ce ИЗПОЛ3ВaT урEDи KaTO ra3OBи KOTLOHn;
Bb3dYxbT He Tp86Ba Da ce OTBeJda npe3 dNMOOTbOda, npedHa3NaueH 3a n3napenra Ta OT ypeDnte, KOInTO pa60rTa Ha ra3 nIi dpyrI rOpBa. PerylaunTe, CBp3aHn C Bb3dyxa Tp86Ba da 6bDat cna3BaHn. YpeBt He MoKe Da ce n3noJ3Ba OT Iuca (BKIOUHTeJIHo Deua) C HamaJeHn Fm3NueCKn, NcHXNUeCKn IIN yMCTBEHN cNoCObHOCTn IIN JInCa Ha ONIT N 3HaHn, OCBEN aKO He Ce Na3npaBA t IIN ca 6II INHCTpyKTIpaHn 3a n3NOJ3BaHeTo Ha ypeDa No 6e3oNaceH NaHH n pa3bupat CbOTBeTHnte ONaCHOCTn.
IeuaTa Tp6Ba Da 6bDat Hau3npaBaan, 3a Da ce rapaHTnpa, Ye He cn nrgpaT cypeDa.
He pfam6npaIte noa6cop6atopa.
A6cop6aTopbT He Tp8Ba Da ce MOHTnpa HaJ KOTIOH C NOBeue OT YETnpi KOTNoHa.
- Te trp6Ba da ca doctaTbUHa BeHTnlaucna Ha nOMEeHneTo, KOrato acnnpaTOpbT ce n3noJ3Ba eINHOpeMeHHo BpeMe KaTo UpeiN, n3rapaun ra3 iIi dpyrI rOpNbA (He e npINOxmo 3a UpeiN, KOINTO cAmO n3XbPJIaT Bb3dUxa ObaTHO B NOMEeHneTo);
- NOДрбнOCи OTHOCH MToJa I YeCTOTaTHa NOnuNCTBaHe.
- CbIeCTByBa pNCK OT NOxap, aKO NOuHCTBaHETO He Ce N3BbPbBa B CbOTBcTcTBnC n HcTpPyKcNITe;
- He ПламнелюдkanakaHa 06xbata;
-BHIMAHHE:IOCTbHNHe YacTn MoTa T Da Ce HarpEaT, KOraTO Ce n3NoJ3BaT C rOTBa pCKn ypeiN.
OnachocT oTeIeKtpnueckn ydap
BkIIOUbaIte ypeDa cMo B npaBnIHo 3a3eMeH KOHTaKT. Ako ce KOJIe6BaTe, CBbpxTe Ce C NOxOJaU KBaIIuΦnIupaH INJKeHep.
Hecna3BaHeTo Ha Te3n INHCTpyKcN MoKe Da IOBeDe Do Cmbpt, NOxap NII TOKOB ydap.
Iamnata, n3noJ3BaHa B To3n npOyKT, He e IoXoJa 3a n3NoJ3BaHe npN OCBeTJIeHne
Ha NOMEUeHne. ZeI Ta Ha Ta3n IaMna e Da OcNrgpN OCBETJeHne 3a H3NoJ3BaHe Ha npOdyKTa.
EneKtpnuecka nHcTaJaCa
LJIaTaNHCTaIauJrTpaDa Ce N3BbPun OT KOMnTeHTHOJIuE IIN KBaIINΦuIpuHo JNuCe eJeKTPoTeXnK . Ppei DaCBbPxKeTe 3axpaHbAHeTo Ce yBepTe , Ye MpexKaTaHAnpexKeHNeTO CbOTBeTcTba Ha HAnpexKeHNeTO Ha TabeJaTa CMapKnIpOBka .
DnpeKTHa Bpb3Ka
UpeblT Tp6Ba Da 6bDe Cbbp3aH DnpeKTHO KbMeIeKTPueckata Mpeka C NOMOuTa Ha BCENoJIocEH PpeKbcBau C MINHMajHO OTBaPraHe MeJdy 3 MM KOHTaKTITE . HcTalaTopbT Tp6Ba Da ce yBepi , ye npabunHaTa eIeKTPuecka Bpb3Ka IMa HAnpaBeHa N Ye TcBTBETCTBa Ha cxemata Ha OKa6eJIyBaHe . Ka6eblT He Tp6Ba Da 6bDe OrbHat IIN KOMnPecIpaH . PeobHo nPoBePraBaiTe UenCeJa N 3axpaHbaUaNja Ka6eI 3a NobpeDi . Ako 3axpaHbAunr Ka6eI e NobpeDeH , ToI Tp6Ba Da 6bDe 3aMeHen CbC CneuaJen Ka6eI IIN MOHTaX Ha pa3noLoXeHne OT IpOn3BOdnteJI YII IN HerOBn CepBn3eH areHT.
BHHMAHHE: Toba e ypei on Klaac I n TPRA6BA da ce 3a3emn
To3n ypeI e cna6dEn C trnxnIneH 3axpaHbau Ka6eI, ouBteH KaTO cneDbA: KaFyB =L nnn Ha XnBO CnH = N nn HeYtpaIeN 3eJeHo nXbIto = E nn 3emr
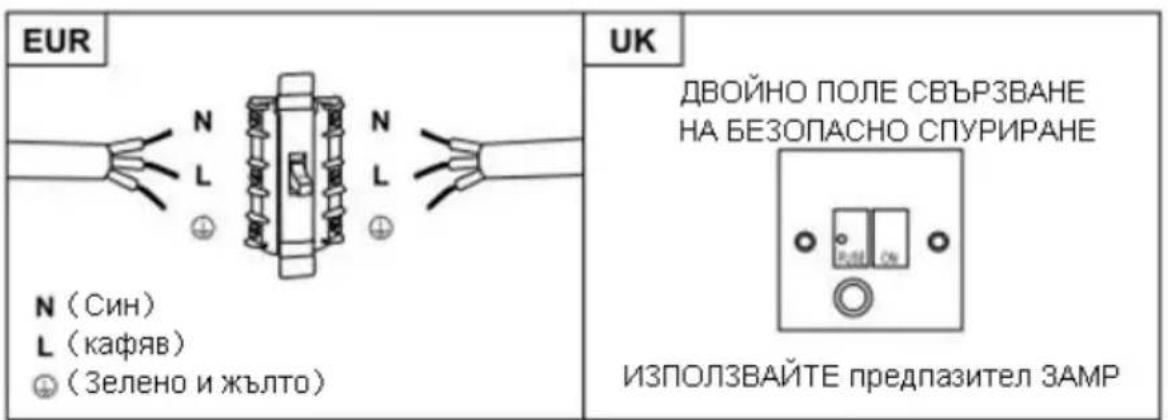
PpeDna3nteJrTp86Ba da e c 3 ampepa.
CnncbK c akcecoapn 3a cTaHdapTeH MOHTaX
ii. MoNTnpaTe c 4 BnHTa. 3a da npeDoTbPaTnTe HanyKBaHeTo Ha CTbKnOTo, MOnJ, He 3aTraJaTe npeKaJeHO BnHTOBeTe.
i. NocTaBeTe BbTpewHnKOMnBbB BbHsHn. CneTToBa n3DbpnaTe BbTpewHnKOMnH Harope. PerynpaIte, 3a da IOCTuHHeTe JeaHaTa BucOyHa.
ii. ПльзHETe KOMHa, 3a Да рergyнрATE BnCOUnHaTMy. Cnei KaTO DoCTHHeTe KeJHaHATA BnCOUnHa, NOCTABeTe OTBopa 3a 3aKaUaHe KbM BnHTOBeTe, KaKTo e NOKa3aHO Ha KapTNHKITE.
8.
i. Ipo6nIe 2 dynk n OT no 8 MM BcraKa, 3a da MOHTnpaTe nnoyata II. C nomounta Ha BNTOBete 3aterHete nnoyata II Ha cTeHaTa C DbATA npedocTabeHN BVHTa.
ii. Crno6eTe KOMnHa B ypea n ro fNkCnpaIte c 2 BNHTa.
CnncbK c akcecoapn 3a cTaHdapTeH MOHTax
| спесифinksя | Илобсташи Кожимецьо | |
| Въдuyшенифелковер | 1 | |
| скоба | 1 | |
| ф8DυSEŋф8×ф6STηцBRT | 2 | |
| ф7.2ВиNTaST4.0×30 | 2 | |
| ф7.2ВиNTaST3.5×12 | 2 |
ИНСТАЛАЦА (Вьздуншен ДЕФЛЕKTOP 3A T-шANKA, KYPTИРАноCTьКЮ,МоДели С ППATEH CTьКЛ):
Bb3nyuhen deoektop ce cnomeHaba kaTO BkIouyBa n He 3aIbJnxTeJIHO.
- Праз мотая за виite Двату края на скобата, Кakто e noka3aHo no-dony:
2.Пoctabete ckobata KbM T-06pa3HnЯ ПлactmacOB KOHTaKT c 2 BnHTa ST3.5x12mmBnHTObe.

3.ПобиITE 2 OTBOPa, 3a Да поставITE сеньсение Ha CTehata, след TOBa 3abHITeI 3aterheTe cko6ata KbM CTehata CпpeIoCTaBeHn 2BHTa BnHTObe ST4x30mm.
- Ппкpenete Изпскateлнота Трьба Кьм ИЗхда 3a Вьздух Ha acnnpaTopa, KaKTo e NOKa3aHo NO-ДОЛу:
5.Инсталпайт e komma KBm ypea n ro Фнкрайte.
o "Molna, liob3no ce ot6eneks: T-06pa3Ha nlaactmaca n3XoN V-Knann MOrat da 6bDat n3NoJ3BaHn eHOBpeMeHHo.MoxTe da rN n3NoJ3BaTe no Dba NaHa: 1) Do6abHe Ha O-Knana Ha cBseCTByBaunte n3XoN; 2) N3NoJ3BaHe T-06pa3Ha nlaactmaca n3XoN, He do6abKa V-Knana."
o "3a6eJekka: PpOdyKbTe cHa6dEn C V-Knana akcecoap. To3n akcecoap He e 3aIbJnxIteHNO 3a MOHTaJ, HAcTPOJka n yNtpe6a Ha npOdyKta."
CnncbK c akcecoapn 3a cTaHdapTeH MOHTax
| спесиophiliaя | Люстрацья КолчесТВО | |
| Бъдuyшени дeфл ekтор | 1 | |
| скоба | 1 | |
| ф8дюбеля ф8хф6≦й с≧ьт | 2 | |
| ф7.2ВиNTa ST4.0×30 | 2 | |
| ф7.2ВиNTa ST3.5×12 | 2 |
MHCTAJALU (Bb3dYuSEH DEΦJEKTOP 3A INPAMNHN N CJIENH MODEJI):
Bb3dyweH deepneKtop ce cnoMeHaBa KaTO BkIIOUyBa I He 3aIbJIxHTeINHO.
1.ФИКСИРаTe cko6aTa KbM T-06pa3HЯ ПlaCTMaCob KOHTaK T C 2 BnHTa ST3.5x12mm BnHTObe,пpeIoCTaBeHn, KaKTo e noka3aHo NO-ДОЛу:
- Haninete 2 OTbopa Ha cTeHata, 3a da noCTaBHTe uenCeJIte Ha cTeHata, CneTobA 3aBHTeIu 3aTeHHeTe cKo6aTa KbM cTeHATA c OcnHypeHn 2pcs BInTOBe ST4x30mm.
- Прикpenete Изпунсанта Трба Кьм ИЗхда 3a Вьздух Ha acнираTopa, КakTO e nOKa3aHo NO-ДОУ:

4.Инсталпайт e komma KBm ypea n ro qnknpaite.
o "Molna, liob3Ho ce ot6eJn: T-0bpa3Ha pIaTmaca n3XoN V-KnAn MOrat da 6bDat n3NoJI3BaHn eIHOBpeMeHHo.MoxTe da rN n3NoJI3BaTe no Dba NaHa: 1) Do6abYHe Ha O-KnAna Ha cBseCTByBaunte n3XoN; 2) N3noJI3BaHe T-0bpa3Ha pIaTmaca n3XoN, He do6abKa V-KnAna."
o "3a6eJekka: PpOdyKbTe cHa6dEn C V-KIana akcecoap. To3n akcecoap He e 3aIbJIknteJH0 3a MOHTaK, HacTpoJka N yNoTppe6a Ha npOdyKta."
MOHTAX (ВъТРЕшА BEHTИДАЦИ)
Ako He pa3noIarate C BbHweH N3BOID, N3nyckaTeHaTa Tpb6a He e HuxHa mOHTaxbT e noo6eH Ha To3n, OncanB pa3deJ (MOHTAX (BbHsHA BEHTNJALU).
ФИТьрВСаКТиBEHБыгпeнМожeДace N3ПОЛ3Вa 3aУЛавЯнHa HeNPиrTHN МИрЗМN.
3a da noctabnte fuiTbpa cakTNBEH BbyrIeH, npBPO Tp6Ba da CBAInTe fuiTbpa 3a Ma3HHn. HataChete 3akNIOUbaun eJeMeHT n N3DbPnaTe HaOly.
IocTaBete cHJTbpa C aKTtBeH BbTHeN B ypea n rO 3aBbPTeTe NO Nocoka Ha YacOBnKOBaTa CTpeIka. NobTopeTe Ta3n Oepaunr O T dpyraTa cTpHa.
3AbeJIeKKA:
o Yepe me ce, ye fummbpbm nocmaeH kopekmno. B npomue H cnvyau. Moke da ce pa3xna6u u da cmahe onaceH.
o Kozamo nocmabume pfumbpa c akmuee H b2neH, 3acMyK8auama MowHocm ue 6bde no-HUcKa.
KOHΦιΓΥΡΑζη 1
1
2
3

PABOTA
6yToH 1
Бутоньт ec Инданацяс посветка , korato habисане 此уна ,поссветкata щe бде вкюоча и вентлаторьт щeбдевКлюун c НИСКАСКОРСТ . korato habисане OTHOBO , той синЗкючи вентлатopa .
I3noJ3Ba ce 3a BeHTnlauny B KuxHraTa . POnxOJaUe 3a KbKpeHe IrotBeHe , npi KOnTO He ce 6bpa3yBaT n3napeHnA .
6yToH 2
Бутоньт ec Инданацяс посветка , korato haTиСHTe 6byToHa ,поДсВЕТКATA себдев BKЛюЧЕHA и BeHTиЛaTOрьт сe 6bdeBКЛючЕн Ha cpeДнa ckopoCT . Korato haTиСHTe OTHOBO , ToI сeN3KЛIOчи BeHTиЛaTOpA .
CkopocTtHa Bb3dUshnna NOTOK e ndeaHa 3a BeHTnlaun npN CTaHdapTHO rOTBeHe .
6yToH 3
Бутоньт ec Иndикадацяс посветka , korato HaTиСHTe 6byToHa ,подсВЕТКATA себдев BKЛюЧЕHA и BeHTиЛaTOрьт себдев BKЛюЧЕн CBИСОКA cKOPOCT . korato HaTиСHTe OTHOBO , тОй сeИЗКЛЮЧI BEHTиЛaTOpa .
Ipn HaJIInuHHeTo Ha rbcTa IINbTHOcT Ha dIM nIIN npa, HATnCHete 6yToHa 3a BnCOka CKOpocT 3a Ha-eΦeKTHBHaBeHTnlaun.
3AБЕЛEXKKA: Ako 6ymoHume 3a HucKa/cpeDHa/ buCoka ckopocm ca Hamuchamu eDHOBpeMeHHO, ypeBm ue paBomu cMo Ha Hau-Bucokama ckopocm.
Бутон за осветленье

KOHΦιΓΥΡΑζησια 2
0 1 2 3
PABOTA
ByToH n3KJI. O
I3noJ3Ba ce 3a I3KIOUbaHe Ha BeHTnlaTopa.
Бутон за Нusska ckopoct 1
I3noJ3Ba ce 3a BeHTnlaunB KuxHraTa. PoDxOJaUe 3a KbKpeHe n rotBeHe, npN KOInTO He ce 6bpa3yBaT N3napEnn.
Бутон за среда скорост 2
Скорocтта на вьздушни поtokе идeална 3a BeHTиlaця пи CTaHdapTHO rOTBeHe.
ByToH 3a BnCoka ckopoCT 3
IpnHaJIuHneTo Ha IbCTa IIbTHOcT Ha dIM nIIN npa, HATnCHeTe 6yToHa 3a BnCOKa CKOpOCT 3a Ha-eΦeKTHBHa BEHTnlaucn.
3A6EJIEXKKA: Ako 6ymoHume 3a HucKa/cpeDHa/Eucoka ckopocm ca Hamuchamu eDHObpeMeHHo, ypeBm ue paBomu cMo Ha Hau-Bucokama ckopocm.
Бутон 3a ocBeТлени

KOHΦιΓΥΡΑΝΙΑ 3


Бутон ВкЛ./и3КЛ.
I3noJI3Ba Ce 3a BkJIIOUbaHe I N3KJIIOUbaHe Ha BeHTnlaTopa.

1 ByToH c Hncka ckopoCT
I3noJ3Ba ce 3a BeHTnlaucnB KuxHra. PoDxOJaE 3a KbnaHe n RotBeHe, KOITo He npaBt MHoro npa.
2 ByToH 3a cpeHa ckopoCT
Скорocтта на вьздушни NOTOK e Идeална 3a BeHTиlaця пri CTaHdapTha pa6ota пri rotbeHe.
3 ByToH c BnCoka ckopoCT
Korato ce obpa3yBa BnCOKa IIbTHOCT Ha dIIM nIIN npa, HATNCHEte 6yToHa 3a BnCOKa CKOpOCT 3a BnCOKO eΦeKTNBHa BeHTUNaIGN.
BФункця 3a ycsnlbahe Ha mouHocTta (Booster)
To3n abcop6batop npntexkaba cyHKunra 3a ycInBaHe Ha MOUHOCCTTa (Booster). 3a da akTINBnpaTe cyHKunra Ta 3a ycINBaHe Ha MOUHOCCTTa (Booster), n36epete B cKOpocT 4, BBBeDeTe Hau-BnCOKata ckopocT, DOkaTo abcop6aTopbT pa6OTn I Toi Ie yBelenuCKOpocTTa 3a 5 MNHyTN, PpeDN OTHOBO Da Jy 3a6abN.

CBeTJnHa
3a ocBcTJIeHne ON/OFF.
ПОДДРьЖKA
Ipei n oocBaHe Ha ypea, rO n3KIOUeTe OT eJIeKTPnueckaTa Mpeka, KaTO n3BaAnTE 3axpaHbauJnA uenCeI.
I. PeodBHO
NoucTbaHe
I3noJI3BaIte MeKa KbpNa, HanoEHa C TOnJa canyHeHa Boda nIi NDOMaKInHcN IOUncTbAu, npenapat. Hnkora He I3noJ3BaIte MeTaJIHn IoJIOxKn, a6pa3INBn MaTePnaJIu nIi rpy6n YeTKn pRn NOUncTbaHeto Ha ypeDa.
II. Meceyu nouchTbaHe Ha cnTbpa 3a Ma3HHN
BAKHO: Nouucmeaume fummbpa eceku Meceu, 3a da npedomepamume pucka om noxap.
ФиNTbpyT c6bnpa Ma3HnHnTe,ДИма И npaxa.....Taka Ye ToI BnIe DInpeKTHO Ha eФиNKacHocCTTa Ha a6cop6aTopa. Ako He e NOUHCTeH, OCTaTBuHTe OT Ma3HnHn (KoINTO ca NOTEHnAJIHO 3aIaJIIMN) IcE Ce HATpyNaT Bbpxy ФиNTbpa. NOnUCTeTe ro c O6NKHOBEH DomaknHcN NouchTBAu nPepapat.
