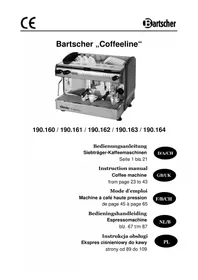
Coffeeline G2 - Coffee machine BARTSCHER - Free user manual and instructions
Find the device manual for free Coffeeline G2 BARTSCHER in PDF.


| Product type | Automatic high-pressure coffee machine |
| Brand | Bartscher |
| Model | Coffeeline G2 |
| Number of brewing systems | Up to 4 (depending on version) |
| Display | Digital with clock display |
| Electronic temperature control | PID technology |
| Water tank filling | Automatic with low-level safety |
| Dosage programming | 4 options per brewing system (1x espresso, 1x coffee, 2x espresso, 2x coffee) |
| Water programming for tea | Yes |
| Self-cleaning | Brewing system with backflush rinsing |
| Descaling alarm | Visual (filter change indication) |
| Clock and timer | Programmable automatic on/off |
| Steam distribution | Steam wand for frothing milk or heating liquids |
| Hot water distribution | Boiling water tap for tea or instant drinks |
| Language selection | Spanish, English, German, French, Italian |
| Safety | Automatic pump and heater shut-off in case of low water level; overheating protection |
| Maintenance | Regular filter cleaning and descaling by authorized technician |
| Included accessories | Filters (1 or 2 cups), cleaning membrane, connection hose |
| Installation | Connection to water supply with water softener if hardness > 6° |
| Intended use | Preparation of coffee, tea, and instant drinks |
Frequently Asked Questions - Coffeeline G2 BARTSCHER
User questions about Coffeeline G2 BARTSCHER
0 question about this device. Answer the ones you know or ask your own.
Ask a new question about this device
Download the instructions for your Coffee machine in PDF format for free! Find your manual Coffeeline G2 - BARTSCHER and take your electronic device back in hand. On this page are published all the documents necessary for the use of your device. Coffeeline G2 by BARTSCHER.
USER MANUAL Coffeeline G2 BARTSCHER
natural_image
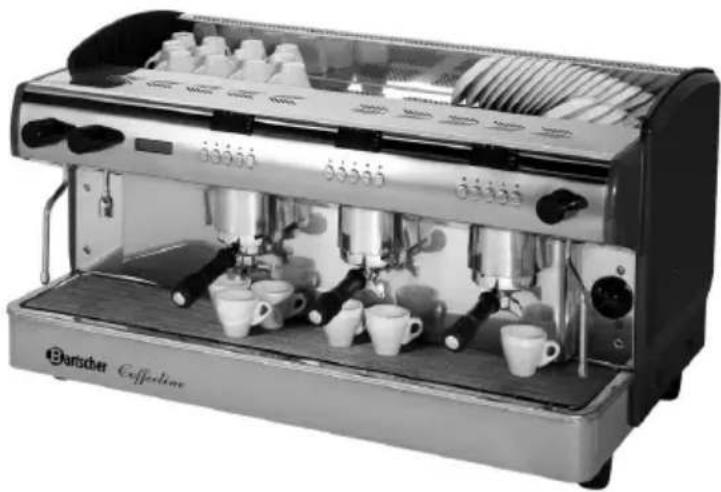
Exterior view of a Bartscher coffee machine with open lid and side dishes (no visible text or symbols on main body)Instruction manual Coffee machine
from page 23 to 43
D/A/CH
GB/UK
Mode d'emploi
natural_image
Exterior view of a Swiss coffee machine (no visible text or symbols on the device itself)Bartscher Coffeeline G1 190.160
natural_image
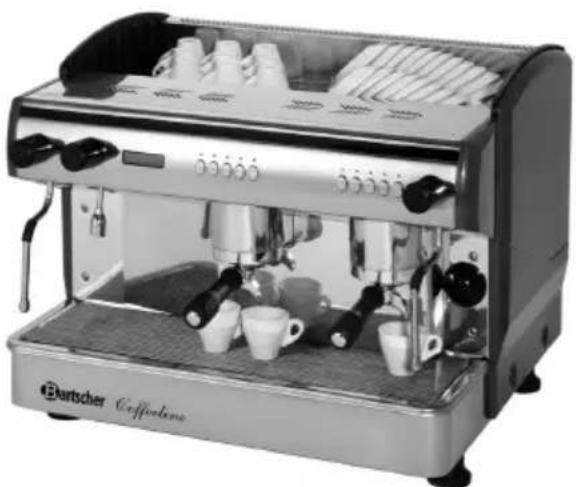
Exterior view of a Swiss coffee machine (no signage or text visible on the machine itself)Bartscher Coffeeline G2 190.161
natural_image
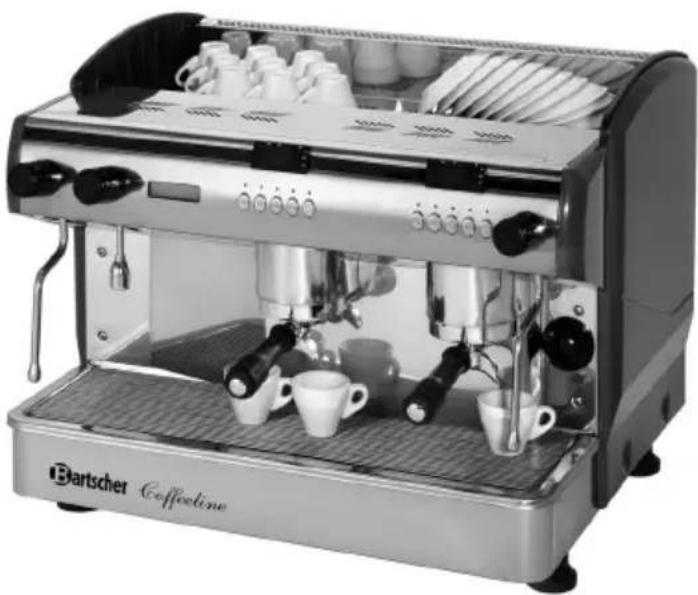
Exterior view of a Bartscher coffee machine with open lid and side dishes (no visible text or symbols on main body)Bartscher Coffeeline G2 plus 190.163
natural_image
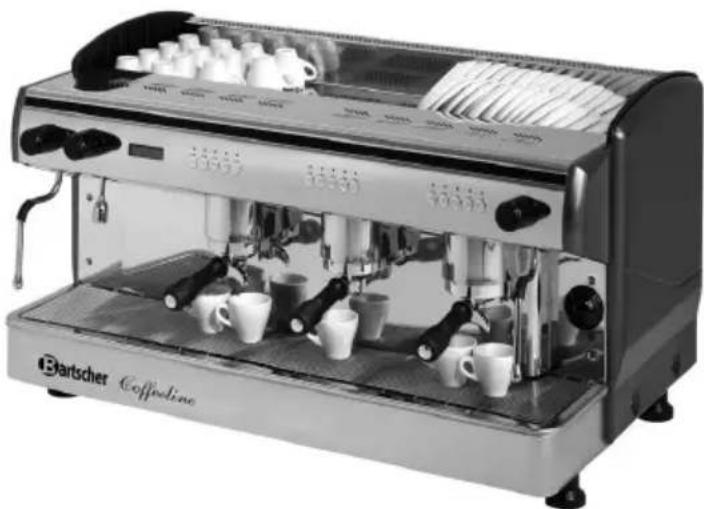
Exterior view of a Bartscher coffee machine with multiple cups and control knobs (no visible text or symbols)Bartscher Coffeeline G3 190.162
natural_image
Exterior view of a Barischer coffee machine with multiple cups and glass cups (no visible text or symbols)Bartscher Coffeeline G3 plus 190.164
natural_image
Diagram showing two hand tools with arrows pointing to the end of each tool (no text or symbols present)Keep this instruction manual ready to hand at the product!
1. General Information 24
1.1 Information about the instruction manual 24
1.2 Key to symbols 24
1.3 Liability and Warrantees 25
1.4 Copyright protection 25
1.5 Declaration of conformity 25
2. Safety
26
2.1 General information 26
2.2 Safety instructions for use for the device 26-27
2.3 Intended use 27
3. Delivery, packaging and storage 28
3.1 Delivery check 28
3.2 Packaging 28
3.3 Storage 28
4. Technical data
29
4.1 Technical specifications 29
4.2 Overview of parts 30-31
5. Installation and operation
31
5.1 Safety instructions 31-32
5.2 Installation and connection 32
5.3 Operation 33-39
6. Cleaning and maintenance
40
6.1 Safety advice 40
6.2 Cleaning and decalcifying 40-41
6.3 Safety instructions for maintenance 41
7. Possible Malfunctions
42
8. Waste disposal
43
Bartscher GmbH
1.1 Information about the instruction manual
This instruction manual contains information about the installation, operation and maintenance of the appliance and should be consulted as an important source of information and reference guide.
Awareness of the safety instructions and instructions for use in this manual will ensure the safe and correct use of the appliance.
In addition to the information given here, you should comply with any local Health and Safety Controls and generally applicable safety regulations.
The instruction manual forms part of the product and should be kept near the appliance and easily accessible for anyone carrying out the installation, servicing, maintenance or cleaning.
1.2 Key to symbols
In this manual, symbols are used to highlight important safety instructions and any advice relating to the device. The instructions should be followed very carefully to avoid any risk of accident, personal injury or material damage.

WARNING!
This symbol highlights hazards, which could lead to injury.
Please follow the instructions very carefully and proceed with particular attention in these cases.

WARNING! Electrical hazard!
This symbol draws attention to potential electrical hazards. If you do not follow the safety instructions, you may risk injury or death.

CAUTION!
This symbol highlights instructions, which should be followed to avoid any risk of damage, malfunctioning and/or breakdown of the appliance.

NOTE!
This symbol highlights tips and information, which have to be followed for an efficient and trouble-free operation of the appliance.

WARNING! Hot external surface!
This symbol is a warning that the device surface is hot when in use. Ignoring this warning may result in burns!
1.3 Liability and Warrantees
All the information and instructions in this manual take into account standard safety regulations, current levels of technical engineering as well as the expertise and experience we have developed over the years.
The instruction manual was translated with all due care and attention. However, we do not accept liability for any translation errors.
The German version of this instruction manual is definitive. If the delivery consists of a special model, the actual scope of delivery may differ from the descriptions and illustrations in this manual.
This is also the case for special orders or when the appliance has been modified in line with new technology. If you have any questions, you should contact the manufacturer.
NOTE!
Read the instruction manual carefully before using the appliance. The manufacturer does not accept liability for any damage or malfunction resulting from not following the instructions for use.
The instruction manual should be kept near the appliance, easily accessible for anyone wishing to work with or using it. We reserve the right to make technical changes for purposes of developing and improving the useful properties.
1.4 Copyright protection
The instruction manual including any texts, drawings, images or other illustrations is copyright. No part of this publication may be reproduced, transmitted or used in any form or by any means without permission in writing from the manufacturer. Any person who commits any unauthorised act in relation to this publication shall be liable to claims for damages. All rights reserved.
NOTE!
The contents, texts, drawings, pictures and any other illustrations are copyright and subject to other protection rights. Any person unlawfully using this publication is liable to criminal prosecution.
1.5 Declaration of conformity
The appliance complies with the current standards and directives of the EU.
We certify this in the EC declaration of conformity.
If required we will be glad to send you the according declaration of conformity.
2. Safety
This section provides an overview of all important safety aspects.
In addition, every chapter provides precise safety advice for the prevention of dangers which are highlighted by the use of the above-mentioned symbols.
Furthermore, attention should be paid to all pictograms, markers and labels on the device, which must be kept in a permanent state of legibility.
By following all important safety advice, you will gain an optimal protection against all hazards as well as the assurance of a safe and trouble-free operation.
2.1 General Information
This device is designed in accordance with the presently applicable technological standards. However, the device can pose a danger if handled improperly and inappropriately.
Knowing the contents of the instruction manual as well as avoiding mistakes, and thus operating this device safely and in a fault-free manner, is very essential to protect yourselves from any hazards.
To prevent hazards and to ensure optimum efficiency, no modifications or alterations to the device that are not explicitly approved by the manufacturer may be undertaken. This device may only be operated in technically proper and safe condition.
2.2 Safety instructions for use of the device
The specifications regarding industrial safety are based on the Regulations of the European Union applicable at the time of manufacturing the device.
If the device is used commercially, the user is obliged to ensure that the said industrial safety measures concur with the state of the rules and regulations applicable at the time in question for the entire period of use of the device, and to comply with the new specifications. Outside the European Union, the industrial safety laws applicable at the place of installation of the device and the regional territorial provisions must be complied with.
Besides the industrial safety instructions in the instruction manual, the general safety and accident prevention regulations as well as environment protection regulations applicable for the areas of application of the device must be followed and complied with.

CAUTION!
- The device is not intended for use by individuals (including children) with physical or mental disabilities, insufficient experience, and/or insufficient knowledge unless such persons are under the care of a person responsible for their safety or have received instructions regarding appropriate use of the device.
o Children should be observed to ensure that they are not playing with the device. - Keep this manual in a safe place. When passing on/selling the device to a third party, the manuals must be handed over along with the device.
○ Every person using the device must act in accordance with the manuals and under consideration of the safety advice. - The device is to be used indoors only.
2.3 Intended use
Safe operation can only be guaranteed when using the device for its intended purpose. Any technical interventions, as well as assembly and maintenance are to be made by a qualified customer service only.
The coffee machines are intended only for preparing coffee and hot water for tea or instant drinks.

CAUTION!
Do not use the device for anything beyond or other than its intended use. The manufacturer and/or authorized parties do not accept any claims resulting from damage caused by using the device not according to its intended use. The operator is totally liable for any such damage.
3. Transport, packaging and storage
3.1 Delivery check
Please check the delivery for completeness and transport damage immediately after receipt.
In case of visible damage, do not accept or accept the delivery with reservation only. Note the extent of damage on the carrier's bill of delivery and notify us of any recorded damage.
Hidden damages should be reclaimed immediately after detection, as claims for damages can only be asserted within the effective period for complaints.
3.2 Packaging
Please do not throw away the covering carton of your device as it might be useful for storage purposes, when moving or, in case of damages, when the device must be sent back to a repair center. The outer and inner packing material should be removed completely from the device before installation.
NOTE!
Observe the regulations applicable in your country when disposing of the packaging. Supply re-usable packing materials to the recycling centre.
Please inspect the device for completeness. In case any part is missing, please contact our customer service center immediately.
3.3 Storage
Keep the package closed until installation and under consideration of the positioning-and storage markings indicated on the outside.
Packages should be stored under consideration of the following:
- Do not store outdoors.
- Keep it dry and dust-free.
- Do not expose it to aggressive media.
- Do not expose it to direct sunlight.
- Avoid mechanical shocks and vibrations.
- In case of longer storage (> 3 months), make sure you check the state of the packaging and the parts regularly. If required, refresh or renew.
4. Technical data
4.1 Technical specifications
| Name „Coffeeline“ coffee machine | |||||
| Art. No.: | 190.160 | 190.161 19 | 0.162 190. | 163 190.164 | |
| Model: | G1 G2 | G3 G2 plus G3 plus | |||
| Power: | 2,85 kW230 V | 3,3 kW230 V | 4,2 kW3 NAC400 V | 3,3 kW230 V | 6,2 kW3 NAC400 V |
| Reservoirs: 1 1 1 | 3 4 | ||||
| Reservoir capacity: | 6 litres 11,5 litres 17,5 | litres 11,5 litres | 11,5 litres | ||
| Dimensions (mm): | W 475D 580H 523 | W 677D 580H 523 | W 967D 580H 523 | W 677D 580H 523 | W 967D 580H 523 |
| Weight: 40 kg 60 kg | 80 kg 62 kg | 87 kg | |||
We reserve the right to modifications!
Coffee machine functionalities/characteristics
▶ Display screen
Time display: current day and time
Programmable automatic ON/OFF timer
Digital display and reservoir temperature control
Electronically controlled reservoir temperature using PID technology
▶ Automatic reservoir filling
➢ Automatic water pump disconnection when water level reaches low levels
➢ Visual indicator displays when water level in reservoir is too low
➢ Automatic disconnection of heating device when water level is too low
➢ Self-cleaning brewing assemblies
➢ Choice of four different programs controlling coffee portions
➢ Visual indicator displays regeneration phase in water decalcifying device
Choice of language (Spanish, English, German, French, Italian)
4.2 Overview of parts
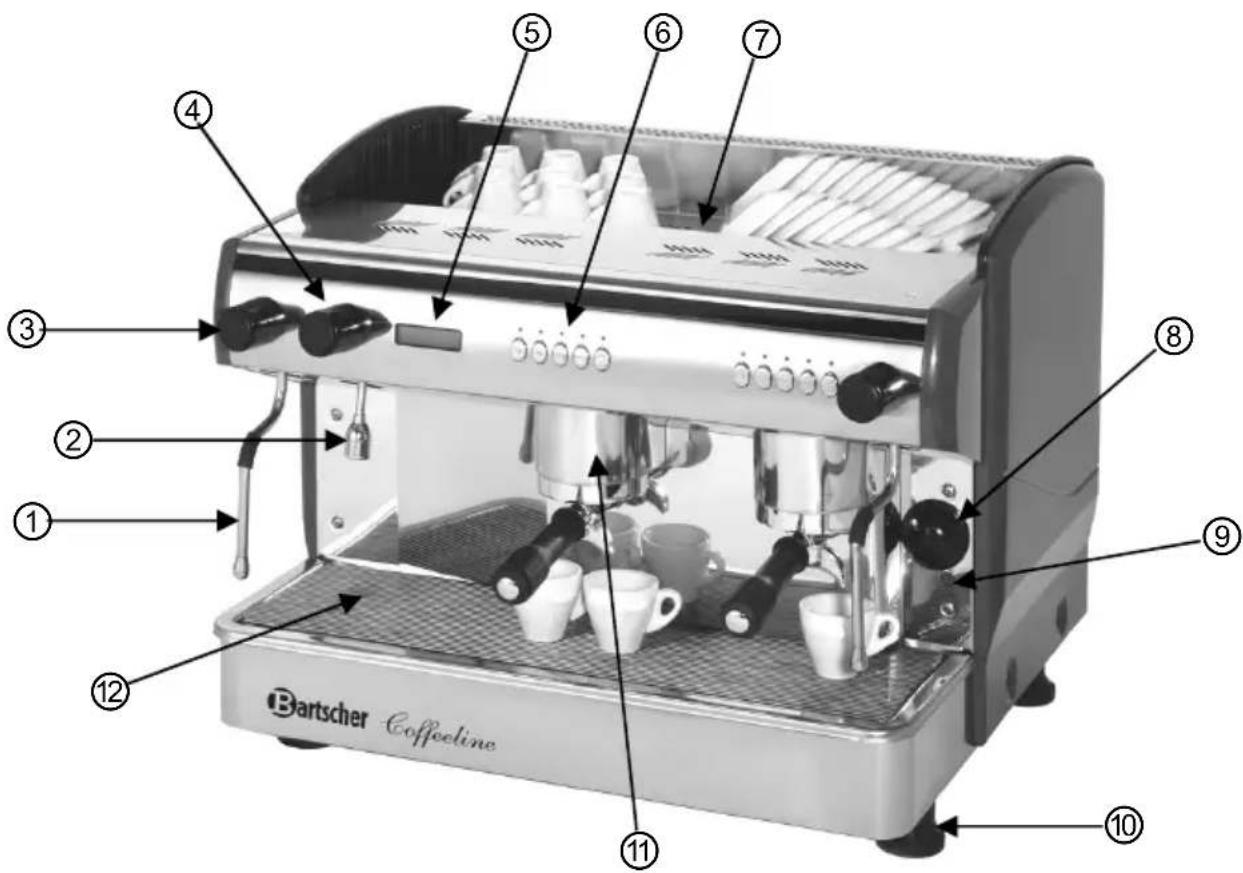
Fig. 1
- Steam arm
- Hot water tap
- Steam regulator
- Water regulator
- Display
- Portion controls
- Cup & saucer storage
- ON/OFF switch
- Control light
- Adjustable legs
- Brewing assembly with strainer
- Run-off tray
Accessories
- For model: Mini (190.160):
1 strainer for 2 cups + 1 single-cup strainer + 1/2 meter hose from artificial materials and one membrane-cleaning device.
2 strainers for 2 cups (2-group device):
3 strainers for 2 cups (3-group device);
4 strainers for 2 cups (4-group device);
- 1 single-cup strainer;
- 1 ½-meter hose from artificial materials;
- 1 membrane-cleaning device.
5. Installation and operation
5.1 Safety instructions

WARNING! Electrical hazard!
The device must only be connected to a properly installed single socket with protective contact.
Never yank cord to disconnect from outlet.
Cable must not touch any hot parts.
- See that the cable does not touch any heat sources or sharp edges. Do not let the cable dangle over the counter edge.

WARNING! Hot external surface!
During operation some parts of the device become very hot. In order to avoid injuries do not touch any hot parts!
- Do not use the device if it does not function properly, has been damaged or dropped.
- Do not use any accessory or spare parts that have not been recommended by the manufacturer. These can be dangerous for the user or lead to damages of the device or personal injury, and further, the warranty expires.
- Do not lay the cable over carpets or heat insulations. Do not cover the cable. Keep away the cable from operating range and do not dunk it into water.
• Do not insert any objects into openings in the device.
• Do not touch the device with bare and/or wet hands.
• Never touch internal parts of the device.
• Do not move or tilt the device during operation.

WARNING! Hazard via electrical current!
The device can cause injuries due to improper installation!
Before installation the local power grid specification should be compared with that of the device (see type label).
Connect the device only in case of compliance!
Take note of the security advice!
5.2 Installation and connection

ATTENTION!
Installation and maintenance of the device must be performed only by qualified personnel!
Set-up
- Unpack the device and dispose of packaging material.
- Place the device on a flat, secure surface which can support the device's weight and is not sensitive to temperature.
• Never place the device on a flammable surface (e.g. table cloth, etc.). - Never place the device near a source of open flame, electric heater, or any other source of heat.
• After set-up, the machine should be adjusted using the adjustable legs to ensure even distribution of coffee to each cup.
• Each electrical plug circuit should be secured to a level of at least 16A. The device can only be plugged directly into a wall socket – do not use multiple-socket clusters or power strips. - Place the device so that the plug is easily accessible and can be quickly removed from its socket in case of necessity.
Hose and water decalcifier installation:
- Remove the run-off tray and connect the elastic hose to its proper location. Connect the other end of the hose to the water decalcifier device. Connect the decalcifier device to the water supply using the second hose. The water pressure should be at a maximum of 4 bar.
5.3 Operation
Filling the water reservoir
The device is equipped with an automatic regulator to keep the water reservoir filled. It is also equipped with a protective mechanism to prevent sudden stops in water flow:
- The heating element, pump motor and magnetic water flow valve are automatically disconnected.
- The following error message appears on the display:
Alarm Time-out Water loading
First use
- Open the water flow tap.
- Turn the device on by the main switch (see. (8) fig. 1).
- Turn the steam regulator until steam begins to come out (see (3) fig. 1).
Strainer set-up
Fig. 2
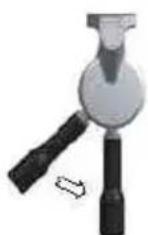
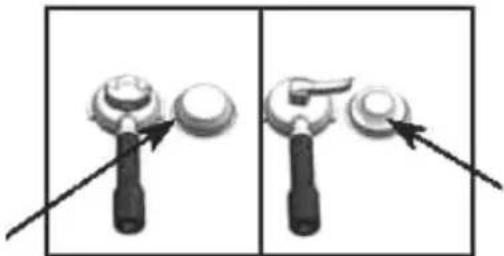
Place the strainer in the left side of the brewing assembly, then turn to the right until it settles into place.
PROPER POSITIOING OF THE STRAINER IN THE BREWING ASSEMBLY
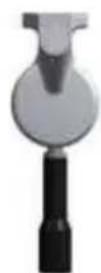
PROPER POSITION
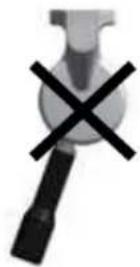
IMPROPERLY SETTLED IN
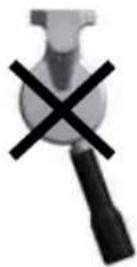
SEALS ARE
DISINTEGRATED
Strainer for two cups
Filter basket for double portion
natural_image
Two-panel illustration showing a hand holding a small object, with arrows pointing to the components (no text or symbols)Strainer for one cup
Filter basket – single portion
Fig. 3
Brewing coffee
a) Remove the strainer from the brewing head.
b) Insert the filter basket and fill it with the desired amount of coffee. For the best, most aromatic and tasty coffee use freshly-ground coffee. Use the appropriate filter basket (see fig. 3).
c) Tightly pack the coffee using the beater.
d) Place the full strainer in the brewing head until it settles into place (see fig. 2). Put the coffee cup under the coffee spout and press the brewing button.
e) Choose the proper function on the service panel (see fig. 4).
The device has 4 pre-set programmes for portion control (see settings, how to change) and a continuous function button.
The first four buttons on the service area for each brewing assembly (1 x espresso - 1 x coffee - 2 x espresso - 2 x coffee) are automatic programmes. After each brewing cycle press the fifth button (continuous function) to stop the program.
NOTE!
For best results, the device, brewing head and strainer must be constantly kept at the appropriate temperature. The strainer should be placed in the brewing head prior to preparing coffee.

WARNING! Danger of burns!
Never remove the strainer during the brewing process, as hot water under high pressure can cause burns.
Service panel
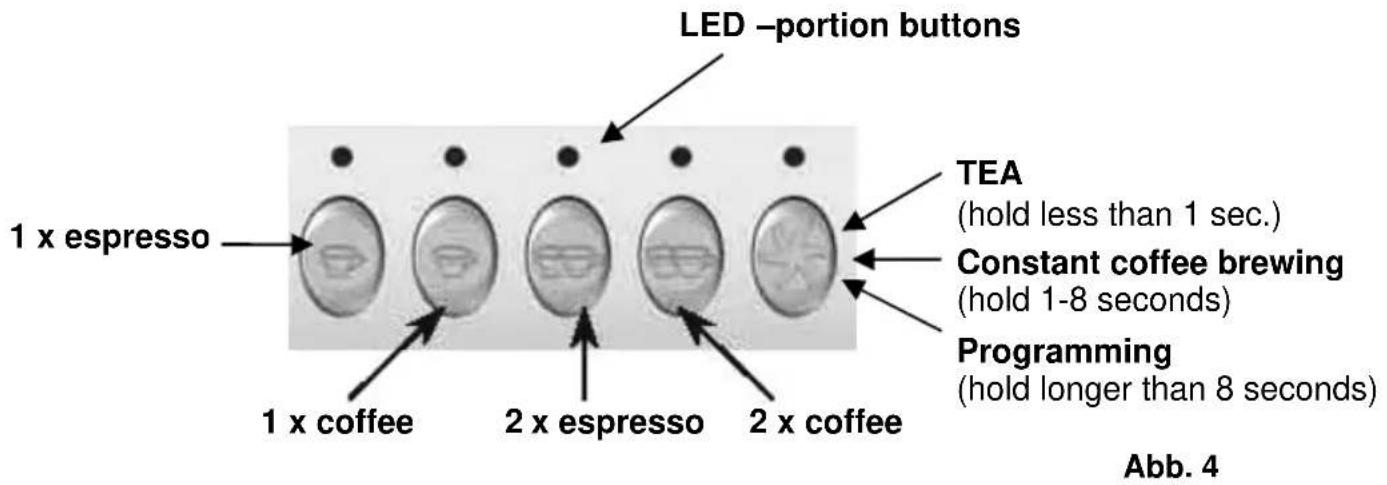
Coffee machine modes
The coffee maker has three modes:
- ON
- Stand-by
-
OFF
-
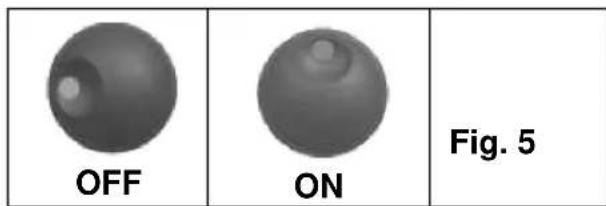
ON: The device is working.
When the device's display shows „OFF“ (in stand-by mode), press the „2 x espresso“ button to shift the device into „ON“ mode.
XX °C
hh: mm
Select
- Stand-by: the display device shows "OFF".
This appears when the machine is disconnected via the service panel. Programming of the automatic ON/OFF function (see section below).
If the device is in the „ON“ mode, to place it in the „Stand-by“ (OFF) mode, press the „2 x espresso“ and „Continuous function button“ simultaneously
OFF
3. OFF
The device is disconnected from its power source.
Heating of liquids
- Hold the steam arm (see (1) fig. 1) over the run-off tray and open the steam regulator slightly in order to receive drops of water from the steam arm.
- Turn the steam regulator.
- Immerse the steam arm into the liquid which is to be heated.
- Open the steam regulator. The liquid is now being heated (never remove the steam arm from the liquid if the steam regulator is open, as this may cause burns or damage). Prior to removing the steam arm, close the steam regulator.
- When the heating process finishes, keep the steam arm above the run-off tray and open the steam regulator in order to clean the steam arm. Close the steam regulator and wipe the steam arm with a moist cloth.
Hot water
- Place a container under the hot water spout from which you wish to draw water.
- Open the water regulator (see (4) fig. 1) until the desired amount of water is obtained.
- Close the water regulator again.
- Check the run-off tray regularly.
Programming water doses for tea
Hold the "Continuous function button" for over 8 seconds of any of the brewing assemblies.
The program's current setting is displayed by the LED displays of a given brewing assembly (besides the LED "continuous function button" – which flashes). The display shows the following information:
Doses programming select 30s
Now press the “Continuous function button” once, for less than 1 second. Hot water will flow out of the hot water spout. After the required amount of water is received, press the button again and the water portion for tea is set. The water portion for tea can also be set for every brewing assembly.
Coffee doses programming
Press and hold the „continuous function button“ from the left brewing assembly for longer than 8 seconds. The program’s current setting is displayed on the LED display of a given brewing assembly (besides the LED „continuous function button“- it flashes). The display shows the following information:
Doses programming select 30s
Now press the button which is to be programmed (1 x espresso – 1 x coffee – 2 x espresso – 2 x coffee). All LED displays (including the one chosen and „continuous function button“) go out. Coffee will begin to flow. When the required amount of coffee is received, press the button again - the dose is now set and the LED light over the button will go out.
The new process is programmed as a new coffee dose. As necessary the process can be repeated for other dose buttons to set the required portions.

NOTE!
If one of the portion buttons on the left service panel (as seen from the front) is reset, the dose will be set for the appropriate buttons of the following brewing assemblies.
Example: Let us change the dose for the button labelled "1 x espresso". This dose will be programmed and remembered for all "1 x espresso" buttons on the service panel.
As stated above, this is only possible for changes made on the left service panel. If changes are set via other service panels, they will affect only the one button.

NOTE!
New programmes should be set with fresh coffee in the filter basket.
Self-cleaning brewing assembly /initial rinsing
- The device must be in the „ON“ mode.
- Turn off the device using the main on/off switch (see (8) fig. 1).
- Press and hold the button "2 x espresso" and turn the device on simultaneously via the main on/off switch (see (8) fig. 1).
Time settings
Hold the „continuous function button“ on the left service panel for more than 8 seconds. The programme’s current setting is displayed on the LED display for a given brewing assembly (except for the „continuous function button“— which flashes). The display shows the following information:
Doses programming select 30s
Press the „continuous function button“ on the left service panel until the display shows the following information:
Time setting
Press the "2 x espresso" button.
Changing day and time (fig. 7)
- To set the hour, when the hour setting is flashing press the "1 x espresso" button to advance and "1 x coffee" to go backwards.
- To set the minute, hold the „2 x espresso“ button until the minute setting begins to flash. Now press the „1x espresso“ button to advance or „1 x coffee“ to go backwards.
- To change the day, hold the "2 x espresso" until the day display flashes. Now press the „1x espresso“ button to advance or the „1 x coffee“ to go backwards.
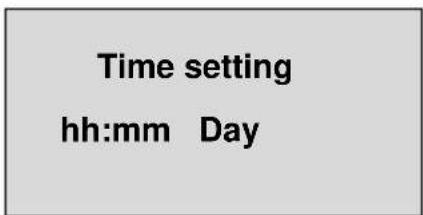
fig. 7
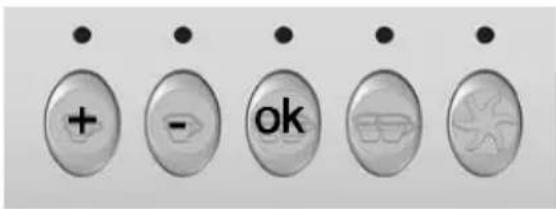
• After changing the date, press „2 x espresso“, to return to the main menu.
Automatic ON/OFF function
Auto ON/OFF
ON: hh:mm
Auto ON/OFF
OFF: hh:mm
Turning on Turning off
• To set the automatic on/off function, press the „2 x espresso“ button.
- To set the hour display, when the hour setting is flashing press the "1 x espresso" button to advance and "1 x coffee" to go backwards.
- To set the minute, hold the „2 x espresso“ button until the minute setting begins to flash. Now press the „1x espresso“ button to advance or „1 x coffee“ to go backwards.
- To set the automatic off function, press the "2x espresso" button and follow the same procedures as for automatic on programming.
- To confirm settings, press the "2 x espresso" a second time.
Day off
• To view the menu, press the "2 x espresso" button.
- When cycling through the menu, values can be increased by pressing "1 x espresso" and decreased pressing the "1 x coffee" button.
- Confirm the value selected by pressing "2 x espresso".
The display shows the day as chosen:
Day OFF
Day (eg. Monday)
NOTE!
To change other settings, contact a Customer Service Centre.
6. Cleaning and maintenance
6.1 Safety advice
Before beginning with repair or cleaning works make sure the device has been disconnected from power socket (pull the power plug!!!) and has cooled down.
- Do not use any acid agents and make sure no water ingresses the device.
Device, cable or plug should never be dunked into water or other liquids. In case liquids enter the inside of the coffee machine the device must be dried and checked by a technician.

CAUTION!
The device is not suited for direct washing via water jets. Therefore, you must not use any kind of pressure water jet for cleaning the device!
6.2 Cleaning and decalcifying
- Clean the coffee maker regularly.
○ Disconnect the machine from its power source (remove the plug!) - The exterior may be cleaned with a damp cloth. Do not use harsh chemicals or solvents.
- Clean the strainer at the end of the (working) day, with only a „blind strainer“ and water.
- Clean using appropriate cleaning agents once a week.
Reverse rinsing
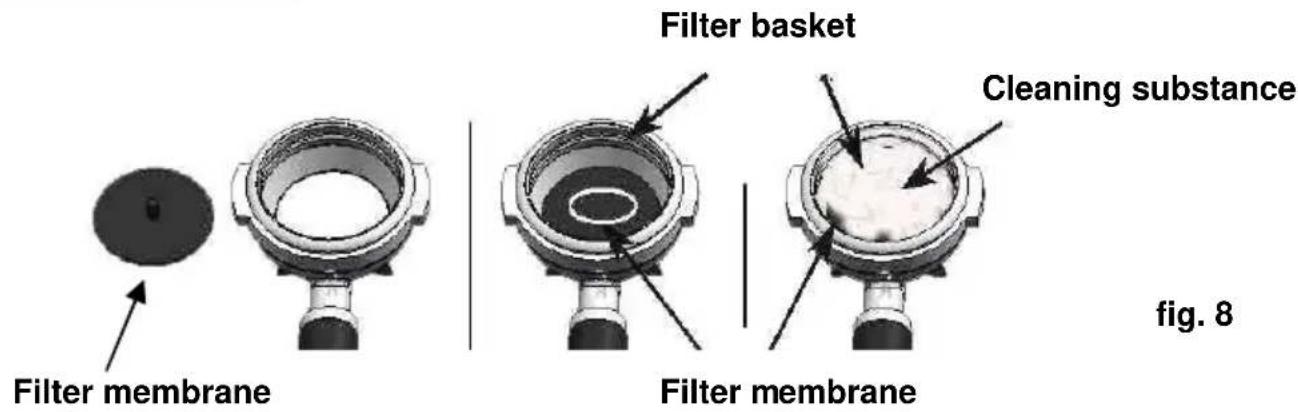
a) Remove the strainer from the brewing head.
b) Place the filter membrane in the filter basket (see fig. 8).
c) Put some of the cleaning substance into the strainer. Use a commercially available cleaning substance for professional coffee makers.
d) Turn the strainer in the brewing head until it settles in.
e) Turn off the device via the main on/off switch (see (8) fig. 1).
f) Press the “2 x espresso” button for the brewing assembly which is to be cleaned, and hold it down while turning of the device using the main on/off switch. The automatic self-cleaning process will begin and it is no longer necessary to hold the button down.

ATTENTION!
After cleaning with a cleaning substance, remove the filter basket and turn the device on in order to rinse out any remaining chemicals. Repeat the above process without using any cleaning substances. Never turn the device on during the self-cleaning process.
After the cycle is complete the device is prepared to return to normal operation.
Decalcifying
- For water hardness above 6° you should connect a water softener unit to the device.
- If, despite the connection of a water softener unit the inside of the coffee maker still scales up, then decalcification should be performed only by a service employee. Never decalcify the device on your own.
6.3 Safety instructions for maintenance
○ Every now and then, the power cable should be checked for damages. Never use the device when the cable is damaged. In case the power cable is damaged it must be replaced by a qualified electrician.
- When you encounter damages or failures contact your specialist dealer or our customer service. Pay attention to the troubleshooting tips in pt. 7.
○ Any maintenance or repair work may only be carried out by a qualified technician using original spare and accessory parts. Do not try to carry out repair work yourself at any time!
7. Possible Malfunctions
The following problems with functioning are the result of calcium deposits:
○ Coffee is not at the right temperature:
- Heat outflow channels are blocked by deposits.
- Water is not flowing from all brewing assemblies:
- Deposits are blocking the flow of water.

ATTENTION!
To prevent malfunctioning of the device due to the formation of calcium deposits, with water hardness greater than 6^ the device must be connected to a water softener unit.
Problems with grinding:
○ Coffee comes out too fast:
- Change grinding settings, as at present they are too coarse.
○ Coffee comes out too slowly:
- Change grinding settings, as at present they are too fine.
If any other problems occur with the functioning of the device, contact a Customer Service Centre.
Alarm signals on the service panel
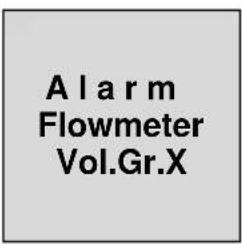
- Contact a Customer Service Centre
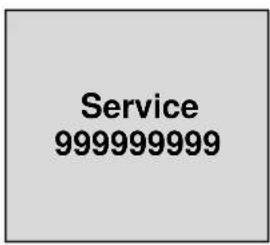
- Contact a Customer Service Centre
- Contact a Customer Service Centre for maintenance service
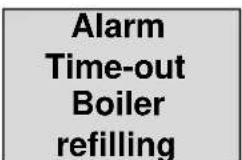
- Check the flow of water to the device
- Contact a Customer Service Centre
Change filter 999999999
- Decalcify the coffee maker.
- To turn off a display warning, turn the device off via the main on/off switch (see (8) fig. 1). Simultaneously hold the „2 x espresso“ and „2 x coffee“ buttons and turn the device off.
8. Waste disposal
Discarding old devices
At the end of its service life the discarded device has to be disposed in accordance with the national regulations. It is advisable to contact a company which is specialized in waste disposal, or just contact the local disposal service in your community.

WARNING!
To exclude any abuse and the dangers involved make the waste device unfit for use before disposal. For that purpose disconnect device from mains supply and remove mains connection cable from the device.
NOTE!
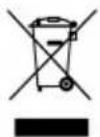
For the disposal of the device please consider and act according to the national and local rules and regulations.
Bartscher GmbH
4.1 Indications techniques
| Nom Machine à | café haute pression „Coffeeline“ | ||||
| No de l'art.: | 190.160 | 190.161 19 | 0.162 190. | 163 190.164 | |
| Modèle: | G1 G2 | G3 G2 plus G3 plus | |||
| Puissance électrique: | 2,85 kW230 V | 3,3 kW230 V | 4,2 kW3 NAC400 V | 3,3 kW230 V | 6,2 kW3 NAC400 V |
| Nombre de réservoirs: | 1 1 1 | 3 4 | |||
| Capacité du réservoir: | 6 litres 11 | 5 litres 17,5 | litres 11,5 litres | 11,5 litres | |
| Dimensions (mm): | larg. 475prof. 580haut. 523 | larg. 677prof. 580haut. 523 | larg. 967prof. 580haut. 523 | larg. 677prof. 580haut. 523 | larg. 967prof. 580haut. 523 |
| Poids: 40 kg 60 kg | 80 kg 62 kg | 87 kg | |||
natural_image
Two-panel diagram showing a hand holding a circular object, with arrows pointing to the components (no text or symbols)Alarm Time-out Water loading
natural_image
Diagram showing two views of a hand tool with circular components, one pointing to a button and the other holding a ring (no text or symbols present)Doses programming select 30s
Doses programming select 30s
Doses programming select 30s
Alarm Time-out Water loading
natural_image
Two-panel illustration showing a hand holding a small object, with arrows pointing to the left (no text or symbols)Doses programming select 30s
Doses programming select 30s
Doses programming select 30s

- Keep this instruction manual ready to hand at the product!
- General Information 24
- Safety
- Delivery, packaging and storage 28
- Technical data
- Installation and operation
- Cleaning and maintenance
- Possible Malfunctions
- Waste disposal
- Information about the instruction manual
- Key to symbols
- WARNING!
- WARNING! Electrical hazard!
- CAUTION!
- NOTE!
- WARNING! Hot external surface!
- Liability and Warrantees
- Copyright protection
- Declaration of conformity
- General Information
- Safety instructions for use of the device
- Intended use
- Transport, packaging and storage
- Delivery check
- Packaging
- Storage
- Technical specifications
- Coffee machine functionalities/characteristics
- Overview of parts
- Accessories
- Safety instructions
- WARNING! Hazard via electrical current!
- Installation and connection
- ATTENTION!
- Set-up
- Hose and water decalcifier installation:
- Operation
- Filling the water reservoir
- First use
- Strainer set-up
- PROPER POSITIOING OF THE STRAINER IN THE BREWING ASSEMBLY
- Brewing coffee
- WARNING! Danger of burns!
- Service panel
- Coffee machine modes
- OFF
- Heating of liquids
- Hot water
- Programming water doses for tea
- Coffee doses programming
- Doses programming select 30s
- Self-cleaning brewing assembly /initial rinsing
- Time settings
- Time setting
- Changing day and time (fig. 7)
- Automatic ON/OFF function
- Turning on Turning off
- Day off
- Safety advice
- Cleaning and decalcifying
- Reverse rinsing
- Decalcifying
- Safety instructions for maintenance
- Problems with grinding:
- Alarm signals on the service panel
- Change filter 999999999
- Discarding old devices
- Indications techniques
Brand : BARTSCHER
Model : Coffeeline G2
Category : Coffee machine