RGV 64 FM PN - Cooker ROSIERES - Free user manual and instructions
Find the device manual for free RGV 64 FM PN ROSIERES in PDF.

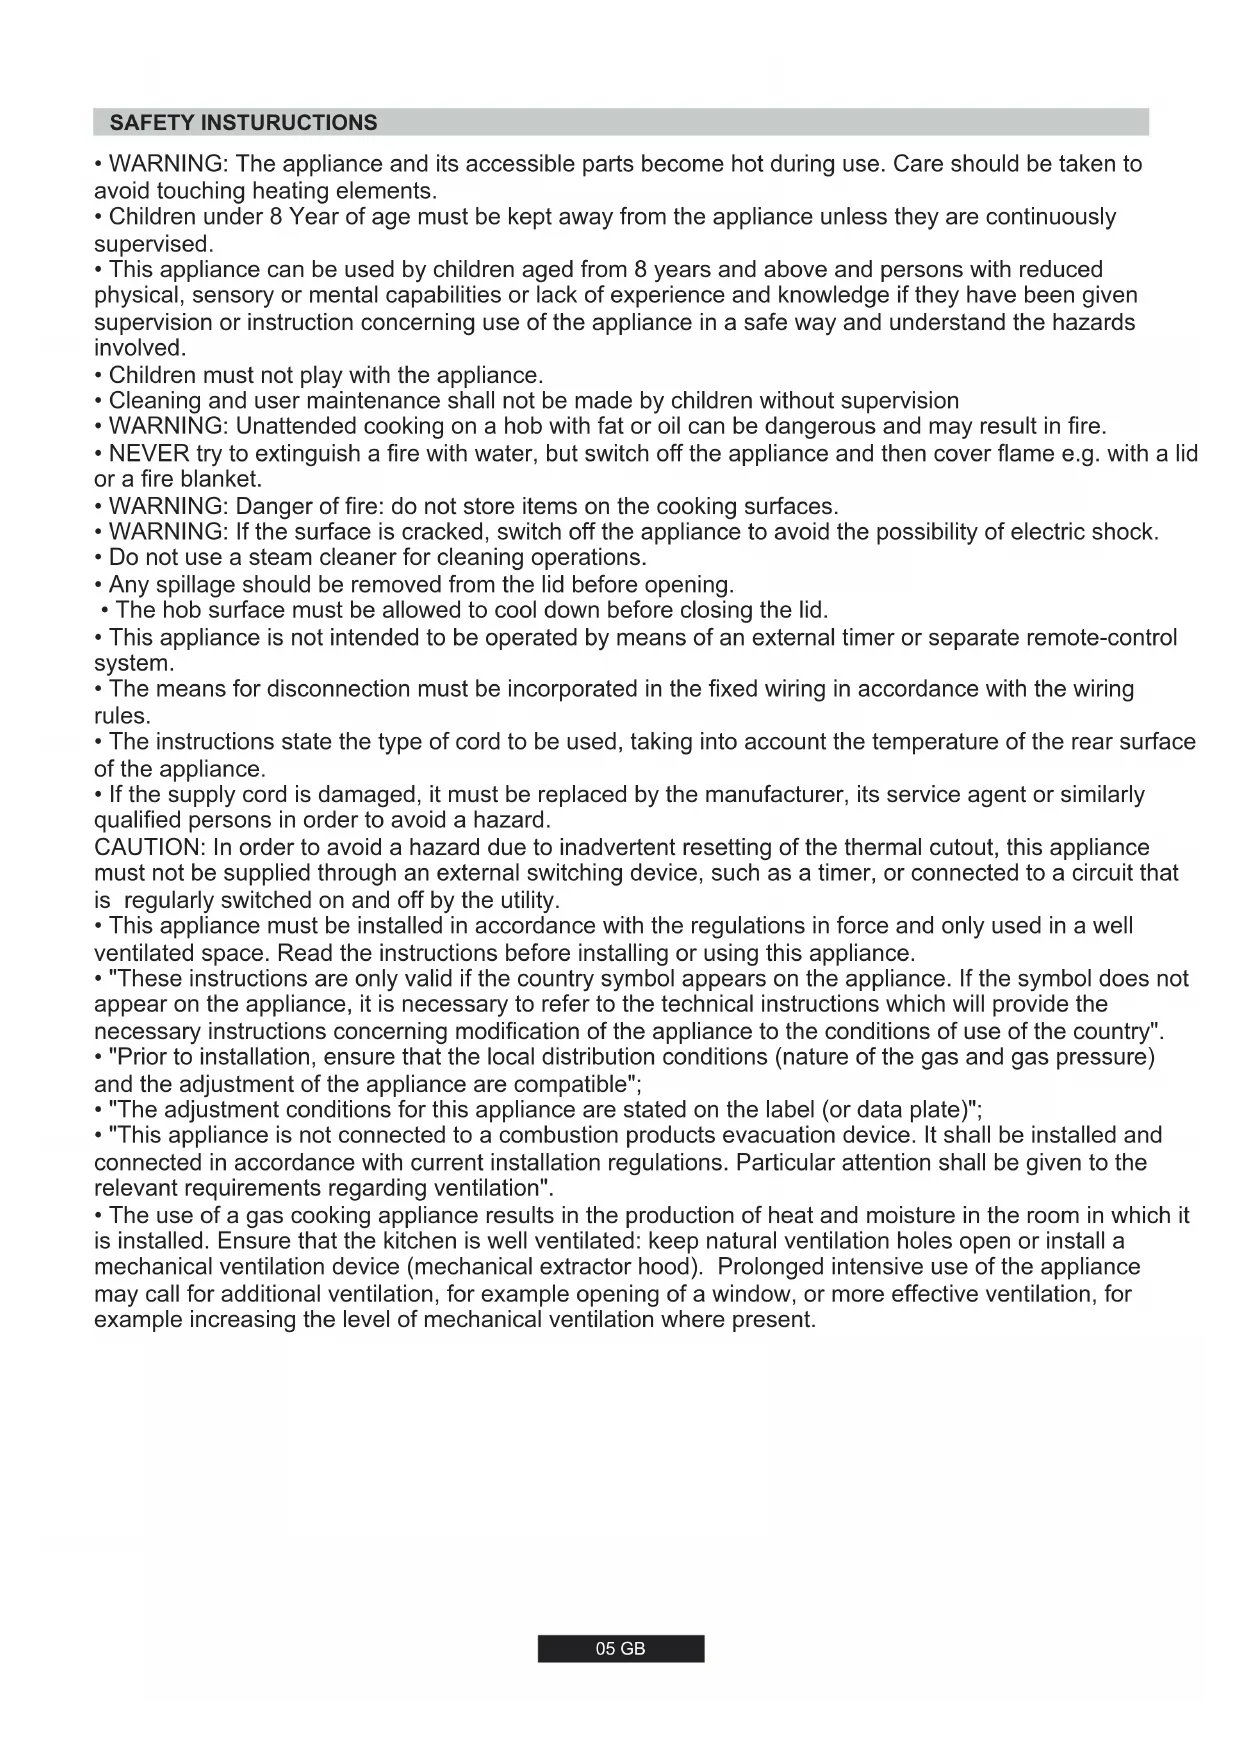


| Product type | Built-in gas hob |
| Brand | Rosieres |
| Model | RGV 64 FM PN |
| Product dimensions (W x D) | 595 x 510 mm |
| Weight | Approximately 12 kg |
| Power supply | Gas (G20/G25 or G30/G31 depending on adjustment) and electrical 220-240 V / 50-60 Hz for ignition |
| Total gas power | Approximately 7.0 kW |
| Number of burners | 4 gas burners |
| Burner types | 1 auxiliary, 1 rapid, 2 semi-rapid (typical configuration) |
| Ignition | Electronic integrated with safety thermocouple |
| Safety | Automatic gas shut-off in case of flame extinction (thermocouple) |
| Material | Stainless steel, chrome-plated grates |
| Care and cleaning | Clean with soapy water and non-abrasive detergent. Do not use steam cleaner. |
| Spare parts and repairability | Parts available from after-sales service. Repair by qualified technician. |
| General information | Household use only. Complies with EU standards (2009/142/EC). Installation class 3. |
Frequently Asked Questions - RGV 64 FM PN ROSIERES
User questions about RGV 64 FM PN ROSIERES
0 question about this device. Answer the ones you know or ask your own.
Ask a new question about this device
Download the instructions for your Cooker in PDF format for free! Find your manual RGV 64 FM PN - ROSIERES and take your electronic device back in hand. On this page are published all the documents necessary for the use of your device. RGV 64 FM PN by ROSIERES.
USER MANUAL RGV 64 FM PN ROSIERES
BAPOUHbIE NOBEPXHOCTN
HCTPYKUNIPOJIb3OBATEJI R
NAVODILA ZA UPORABO
VGRADNJO IN PRIKLJUCITEV SL
PIANI COTTURA
ISTRUZIONI PER L'USO IT
PLACAS
INSTRUÇÉS DE UTILIZACão PT
UPUTSTVO ZA UPOTREBU
UGRADNJA I PRIKLJUČENJE SRE
PLITE
MANUAL DE UTILIZARE RO
SIJEČNJA
UPUTE ZA UPORABU INSTALACIJU HR
CONTENT
GB-IE
Safety Instructions 05
1. Instructions For The Installer .06
1.1. Building In .06
1.2. Suitable Location 06
2. Electrical Connection (For U.K. Only) .06
2.1. Electrical Connection .06
2.2. Gas Connection (For U.K. Only). 06
2.3. Adapting The Hob To Different Types Of Gas 07
2.4.Regulating The Minimum Flame 07
3.Use Of Hob-User Instructions .07
3.1. Using The Gas Burner 07
3.2.Use Of Cooktop Electrical Plates .07
4. Maintenance and Cleaning .08
5. Aftercare 08
6. Protection Of The Environment 08
OBSAH
CZ
- WARNING: The appliance and its accessible parts become hot during use. Care should be taken to avoid touching heating elements.
Children under 8 Year of age must be kept away from the appliance unless they are continuously supervised. - This appliance can be used by children aged from 8 years and above and persons with reduced physical, sensory or mental capabilities or lack of experience and knowledge if they have been given supervision or instruction concerning use of the appliance in a safe way and understand the hazards involved.
Children must not play with the appliance. - Cleaning and user maintenance shall not be made by children without supervision
- WARNING: Unattended cooking on a hob with fat or oil can be dangerous and may result in fire.
- NEVER try to extinguish a fire with water, but switch off the appliance and then cover flame e.g. with a lid or a fire blanket.
- WARNING: Danger of fire: do not store items on the cooking surfaces.
- WARNING: If the surface is cracked, switch off the appliance to avoid the possibility of electric shock.
- Do not use a steam cleaner for cleaning operations.
- Any spillage should be removed from the lid before opening.
- The hob surface must be allowed to cool down before closing the lid.
- This appliance is not intended to be operated by means of an external timer or separate remote-control system.
- The means for disconnection must be incorporated in the fixed wiring in accordance with the wiring rules.
- The instructions state the type of cord to be used, taking into account the temperature of the rear surface of the appliance.
- If the supply cord is damaged, it must be replaced by the manufacturer, its service agent or similarly qualified persons in order to avoid a hazard.
CAUTION: In order to avoid a hazard due to inadvertent resetting of the thermal cutout, this appliance must not be supplied through an external switching device, such as a timer, or connected to a circuit that is regularly switched on and off by the utility.
- This appliance must be installed in accordance with the regulations in force and only used in a well ventilated space. Read the instructions before installing or using this appliance.
- "These instructions are only valid if the country symbol appears on the appliance. If the symbol does not appear on the appliance, it is necessary to refer to the technical instructions which will provide the necessary instructions concerning modification of the appliance to the conditions of use of the country".
- "Prior to installation, ensure that the local distribution conditions (nature of the gas and gas pressure) and the adjustment of the appliance are compatible";
- "The adjustment conditions for this appliance are stated on the label (or data plate)";
- "This appliance is not connected to a combustion products evacuation device. It shall be installed and connected in accordance with current installation regulations. Particular attention shall be given to the relevant requirements regarding ventilation".
- The use of a gas cooking appliance results in the production of heat and moisture in the room in which it is installed. Ensure that the kitchen is well ventilated: keep natural ventilation holes open or install a mechanical ventilation device (mechanical extractor hood). Prolonged intensive use of the appliance may call for additional ventilation, for example opening of a window, or more effective ventilation, for example increasing the level of mechanical ventilation where present.
1. INSTRUCTIONS FOR THE INSTALLER
INSTALLING A DOMESTIC APPLIANCE CAN BE A COMPLICATED OPERATION WHICH IF NOT CARRIED OUT CORRECTLY, CAN SERIOUSLY AFFECT CONSUMER SAFETY. IT IS FOR THIS REASON THAT THE TASK SHOULD BE UNDERTAKEN BY A PROFESSIONALLY QUALIFIED PERSON WHO WILL CARRY IT OUT IN ACCORDANCE WITH THE TECHNICAL REGULATIONS IN FORCE. IN THE EVENT THAT THIS ADVICE IS Ignored AND THE INSTALLATION IS CARRIED OUT BY AN UNQUALIFIED PERSON, THE MANUFACTURER DECLINES ALL RESPONSIBILITY FOR ANY TECHNICAL FAILURE OF THE PRODUCT WHETHER OR NOT IT RESULTS IN DAMAGE TO GOODS OR INJURY TO INDIVIDUALS.
1.1 BUILDING IN
The hob may be installed in any worktop which is heat resistant to a temperature of 100°C and has a thickness of 25-45 mm. The dimensions of the insert to be cut out of the worktop are in shown in Figure 2.
If the Hob is fitted next to a cabinet on either side, the distance between the Hob and the cabinet must be at least 15cm (see Figure 4); while the distance between the hob and the rear wall must be at least 5.5cm .
The distance between the hob and any other unit or appliance above it (e.g. An extractor hood) must be no less than 70 cm (Figure 4).
When there is an accessible space between the built-in hob and the cavity below, a dividing wall made of insulating material should be inserted (wood or a similar material) (Figure 3).
Important - The diagram in figure 1 shows how the sealant should be applied.
The Hob unit is fitted by attaching the Fixing Clamps supplied, using the holes at the base of the unit.
If a hob of 60 cm is fitted above an oven which is not equipped with fan cooling system it is recommended that openings are created within the built in furniture to ensure correct air circulation.
The size of these openings must be at least 300cm2 and placed as shown in Figure 5.
When a 75 cm hob is fitted over a built in oven, the latter must be fan cooled.
This appliance is not intended to be operated by means of an external timer or separate remote-control system.
1.2. SUITABLE LOCATION
This appliance must be installed in accordance with the regulations in force and only used in a well ventilated space. Read the instructions before installing or using this appliance.
A gas-powered cooking appliance produces heat and humidity in the area in which it is installed. For this reason you should ensure good ventilation either by keeping all natural air passages open or by installing an extractor hood with an exhaust flue. Intensive and prolonged use of the appliance may require extra ventilation, such as the opening of a window or an increase in speed of the electric fan, if you have one.
If a hood can not be installed, an electric fan should be fitted to an outside wall or window to ensure that there is adequate ventilation.
The electric fan should be able to carry out a complete change of air in the kitchen 3-5 times every hour. The installer should follow the relevant national standards.
2. ELECTRICAL CONNECTION (FOR U.K. ONLY)
Warning - this appliance must be earthed
This appliance is designed for domestic use only. Connection to the main supply must be made by a competent electrician, ensuring that all current regulations concerning such installations are observed.
The appliance must only be connected to a suitably rated spur point, a 3 pin 13 amp plug/rod is not suitable. A double pole switch must be provided and the circuit must have appropriate fuse protection. Further details of the power requirement of the individual product will be found in the users' instruction and on the appliance rating plate. In the case of built-in product you are advised, should you wish to use a longer cable than the one supplied, that a suitably rated heat resistant type must be used.
The wiring must be connected to the mains supply as follows: CONNECT TO SPUR TERMINAL
Green & Yellow Wire Earth Connection
Blue Wire Neutral Connection
Brown Wire Live Connection
Note: We do not advocate the use of earth leakage devices with electric cooking appliances installed to spur points because of the 'nuisance tripping' which may occur. You are again reminded that the appliance must be correctly earthed, the manufacturer declines any responsibility for any event occurring as a result of incorrect electrical installation.
2.1. ELECTRICAL CONNECTION
Check the data on the rating plate, located on the outside of the unit, to ensure that the supply and input voltage are suitable.
Before connection, check the earthing system.
By Law, this appliance must be earthed. If this regulation is not complied with, the Manufacturer will not be responsible for any damage caused to persons or property. If a plug is not already attached, fit a plug appropriate to the load indicated on the rating plate.
The earth wire is coloured yellow/green. The plug should always be accessible.
Where the Hob is connected direct to the electricity supply, a circuit breaker must be fitted.
If the power supply cord is damaged this is to be replaced by a qualified engineer so as to prevent any potential risk.
The earth wire (green and yellow coloured) must be at least 10mm longer than the live and neutral wires.
The section of the cable used must be of the correct size in relation to the absorbed power of the hob.
Please check rating plate for the power details and ensure that the power supply cord is of the type 3 × 0.75 mm2 H05 V2V2-F.
| Mains Supply | LIVE | L | Brown Wire |
| EARTH | Green/Yellow Wire | ||
| NEUTRAL | N | Blue Wire |
If an appliance is not fitted with a supply cord and a plug, or with other means for disconnection from the supply mains having a contact separation in all poles that provide full disconnection under overvoltage category III conditions, the instructions shall state that means for disconnection must be incorporated in the fixed wiring in accordance with the wiring rules.
2.2. GAS CONNECTION
These instructions are for qualified personnel, installation of equipment must be in line with the relevant national standard. (For U.K. only: by law the gas installation\commissioning must be carried out by a "Gas Safe" installer)
All work must be carried out with the electricity supply disconnected.
The rating plate on the hob shows the type of gas with which it is designed to be used. Connection to the mains gas supply or gas cylinder should be carried out after having checked that it is regulated for the type of gas with which it will be supplied. If it is not correctly regulated see the instructions in the following paragraphs to change gas setting.
For liquid gas (cylinder gas) use pressure regulators which comply with the relevant national standards.
Use only pipes, washers and sealing washers which comply with the relevant national standards.
For some models a conic link is furnished to outfit for the installation in the countries where this type of link is obligatory; in picture 8 it is pointed out how to recognize the different types of links (CY = cylindrical, CO = conic). In every case the cylindrical part of the link has to be connected to the hob.
When connecting the hob to the gas supply via use of flexible hoses please ensure that the maximum distance covered by the hose does not exceed 2 metres.
The flexible tube shall be fitted in such a way that it cannot come into contact with a moveable part of the housing unit (e.g. a drawer) and does not pass through any space where it may become crushed/ kinked or damaged in any way.
To prevent any potential damage to the hob please carry out the installation following this sequence (picture 6):
1)As illustrated, assemble parts in sequence:
A: 1/2 Male Adaptor Cylindrical
B:1/2 Seal
C: 1/2 Female Gas Adaptor Conical-Cylindrical or Cylindrical-Cylindrical
2) Tighten the joints with the spanner, remembering to twist the pipes into position.
3)Attach fitting C to mains gas supply using rigid copper pipe or flexible steel pipe.
IMPORTANT: carry out a final check for leaks on the pipe connections using a soapy solution. NEVER USE A FLAME. Also, make sure that the flexible pipe cannot come into contact with a moving part of the cabinet (eg.adrawer) and that it is not situated where it could be damaged.
Warning: If gas can be smelt in the vicinity of this appliance turn off the gas supply to the appliance and call the engineer directly. Do not search for a leak with a naked flame.
2.3. ADAPTING THE HOB TO DIFFERENT TYPES OF GAS
To adapt the Hob for use with different types of gas, carry out the following instructions:
remove the grids and burners
- insert on hexagonal spanner (7 mm) into the burner support (Figure 7)
- Unscrew the injector and replace it with one suitable for the gas to be used (see gas type table)
2.4. REGULATING THE MINIMUM FLAME
After lighting the burners, turn the control knob to the minimum setting and then remove the knob (this can easily be removed by applying gentle pressure).
Using a small «Terminal» type screwdriver the regulating screw can be adjusted as in Figure 9. Turning the screw clockwise reduces the gas flow, whilst turning it anticlockwise increases the flow - Use this adjustment to obtain a flame of approximately 3 to 4mm in length and then replace the control knob.
When the gas supply available is LPG - the screw to set the idle flame must be turned (clockwise) to the end stop.
When you have carried out the new gas regulation, replace the old gas rating plate on your appliance with one (supplied with hob) suitable for the type of gas for which it has been regulated.
3. USE OF HOB - USER INSTRUCTIONS
This appliance must only be used for the purpose for which it is intended, domestic cooking, and any other use will be considered improper and could therefore be dangerous. The Manufacturer will not be responsible for any damage or loss resulting from improper use.
To ignite the burners, place a lighted taper close to the burner, press in and turn the control knob anti-clockwise.
If the burners have not been used for a couple of days, wait for a few seconds before lighting the burner, this will allow any air present in the pipes to escape.
For appliances fitted with electronic ignition carry out the following:
- push in and turn the knob anticlockwise to the ignition symbol.
- ignite the burner by pressing the sparker button.
For hobs fitted with automatic ignition simply push in and turn the knob to the ignition symbol.
The ignition system will continue to generate sparks as long as the control knob is being pressed.
If the burner has not ignited within 5 seconds, turn the knob to the O position and repeat the operation.
For models fitted with a safety tap (which cuts-off the flow of gas if the flame is accidentally extinguished) the burners are ignited and described above, but care must be taken.
Prior to switching on the gas hob ensure that the burners and burner caps are correctly placed within their position.
GENERAL ADVISE
For best results, use cooking vessels with a flat surface. The size of the surface should match the gas burner side as follows. Table A.
Table A
| Burner Type | Ø pan / pot Min (cm) | Ø pan / pot Max(cm) | |
| AUX | Auxiliary | ≥10 | ≤ 18 |
| SR | Semi Rapid | ≥12 | ≤ 24 |
| R | Rapid | ≥16 | ≤ 26 |
| QC/DC | Quadruple Crown/Double Crown Burner | ≥18 | ≤ 26 |
| TC | Triple Crown Bumer | ≥18 | ≤ 26 |
For smaller containers the gas burner should be regulated so that the flame does not overlap the base of the pan. Vessels with a concave or convex base should not be used.
The special removable support, supplied with some models, must be used only on the auxiliary burner.
WARNING: If a flame is accidentally extinguished, turn the knob to the off position and do not attempt to re-ignite if for at least 1 minute.
If over the years the gas taps become stiff to turn it is necessary to lubricate them.
Such operation must be carried out only by qualified Service Engineers.
3.2. USE OF COOKTOP ELECTRICAL PLATES
Turn the knob to the position for the required temperature of the hot plate. The indicator light of the hot plate will come on and the hot plate will start to heat.
When cooking is completed, turn the knob to the "O" position. (Figure 10). Do not leave the hot plate turned on without a pan on it. The diameter and the base of the pan you use is critical. The maximum diameter of the pan base is 14cm and the base should be flat.
Leave the hot plate to heat up for 5 minutes before placing a pan on it the first time you use it. This will allow the heat resistant coating of the plate to harden due to burning.
Use a wet cloth and detergent for cleaning the hot plates. Do not remove food residues from the hot plates with a knife or any other hard, sharp object.
Turn on the hot plate for a few moments to dry it after cleaning. However, it must never be left on for more than a few moments without a pan on top.
| Position | Power (Watt) | Power (Watt) | Explanation |
| 0 | 0 | 0 | Off |
| 1 | 100 W | 135 W | Heating |
| 2 | 180 W | 220 W | Cooking at low temperature |
| 3 | 250 W | 300 W | Cooking at low temperature |
| 4 | 500 W | 850 W | Cooking, Roasting, Boiling |
| 5 | 750 W | 1150 W | Cooking, Roasting, Boiling |
| 6 | 1000 W | 1500 W | Cooking, Roasting, Boiling |
Suitability of Cooking Pans (Figure 11)
Keep in mind that larger pans have larger heating surfaces.
This will help them to cook the food faster than pans with smaller heating surfaces.
Always use pan sizes proportionate to the amount of the food to be cooked. In order to prevent splashing, do not use very small pans, especially for foods with excess liquid. If you use excessively large pans for quick cooked foods, sausages and liquids will stick and residues will remain attached to the pan after being emptied.
Closed pans and baking trays or moulds are suggested for cooking sweets. Splashed sugar and juices from an open pan may stick to the cooker surface and will be difficult to remove.
This is especially important for pans used for roasting or pressurized cooking at high temperature.
- Do not leave burners unattended without a pan or with an empty pan on top.
- Check the suitability of cooking pans with respect to the following criteria;
- They should be heavy.
They should completely cover the burner surface; they may be a little bigger but no smaller.
- For the best use of the electric hotplates and to minimize energy consumption, only pans with smooth flat bases should be used. The size of the pan should be as close as possible to the diameter of the hotplate, and never smaller. The base of the pan should be dry and spillage should be avoided. Empty pans must not be left on the plates, and the plates should not be left switched on without a pan.
4. MAINTENANCE AND CLEANING
Before cleaning the hob, ensure the appliance has cooled down. Remove the plug from the socket or (if connected directly) switch off the electricity supply.
Cleaning and user maintenance shall not be made by children without supervision.
Never use abrasives, corrosive detergents, bleaching agents or acids. Avoid any acid or alkaline substances (lemon, juice, vinegar etc.) on the enamelled, varnished or stainless steel sections.
When cleaning the enamelled, varnished or chrome sections, use warm soapy water or a non caustic detergent. For stainless steel use an appropriate cleaning solution.
The burners can be cleaned with soapy water. To restore their original shine, use a household stainless steel cleaner. After cleaning, dry the burners and replace.
It is important the Burners are replaced correctly.
Chromed grids and burners
Chromed grids and burners have a tendency to discolour with use.
This does not jeopardize the functionality of the hob.
Our After Sales Service Centre can provide spare parts if required.
5. AFTERCARE
Before calling out a Service Engineer please check the following:
- that the plug is correctly inserted and fused;
- that the gas supply is not faulty.
If the fault cannot be detected:
Switch off the appliance and call the After Service Centre. DO NOT
TAMPER WITH THE APPLIANCE.
6. PROTECTION OF THE ENVIRONMENT

This appliance is marked according to the European directive 2012/19/EU on Waste Electrical and Electronic Equipment (WEEE). WEEE contains both polluting substances (which can cause negative consequences for the environment) and basic components (which can be re-used). It is important to have WEEE subjected to specific treatments, in order to remove and dispose properly all pollutants, and recycle all materials.
Individuals can play an important role in ensuring that WEEE does not become an environmental issue; it is essential to follow some basic rules:
WEEE shall not be treated as household waste.
- WEEE shall be handed over to the relevant collection points managed by the municipality or by registered companies. In many countries, for large WEEE, home collection could be present.
- When you buy a new appliance, the old one may be returned to the retailer who has to collect it free of charge on a one-to-one basis, as long as the equipment is of equivalent type and has the same functions as the supplied equipment.
Declaration of compliance: This equipment, in the parts intended to come into contact with food, complies with the regulations laid down in EEC directives 89/109.
This equipment, in the parts intended to come into contact with food, complies with the regulations laid down in EEC directives 89/109.
The appliance complies with European Directives 2009/142/EC and subsequent amendments.
By placing the C mark on this product, we are confirming compliance to all relevant European safety, health and environmental requirements which are applicable in legislation for this product.
The Manufacturer will not be responsible for any inaccuracy resulting from printing or transcript errors contained in this brochure. We reserve the right to carry out modifications to products as required, including the interests of consumption, without prejudice to the characteristics relating to safety or function.
Table 1
| BUILT IN HOBS | |||||||||||
| Type /Reference | PLV6S | PLV7S | |||||||||
| Burners Arrangement | 3Gas | 3Gas | 3Gas | 4Gas | 3Gas+1E | 5Gas | 5Gas | 5Gas | 4Gas | 4Gas | 4Gas |
| Auxiliary Burner (AUX) | 1 | 1 | 1 | 1 | 1 | 1 | 1 | 1 | 1 | 1 | 1 |
| Semirapid Burner (SR) | - | - | - | 2 | 2 | 1 | 1 | 1 | 1 | 1 | 1 |
| Rapid Burner (R) | 1 | 1 | 1 | 1 | - | 2 | 2 | 2 | 1 | 1 | 1 |
| Ultrarapid Burner (UR) | - | - | - | - | - | - | - | - | - | - | - |
| Quadruple Crown Burner (QC) | - | - | 1 | - | - | 1 | - | - | 1 | - | - |
| Triple Crown Burner (TC) | - | 1 | - | - | - | - | 1 | - | - | 1 | - |
| Double Crown Burner (DC) | 1 | - | - | - | - | - | - | 1 | - | - | 1 |
| Electric Plate | - | - | - | - | 1 | - | - | - | - | - | - |
| Flame Failure Device | YES | ||||||||||
| Ignition | YES | ||||||||||
| Installation Class | 3 | 3 | 3 | 3 | 3 | 3 3 | 3 3 3 | ||||
| Product Dimension (mmxmm) | 595X510 | 745X510 | 745X510 | ||||||||
| 860X510 | |||||||||||
| Installed Gas Type / Power | |||||||||||
| Gas Power (kW) | 7,5 | 7,3 | 7,1 | 7 | 4,5 | 11,35 | 11,55 | 11,75 | 8,85 | 9,05 | 9,25 |
| G20 20 mbar (N.G.) (l/h) | 714 | 695 | 676 | 667 | 429 | 1081 | 1100 | 1119 | 843 | 862 | 881 |
| Alternative Injector Kit For LPG Gas Available In The Packaging | |||||||||||
| Gas Power (kW) | 7,5 | 7,3 | 7,1 | 7 | 4,5 | 11,35 | 11,55 | 11,75 | 8,85 | 9,05 | 9,25 |
| G30/G31 28-30/37 mbar (LPG) (g/h) | 546 | 531 | 516 | 509 | 327 | 825 | 840 | 855 | 644 | 658 | 673 |
| Rated Power Input | |||||||||||
| Voltage (V) /Frequency (Hz) | 220-240 V / 50-60 Hz | ||||||||||
| Electrical Power (W) | 1 | 1 | 1 | 1 | 1500 | 1 1 1 | 1 1 1 | ||||
This appliance has been designed for non-professional, i.e. domestic, use only.
1.2 VHODNÉ MISTO INSTALACE
Table 1
BUILT IN HOBS
| Type/Referentie | PLV6S | PLV7S | |||||||||
| Branders | 3Gas | 3Gas | 3Gas | 4Gas | 3Gas+1E | 5Gas | 5Gas | 4Gas | 4Gas | 4Gas | |
| Brander Aux (AUX) | 1 | 1 | 1 | 1 | 1 | 1 | 1 | 1 | 1 | 1 | 1 |
| Brander Half snel (SR) | - | - | - | 2 | 2 | 1 | 1 | 1 | 1 | 1 | 1 |
| Brander Snel (R) | 1 | 1 | 1 | 1 | - | 2 | 2 | 2 | 1 | 1 | 1 |
| Brander Zeer Snel (UR) | - | - | - | - | - | - | - | - | - | - | - |
| Brander 4 Kronen (QC) | - | - | 1 | - | - | 1 | - | - | 1 | - | - |
| Drievoudige Kroon (TC) | - | 1 | - | - | - | - | 1 | - | - | 1 | - |
| Dubbel Belsignaal Brander (DC) | 1 | - | - | - | - | - | - | 1 | - | - | 1 |
| Elektrische Plaat | - | - | - | - | 1 | - | - | - | - | - | - |
| Beveiliging | JA | ||||||||||
| Ontsteking | JA | ||||||||||
| Installatie Klasse | 3 | 3 | 3 | 3 | 3 | 3 | 3 | 3 | 3 | 3 | 3 |
| Afmeting Product (mmxmm) | 595X510 | 745X510 | 745X510 | ||||||||
| 860X510 | |||||||||||
| Gastype Geinstalleerd / Vermogen | |||||||||||
| Vermogen Gas (kW) | 7,6 | 6,8 | 7,1 | 7 | 4,5 | 11,35 | 11,05 | 11,85 | 8,5 | 8,55 | 9,35 |
| G25.3 25 mbar (N.G.) (l/h) | 827 | 740 | 772 | 761 | 489 | 1234 | 1202 | 1289 | 962 | 930 | 1017 |
| Alternative injector kit voor aardgas gas beschikkaar in het BIJSTAND SERVICE | |||||||||||
| Vermogen Gas (kW) | 7,5 | 7,3 | 7,1 | 7 | 4,5 | 11,35 | 11,55 | 11,75 | 8,85 | 9,05 | 9,25 |
| G20 20 mbar (N.G.) (l/h) | 714 | 695 | 676 | 667 | 429 | 1081 | 1100 | 1119 | 843 | 862 | 881 |
| Alternative injector kit voor aardgas gas beschikkaar in het BIJSTAND SERVICE | |||||||||||
| Vermogen Gas (kW) | 7,5 | 7,3 | 7,1 | 7 | 4,5 | 11,35 | 11,55 | 11,75 | 8,85 | 9,05 | 9,25 |
| G30/31 30/30 mbar (LPG) (g/h) | 989 | 900 | 931 | 925 | 594 | 1493 | 1462 | 1551 | 1162 | 1131 | 1220 |
| Injectiekit Voor LPG Gas Beschikkaar In Zakjes | |||||||||||
| Vermogen Gas (kW) | 7,5 | 7,3 | 7,1 | 7 | 4,5 | 11,35 | 11,55 | 11,75 | 8,85 | 9,05 | 9,25 |
| G30/G31 30/30 mbar (LPG) (g/h) | 546 | 531 | 516 | 509 | 327 | 825 | 840 | 855 | 644 | 658 | 673 |
| Elektrisch Vermogen | |||||||||||
| Spanning (V) / Frequentie (Hz) | 220-240 V / 50-60 Hz | ||||||||||
| Elektrisch Vermogen (W) | 1 | 1 | 1 | 1 | 1500 | 1 | 1 | 1 | 1 | 1 | 1 |
PacctoHne MExdy BapouHoN NOBepxHOCTbIO IN DpyrM 3NeKTPoPnPbOpOM (HaNPmEp, BbITXHOI KOIIaK) DOXHO 6bITb He MeHbWe 70 cm (cm. pnc.4).
Ecnno BapOoho NOBepxHocTbIO IMeETc CBO6oHoe npoctpaHCTBO,TO NOB BapOHHIOBepxHOCtbo HyXHO yCTaHOBTb pa3dneITbHyIO NaHeIb, I3r0TOBnEHHyIO n3 TeNnON3OJNAOHHO MaTePnAna (HanpImep, n3 DepeBa) (cm. pnc. 3).
Baxhna Hhopmaun Ha pnc. 1 noka3aHo, kak hahocntcra repmetnK
Bapouhna NOBepxHocTb KpennTcN c NOMOsbH O pKNCpuyuixn 3aXHMOB, KOtOpbIe BCTabJIyOTcB OTBepCTn, paCNOIOKeHHbIe Ha OCHOBaHm BapouHOH NOBepxHocTn.
EcHn Bapouhna NOBepxHOCTb 60 cm yCTaHaBJIINBaETc HAD IyXOBKO, B KOTOpO Het CNTeMbI OXJaXeHnC B eHTInrTOpOM, TO BO BCTpaBaEMo Me6ePi peKOMeHNyETc CDeNaTb OTBepCTnI DnI OBeCneHeHn HOpMaJIbHoN UINPKUPLN BO3Dxa.
Плоцадь STИХ OTВерстNi DoJIнa 6БТь He MeHbIe 300 cm2 n 3TN OTBерстNi DoJIxHbI paCnOlaRaTbCra TAK, KaK NOKa3aHo Ha pnc.5.
EcnB BapOuHnA NOBepXHocTb 75 cm KpeNITcHnD nyxOBKO,TO B DnyxOBKe DoJnxHa 6bIb CnCTema OxJaXdEHnC B eHTnJIrTOpOM.
1.2.BbIbOP MECTAДЛЯ YCTAHOBKNBAPOUHON IOBEPXHOCTN
DaHHbI 6bITOBo np6op DoJIKeH yCTaHaBJIbBaTbc B COOTBeCTBnC DcIeCTByIOUIMN npABINaMn, IN TOJbKO B XOPOJO nPoBETpNBaeMbIX NOMEuEHnx. Pepey YCTaHOBko IIN NcNOJIb3OBAHHeM 6bITOBo np6bopa npOHTte IHCTpyKunio.
B MecTax, rIe ycTaHOBnEhI ra30Ble IINITbI, BbIeJraTe TEnIO IN BJIaRa. NtOToMBy Bbl DoJXHbI ObcepeNtB XOpOyUo BEHTnLAnIO B NOMeHN IINoC n NOMObIHO OTBepCTn IINr eCTeBHNOBHTnLIuIN, IINoC n NOMObIoo 3JIeKTPnueCKO BbITJkN. Pn INTHcHBOHn I NpOdoJnxNTeJbHO 3KcNpyaTauIN NlNTb MOKeT NOTpeBOBaTbcra DOnONHtENbHaR BeHTnLAnz, oBeCeNeuBaEmaH, HApnIMep, C NOMOsbIO OTKpbIBAHn OKHa, INPObETPNBAHn NOMEseHn IIN c NOMOcbIO YBeJIuYeHn CKOpocTN BpaueHn 3JIeKTPnueCKTOBEHTnITopa CNCTeMbI pInHydntelHOB BeHTnLIuIN (ecm OH yCTaHOBneH).
EcnHET BO3MOXHOCTN yCTAHOBITb BbTJAHHO KoJNAK, TO B CTeHe INI BOKOHOM IPOeME HxKHO YCTAHOBITb 3JIeKTpUeCKN BTRXHOB BEHTINATOP.
BbITRAKHOBEHTNIAIOTOpOJXeHIMTeMbMOUHOCb,DOCTaTOHYIOIJI TOrO,QTOb6bBO3DyX B KXYHE NOINHOCTBIO 3aMeHNrC3-5pa3Bvac. YcTaHOBAOJDNKHA BbIOnIHITCBa COOTBeTcTBn C Tpe6oBaHnMR HAIOHaNbHbIxPiABNJ HOPM.
2. NOДКЛIOЧЕНЕ K ЗЛЕKTPOCETN (TOЛьКО ДЛЯ BEЛИКOBOPTUHIN)
BHHMaHHe daHbI 3JIeKTpponp6Op dONJKeH 6bITb 3a3EmnE
DaHHb 3NeKtpponp6op npedHa3HaueH ToIbKO dIe 6bITobBIX pnpimeHeH.NIOKIIuOyeHKe 3NeKtpocetN DOJXHO BblONIHrTbcR TOIbKO ONbIHTbIM 3NeKtpnKOM C COJIIODeHHeM BCEx DeIcTBYIOUX pnpINH HOPM 3NeKtpo6e30anchoCTN.
DAnHHb3NeKtpponp6Op DOnJKeH NOkKnHuaTcR K OTBeTbHeHIO 3NeKtpocetn C DoCTaTOOH Harpy3OHOH CNOC6HOCTbIO. 3-
WtBtpbKOBa Bnka/po3eTka Ha 13 A He noDxOHT dJa daHHOro
NoDKHIOUeHNA. B JIHNN 3NEKPTponTAHnA DOJENK E6bYCTAHOBnEH
DByXnOIOChB bIKIOuHaTeB, N cEh DOnKHa 6bIT 3aUINueHa C
NOMOsBIO pIABKORo PnpOxApoHAnTEr CoOTBeTCTBYUoTe
HomHaHa. Boone npOboHn HfOpMaUN OTHOCTeNbHO
Tpe6oBaHn, npEdbAeMbIX K3NeKTPoNtAHNO DnI KOHKpeTHOrO
H3denn, npEcdTabHea B INHCTpykunno NO 3KnIyatauNN I B
NaCnOpTHO TAbNueKe, 3akpeINPeHHo HA n3dJeNN. EcnI dNnHa
Ka6eYnTaNHO, NocTaBnEmeHO B KOMPNeKe C BapOCHNOBepxHOCtBu, AynTe c HeOcTaTOHNO To cneNyET
NCNoB3OBaTB 60Jee DNInHbY TeINIOCTOKe K Ka6eNPiTaHnca
DOctaTOHNO Harpy3OHyOH CNOCO6HoCTbIO. POnKIOUeHne K
3NeKTPocEt DoJXHO 6bITb BInONHeHO cNeDyIOUM Opa3OM:
IIOCOEINHITE
3eIeHO-KeTbI npOBd
CnHnn npBOd
KopnHeBbI npOBd
K KJIEMME OTBODA 3JNEKTPOCETN
3emn
Heɪtpaɪb
Φa3a
IpmeaHHe npKIOuAte BapOHyIOBepXHOCTbYepe3 yctpoCTBO O6hApkyeHn yTeCKn TOKa Ha 3eMnIO, TAK KaK 3TO MOKeT pNBeCn K JIOXHBIM OTKnIOyeHnM. Eue pa3 HanOMHaem, YTO 3NeKTPoPnp60 DOnJKe H 6bITn PpaBnBHO 3a3EmneH, NTO pON3BOIDNTJI He npINHMAe HNKaNX nPeTeHN B Cnyae NOBpeXDeHn N HechacThbX CnyaEB, BO3NHKUnx B pe3yNbTaTe HEnpaBnBHoro npKnIOueHn 3NeKTPoPnp60pKa K3NeKTPocETn.
2.1. NOKJIIOUeHNE K 3JEKTPOCETN
PpOBepbTe DaHbIe, npBBeHeHbIe B nacnOpTHo TabNHyKe, 3aKpeIeHHo ChapyKn Ha BApOHO NobEpxHOCTn, Ira TOrO, YTo6bl y6eNTbcraTOM, YTO BXoHDoe HAnpJxHne BApOHO NobEPXHOCTN COOTBeTCTByET HAnpJxHHe 3JIeKTPoccTeN.
Ipeep noKIOHHeHbApoHNOBepxHocTn K 3neKTpocTeINpoBepbTe CNTeMy 3a3eMJIeHn.
AaHbI 3eKpnp6op 6o3aTeJbHO DoJxHc 6bIt 3a3EmnE. B cnyae HecobIOJeHH 3TOr TpeBOAHN Ipon3BOInTeB CHMaet Cce6O TBETCTBeHHocTb 3a HAHeCEHHe BPeDa 3DOpOBbIO IIOeH N IOBpeXdHe NMyUeCTBa.Ecn K Ka6EnIO NITAHN He NOcOeINHe BA INKa, NOcOeINHTE K Ka6EnIO NITAHN BINKy, HArpy3OuHAR CNOC6HocTB KOtOpON COOTBeTCTByET Yka3AHHO B nACnopTHo TabNueKe. PpOBo3a3eMHeNl NMeet XeENT-3eNEHbI CBET. K 3eKtpnueeckOn p03eTKe DOJxHc BcERda ObecneYBaTbcra CBO6OHNIOCTyn.
EcnB BapouHnnoBepxHocb noKnHouaetcK 3JeKtpocTe HnnpMyo,TO dONKeH 6bItb yCTaHOBnHe n ABtOMaTHueckn BBkIIOuHaTeNb.
IpypeDToBpaueHnnaOaChocTe 3aMeHa NOBpeXeHOro Ka6eJI IITaHnI DOJxHa BbIOJHrTbCg TOnbKO KBaINΦuNipObaHHbIM CneuaNtCTOM.
PpOBoD 3a3eMJIeHn (XeJITo-3eIeHbI) DOJIKeH 6bITb npNbn3nteHbHO Ha 10 MM dINHHee npOBoD Oa3bl N HeITpaII. CeueHne npOBoHNKOB KaBeJRA NTaHn DOnNXHO COOTBeTCTByET MOuHOCTH, NOTpeBnREMoB BApOyHO NObEPXHOCTbIO.
PpOBepbTe 3NaueHne MoUHocTn,notpe6JIeMoN 3JeKTPoPnpBOpOM,yKa3aHHoe B nacnopTHo Ta5NuKe,a TaKKe npOBepbTe,yTO nCNoJb3yETcKa6eNb nTuHa Tnna 3× 0.75mm2 H05V2V2-F.
JINHIA 3NEKTPONITAHNA


Ecn 3eKtpnp6op nocTabnreTc63 Ka6JIy NITaHn C BNko, Hn63 dpyrnx yctpoCTB dIg OTcoeHNHeHr OT 3eKtpocetn cOTcoeHNHeHm Bcex pa3, TTO obeCneYBaET NnHoe OTcoeHNHeHne 3eKTPnp6oPA OT 3eKTPocTeN B cnUae BO3HKHOBeHnpeHaPnRkHeHn KaterOpn I1I, To 3eKTPnp6op DOJKeH NpDKIIuOaTbC4pe3 pa3beHNHOoee yCTpoCTBO C XeKTK 3eKTPnpOBdKO, CMHTnpOBaHHo B COOTBeCTBm C npabnnam npokndKn 3eKTPnpOBdoKn.
2.2. NOДКЛIOUЧЕНЕ K JIINHIM RA3OCHABXECHNIA
DaHHbIe INHCTpyKuIN PnpHa3HaueHeBd IIN CneuaJIInCTOB, NMeIOUHX DocTaTOUYU KBAJINΦKAUIN DnB BbINOJIHEHNI YcTAHOBKN 6ObpODABOHARN B COOTBECTNBIN C Tpe6OBAHNRMa HauMOHANbHbIX npABIN HOpM. TOnbKO dN BENKo6pHTAHNN. CorJaCHO 3aKOHy, ycTaHOBAK/BBOD B3ckPnyATAuNO DoONKbI BblIONJrTBcT OToBko COtpyDnKOM cnyXbI "Gas Safe".
Bce pa6oTbI DOJIKHBblbINOHNrTBcCOTCOeHHeHHbIM 3JIeKTPonNTaHnEM.
B 3akpenlenho Ha Bapouho NOBepxHocTn nacnptho Ta5nueyka3aH TIN ra3a,Ha KOtOpom DoJHKha pa6oTaTB BapOHHa NOBepxHocTb. Ppepd noKKnOHeHHem BApOHO NOBepxHocTn Knnmra3OCh6KeHHn K Ra30OBMy BaIIIOHy Heo6XoIMNoPoeBpntb, YoBapOHaNOBepxHocTb OTepyIupOBaHa H ToT TIN ra3a,KOTOpBn 6yDet B HeoNDabATbc. Ecnn BapOHHa NOBepxHocTb He OTepyIupOBaHa Ha HykHbTIN ra3a,ObpaTInTeCb K INHcTpKUqM, npBBeDeHHbM B NocJeDyOuNX naparpaFax, rde OnnCaHo, KaK n3MeHHTb peYIupOBKn.
Ppi pa6ote Ha cKxHcHOM ra3e (ra3 B 6aIIOHe) cneJyET nOb3OBaTBCpeYJrTOpOM daBHeHn, OTBeHaIOUero Tpe6oBaHnM HauNoHaJIbHbIXCTaHapTOB.
Tpby, uaybmyyNIOHTHnTehBHe npOKnADKn DOJXHb COOTBeCTBOBaTb TpeboHaHm HauHOHaBHyIX CTaHapTOB.
HeKOTOpBie MoeIIN NOCTaBnIOTcC KOJIeHOM (peXeOHNKOM), IMeIOUIM KOHNeCKyHO pe3b5y. B HeKOTOpBIX CTPaHx NCNOJIb3OBaHne TAKNX PeEXoDHNKOB ABNIEcTc OB3AteIbHbIM. Ha pnc. 8 NOKa3aHO, KaO TJIuHITb NEPEOXDNIK C UININDPueCKO pe3b60I OT nepeXoDNIka C KOHNeCKO pe3b60I (CY = UININDPueCKA, CO = KOHNeCKA). B IIObOM cIyae CUNINDPueCKA pe3b6a DOJXHa 6blB B IIObOM cIyae, KOHeCpeXoDNIka C UININDPueCKO pe3b60I DoJXeH NODCOEINHbTcR K BAPoYHON nobEPXHOCTN.
TnKbA Tpy6Ka MOHTNpyETc TAKHM 6pb3OM, YTO6bl OHa HE KOHTaKTnPoBana C NOdBxKhbIM NCTaM MeBEN (HApnMep, RzIKOM) H He npolarana B MeCtax, rne MoKet 5bItb nepexata.
EcnnnoKnOHeBapOHHoNEOBEPXHOCTNKNHmraOCHKeHNOcYIeCTBIIeTcC NOMOChIO R6KOOrUShaHra,poBepbTe,TO dHaR6KOOrUShaHra He npeBbIuaet 2 M.
YTo6bI He NOBpeDnTb BapOHyIO NOBepXHocTb, BblOnHInTe ee ycTaHOBky, KAK ONCaHO (CM. PNC. 6).
1)ПодcoeДинITE DeTaN,Кak noka3aHo Ha pncyHKe:
A) IpepeoDnHc HapyKHOuHHpueckO pe3b601/2IIOHa
B) Ppoknadka 1/2 JIOIma
C) Ra3OBbI nepeXoDnHc BHyTpEnHepe3b601/2IOIMa, KOHNueckar cnHHnpueckar, nIN cNnHnpueckar cnHHnpueckar.
2) 3aTAYHHe COeHNHeHc NOMOsbIO raeYhbIX KInOeH. NepeTe kAK 3aTAYb CoeHNHeHc YCTAHOBnTe TpybI B HxNHOe NOOXHeHc.
3)IOncoeHNHTe KoneHO C K NINNN NOaHr r3a c NOMOUBHO XeCTKoM MeHoi Tpy6blnnn n6KOcTaNbHOITpy6bl.
BAKHOE 3AMEAHHE: Nocne noDcoeHHe H BapOHoN NOBepxHocTN K IINnra3oCna6JHnnpOBepbTe Ha OTCyTcTBHe Yteek Ra3a BCE Tpy6hIbe CoeHHeHn C nMOouhIO MbInbHoro pactbOpa. HIKOrDA HE NCNOB3YITE JIPOBEPKN YTEeK FA3A PIIAMr. IpOBepBe TaKKe, YTO r6Kn WAnr He cOnpukacaeTcRc DnBxUmncs qactmkyXOHn Me6enn (HanPmep, BblBnxKHO RnK) Hne npoxoHT B TakOM MecTe, rde OH MoKet 6bTb NobpekDeH.
PpeynpexdHe: Ecnn B6n3n BapOCHo NOBepxHocTN Bbl NOyBCByeTe 3anax rasa, nepekoTe npaHy rasa Ha BapOCHIO NOBepXOCTb I BY30BeNTe CneuaJIcTa. He nIuTE MeCTO yTeKn Ra3a C NOMOZbIO OKpbITOrTO NnAMEH。
2.3.AAANTAUNBAPOUHONIOBEPXHOCTN HA DPyTNE TINbI FA3A
IaandaTaunBapOHNoBepxHocTnIpaobToCdpyMn ra3amBbINOHNHTOINCAHHBe HNKe INCHpyKUn:
CHIMMITEpeeTKN KOHOpokn
BCTaBbTe IecTnIpaHHbI KIOU (7 MM) B OCHOBaHne KOHOpKn (puC. 7)
- BbBepHnTe fOpcyHky n3aMeHnTe ee fOp cyHkO, COOTBeCTByUoSeI TOMy TIny Ra3a, KOTOpbI 6yDet NcNoJb3OBaTbCRA (cm. ma6nuy mun08 a3a).
2.4.PEYJINPOBKA MHHIMAJbHOrO PJIAMEHN
Iocne 3axnraHn KOHOpKn yctahOBHTe pyky perynlTopa BbICOTbl
PiAmEH N NOJXeHHe, COOTBeTCTBByUoOee MHNMaJIbHOMy PiAmEHn, a
3aTem CHIMNTE pyky perynlTopa, pInnoKINB He60bnJooyeCnIe.
PerynIOBka MNHMalbHOro PiAmEH N BbINOJHReTcN C NOMUbBO BNHTa
MaJIeHbKOt OBepTKn, KaK NOKa3AHO Ha puc. 9. NobOPOT BNHTa No
YacOBo CTpeJIke YMeHbJaet NOTOK r3a, a NobOPOT BNHTa IpOTNB
YacOBo CTpeKNy BeENuHBaet NOTOK r3a. C NOMOuBt OToI
perynIOBkn NpOyHTe PiAmr BbcOTOn 3-4 MM, a 3aTEM yctAHOBHTe Ha
MeTO pykny perynlTopa.
EcnncnObl3yeTcXKxKeHHbHeΦTahHOra3(CHΓ),noBepHnte BHT doynopa no yacoboi CTpeJIke.
Iocne BbInonHeHnpeynipOBOK dJaanTaunn BapOHyo nOBepxHOCTn Ha DpyroT Tn rra3a 3aMeHHTe CTApYIO Tabmky, 3aKpenHcHryo Ha BapOHyo NOBepxHOCTn, B KOTOpoi yKa3AH Tn rra3a, H HOByIO (NocTabnEeTcB KOMPiKeTe C BapOHyo NOBepxHOCTbIO), B KOTOpoi yKa3AH Tn rra3a, Ha KOTOpbi nepeBeDeHa BapOHyar nOBepxHOCTb.
3. INHCTPYKUNI NO 3KCPNLYATAUNBAPOUHOI NOBEPXHOCTN
DaHHb 3IeKtpOnpN6Op npEHa3Haueh ToIbKO IINcNoB3OBAHnI NO ero npMOMy Ha3HauehNO,To eCTb,IaI npriTOBneHnI Hn B DomaunHX ycnoBNX. JIO6OE dpyroe npmHeHne B apouHoN IOBepxHOCTn CHTaeTc HnPaBnHBm,IM No3TOMy MOKeT 6bITb OAnchBM. POns3BODnteJI He HeceT OTBeTCTBeHHOCTn 3a NOBpeJdHnI NOTepn, JYBIAUeCEC CNECTBnEM HnPaBnBHOrO NCNoB3OBAHnI BapocHoi NOBepxHOCTn.
3.1.NCIOJIb3OBAHNE FA3OBOI KOHΦOPK
TObbl 3aKeeb KOHOpKpy, NOHeCHTE K Hei 3aXKeEHHyo CnMky, HaxMMte Ha pykny perynipOBKn BlicOTbI PnAmehu, N noBepHMe ee npOTNB acBOB CTpeKN.
Ecnn KOHOPKIN He nCnIb3oBAnicb B TeueHne DByx nn 6one Dhei TO npExde Yem 3aKeHb KOHOPKY noOxKnTe HeckOJIbKO cEkyHd dIra TORO, Tc0bbl trpy6ok bblwee Bo3dyx.
YtO6b3aKeUb KOHΦOpKy BApOuHOI NOBepxHOCTN, CHa6KeHHyO YcTpoiCTBOM 3NeKtpoNpOJnIRa, BbIOINHTe CneDyIOUne ONEpaUN:
HaxMNHe h pyknypeynipOBKn BbICOTbl nAmEnn NOBepHnTe ee npOTNB acBOB CTpeKNB NOJIOKeHne, 063NaueHHoe noJNra.
- 3axrnte KOHcOpky c NOMOsbIO HxkATN KONKn 3neKtPONoJXnra.
EcnnBapouhna NOBepxHOCTb Ch6keHa ABOMATuecknM 3NEKTPONOJKHROM, npocto HAKMMte Ha pykU pyERyINPOBKN BILCOTbl pIaMeHN u yCTAHOBITE ee B noIOnOKeHHe, O6O3HaHHeHoe 3NcHMo NpIKrA. CnCTema 3NEKTPONOJKrA 6yDet NOCToHNO rHEepuPoBATb NCKpbI, Do TEX NOP, nOKa pyka pyERyINPOBKN pIaMeHN 6yDet HAXODITbcB HAKATOM NONOKeHm.
Ecnn KOHopkna He 3aropaetcB TeeyHe 5 ckyH, yctaHObnte pyky peryInpOBKn B nOIOXeHne 0, INOBtPte ONnCAHHyO bIIue ONEpaHIO. B MoeJnx, Ch6KeHHbix 3aunTHbIM KJIanAHOM, KOtOpB IM ATOmatueckn nepeKpbBaet Noayd rasa B Cnyae BHE3AnHoro NoracAHN PnAmEHN, KOHOPKn 3aKfAOTcK, KAK ONCAHO BUIue, HO pNITOM NOCNe 3aKIFraHn KOHOpKn Heo6xOIMO CoBnOdaTb OCTopoXHocTb.
Peped BkHIOeHNem Ra3OBoI BApOuHOI NOBepxHocTN IpOBepbTe, Yo KOHOPKn I KpblKm KOHOPOK npabunbHo yCTaHOBnHeHb Ha BApOHyo NOBepxHocb.
NOJE3HbIE COBETbl
IINIJIIOJYUHINHAIIUYIINXpe3yIbTATOBINIISyIITecbKOBOPOaMNI KACTPIOJIAMCNIOCKIMDHom,pa3MEpbI KOTOBpIX COOTBeTCTBYOT pa3MEpaM RA30BIX KOHDPoK (CM.TaBn.A).
The manufacturer will not be responsible for any inaccuracy resulting from printing or transcript errors contained in this brochure. We reserve the right to carry out modifications to products as required, including the interests of con sumption, without prejudice to the characteri stics relating to safety or function.
FR


- BAPOUHBIE NOBEPXHOCTN
- NAVODILA ZA UPORABO
- PIANI COTTURA
- PLACAS
- UPUTSTVO ZA UPOTREBU
- PLITE
- SIJEČNJA
- CONTENT
- GB-IE
- OBSAH
- CZ
- INSTRUCTIONS FOR THE INSTALLER
- 1.1 BUILDING IN
- SUITABLE LOCATION
- ELECTRICAL CONNECTION (FOR U.K. ONLY)
- WARNING - THIS APPLIANCE MUST BE EARTHED
- ELECTRICAL CONNECTION
- GAS CONNECTION
- ADAPTING THE HOB TO DIFFERENT TYPES OF GAS
- REGULATING THE MINIMUM FLAME
- USE OF HOB - USER INSTRUCTIONS
- GENERAL ADVISE
- USE OF COOKTOP ELECTRICAL PLATES
- SUITABILITY OF COOKING PANS (FIGURE 11)
- MAINTENANCE AND CLEANING
- CHROMED GRIDS AND BURNERS
- AFTERCARE
- PROTECTION OF THE ENVIRONMENT
- 1.2 VHODNÉ MISTO INSTALACE
- BAXHNA HHOPMAUN HA PNC. 1 NOKA3AHO, KAK HAHOCNTCRA REPMETNK
- 1.2.BBIBOP MECTAДЛЯ YCTAHOBKNBAPOUHON IOBEPXHOCTN
- NOДКЛIOЧЕНЕ K ЗЛЕKTPOCETN (TOЛЬКО ДЛЯ BEЛИКOBOPTUHIN)
- BHHMAHHE DAHBI 3JIEKTPPONP6OP DONJKEH 6BITB 3A3EMNE
- IIOCOEINHITE
- K KJIEMME OTBODA 3JNEKTPOCETN
- NOKJIIOUEHNE K 3JEKTPOCETN
- NOДКЛIOUЧЕНЕ K JIINHIM RA3OCHABXECHNIA
- 2.3.AAANTAUNBAPOUHONIOBEPXHOCTN HA DPYTNE TINBI FA3A
- 2.4.PEYJINPOBKA MHHIMAJBHORO PJIAMEHN
- INHCTPYKUNI NO 3KCPNLYATAUNBAPOUHOI NOBEPXHOCTN
- 3.1.NCIOJIB3OBAHNE FA3OBOI KOHΦOPK
- NOJE3HBIE COBETBL
- FR
Brand : ROSIERES
Model : RGV 64 FM PN
Category : Cooker