
WS462100 - Plate warmer GAGGENAU - Free user manual and instructions
Find the device manual for free WS462100 GAGGENAU in PDF.
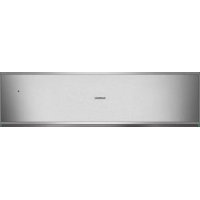
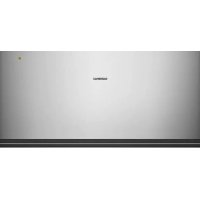
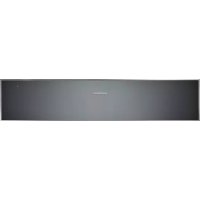
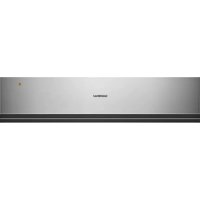
| Product type | Built-in plate warmer (heating drawer) |
| Brand | Gaggenau |
| Model | WS462100 |
| Dimensions (W x H x D) | 595 x 140 (or 290) x 385 mm (depending on version) |
| Weight | Approximately 25 kg |
| Power supply | 220-240 V, 50/60 Hz |
| Power | Approximately 1500 W |
| Maximum capacity | 25 kg |
| Number of plates (upper drawer) | 12 plates ∅ 24 cm |
| Number of plates (lower drawer) | 6 plates ∅ 24 cm |
| Functions | Preheating dishes (position 4), keeping warm (position 3), defrosting (positions 1-2), low-temperature cooking |
| Safety | Do not touch the heating plate; keep children away; automatic shut-off when drawer is opened |
| Maintenance and cleaning | Clean with water and dish soap; avoid caustic products; dry with a soft cloth |
| Repairability index | Light source class G, replaceable only by a professional |
| General information | User manual downloadable at notice-facile.com |
Frequently Asked Questions - WS462100 GAGGENAU
User questions about WS462100 GAGGENAU
0 question about this device. Answer the ones you know or ask your own.
Ask a new question about this device
Download the instructions for your Plate warmer in PDF format for free! Find your manual WS462100 - GAGGENAU and take your electronic device back in hand. On this page are published all the documents necessary for the use of your device. WS462100 by GAGGENAU.
USER MANUAL WS462100 GAGGENAU
Störungen – was tun? 9
Kundendienst 10
Important safety information 12
Environmental protection 13
Environmentally-friendly disposal 13
Getting to know the appliance 13
Opening and closing 13
Preheating ovenware 13
General ovenware 13
Drinks containers 14
Method 14
Keeping food warm 14
Method 14
Switching off 14
Uses 15
Slow cooking 15
Cleaning 17
Appliance exterior 17
Heating plate 17
Troubleshooting 17
After-sales service 18
Additional information on products, accessories, replacement parts and services can be found at www.gaggenau.com and in the online shop www.gaggenau.com/zz/store
⚠️ Important safety information
Read these instructions carefully. Only then will you be able to operate your appliance safely and correctly. Retain the instruction manual and installation instructions for future use or for subsequent owners.
Check the appliance for damage after unpacking it. Do not connect the appliance if it has been damaged in transport.
This appliance is intended for domestic use and the household environment only. The appliance should be used for keeping food warm and warming plates only.
This appliance is intended for use up to a maximum height of 4000 metres above sea level. This appliance may be used by children over the age of 8 years old and by persons with reduced physical, sensory or mental capabilities or by persons with a lack of experience or knowledge if they are supervised or are instructed by a person responsible for their safety how to use the appliance safely and have understood the associated hazards.
Children must not play with, on, or around the appliance. Children must not clean the appliance or carry out general maintenance unless they are at least 15 years old and are being supervised.
Keep children below the age of 8 years old at a safe distance from the appliance and power cable.
Risk of serious burns!
- The heating plate in the warming drawer becomes very hot.
Do not touch the heating plate when it is hot. Keep children at a safe distance. - Accessories and ovenware become very hot. Always use oven gloves to remove accessories or ovenware from the cooking compartment.
Risk of electric shock and serious injury!
- The cable insulation on electrical appliances may melt when touching hot parts of the appliance. Never bring electrical appliance cables into contact with hot parts of the appliance.
- Do not use any high-pressure cleaners or steam cleaners, which can result in an electric shock.
- A defective appliance may cause electric shock. Never switch on a defective appliance. Unplug the appliance from the mains or switch off the circuit breaker in the fuse box. Contact the after-sales service.
- Cracks or fractures in the glass plate could cause electric shocks. Switch off the circuit breaker in the fuse box. Contact the after-sales service.
- Incorrect repairs are dangerous. Repairs may only be carried out by one of our trained after-sales engineers. If the appliance is faulty, unplug the mains plug or switch off the fuse in the fuse box. Contact the after-sales service.
Risk of fire and serious injury!
The heating plate in the warming drawer becomes very hot and flammable materials may catch fire.
Do not store flammable objects or plastic containers in the warming drawer.
Environmental protection
Environmentally-friendly disposal
Dispose of packaging in an environmentally-friendly manner.
This appliance is labelled in accordance with European Directive 2012/19/EU concerning used electrical and electronic appliances (waste electrical and electronic equipment - WEEE). The guideline determines the framework for the return and recycling of used appliances as applicable throughout the EU.
You can use the warming drawer to preheat ovenware or to keep food warm.
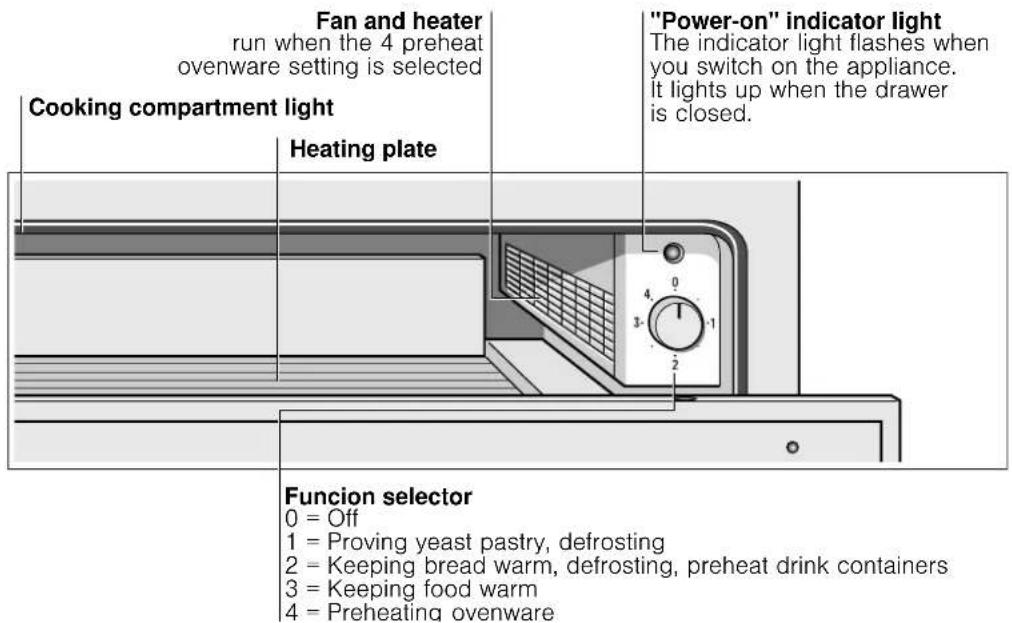
The appliance will only heat up if the drawer is closed correctly.
Opening and closing
The appliance has a recess at the bottom which can be used as a handle to open and close it.
While opening and closing the illumination automatically turns on and off.
You can also turn off illumination completely by reaching into the appliance, using the slide switch on the upper left side.
Preheating ovenware
Food stays warm for longer in preheated ovenware. Drinks also remain warm for longer.
General ovenware
Only load the warming drawer up to 25 kg. You can preheat dinnerware for 6 or 12 people, for example.
| Low drawer, (14 cm in height) | Tall drawer, (29 cm in height) |
| 6 dinner plates ∅ 24 cm 12 dinner plates ∅ 24 cm | |
| 6 soup bowls ∅ 10 cm 12 soup bowls ∅ 10 cm | |
| 1 serving dish ∅ 19 cm 1 serving dish ∅ 22 cm | |
| 1 serving dish ∅ 17 cm 1 serving dish ∅ 19 cm | |
| 1 meat plate 32 cm 1 serving dish ∅ 17 cm | |
| 2 meat plates 32 cm | |
Arranging ovenware
As far as possible, distribute the ovenware over the entire surface. It takes longer to warm through tall stacks of plates than individual pieces of ovenware, e.g. 2 serving dishes.
Drinks containers
Always heat drinks containers, e.g. espresso cups, using setting 2.
⚠️ Risk of burning!
At setting 3 or 4, the drinks containers will get very hot and may cause serious injury.
Method
1 Place the ovenware in the drawer.
2 Set the function selector to setting 4. Always heat drinks containers using setting 2.
The "power on" indicator light flashes.
3 Close the warming drawer.
The "power on" indicator light lights up. The appliance heats up.
How long does preheating take
The length of time required for preheating depends on the material the ovenware is made of and its thickness, as well as the quantity, height and arrangement of the ovenware. As far as possible, distribute the ovenware over the entire surface.
It takes approximately 15-25 minutes to preheat dinnerware for 6 people.
Switching off
Open the drawer. Switch off the function selector.
Removing ovenware
Remove ovenware from the drawer using oven gloves or an oven cloth.
⚠️ Risk of burning!
The upper surface of the heating plate will be hot. The base of the ovenware will be hotter than the top.
Keeping food warm
Do not place hot saucepans or pans on the glass surface of the warming drawer immediately after removing them from the hot drawer. This could damage the glass surface.
Do not fill the ovenware to such an extent that food spills over.
Cover the food with a heat-resistant lid or aluminium foil.
It is recommended that you do not keep food warm for longer than an hour.
Suitable foods: The appliance is suitable for keeping meat, poultry, fish, sauces, vegetables, side dishes and soups warm.
Method
1 Place the ovenware in the drawer.
2 Set the function selector to setting 3 and preheat the appliance for 10 minutes.
3 Add the food to the preheated ovenware.
4 Close the drawer again.
The "power on" indicator light lights up. The appliance heats up.
Switching off
Switch off the function selector. Remove the food from the drawer using oven gloves or an oven cloth.
The table shows various uses for the warming drawer. Set the function selector to the desired setting. Preheat the ovenware as indicated in the table.
| Level Food / ovenware Note | |
| 1 Delicate deep-frozen food e.g. cream cakes, butter, sausages, cheese | Defrost |
| 1 Leaving yeast dough to rise Cover | |
| 2 Deep-frozen food e.g. meat, cakes, bread Defrost | |
| 2 Keeping eggs warm e.g. hard-boiled eggs, scrambled eggs Preheat ovenware, cover food | |
| 2 Keeping bread warm e.g. toast, bread rolls Preheat ovenware, cover food | |
| 2 Preheating drinks containers e.g. espresso cups | |
| 2 Delicate food e.g. slow-cooked meat Cover ovenware | |
| 3 Keeping food warm Preheat ovenware, cover food | |
| 3 Keeping drinks warm Preheat ovenware, cover drinks | |
| 3 Warming flat dough-based foods e.g. pancakes, wraps, tacos | Preheat ovenware, cover food |
| 3 Warming dry cakes e.g. crumble cakes, muffins Preheat ovenware, cover food | |
| 3 Melting cooking chocolate or chocolate coating Preheat ovenware, break up food into small pieces | |
| 3 Dissolving gelatine Open, approximately 20 minutes | |
| 4 Preheating ovenware Not suitable for drinks containers | |
Slow cooking
Slow cooking is the ideal cooking method for all tender pieces of meat which are to be cooked rare or very rare. The meat remains very juicy and turns out as soft as butter. Advantage: this gives you flexibility when planning meals, since the cooking times for slow cooking are generally longer. Slow-cooked meat can be kept warm easily.
Suitable ovenware: Use ovenware made out of glass, porcelain or ceramic and with a lid, e.g. a glass roasting dish.
Method
1 Preheat the warming drawer containing the ovenware at setting 4.
2 Rapidly heat a little fat in a pan. Sear the meat over a high heat and then place it directly in the warmed ovenware. Place the lid on top.
3 Put the ovenware with the meat back in the warning drawer and complete the cooking. Set the function selector to setting 3.
Notes on slow cooking
Only use high-quality, fresh meat for this. Carefully remove sinews and fat. Fat develops a strong, distinct taste during slow cooking.
The meat should not be turned even if it is a large joint.
You can cut the meat immediately after slow cooking. It is not necessary to leave the meat to stand.
This particular cooking method always leaves the inside of the meat medium rare. However, this does not mean that it is raw or not properly cooked.
Meat that has been slow-cooked is not as hot as meat that has been cooked conventionally. Serve the sauce very hot. Place the plates in the warming drawer for the last 20-30 minutes.
Turn the oven back to setting 2 after slow cooking in order to keep the slow-cooked meat warm. You can keep small pieces of meat warm for up to 45 minutes, and large pieces for up to two hours.
Table
All tender joints of beef, pork, veal, lamb, game and poultry are suitable for slow cooking. Searing and braising times depend on the size of the piece of meat. The times for searing refer to the meat being placed in hot fat.
Meal Searing on the hotplate Completing in the oven
Small pieces of meat
Cubes or strips 1-2 minutes all over 20-30 minutes
Small cutlets, steaks or médaillons 1-2 minutes per side 35-50 minutes
Medium-sized pieces of meat
Fillet (400-800g) 4-5 minutes all over 75-120 minutes
Saddle of lamb (approx. 450g) 2-3 minutes per side 50-60 minutes
Lean joint (600-1000g) 10-15 minutes all over 120-180 minutes
Large pieces of meat
Fillet (from 900g) 6-8 minutes all over 120-180 minutes
Roast beef (1,1-2kg) 8-10 minutes all over 210-300 minutes
Cleaning
Do not use high-pressure cleaners or steam jets. Only clean the drawer when the appliance is switched off. Function selector Setting = 0.
Appliance exterior
Wipe the appliance with water and a little detergent. Then dry it with a soft cloth.
Caustic or abrasive cleaning products are not suitable. If a caustic or abrasive substance comes into contact with the frontage, wash it off immediately with water.
Stainless steel surfaces
Always remove any spots of limescale, grease, cornflour and egg white immediately. Corrosion can form under such spots. Clean the appliance using water and a little detergent. Then dry the surface with a soft cloth.
Appliances with glass fronts
Clean the glass front with glass cleaner and a soft cloth. Do not use a glass scraper.
Heating plate
Clean the heating plate using warm water and a little detergent.
Malfunctions often have simple explanations. Please read the following instructions before calling the after-sales service:
| The ovenware or food remain cold. Check whether: | |
| the appliance is switched onthere has been a power cutthe drawer is closed completely | |
| The ovenware or food are not warmed sufficiently. This may indicate that: | |
| the ovenware or food were not warmed for a sufficient length of timethe drawer was left open for a long time | |
| The "power on" indicator light flashes. Check whether the drawer is closed. | |
| The indicator light flashes rapidly when the warming drawer is closed. | Call the after-sales service. |
| The "power on" indicator light does not light up. | The indicator light is faulty. Consult the after-sales service |
| The fuse in the fuse box has blown. | Disconnect the appliance at the mains and consult the after-sales service. |
Repairs must only be carried out by qualified specialists. Incorrect repairs may result in serious injury to the user.
After-sales service
Our after-sales service is there for you if your oven should need to be repaired. You will find the address and telephone number of your nearest after-sales service centre in the phone book. The after-sales service centres listed will also be happy to advise you of a service point in your local area.
E number and FD number
When contacting the after-sales service, always specify the product number (E no.) and the production number (FD no.) of your appliance. The rating plate bearing these numbers can be found by opening the warming drawer. Make a note of these numbers in the space below to save time in the event of your appliance malfunctioning.
E no. FD no.
After-sales service 📞
Please find the contact data of all countries in the enclosed customer service list.
To book an engineer visit and product advice
GB 0344 892 8988
Calls charged at local or mobile rate.
IE 01450 2655
0.03 € per minute at peak.
Off peak 0.0088 € per minute.
AU 1300 368 339
NZ 09 477 0492
Trust the expertise of the manufacturer, and rest assured that the repair will be carried out by trained service technicians using original spare parts for your domestic appliance.
This product contains light sources from energy efficiency class G. These light sources are available as a spare part and should only be replaced by trained specialist staff.
Table des matières
Plaque chauffante 25
- ⚠️ Important safety information
- Risk of serious burns!
- Risk of electric shock and serious injury!
- Risk of fire and serious injury!
- Environmental protection
- Environmentally-friendly disposal
- Opening and closing
- Preheating ovenware
- General ovenware
- Arranging ovenware
- Drinks containers
- ⚠️ Risk of burning!
- Method
- How long does preheating take
- Switching off
- Removing ovenware
- Keeping food warm
- Slow cooking
- Notes on slow cooking
- Table
- Cleaning
- Appliance exterior
- Stainless steel surfaces
- Appliances with glass fronts
- Heating plate
- After-sales service
- E number and FD number
- To book an engineer visit and product advice
- Table des matières
Brand : GAGGENAU
Model : WS462100
Category : Plate warmer