FX9 X Ultimate - Cordless vacuum AEG - Free user manual and instructions
Find the device manual for free FX9 X Ultimate AEG in PDF.
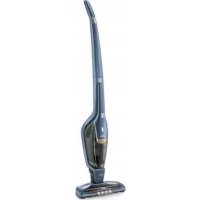
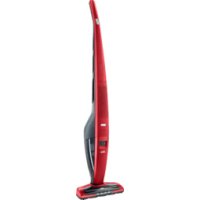
| Product type | Cordless vacuum cleaner |
| Brand | AEG |
| Model | FX9 X Ultimate |
| Power supply | Lithium-ion battery 36 V, 93.8 Wh |
| Runtime (long mode) | Approximately 60 minutes |
| Runtime (normal mode) | Approximately 30 minutes |
| Runtime (max power mode) | Approximately 17 minutes |
| Charging time | Approximately 6 hours |
| Charging temperature range | 5 °C to 35 °C |
| Storage temperature range | 5 °C to 35 °C |
| Storage humidity | 20% to 80% without condensation |
| Battery type | Integrated rechargeable Li-Ion |
| Filtration system | Cyclonic with washable filter |
| Rotating brush | Yes, motorized |
| Indicator lights | LED for charge level and capacity |
| Maintenance | Regular cleaning of filter and brush |
| Safety | Indoor use only, do not vacuum liquids |
| Spare parts | Filters available online at www.aeg.com/shop |
| Repairability | AEG authorized after-sales service |
| Warranty | Does not cover loss of runtime due to battery age |
Frequently Asked Questions - FX9 X Ultimate AEG
User questions about FX9 X Ultimate AEG
0 question about this device. Answer the ones you know or ask your own.
Ask a new question about this device
Download the instructions for your Cordless vacuum in PDF format for free! Find your manual FX9 X Ultimate - AEG and take your electronic device back in hand. On this page are published all the documents necessary for the use of your device. FX9 X Ultimate by AEG.
USER MANUAL FX9 X Ultimate AEG
www.aeg.com/productregistration
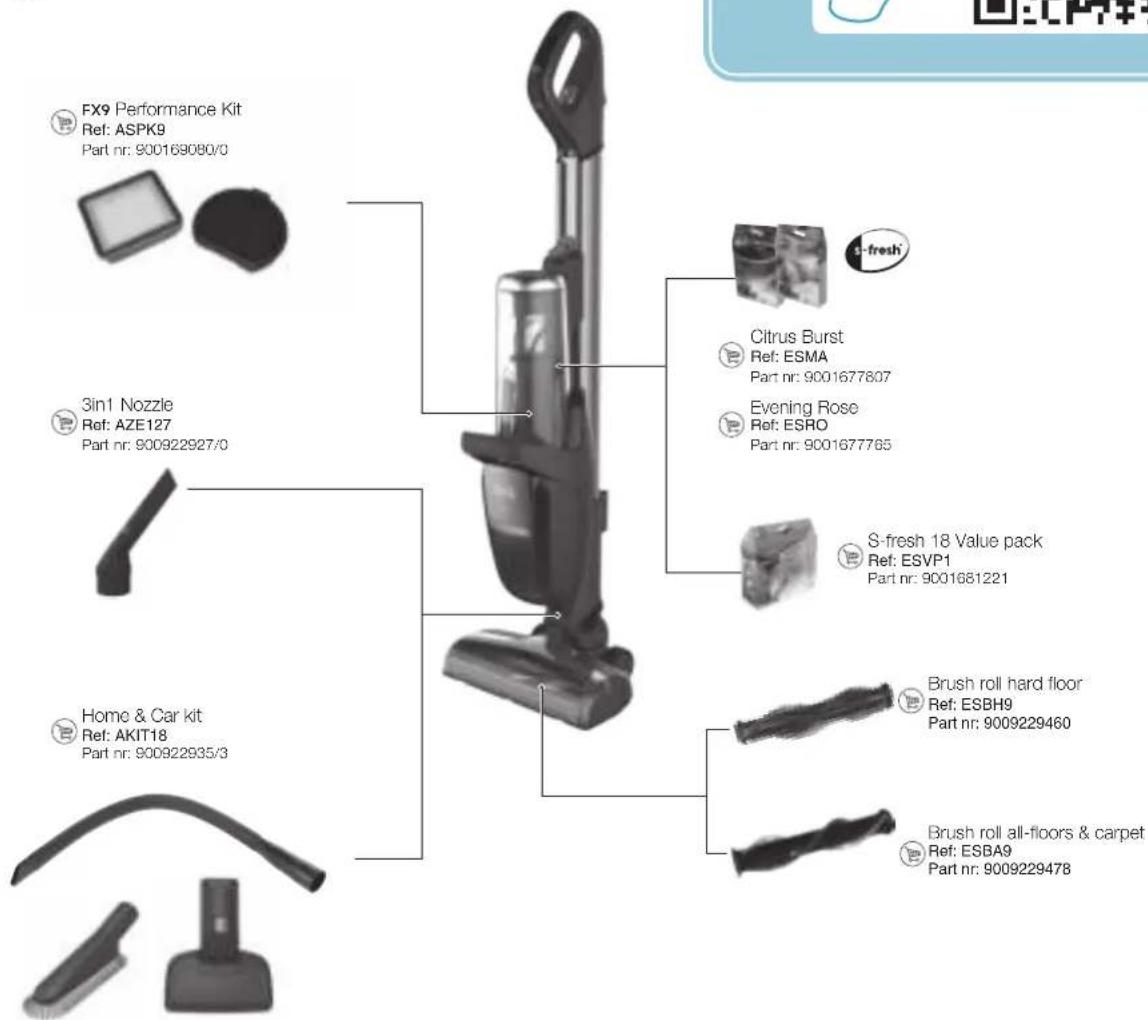
CONSUMABLES & ACCESSORIES

www.aeg.com/shop
natural_image
Illustration of a person using a vacuum cleaner to lift a leg, with instructions to press the digit 'CLICK!' (no text or symbols on the device itself)
natural_image
Illustration showing three-step procedure: tool insertion, press application, and electrical plug installation (no text or symbols)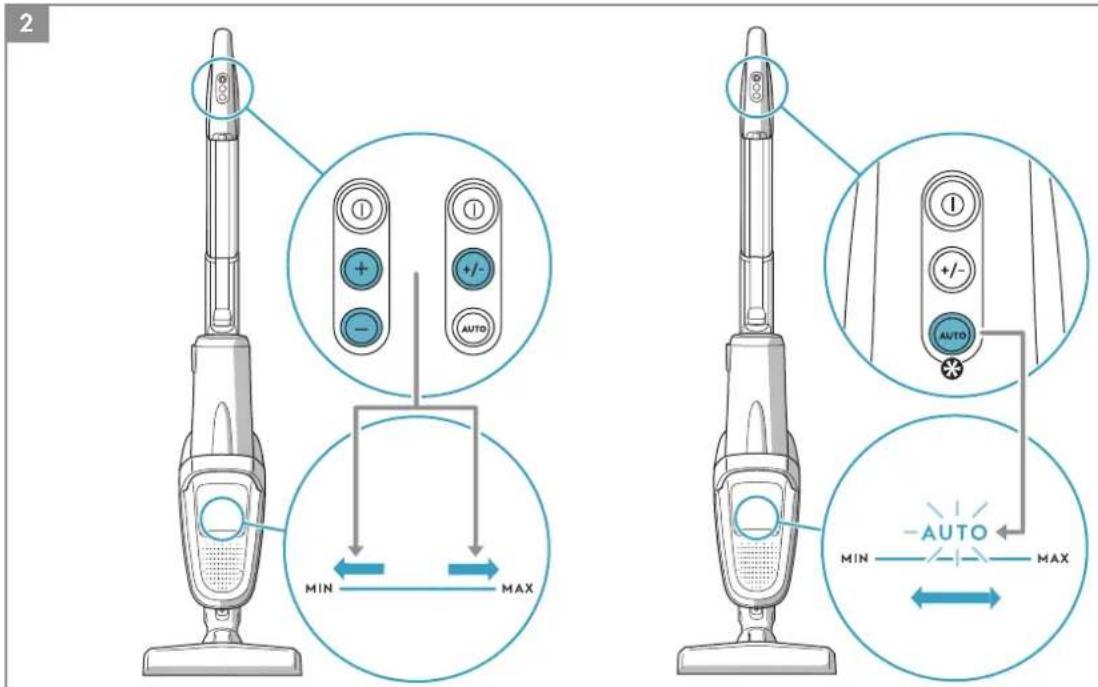

natural_image
Illustration of a person using a vacuum cleaner with a blue arrow indicating direction, alongside an inset close-up of the device (no text or symbols)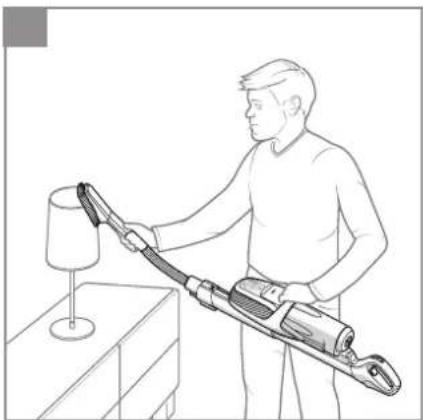
natural_image
Line drawing of a person using a vacuum cleaner to clean or store items (no text or symbols)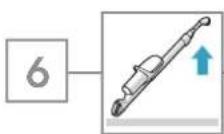
natural_image
Illustration of a person using a handheld tool to lift or stand on a wall, no text or symbols presentCertain models only
flowchart
graph LR
    A["7"] --> B["支付设备"]
    B --> C["电脑显示器"]
    C --> D["手机支付"]
    D --> E["二维码"]
natural_image
Illustration of hands holding a small object with a blue arrow indicating direction (no text or symbols)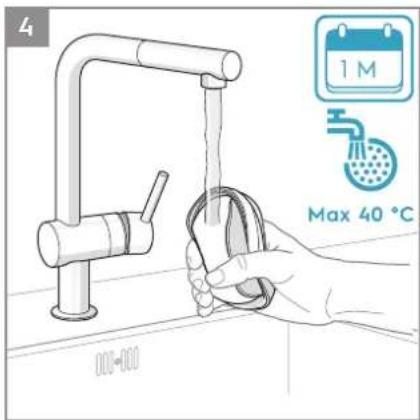
natural_image
Line drawing of a hand using a brush to clean or adjust a small object inside a container (no text or symbols)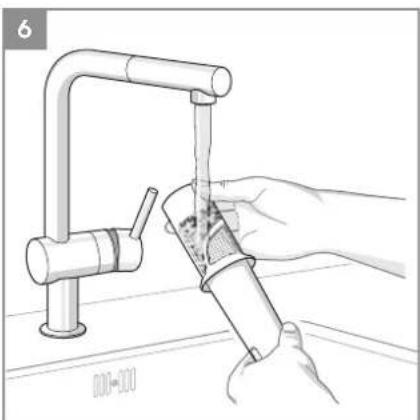
natural_image
Illustration of a hand using a tool to clean or wash a surface, with no text or symbols present.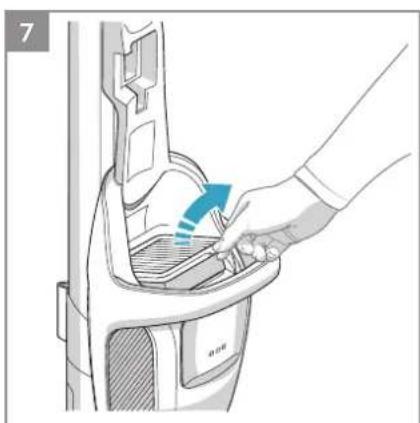
natural_image
Illustration of a hand cleaning a car trunk with a blue arrow indicating the handle (no text or symbols present)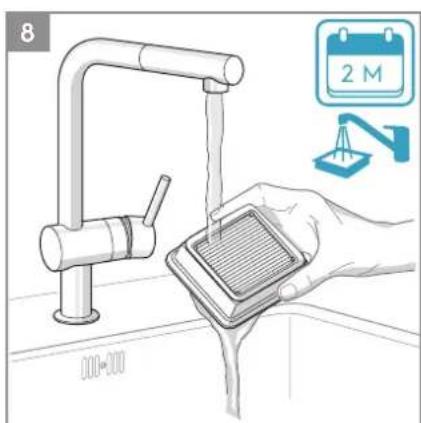
natural_image
Illustration of a hand washing a sink with a water drain, accompanied by a calendar and cleaning tools (no text or symbols)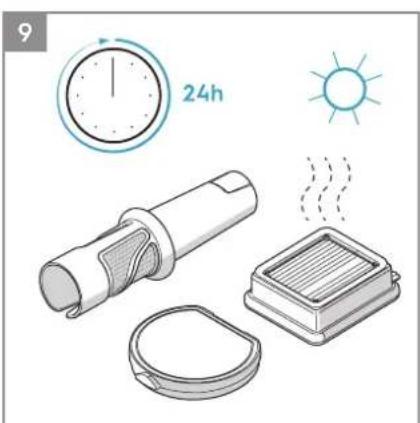
natural_image
Illustration of household appliances including a timer, lamp, and heat sink (no text or symbols)
natural_image
Line drawing of a person using a vacuum cleaner on a bed (no text or symbols)
natural_image
Line drawing of a person using a vacuum cleaner on a small table (no text or symbols)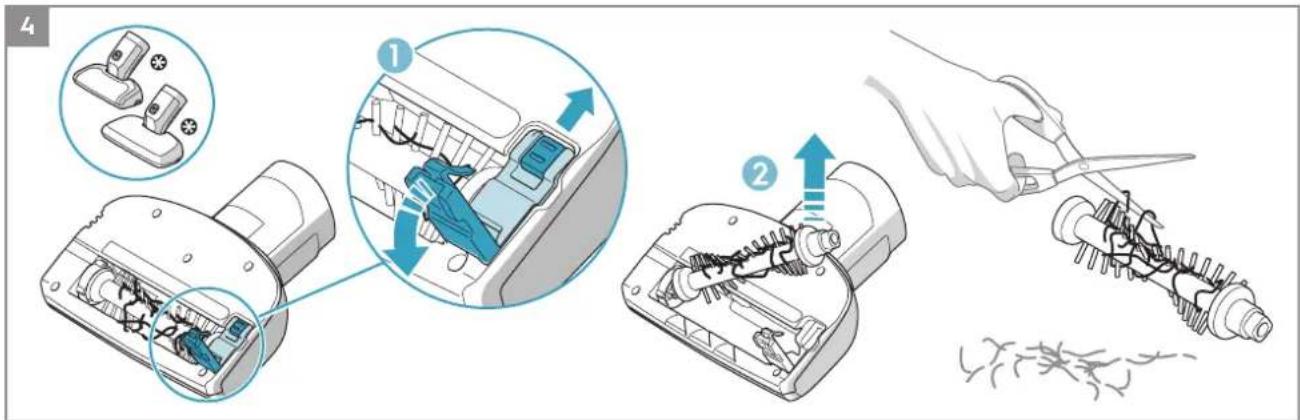
natural_image
Illustration of hands using scissors to draw or wire on a table (no text or symbols)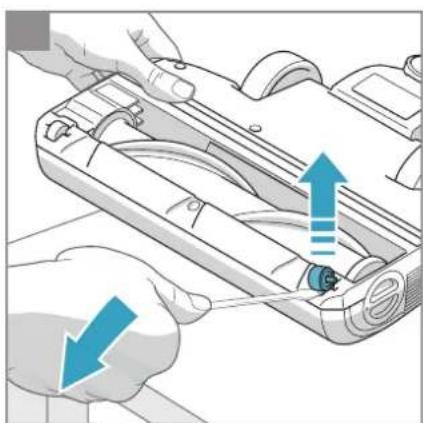
natural_image
Illustration of hands installing or adjusting a mechanical component with blue arrows indicating direction (no text or symbols)
natural_image
Illustration of a hand pressing down on a device with blue arrows indicating motion or force (no text or symbols)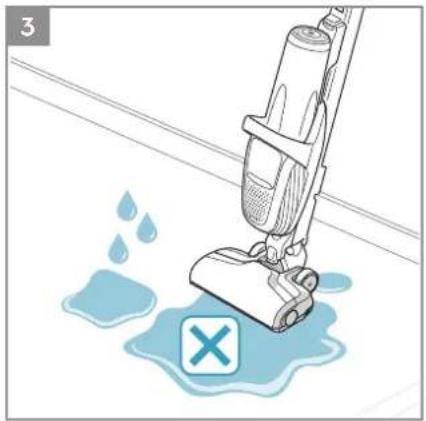
natural_image
Illustration of a vacuum cleaner spraying water with a 'X' symbol (no text or labels)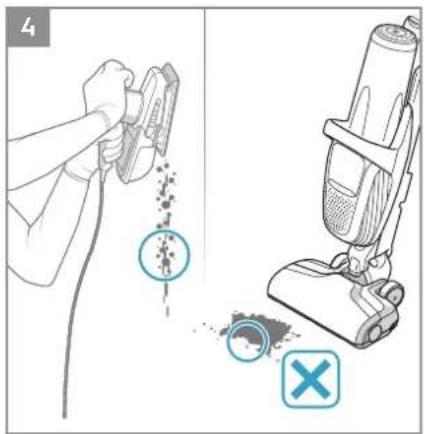

natural_image
Line drawing of a vacuum cleaner emitting debris with a warning symbol (no text or labels)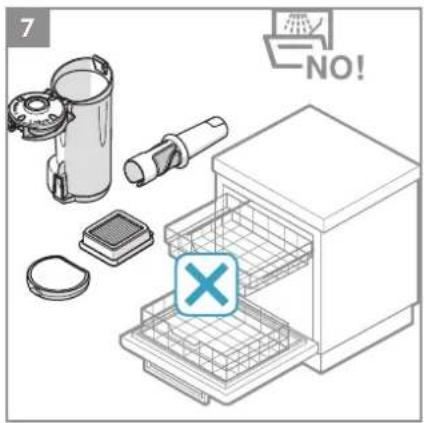
SAFETY PRECAUTIONS
This appliance can be used by children aged from 8 years and above and persons with reduced physical, sensory or mental capabilities or lack of experience and knowledge if they have been given supervision or instruction concerning use of the appliance in a safe way and understand the hazards involved.
Children shall not play with the appliance.
Cleaning and maintenance shall not be made by children without supervision.
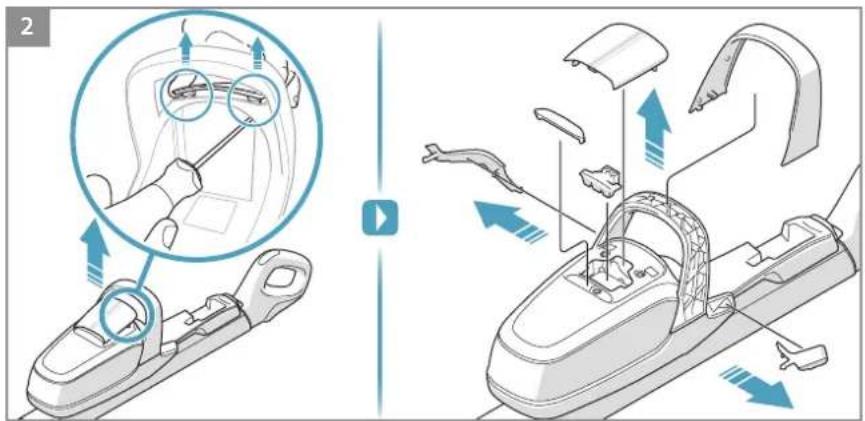
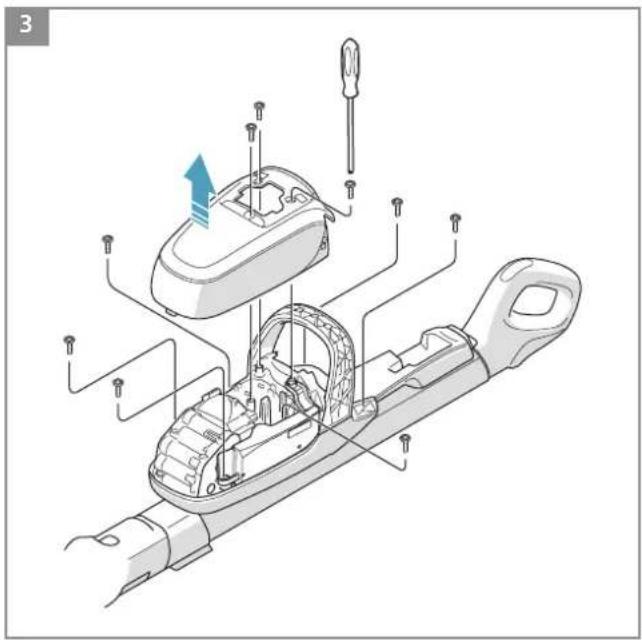
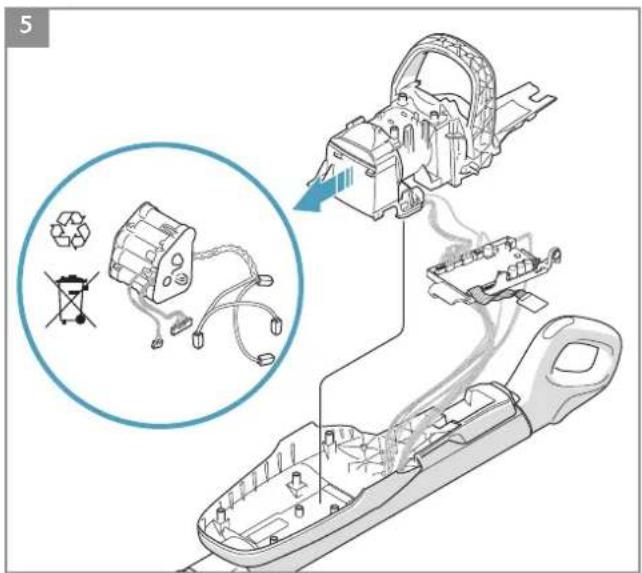
Batteries must be removed from the appliance before it is scrapped.
The battery is to be disposed of safely.
Only use the charging adapter that was provided with the product.
The product should only be used for normal vacuuming indoors and in a domestic environment. Make sure it is stored indoors and in a dry place.
Packaging material, e.g. plastic bags should not be accessible to children to avoid suffocation.
Never use the vacuum cleaner:
- In wet areas.
- Close to flammable gases, etc.
- When the product shows visible signs of damage.
- On sharp objects or liquids.
- On hot or cold cinders, lighted cigarette butts, etc.
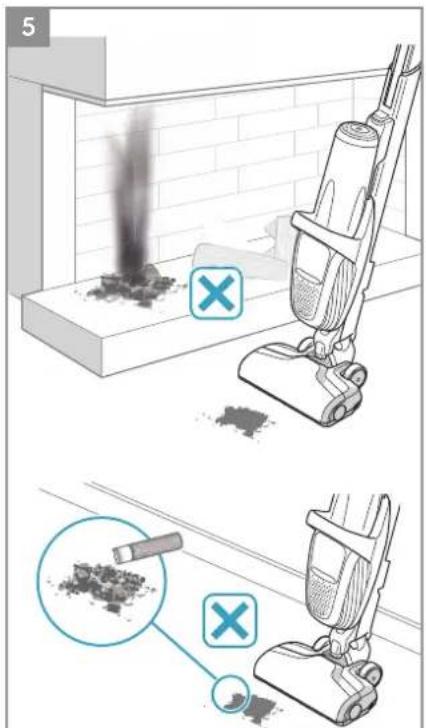
- On fine dust, for instance from plaster, concrete, flour, hot or cold ashes.
Caution:
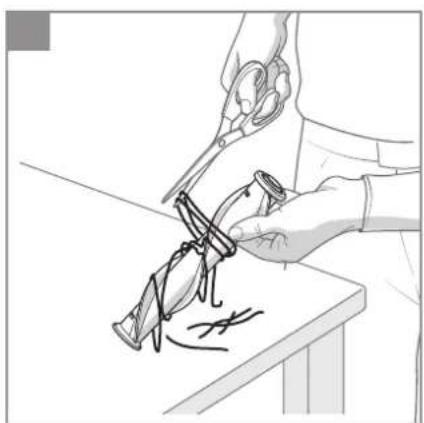
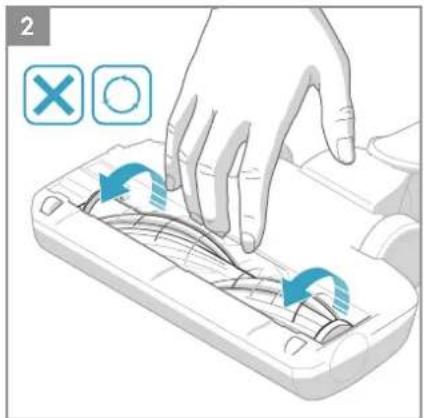
- Mind your fingers if cleaning the inside of the floor nozzle.
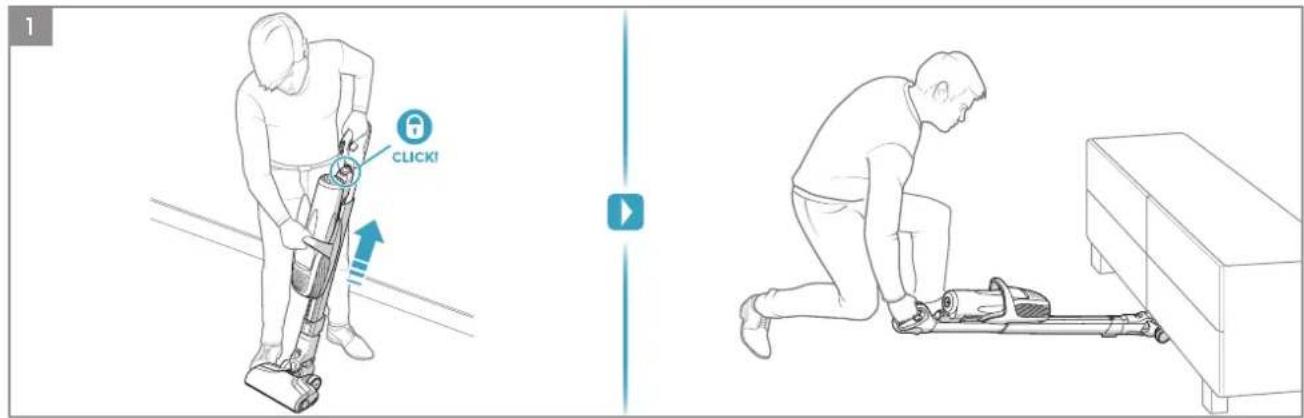
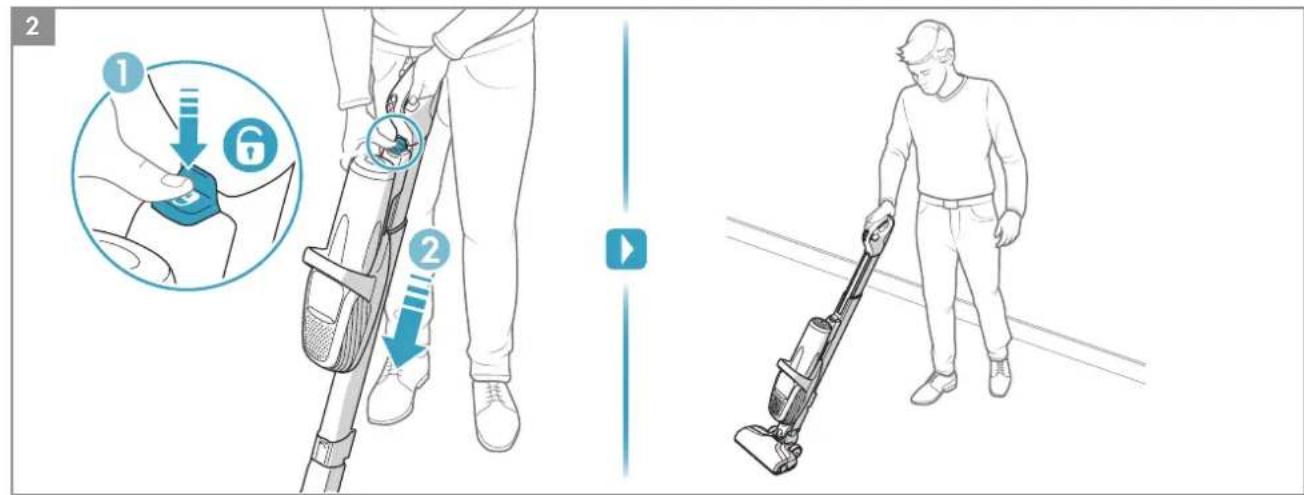
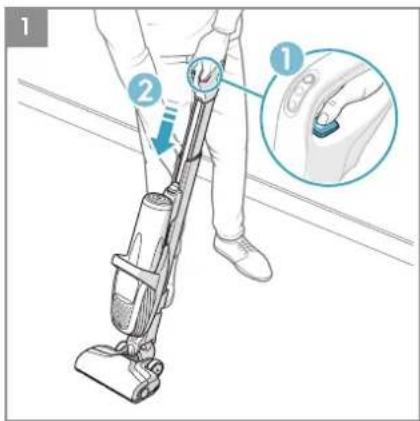
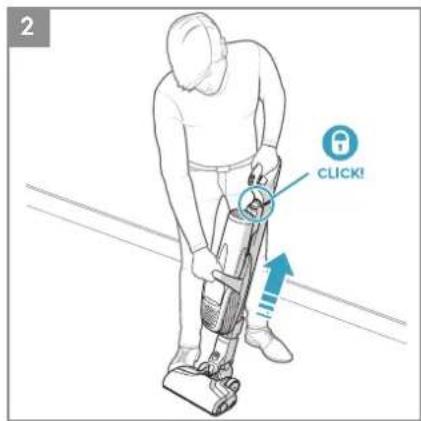
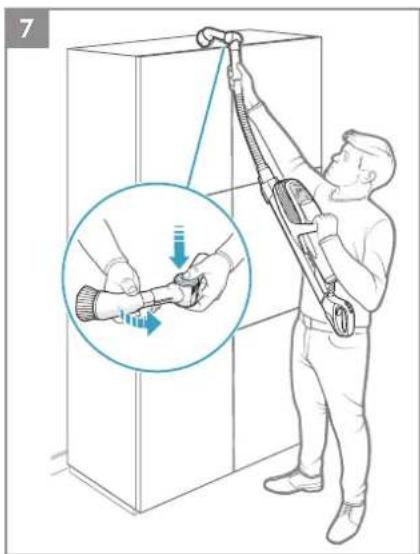
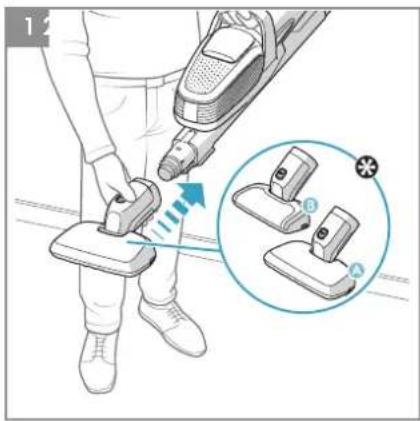
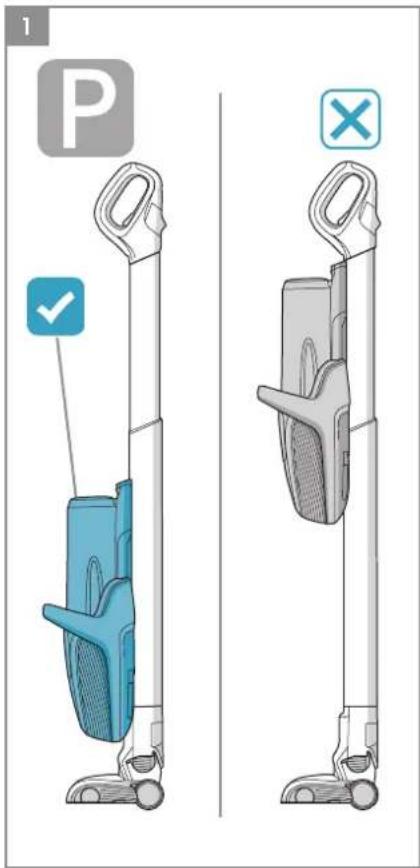
- Make sure to use the designated handles when operating the product and when using the slide function of the main unit.
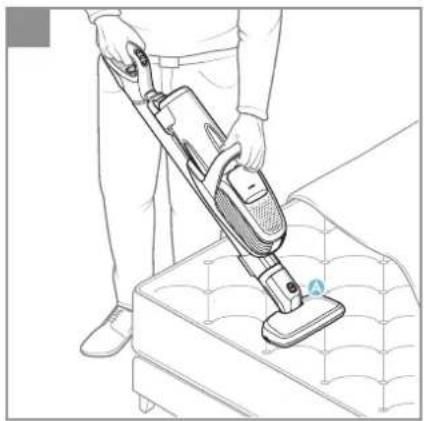
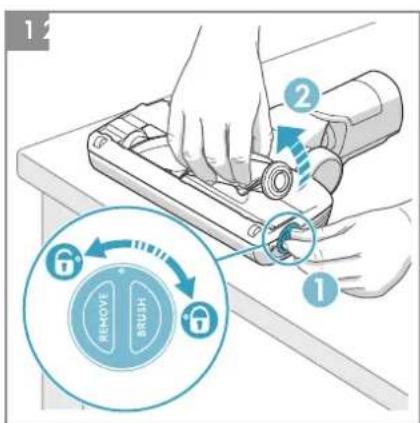
- Make sure the main unit is locked in the upper position when using the cleaner in high cleaning mode (Chapter 6 step 1)
Warning:
- Do not leave, store or charge the vacuum cleaner in direct sunlight.
- Avoid exposing the vacuum cleaner to strong heat.
- The battery cells within must not be dismantled, short circuited or placed against a metal surface.
- Never use the vacuum cleaner without its filters.
- Do not try to touch the brush roll while the cleaner is switched on and the brush roll is turning.
Using the vacuum cleaner in the above circumstances may cause serious personal injury or damage to the product. Such injury or damage is not covered by the warranty or by AEG.
SERVICING AND WARRANTY
All service or repairs must be carried out by an authorized AEG service centre.
This warranty does not cover reduction in battery runtime due to battery age or use, as the life of the battery depends upon the nature of use.
To protect the motor, battery and electronics the product should not be operated in:
- an ambient temperature below 5^ or exceeding 35^ .
- A humidity level below 20% or exceeding 80% (non-condensing).
Storage considerations to protect the battery and electronics;
- If the product is temporarily stored in a temperature below 5 °C or exceeding 35 °C, let the product cool down or warm up and dry for a few hours before usage. Dew condensation may form inside the product if the unit is moved from a cold to a warm environment.
If the product is stored for an extended time period (without usage or continuous charging), we recommend to store the product
- indoors and in temperature between 5^ to 35^ , and at a humidity between 20% to 80% .
• with the batteries charged at 50% capacity or more.
TROUBLESHOOTING
| PROBLEM CAUSE SOLUTION | ||
| The product stops or does not start | The brushroll is blocked | Clean and remove entangled hair, threads and fibres from the brush roll. |
| The product might be overheated | Turn off the vacuum cleaner. Then check if the nozzle, tube, hose or filters are blocked and/or dirty. Let the product cool down for minimum 2 hours on the charging stand before starting it again. If the product still is not working, please contact an authorized AEG Service Centre. | |
| The battery is empty (last LED blinks) | Charge the vacuum cleaner. | |
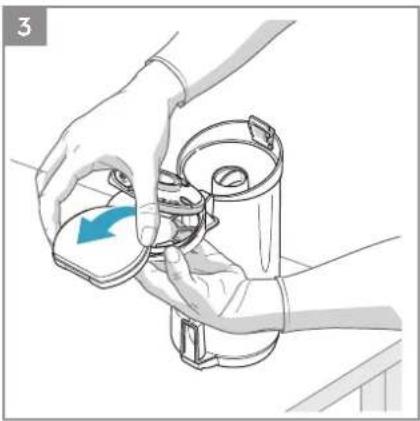
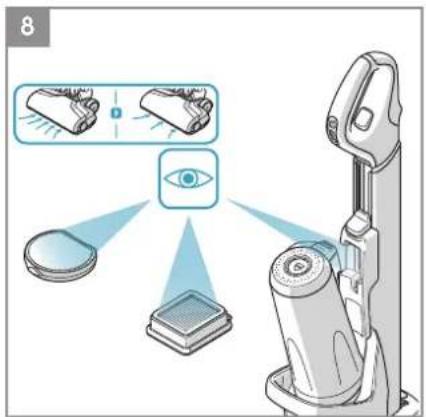
| Reduction or no suction power | Filters / Nose Cone is dirty or missing | - Clean or wash the filters and put them back (See also Instruction book section 7).- Change or replace the filters (www.aeg.com/shop). |
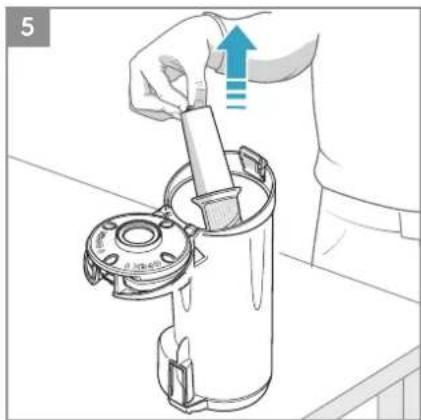
| Air Channel / Cyclon is blocked | - Remove the dust container and check the air channel and air inlet in the dust container to see if something is stuck. | |
| Floor nozzle is blocked | - Remove Floor nozzle and check if something is stuck in the nozzle. | |
| Hose is blocked | - Remove Floor nozzle and check if something got stuck in the hose. If so use a stick to remove the obstacle. However, be careful in case the obstruction. | |
| Note: The warranty does not cover any damage to the hose caused by cleaning it. | ||
| Water or other liquids has been sucked into the product | - Stop the product and let it dry for 48h (do not put it in the charging stand!).If the product is not working anymore it will be necessary to replace the motor at an authorized AEG service centre.Note: Damage to the motor caused by the penetration of water is not covered by the warranty. | |
| The product is not charging | Main unit is in wrong position | Push the main unit down to the lowest position. It should not be locked in the upper position and/or in between. |
| Product is placed wrong in the charging stand | Check if the connectors from the back of the main unit are connected to the charging stand. | |
| Charging pin is not plugged in | Make sure charging pin is connected in the back of the charging stand, and charging adapter is plugged in the socket. | |
| Wrong or no nozzle attached | Make sure the main floor nozzle is attached to the product or it will not charge. | |
| To protect the battery and electronics, charging will not occur if room temperature is below 5°C or over 35°C. | Store and charge the product indoor and in a room temperature between 5 - 35°C. | |
| Charging is taking longer than 6 hours | Room temperature is over 35°C | Charging time will be longer if the temperature is high, which is normal. Store and charge the product in a normal room temperature. |
| Please also see Instruction book chapter 2. | ||
| Brushroll is not rotating | Changing the floor nozzle while product is running | After changing the nozzle restart the product. |
BATTERY LAMPS INDICATION
| Charging What does it mean? During usage What does it mean? | ||||||||||
 | Blink slowly = 100 % fully charged 75 - 100 % capacity | |||||||||
 → [000] → [000] | 50 - 95 % charged 50- 75 % capacity remaining | |||||||||
 → →  | |  [101] (5DDW) | [101] (5DDW) |  % | % |  jed jed  . 5C [3D50] apz . 5C [3D50] apz  rema rema  | |   | ||||||||||
HXHD) I9 n  , to [26HX] echarged. , to [26HX] echarged. | ||||||||||
RUNNING TIMES FOR FX9
| 36V 32,4 V | ||
| High power mode | prox. 17 min* Approx. 15 min* | |
| Normal mode | 30 min* Approx. 25 min* | |
| Long runtime mode | approx. 60 min* Approx. 55 min* | |
| *based on AEG Internal Testing | ||
This warranty does not cover reduction in battery runtime due to battery age or use, as the life of the battery depends upon the amount and nature of use.

This symbol on the product indicates that this product contains a built-in rechargeable battery which shall not be disposed with normal household waste.

This symbol on the product or on its packaging indicates that the product may not be treated as household waste.
To recycle your product, please take it to an official collection point or to an AEG service center that can remove and recycle the battery and electric parts in a safe and professional way. Follow your country's rules for the separate collection of electrical products and rechargeable batteries.
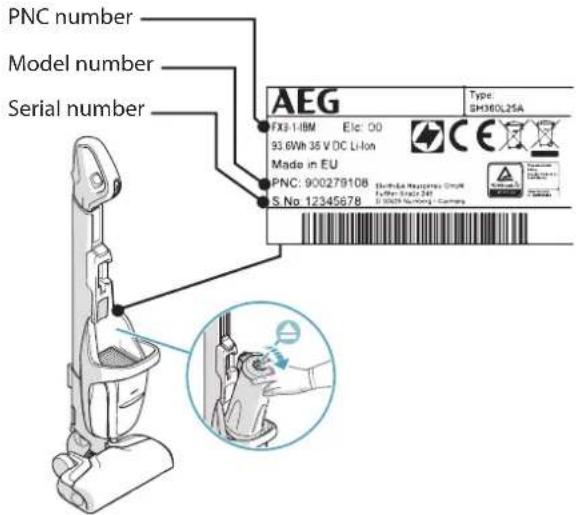
CUSTOMER CARE AND SERVICE
When contacting the AEG service center, ensure that you have following data available:
- Model number,
- PNC number
- Serial number
The information can be found on the rating plate.
ASSISTÊNCIA E GARANTIA
natural_image
Illustration of a mechanical device with a blue arrow indicating direction (no text or symbols)