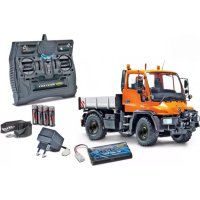
Unimog U300 - Remote control toy Carson - Free user manual and instructions
Find the device manual for free Unimog U300 Carson in PDF.


| Brand | Carson |
| Model | Unimog U300 |
| Product type | Radio-controlled toy (RC) |
| Category | Off-road truck |
| Approximate scale | 1:10 |
| Dimensions (L x W x H) | Approximately 40 x 20 x 15 cm |
| Weight | Approximately 2.5 kg |
| Model power supply | NiMH battery 7.2 V (not included) |
| Transmitter power supply | 4 AA batteries 1.5 V (not included) |
| Radio frequency | 2.4 GHz |
| Radio range | Approximately 50 meters |
| Main functions | Forward/backward, left/right steering |
| Recommended age | From 14 years (with adult supervision) |
| Intended use | Leisure, dry outdoor terrain |
| Maintenance | Check screws and nuts before each use; clean after use |
| Battery care | Do not mix charged and discharged batteries; only charge rechargeable batteries |
| Safety | Do not use near people, animals, high voltage lines, or during thunderstorms |
| Spare parts | Use only original Carson spare parts |
| Repairability | Repairs only by an authorized Carson service under warranty |
| Warranty | Covering material and manufacturing defects (excluding abuse, normal wear) |
| Standards | Directive 2014/53/EU (radio equipment) |
Frequently Asked Questions - Unimog U300 Carson
User questions about Unimog U300 Carson
0 question about this device. Answer the ones you know or ask your own.
Ask a new question about this device
Download the instructions for your Remote control toy in PDF format for free! Find your manual Unimog U300 - Carson and take your electronic device back in hand. On this page are published all the documents necessary for the use of your device. Unimog U300 by Carson.
USER MANUAL Unimog U300 Carson
Mercedes Benz Unimog U300
Before using your product for the first time or ordering any spare parts, check that your manual is fully up-to-date.
This manual contains the technical appendices, important instructions for correct start-up and use and product information, all fully up-to-date before going to press.
The contents of this manual and the technical data of the product can change without prior notice.
For the latest version of your manual, see: www.carson-modelsport.com
FR // Remarque importante
We congratulate you for buying this CARSON product, which is designed and manufactured using state of the art technology.
According to our policy of continued development and product improvement we reserve the right to make changes in specifications regarding equipment, material and design at any time without notice.
Specifications or designs of the actual product may vary from those shown in this manual or on the box.
The manual forms part of this product. Should you ignore the operating and safety instructions, the warranty will be void.
Keep this guide for future reference.
Limited Warranty
This product is warranted by CARSON against manufacturing defects in materials and workmanship under normal use for 24 months from the date of purchase from authorised franchisees and dealers. In the event of a product defect during the warranty period, return the product along with your receipt as proof of purchase to any CARSON store.
CARSON will, at its option, unless otherwise provided by law:
(a) Correct the defect by repairing the product without charging for parts and labour;
(b) Replace the product with one of the same or similar design.
All replacement parts and products, and products on which a refund is made, become the property of CARSON. New or reconditioned parts and products may be used in the performance of warranty services.
Repaired or replaced parts and products are warranted for the remainder of the original warranty period. You will be charged for repair or replacement of the product made after the expiration of the warranty period.
The Warranty does not cover:
- Damage or failure caused by or attributable to acts of God, abuse, accident, misuse, improper or abnormal usage, failure to follow instructions, improper installation or maintenance, alteration, lightning or other incidence of excess voltage or current;
- Damage caused by losing control of your model;
- Any repairs other than those provided by a CARSON authorised service facility;
- Consumables such as fuses or batteries;
- Cosmetic damage;
- Transportation, shipping or insurance costs; or
- Costs of product removal, installation, set-up service adjustment or reinstallation;
- Any changes to plugs and cables, open the housing and damage the sticker.
This warranty gives you specific legal rights, and you may also have other rights which may vary according to the country of purchase.
Declaration of conformity
TAMIYA-CARSON Modellbau GmbH & Co. KG hereby declares that the radio equipment type 500707099 / 500707109 / 500907170 / 500907174 / 500907213 / 500907251 / 500907290 conforms to Directive 2014/53/EU. The complete test for the EU declaration of conformity is available at the following Internet address.
The explanation of the symbol on the product, packaging or instructions: Electronic devices are valuable products and should not be disposed of with the household waste when they reach the end of their service life! Help us to protect the environment and respect our resources by delivering this appliance to the relevant recycling point.

We wish you a lots of fun using your CARSON product!
Before use, read this manual carefully!
CONTENTS
Preface 12
Included Items accessories 13
Safety Precautions 14
Installing the Transmitter Batteries. 15
Transmitter. 15
Charging the Battery Pack. 16
Insert Driving Batteries 16
Start 17
Throttle Trim. 17
Steering Trim 17
Now You Can Set off on Your Travels. 18
Cautions when Operating the RC Model. 18
Load platform 18
Rope winch 18
Lights 19
Binding 19
Shut down 20
Troubleshooting 20
INCLUDED ITEMS ACCESSORIES
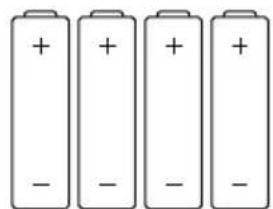
Battery
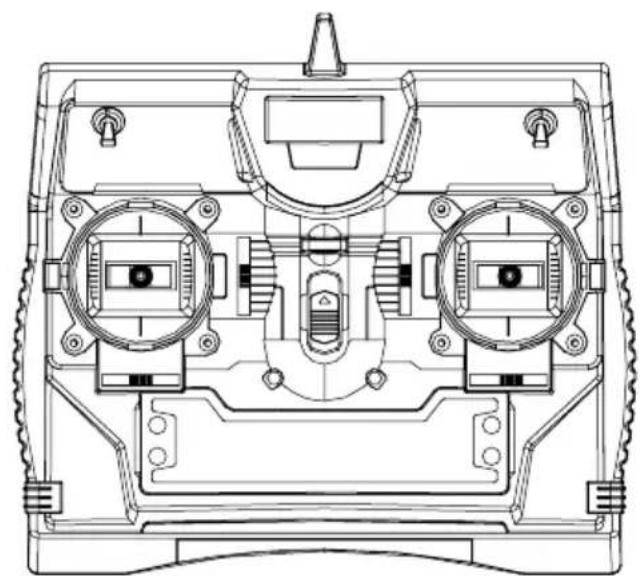
Transmitter

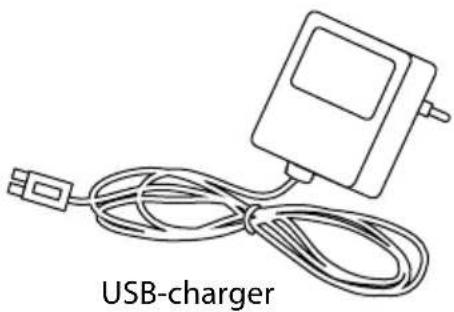
SAFETY PRECAUTIONS
Safety Instructions and Intended Use
This product is designed exclusively for hobby use and may only be used on tracks and areas intended for this purpose.
No persons or animals may be transported with this model.
To avoid operator errors, it is mandatory that the user manual is read before use!
To avoid faulty operation of the control system causing the model to run out of control, it must be checked that the transmitter and model batteries are in good condition.
It is essential to check that the model is correctly assembled both before and after use; if need be, tighten nuts and bolts.
This model is not a toy!
- This product is not a toy, its operation must be learned step by step.
Children under 14 years of age should operate the model only if supervised by an adult.
Operating RC models is a fascinating hobby that, however, must only be exercised with proper precautions and care. Since the weight of this model is considerable and it can reach a very high speed it can, if it runs out of control, cause significant damage and injury for which you, as the operator, are liable.
Only a correctly assembled model will work and react as expected.
Never improvise with unsuitable materials but, when the need arises, use only original spare parts. Even if the model is pre-assembled, all joints and fastenings should be checked for correct seating and tightness.
Before use, you must make sure of the following points:
- All rechargeable batteries must be fully charged.
Before starting, check the radio range. - Check that the model reacts correctly to the control signals.
- All functional parts of the product are in a faultless condition and have been checked.
All screw fastenings are firmly seated. - Do not drive under high-voltage power lines or radio masts or with nearby thunderstorms!
- Atmospheric interference can influence the operation of your model.
- The remote controlled model may be driven only on suitable areas.
- Do not use near people or animals!
- Do not use it when tired or if your reactions are otherwise impaired.
- Always maintain direct visual contact with your model.
- Regular maintenance and care are required for firt class driving performance.
- The model has parts that become hot in operation, e.g. the top of the motor, the metal gearbox, amongst many others. Touching these parts during operation can cause injury.
Pay attention to the charge level indication on your transmitter.
- With power packs or batteries that are half discharged, you can lose control of the model.
- In the transmitter, never mix fully charged batteries, rechargeable or not, with half discharged batteries or rechargeable batteries of different capacity.
- Never try to charge non-rechargeable batteries (dry cells), only batteries specified as rechargeable can be charged.
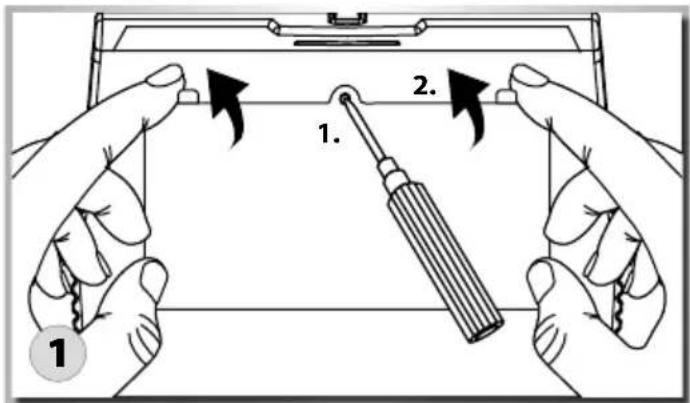
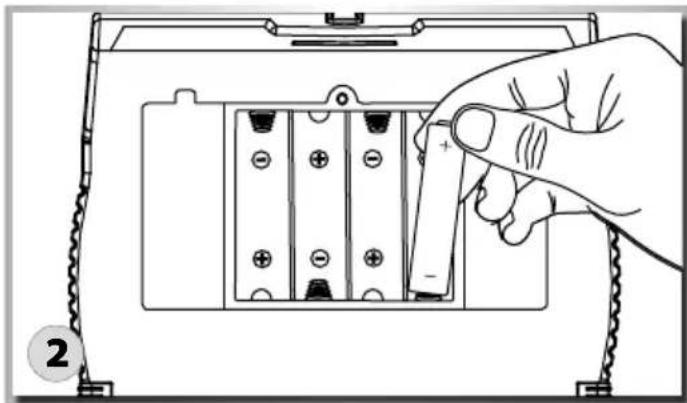
INSTALLING THE TRANSMITTER BATTERIES
- Open the battery compartment lid on the reverse of the transmitter.
-
Insert fully charged rechargeable batteries or new AA batteries observing the correct polarity.
-
Close the cover on the battery compartment again. Ensure that the cover clicks properly into place. Check that it is in its correct position.
TRANSMITTER
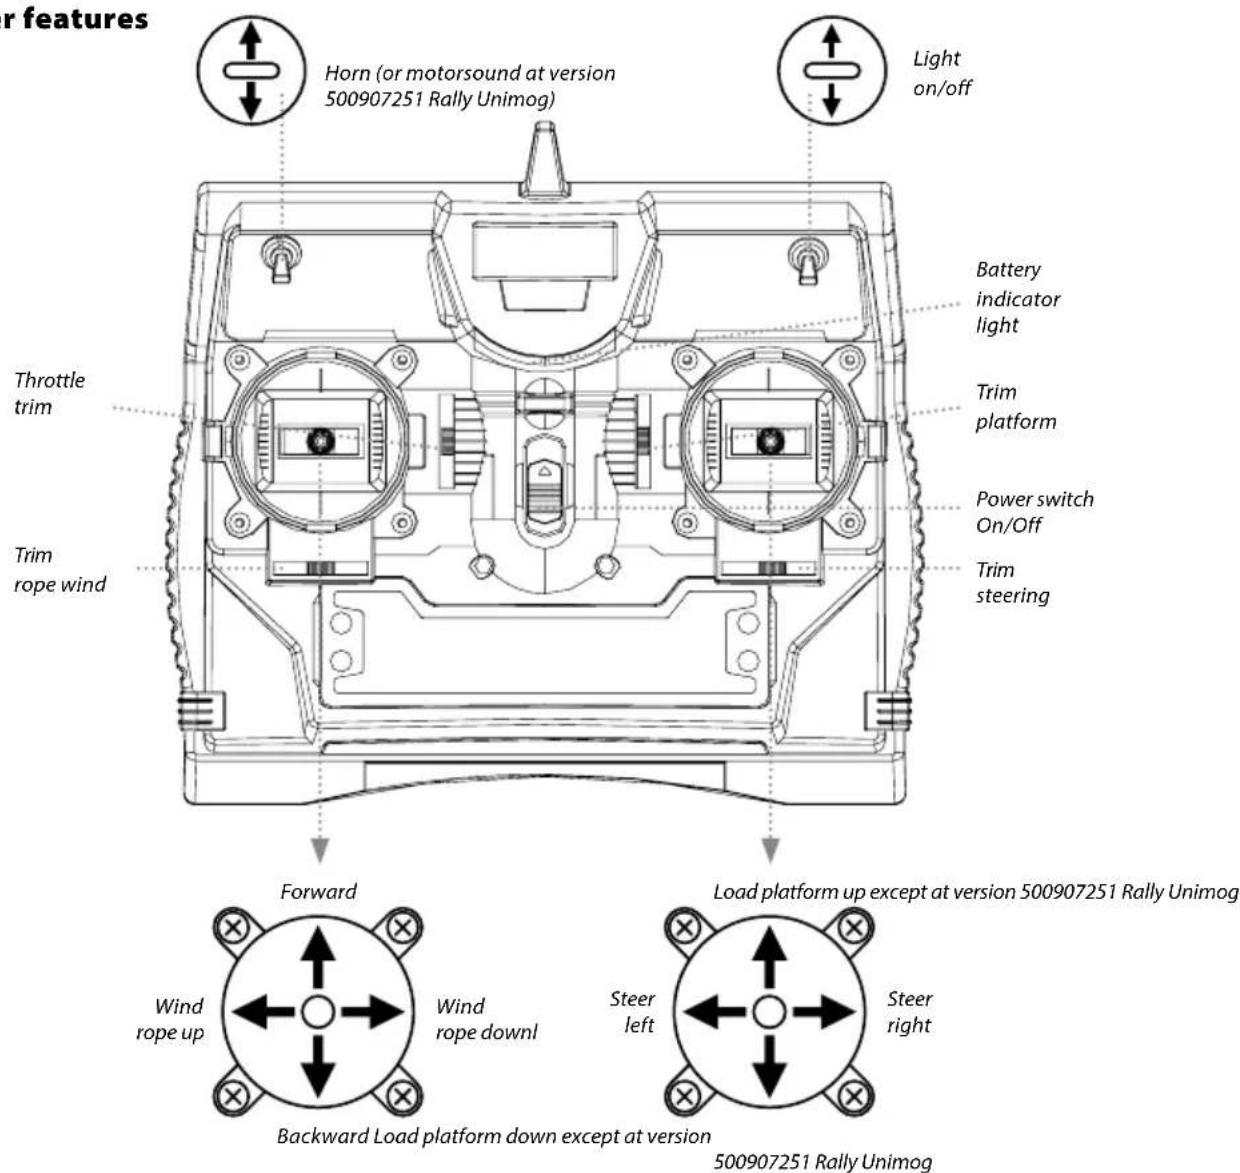
Transmitter features
CHARGING THE BATTERY PACK
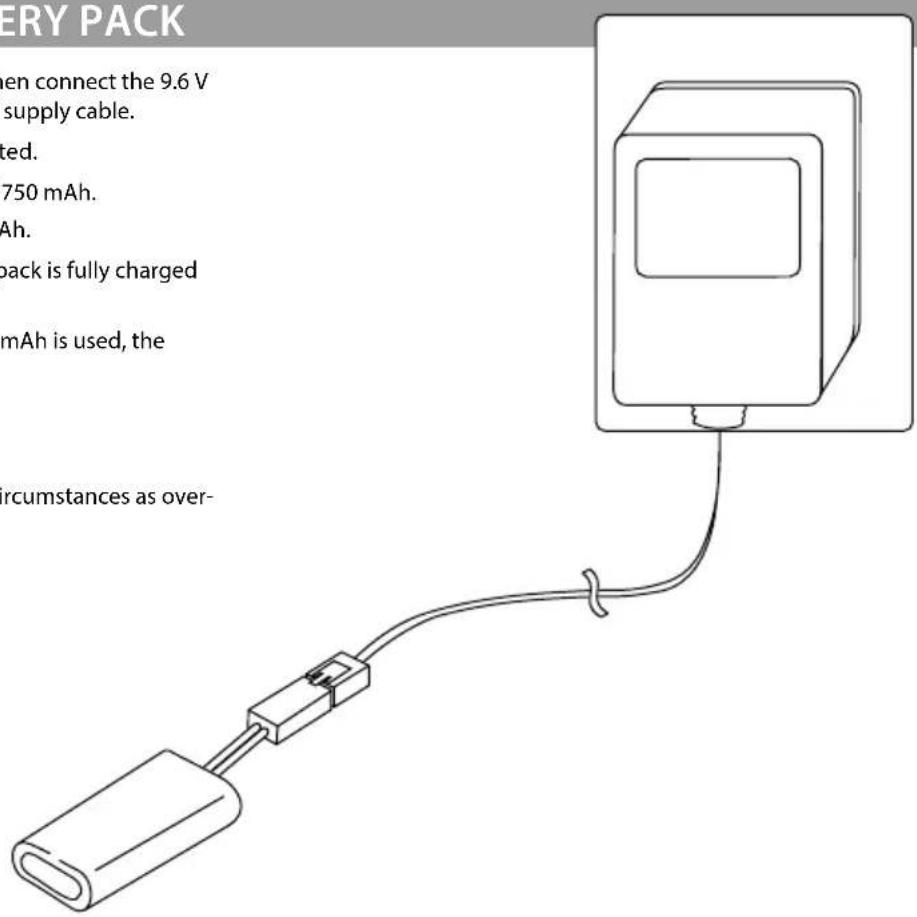
First plug the charger into the socket and then connect the 9.6 V driving battery pack to the charger's power supply cable.
Check that the charger is properly connected.
The battery pack supplied has a capacity of 750mAh .
The charger has a charge current of 180mAh
This means that the 750 mAh 9.6 V battery pack is fully charged after approx. 46 hours.
If the optional 9.6 V battery pack with 1300mAh is used, the charge time increases to approx. 76 hrs.
Warning!!!
Do not exceed the charge time under any circumstances as overcharging damages the battery pack.
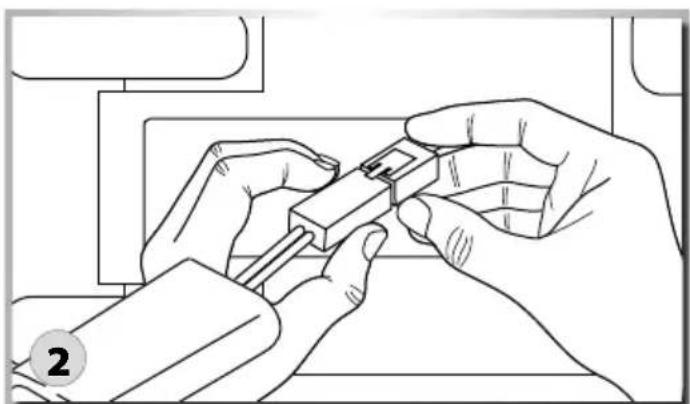
INSERT DRIVING BATTERIES
- Open the battery cover.
- Insert fully charged rechargeable batteries or new AA batteries observing the correct polarity.
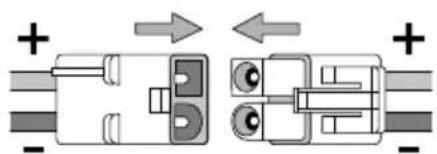
- Close the cover on the battery compartment again. Ensure that the cover clicks properly into place. Check that it is in its correct position.


START
-
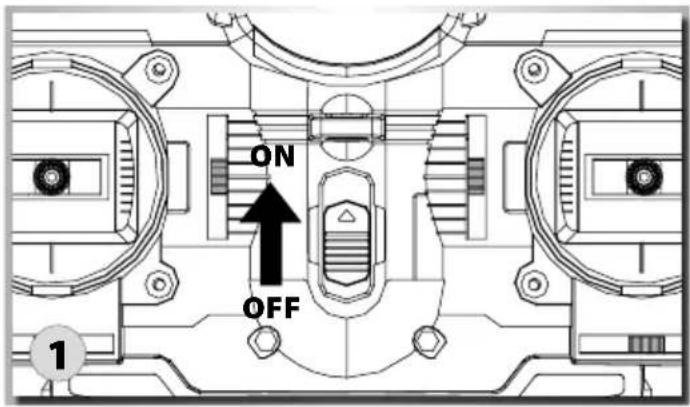
First switch on the transmitter.
-
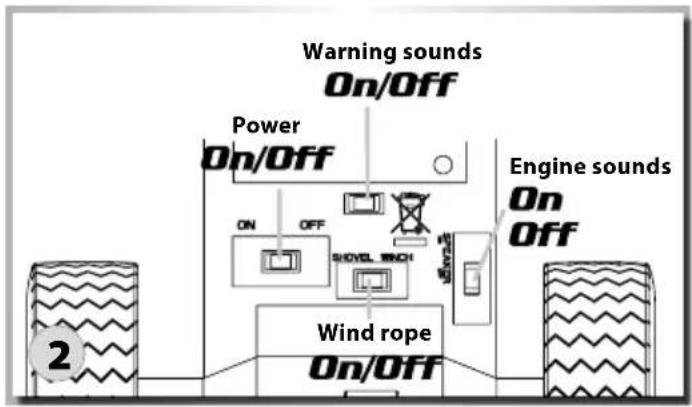
No you're ready to activate the model.
To do this, push the main switch (power) on the underside of the model to the "ON" position.
If the wheels start to turn, trim them in the opposite direction using the throttle trim.
The engine and warning sounds can also be switched on using a separate switch.
To switch off after use, switch the model off, and then the transmitter.
THROTTLE TRIM
If RC model moves on its own accord when throttle trigger is in neutral, adjust throttle trim.
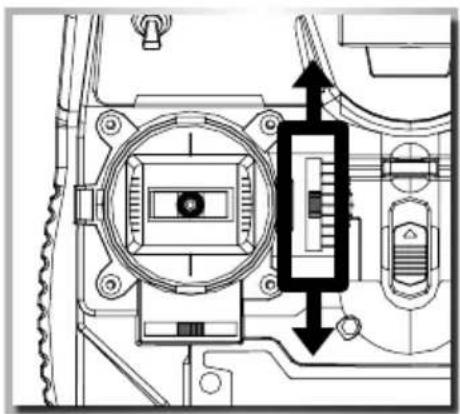
When the model is going backwards
When the model is going forwards
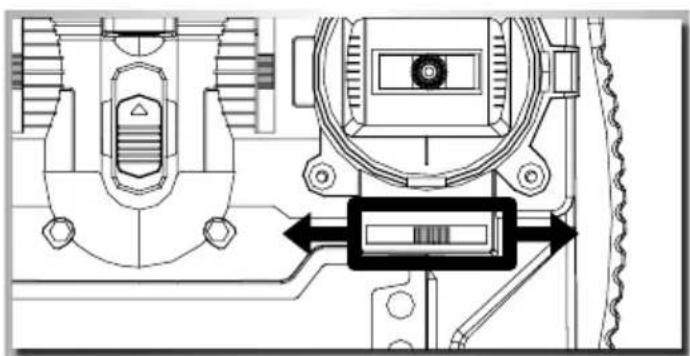
STEERING TRIM
When the RC model does not run straight, adjust the steering trim. Allow the model to move without adjusting the steering so that you can establish the direction of travel and correct it by pushing the steering trim in the opposite direction from the direction in which the RC fork lift is moving.
NOW YOU CAN SET OFF ON YOUR TRAVELS
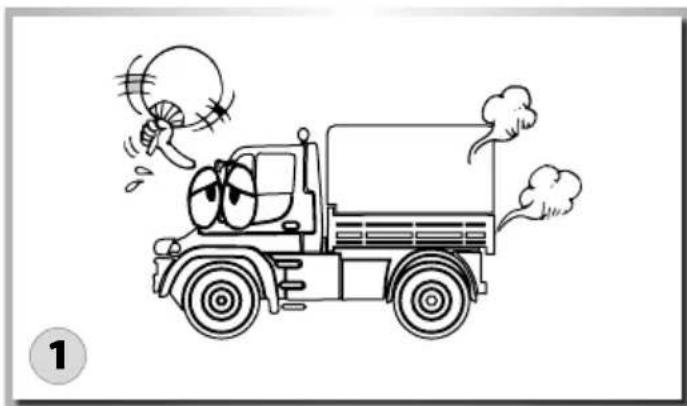
Avoid continuous running. Allow the motor to cool down approximately 30 minutes after running.
Never run the model on public roads or streets, as it could endanger traffic.
Attention!
Switch on transmitter first, then switch on RC model. Make sure to follow this order when turning on your RC model.
CAUTIONS WHEN OPERATING THE RC MODEL
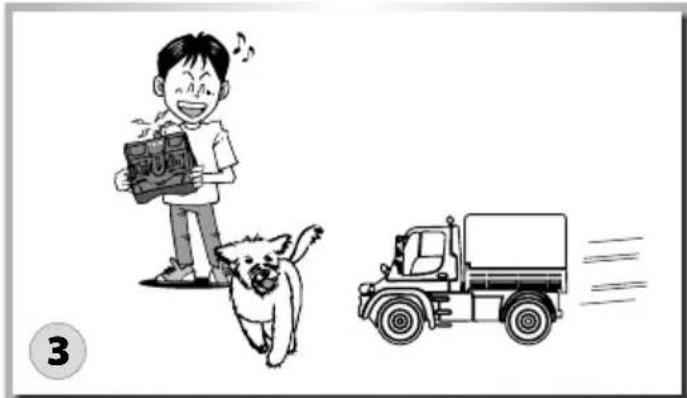
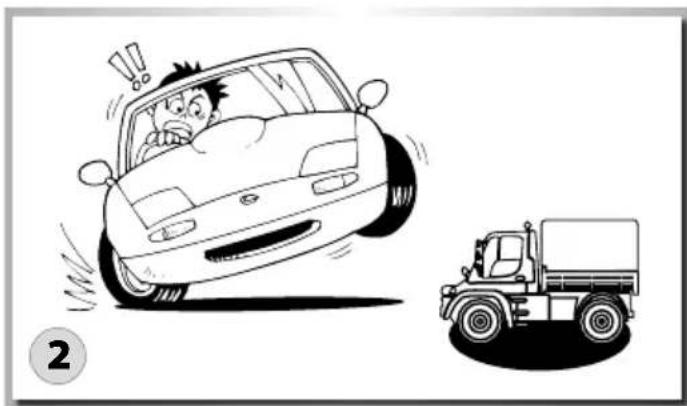
- Never run the model in crowded areas, near or toward people or animals, to prevent property damage and/or personal injury.
- Never run the model on grassland. Twining grass may hinder axle rotation and may cause motor heat buildup.
- Never run the model near rivers, ponds or lakes as to prevent RC model from dropping into the water.
LOAD PLATFORM
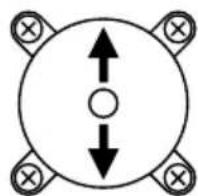
Right control lever
The load platform can be controlled using the transmitter:
To tip the load platform, push the right control lever up.
After unloading, push the lever back down. The load platform will return to its original position.
ROPE WINCH
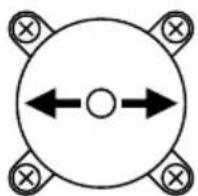
Left control lever
First activate the rope winding function on the underside of the chassis.
Then push the left control lever to the right to unwind the rope.
The control lever must then be pushed to the left to wind the rope back in again.
LIGHTS
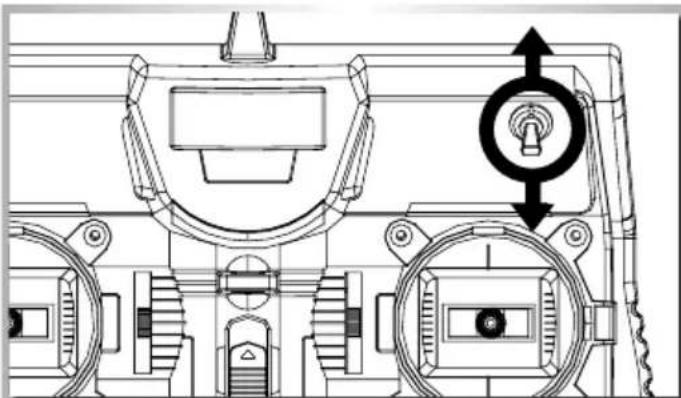
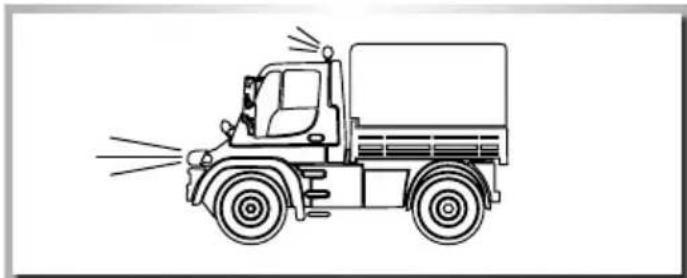
The lights can be switched on or off as required. The switch is on the top right of the transmitter.
BINDING
Assigning a transmitter identifier to the receiver (binding)
When a remote control signal is sent, in addition to control information, an electronic identifier is sent with each transmitter burst. This is how the receiver recognizes that the signal has come from its own transmitter. Since many millions of transmitter identifiers are available, it is extremely unlikely that a different transmitter could influence your receiver.
In case the (radio) connection between the transmitter and the model is lost, the assignment must be renewed. For this purpose, the following procedure is required. So far as possible, it should be undertaken at a place where no other electrical signal - especially from another 2.4-GHz transmitter - can interfere with this transmission.
- With transmitter and model ready to operate but switched off, position them a short distance apart.
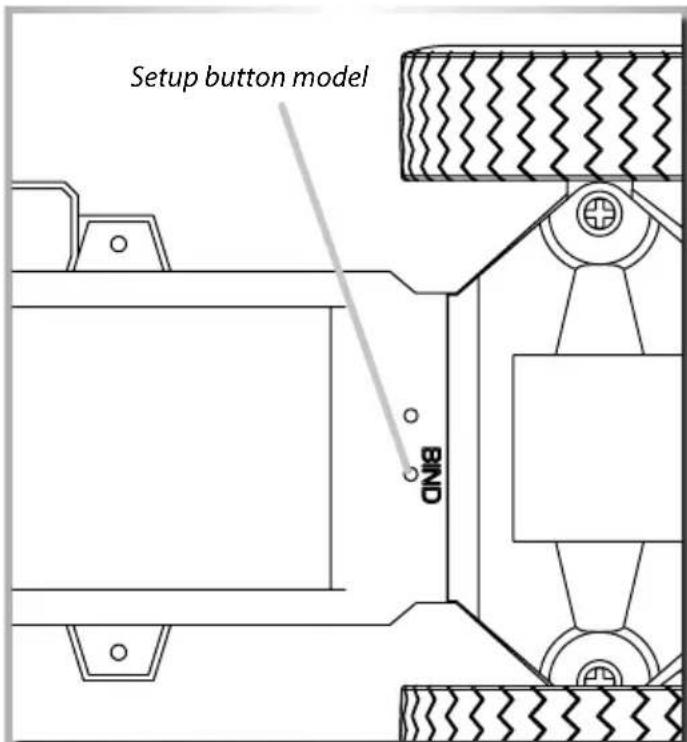
- Switch on the model. Press the "Setup/Binding" button; the LED should begin to flash.
- Now switch on the transmitter.
- When the receiver LED is lit continuously, the binding process is complete and the RC system is ready for use.
SHUT DOWN
Follow reverse procedure to shut down.
- Turn off the model.
-
Turn off the transmitter.
-
Never touch or hinder rotating tire.
- Never run RC model in the rain or let run over puddles, as water may cause trouble with RC model.
- The motor and battery may become hot during operation. Take care when you handle them.
- Remove the batteries from the model and the transmitter when they are not in use.
Cautions when handling batteries/ rechargeable batteries
Use AA rechargeable/non-rechargeable batteries for the RC model and AA rechargeable/non-rechargeable batteries for the transmitter.
- Do not recharge battery that is still warm from use as it may damage the battery. Allow the battery to cool off prior to recharging.
- Remove transmitter battery when not using it for a long term as it may leak and damage transmitter when left for a long period.
- Never incinerate used batteries, as they can explode causing serious accidents.
- Non-rechargeable batteries are not to be recharged.
- Rechargeable batteries are to be removed from the model before being charged.
- Rechargeable batteries are only to be charged under adult supervision.
- Batteries are to be inserted with the correct polarity.
- Exhausted batteries are to be removed from the model.
- Please check the electronics, cable, body and other parts regularly for damage.
TROUBLESHOOTING
| Problem Cause Remedy | ||
| Model does not move | Transmitter switch and/or model switch is/are off Switch on | |
| Weak or no rechargeable batterie/battery in model Install charged rechargeable batterie/battery | ||
| Heat protector has stopped car due to excess heat | Turn off receiver switch. Let RC model cool down for approximately 30 minutes. | |
| No control Weak or no batteries | in transmitter or model Install charged or fresh batteries | |
Cher client
- Mercedes Benz Unimog U300
- FR // Remarque importante
- Limited Warranty
- The Warranty does not cover:
- Declaration of conformity
- CONTENTS
- INCLUDED ITEMS ACCESSORIES
- SAFETY PRECAUTIONS
- Safety Instructions and Intended Use
- This model is not a toy!
- Before use, you must make sure of the following points:
- Pay attention to the charge level indication on your transmitter.
- INSTALLING THE TRANSMITTER BATTERIES
- TRANSMITTER
- CHARGING THE BATTERY PACK
- Warning!!!
- INSERT DRIVING BATTERIES
- START
- THROTTLE TRIM
- STEERING TRIM
- NOW YOU CAN SET OFF ON YOUR TRAVELS
- Attention!
- CAUTIONS WHEN OPERATING THE RC MODEL
- LOAD PLATFORM
- ROPE WINCH
- LIGHTS
- BINDING
- Assigning a transmitter identifier to the receiver (binding)
- SHUT DOWN
- Follow reverse procedure to shut down.
- Cautions when handling batteries/ rechargeable batteries
- TROUBLESHOOTING
- Cher client
Brand : Carson
Model : Unimog U300
Category : Remote control toy