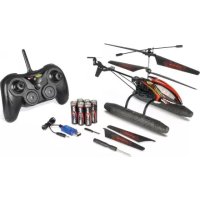
Easy Tyrann 235 - Remote control toy Carson - Free user manual and instructions
Find the device manual for free Easy Tyrann 235 Carson in PDF.


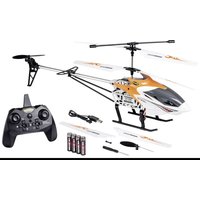
| Brand | Carson |
| Model | Easy Tyrann 235 |
| Product type | Radio-controlled model aircraft |
| Category | Radio-controlled toy |
| Model power supply | Lithium-Polymer (LiPo) battery |
| Remote control power supply | Batteries (not included) |
| Charger included | Yes, specific LiPo battery charger |
| Recommended age | From 14 years (adult supervision required) |
| Usage | Indoors mainly, outdoors in zero wind |
| Control functions | Throttle, direction (pitch, yaw, roll depending on model) |
| Rotor type | Main rotor with blades |
| Maintenance | Check screws and nuts, clean with dry cloth |
| Cleaning | Do not use liquid products, wipe with soft cloth |
| Spare parts | Original Carson parts recommended |
| Repairs | Refer to an authorized Carson service |
| Safety | Read safety instructions carefully before use |
| Warranty | Manufacturer's warranty according to conditions (see manual) |
| Standards | Compliant with European directives 98/37/EC, 89/336/EEC, 1999/5/EC |
| Disposal | Do not dispose of with household waste, appropriate recycling |
| Manual | Available in multiple languages at www.carson-modelsport.com |
Frequently Asked Questions - Easy Tyrann 235 Carson
User questions about Easy Tyrann 235 Carson
0 question about this device. Answer the ones you know or ask your own.
Ask a new question about this device
Download the instructions for your Remote control toy in PDF format for free! Find your manual Easy Tyrann 235 - Carson and take your electronic device back in hand. On this page are published all the documents necessary for the use of your device. Easy Tyrann 235 by Carson.
USER MANUAL Easy Tyrann 235 Carson
Radio ContRolled HeliCopteR RtF
Before using your product for the first time or ordering any spare parts, check that your manual is fully up-to-date.
This manual contains the technical appendices, important instructions for correct start-up and use and product information, all fully up-to-date before going to press.
The contents of this manual and the technical data of the product can change without prior notice.
For the latest version of your manual, see: www.carson-modelsport.com
FR // Remarque importante
natural_image
Line drawing of a game controller with four circular buttons and a handle (no text or symbols)
natural_image
Simple line drawing of a rectangular object with a small protrusion on the left side (no text or symbols)

natural_image
Illustration of a city street scene with a helicopter, cars, buildings, and trees (no text or symbols)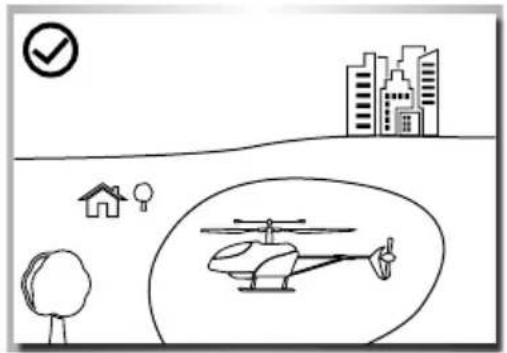
natural_image
Simple line drawing of a helicopter inside an oval, with a checkmark, house, and city skyline in the background (no text or symbols)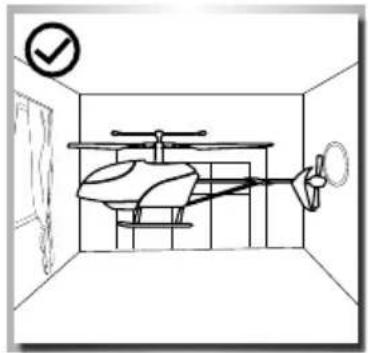
natural_image
Line drawing of a helicopter inside a room with a checkmark icon (no text or symbols)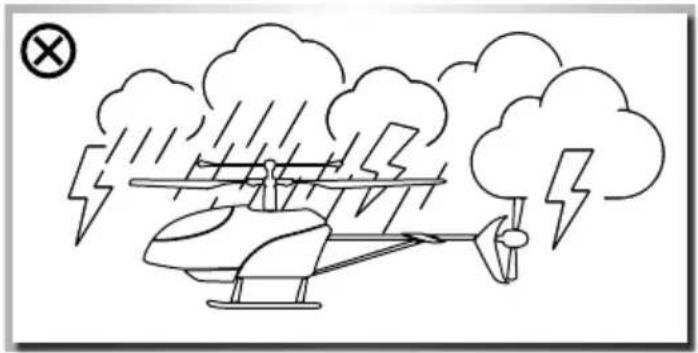
natural_image
Simple line drawing of a helicopter under rain with lightning and smoke clouds (no text or symbols)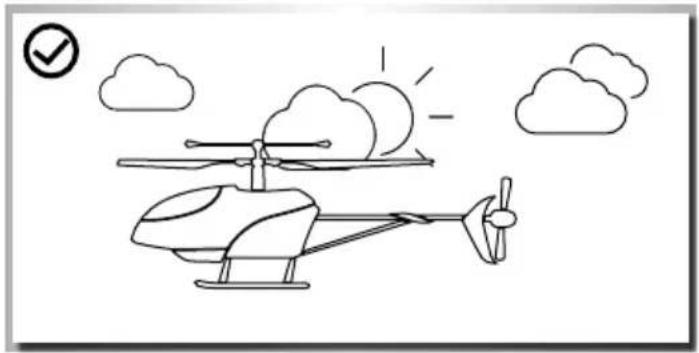
natural_image
Line drawing of a helicopter with sun and clouds, no text or symbols presentnatural_image
Simple line drawing of an umbrella with raindrops and a warning triangle (no text or symbols)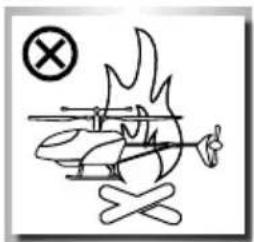
Rotor
natural_image
Diagram of a game controller with a black downward arrow indicating force or movement (no text or symbols present)natural_image
Diagram of a device casing with internal battery pack and mounting holes (no text or symbols)natural_image
Diagram of a game controller with an upward arrow indicating motion or force (no text or symbols present)natural_image
Diagram of a mechanical assembly with connected components and a cable, no visible text or symbols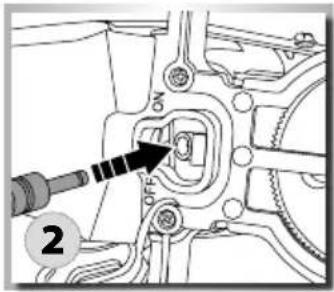
natural_image
Mechanical assembly diagram showing a component with a black arrow pointing to a specific part (no text or symbols present)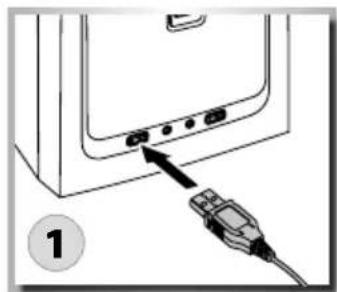
natural_image
Diagram of a computer monitor with an attached USB cable, showing ports and an arrow pointing to the cable (no text or symbols present)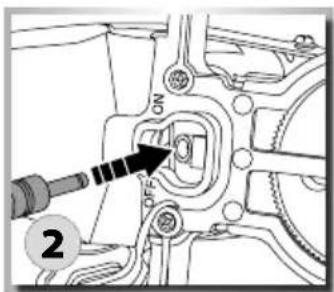
HeLicopter StartkLar macHen
natural_image
Diagram of a game controller with four wheels and directional arrows indicating motion (no text or symbols)natural_image
Line drawing of a game controller with directional arrows indicating movement (no text or symbols)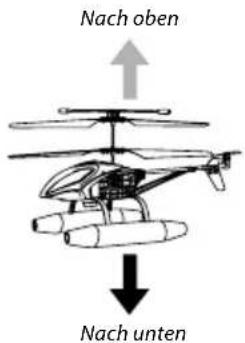
natural_image
Line drawing of a game controller with directional arrows indicating movement or flow (no text or symbols)natural_image
Line drawing of a helicopter with a curved arrow indicating rotation or change (no text or symbols)natural_image
Line drawing of a game controller with directional arrows indicating movement or force (no text or symbols)Vorwärts Rückwärts
natural_image
Line drawing of a helicopter with propeller and rotor, showing directional arrow (no text or symbols)natural_image
Diagram of a helicopter hovering above water with a downward arrow indicating fluid or gravity (no text or symbols)FLugbetrleb
Austrimmen des Helicopters
natural_image
Illustration of two workers in hard hats demonstrating a helicopter rotation exercise (no text or symbols)FeHLerSucHe
We congratulate you for buying this CARSON product, which is designed and manufactured using state of the art technology.
According to our policy of continued development and product improvement we reserve the right to make changes in specifications regarding equipment, material and design at any time without notice.
Specifications or designs of the actual product may vary from those shown in this manual or on the box.
The manual forms part of this product. Should you ignore the operating and safety instructions, the warranty will be void.
Keep this guide for future reference.
Limited Warranty
This product is warranted by CARSON against manufacturing defects in materials and workmanship under normal use for 24 months from the date of purchase from authorised franchisees and dealers. In the event of a product defect during the warranty period, return the product along with your receipt as proof of purchase to any CARSON store.
CARSON will, at its option, unless otherwise provided by law:
(a) Correct the defect by repairing the product without charging for parts and labour;
(b) Replace the product with one of the same or similar design.
All replacement parts and products, and products on which a refund is made, become the property of CARSON. New or reconditioned parts and products may be used in the performance of warranty services.
Repaired or replaced parts and products are warranted for the remainder of the original warranty period. You will be charged for repair or replacement of the product made after the expiration of the warranty period.
The Warranty does not cover:
- Damage or failure caused by or attributable to acts of God, abuse, accident, misuse, improper or abnormal usage, failure to follow instructions, improper installation or maintenance, alteration,
lightning or other incidence of excess voltage or current;
• Damage caused by losing control of your model; - Any repairs other than those provided by a CARSON authorised service facility;
• Consumables such as fuses or batteries; - Cosmetic damage;
• Transportation, shipping or insurance costs; or - Costs of product removal, installation, set-up service adjustment or reinstallation;
- Any changes to plugs and cables, open the housing and damage the sticker.
This warranty gives you specific legal rights, and you may also have other rights which may vary according to the country of purchase.
Declaration of Conformity
Dickie Tamiya GmbH & Co. KG hereby declares that this model kit with radio, motor, battery and charger is in accordance with the basic requirements of the following European directives: 98/37 EC and 89/336/EEC and other relevant regulations of guideline 1999/5/EC (R&TTE).
The original declaration of conformity can be obtained from the following address:
The explanation of the symbol on the product, packaging or instructions: Electronic devices are valuable products and should not be disposed of with the household waste when they reach the end of their service life! Help us to protect the environment and respect our resources by handing this appliance over at the relevant recycling points.

We hope your new Carson model gives you much pleasure.
Before use, read this manual carefully!
Preface ....15
Included Items accessories 16
Safety Precautions ....17
The Helicopter with More Functions....21
your Remote Control Transmitter....21
Input Key Function....22
Battery Mounting 22
LiPo Battery Charging....23
Get the helicopter ready for takeoff....23
Steering your model 24
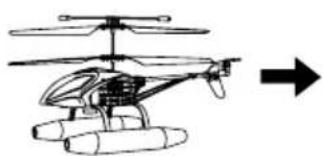
Landing on water 25
Flight Operation....25
Troubleshooting 26
Spare Parts 35
• 2.4 GHz 3.5-channel remote control transmitter
• LiPo battery 3.7 V
- USB charger
• Batteries for the transmitter
- Spare propeller
SaFety precautionS
General
- Read the Operating Manual carefully and keep it for future reference.
• Familiarise yourself with all the instructions for flight operation.
This model is not a toy!
- This radio-controlled model aircraft not a toy. Learning how to control it correctly is a gradual process.
• Children under 14 years of age should be supervised by an adult.
If you are not yet proficient with model aircraft, we suggest you approach a more experienced model pilot or a model-making club about making your first flight attempts.
Flying a radio-controlled model aircraft a fascinating hobby. However, it has to be practised with the necessary caution and consideration.
A radio-controlled model aircraft can cause damage and injury in an uncontrolled flying mode, and the user is liable for any such incident.
As a manufacturer and distributor of the model, we have no influence on the correct handling and operation of the model.
Make sure that you have sufficient insurance cover when practising your hobby or take out a special insurance for model aircraft. The contact address for this is Deutscher Modellfliegerverband e.V. Rochusstr. 104 – 106, 53123 Bonn.
Only a well-maintained model will function properly. Only use approved spare parts and never improvise with any unsuitable items.
It is the user's responsibility to ensure that the model is functioning correctly and that all nuts, bolts and screws are tightened.
Keep the model well beyond the reach of small children. They may unintentionally activate the model and cause themselves injury with it, or they may put batteries and small parts into their mouths and swallow them.
Preparations
Never start flying before you have made sure of the following points:
- Pay attention to visible damage on the model, remote control, battery charger, and lithium battery.
- Ensure that the model is functioning correctly and that all screwed and plugged connections are fitted precisely and tightly.
- The flight battery must be fully charged and correspond to the correct voltage. Only use new/fresh batteries for the transmitter.
• Make sure that all servos respond correctly to the signals of the transmitter.
• Always check the radio operation before starting the model.
Flight operation
The model is primarily designed for indoor flights since its low weight and unstable flight position resulting from the construction type make it very susceptible to air movements.
Moreover, the components are not dust- and moisture-proof.
Do not fly any longer than one battery charge
Afterwards, the model must cool down for at least 5 minutes.
Then recharge the battery. Avoid deep discharge in any case.
General information
• If you have little or no experience with model aircraft you should practice with a flight simulation program first.
- Ask experienced model pilots for advice with the fine settings of your model aircraft.
• Familiarise yourself with the control functions of your trnasmitter.
- Start your first flights, standing behind the model and looking in the flight direction. In this case, the control reaction equals the controlling direction.
- Also familiarise yourself with the movements of the model, when it flies towards you (response opposite to the control direction)!
natural_image
Illustration of a city street scene with a helicopter, cars, buildings, and trees (no text or symbols)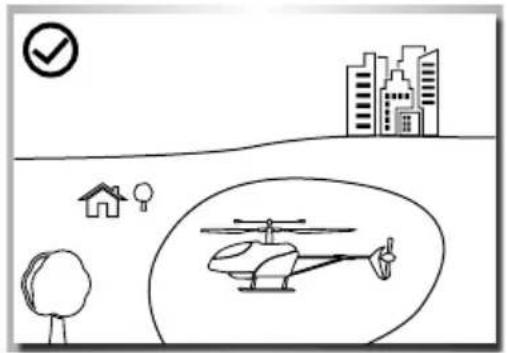
natural_image
Simple line drawing of a helicopter inside an oval, with a checkmark, house, and city skyline in the background (no text or symbols)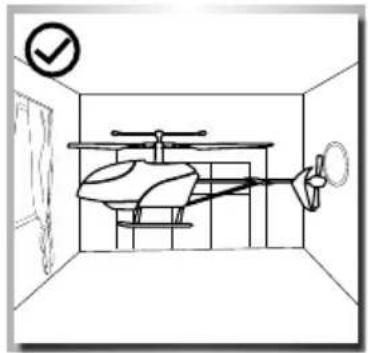
natural_image
Line drawing of a helicopter inside a room with a checkmark icon (no text or symbols)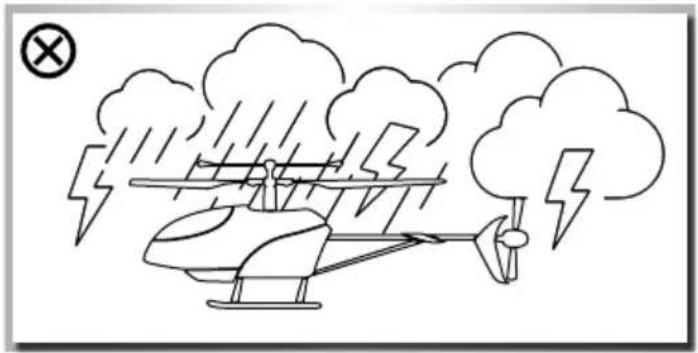
natural_image
Simple line drawing of a helicopter under rain with lightning and smoke clouds (no text or symbols)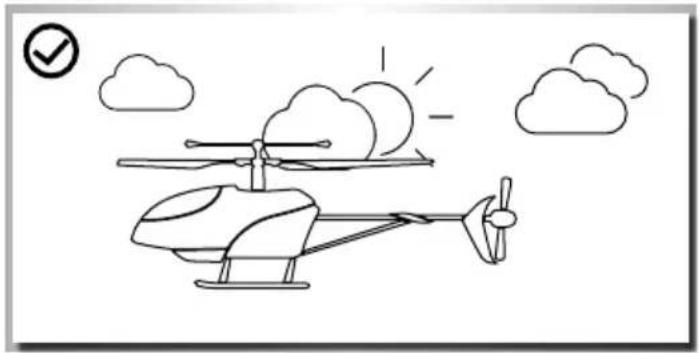
natural_image
Line drawing of a helicopter with sun and clouds, no text or symbols presentIt is best to fly only in closed rooms
• With sufficient free space in all directions
- On flat ground
• Without standing (furniture) or moving obstacles (persons, animals)
• In rooms without air draught
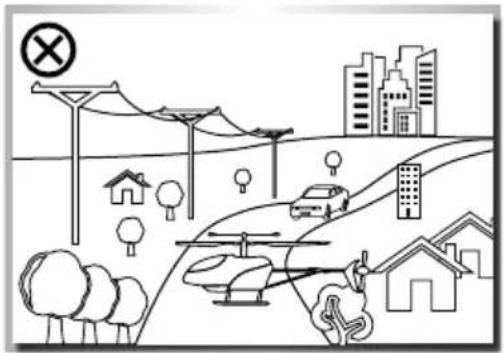
If you want to fly outdoors, do this
• Only when there is no wind
Do not fly
• If you are exhausted or your reaction is impaired in any way.
• At wind-force 1 or greater.
- Keep your model away from high-voltage cables or radio masts. Never use the model in lightning storms. Atmospheric disturbances can affect the signals of your remote controlling transmitter.
- Near any obstacles such as buildings, furniture, persons and animals.
- On public roads
natural_image
Simple line drawing of an umbrella with raindrops and a warning symbol (no text or labels)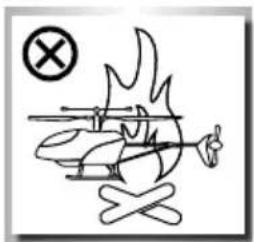
natural_image
Simple line drawing of a helicopter with wings and a cross symbol (no text or labels)Propeller
- Damaged propeller blades must be replaced! Do not try to repair!
- Keep away from the propellers, as soon as the battery is connected.
- Avoid presence in the plane of rotation of the propellers. Do not operate the model while seated, so that you can rapidly get out of the hazardous area if necessary.
Employ exclusively the enclosed battery charger
• Operate the battery charger only on fire resistant surfaces and
- Also place the rechargeable battery/the model on an inflammable surface while charging.
• Ensure sufficient ventilation while charging.
• Never leave the battery charger unattended while charging.
• Only use rechargeable batteries of the same build and capacity.
• Observe correct polarity when charging
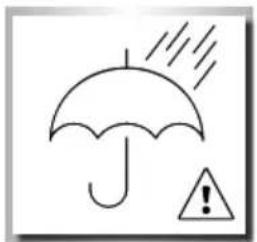
Never subject the transmitter, the rechargeable batteries and the model to adverse ambient conditions!
These are, for instance:
- Wetness, too-high humidity (> 75% rel., condensing). Do not touch the battery charger with wet hands.
- Never operate the model right after it has been brought from cold into warm surroundings. The resulting condensation can destroy the device. Permit the device to attain the ambient temperature while unconnected.
• Dust and flammable gases, vapours or solvents, benzenes - Too-high ambient temperatures (> about +40°C), direct sunlight
- Open fire, ignition sources
• Mechanical stress such as shock, vibration
• Strong contamination
• Strong electromagnetic fields (motors or transformers) or electrostatic fields (charges) - Transmitters (radio telephones, transmitters for model building, etc.). Transmitter emission can lead to the malfunction of charging or to destruction of the battery charger and thereby also of the rechargeable battery.
Permit the battery charger to cool down between charging operations. Disconnect the battery charger from the mains when charging is completed.
A defective battery charger must no longer be operated. If it is assumed that the device is defective, i.e. if
• The device shows visible damage,
• The device no longer works and
• After longer storage under unfavourable conditions or
• After severe transportation stress, it must be switched off without delay and secured against unintentional operation.
Dispose of the unusable (irreparable) battery charger according to the applicable statutory regulations.
For safety and registration reasons (CE), the unauthorised conversion and/or modification of the battery charger is not permitted.
Lithium-polymer/lonen battery
Use the enclosed rechargeable battery for this model only.
Only use a genuine part as a replacement battery.
- Do not overcharge or deep-discharge the battery! Both can cause electrolyte to leak and lead to self-ignition.
- Never mix fully charged rechargeable batteries/batteries with half-charged ones or rechargeable batteries with different capacities.
- Charge the LiPo battery at least every six months in order to avoid deep discharge.
- Remove the charged battery from the battery charger in order to avoid self-discharge.
Defective rechargeable batteries/rechargeable batteries that can no longer be charged must be disposed of as hazardous waste (collection points). Disposal in the household waste is forbidden!
The batteries must not
- Be immersed in liquid,
- Be thrown in the fire or subjected to high temperatures or
- Mechanical stress or
- Be taken apart or damaged
• Or be short-circuited.
f you notice any smell, discolouration, excessive heating, deformation or other abnormalities while using, charging or storing the rechargeable battery:
- Disconnect the rechargeable battery from the battery charger
• Disconnect the rechargeable battery from the consumer
• No longer use the rechargeable battery.
If electrolyte leaks:
- Avoid contact with eyes and skin!
- Wash the affected locations immediately with clear water and
- Consult a physician.
Note
• Non-rechargeable batteries are not to be recharged.
- Rechargeable batteries are only to be charged under adult supervision.
- Batteries/rechargeable batteries are to be inserted with the correct polarity.
• The connection cables are not to be short-circuited.
- regularly inspect the electronics or rechargeable batteries, charger, connection plugs, cables, housings and other parts for damage.
Lithium-polymer/lonen battery safety instruction
- Do not disassemble or convert the rechargeable battery.
- Do not use the rechargeable battery near fire, stoves or other heated places.
- Do not immerse the rechargeable battery in water or expose it to other liquids.
- Do not charge the rechargeable battery near fire or in direct sunlight.
- Only use the specified charger and observe the charging instructions.
- Do not drive any nails into the rechargeable battery, do not strike it with a hammer or step on it.
- Do not subject the rechargeable battery to external pressure or throw it.
- Do not use any rechargeable batteries that are damaged or deformed.
- Do not perform soldering work right at the rechargeable battery.
- Do not reverse polarity or overdischarge the cell.
- Observe proper polarity when charging and discharging.
- Do not connect the rechargeable battery to a power outlet or the cigarette lighter in the car.
- Avoid direct contact with leaking rechargeable batteries.
- Keep the rechargeable battery away from babies.
- Never charge the rechargeable battery beyond the specified time.
-
Do not place the rechargeable battery in a microwave or pressure container.
-
Do not use a leaked battery near fire.
- Do not expose the rechargeable battery to direct sunlight or use it in it (or in the heated car).
- Do not use the rechargeable battery in any areas where static electricity is present or may form since this may damage the safety circuit.
- The rechargeable battery may be charged at temperatures from 0 °C to 45 °C. Do not charge the rechargeable battery out of the recommended temperature range.
- If the rechargeable battery shows rust, has a suspicious smell or appears unusual in any other manner before first use, do not use it and return it to the shop where it was bought.
- Keep the rechargeable battery out of the reach of children. Ensure that the rechargeable battery cannot be taken out of the charger by children.
- If any of the chemicals in the rechargeable battery come into contact with skin or clothes, wash them off immediately with clear water to avoid skin irritation.
- Never charge the rechargeable battery on a carpeted floor as this may cause fire.
- Do not use the rechargeable battery for equipment that is not specified or for any other purposes.
- Do not touch the rechargeable battery if it is leaking. If you do touch the rechargeable battery, you should wash your hands immediately.
- Do not use any batteries that have swelled up or are damaged.
- Never leave a charging rechargeable battery unattended.
tHe HeLicopter wltH more FunctionS
Completely preassembled, no construction required! Fun straight out of the box!
Features:
• Stable flight behaviour
• Completely assembled Ready To Fly
• + Gyro (stabilizing function)
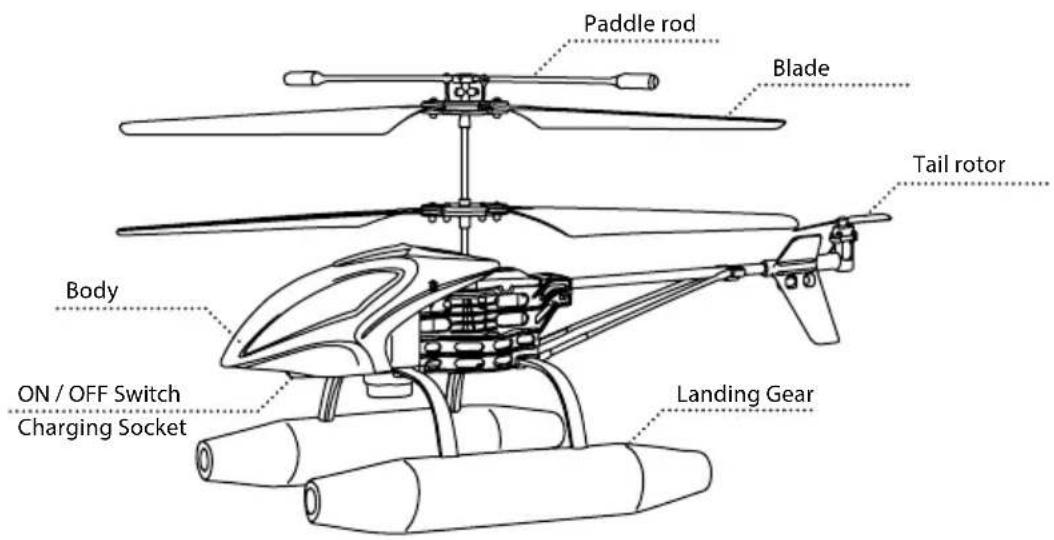
your remote controlL tranSmltter
Transmitter features
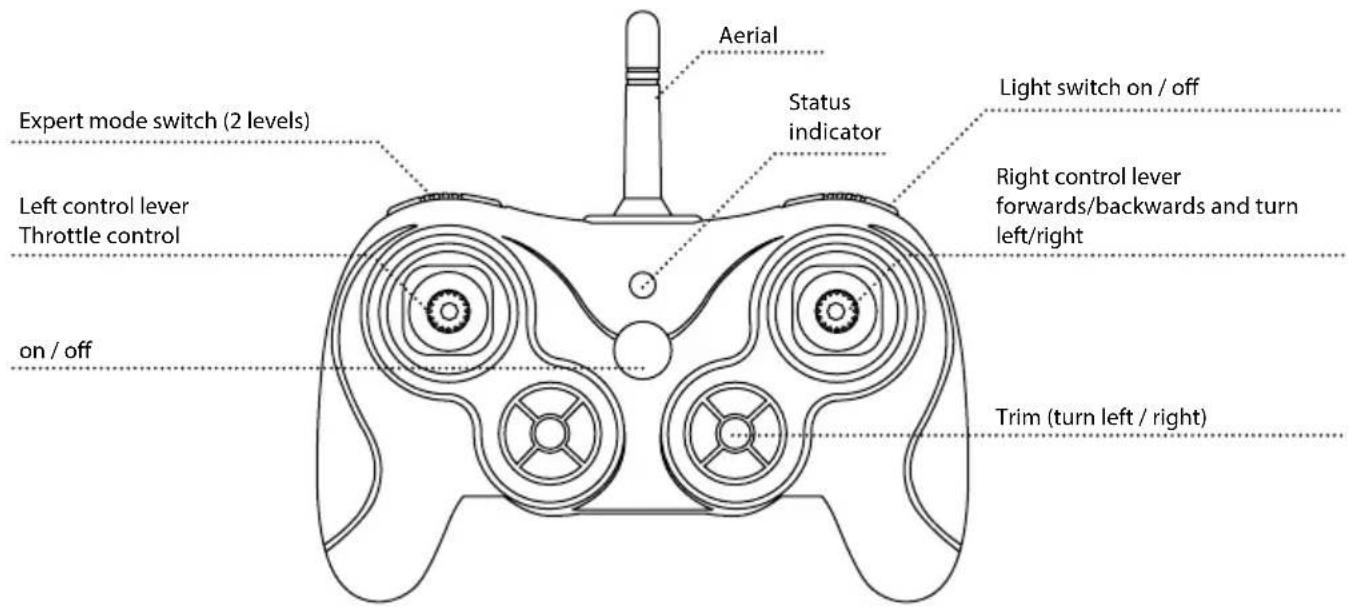
Input key Function
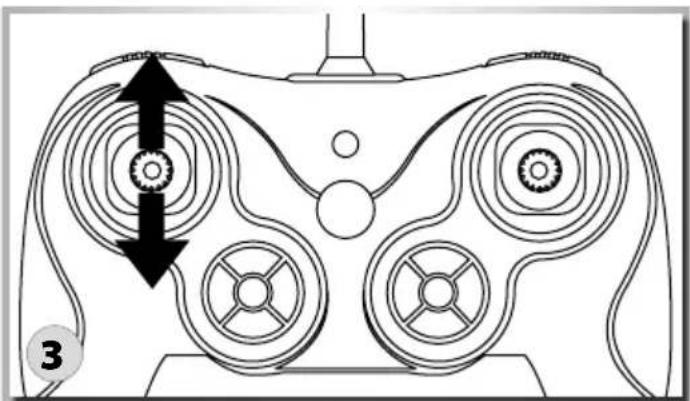
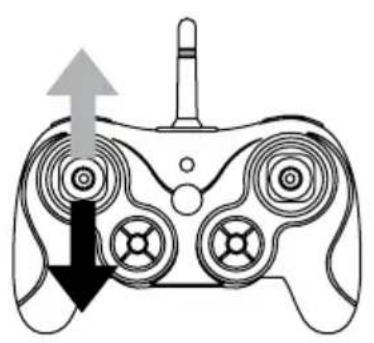
| 1 | Left control lever | Moving the control lever forwards or backwards makes the copter climb or dive. |
| 2 | Right control lever | Moving the control lever forwards or backwards makes the copter move forwards or backwards. Moving the control lever to the left or right makes the copter rotate to the left or right. |
| 3 | Rotate trim | The rotate trim adjusts the rotation to the left or right. |
| 4 | On/off switch | The transmitter is switched on by pressing the pushbutton. |
| 5 Expert mode switch Pressing the switch alters the copter's agility | ||
battery mounting
Attention
• Never mix used and new batteries.
• Never use batteries of different types together.
• Do not attempt to charge non-rechargeable batteries.
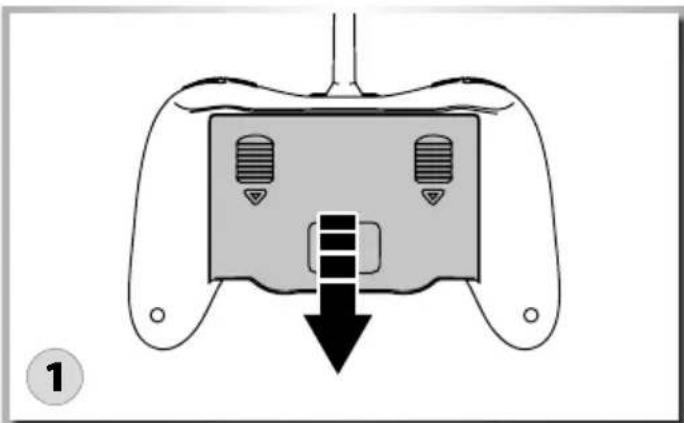
natural_image
Diagram of a game controller with a black arrow indicating downward motion (no text or symbols present)Unscrew the screw from the battery compartment cover. Remove the battery compartment cover.
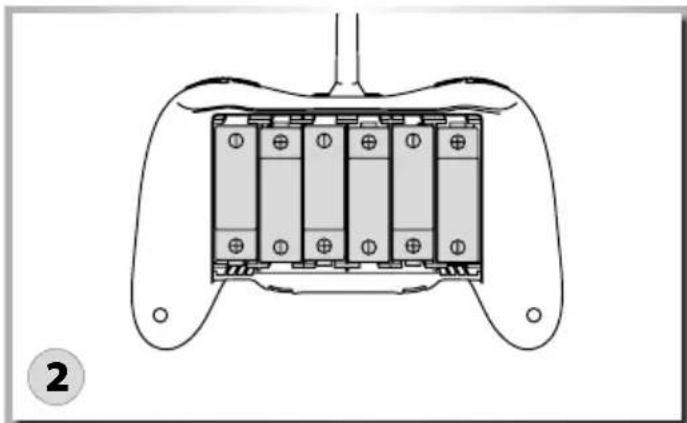
natural_image
Diagram of a game controller casing with internal battery pack and mounting holes (no text or symbols)Insert fresh AA Mignon batteries with the correct polarity in the battery compartment.
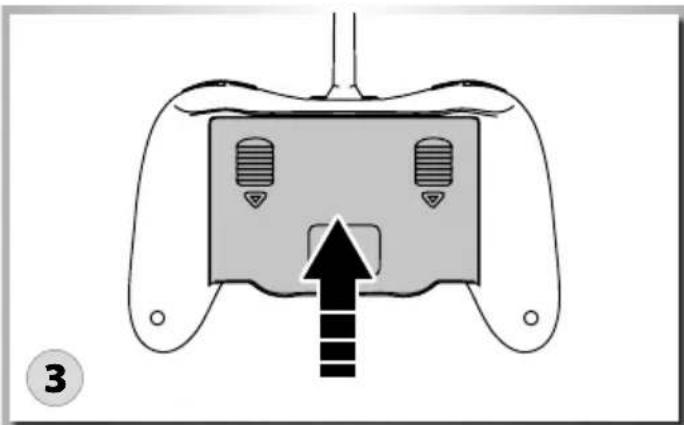
natural_image
Diagram of a game controller with an upward arrow indicating motion or force (no text or symbols present)Close the battery compartment again.
LIpo battery cHargIng
The helicopter is fitted with a LiPo battery.
3.7 V LiPo battery.
The supplied LiPo battery is stored in the body of the helicopter.
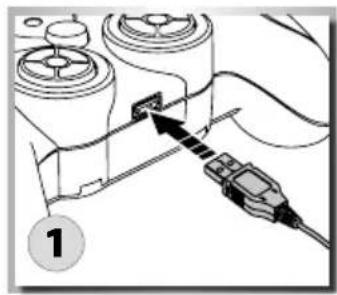
Charging via the radio control unit:
- Switch the radio control unit ON
- Switch the helicopter OFF
- Connect the USB charging cable between the radio control unit and the helicopter (remove rubber protective cap)
- Power LEDs on the transmitter and USB connector glows red (charging battery)
- LED goes out: battery is charged
Charging from a computer USB connection:
- Switch the helicopter OFF
- Connect the USB charging cable between the computer and the helicopter (remove rubber protective cap)
- USB connector LED glows red (charging battery)
- LED goes out: battery is charged
Important: After charging, replace the rubber protective cap!
natural_image
Diagram of a mechanical assembly with a plug inserted into a housing component (no text or symbols visible)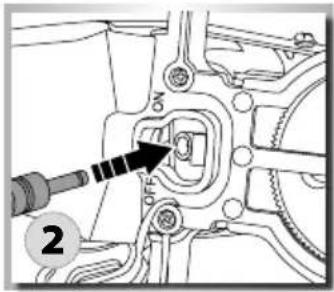
natural_image
Mechanical assembly diagram showing a component with a tool inserted, no visible text or symbols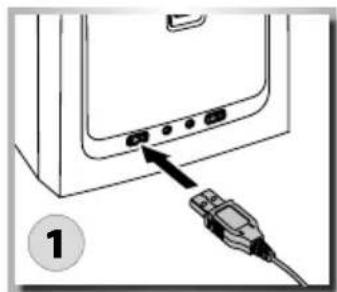
natural_image
Diagram showing a computer monitor with ports and an attached USB cable, labeled with number 1 (no text or symbols on the diagram itself)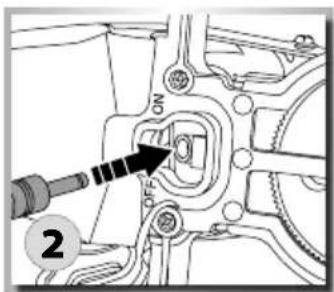
get tHe HeLicopter reaDy For takeoFF
Now we're good to go! But before liftoff, make sure that you have read this manual through completely.
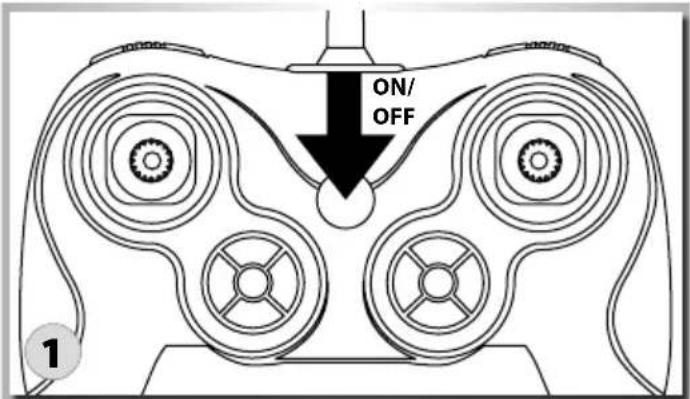
Push the throttle lever fully down and then switch on the transmitter.
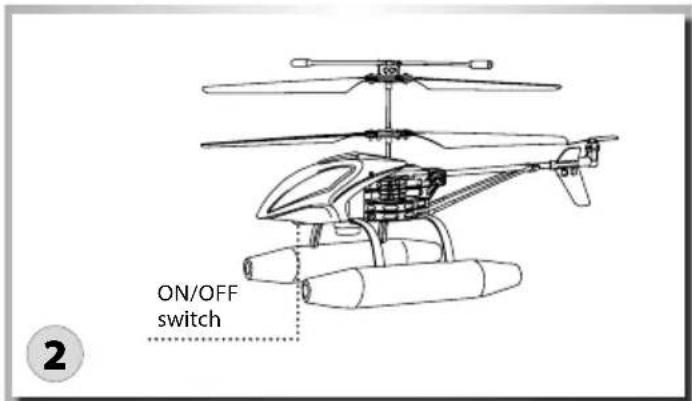
Switch the helicopter on and place it on a level surface.
natural_image
Diagram of a game controller with four wheels and directional arrows indicating motion (no text or symbols)Now move the throttle lever completely up and then back down.
Now the helicopter is ready to launch.
Steering your moDeL
cAution
To avoid loss of control: ALWAYS move the controls S-L-O-W-L-Y! The throttle increases/decreases the flying height your Helicopter.
natural_image
Line drawing of a game controller with directional arrows indicating movement (no text or symbols)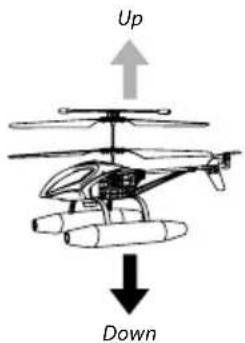
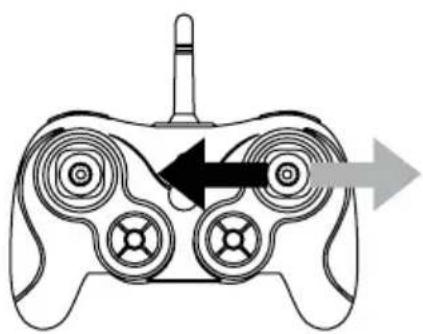
natural_image
Line drawing of a game controller with directional arrows indicating movement or flow (no text or symbols)Right
rotation
Left rotation
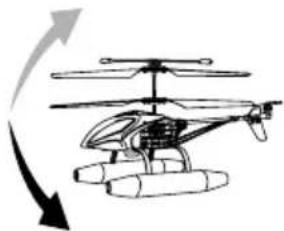
natural_image
Line drawing of a helicopter with a curved arrow indicating rotation or change (no text or symbols)The control lever for Turn turns your Helicopter left/right.
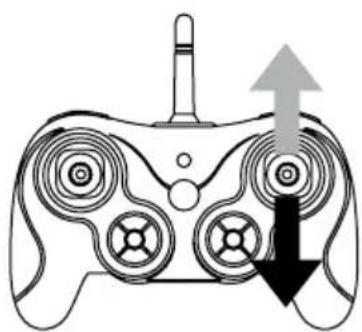
natural_image
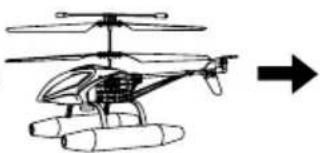
Line drawing of a game controller with directional arrows indicating movement or force (no text or symbols)Forward Backward
natural_image
Line drawing of a helicopter with propeller and rotor, showing directional arrow (no text or symbols)The control lever for Nick turns your Helicopter forwards/backwards.
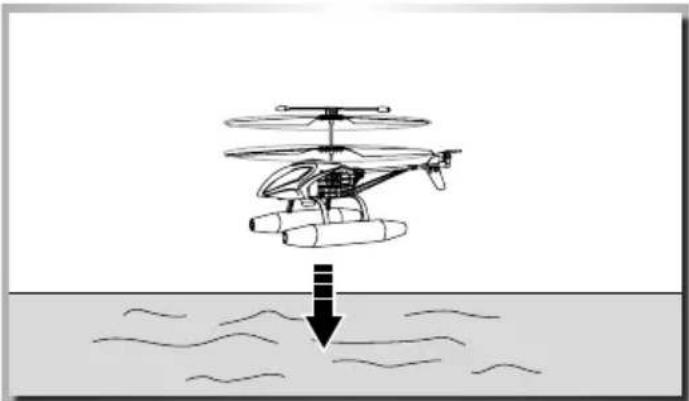
LanDIng on water
Carefully reduce the speed of the rotors.
Now bring the helicopter in to land; take care that the water surface is calm !!!
natural_image
Diagram of a helicopter hovering above water with a downward arrow indicating fluid or gravity (no text or symbols)FLIgHt operation
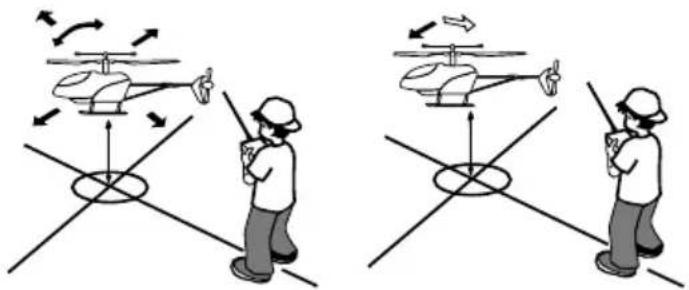
Trimming the quadcopter
Already shortly before the quadcopter takes off, you can recognize whether it wants to turn or glide in a particular direction. Correct the deviations from the vertical ascent with the trim knob of the turn function.
Tip of the fuselage turns to the right:
- Reduce speed and push the trim slider of the turn function on the right remote control lever stepwise to the left.
- Push the throttle-lever forward again and check whether the correction was sufficient, if necessary shift the trim further to the left.
- Repeat the process until the quadcopter no longer shows a tendency to turn to the right.
Tip of the fuselage turns to the left:
- Proceed as described above, but push the trim slider of the turn function stepwise to the right.
natural_image
Illustration of two helicopter operation scenarios showing hand positioning and rotation direction (no text or symbols)troubLeSHootIng
| Problem Cause Reparation | ||
| The model does not move Check, if the transmitter and the model are switched ON. | Switch on the Transmitter and the Model. | |
| Check the battery voltage of transmitter and model | ||
| Motor does not turn Motor is defective Exchange | ||
| Motor is too hot Allow the motor to cool down | ||
| The model reacts incorrectly to the control commands or flies choppily | Check the state of the transmitter and receiver battery charges | |
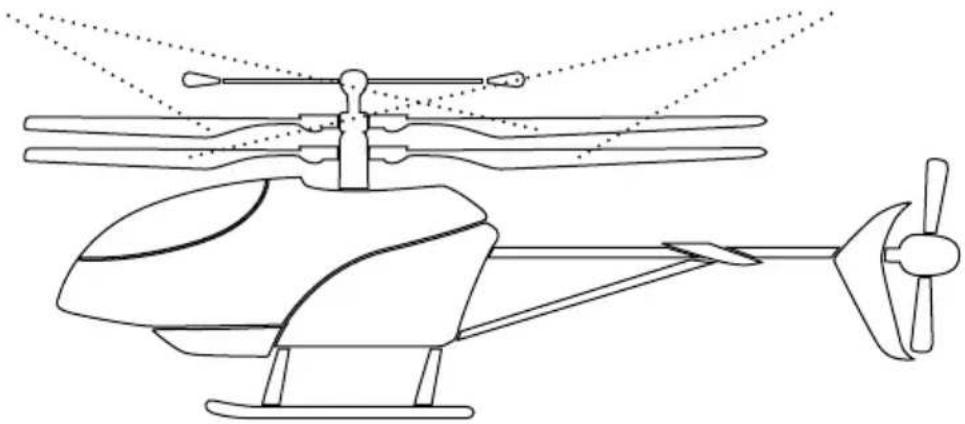
| The model does not take off | Rotor blades are twisted | |
| Motor is too hot Allow the motor to cool down | ||
| Batteries are empty Charge the batteries or exchange them | ||
| The model moves forward/ backward and sidewise, but does not hover | Check whether the Helicopter is exposed to a draught, e.g. by an opened window or an air conditioner. Hover flight is not possible when there is a draught | |
| The model vibrates severely | Check whether the rotors run true | |
| Transmitter and Helicopter can not be binded | Throttle control not set to minimum Throttle need to be minimized to zero | |
| Can not take off | Wrong installation on rotors | |
Blade B Blade A
natural_image
Line drawing of a helicopter with propeller and rotor, no text or symbols presentCher client
natural_image
Pure line drawings of propeller blades without any text or symbols
CARSON-Model Sport
- FR // Remarque importante
- Rotor
- HeLicopter StartkLar macHen
- FLugbetrleb
- Austrimmen des Helicopters
- FeHLerSucHe
- Limited Warranty
- The Warranty does not cover:
- Declaration of Conformity
- SaFety precautionS
- General
- This model is not a toy!
- Preparations
- Never start flying before you have made sure of the following points:
- Flight operation
- Do not fly any longer than one battery charge
- General information
- It is best to fly only in closed rooms
- If you want to fly outdoors, do this
- Do not fly
- Propeller
- Employ exclusively the enclosed battery charger
- Never subject the transmitter, the rechargeable batteries and the model to adverse ambient conditions!
- Permit the battery charger to cool down between charging operations. Disconnect the battery charger from the mains when charging is completed.
- Lithium-polymer/lonen battery
- The batteries must not
- If electrolyte leaks:
- Note
- Lithium-polymer/lonen battery safety instruction
- tHe HeLicopter wltH more FunctionS
- Features:
- your remote controlL tranSmltter
- Transmitter features
- Input key Function
- battery mounting
- Attention
- LIpo battery cHargIng
- The helicopter is fitted with a LiPo battery.
- Charging via the radio control unit:
- Charging from a computer USB connection:
- get tHe HeLicopter reaDy For takeoFF
- Steering your moDeL
- cAution
- LanDIng on water
- Trimming the quadcopter
- Tip of the fuselage turns to the right:
- Tip of the fuselage turns to the left:
- troubLeSHootIng
- Cher client
- CARSON-Model Sport
Brand : Carson
Model : Easy Tyrann 235
Category : Remote control toy