ER626HT90E - Cooker SIEMENS - Free user manual and instructions
Find the device manual for free ER626HT90E SIEMENS in PDF.

User questions about ER626HT90E SIEMENS
0 question about this device. Answer the ones you know or ask your own.
Ask a new question about this device
Download the instructions for your Cooker in PDF format for free! Find your manual ER626HT90E - SIEMENS and take your electronic device back in hand. On this page are published all the documents necessary for the use of your device. ER626HT90E by SIEMENS.
USER MANUAL ER626HT90E SIEMENS
natural_image
Black-and-white photo of a plated dish with raw fish, shrimp, and seafood on a table, alongside a side-by-side photo of a cup of soup with dipping sauce (no visible text or symbols)en Operating instructions 2
de | Gebrauchsanweisung 22
fr Mode d'emploi 42
it Avvertenze per l'uso 62
es Instrucciones de funcionamiento 82
pt Manual de utilização 1 02
nl Gebruiksaanwijzing 122
t r Kullanma Ki lavuzu 142
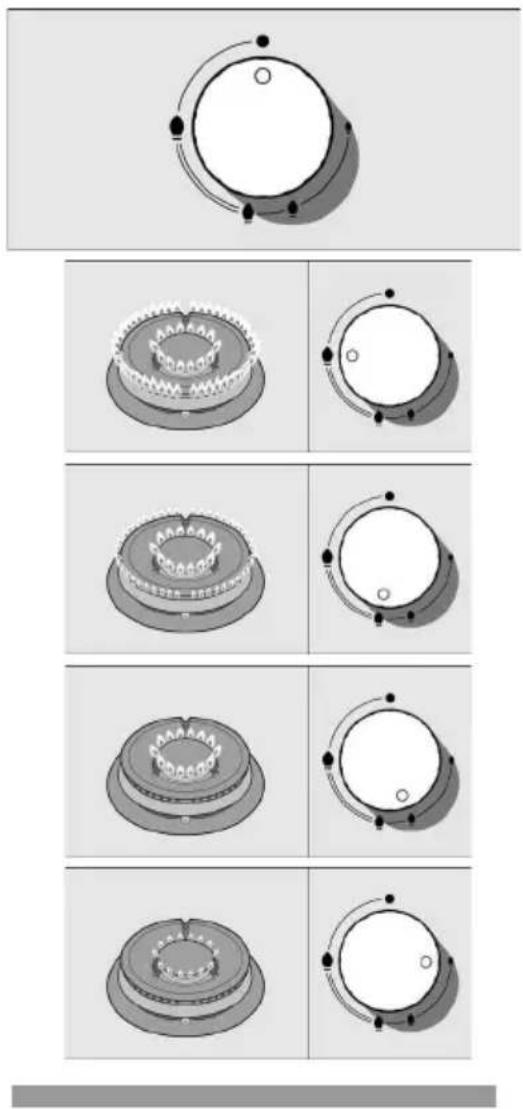
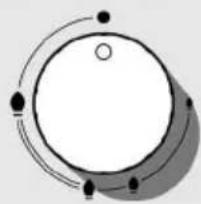
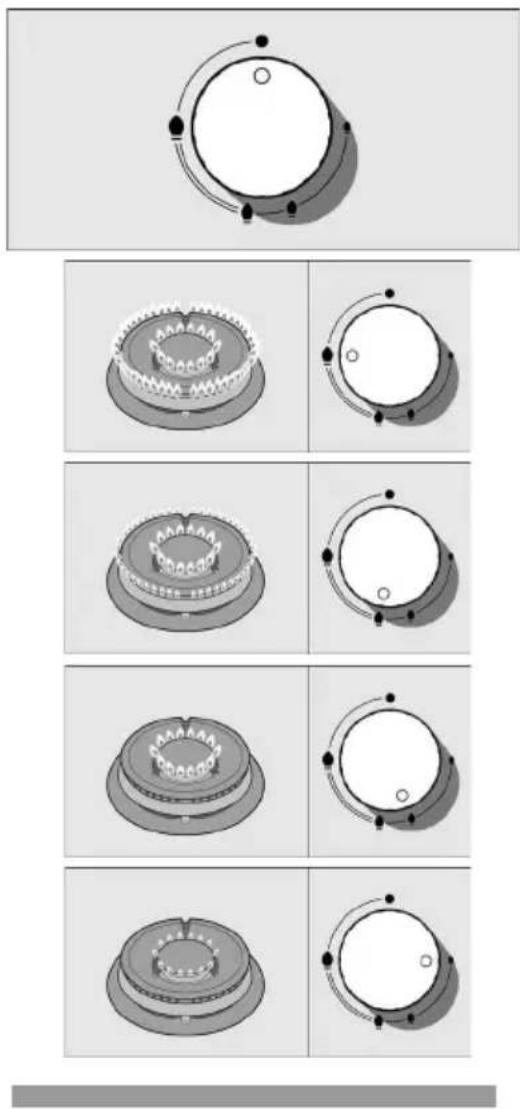
Switching on manually ....
Switching on automatically .....
Safety system . . . . . . . . . . . . . . . . . . . . . .
Switching off a burner ....
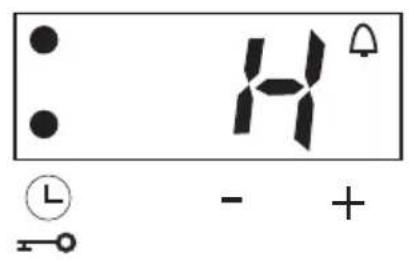
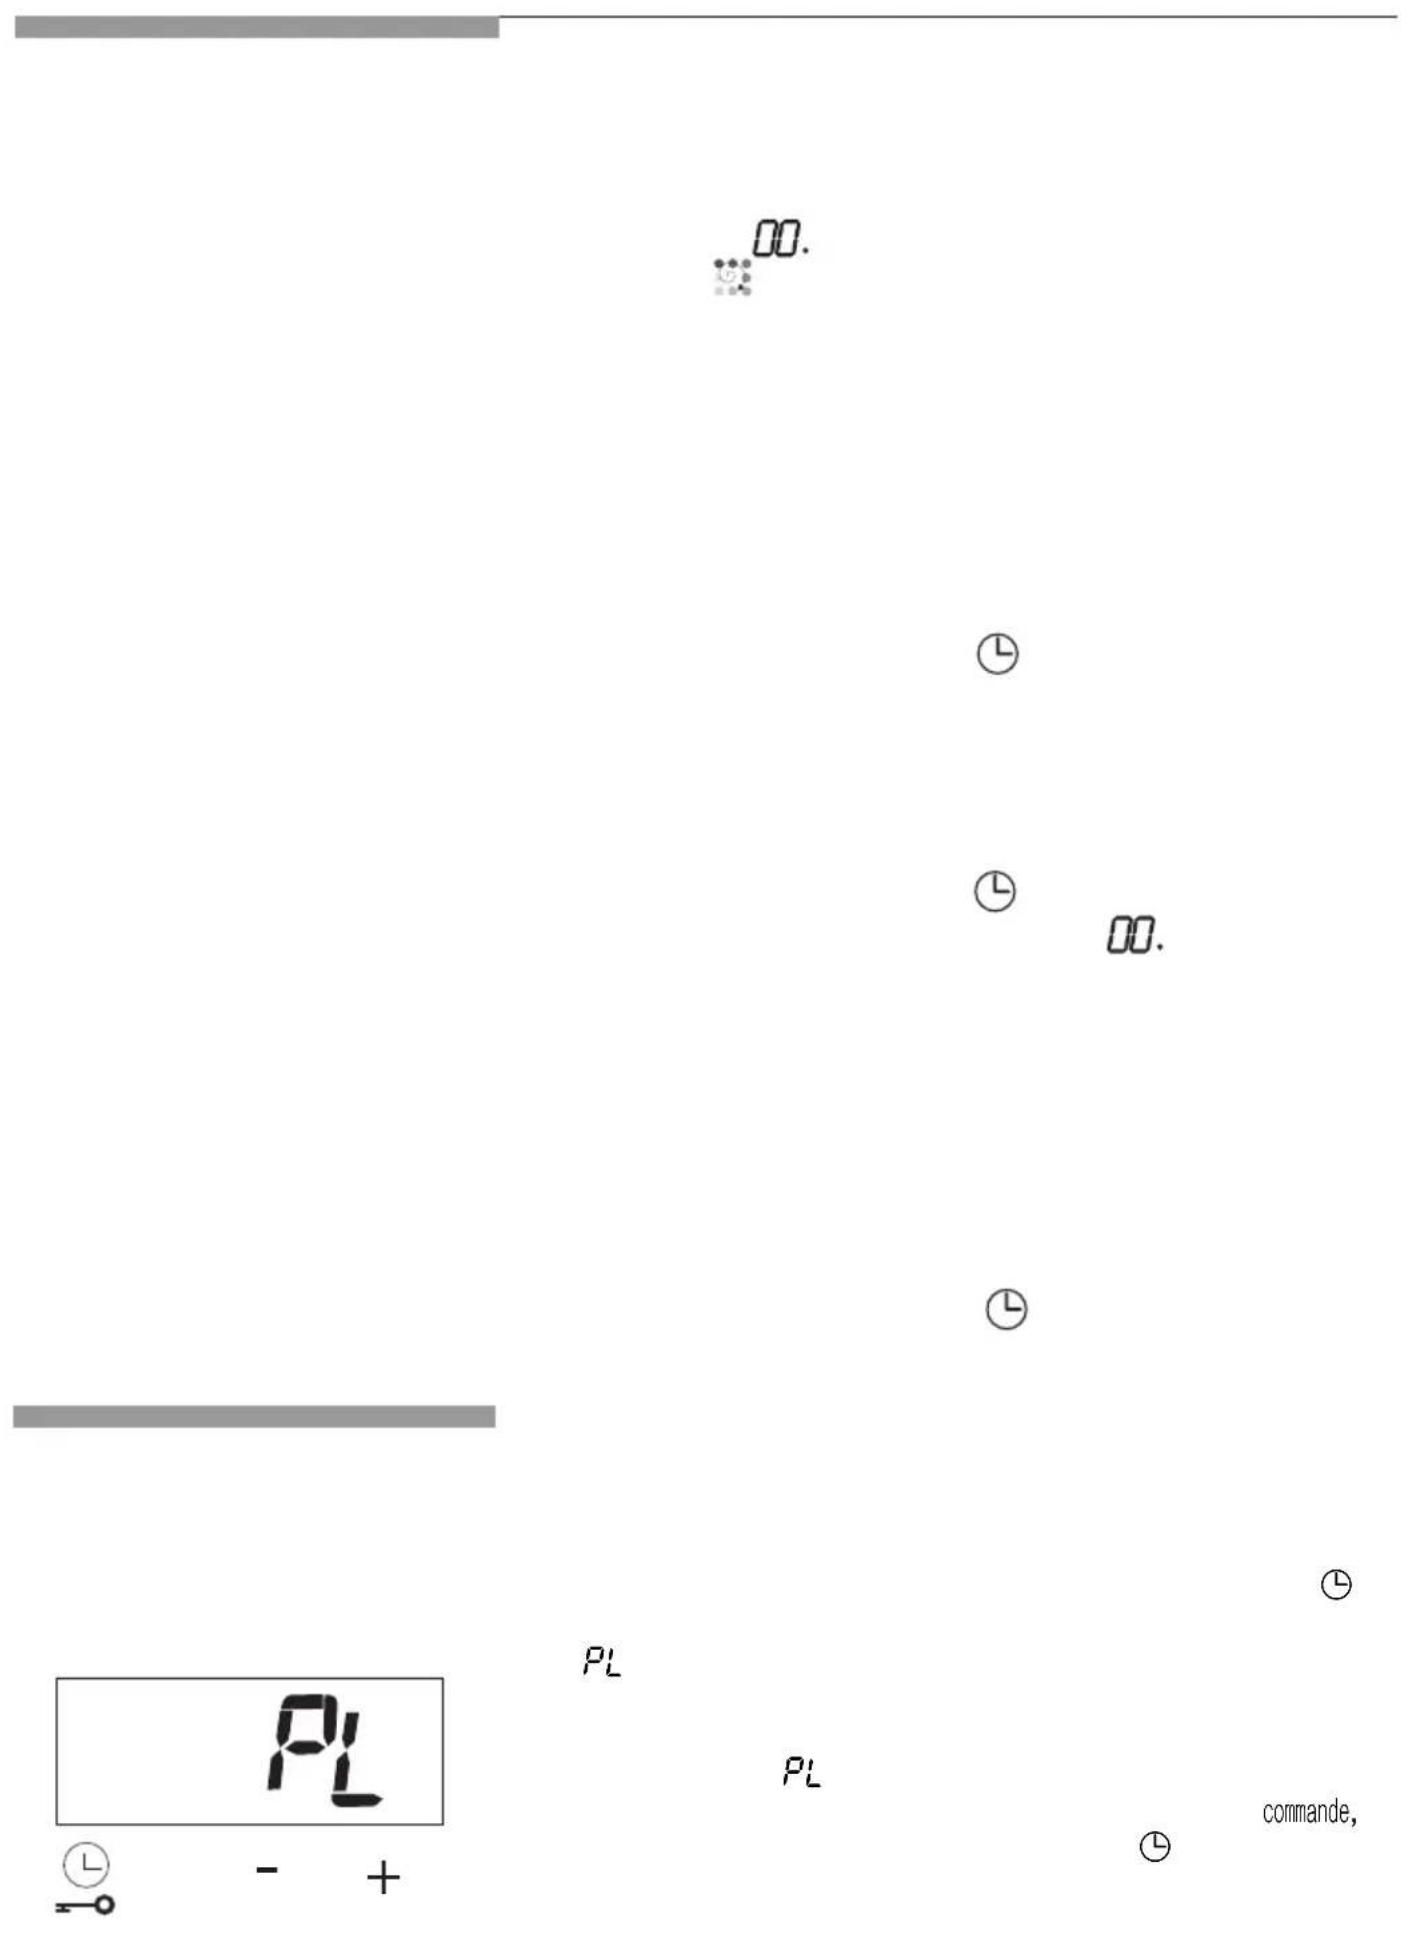
Power levels ....
Warnings . . . . . . . . . . . . . . . . . . . . . . . . . . .
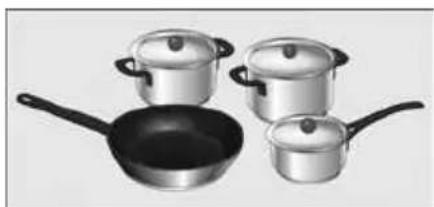
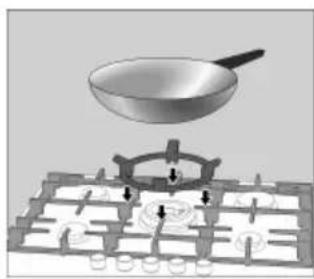
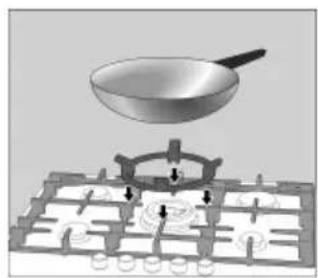
Suitable pans ....
Wok pan . . . . . . . . . . . . . . . . . . . . . . . . . .
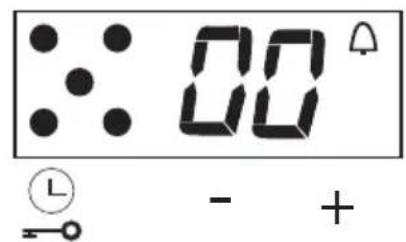
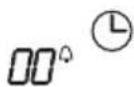
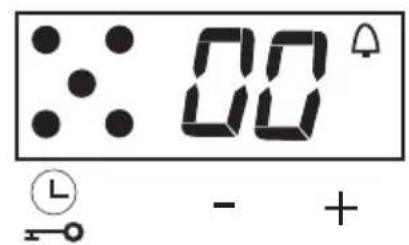
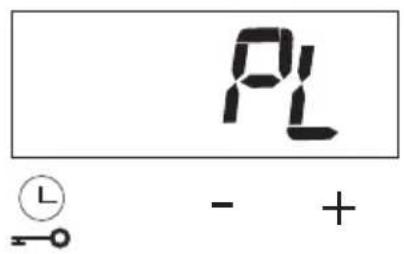
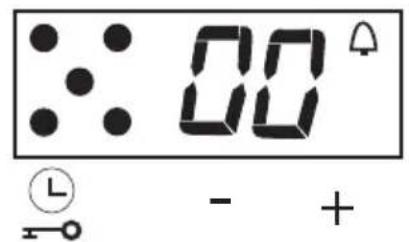
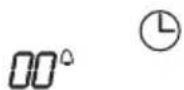
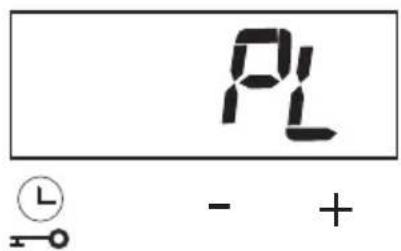
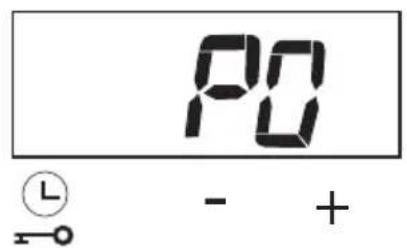
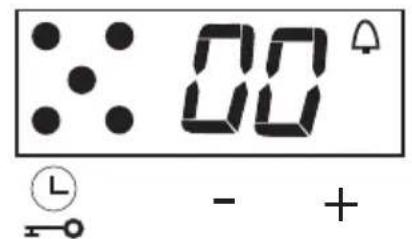
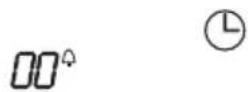
Timer Function ....
Kitchen timer 1.0
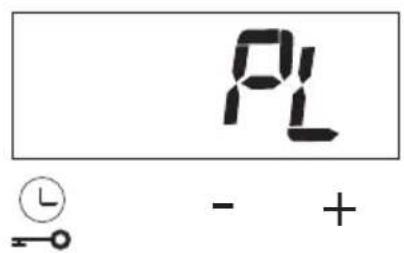
Programming
Other functions ....
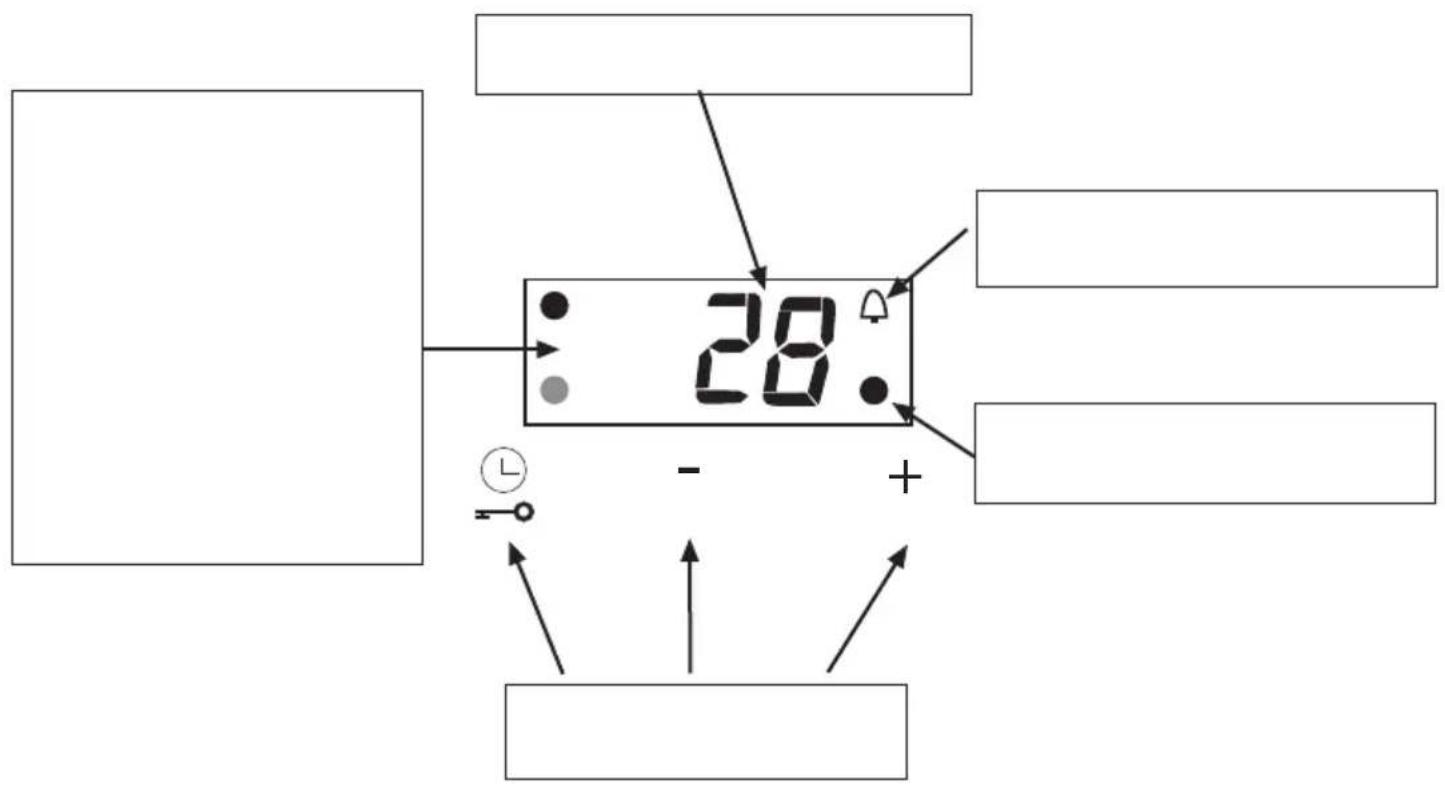
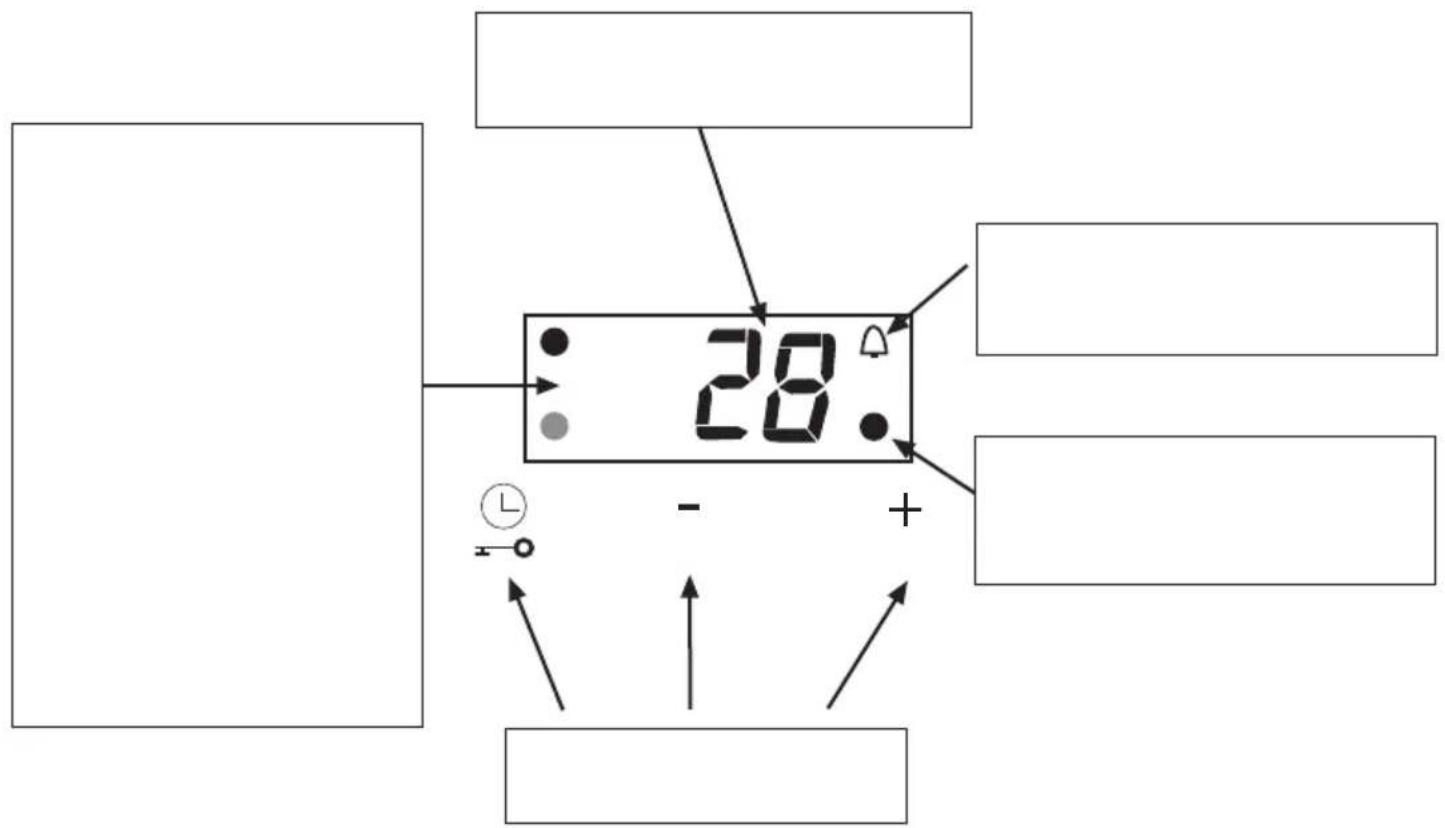
The digital display ....
Accessories ....
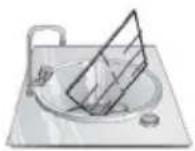
Additional pan support ....
Additional coffee maker support ....
Cooking recommendations ....
Precautions for use ....
Cleaning and maintenance ....
Cleaning
Unsuitable products ....
Maintenance ....
Faults
Technical Assistance Service .....
Warranty conditions ....
Used appliances and packaging .....
Environmentally-friendly waste management .
Read these instructions carefully. Reading these instructions will enable you to use your appliance safely and effectively. Keep the operation and installation instructions and provide them along with the appliance if it is passed on to another user.
The manufacturer is exempt from all responsibility if the requirements of this manual are not complied with.
The images shown in these instructions are for guidance only.
Do not remove the appliance from its protective packaging until it is installed in the unit.
Do not switch on the appliance if it is damaged in any way. Contact our Technical Assistance Service.
This appliance is class 3 type, according to the EN 30-1-1 regulation for gas appliances: built-in appliance.
This appliance must only be used in well ventilated places.
All operations relating to installation, connection, regulation and conversion to other gas types must be carried out by an authorised installation engineer, respecting all applicable regulations, standards and the specifications of the local gas and electricity suppliers. Special attention shall be paid to ventilation regulations.
It is recommended you contact the Technical Assistance Service to change to another gas type.
Before installing your new hob, ensure that it is being installed according to the assembly instructions.
This appliance leaves the factory set to the type of gas that is indicated on the specifications plate. If this needs to be changed, please consult the assembly instructions.
This appliance has been designed for home use only, not for commercial or professional use. This appliance cannot be installed on yachts or in caravans. The warranty will only be valid if the appliance is used for the purpose for which it was designed.
This appliance is only intended for cooking purposes, not as a heating system.
This appliance is not intended for operation with an external clock timer or a remote control.
Never leave the appliance unattended during operation.
This appliance may be used by children 8 years old and older and by persons with reduced physical, sensory or mental capacity or a lack of experience or knowledge if they are supervised or they have been instructed about
the safe use of the appliance and have understood the associated dangers.
Never let children play with the appliance. Cleaning and user maintenance must not be carried out by unsupervised children.
Accumulation of unburned gas in an enclosed area carries a risk of deflagration. Carefully read the instructions and warnings on the operation of gas burners.
The hotplates and surrounding area become very hot. Never touch the hot surfaces. Children under 8 years old must be kept at a safe distance from the appliance.
The hotplates become very hot. Never place combustible items on the hob. Never place objects on the hob.
Do not store or use corrosive chemicals, steamers, inflammable materials or non-food products below or near this domestic appliance.
Fat or oil which is overheated can catch fire easily. Do not leave oil or fats to heat up unattended. If oil or fats do catch fire, never use water to put the fire out. Risk of burns! Put the fire out by covering the pan with a lid and switch off the hotplate.
Pans which are damaged, are not the right size, hang over the edge of the hob or are not positioned correctly can cause serious injuries. Follow the advice and warnings provided relating to the cooking pans.
The kitchen will become hot and humid and combustion products produced when this gas appliance is used. Make sure the kitchen is well ventilated, particularly when the hob is in use: either keep the natural ventilation apertures open, or install a ventilation system (extractor hood). Intense prolonged use of the appliance may require additional or more effective ventilation: open a window or increase the power of the ventilation system.
Do not subject the appliance to draughts. These might blow out the burners.
Do not clean the hob using a steam cleaner. Risk of electrocution!
In the event of a malfunction, turn off the appliance's gas and electricity supply. For repairs, call our Technical Assistance Service.
Do not tamper with the appliance's interior. If necessary, call our Technical Assistance Service.
If one of the control knobs will not turn, do not force it. Call the Technical Assistance Service immediately, so that they can repair or replace it.
Cracks or fractures in the glass may cause electric shocks. Switch off the circuit breaker in the fuse box. Contact the after-sales service.

text_image
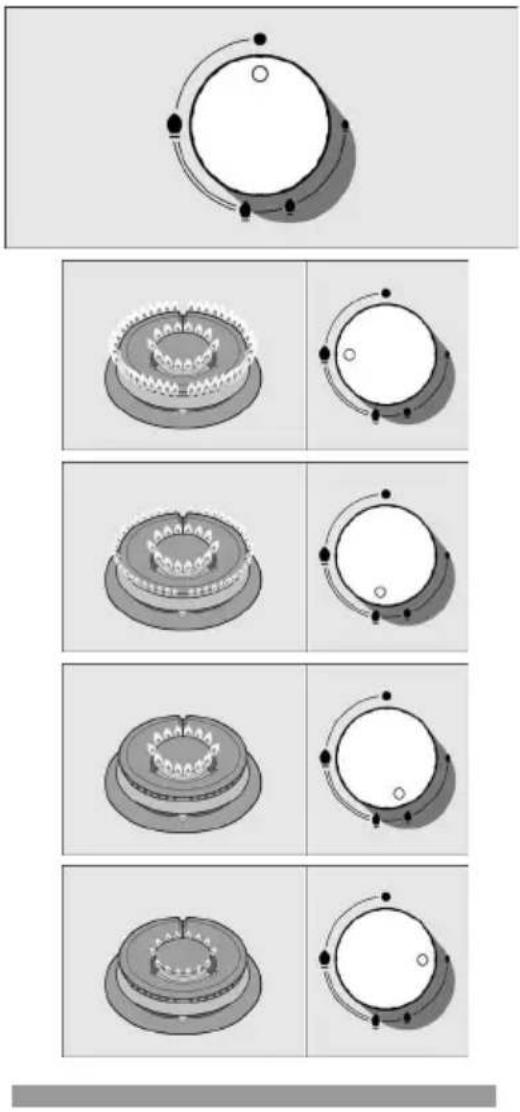
Diagram showing a circular object with internal curved lines and symbols, alongside a plus sign with a small circle and minus sign.
natural_image
Diagram showing a mechanical component with an arrow indicating motion or force, no text or symbols present.
natural_image
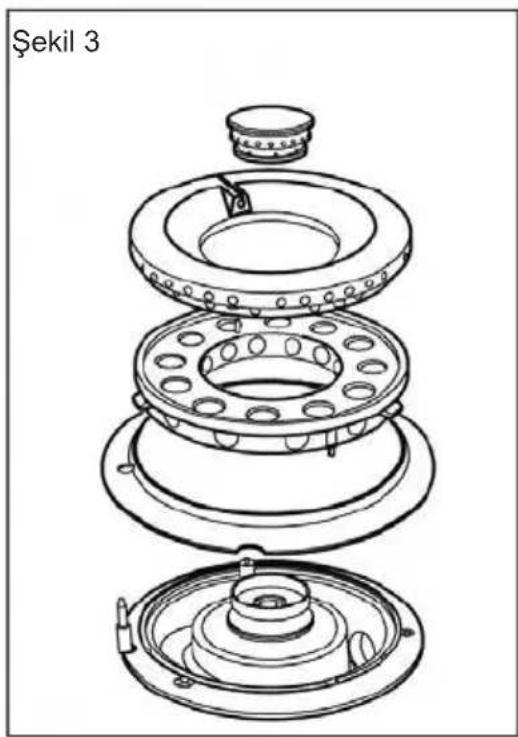
Exploded view diagram of a mechanical assembly showing layered components (no text or labels)
natural_image
Technical diagram of a mechanical assembly with arrows indicating motion or force directions (no text or symbols present)
natural_image
3D rendering of a gray hat with two small cylindrical objects on its side (no text or symbols)
natural_image
Six grayscale diagrams showing mechanical components arranged in a grid, with no visible text or symbols.It is normal to hear a slight whistling noise while the burner is operating.
When it is first used, it is normal for the burner to give off odours; this does not pose any risk and does not indicate a malfunction; they will disappear in time.
A few seconds after the burner is switched off, a sound (thud) will be produced. This is not a fault - this means that the safety device is no longer operating.
Keep the burner as clean as possible. If the ignition sparkers are dirty they will not light properly. Clean them periodically using a small non-wire brush. Bear in mind that the ignition sparkers must not suffer any serious impacts.
An orange-coloured flame is normal. This is caused by the presence of dust in the atmosphere, spilt liquids, etc.
If the burner flames are accidentally blown out, switch off the burner operating control knob and do not try to relight it for at least one minute.
natural_image
Assorted kitchenware including cooking pots, a frying pan, and a black frying pan (no text or symbols visible)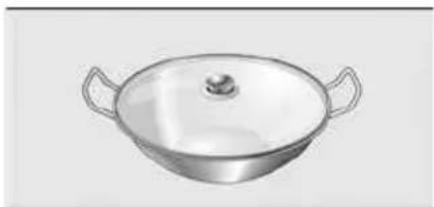
natural_image
Illustration of a stainless steel wok with lid and side handles (no text or symbols)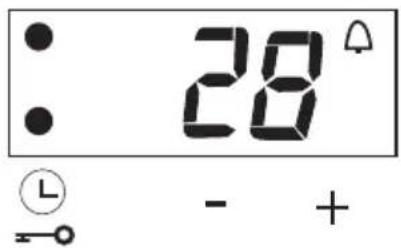
text_image
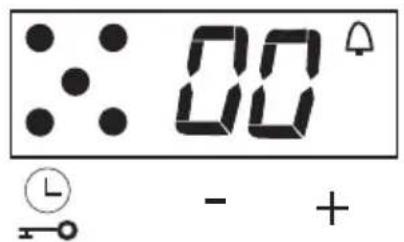
28° L - +00^ ①
00°
L
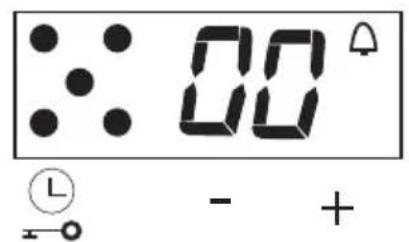
text_image
00 L - +


text_image
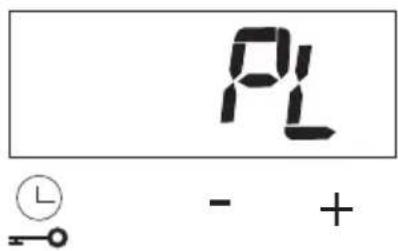
PL - +


text_image
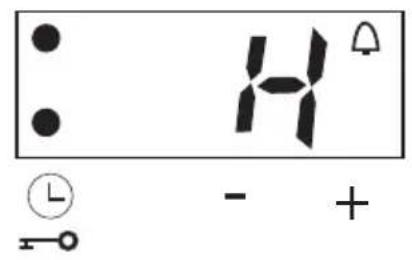
H L - + +H
H
H

text_image
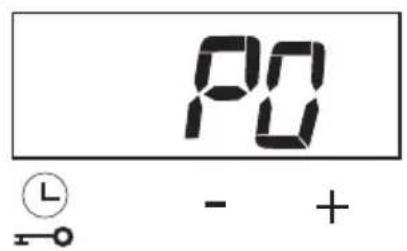
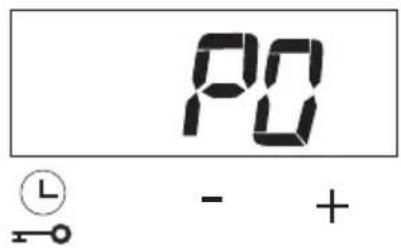
Po L - +PO
PO
text_image
28 - +H PL PO ). .
natural_image
Illustration of a frying pan above a grid-patterned floor with arrows indicating direction (no text or symbols)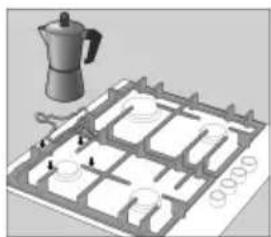
natural_image
3D diagram of a coffee maker with a kettle and tray, no visible text or symbols
natural_image
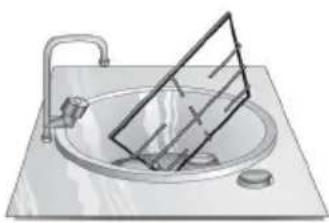
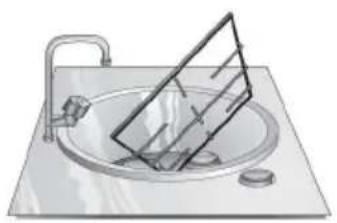
Illustration of a washing machine with a plate and sink (no text or symbols)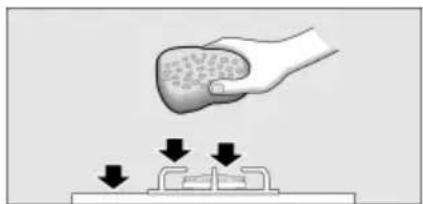
natural_image
Illustration of a hand holding a textured object above a mechanical component with downward arrows indicating force or movement (no text or symbols)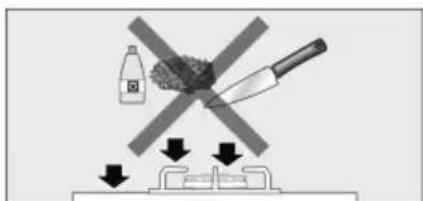
text_image
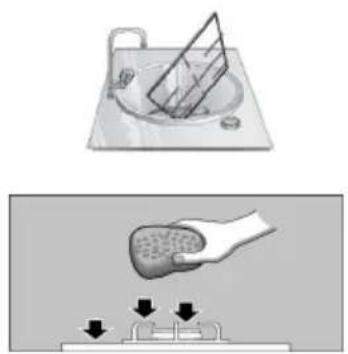
Warning symbol showing a crossed-out tool over food, with arrows indicating removal or damage points.Once the appliance is cool, use a sponge to clean it with soap and water.
After each use, clean the surface of the respective burner parts once they have cooled down. If any bits are left (overcooked food, drops of grease etc.), however few, they will become stuck to the surface and more difficult to remove later. The holes and grooves must be clean for the flame to ignite properly.
The movement of some pans may leave metal residue on the pan supports.
Clean the burners and pan supports using soapy water and scrub with a non-wire brush.
Alternatively, the pan supports can be put in the dishwasher. Use the dishwasher manufacturer's recommended detergent. If the pan supports are very dirty, they should be cleaned previously.
Do not put the burner caps in the dishwasher.
If the pan supports are fitted with rubber rests, ensure that these are also cleaned. The rests may come loose and the pan support may scratch the hob.
Always dry the burners and pan supports completely. Water droplets or damp patches on the hob at the start of cooking may damage the enamel.
After cleaning and drying the burners, make sure the burner covers are correctly placed on the burner flame diffuser.
Never slide pans across the glass surface, as you may scratch it. In addition, try not to drop heavy or sharp objects on the glass. Never strike any part of the hob.
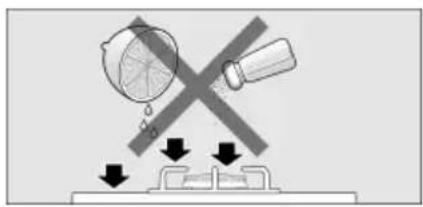
Do not use steam cleaners. This could damage the hob.
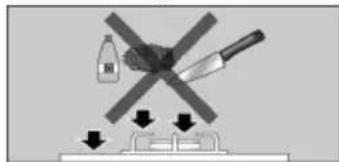
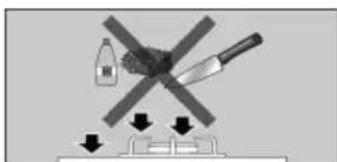
Never use abrasive products, steel scourers, sharp implements, knives, etc. to remove bits of hardened food from the hob.
If your hob is fitted with a glass or aluminium panel, never use a knife, scraper or similar to clean the point where it joins the metal.
Do not use knives, scrapers or similar implements to clean the point where the glass meets the burner trims, the metal frames or the glass/aluminium panels, if fitted.
text_image
Diagram showing a device with a cross-shaped warning sign and downward arrows indicating process flow or damage.Fault Possible cause Solution
| The general electrical system is malfunctioning. | Defective fuse. Check the fuse in the rain fuse box and | change it if it is damaged. |
| The automatic safety switch or circuit breaker has tripped. | Check the main control panel to see if the automatic safety switch or circuit breaker has tripped. | |
| The automatic switching on function does not work. | There may be food or cleaning products stuck between the ignition sparkers and the burners. | The space between the ignition sparker and the burner must be clean. |
| The burners are wet. Dry the burner caps carefully. | ||
| The burner caps are not correctly positioned. | Check that the covers are correctly positioned. | |
| The appliance is not earthed, is poorly connected or the earthing is faulty. | Contact the installation technician. | |
| The burner flame is not uniform. | The burner components are not correctly positioned. | Correctly place the parts on the appropriate burner. |
| The grooves on the burner are dirty. Clean the grooves on the burner. | ||
| The gas flow is not normal or there is no gas. | The gas supply is blocked via intermediary valves. | Open all gas taps. |
| If the gas is supplied from a gas cylinder, check that this is not empty. | Change the gas cylinder. | |
| The kitchen smells of gas. A gas tap has been left on. Turn off the taps. | ||
| The burner immediately switches off after releasing the control knob. | The control knob was not held down for long enough. | Once the burner is on, hold the control knob down a few seconds longer. |
| The grooves on the burner are dirty. Clean the grooves on the burner. | ||

I NHALT
Sicherheitshinweise ....
text_image
Diagram showing a circular object with internal curved lines and symbols, alongside a plus sign with a small circle and minus sign.
natural_image
Diagram showing a mechanical component with an arrow indicating motion or force, no text or symbols present.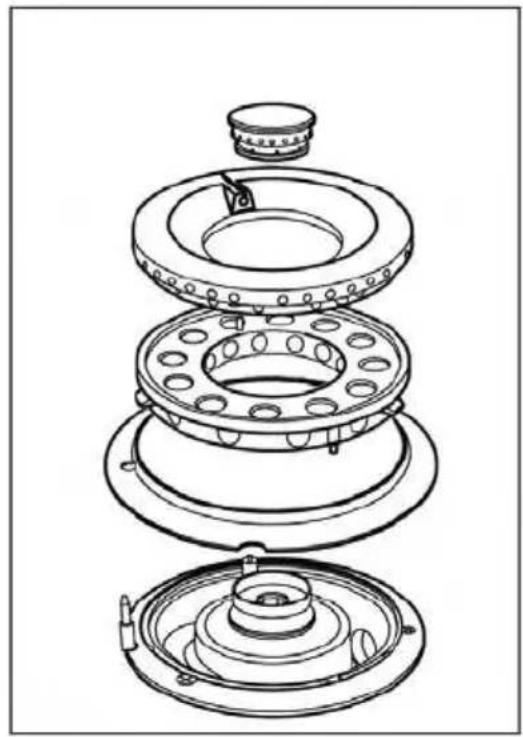
natural_image
Exploded view diagram of a mechanical assembly showing layered components (no text or labels)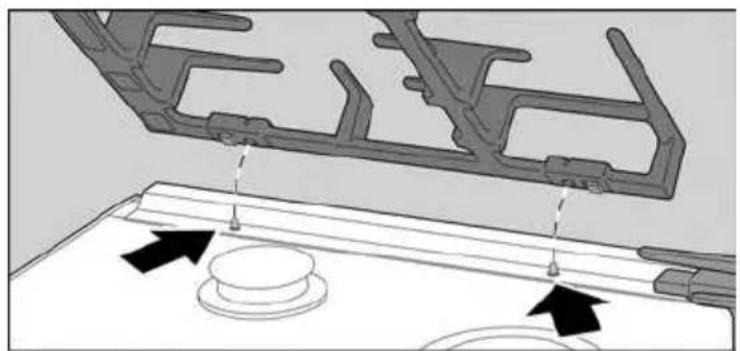
natural_image
Technical diagram of a mechanical assembly with arrows indicating motion or force directions (no text or symbols present)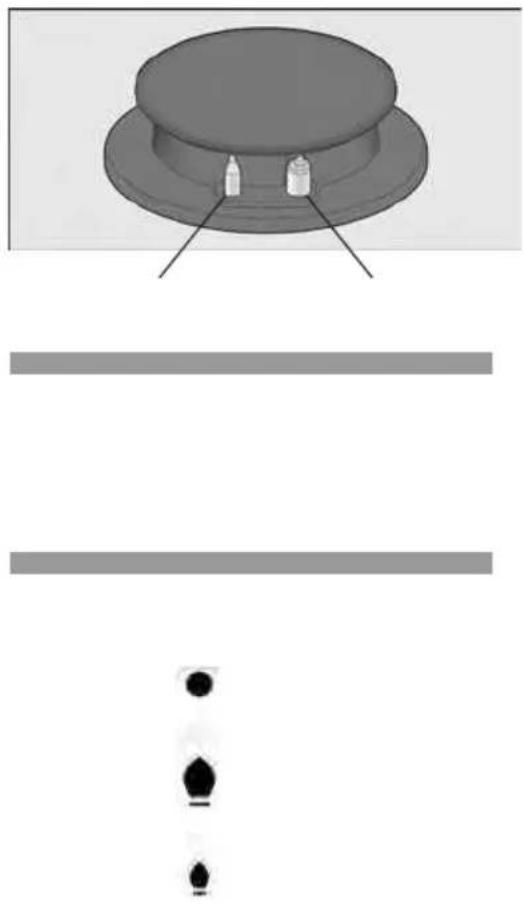
natural_image
3D diagram of a hat with two small objects on top, above and below horizontal lines (no text or symbols)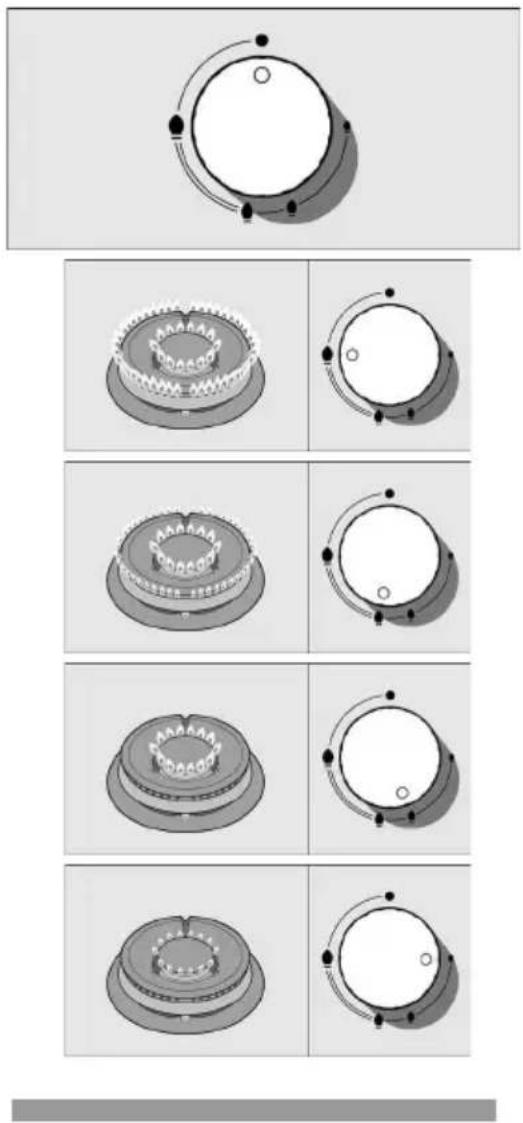
natural_image
Diagram showing a multi-step mechanical assembly with circular components and mounting holes (no text or labels)natural_image
Assorted kitchenware including a frying pan, cooking pots, and a pan (no text or symbols visible)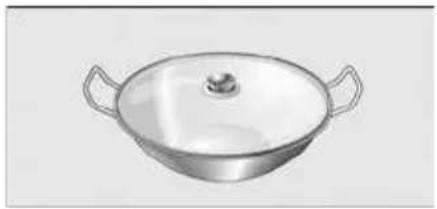
natural_image
Illustration of a stainless steel wok with lid and side handles (no text or symbols)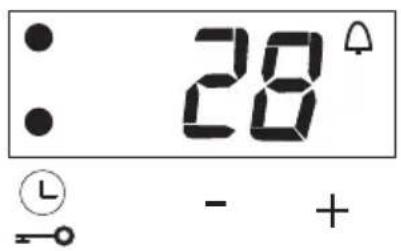
text_image
28° - +00°
L
00°
L
text_image
00 L - +


(
L
00.
L
text_image
PL L - +(
PL
PL.
L.
text_image
H - +H
H
H
text_image
Po L - +PO
PO

text_image
28 - +
text_image
H PL PO
natural_image
Illustration of a frying pan above a grid with mechanical components (no text or symbols)
natural_image
3D architectural layout diagram showing a kettle and grid-like structure with no visible text or symbols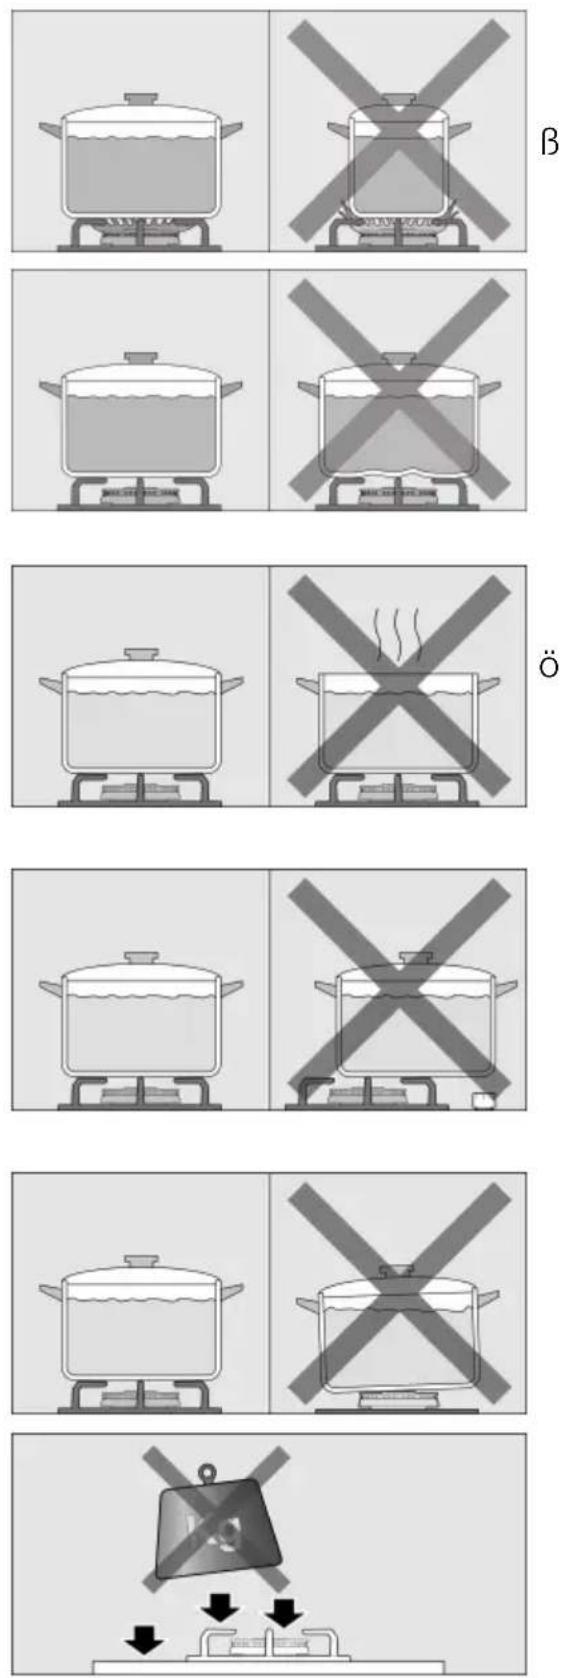
natural_image
Simple line drawing of a sink with a triangular object on top, no text or symbols present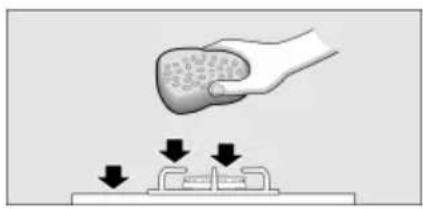
natural_image
Illustration of a hand holding a textured object above a scale with downward arrows indicating pressure or force (no text or symbols)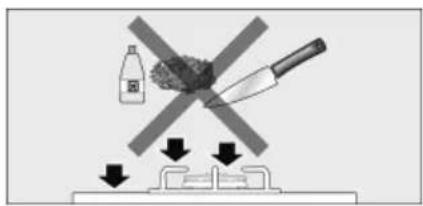
text_image
Warning symbol showing a crossed-out tool over a surface with downward arrows indicating safety or hazard.text_image
Diagram illustrating a mechanical or electrical hazard with a cross symbol indicating failure or damage, and downward arrows indicating safety or damage.Service Technique .....
Conditions de garantie ....
text_image
Diagram showing a circular object with internal curved lines and symbols, alongside a mathematical expression with operators and signs.
natural_image
Diagram showing a mechanical component with a downward arrow indicating motion or force, no text or symbols present.
natural_image
Exploded view diagram of a mechanical assembly showing layered components (no text or labels)
natural_image
Technical diagram of a mechanical assembly with arrows indicating motion or force directions (no text or symbols present)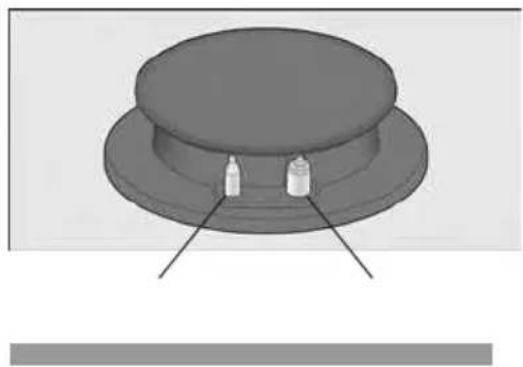
natural_image
3D rendering of a hat with two small vials on its side (no text or symbols)
natural_image
Simple circular diagram with a central circle and surrounding dots, no text or symbols present.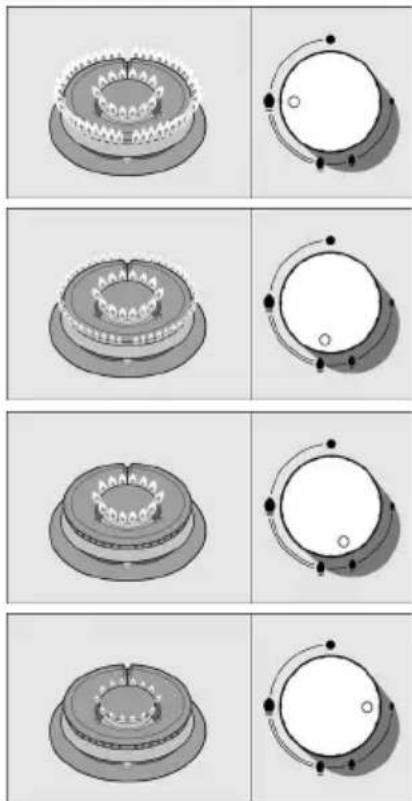
natural_image
Six 3D mechanical component diagrams showing progressive assembly or assembly steps, with no visible text or symbols.natural_image
Assorted kitchenware including a frying pan, cooking pots, and a wok (no text or symbols visible)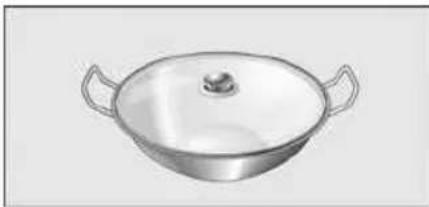
natural_image
Illustration of a stainless steel wok with lid and side handles (no text or symbols)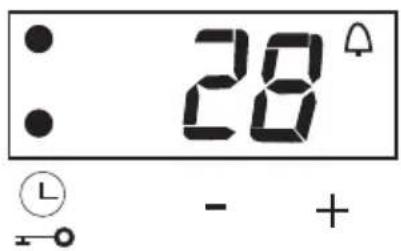
text_image
28° L - +00^
00°
L
text_image
00 L - +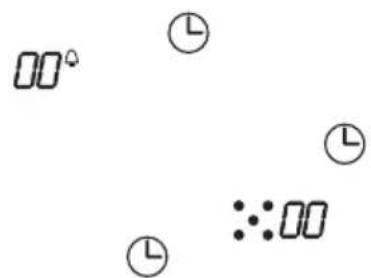
text_image
00° L L L ::002 BRÛLEURS EN MÊME TEMPS.
text_image
00. 00. 00. PL PL PL commande, - +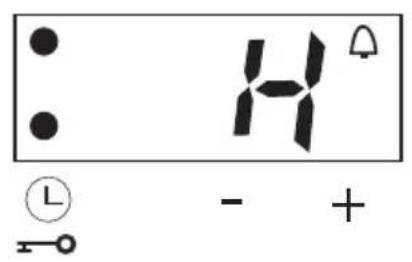
text_image
H L - +H
H
H
text_image
Po L - +PO
PO

text_image
28 - +H ).
PL
PO

natural_image
Illustration of a frying pan above a grid with arrows indicating direction (no text or symbols)
natural_image
Isometric view of a kitchen counter with a kettle and tray (no text or symbols)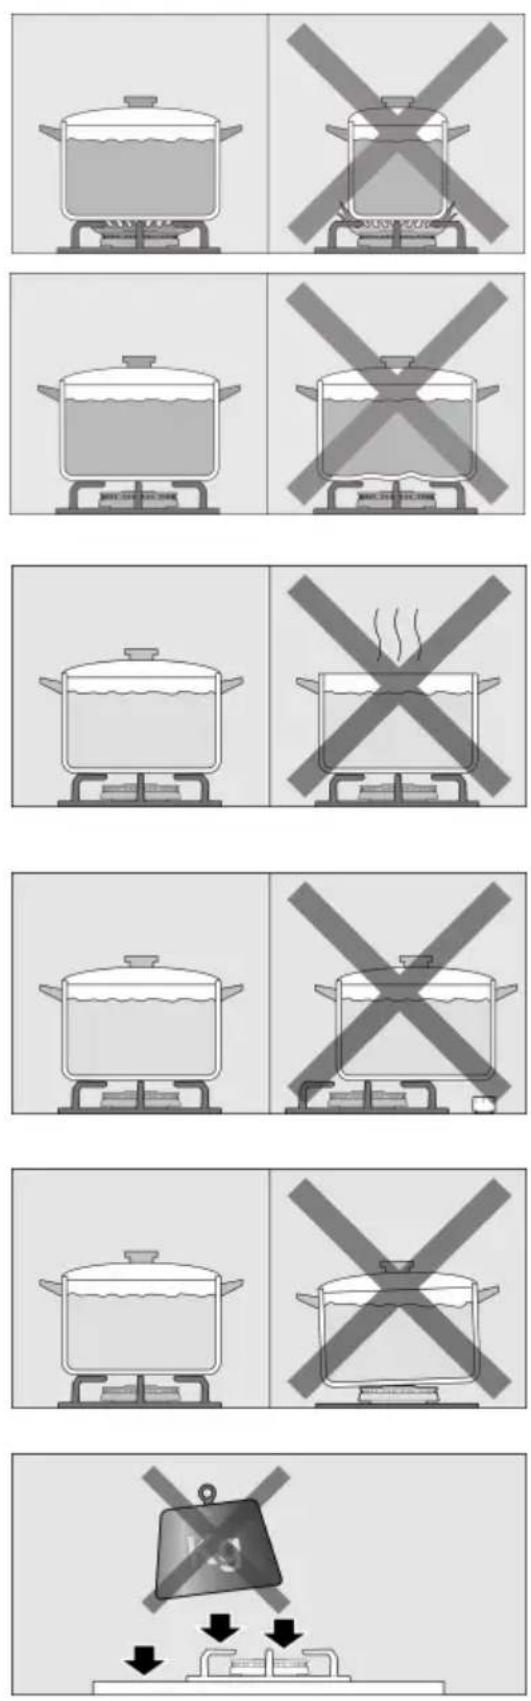
Nettoyage
natural_image
Two-step diagram showing a kitchen sink and a hand holding a food item, with arrows indicating process flow (no text or symbols)text_image
Warning symbol with crossed-out black cross over bottle and paint bottle, indicating no clear warning or damagenatural_image
Diagram showing a magnifying glass over a surface with a crossed-out tool, and downward arrows indicating force or damage (no text or symbols)Griglia supplement are wok .....7. 5.....
Griglia supplement are caffettiera 7.5 . . . . .
text_image
Diagram showing a circular object with internal curved lines and symbols, alongside a mathematical expression with operators and signs.
natural_image
Diagram showing a mechanical component with an arrow indicating motion or force, no text or symbols present
natural_image
Exploded view diagram of a mechanical assembly showing layered components (no text or labels)
natural_image
Technical diagram showing mechanical components with directional arrows indicating movement or force (no text or symbols present)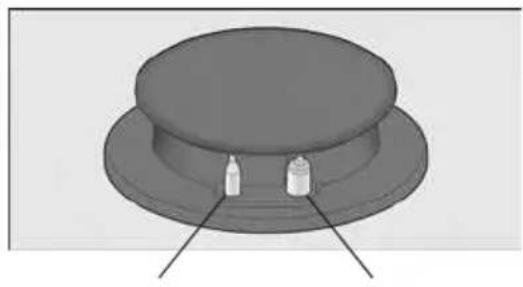
natural_image
3D rendering of a cylindrical object with two small protrusions on top, shown in perspective view (no text or symbols)
natural_image
Six grayscale diagrams showing a circular object with internal patterns, arranged in two rows (no text or symbols)" "
natural_image
Assorted kitchenware including cooking pots, a frying pan, and a black pot (no text or symbols visible)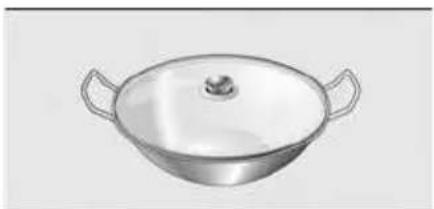
natural_image
Illustration of a stainless steel wok with lid and side handles (no text or symbols)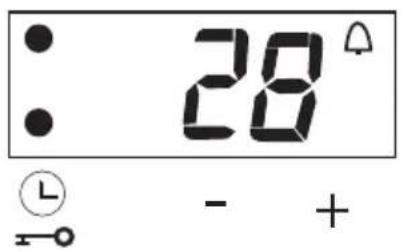
text_image
28° - +^ ①
00 ^4
L
text_image
00 L - +


00.

L
①00.
L
L.
PL.
PL
L
text_image
PL L - +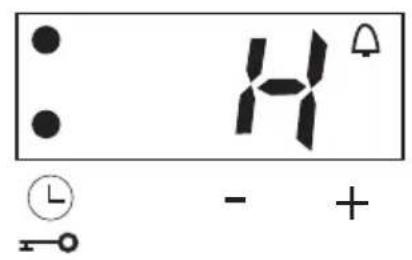
text_image
H - +H
H
H
text_image
Po L - +PO
PO

text_image
28 - +H PL PO

natural_image
Illustration of a frying pan above a grid with directional arrows, no text or symbols present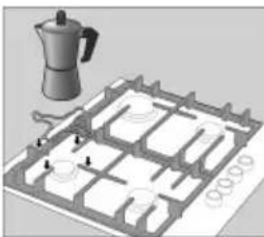
natural_image
3D diagram of a coffee maker with a kettle and tray, no text or symbols present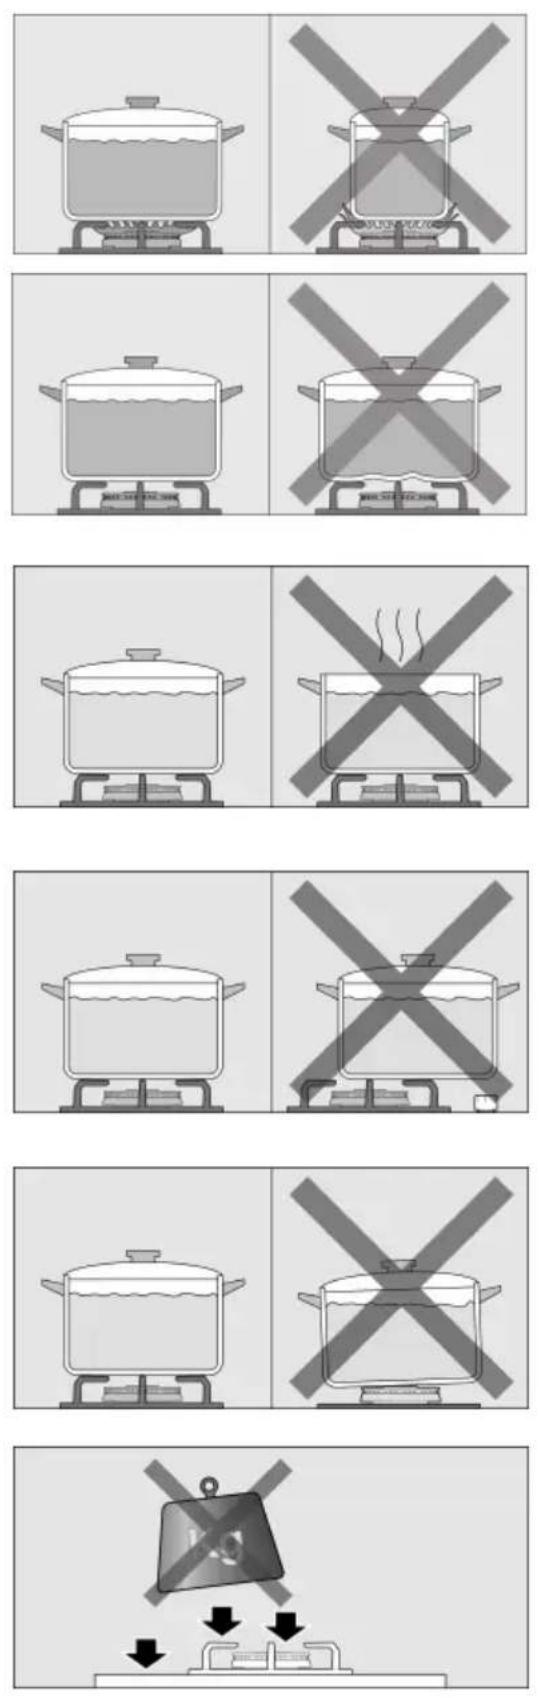
Pulizia

natural_image
Diagram showing a hand pressing down on a surface with arrows indicating downward motion (no text or symbols present)Prodotti inadeguati
text_image
Warning symbol image showing a crossed-out bottle and pen above a device with downward arrows indicating safety or hazard.natural_image
Diagram showing a magnifying glass over a surface with a crossed-out tool, and arrows indicating downward force or damage (no text or symbols)text_image
Diagram showing a circular object with internal curved lines and symbols, alongside a plus sign with a small circle and minus sign.
natural_image
Diagram showing a mechanical component with a downward arrow indicating motion or force, no text or symbols present.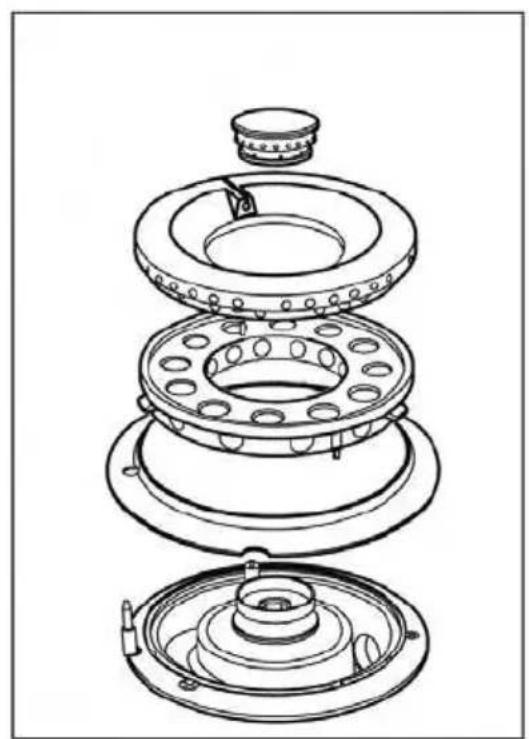
natural_image
Exploded view diagram of a mechanical assembly showing layered components (no text or labels)
natural_image
Technical diagram of a mechanical assembly with arrows indicating motion or force directions (no text or symbols present)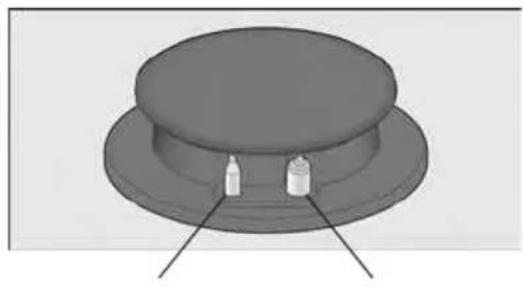
natural_image
3D rendered diagram of a hat with two small cylindrical objects on its side (no text or symbols)
natural_image
Diagram showing six sequential views of a mechanical component with circular features and mounting holes (no text or labels)natural_image
Assorted kitchenware including a frying pan, cooking pots, and a pan (no text or symbols visible)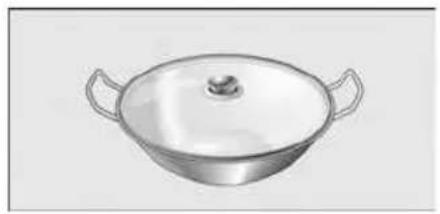
natural_image
Illustration of a stainless steel wok with lid and side handles (no text or symbols)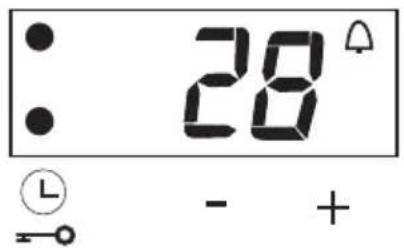
text_image
28° L - +natural_image
Illustration of a frying pan above a grid with arrows indicating direction (no text or symbols)
natural_image
3D diagram of a coffee maker with a kettle and tray, no text or symbols present
Limpieza

natural_image
Diagram showing a hand pressing down on a device with arrows indicating downward motion (no text or symbols present)text_image
Warning sign with crossed-out black object and downward arrows indicating safety or hazardnatural_image
Diagram showing a magnifying glass over a surface with a cross symbol, and downward arrows indicating force or damage (no text or labels)text_image
Diagram showing a circular object with internal curved lines and symbols, alongside a plus sign with a small circle and minus sign.
natural_image
Diagram showing a mechanical component with a downward arrow indicating motion or force, no text or symbols present.
natural_image
Exploded view diagram of a mechanical assembly showing layered components (no text or labels)
natural_image
Technical diagram of a mechanical assembly with arrows indicating motion or force directions (no text or symbols present)
natural_image
3D rendering of a cylindrical object with two small protrusions on top, mounted on a circular base (no text or symbols)

natural_image
Diagram showing a multi-step mechanical assembly with circular components and mounting holes (no text or labels)natural_image
Assorted kitchenware including a pan, cooking pots, and a frying pan (no text or symbols visible)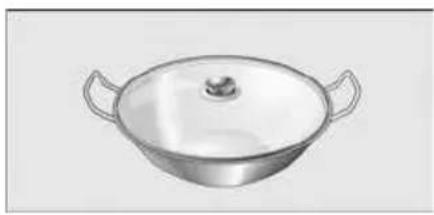
natural_image
Illustration of a stainless steel wok with lid and side handles (no text or symbols)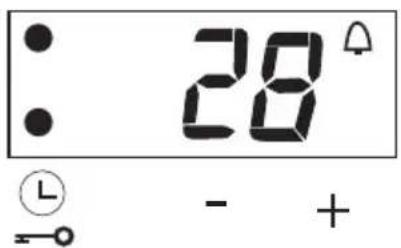
text_image
28° L - +00^
00°
L
text_image
00 L - +


natural_image
Illustration of a frying pan above a grid with directional arrows, no text or symbols present.
natural_image
3D illustration of a kettle placed on a grid with mechanical components (no text or symbols)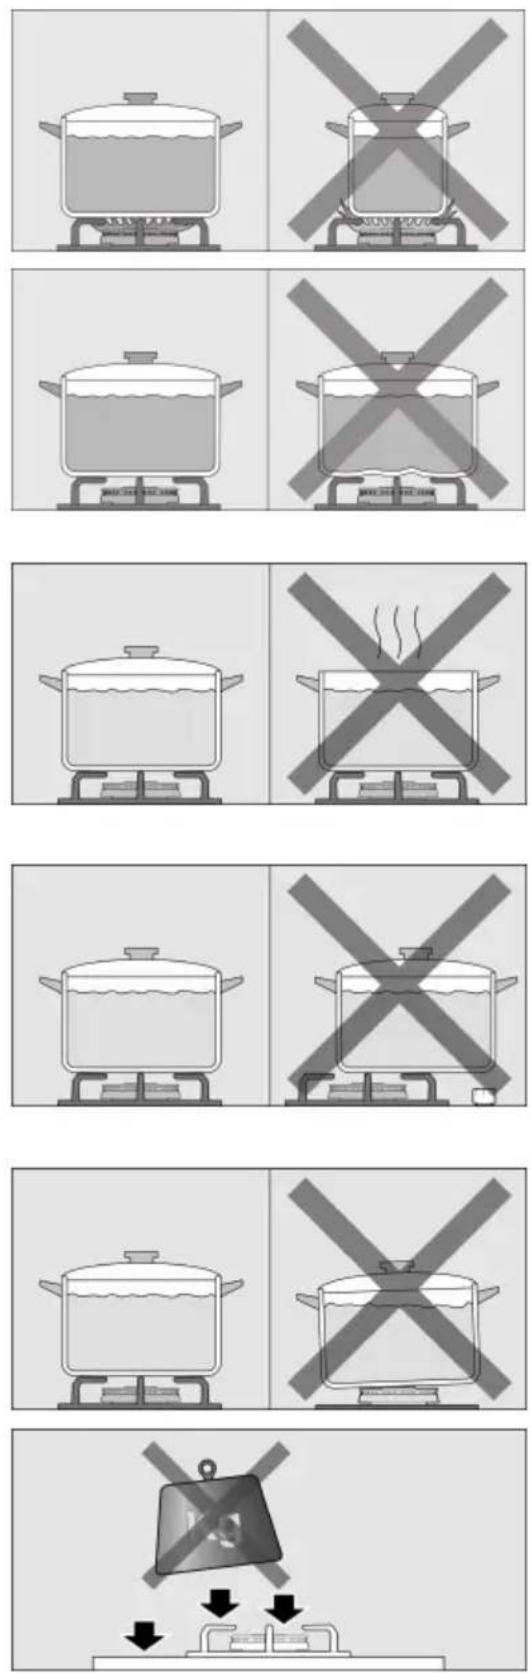
Limpeza

natural_image
Diagram showing a hand pressing down on a surface with arrows indicating downward motion (no text or symbols)text_image
Warning symbol image showing a crossed-out device with liquid and paper bottle, indicating no hazard or caution.natural_image
Diagram showing a magnifying glass over a surface with a crossed-out tool, and downward arrows indicating force or damage (no text or symbols present)text_image
Diagram showing a circular object with internal curved lines and symbols, alongside a plus sign with a small circle and minus sign.
natural_image
Diagram showing a mechanical component with a downward arrow indicating motion or force, no text or symbols present.
natural_image
Exploded view diagram of a mechanical assembly showing layered components (no text or labels)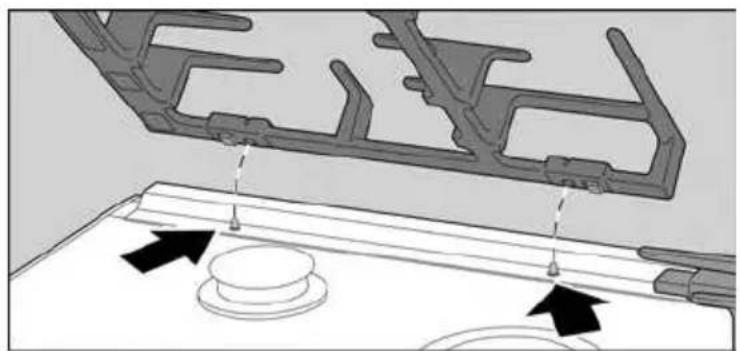
natural_image
Technical diagram of a mechanical assembly with arrows indicating motion or force directions (no text or symbols present)
natural_image
3D rendering of a gray hat with two small cylindrical objects on its side (no text or symbols)

natural_image
Diagram showing a multi-step mechanical assembly with circular components and mounting holes (no text or labels)natural_image
Black-and-white photo of kitchenware including a pan, cooking pot, and cooking panes (no text or symbols visible)
natural_image
Illustration of a stainless steel wok with lid and side handles (no text or symbols)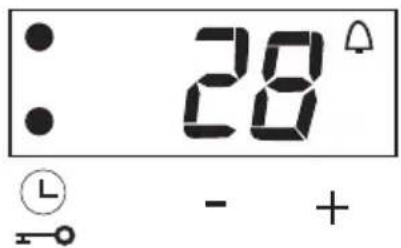
text_image
28° - +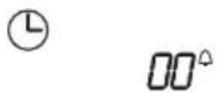


00^
text_image
00 - +① ② ③ ④ 00° ::00
00.
(
10.
(
L.
PL.
PL
L.
text_image
PL - +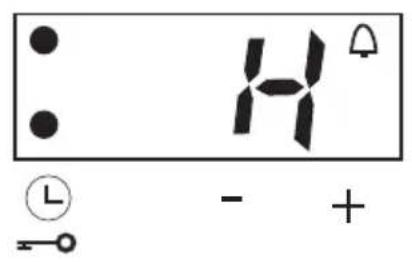
text_image
H - +H
H
H

text_image
Po L - +PO
PO
text_image
28 - +H
PL
Po
natural_image
Illustration of a frying pan above a grid with arrows indicating direction (no text or symbols)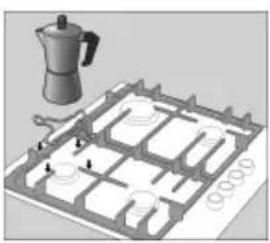
natural_image
3D diagram of a coffee maker with a kettle and tray, no text or symbols present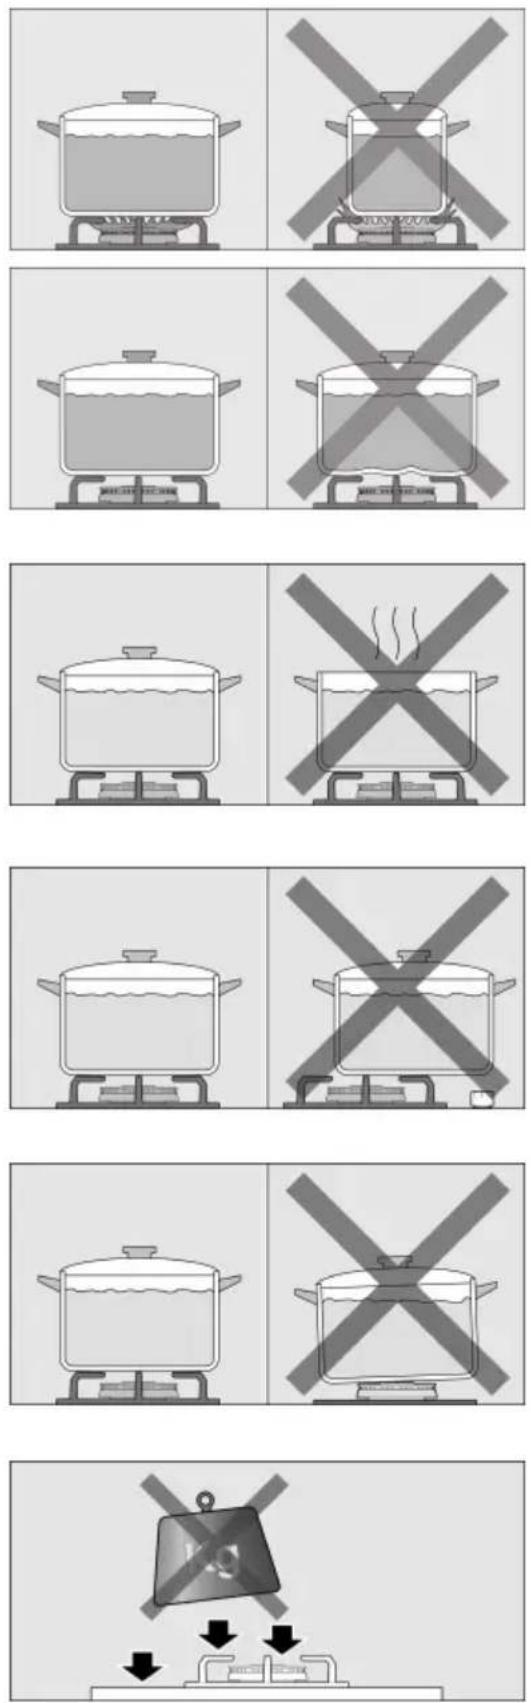
Rei ni gi ng

natural_image
Diagram showing a hand pressing down on a mechanical component with downward arrows indicating force or movement (no text or symbols present)Ongeschikte producten
text_image
Warning symbol image showing a crossed-out bottle and plastic bag above a table with downward arrows indicating safety or hazard.text_image
Diagram illustrating a mechanical or electrical hazard with a magnified view of a device and downward force arrows indicating load or damage.text_image
Diagram showing a circular object with internal lines and symbols, including a plus sign and a minus sign.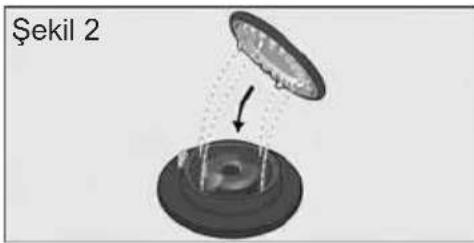
text_image
Şekil 2