
Arnova 7C G2 - Tablet ARCHOS - Free user manual and instructions
Find the device manual for free Arnova 7C G2 ARCHOS in PDF.
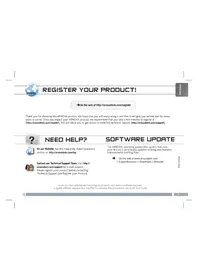



| Brand | ARCHOS |
| Model | Arnova 7C G2 |
| Product type | Touchscreen tablet |
| Dimensions (estimated) | 192 x 122 x 11 mm |
| Weight (estimated) | 350 g |
| Screen size | 7 inches |
| Operating system | Android™ |
| Processor (estimated) | 1 GHz |
| RAM memory (estimated) | 512 MB |
| Storage | Micro-SD card (not included) |
| Connectivity | Wi-Fi 802.11 b/g/n, 3G |
| Ports | Micro-USB, 3.5 mm headphone jack, power connector |
| Slots | 1x Micro-SD, 1x SIM |
| Speaker | Built-in |
| Microphone | Built-in |
| Battery (estimated) | Li-ion 3000 mAh |
| Power supply | Wall charger via dedicated connector |
| Buttons | ON/OFF, Volume, Home, Menu, Back, Search, Reset |
| Main functions | Web browsing, Email, AppsLib, Multimedia, Social networks |
| Maintenance and cleaning | Wipe with a soft, dry cloth. Do not use liquid products. |
| Safety | Do not expose to moisture, do not open the device, use only the supplied charger. |
| Spare parts and repairability | Reset button accessible. For any repair, contact ARCHOS technical support. |
| General information | Product registration recommended at arnovatech.com/register |
Frequently Asked Questions - Arnova 7C G2 ARCHOS
User questions about Arnova 7C G2 ARCHOS
0 question about this device. Answer the ones you know or ask your own.
Ask a new question about this device
Download the instructions for your Tablet in PDF format for free! Find your manual Arnova 7C G2 - ARCHOS and take your electronic device back in hand. On this page are published all the documents necessary for the use of your device. Arnova 7C G2 by ARCHOS.
USER MANUAL Arnova 7C G2 ARCHOS
Thank you for choosing this ARNOVA product. We hope that you will enjoy using it and that it will give you satisfaction for many years to come. Once you unpack your ARNOVA product, we recommend that you take a few minutes to register it (http://arnovatech.com/register). This will allow you to get access to ARNOVA technical support (http://arnovatech.com/support).

NEED HELP?

On our Website: See the Frequently Asked Questions section on http://arnovatech.com/faq

Contact our Technical Support Team: Visit http://arnovatech.com/support for e-mail support. Please register your product before contacting Technical Support (see Register your Product).
SOFTWARE UPDATE
The ARNOVA operating system (the system that runs your device) is periodically updated to bring new features, improvements and bug fixes.

support&account > Downloads = firmware
P/N:109940
As we are often updating and improving our products, your device's software may have a slightly different appearance or modified functionality than presented in this Quick Start Guide.
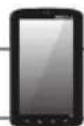
DESCRIPTION OF THE DEVICE
1 Power Button: press and hold to switch on.
- To switch off, when you press and hold on the Power button, a window appears with a list of options. Touch "Power Off" > "Ok" to fully shut down your ARNOVA. -To put your device in standby, press the Power button once.
2 Volume buttons
Built-in microphone. Micro-SD card slot: a Micro-SD card should be inserted in the device. It allows the device to be identified as a removable storage when connected to a PC. 5 SIM card slot: Any standard SIM card can be inserted. 6 Loudspeaker. 7 Headphone jack. Micro-USB port: to connect your ARNOVA to your computer, using the included USB cable (to transfer files via USB 2.0 or higher). Power connector: to connect the supplied power cable. 10 Reset button: If your device is frozen, you can turn it off by pressing the reset button.
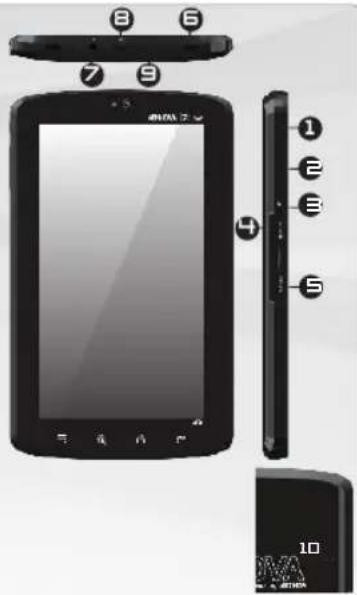
Menu - gives menu options according to the current screen. Home - Short press: return to the Home screen. Hold: jump to one of the recent applications.
Search - allows you to search for an item on the device or on the Internet. Back - returns to the previous screen.
GO! STARTING UP

Before using your ARNOVA for the first time, completely charge the battery!

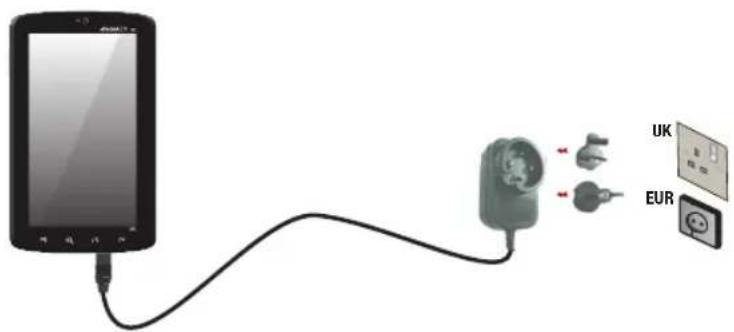
Charging the Battery
1 Connect the supplied power cable to the ARNOVA Power connector and to a wall outlet. 2 The ARNOVA device will start charging. IMPORTANT: The device should not be charged via a USB port.

CONNECTING TO A WIFI NETWORK

For this procedure to work, you need to be in a WiFi zone that will allow you to connect to it. Every time the ARNOVA is in range of a network that you have already configured once, it will attempt to make a connection.
1 To configure a new WiFi network, go on the Home screen, tap on the Menu icon then select Settings

2 In the Settings screen, select Wireless & networks.

3 If the WiFi is off, tap on the Wi-Fi line to turn it on. Then select Wi-Fi settings. The ARNOVA will scan for available WiFi networks and display them at the bottom of the screen.
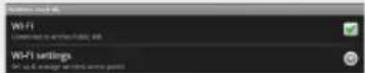
4 Tap on the network you want to connect to, enter the required network information* and then tap on Connect. Your ARNOVA will now attempt to establish a connection to that WiFi hot spot with the network parameters you entered.
CONNECTING TO A 3G NETWORK

Your Arnova 7c G2 is equipped with a SIM card slot. Any standard SIM card can be inserted. There is no provider restriction. Note that the Arnova 7c G2 will only have signal if you are in an area covered by your 3G provider's 3G or EDGE network.
Inserting your SIM card
IMPORTANT: Before inserting a SIM card, you must turn off the device.

Switch off the device.

Insert the SIM card in the SIM card slot. Make sure to have the chip side up when you insert it.
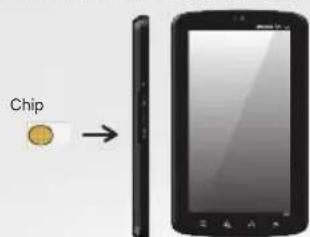

Turn on the device.

AP in number may be requested. Enter the SIM card pin number. Your device will attempt to connect to the 3G network of your provider.
NOTE: If your device does not connect to your 3G provider's network:
- Contact your 3G provider to obtain the connection parameters.
- On your device, tap the Menu icon, then settings.
- Select Wireless & networks > Mobile networks. -In Network operators, select your operator. -In Access Point Names, select the correct access point name and enter the exact connection parameters.
CUSTOMIZING YOUR PRODUCT
Customizing the Home screen items
- To add a Home screen item (shortcuts, widgets, etc.), hold your finger on the screen at an empty location, then choose from the list. You can also tap on the Menu icon and select Add + , at the bottom of the screen.
- To move a Home screen item, hold your finger onto it until it gets larger, then drag it to the desired location, and release your finger.
- To remove a Home screen item, hold your finger onto it, drag it onto the recycle bin (while you're holding an item, the Applications tab, on the right side of the screen, turns into a recycle bin) and release your finger.

Adding more applications with APPSLIB: With the ARNOVA connected to the Internet, tap on the AppsLib icon. This online library of free and purchasable applications has thousands of fun games and useful applications to download and use.

Changing the Settings: From the Home screen, tap on the Menu icon, then tap on Settings and choose a category: Wireless controls, Sound & display, Date & time, etc.


THE ARNOVA INTERFACE
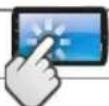
Your ARNOVA device is equipped with a capacitive touchscreen. Use your finger pulp to navigate.
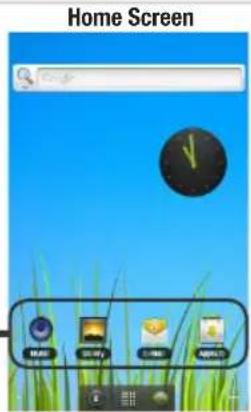
These are the default Android™ shortcuts (Web Browser, EMail, etc.). Tap on an icon to open the corresponding application. You can customize the Home screen by adding/removing shortcuts and widgets, changing the wallpaper, etc. See next page.
Application button
Tap on this icon to reveal all the Android™ applications installed on your ARNOVA (games, various tools, etc.). You can copy them onto the Home screen. You can get more Android™ applications from AppsLib.
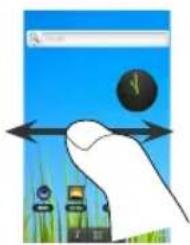
The extended Home screen
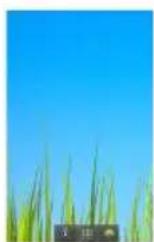
Slide your finger horizontally on the screen to go to the left or right side of the extended Home screen.
TRANSFERRING MEDIA TO YOUR ARNOVA
IMPORTANT: A Micro-SD card should be inserted in the device. It works as your device storage. If there is no Micro-SD card, you can't transfer files to your device.
1 Connect the supplied USB cable to the ARNOVA and to a running computer via USB 2.0 or higher. 2 The ARNOVA will ask you if you want to connect it. Tap on Turn on USB storage to connect it and press OK to confirm. Within a few seconds the Micro-SD card will appear as an icon on your computer. 3 You can transfer your media files to the Micro-SD card either by copy/pasting them into the respective folders using Windows® Explorer (or the Finder on a Mac®), or by using Windows Media® Player. Open Windows Media Player® and then use the Sync tab to synchronize your music, videos, and photos onto your Micro-SD card. See Windows Media Player®'s Help to learn more about this. Once all your file transfers are finished, close Windows® Explorer and any other program that may have read or written to the Micro-SD card. Click on the 'safely remove' icon in the system tray, next to the clock. You can now unplug the USB cable.

REGISTER YOUR PRODUCT!
→ On the Internet: http://arnovatech.com/register

CONNECTING TO A WIFI NETWORK


Applications button
TRANSFERRING MULTIMEDIA FILES

CUSTOMIZING YOUR PRODUCT

Applications button

TRANSFERRING MEDIA FILES

CONNECTING TO A WIFI NETWORK


TRANSFERRING MULTIMEDIA FILES

CONNECTING TO A WIRELESS NETWORK


DUTCH
43

WIFI NETWORK CONNECTION

CUSTOMIZE YOUR PRODUCT
Applications button

TRANSFERRING MEDIA TO YOUR ARNOVA

CONNECTING TO A WIFI NETWORK

National restrictions
This device is intended for home and office use in all EU countries (and other countries following the EU directive 1999/5/EC) without any limitation except for the countries mentioned below:
Country Restriction Reason/remark
Bulgaria None General authorization required for outdoor use and public service
France Outdoor use limited to 10 mW e.i.r.p. within the band 2454-2483.5 MHz Military Radiolocation use. Refarming of the 2.4 GHz band has been ongoing in recent years to allow current relaxed regulation. Full implementation planned 2012
Italy None If used outside of own premises, general authorization is required.
Luxembourg None General authorization required for network and service supply (not for spectrum)
Norway Implemented This subsection does not apply for the geographical area within a radius of 20 km from the centre of Ny-Alesund
Russian Federation None Only for indoor applications
Note: Frequency 2454-2483.5 MHz is restricted to indoor use in France.
Consult the declaration of conformity on http://www.arnovatech.com/products/declaration_conformity.html
CHARGING SPECIFICATIONS
Adaptor Model: HNC050200X
Output: 5.0V, 2.0A
Relative Humidity: 10% ~ 90%
Input: 100-240V; 50/60Hz
Operating Temperature: 0°C ~ 40°C.
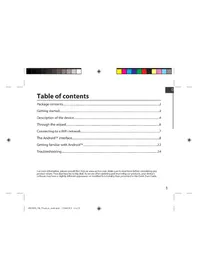
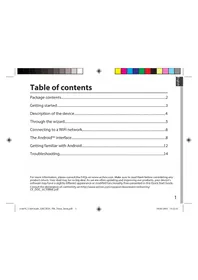

- NEED HELP
- SOFTWARE UPDATE
- DESCRIPTION OF THE DEVICE
- GO! STARTING UP
- CHARGING THE BATTERY
- CONNECTING TO A WIFI NETWORK
- CONNECTING TO A 3G NETWORK
- INSERTING YOUR SIM CARD
- CUSTOMIZING YOUR PRODUCT
- CUSTOMIZING THE HOME SCREEN ITEMS
- THE ARNOVA INTERFACE
- APPLICATION BUTTON
- THE EXTENDED HOME SCREEN
- TRANSFERRING MEDIA TO YOUR ARNOVA
- REGISTER YOUR PRODUCT
- APPLICATIONS BUTTON
- TRANSFERRING MULTIMEDIA FILES
- TRANSFERRING MEDIA FILES
- CONNECTING TO A WIRELESS NETWORK
- WIFI NETWORK CONNECTION
- CUSTOMIZE YOUR PRODUCT
- NATIONAL RESTRICTIONS
Brand : ARCHOS
Model : Arnova 7C G2
Category : Tablet