Redline Drums - Computer drum ION - Free user manual and instructions
Find the device manual for free Redline Drums ION in PDF.


| Product Type | Drum computer (electronic percussion module) |
| Brand | ION |
| Model | Redline Drums |
| Dimensions (approx.) | 20 cm x 15 cm x 5 cm |
| Weight (approx.) | 0.5 kg |
| Power Supply | 9 V DC, 500 mA adapter, center positive plug |
| Power Consumption | 4.5 W max |
| Number of Kits (sound sets) | 10 preset kits |
| Number of Patterns (accompaniment sequences) | 30 patterns |
| Built-in Metronome | Yes, with tempo settings (30-280 BPM), volume, sound (5 sounds), time division, and interval |
| Built-in Drum Teacher | 5 exercises: Beat Check, Gradual Up/Down, Rhythm Change Up, Follow Me, Drum Mute |
| MIDI Connectivity | USB port for MIDI transmission to computer |
| Audio Outputs | Stereo main outputs (2x 6.35 mm jack), headphone output (3.5 mm stereo jack) |
| Auxiliary Input | 3.5 mm stereo jack input for external audio device |
| Pad Inputs | Multi-pin connector for drum pads, cymbals, and pedals |
| Auto Power Off | Yes, after 30 minutes of inactivity (can be disabled) |
| Care and Cleaning | Clean with a soft, dry cloth. Do not use abrasive products or solvents. |
| Safety | Use only the supplied power adapter. Do not expose to moisture or extreme temperatures. |
| Spare Parts / Included Accessories | Power adapter, multi-pin cable |
| Repairability | Contact ION support for any repairs. No user-serviceable parts. |
Frequently Asked Questions - Redline Drums ION
User questions about Redline Drums ION
0 question about this device. Answer the ones you know or ask your own.
Ask a new question about this device
Download the instructions for your Computer drum in PDF format for free! Find your manual Redline Drums - ION and take your electronic device back in hand. On this page are published all the documents necessary for the use of your device. Redline Drums by ION.
USER MANUAL Redline Drums ION
User Guide (English)
Support
For complete system requirements, compatibility information, and product registration, visit: ionaudio.com/redline-drums.
For additional product support, visit ionaudio.com/support.
Quick Start
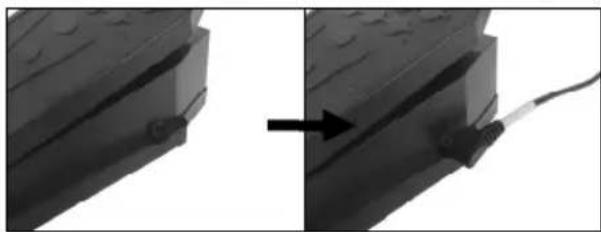
Connecting the Drum Module
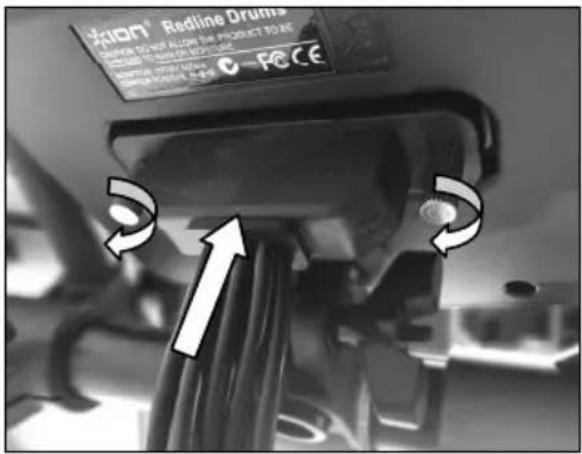
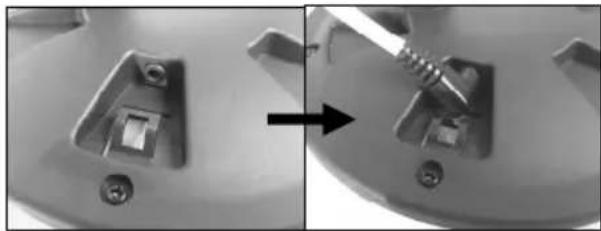
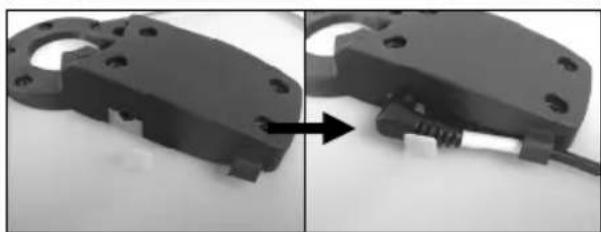
Connect the cable snake here (using the two screws to secure it), and then connect the 1/4'' ends of the cables to their respective pads.
Selecting a Kit
To select one of the module's 10 preset Kits, do one of the following:
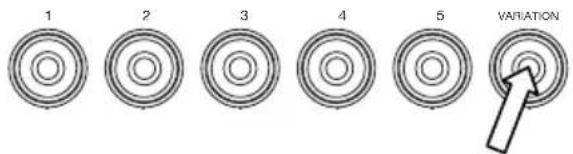
- Press the Variation Button so it is lit red, and then press the 1, 2, 3, 4, or 5 Button to select Kit 1, 2, 3, 4, or 5 (respectively).
- Press the Variation Button so it is lit green, and then press the 1, 2, 3, 4, or 5 Button to select Kit 6, 7, 8, 9, or 10 (respectively).
The Kit number will appear in the display. Once you have selected a Kit, you can select others by repeating one of the steps above or by using the - and + Buttons.
Playing the Pads
If your electronic drum kit has velocity-sensitive pads, this drum module will play sounds of varying timbres depending on how hard you hit the pads. Try hitting the pads with different amounts of force to experiment with the different sounds produced by the module!
Note: The hi-hat sound will vary based on the position of the hi-hat controller pedal:
- Open hi-hat: With your foot off of the pedal, hit the hi-hat pad.
- Closed hi-hat: With your foot pressing the pedal all the way down, hit the hi-hat pad.
- Pedal close: Press the hi-hat pedal all the way down without hitting the hi-hat pad.
- Splash: Quickly press the hi-hat pedal all the way down, and then release it immediately.
Learn more about using the drum module in the Using the Module section of this manual.
Features
Front Panel
- Power Button: Press this button to turn the drum module on. Press and hold it for 2 seconds to turn the drum module off.
- Display: This area shows values and text relevant to the drum module's functions and operation.
- Volume Knob: Turn this knob to adjust the volume of the Main Outputs and Phones Output.
-
- / + : Press either of these buttons to decrease or increase the value shown in the display.
- Click Button: Press this button to turn the metronome ("click") on or off. See the Using the Metronome (Click) section for more information.
- Start/Stop Button: Press this button to
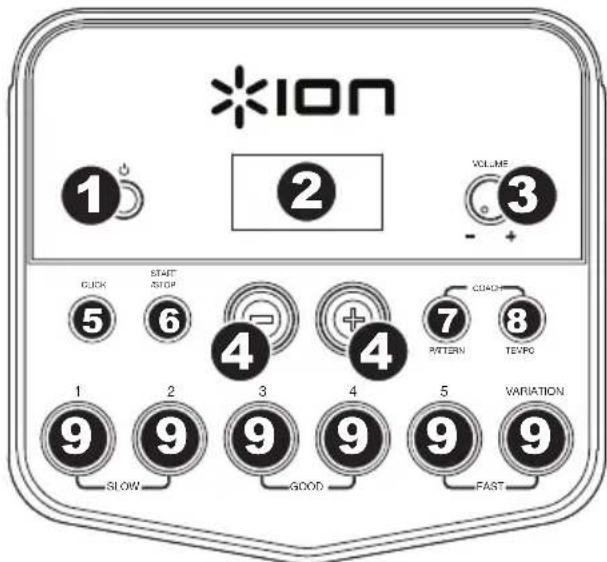
start or stop playback of a Pattern. See the Playing Along With Patterns section for more information.
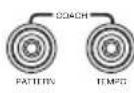
- Pattern Button: Press this button to enter Pattern Mode. Press both this button and the Tempo Button simultaneously to use the Built-In Drum Coach. See the Playing Along With Patterns and Using the Built-In Drum Coach sections for more information.
- Tempo: Press this button to enter Tempo Mode, and use the - and + buttons to adjust the tempo. Press both this button and the Pattern Button simultaneously to use the Built-In Drum Coach. See the Using the Metronome (Click) and Using the Built-In Drum Coach sections for more information.
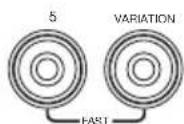
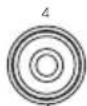
- 1-5/Variation Buttons: Press any one of these buttons to enter Kit Mode and select a Kit. When using the Built-In Drum Coach, you can use these buttons to select an exercise. See the Using Kits and Using the Built-In Drum Coach sections for more information.
Rear Panel
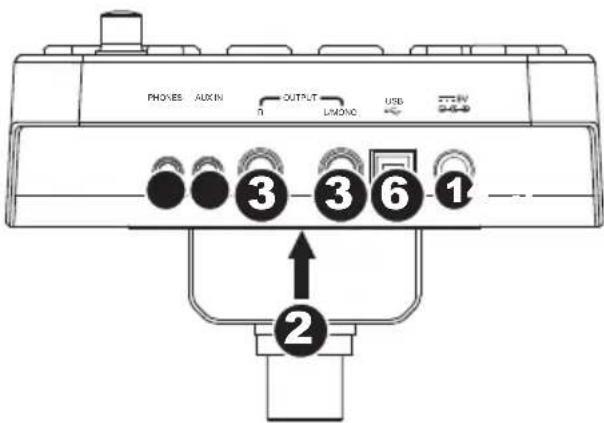
- Power Jack: Use a power adapter (included, 9 V, 500 mA, center pin-positive) to connect this jack to your power outlet.
- Cable Snake Connector: Connect your cable snake (included) here, and connect the cable snake's cables to your kit's triggers (drum pads, cymbal pads, and pedals).
- Main Outputs: Use standard 1/4" mono cables (not included) to connect these outputs to your monitor, amplifier, or PA system. Adjust the volume with the Volume Knob on the top panel.
- Phones Output: Connect standard 1/8" stereo headphones to this output. Adjust the volume with the Volume Knob on the top panel.
- Aux In: Use a 1/8" stereo cable (not included) to connect an external audio device (smartphone, CD player, etc.) to this input.
- USB Port: Use a standard USB cable (not included) to connect your computer to this port, allowing you to send and receive MIDI messages to and from your computer. See the Using MIDI section for more information.
Using the Module
Using Kits
Selecting a Kit
To select one of the module's 10 preset Kits, do one of the following:
- With the Variation Button lit red, press the 1, 2, 3, 4, or 5 Button to select Kit 1, 2, 3, 4, or 5 (respectively).
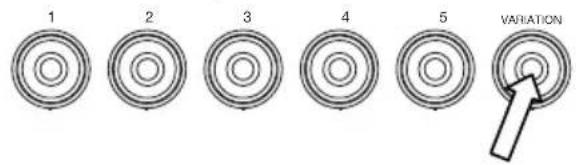
- With the Variation Button lit green, press the 1, 2, 3, 4, or 5 Button to select Kit 6, 7, 8, 9, or 10 (respectively).
The Kit number will appear in the display. Once you have selected a Kit, you can select others by repeating one of the steps above or by using the - and + Buttons.
Adjusting Kit Volumes
To adjust the volume of each separate Kit:
- Do one of the following:
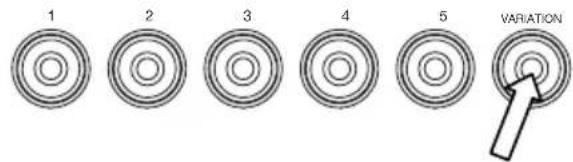
With the Variation Button lit red, double-press the 1, 2, 3, 4, or 5 Button to select Kit 1, 2, 3, 4, or 5 (respectively).
-
With the Variation Button lit green, double-press the 1, 2, 3, 4, or 5 Button to select Kit 6, 7, 8, 9, or 10 (respectively).
-
The display will show an L ("level") and the volume level (00 - 32). Use the - or + Buttons to set the Kit's volume level. (The default volume level is 28.)
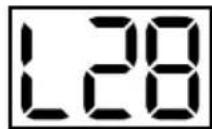
- Wait for 4 seconds. The drum module will automatically save the new setting.
Playing Along With Patterns
Selecting and Playing a Pattern
To select one of the 30 preset Patterns:
- Press the Pattern Button to enter Pattern Mode. The button's LED will light up, and the display will show the current Pattern's number.

- Use the - or + buttons to select a Pattern. (You can hold down the - or + buttons to scan quickly through the list.)


-
Press the Start/Stop Button to start the Pattern's playback.
-
Play along to the Pattern!

- Press the Start/Stop Button to stop the Pattern's playback.
Adjusting the Pattern Volume
To adjust the volume of each separate Pattern:
- Double-press the Pattern Button.

- The display will show the volume level (00 - 32). Use the - or + Buttons to set the Pattern's volume level. (The default volume level is 25.)


Using the Metronome (Click)
You can use the built-in metronome ("click") to help you keep time while practicing with the Built-In Drum Coach or with Patterns. You can change the metronome's tempo (speed), volume, sound, and time signature.
Turning the Metronome On or Off
To turn the metronome on or off, press the Click button.

Adjusting the Metronome Tempo
To adjust the metronome's tempo (speed):
- Press the Tempo Button.
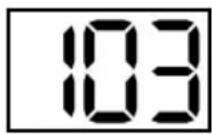
- The display will show the current tempo (30 - 280) in BPM ("beats per minute"). Use the - or + Buttons to set the new tempo.
- Wait for 4 seconds. The drum module will automatically save the new setting.

Adjusting the Metronome Volume
To adjust the metronome's volume:
- Double-press the Click Button.
- The display will show an L ("level") and the volume level (00 - 32). Use the - or + Buttons to set the metronome's volume level. (The default volume level is 25.)
- Wait for 4 seconds. The drum module will automatically save the new setting.

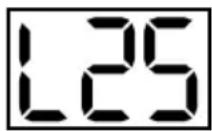
Changing the Metronome Sound
To change the metronome's "click" sound:
- Press the Click Button and 1 Button simultaneously.
-
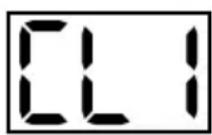
The display will show CL ("click") and the number of the sound (CL1 - CL5). Use the - or + Buttons to set the metronome sound:
-
CL1: Chime and click (default)
- CL2: Clave
- CL3: Side-stick
- CL4: Cowbell
- CL5: Vocal

- Wait for 4 seconds. The drum module will automatically save the new setting.
Changing the Metronome Time Signature
To change the metronome's time signature:
- Press the Click Button and 2 Button simultaneously.
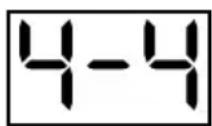
- The display will show the current time signature. Use the - or + Buttons to select a time signature: 1/2, 2/2, 3/4, 4/4, or 6/8.
- Wait for 4 seconds. The drum module will automatically save the new setting.

Changing the Metronome Interval
To change the metronome's note division (the note value it measures with each click):
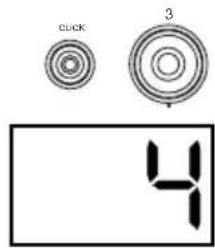
- Press the Click Button and 3 Button simultaneously.
- The display will show the current interval. Use the - or + Buttons to select a new interval: 2 (half note), 3 (triplet), 4 (quarter note), 6 (sextuplet), 8 (eighth note), or 16 (sixteenth note). (The default is 4.)
- Wait for 4 seconds. The drum module will automatically save the new setting.
Using the Built-In Drum Coach
The Built-In Drum Coach contains five different exercises to help you develop and improve a sense of tempo, accuracy, or stamina: Beat Check, Gradual Up/Down, Rhythm Change Up, Follow Me, and Drum Mute.
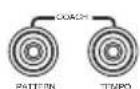
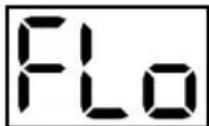
To use the Built-In Drum Coach, press the Pattern Button and Tempo Button at the same time. Then, press the 1, 2, 3, 4, or 5 Button that corresponds to the exercise you want to do. The display will show which exercise you have selected.
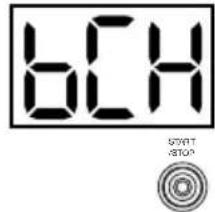
- Beat Check (bCH)
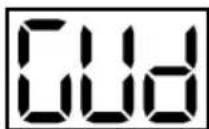
- Gradual Up/Down (Gud)
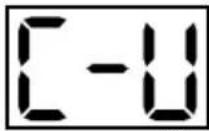
- Rhythm Change Up (C-U)
- Follow Me (FLo)
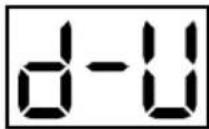
5.Drum Mute (d-U)
Using Beat Check
This exercise evaluates your sense of time and how accurately you play along with the metronome.
To use Beat Check:
- Press the Pattern Button and Tempo Button at the same time, and then press the 1 Button.

- Set the metronome's time signature and interval (described in the Using the Metronome (Click) section).
- Press the Start/Stop Button to begin.
-
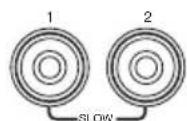
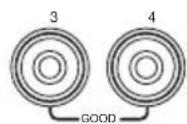
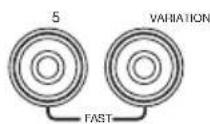
Hit the pads in time with the metronome. The six LEDs of the 1-5/Variation Buttons indicate how accurate (how "on time") you are.
-
When you are right on the beat, the 3 and 4 Button light up.
- When you are slightly off the beat, the 2 or 5 Button will light up.
- When you are off the beat, the 1 or Variation Button will light up.
- When you are completely off the beat, no buttons will light up.
- Press the Start/Stop Button to stop.
Using Gradual Up/Down
Gradual Up/Down evaluates how quickly you can play while still maintaining accurate time.
To use Gradual Up/Down:
- Press the Pattern Button and Tempo Button at the same time, and then press the 2 Button.
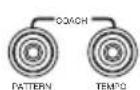
- Set the metronome's time signature and interval (described in the Using the Metronome (Click) section).
- Press the Start/Stop Button.

-
Do one of the following:
-
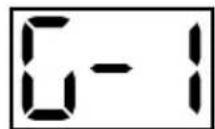
Press the 1 Button to select G-1 Mode. In this mode, the tempo automatically decreases or increases by 5 BPM every 4 measures, depending on your accuracy.
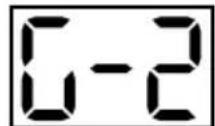
- Press the 2 Button to select G-2 Mode. In this mode, the tempo automatically decreases or increases by 1 BPM each measure. (The starting tempo is your metronome's current setting.)
-
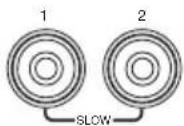
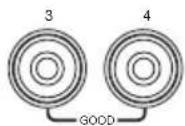
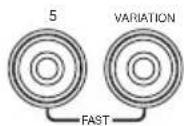
Hit the pads in time with the metronome. The six LEDs of the 1-5/Variation Buttons indicate how accurate (how "on time") you are.
-
When you are right on the beat, the 3 and 4 Button light up.
- When you are slightly off the beat, the 2 or 5 Button will light up.
- When you are off the beat, the 1 or Variation Button will light up.
- When you are completely off the beat, no buttons will light up.
- Press the Start/Stop Button to stop.
Using Rhythm Change Up
Rhythm Change Up helps you practice changing rhythms while still maintaining accurate time.
To use Rhythm Change Up:
- Press the Pattern Button and Tempo Button at the same time, and then press the 3 Button.
-
Press the Start/Stop Button.
-
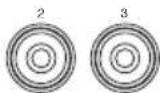
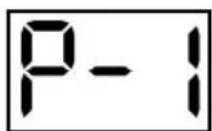
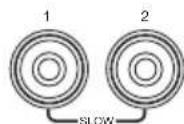
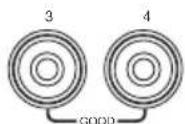
Press the 1, 2, or 3 Button, or use the - and + Buttons to select a rhythmic progression, shown below:




-
Press the Start/Stop Button to begin.
-
Hit the pads in the rhythm you selected (above) and in time with the metronome (the starting tempo is your metronome's current setting). The six LEDs of the 1-5/Variation Buttons indicate how accurate (how "on time") you are:
-
When you are right on the beat, the 3 and 4 Button light up.
- When you are slightly off the beat, the 2 or 5 Button will light up.
- When you are off the beat, the 1 or Variation Button will light up.
- When you are completely off the beat, no buttons will light up.
The display will show your score:
0-29:OK
30-59:Good
60-79: Very Good
80-100:Excellent
Using Follow Me
Follow Me helps you practice identifying different drums by their sound and memorizing drum rhythms that use the entire drum kit. In this exercise, a drum loop will repeat, alternating between (1) the drum pattern itself and (2) a metronome track of the same length during which you play the drum pattern yourself.
To use Follow Me:
- Press the Pattern Button and Tempo Button at the same time, and then press the 4 Button.
-
Press the Start/Stop Button.
-
Use the - and + Buttons to select the drum pattern you want to play to.


-
Press the Start/Stop Button to begin.
-
When you hear the drum pattern, try to learn which pads are being played and when. During the metronome track that follows, play the same drum pattern in time with the metronome. For reference, the display will show the current beat. The six LEDs of the 1- 5/Variation Buttons indicate how accurate you are.
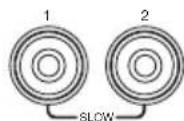
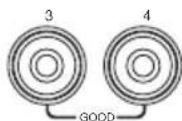
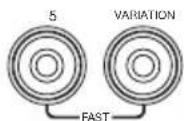
- Press the Start/Stop Button to stop.
Using Drum Mute
Drum Mute lets you silence certain parts of various drum patterns, allowing you to play freely and create your own parts over the rest of the drum pattern.
To use Drum Mute:
- Press the Pattern Button and Tempo Button at the same time, and then press the 5 Button.
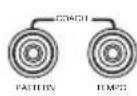

-
Press the Start/Stop Button.
-
Use the - and + Buttons to select the drum pattern you want to play to.


- Press one or several of the 1-5/Variation Buttons to select the sound or sounds you want to mute:
1: Kick drum
2: Snare drum
3: Hi-hat
4: Toms
- 5: Crash and ride cymbals
- Variation: Percussion
-
Press the Start/Stop Button to begin.
-
Play freely along with the drum pattern you hear. The drum pattern will not include any sounds you muted in Step 4, allowing you to create your own part.
- Press the Start/Stop Button to stop.
Automatic Power-Off
To save energy, the drum module will power off automatically after 30 minutes of no activity. If you do not need this feature, disable it by powering off the drum module, and then pressing and holding the Start/Stop Button while powering it back on. PoF will appear on the display to confirm the feature is off.
Note: After powering off, this feature will be re-enabled. Repeat the procedure above to disable it each time you power on the module.
Using MIDI
About MIDI
MIDI (Musical Instrument Digital Interface) is a standard way in which certain electronic musical devices can communicate with each other. When two MIDI devices are connected, they can send/receive MIDI "messages," "data," or "information" over either a 5-pin MIDI cable or a standard USB cable (depending on the available ports on the devices).
In the case of the DM Lite module, you can connect its USB port to a USB port on your computer with a standard USB cable (sold separately). All MIDI messages will travel to and from your computer over this connection. This allows you to do one of two things:
- Use an electronic drum kit connected to the drum module to trigger sounds on an external MIDI device (e.g., a sequencer, your computer if you use software that can receive MIDI notes, etc.). See Triggering Sounds on an External MIDI Device later in this section.
- Use an external MIDI device to play sounds in the drum module. See Using the Drum Module as the Sound Module later in this section.
Triggering Sounds on an External MIDI Device
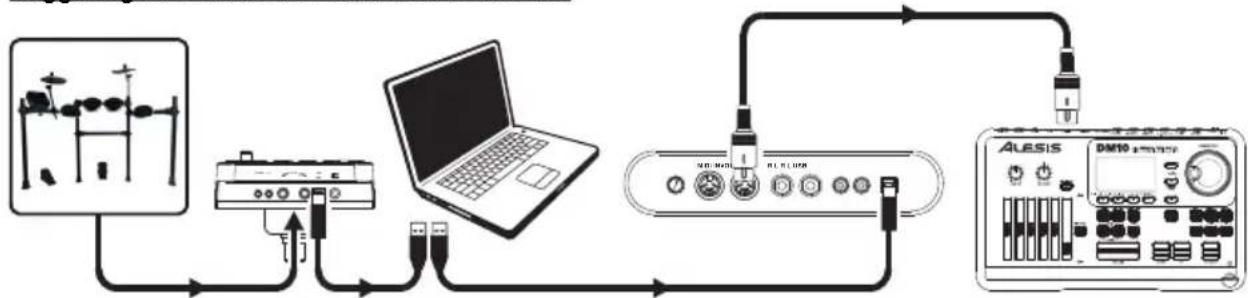
- Using a standard USB cable (not included), connect the drum module's USB port to a USB port on your computer.
- If you are triggering sounds in software, skip to the next step.
If you are triggering sounds in an external MIDI device, make sure that device is connected to your computer (either directly via USB or through a USB-MIDI interface).
- Set the active track of your MIDI software, sequencer, etc. to Channel 10, and start recording.
- Play your electronic drum kit. The MIDI information will be sent to your computer, sequencer, etc. See the Trigger MIDI Notes section of this manual's Appendix for a list of the MIDI notes sent out by each trigger.
- Stop recording.
Using the Drum Module as the Sound Module
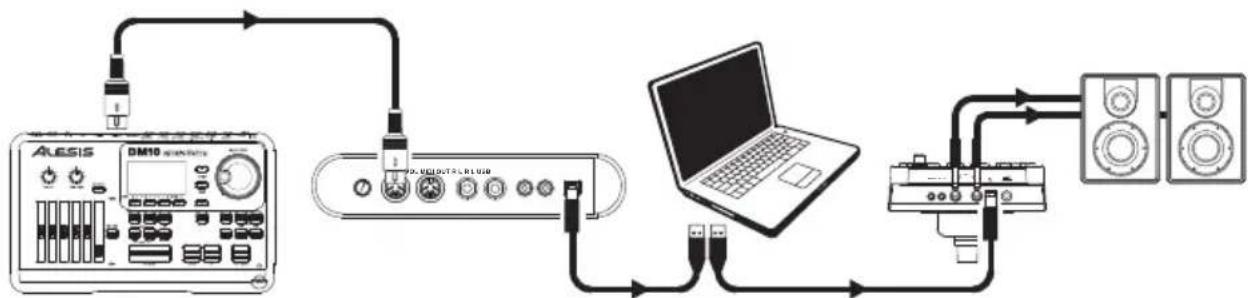
- Using a standard USB cable (not included), connect the drum module's USB port to a USB port on your computer.
- If you are using software to play the drum module's sounds, skip to the next step. If you are using an external MIDI device to play the drum module's sounds, make sure that device is connected to your computer (either directly via USB or through a USB-MIDI interface).
- Set the active track of your MIDI software, sequencer, etc. to the desired channel (1-16). Note: Channel 10 of the drum module is reserved for drum sounds.
- Play your sequencer or other external device to hear the drum module's internal sounds.
- See the Presets and General MIDI (GM) sections of this manual's Appendix for lists of the available sounds.
Assistance technique
Follow Me (accompagnement)
Selection are un Kit
| Trigger MIDI | Note |
| Hi-Hat (closed) | 44 |
| Splash | 21 |
Presets
Kits
| Number | Preset Kit |
| 1 | Acoustic |
| 2 | Funk |
| 3 | Jazz Brushes |
| 4 | Rock |
| Number | Preset Kit |
| 5 | 808 |
| 6 | 909 |
| 7 | FX Mix |
| 8 | Marimba |
| Number | Preset Kit |
| 9 | Indian |
| 10 | Percussion2 |
Patterns
| Number | Preset Kit |
| 1 | Fusion1 |
| 2 | Dance Funk |
| 3 | Modern Pop |
| 4 | Hip Hop |
| 5 | Dance |
| 6 | Classic Rock |
| 7 | 68 Ballad |
| 8 | CountryPop |
| 9 | Pop Ballad |
| 10 | Break Beat |
| Number | Preset Kit |
| 11 | Fusion2 |
| 12 | R&B |
| 13 | Latin Rock |
| 14 | Latin Dance |
| 15 | Funk1 |
| 16 | Fusion3 |
| 17 | Pop Shuffle |
| 18 | Mambo |
| 19 | Pop Bossa |
| 20 | 34 Jazz |
| Number | Preset Kit |
| 21 | Rock |
| 22 | Pop Funk |
| 23 | Big Band1 |
| 24 | Latin Jazz |
| 25 | Swing |
| 26 | Funky Blues |
| 27 | Funk2 |
| 28 | Samba |
| 29 | Big Band2 |
| 30 | NuJazz Funk |
General MIDI (GM)
Kits
| Note Number | Standard 1 (Bank 0) | Room (Bank 8) | Rock (Bank 16) |
| 27 (D#1) High Q | |||
| 28 (E1) | Slap | ||
| 29 (F1) | Scratch Push | ||
| 30 (F#1) | Scratch Pull | ||
| 31 (G1) | Sticks | ||
| 32 (G#1) | Square Click | ||
| 33 (A1) | Metronome Click | ||
| 34 (A#1) | Metronome Bell | ||
| 35 (B2) | Acoustic Bass Drum | Room Bass Drum 1 | Rock Bass Drum 1 |
| 36 (C2) | Standard 1 Bass Drum | Room Bass Drum 2 | Rock Bass Drum 2 |
| 37 (C#2) Side Stick |
Kits (continued)
| Note Number | Standard 1 (Bank 0) Room (Bank 8) Rock (Bank 16) | ||
| 38 (D2) Standard 1 | Snare Room Snare Rock Snare | ||
| 39 (D#2) Hand Clap | |||
| 40 (E2) Standard 1 | Snare Rim Room Snare Rim Rock Snare Rim | ||
| 41 (F2) Standard 1 | Tom 6 Room Tom 6 Rock Tom 6 | ||
| 42 (F#2) | Standard 1 Hi-hat Close Room Hi-hat Close | Rock Hi-hat Close | |
| 43 (G2) | Standard 1 Tom 5 Room Tom 5 Rock Tom 5 | ||
| 44 (G#2) | Standard 1 Hi-hat Pedal Room Hi-hat Pedal | Rock Hi-hat Pedal | |
| 45 (A2) Standard 1 | Tom 4 Room Tom 4 Rock Tom 4 | ||
| 46 (A#2) | Standard 1 Hi-hat Open Room Hi-hat Open | Rock Hi-hat Open | |
| 47 (B3) | Standard 1 Hi-hat Open Room Hi-hat Open | Rock Hi-hat Open | |
| 48 (C3) | Standard 1 Tom 3 Room Tom 3 Rock Tom 3 | ||
| 49 (C#3) Standard 1 Crash 1 Room Crash 1 Rock Crash 1 | |||
| 50 (D3) | Standard 1 Tom 1 Room Tom 1 Rock Tom 1 | ||
| 51 (D#3) Standard 1 Ride Room Ride Rock Ride | |||
| 52 (E3) Chinese Cymbal 1 | |||
| 53 (F3) Ride Bell Room Ride Bell Rock Ride Bell | |||
| 54 (F#3) Tambourine | |||
| 55 (G3) Splash Cymbal Room Splash Cymbal | Rock Splash Cymbal | ||
| 56 (G#3) Standard 1 Cowbell Room Cowbell | Rock Cowbell | ||
| 57 (A3) Standard 1 Crash 2 Room Crash 2 Rock Crash 2 | |||
| 58 (A#3) Vibra-slap | |||
| 59 (B3) Ride Cymbal | |||
| 60 (C4) Hi Bongo | |||
| 61 (C#4) Low Bongo | |||
| 62 (D4) Mute Hi Conga | |||
| 63 (D#4) Open Hi Conga | |||
| 64 (E4) Low Conga | |||
| 65 (F4) High Timbale | |||
| 66 (F#4) Low Timbale | |||
| 67 (G4) High Agogo | |||
| 68 (G#4) Low Agogo | |||
| 69 (A4) Cabasa | |||
| 70 (A#4) Maracas | |||
| 71 (B4) Short Whistle | |||
| 72 (C5) Long Whistle | |||
| 73 (C#5) Short Guiro | |||
| 74 (D5) Long Guiro | |||
| 75 (D#5) Claves | |||
| 76 (E5) Hi Wood Block | |||
| 77 (F5) Low Wood Block | |||
| 78 (F#5) Mute Cuica | |||
| Note Number | Standard 1 (Bank 0) | Room (Bank 8) | Rock (Bank 16) |
| 79 (G5) Open Cuica | |||
| 80 (G#5) Mute Triangle | |||
| 81 (A5) Open Triangle | |||
| 82 (A#5) Shaker | |||
| 83 (B5) Jingle Bell | |||
| 84 (C6) | Bell Tree | ||
| 85 (C#6) | Castanets | ||
| 86 (D6) | Mute Surdo | ||
| 87 (D#6) | Open Surdo | ||
| Note Number | Electronic (Bank 24) | Brush (Bank 40) |
| 27 (D#1) | ||
| 28 (E1) | ||
| 29 (F1) | ||
| 30 (F#1) | ||
| 31 (G1) | ||
| 32 (G#1) | ||
| 33 (A1) | ||
| 34 (A#1) | ||
| 35 (B2) | Electronic Bass Drum 1 | Brush Bass Drum 1 |
| 36 (C2) | Electronic Bass Drum 2 | Brush Bass Drum 2 |
| 37 (C#2) | ||
| 38 (D2) | Electronic Snare | Brush Snare |
| 39 (D#2) | ||
| 40 (E2) Electronic Snare Rim Brush Snare Rim | ||
| 41 (F2) | Electronic Tom 6 | Brush Tom 6 |
| 42 (F#2) | Electronic Hi-hat Close | |
| 43 (G2) | Electronic Tom 5 | Brush Tom 5 |
| 44 (G#2) | Electronic Hi-hat Pedal | |
| 45 (A2) | Electronic Tom 4 | Brush Tom 4 |
| 46 (A#2) Electronic Hi-hat Open | ||
| 47 (B3) | Electronic Tom 3 | Brush Tom 3 |
| 48 (C3) | Electronic Tom 2 | Brush Tom 2 |
| 49 (C#3) | Brush Crash 1 | |
| 50 (D3) | Electronic Tom 1 | Brush Tom 1 |
| 51 (D#3) | Brush Ride | |
| 52 (E3) | ||
| 53 (F3) | ||
| 54 (F#3) | ||
| 55 (G3) | ||
| 56 (G#3) | ||
| 57 (A3) | Brush Crash 2 | |
Backing Instruments
| Piano | |
| 1 Acoustic Grand Piano 44 Co | |
| 2 Bright Acoustic Piano 45 Tre | |
| 3 Electric Grand Piano 46 Pizzi | |
| 4 Honky Tonk Piano 47 Orches | |
| 5 Electric Piano 1 48 Timpani | |
| 6 Electric Piano 2 | |
| 7 Harpsichord | |
| 8 Clavi 4 |
| 3 | Cell | 86 | Lead 6 (Voice) |
| bass | 87 | Lead 7 (Fifths) | |
| o | Strings | 88 | Lead 8 (Bass & Lead) |
| o | Strings | ||
| Harp | |||
| Pad | 1 | (New Age) | |
| Mallet | |
| 9 Celesta | 5 |
| 10 | Glockenspiel |
| 11 | Music Box |
| 12 | Vibraphone |
| 13 | Marimba |
| 14 | Xylophone |
| 15 | Tubular Bells |
| 16 | Dulcimer |
| Strings Ensemble | |
| Strings | Ensemble 1 92 P |
| 50 | Strings Ensemble 2 |
| Synth Strings 1 94 | |
| Synth Strings 2 95 P | |
| 53 | Choir Aahs |
| Voice Oohs | |
| 55 | Synth Voice |
| 56 | Orchestra Hit |
| 91 | Pad 3 (Poly Synth) |
| d | 4 (Choir) |
| 93 Pad 5 (Bowed) | |
| Pad 6 (Metallic) | |
| 7 (Halo) | |
| 96 Pad 8 (Sweep) |
| Organ | |
| 17 | Drawbar Organ |
| 18 | Percussive Organ |
| 19 | Rock Organ |
| 20 | Church Organ |
| 21 | Reed Organ |
| 22 | Accordion |
| 23 | Harmonica |
| 24 | Tango Accordion |
| Brass | |
| 57 | Trumpet |
| 58 | Trombone |
| 59 | Tuba 102 FX 6 (Goblins) |
| 60 | Muted Trumpet |
| 61 | French Horn |
| 62 | Brass Section |
| 63 | Synth Brass 1 |
| 64 | Synth Brass 2 |
| Effects | |
| 97 | FX 1 (Rain) |
| 98 | FX 2 (Soundtrack) |
| FX 3 | Crystal) |
| 100 | FX 4 (Atmosphere) |
| 101 | FX 5 (Brightness) |
| 103 | FX 7 (Echoes) |
| 104 | FX 8 (Sci Fi) |
| Guitar | |
| 25 | Nylon Guitar |
| 26 | Steel Guitar |
| 27 | Jazz Guitar |
| 28 | Clean Guitar |
| 29 | Muted Guitar |
| 30 | Overdriven Guitar |
| 31 | Distorted Guita |
| 32 | Guitar Harmonics |
| Reed | |
| 65 | Soprano Sax |
| 66 | Alto Sax |
| 67 | Tenor Sax |
| 68 | Baritone Sax |
| 69 | Oboe |
| 70 | English Horn |
| 71 | Bassoon |
| 72 | Clarinet |
| Ethnic | |
| 105 | Sitar |
| 106 | Banjo |
| 107 | Shamisen |
| 108 | Koto |
| 109 | Kalimba |
| 110 | Bagpipe |
| 111 | Fiddle |
| 112 | Shanai |
| Bass | |
| 33 | Acoustic Bass |
| 34 | Finger Bass |
| 35 | Pick Bass |
| 36 | Fretless Bass |
| 37 | Slap Bass 1 |
| 38 | Slap Bass 2 |
| 39 | Synth Bass 1 |
| 40 | Synth Bass 2 |
| Pipe | |
| 73 | Piccolo |
| 74 | Flute |
| 75 | Recorder |
| 76 | Pan Flute |
| 77 | Blown Bottle |
| 78 | Shakuhachi |
| 79 | Whistle |
| 80 | Ocarina |
| Percussion | |
| 113 | Tinkling Bell |
| 114 | Agogo |
| 115 | Steel Drums |
| 116 | Wood Block |
| 117 | Taiko Drum |
| 118 | Melodic Tom |
| 119 | Synth Drum |
| 120 | Reverse Cymbal |
| Strings | |
| 41 | Violin |
| 42 | Viola |
| Lead | |
| 81 | Lead 1 (Square) |
| 82 | Lead 2 (Sawtooth) |
| 83 | Lead 3 (Calliope) 126 Helicopter |
| 84 | Lead 4 (Chiff) |
| 85 | Lead 5 (Charang) |
| Sound Effects | |
| 121 | Guitar Fret Noise |
| 122 | Breath Noise |
| 123 | Seashore |
| 124 | Bird Tweet |
| 125 | Telephone Ring |
| 127 | Applause |
| 128 | Gunshot |
Technical Specifications
| Kits | 10 preset kits; 5 General MIDI (GM) kits |
| Sequencer | 30 Patterns; 12 "Follow Me" patterns |
| Resolution | 192 ticks per quarter note |
| Maximum Polyphony | 64 |
| Display | 3-digit LED |
| Tempo | 30 – 280 BPM |
| Connectors | 25-pin trigger input jack (for cable snake) 1/8" TRS headphone output 1/4" TS main outputs (right and left/mono) 1/8" TRS auxiliary input USB port (MIDI) Power jack |
| Power | 9 V, 500 mA, center-positive |
| Dimensions (width x height x depth; sound module only) | 5.8" x 7.2" x 4.4" 147 mm x 183 mm x 112 mm |
| Weight (sound module only) | 1.1 lbs. 0.5 kg |
- Specifications are subject to change without notice.
ionaudio.com
- User Guide (English)
- Support
- Quick Start
- Connecting the Drum Module
- Selecting a Kit
- Playing the Pads
- Features
- Front Panel
- Rear Panel
- Using the Module
- Using Kits
- Adjusting Kit Volumes
- Playing Along With Patterns
- Selecting and Playing a Pattern
- Adjusting the Pattern Volume
- Using the Metronome (Click)
- Turning the Metronome On or Off
- Adjusting the Metronome Tempo
- Adjusting the Metronome Volume
- Changing the Metronome Sound
- Changing the Metronome Time Signature
- Changing the Metronome Interval
- Using the Built-In Drum Coach
- Using Beat Check
- Using Gradual Up/Down
- Using Rhythm Change Up
- Using Follow Me
- Using Drum Mute
- Automatic Power-Off
- Using MIDI
- About MIDI
- Triggering Sounds on an External MIDI Device
- Using the Drum Module as the Sound Module
- Assistance technique
- Follow Me (accompagnement)
- Selection are un Kit
- Presets
- Kits
- Patterns
- General MIDI (GM)
- Kits (continued)
- Backing Instruments
Brand : ION
Model : Redline Drums
Category : Computer drum