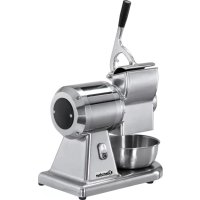
A370350 - Electric grater BARTSCHER - Free user manual and instructions
Find the device manual for free A370350 BARTSCHER in PDF.


| Product type | Professional electric grater |
| Brand | Bartscher |
| Model | A370350 (GR12/S) |
| Dimensions (L × D × H) | 420 × 300 × 420 mm |
| Net weight | 17 kg |
| Power supply | 230 V, 50 Hz, single-phase |
| Power | 0.75 kW (1 HP) |
| Productivity | 40 kg/h (cheese, biscuits, dry bread, dried fruits) |
| Construction material | Aluminum and stainless steel |
| Noise level | Less than 70 dB(A) |
| Installation | Tabletop |
| Safety devices | Lever microswitch, remote switch, electronic motor brake |
| Cleaning | Disassembly of parts, washing with hot water or in dishwasher |
| Spare parts | Grates, blades, conveyor screw, grating roller (available) |
| Repairability | Technical support via authorized dealer |
| Warranty | Refer to the provided warranty document |
Frequently Asked Questions - A370350 BARTSCHER
User questions about A370350 BARTSCHER
0 question about this device. Answer the ones you know or ask your own.
Ask a new question about this device
Download the instructions for your Electric grater in PDF format for free! Find your manual A370350 - BARTSCHER and take your electronic device back in hand. On this page are published all the documents necessary for the use of your device. A370350 by BARTSCHER.
USER MANUAL A370350 BARTSCHER
natural_image
Modern stainless steel manual grater with handle and side bowl (no visible text or labels)
natural_image
Exterior view of a stainless steel meat processing unit (no text or symbols visible)370.223
natural_image
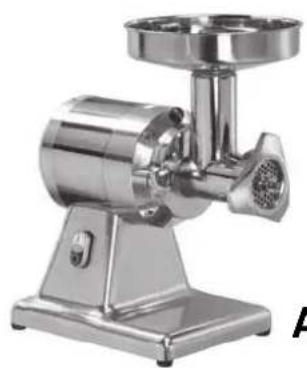
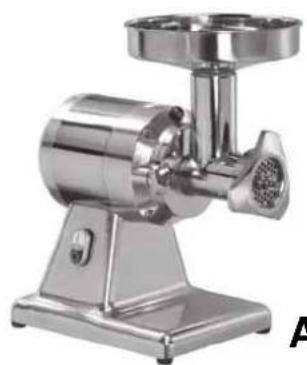
Close-up of a stainless steel meat maker with handle and spout (no visible text or labels)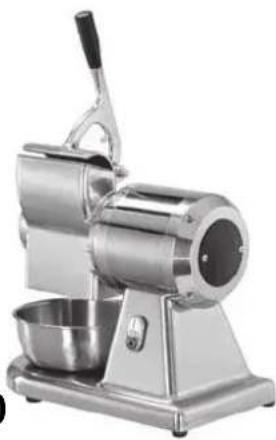
natural_image
Modern stainless steel manual grater with handle and bowl (no visible text or symbols)A370.212 A370.350
natural_image
Technical line drawing of a mechanical device with no visible text or symbolsnatural_image
Line drawing of two hands holding a rectangular box (no text or symbols)Aufstellbereich
8) Stopp-Taster (nur Mod. AB22/AE - TR22/TE - TR22/C Reverse)
natural_image
Technical line drawing of a mechanical device with labeled parts (no text or symbols present)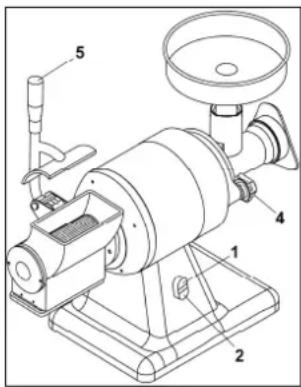
Bedienung der Reibe
natural_image
Technical line drawing of a manual grinding machine with exploded view showing internal components (no text or labels)Mod.AB12/AT - AB22/AE - TR12/TS - TR12/C TR22/TE - TR22/C:
natural_image
Symbol of a trash bin crossed with no text or labelsnatural_image
Modern stainless steel manual grater with handle and side bowl (no visible text or labels)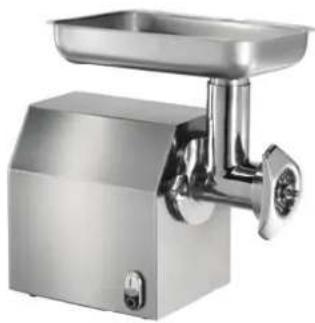
natural_image
Exterior view of a stainless steel meat processing unit (no text or symbols visible)370.223
natural_image
Close-up of a stainless steel meat maker with handle and spout (no visible text or labels)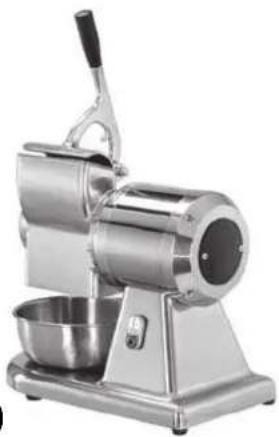
natural_image
Modern stainless steel slurry maker with handle and bowl (no visible text or symbols)A370.212 A370.350
MEAT MINCER AND GRATER
CONTENTS
1 GENERAL INFORMATION
Purpose of this manual.... 4
Manufacturer and machine Identification...... 4
Machine description.... 5
Specifications.... 6
Overall dimensions.... 6
Safety devices.... 7
Safety information.... 7
2 INSTALLATION
Packing and unpacking.... 8
Installation area.... 8
Electric connection.... 8
3 OPERATION AND CLEANING
Control descriptions.... 9
Using the grater.... 9
Using the mincer.... 10
Dismantling the mincing set.... 10
Recommendations for use.... 10
End-day cleaning.... 11
Long periods of inactivity.... 11
4 TROUBLESHOOTING, RECYCLING
Foreword.... 12
Troubles, causes and remedies.... 12
Disposal and recycling.... 12
ANNEXES
Unger mincing set assembly diagram
Spare parts catalogue
Electrical wiring diagram
Purpose of this manual
This manual has been written by the Manufacturer to make an integral part of the machine standard equipment. During the design and construction phases, special care has been devoted to any aspects which might endanger the safety and health of the people interacting with the machine. In addition to the applicable safety legislation, all “good construction practice” rules have been adopted. The purpose of these information notes is to make machine users aware that special care should be applied to prevent any risks. The biggest asset to this end, however, is precaution. Safety is also the responsibility of all the operators who interact with the machine. Keep this manual in a suitable place, where it can be conveniently reached for consultation. In order to highlight some parts of the text, the following symbols have been used:

DANGER – CAUTION: it indicates hazards likely to cause severe injury ; caution is requested.

INFORMATION: technical indications of special interest.
This manual comes with the following annexes:
- a guarantee certificate containing the guarantee conditions prescribed by the Manufacturer.
- documents certifying compliance with the applicable safety and personal health legislation in force.
To request After-sales service, submit inquiries or dorder spare parts, contact your Authorised dealer.
Manufacturer and machine Identification
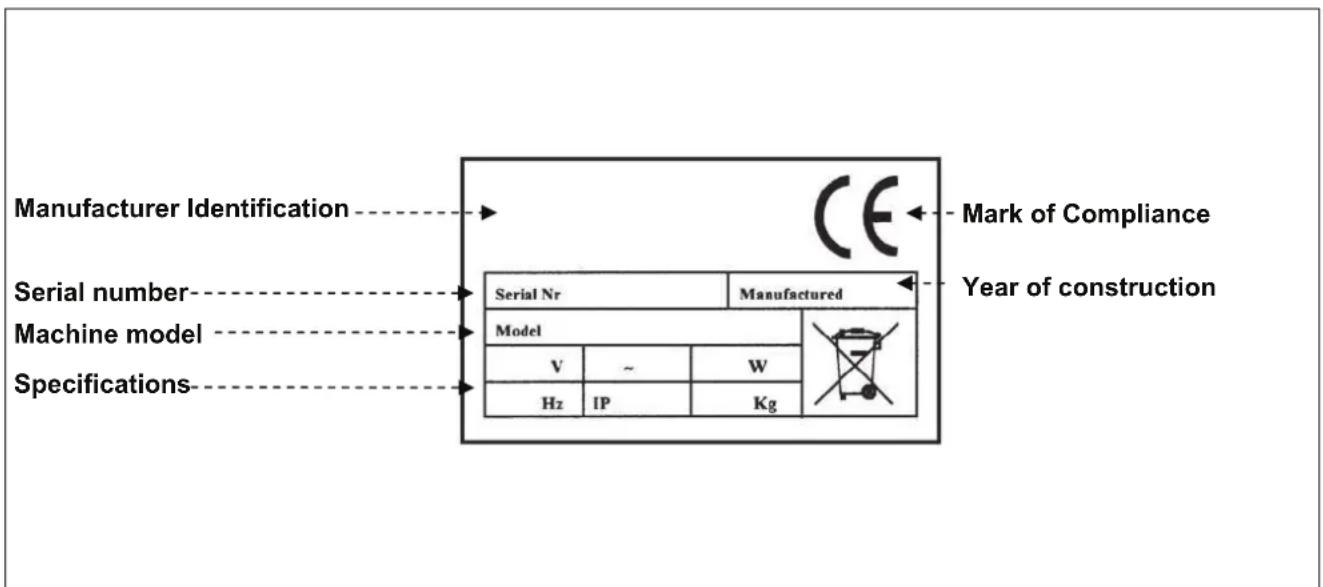
Machine description
Combined mincer - grater:
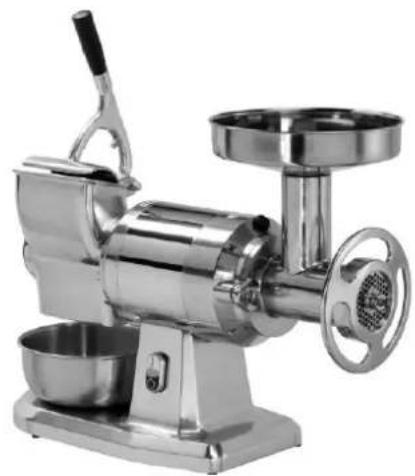
The combined mincer-grater is a professional machine designed for processing meat and cheese for mass catering purposes (restaurants, hotels, community centres, butcher's shops, refectories, etc.). By using the mincer with a series of different mincing plates, different kinds of minced meat can be obtained. The grater can process products such as seasoned cheese, biscuits, dry bread, dried fruit, etc. The range includes 4 different models:
AB12/T (mod.12 basic version with round hopper)
AB12/L (mod.12 deluxe version with rectangular hopper and larger trays)
AB12/AT (mod.12 version with completely removable mincer set and round hopper)
AB22/AE (mod.22 version with completely removable mincer set and round hopper)
The machine has an easy-to-clean aluminium and stainless steel structure.
The machine's safety devices conform to European Directives.
Mincer:
The mincer is a professional machine designed for processing meat for mass catering purposes (restaurants, hotels, community centres, butchers, collective refectories). The application of different mincer plates makes it possible to obtain various types of minced meat.
The range includes 5 models:
TR12/S (mod.12 basic version with round hopper)
TR12/TS (mod.12 version with completely removable mincer set and round hopper)
TR12/C (mod.12 version with completely removable mincer set and stainless steel housing)
TR22/TE (mod.22 version with completely removable mincer set and round hopper)
TR22/C (mod.22 version with completely removable mincer set and stainless steel housing)
The machine has an easy-to-clean aluminium and stainless steel structure.
The machine's safety devices conform to European Directives.
Grater:
The grater is a professional machine designed for processing cheese for mass catering purposes (restaurants, hotels, community centres, butchers, refectories, etc.). The grater can process products such as: seasoned cheeses, biscuits, dry bread, dry fruit, etc.
The range is composed of 1 model:
GR12/S (mod.12 basic version with stainless steel roller)
The machine has an easy-to-clean aluminium and stainless steel structure.
The machine's safety devices conform to European Directives.
| MOD.AB12/T-L-12/AT-22/ | AE MOD.TR12/TS-12/S-12/C-22/TE-22/C | MOD.GR12/S |
| Grater lever Hopper Handwheel Control panel | Hopper Handwheel Control panel | Grater lever Control panel |
Specifications
| Description Unit of measure | AB12/T AB12/L AB12/AT AB22/AE | ||||
| Electric power input V Hz | Ph | 230V 50Hz 1Ph230/400V 50Hz 3Ph | |||
| Power kW (HP) 0.75 (1) 0.75 (1) 0.75 (1) 1.1 (1.5) | |||||
| Mincer output kg 160 160 | 160 300 | ||||
| Grater output kg 40 | 40 | 40 | 40 | ||
| Net weight | kg | 22 | 23 | 26 | 27 |
| Packaged weight | kg | 26 | 27 | 30 | 31 |
| Noise | < 70 dB(A) | ||||
| Installation | On the table | ||||
| Description | Unit of measure | TR12/S | TR12/TS | TR12/C | TR22/TE | TR22/C | GR12/S |
| Electric power input | V Hz Ph | 230V 50Hz 1Ph230/400V 50Hz 3Ph | |||||
| Power | kW (HP) | 0.75 (1) | 0.75 (1) | 0.75 (1) | 1.1 (1.5) | 1.1 (1.5) | 0.75 (1) |
| Mincer output | kg | 160 | 160 | 160 | 300 | 300 | / |
| Grater output | kg | / | / | / | / | / | 40 |
| Net weight | kg | 20 | 20 | 22 | 24 | 26 | 17 |
| Packaged weight | kg | 22 | 22 | 24 | 26 | 28 | 19 |
| Noise | < 70 dB(A) | ||||||
| Installation | On the table | ||||||
Overall dimensions
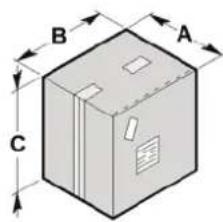 | mm. | A | B | C | mm. | A | B | C |  | 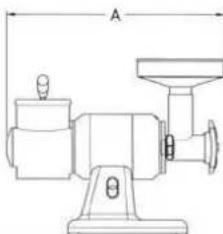 | ||
| AB12/T | 290 | 740 | 460 | AB12/T | 670 | 300 | 460 | |||||
| AB12/L | 290 | 740 | 460 | |||||||||
| AB12/AT | 290 | 740 | 460 | |||||||||
| AB22/AE | 290 | 740 | 460 | |||||||||
| TR12/S | 290 | 460 | 460 | |||||||||
| TR12/TS | 290 | 460 | 460 | |||||||||
| TR12/C | 290 | 460 | 460 | |||||||||
| TR22/TE | 290 | 460 | 460 | |||||||||
| TR22/C | 290 | 460 | 460 | |||||||||
| GR12/S | 290 | 460 | 460 | |||||||||
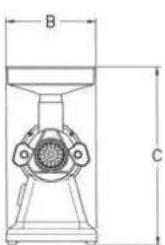 |  | mm. | A | B | C | mm. | A | B | C | 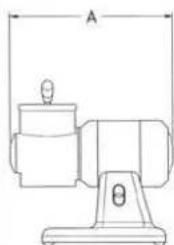 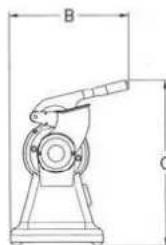 | ||
| TR12/S | 400 | 250 | 470 | GR12/S | 420 | 300 | 420 | |||||
| TR12/TS | 400 | 250 | 470 | |||||||||
| TR12/C | 440 | 270 | 400 | |||||||||
| TR22/TE | 450 | 250 | 480 | |||||||||
| TR22/C | 470 | 270 | 410 | |||||||||
Safety devices
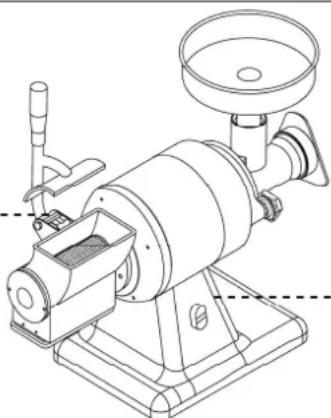
Microswitch: stops the machine when the grater lever is lifted. When the lever is lowered, restart the machine by pressing the I button.
natural_image
Technical line drawing of a manual milling machine with no visible text or symbolsRemote control switch: can be used to restart the machine when the electricity supply is switched off accidentally.
For Grater mod.GR12/S only, when the machine stops, the electronic board intervenes to block the roller using the motor brake.
Safety information
- It is of the greatest importance to carefully read this manual before carrying out installation and use operations. Consistent compliance with the instructions contained in this manual will guarantee personal and machine safety.
- Do not tamper with the safety devices for any reason.
- We recommend that industrial safety regulations issued nationally by the appointed organisms be strictly respected.
- The manufacturer declines all responsibility for injuries to persons or damages to property, resulting from failure to comply with these safety rules.
- Correct machine setting, lighting and workshop cleanness are pre-conditions for personal safety.
- Do not expose the machine to atmospheric agents.
- The machine connection and start-up should only be executed by skilled engineers.
- Check that the plant mains ratings correspond to the specifications printed on the machine data plate.
- Make sure that the machine is connected to a grounding system.
- The work area around the machine should always be kept clean and dry.
- Wear the work attire prescribed by the industrial accident-prevention regulations.
- This machine should always be used for its recommended uses; any other use is deemed improper and therefore dangerous.
- Check the suitability and weight of the products to work; do not overload the machine to exceed its capacity.
- It is forbidden to introduce any objects, tools or hands in the dangerous parts.
- Keep the machine out of children's reach.
- Unplug the machine from the mains when not in use.
- In the event of breakdowns and/or malfunctioning, do not carry out any repair yourselves, apply to your Authorised dealer.
- Order original spare parts only.
- Before carrying out machine cleaning, unplug it from the power mains.
- Do not clean with high-pressure water jets.

DANGER – CAUTION: Using plates with hole diameters over 8mm and with total thickness under 5 mm is strictly prohibited.
Should wear cause plate thickness to drop under 5 mm, we recommend you replace it. The manufacturer is not liable for any personal or property damages due to failure to observe these instructions.
Packing and unpacking
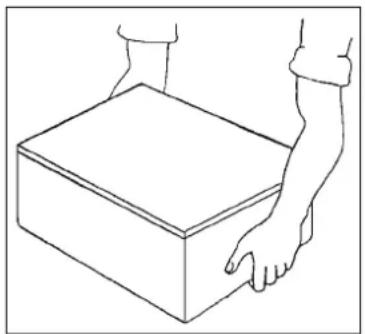
The machine will come packaged in a carton with foamed polyester inserts to guarantee perfect safety during transport.
- Handle the carton in compliance with the instructions.
- Open the carton and make sure that all components are intact. Keep the carton for any future machine removal.
- Lift the machine according to the instructions and place it in its selected setting for installation.
natural_image
Line drawing of two hands holding a rectangular box (no text or symbols)Installation area
The selected machine work setting must be sufficiently lit and have an electric power outlet. The worktop must be sufficiently large, perfectly level and dry. The machine should be installed in non-explosive environments. In any case, installation should be carried out by taking into account any applicable industrial safety regulations in force.
Environmental Condition Table
| Descriptions Values | |
| Working temperature 0÷35 °C (32÷95 °F) | |
| Storage temperature -15 to +65 °C (from -6.8 to +149 °F) | |
| Relative humidity | Maximum 80% at an ambient temperature of 20 °CMaximum 50% at an ambient temperature of 20÷60 °C |
| Ambient dust Lower than 0.03 g/m3 | |
Electric connection

DANGER – CAUTION: Electric connection to the power mains should be executed by skilled engineers.
Check for the perfect efficiency of the plant grounding system. Make sure that the line voltage (V) and frequency (Hz) correspond to the machine ratings (refer to the machine identification plate and wiring diagram). T machine comes equipped with an electric cable to which a multipolar plug should be connected. Plug the machine into a main wall switch with differential.
Three-phase connection
Start the machine for just a few seconds and check that the beater turns in the right direction. If this is not the case, disconnect power and exchar two of the three phase wires in the plug.
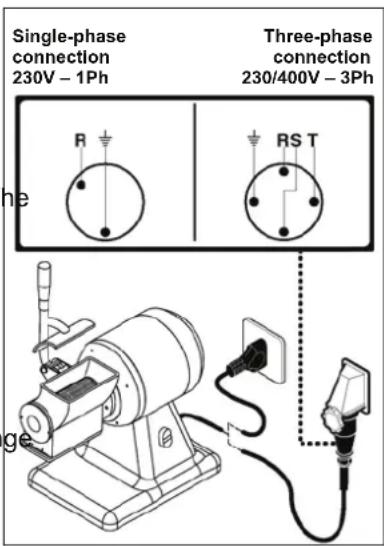
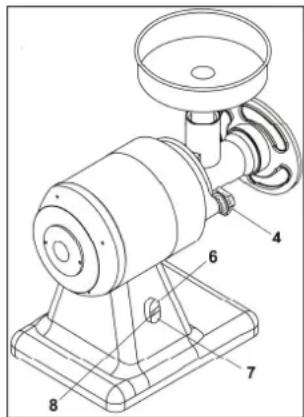
Control descriptions
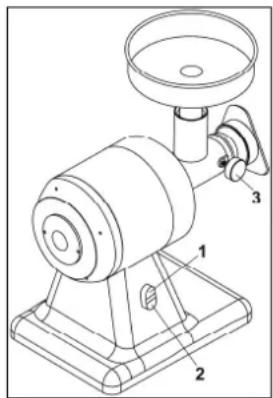
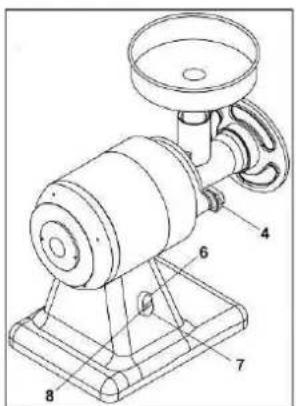
1) Start button "I"
Push the button to start up the machine. In the combined and grater versions, start-up is only enabled when the grater lever is lowered.
2) Stop button "0"
Press the button to stop the machine.
3) Mincer filler knob (mod.AB12/T-L - TR12/S only)
Turn the knob to block (clockwise) or unblock (anti-clockwise) the mincer filler. Do not start the machine until the mincer filler is blocked.
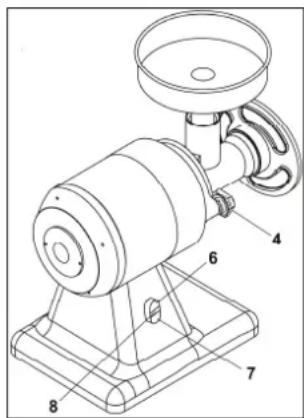
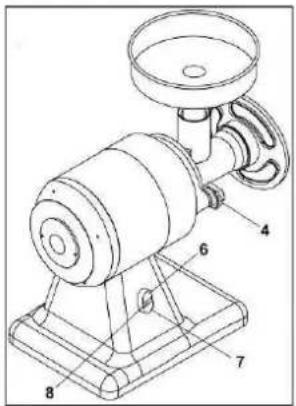
4) Mincer body blocking knobs (mod.AB12/AT - AB22/AE - TR12/TS - TR12/C - TR22/TE - TR22/C only)
Screw down the knobs to block or screw off to unblock the mincer body.
5) Grater lever (mod.AB12/T-L-AT - AB22/AE - GR12/S only)
Press the lever down to grate the product to be processed.
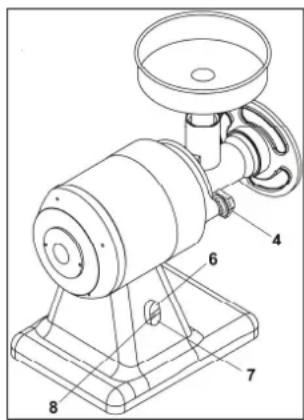
6) Forward gear button (mod.AB22/AE - TR22/TE - TR22/C only)
Press the button to start the machine. In the combined versions, start-up is only enabled when the grater lever is lowered.
7) Reverse gear button (mod.AB22/AE - TR22/TE - TR22/C only)
Press the button to invert the direction of machine rotation. In combined versions, start-up is only enabled when the grater lever is lowered.
8) Stop button (mod.AB22/AE - TR22/TE - TR22/C only)
Press the button to stop the machine.
natural_image
Technical line drawing of a mechanical device with labeled parts (no text or symbols present)
Using the grater
- In combined mincer-grater models, remove the mincer set before using the grater.
- Lift the grater lever and place the product to be processed inside the grater mouth.
- Lower the grater lever and press the start button "I" (the machine will only start if the grater lever is lowered).
- Gradually press the lever until the product is finished.
- At the end of processing lift the lever and introduce more product into the grater mouth; lower the lever once more and press start button "I" (the machine will only start if the grater lever is lowered).
- In order to stop the machine, press the stop button "0" or lift the grater lever.
- At the end of the work cycle, grate a piece of hard bread or use the appropriate brush to clean the roller.
Using the mincer
- In combined grater-mincer versions, lower the grater lever.
- Tighten the filler knob in the versions mod.AB12/T-L - TR12/S.
- Tighten the mincer body-blocking knobs in versions mod.AB12/AT – AB22/AE – TR12/TS – TR12/C – TR22/TE – TR22/C.
- Tighten the handwheel on the output mouth of the mincer without blocking.
- Start-up the machine by pressing start button "I" (in combined models start-up is only possible if the grater lever is lowered).
- Place the product inside the upper mincer mouth and press it down using the pestle supplied.
- At the end of the work session press the stop button "0".
- At the end of the work cycle remove the mincer set and wash using suitable detergents in hot water or in the dishwasher.
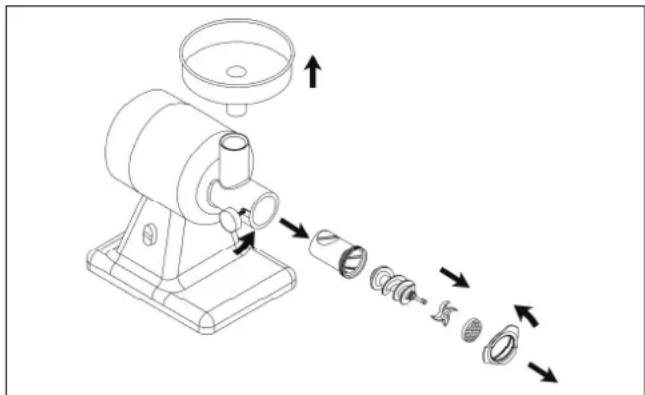
Dismantling the mincer set
Mod.AB12/T-L - TR12/S:
- Remove the hopper from the upper mouth.
- Rotate the handwheel anti-clockwise.
- Extract:
- the mincing plate;
- the blade;
- and the volute, in sequence
- Unscrew the filler knob by turning anti-clockwise and extract the mincer filler.
- Perform operations in reverse order to reassemble the mincer group.
natural_image
Line drawing of a manual kitchen tool with exploded view showing internal components (no text or symbols)Mod.AB12/AT - AB22/AE - TR12/TS - TR12/C - TR22/TE - TR22/C:
- Remove the hopper from the upper mouth.
- Turn the handwheel anti-clockwise.
- Extract
- the mincing plate;
- the blade;
- and the volute in sequence
- Unscrew the filler knobs and extract the mincer filler.
- Perform operations in reverse order to reassemble mincer group.

i INFORMATION: Prior to each work cycle ensure that the removable parts are properly fixed to the machine.
Recommendations for use
The completely extractable mincing set on the versions AB12/AT-AB22/AE-TR12/TS-TR12/C-TR22/TE-TR22/C, permits the user to place it in refrigerators and other similar devices, even when it contains residual product. This feature makes it possible to use the mincer at different times of the day without having to wash and clean the various components after use, in conformity with hygiene laws currently in force.
End-of-day cleaning
- At the end of the working day remove the plug from the power socket.
- Clean thoroughly using neutral products.
- Wash the outer part of the machine using a damp sponge.
- Do not use steel wool or abrasive pads.
• Dismantle the mincer set and wash using suitable detergents in hot water or in the dishwasher.
Long periods of inactivity
If the machine is to be left idle for long periods of time, turn off the main wall switch, thoroughly clean the machine and cover it with a sheet to protect it from dust.
Foreword
In the event of breakdowns or malfunctioning, turn off the main wall switch and contact your local Dealer's After-sales service. Do not disassemble any internal machine parts.
The Manufacturer declines all responsibility for any tampering!
Troubles, causes and remedies
| Trouble | Cause | Remedy |
| The machine will not start | Main switch is off | Turn the main switch on to “I” |
| No voltage input to power line | Apply to your local Dealer's After-sale service | |
| Logic board protective fuse is blown | Apply to your local Dealer's After-sale service |
Disposal and recycling
natural_image
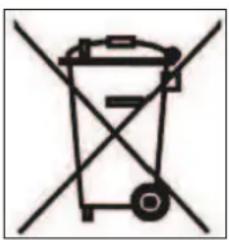
Symbol of a trash bin crossed with no text or labelsThe markings illustrated here (barred garbage bin), on the utensil data plate, indicates that at the end of its working life, the utensil must be disposed of and recycled according to European Directive. The Directive provides for the separate collection of electric and electronic equipment by a collection system called RAEE. Upon purchasing a new utensil, the user must not dispose of the utensil as urban waste but must return it, in a one-to-one exchange, to the dealer or distributor. The dealer may dispose of the utensil following the procedures set by the RAEE collection system. In the event the user disposes of the utensil without purchasing a new one, in Italy contact the manufacturer who will provide suitable information on machine disposal at the collection centre closest to the user. Users who do not reside in Italy must contact the Ministry of the Environment in their countries who will provide information necessary for correct disposal. Failure to observe the disposal procedure may cause harmful effects on the environment and people. Therefore, total or partial illicit utensil disposal by users is punishable by local authorities.
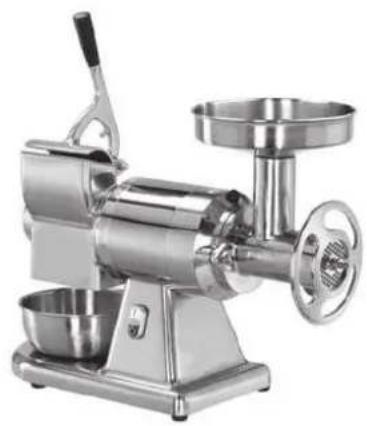
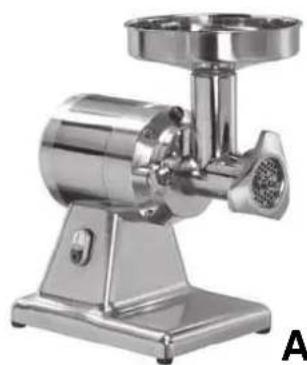
AB12/T-L • TR12/S • GR12/S • TR12/C • AB12/AT • TR12/TS • AB22/AE • TR22/C • TR22/TE

natural_image
Modern stainless steel manual grater with handle and side bowl (no visible text or labels)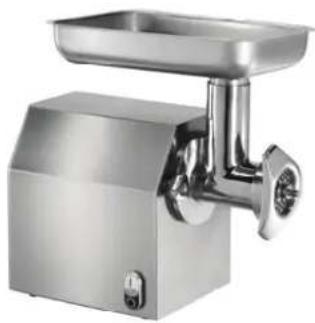
natural_image
Exterior view of a stainless steel meat processing unit (no text or symbols visible)370.223
natural_image
Close-up of a stainless steel manual laboring machine (no visible text or labels)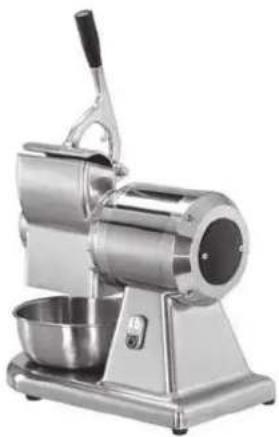
natural_image
Modern stainless steel manual grater with handle and bowl (no visible text or symbols)A370.212 A370.350
natural_image
Technical line drawing of a manual milling machine with handle and base (no text or symbols)natural_image
Line drawing of two hands holding a rectangular box (no text or symbols)Zone d'installation
natural_image
Technical line drawing of a mechanical device with labeled parts (no text or symbols present)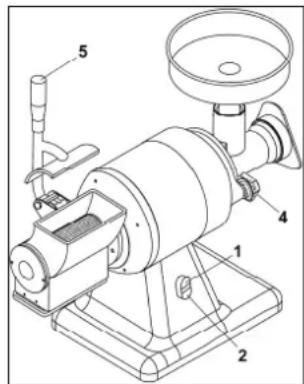
Mod.AB12/AT - AB22/AE - TR12/TS - TR12/C TR22/TE - TR22/C:

Inconvénients, causes, remèdes
natural_image
Symbol of a trash bin crossed with no text or labelsTR12/TS • AB22/AE • TR22/C • TR22/TE
natural_image
Modern stainless steel manual grater with handle and side bowl (no visible text or labels)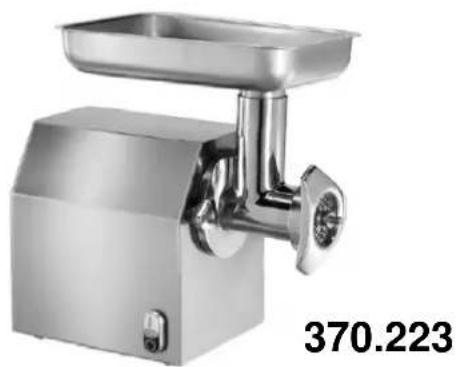
natural_image
Close-up of a stainless steel meat processing machine (no visible text or symbols)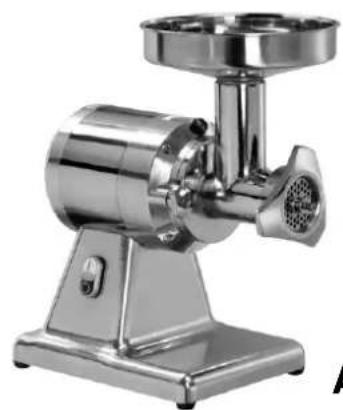
natural_image
Exterior view of a stainless steel meat maker (no text or symbols visible)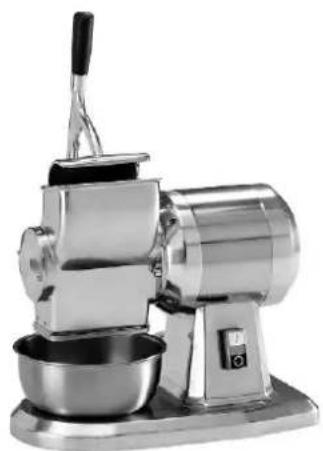
natural_image
Modern stainless steel kitchen grater with bowl and side-mounted stand (no visible text or symbols)A370.212
A370.350
VLEESMACHINE EN RASP
INHOUDSOPGAVE
1. ALGEMENE INFORMATIE
natural_image
Technical line drawing of a mechanical pump or motor with labeled dimension A (no text or symbols beyond the label)| mm. | A | B | C | mm. | A | B | C | ||
| TR12/S | 400 | 290 | 470 | GR12/S | 420 | 300 | 420 |  | 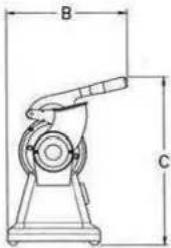 |
| TR12/TS | 400 | 290 | 470 | ||||||
| TR12/C | 270 | 440 | 400 | ||||||
| TR22/TE | 450 | 290 | 480 | ||||||
| TR22/C | 270 | 470 | 410 | ||||||
natural_image
Technical line drawing of a manual milling machine with no visible text or symbolsnatural_image
Line drawing of a hand holding a rectangular box (no text or symbols)natural_image
Technical line drawing of a mechanical device with labeled parts (no text or symbols present)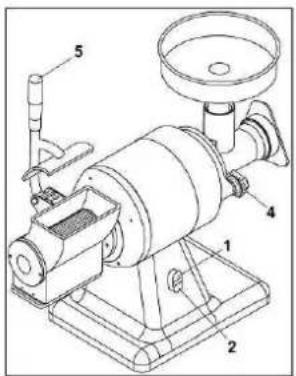
Bediening van rasp
natural_image
Technical line drawing of a mechanical device with exploded view showing internal components and directional arrows (no text or symbols)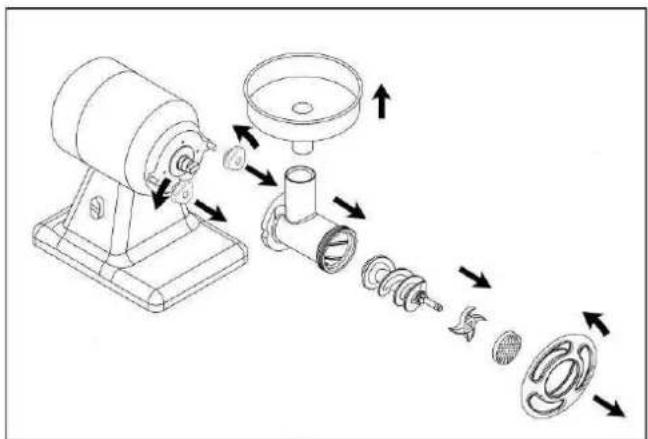
natural_image
Modern stainless steel manual laboring machine with handle and side plate (no visible text or labels)
natural_image
Exterior view of a stainless steel meat processing unit (no text or symbols visible)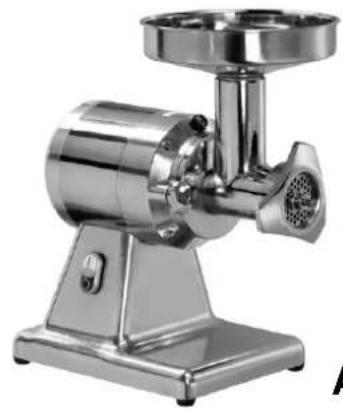
natural_image
Exterior view of a stainless steel meat maker (no text or symbols visible)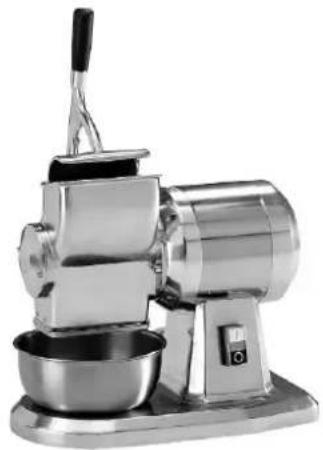
natural_image
Modern stainless steel coffee maker with a bowl on top (no visible text or symbols)A370.212
A370.350
MASZYNA DO MIEŚA I TARKA
SPIS TREŚCI
1. INFORMACJE OGÓLNE
3. UŻYTKOWANIE I CZYSZCZENIE
natural_image
Technical line drawing of a mechanical device with no visible text or symbolsnatural_image
Line drawing of a hand holding a rectangular box (no text or symbols)Miejsce ustawienia
8. Przycisk stop (tylko Mod. AB22/AE - TR22/TE - TR22/C rewersy)
natural_image
Technical line drawing of a mechanical device with labeled parts (no text or symbols present)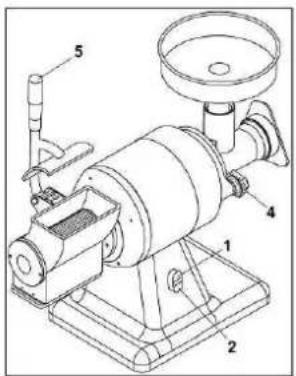
Obsługa tarki
natural_image
Technical line drawing of a mechanical presser with exploded view showing internal components (no text or symbols)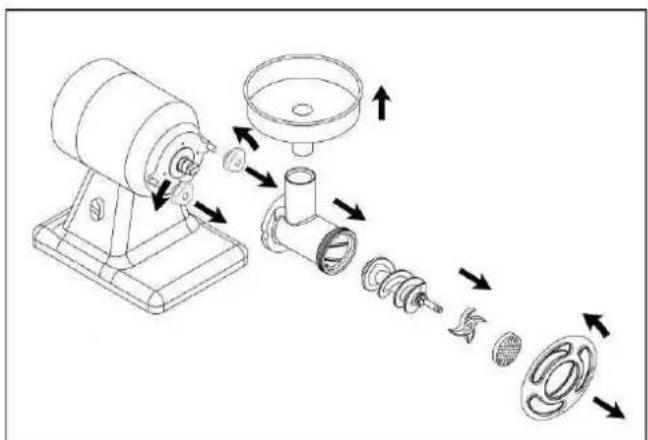

natural_image
Symbol of a trash bin crossed out by diagonal lines, representing waste sorting or disposal (no text or labels)- Aufstellbereich
- 8) Stopp-Taster (nur Mod. AB22/AE - TR22/TE - TR22/C Reverse)
- Bedienung der Reibe
- Mod.AB12/AT - AB22/AE - TR12/TS - TR12/C TR22/TE - TR22/C:
- MEAT MINCER AND GRATER
- CONTENTS
- GENERAL INFORMATION
- INSTALLATION
- OPERATION AND CLEANING
- TROUBLESHOOTING, RECYCLING
- ANNEXES
- Purpose of this manual
- Manufacturer and machine Identification
- Machine description
- Combined mincer - grater:
- Mincer:
- Grater:
- Safety devices
- Safety information
- DANGER – CAUTION: Using plates with hole diameters over 8mm and with total thickness under 5 mm is strictly prohibited.
- Packing and unpacking
- Installation area
- Electric connection
- DANGER – CAUTION: Electric connection to the power mains should be executed by skilled engineers.
- Three-phase connection
- Control descriptions
- 1) Start button "I"
- 2) Stop button "0"
- 3) Mincer filler knob (mod.AB12/T-L - TR12/S only)
- 4) Mincer body blocking knobs (mod.AB12/AT - AB22/AE - TR12/TS - TR12/C - TR22/TE - TR22/C only)
- 5) Grater lever (mod.AB12/T-L-AT - AB22/AE - GR12/S only)
- 6) Forward gear button (mod.AB22/AE - TR22/TE - TR22/C only)
- 7) Reverse gear button (mod.AB22/AE - TR22/TE - TR22/C only)
- 8) Stop button (mod.AB22/AE - TR22/TE - TR22/C only)
- Using the grater
- Using the mincer
- Dismantling the mincer set
- Mod.AB12/T-L - TR12/S:
- Mod.AB12/AT - AB22/AE - TR12/TS - TR12/C - TR22/TE - TR22/C:
- i INFORMATION: Prior to each work cycle ensure that the removable parts are properly fixed to the machine.
- Recommendations for use
- End-of-day cleaning
- Long periods of inactivity
- Foreword
- Disposal and recycling
- AB12/T-L • TR12/S • GR12/S • TR12/C • AB12/AT • TR12/TS • AB22/AE • TR22/C • TR22/TE
- Zone d'installation
- TR12/TS • AB22/AE • TR22/C • TR22/TE
- VLEESMACHINE EN RASP
- INHOUDSOPGAVE
- ALGEMENE INFORMATIE
- Bediening van rasp
- MASZYNA DO MIEŚA I TARKA
- SPIS TREŚCI
- INFORMACJE OGÓLNE
- UŻYTKOWANIE I CZYSZCZENIE
- Miejsce ustawienia
- Przycisk stop (tylko Mod. AB22/AE - TR22/TE - TR22/C rewersy)
- Obsługa tarki
Brand : BARTSCHER
Model : A370350
Category : Electric grater