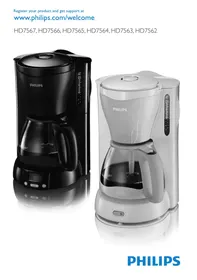
USER MANUAL HD7546/20 PHILIPS
ENGLISH 6
DANSK 11
DEUTSCH 16
ΕΛΛΗΝΙΚΑ 22
ESPAÑOL 28
SUOMI 33
FRANÇAIS 38
ITALIANO 44
NEDERLANDS 50
NORSK 56
PORTUGUÊS 61
SVENSKA 66
TÜRKÇE 72
Introduction
Congratulations on your purchase and welcome to Philips! To fully benefit from the support that Philips offers, register your product at www.philips.com/welcome.
Important
Read this user manual carefully before you use the appliance and save it for future reference.
Danger
- Never immerse the appliance in water or any other liquid.
Warning
- Check if the voltage indicated on the appliance corresponds to the local mains voltage before you connect the appliance.
- Do not use the appliance if the plug, the mains cord or the appliance itself is damaged.
- If the mains cord is damaged, you must have it replaced by Philips, a service centre authorised by Philips or similarly qualified persons in order to avoid a hazard.
- This appliance is not intended for use by persons (including children) with reduced physical, sensory or mental capabilities, or lack of experience and knowledge, unless they have been given supervision or instruction concerning use of the appliance by a person responsible for their safety.
- Children should be supervised to ensure that they do not play with the appliance.
- Keep the mains cord out of the reach of children. Do not let the mains cord hang over the edge of the table or worktop on which the appliance stands.
Caution
- Do not place the appliance on a hot surface and prevent the mains cord from coming into contact with hot surfaces.
- Unplug the appliance if problems occur during brewing and before you clean it.
Electromagnetic fields (EMF)
This Philips appliance complies with all standards regarding electromagnetic fields (EMF). If handled properly and according to the instructions in this user manual, the appliance is safe to use based on scientific evidence available today.
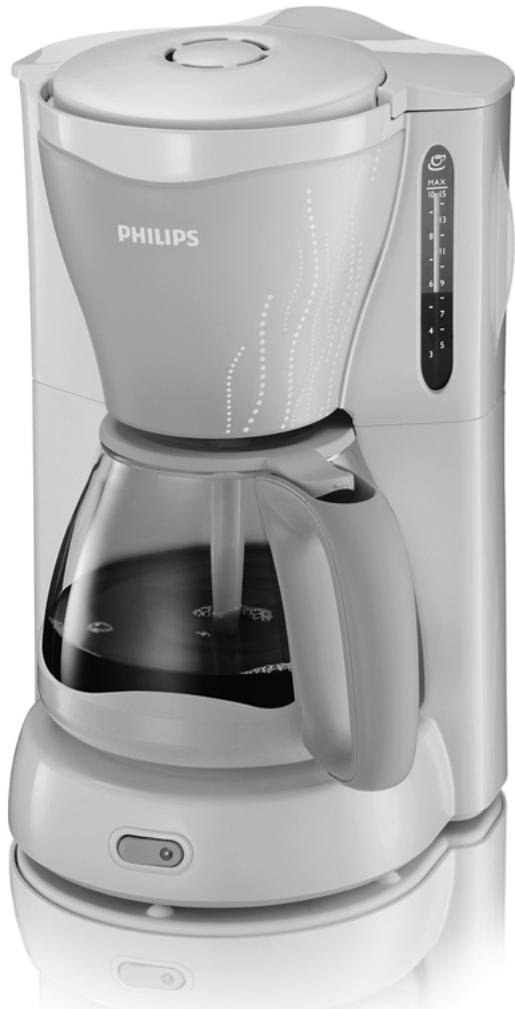
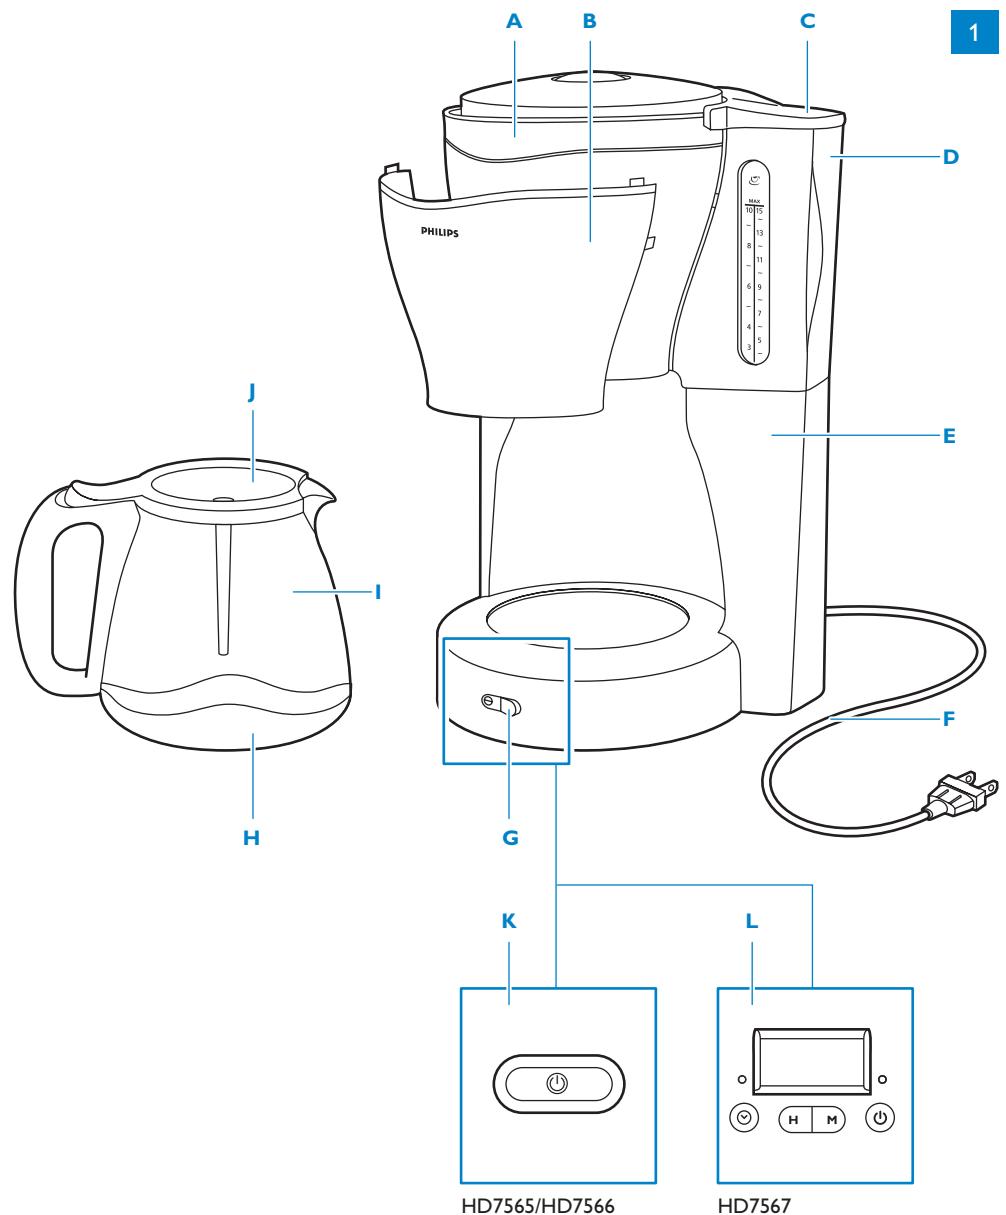
General description (Fig. 1)
A Filter holder
B Detachable front cover
C Water tank lid
D Water tank
E Coffeemaker
F Mains cord
G On/off rocker switch with power-on light (HD7564/HD7563/HD7562)
H Buffer ring (HD7567/HD7562)
I Jug
J Jug lid with mixing pipe
K On/off button with power-on light ring (HD7566/HD7565)
L Display with timer and on/off button with power-on light (HD7567)
Preparing for use
1 Put the appliance on a flat and stable surface.
2 Put the plug in an earthed wall socket.
3 To store excess cord, push it into the opening at the back of the coffeemaker (Fig. 2).
Setting the clock (HD7567 only)
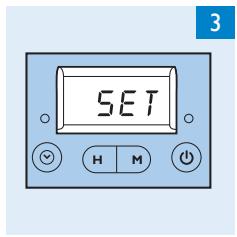
1 After you have put the plug in the wall socket, the word 'SET' appears on the display (Fig. 3).
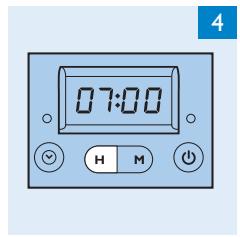
2 Press the 'H' button one or more times to set the hour (Fig. 4).
The display shows the set hour (e.g. 7:00).
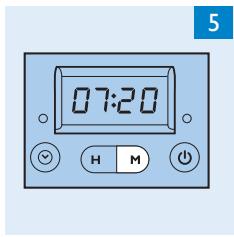
3 Press the 'M' button one or more times to set the minutes (Fig. 5).
The display shows the set minutes (e.g. 7:20).
Using the appliance
Brewing coffee
1 Make sure the plug is in the wall socket.
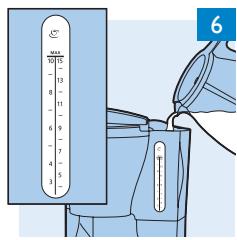
2 Fill the water tank with fresh, cold water (Fig. 6).
- The graduations on the left are for large cups (120ml).
- The graduations on the right are for small cups (80ml).
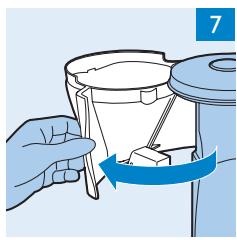
3 Open the filter holder (Fig. 7).
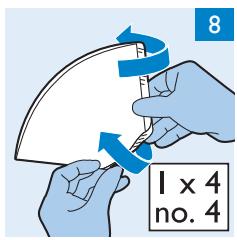
4 Take a paper filter (type 1x4 or no. 4) and fold the sealed edges to prevent tearing and folding (Fig. 8).
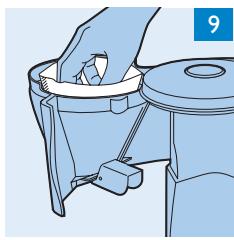
5 Put the filter in the filter holder (Fig. 9).
Note: Some versions come with a permanent filter. In this case you do not need to use paper filters.
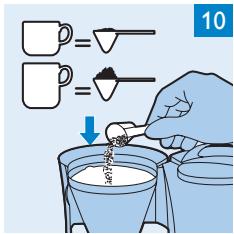
6 Put ground coffee (filter-fine grind) in the filter (Fig. 10).
- For large cups: use one heaped measuring spoon of ground coffee for each cup.
- For small cups: use one level measuring spoon of ground coffee for each cup.
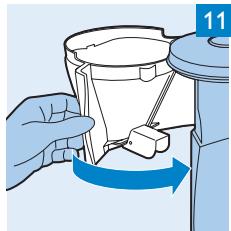
7 Close the filter holder. (Fig. 11)
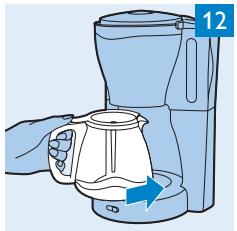
8 Place the jug on the hotplate (Fig. 12).
9 Switch on the appliance.
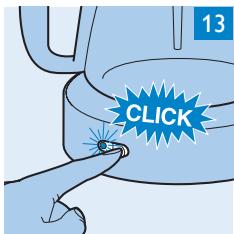
- HD7564/HD7563/HD7562: Press the on/off rocker switch. The power-on light goes on (Fig. 13).
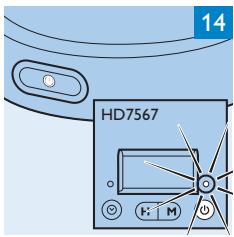
- HD7566/HD7565: Press the on/of button. The power-on light ring round the button goes on (Fig. 14).
- HD7567: Press the on/off button. The power-on light goes on.
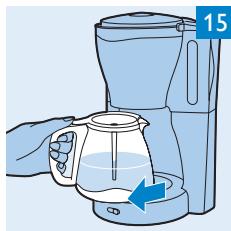
10 When all the water has passed through the filter, you can remove the jug from the appliance (Fig. 15).
If you remove the jug for more than 30 seconds before all the water has passed through the filter, the filter may overflow.
11 Press the on/off button (HD7567/HD7566/HD7565) or on/off rocker switch (HD7564/HD7563/HD7562) to switch off the appliance after use.
HD7566/HD7565: The appliance switches off automatically after 2 hours.
12 Let the appliance cool down for at least 3 minutes before you start brewing coffee again.
Timer (HD7567 only)
You can use the timer to preset the time at which you want the coffeemaker to brew coffee.
Note: If you want to use the timer function, make sure the clock is set to the correct time. You can only set the current time when the appliance is switched off (see section ‘Setting the clock (HD7567)’ in chapter ‘Preparing for use’).
Note: After a power failure, you have to set the clock and the timer again.
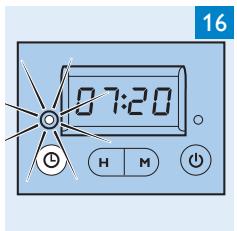
1 Press the timer button (Fig. 16).
The display shows the set auto-on time and the orange timer light goes on.
After you press the timer button, the normal time reappears if you stop pressing the hour button or minutes button for more than 5 seconds. In that case, the timer is set.
2 Press the 'H' button one or more times to set the hour (Fig. 4).
3 Press the 'M' button one or more times to set the minutes (Fig. 5).
5 seconds after you stop pressing the hour button or minutes button, the normal time reappears. The yellow timer light goes on to indicate that the timer is set.
4 Follow steps 1 to 8 of section ‘Brewing coffee’ to prepare the appliance for brewing coffee.
5 The appliance starts brewing coffee at the preset time.
The yellow timer light goes off and the red power-on light goes on.
Note: If you want to check whether you have set the timer correctly, press the timer button.
Note: If you want to switch off the timer, press the on/off button.
Features
Drip stop
- The drip stop system prevents coffee from dripping through the filter onto the hotplate when you remove the jug from the appliance during or after brewing.
Protective buffer ring (HD7567/HD7562 only)
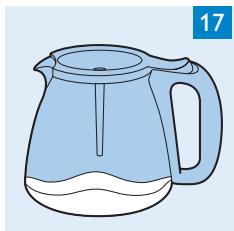
- The jug has a detachable buffer ring that helps prevent the jug from breaking (Fig. 17).
Aroma swirl
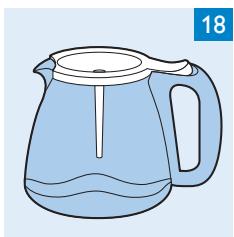
- A mixing pipe attached to the jug lid makes the coffee circulate through the jug for optimal aroma distribution (Fig. 18).
Heating up coffee in the microwave
If you want to heat up coffee, you can place the jug in the microwave, even with the buffer ring attached.
Cleaning
Never immerse the appliance in water.
Never use scouring pads, abrasive cleaning agents or aggressive liquids such as petrol or acetone to clean the appliance. Only use a damp cloth
1 Let the appliance cool down and unplug it.
2 Clean the outside of the appliance with a damp cloth.
3 If you have used a permanent filter, empty it and rinse it under the tap.
Filter holder
You have to clean the filter holder regularly to avoid the build-up of coffee residues.
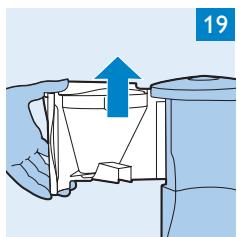
1 Lift up the filter holder to detach the lower hinge of the filter holder. (Fig. 19)
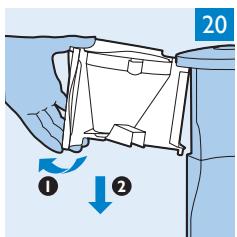
2 Tilt the bottom edge of the filter holder towards you (1). Move the filter holder downwards (2). (Fig. 20)
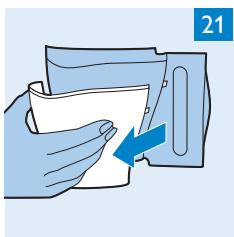
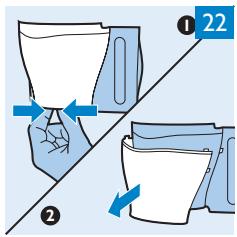
3 Detach the front cover of the filter holder.
- All types except HD7564: Pull the front cover off the filter holder (Fig. 21).
- HD7564: Squeeze the pins in the bottom of the filter holder (1) and remove the front cover (2) (Fig. 22).
4 Clean the front cover.
- All types except HD7564: clean the plastic front cover in hot water with some washing-up liquid or in the dishwasher.
- HD7564: clean the metal front cover with a moist cloth.
Do not clean the metal cover of the filter holder in the dishwasher.
5 Clean the filter holder in hot water with some washing-up liquid or in the dishwasher.
6 After cleaning, reattach the front cover to the filter holder.
- All types except HD7564: Snap the front cover back onto the filter holder.
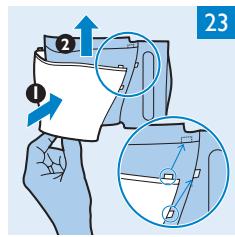
- HD7564: Slide the positioning lugs in the openings (1) and then slide the metal cover upwards as far as it goes (2) (Fig. 23).
7 Put the filter holder back into the appliance.
Glass jug
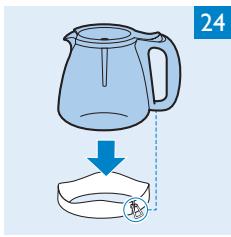
1 HD7567/HD7562: Flip open and pull down the metal clamp to detach the buffer ring (Fig. 24).
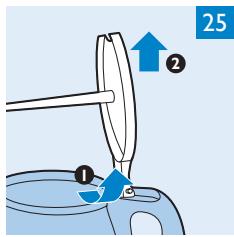
2 Open the lid of the jug. Tilt the lid slightly to the left or right (1) and then pull it off the jug (2). (Fig. 25)
3 Clean the jug, the buffer ring (HD7567/HD7562 only) and the jug lid in hot water with some washing-up liquid or in the dishwasher.
4 After cleaning, rinse the glass jug with fresh hot water.
5 Make sure that the mixing pipe is not blocked by anything before you reattach the lid to the jug.
Descaling
Regular descaling prolongs the life of the appliance and guarantees optimal brewing results for a long time.
In case of normal use (two full jugs of coffee every day), we recommend the following descaling frequency:
- 2 or 3 times a year if you use soft water (up to 18dH);
- 4 or 5 times a year if you use hard water (over 18dH).
Contact your local water board for information about the water hardness in your area.
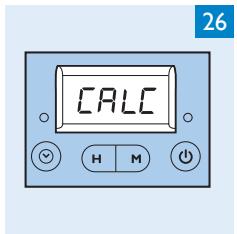
- HD7567: The word CALC appears on the display when you need to descale the appliance (Fig. 26).
To descale the appliance, perform the following steps:
1 Fill the water tank half full with water and a liquid descaler according to the instructions on the package.
Tip: You can also use white vinegar (4% acetic acid).
Do not use a powder descaler.
Do not put a filter and ground coffee in the filter holder.
2 Let the appliance complete two brewing cycles.
See chapter 'Using the appliance'. Let the appliance cool down for 3 minutes before you start the second brewing cycle.
3 Let the appliance complete two more brewing cycles with fresh, cold water to remove all descaler and scale residues.
4 Clean the jug and the filter holder (see chapter 'Cleaning').
Replacement
You can order a new glass jug from your Philips dealer or a Philips service centre.
- HD7562/35 and HD7566/35: order no. 4222 459 45334, dark lilac incl. buffer ring.
- HD7562/55 and HD7566/55: order no. 4222 459 45335, sunflower orange incl. buffer ring..
- HD7565/80: order no. 4222 459 45336, black.
Environment
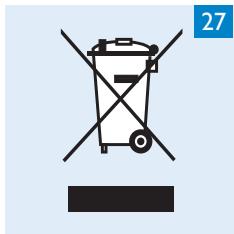
- Do not throw away the appliance with the normal household waste at the end of its life, but hand it in at an official collection point for recycling. By doing this, you help to preserve the environment (Fig. 27).
Guarantee & service
If you need service or information or if you have a problem, please visit the Philips website at www.philips.com or contact the Philips Consumer Care Centre in your country (you find its phone number in the worldwide guarantee leaflet). If there is no Consumer Care Centre in your country, go to your local Philips dealer.
Troubleshooting
This chapter summarises the most common problems you could encounter with the appliance. If you are unable to solve the problem with the information below, contact the Consumer Care Centre in your country.
| Problem | Solution |
| Brewing coffee takes longer than usual. | The appliance needs to be descaled (see chapter ‘Descaling’). |
| The coffee maker switches off before the water tank is empty. | The appliance needs to be descaled (see chapter ‘Descaling’). |
| The filter overflows when the jug is removed from the appliance during brewing. | Do not remove the jug for more than 30 seconds, to prevent the filter from overflowing. |
| The coffee flows from the filter; but does not flow into the jug properly or at all. | Check if the mixing pipe is blocked. |
Introduktion