
LPad Universe LETAB1008 - Tablet Leotec - Free user manual and instructions
Find the device manual for free LPad Universe LETAB1008 Leotec in PDF.

| Product type | Touchscreen Tablet |
| Brand | Leotec |
| Model | LPad Universe LETAB1008 |
| Screen | 10.1-inch capacitive TFT, resolution 1024x600 |
| Operating system | Android 4.1 (Jelly Bean) |
| Processor | Rockchip 2928 (Cortex-A9) 1.2 GHz |
| RAM | 1 GB DDR3 |
| Internal storage | 8 GB (flash memory) |
| Expandable storage | MicroSD up to 32 GB |
| Connectivity | Wi-Fi, HDMI, USB Host/OTG, mini USB, 3.5mm headphone jack |
| Battery | Rechargeable lithium polymer 4500 mAh, 3.7 V |
| Power supply | AC adapter 5.0-5.5 V / 1.5 A (included) |
| Dimensions | 263 x 165 x 10.5 mm |
| Weight | 700 g |
| Sensors | 3D Gravitational |
| Supported video formats | HD 1080p, AVI, H.264, DIVX, XVID, RM, RMVB, WMV, MOV, MP4, MPEG, FLV, ASF, TS, TP, 3GP, etc. (supports 2160p) |
| Supported audio formats | MP3, WMA, APE, FLAC, OGG, WAV, AAC |
| Supported photo formats | JPG, JPEG, GIF, BMP, PNG |
| Supported ebook formats | TXT, EPUB, PDF, WORD, EXCEL, POWERPOINT |
| Warranty | 24 months for the device (excluding battery and accessories) |
| Maintenance and cleaning | Clean with a soft dry cloth; do not use alcohol, benzene, or similar products |
| Safety | Do not expose to moisture, high temperatures, drops; use only the supplied charger |
Frequently Asked Questions - LPad Universe LETAB1008 Leotec
User questions about LPad Universe LETAB1008 Leotec
0 question about this device. Answer the ones you know or ask your own.
Ask a new question about this device
Download the instructions for your Tablet in PDF format for free! Find your manual LPad Universe LETAB1008 - Leotec and take your electronic device back in hand. On this page are published all the documents necessary for the use of your device. LPad Universe LETAB1008 by Leotec.
USER MANUAL LPad Universe LETAB1008 Leotec
Thank you for choosing this LEOTEC product. We hope it will satisfy you totally and will work perfectly for a long time. This Tablet with Android™ operating system allows you to download many applications (Apps) and take full advantage of all the Internet potential (surf the net, send and receive emails, download widgets, etc.), as you would on a laptop or desktop computer. Enjoy watching videos or listening to music, communicate over Internet with any instant messaging application or even read or edit office documents (text documents, spreadsheets, presentations, etc.)
The LEOTEC team
All information in this manual is correct at the time of publication. Now, to be updating and improving our products, the appearance or the device software may differ from those described in this manual. You can get updates through our website www.leotec.com
Attention:
This handbook contains important security measures and the correct use of the product information, in order to avoid accidents. Please make sure to reading the manual carefully before use the device.
- Please don't be in high temperature, moisture or very dust place
- Please don't be in high temperature, especially in summer don't put the device in the car when Windows closed.
- Avoid fall or Violent collision of the device, don't make the TFT display screen were violent tremor, This could cause TFT display screen abnormal or damage.
- Please choose the appropriate volume, Use headphones should not be too big volume, If feel tinnitus, Lower the volume or stop using it please charge In the following condition,
The battery power ICONS shows have no power
The system automatically shut off, startup after power off soon
Operation buttons no response
The machine that the top right corner show red icons
-
When the device in the format or ongoing upload and download file, please don't suddenly disconnect, This could cause application error.
-
For those who because of damage to the product, repair, or other causes of erased the memory, The company shall not be liable for any responsibility, please follow the user manual for the standardized operation to use the device.
-
Don't disassemble the product, don't use alcohol, Thinner or benzene to scrubbing products
-
Don't use the device one of the place of prohibit to use electronic equipment in regional (such as the plane)
- Please don't using the Tablet PC when you in driving or walking down the street,
- USB just only be used for data transmission
The company reserves the right to improve product, products specification and design have any change, The information is subject to changes without prior notice.
Note that this device uses an operating system license AndroidTM free of charge so there can be substantial differences in the instructions in this manual regarding to those found in your device, as well as differences in the language of the displayed options due to operating system upgrades.
Remark All pictures in this manual is just for your reference. products specification and design have any change, The information is subject to changes without prior notice.
INTRODUCTION
First time use
Battery charge
Before using your LEOTEC L-Pad for the first time, fully charge the battery. Plug the adapter / charger. Caution: Use ONLY the charger / adapter supplied with your device LEOTEC or a compatible model with exactly the same specifications. The LEOTEC Tablet will turn on and start charging. The battery icon in the main interface will indicate when the device is fully charged. If not connected to a power adapter, the icon displays the percentage of available battery.
Configuration
We recommend that the first time you use the L-Pad Tablet LEOTEC configure core values such as language, location, date, time, security options and backup found in the Settings section

1. Appearance and button:
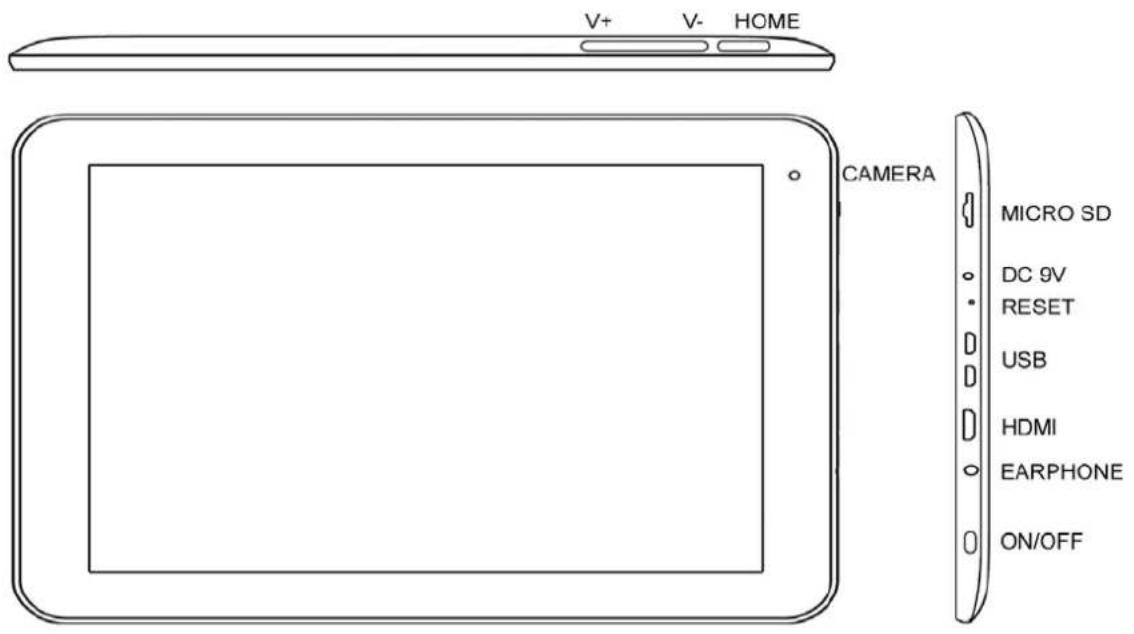
1.1 Touch panel
10,1" Capacitive touch panel: In the Operation, to click, dragging on the touch panel
1.2 POWER
Start up: Long Press and hold the power button, then it will load the operating system and display the main interface.
Shutdown: In the main menu interface, Press the power button about 5 second to shutdown, The system can hint "power off" option, Clic "ok". you can safely shut down.
Lock screen: Short press Power button to lock screen or unlock screen.
Remark 1. When power is empty, system will shut down automatically.
- Illegal turn off the device, restart will scan and restore the disk, it may take longer time to enter into system
1.3 HOME key
Short press to return to main interface.
1.4 V- key
Long press to decrease volume.
1.5 V+ key
Long press to increase volume
1.6 Earphone jack
3.5 mm standard earphone jack
1.7 HDMI
Mini HDMI output interface
1.8 TF card
Memory expand through TF-CARD slot: external T-FLASH card
1.9 Mini USB
Mini USB jack: you can use it to connect the computer for data transmission, charging and external connection USB flash drive
1.10 RESET
Remark: unless unable to shutdown, otherwise don't use the reset, suggest you to shutdown by normal, or it will easy to damage the machine system.
1.11 DC
Connecting the battery charger.
Attention: ONLY USE THE CHARGER SUPPLIED BY THE MANUFACTURER or ANY APPROVED BY THE SAME.
First use - Battery management and charge
Before first use, please set the device's battery is fully charged
Just need to connect the adaptor or USB interface, then you can charge
The first two times charging please keep about 6 hours, after that you just need 4 hours to charge.
Remark: This tablet using Built-in type polymer battery, Charge must be to choose standard adaptor (Input: AC110~240V 50/60Hz Max: 180MA.. Output: DC5.0~5.5V/1.5A), this device without supply DC charging, USB interface can charge, Choose USB interface to charger During the charging, the battery icon will scroll
When finished charging, battery icon will become green and stop rolling
In order to prolong the service life of the machine, suggest use out battery power before charge it
Remark:
1 If you long time don't to use this Tablet, in order to avoid power consumption caused damage, Please charge/play the battery once a month.
2 After low battery shut down, connect DC adaptor, device will remind low battery, charging, need to wait some time until the battery is enough power to enter into main menu.
3 Device charging should be in standby status for reach normal charging time.
Because with device and screen consumption, it may cause longer charging time.
2. Connection with PC
Use USB cable to connect device to PC, device will pop up the USB connection window, click Turn on USB storage to connect to PC
Once connected click on the USB icon that appears at the bottom right of the screen:

The device enables users to access the screen to activate the USB storage as shown in the following screen:
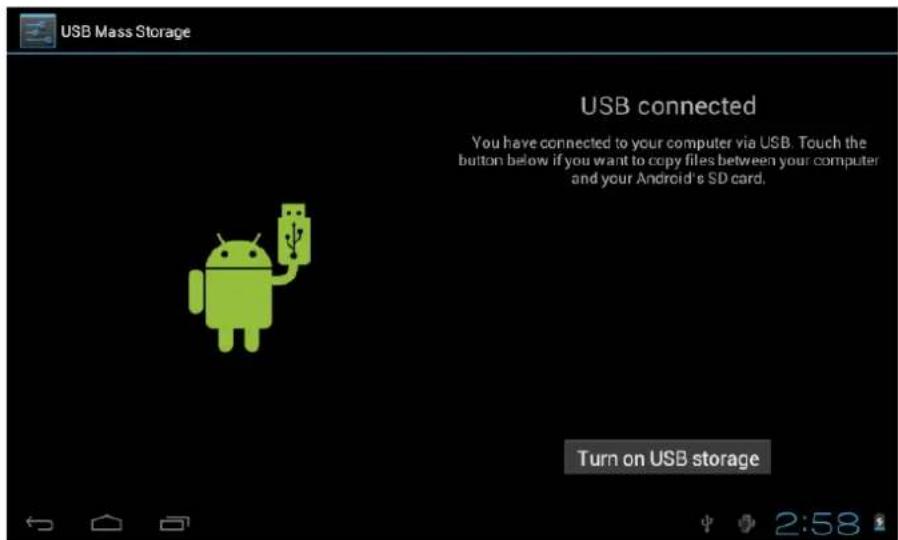
Into the load mode, you can copy, delete the file on the device and the file on the memory card.
3. Equipment operation interface
3.1 Main interface describe
After startup will enter the main interface
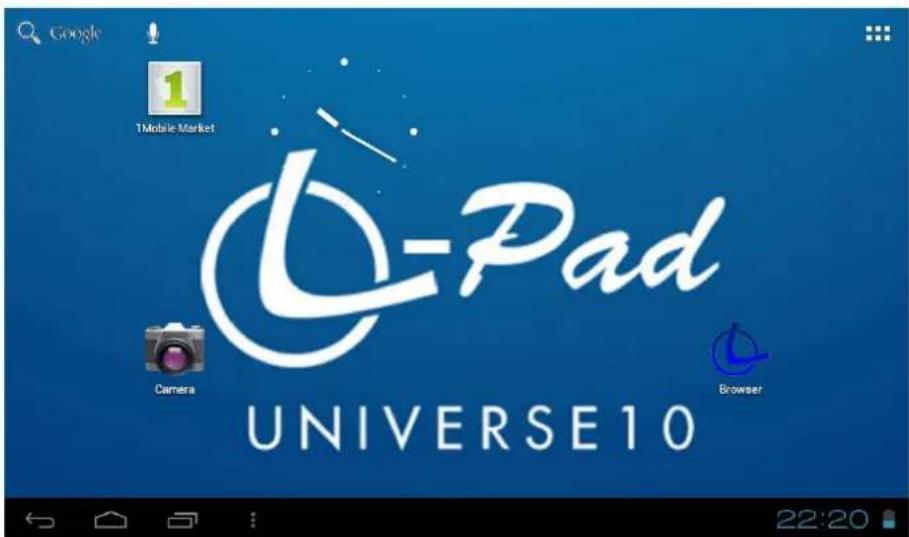
The main interface, can be divided into 5 parts, each of the corners and the main body of the screen. In the main of the screen are housed icons and widgets that the user wants, capable of being moved to the left (2 screens) or right (2 screens) thus has a total of 5 screens that can be
added shortcuts, bookmarks and Widgets

The upper left corner: can either perform a Google search by typing the desired look or do a search for voice (in either case must be connected to the Internet)
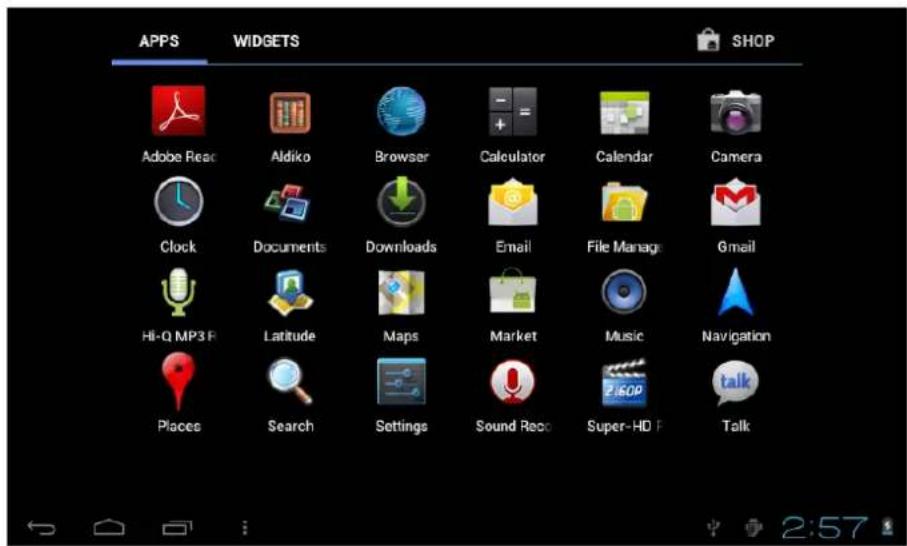
The upper right corner: access to applications and installed Widgets.

Applications are programs that run when the user wishes and stop working when the user exits the application. They can be installed by downloading the application 1Mobile Market or through websites that offer Android applications.
- Widgets are small easy access programs that run continuously, they are located in any of the main screens. For example one of the widgets that are already installed and running is the analogue clock

The lower left corner has 4 icons

Allows to go back

Go to the main screen. The same function as the

button on the top of the Tablet.

View and select the applications that are currently running.

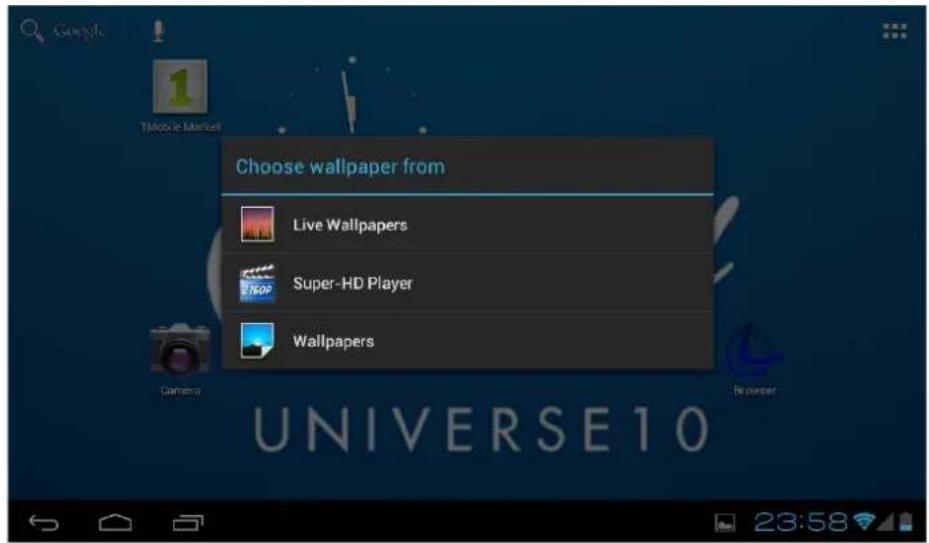
Access the menu depending on the application you are using. If you are in the main office will pop up a menu that lets you change the wallpaper, manage applications or access system settings.
In the lower right corner is the status area: showing the current time, battery status, wireless connection, different alarms and status messages. By clicking you can access some quick adjustments.
Accessing the area of applications and widgets you can manage the main interface icons:
Press and hold an icon 3 seconds after the icon is enlarged, you can drag it anywhere on the interface
Delete icons: long press the icons 3 second, drag the icons to the Recycle Bin icon, once
it become red, Loosen your hand, after that you can delete icon
You touch the screen keep a time, appear the dialog box" Add you Home screen" as shown below:
4. Basic settings

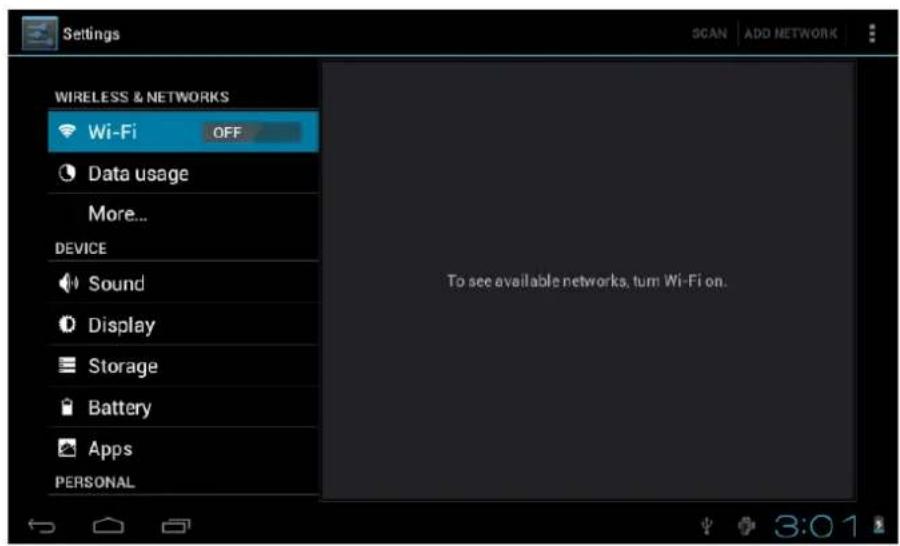
Setting: Clic setting icons Settings, enter setting interface
4.1 Wi-Fi: Turns on the Wi-Fi and connects to any Wi-Fi that is within the coverage area
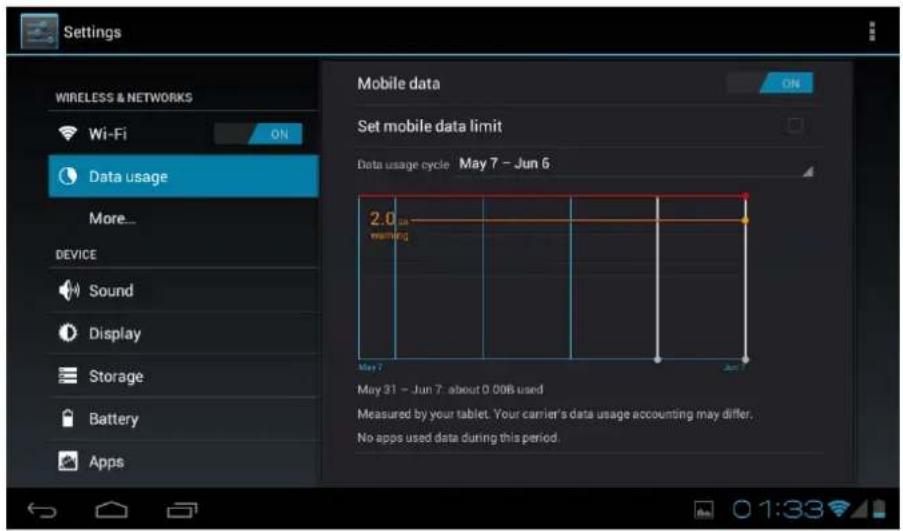
4.2 Data Usage: Allows you to disable or limit access to mobile data as well as shows the volume of data downloaded.
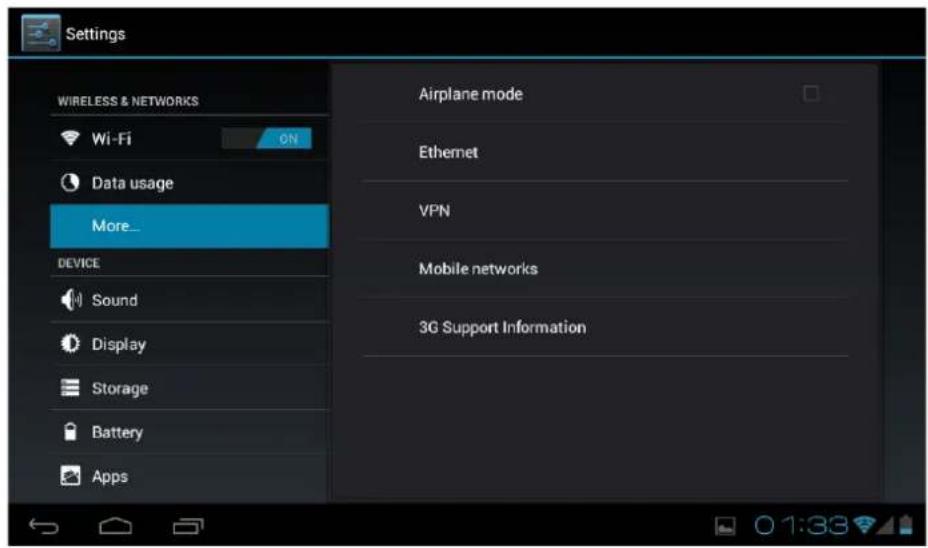
4.3: More ...: Enables Airplane mode (used when you are aboard a plane), and advanced settings for both Ethernet networks, creation of VPNs and mobile networks
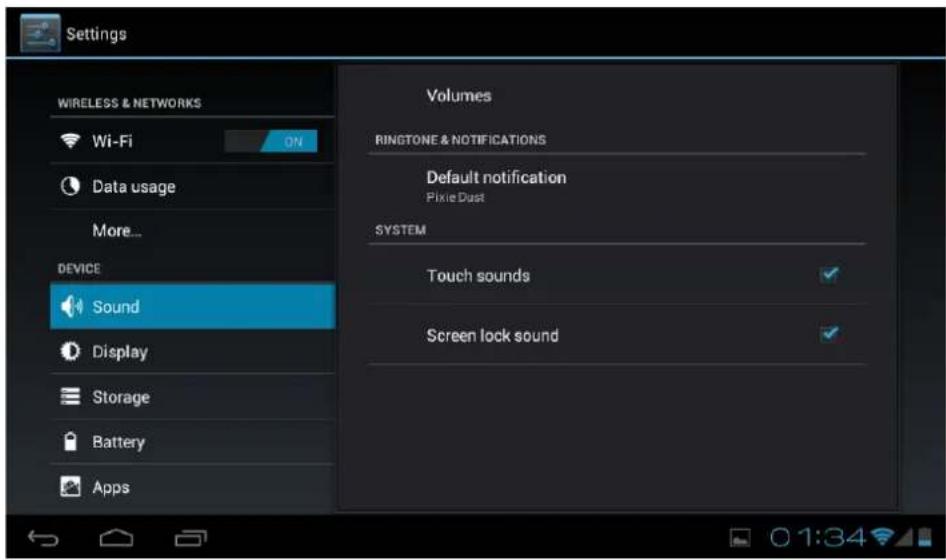
4.4 Sound: You can change the default volume of music, games and other media files, notifications and alarms, different melodies for service, enable sound to play and also the sound of the lock screen.
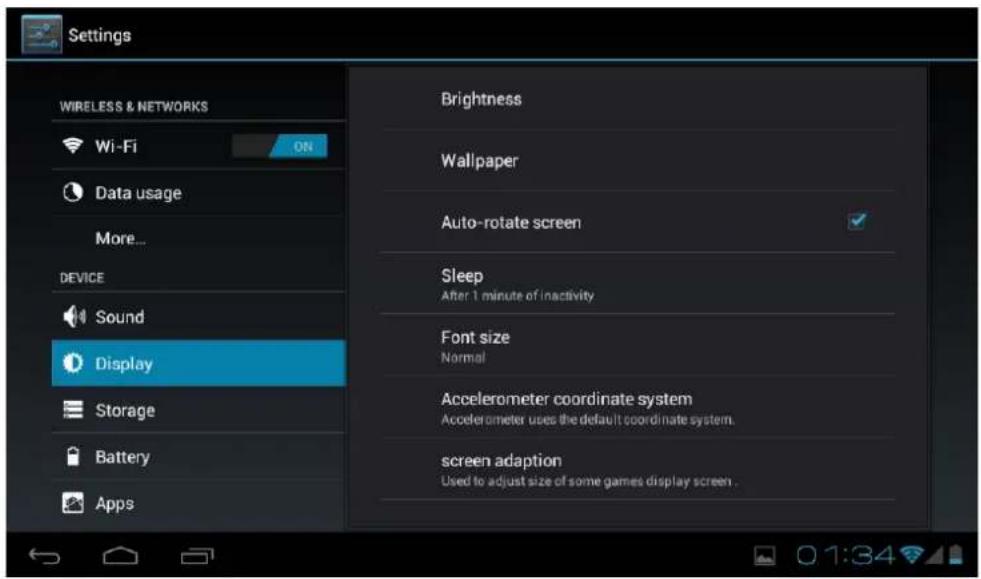
4.5 Screens: adjust properties, change backgrounds, change font size, etc.
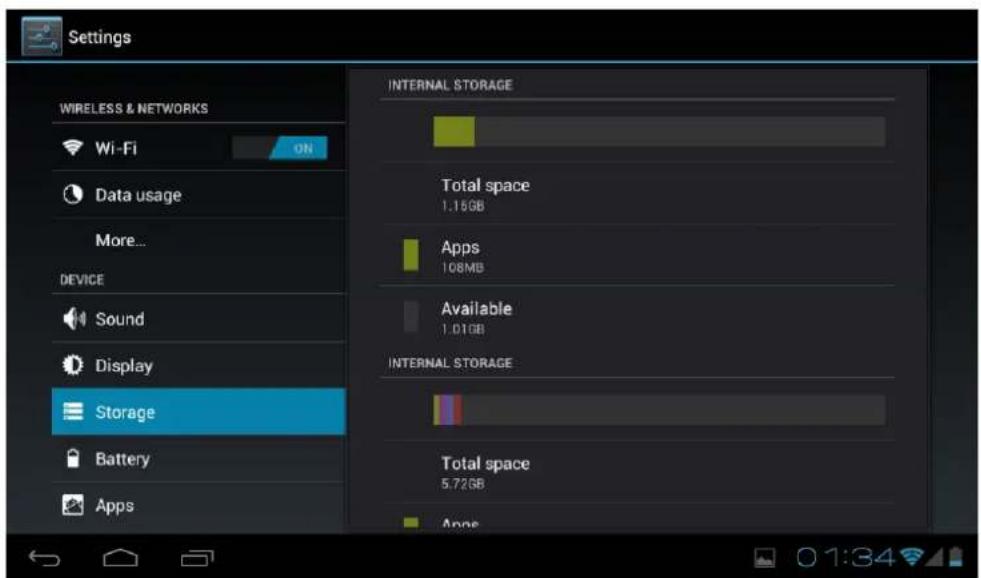
4.6 Storage: Shows the memory usage in the different storage media
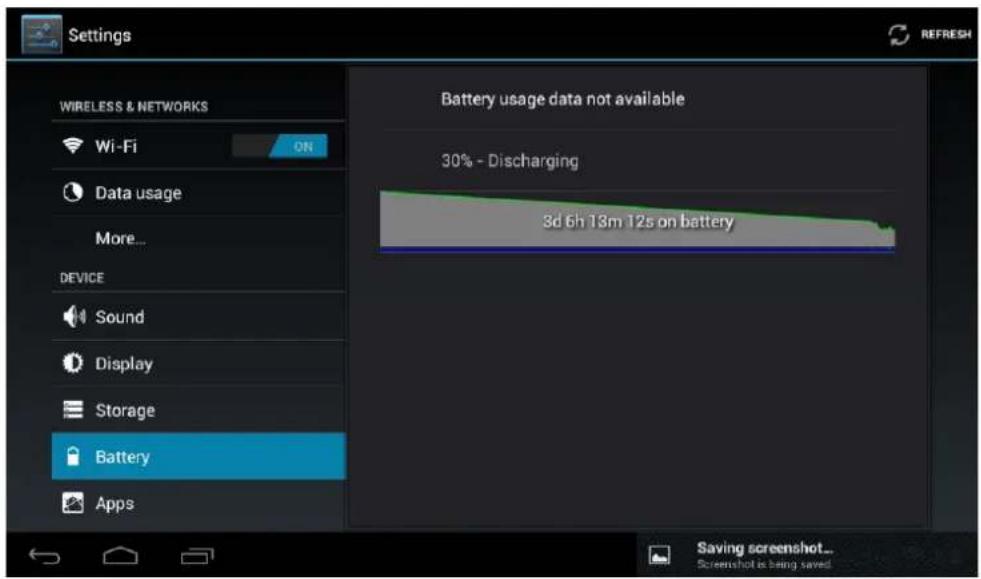
4.7 Battery: Displays current use of the battery
4.8 Applications: Displays applications downloaded to main memory or the memory card (SD) as well as the currently running applications.
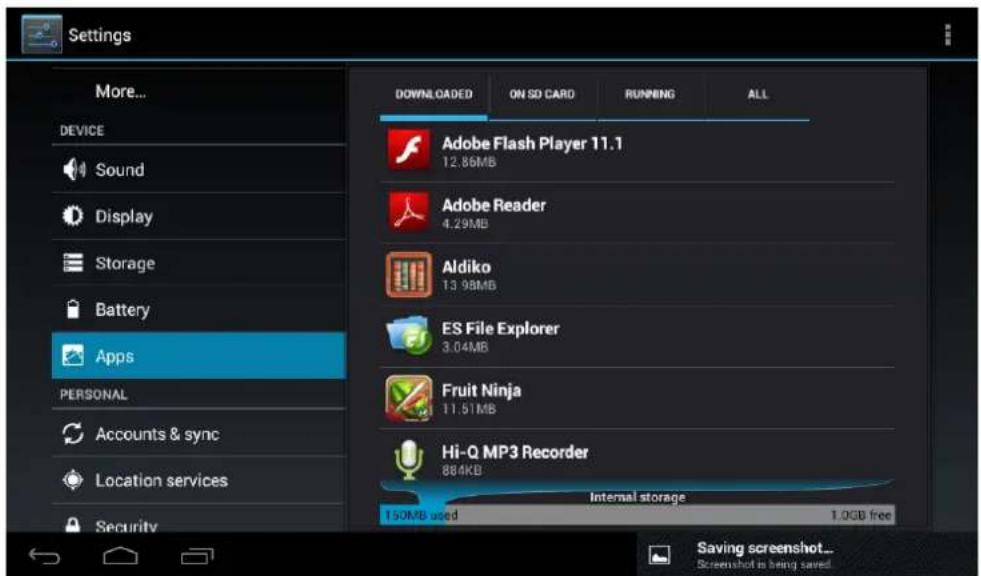
One way to install new applications is through Markets or stores available online. An example is www.1mobile.com, which comes pre-installed on your Tablet LEOTEC L-Pad, access via the
"1Mobile Market" available in the Applications screen and enjoy thousands of programs and games.
WARNING
The manufacturer does not guarantee the compatibility of the version installed on your Android device with all the applications available for this platform.
The manufacturer is not liable for damage to the device for any malware, worm, trojan or virus as a result of the installation, implementation, or downloading programs.
The manufacturer is not liable for the misuse by a user with the device and download and installation of proprietary software without authorization from the owner.
How to uninstall?
(1). Enter Settings "setting">"Application">"Manage application" And then there will be installed the program list
(2). Clic you want to uninstall icons, will enter the following interface
(3). Clic Uninstall, then you can delete the application
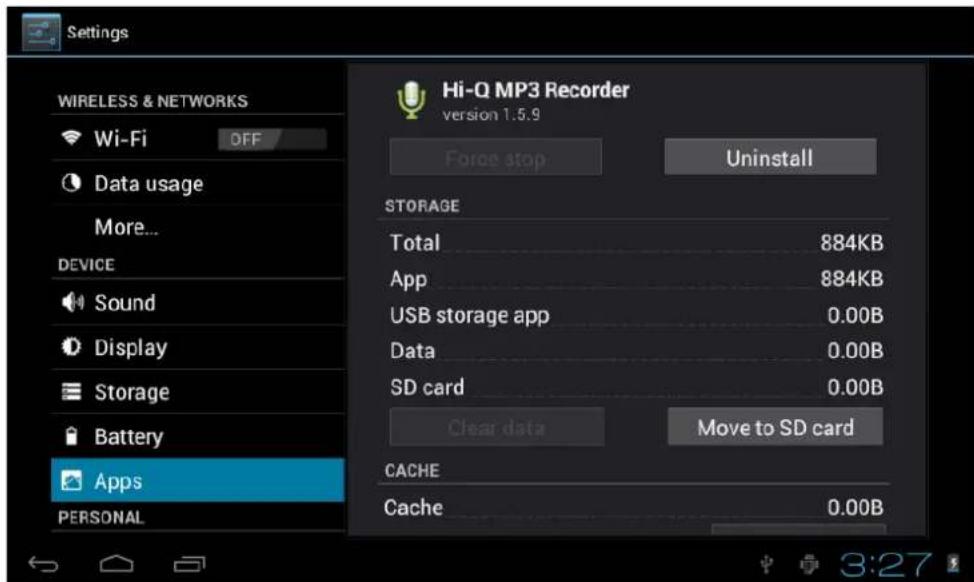
Some applications allow to be moved to external memory (SD card) to not fill the entire main memory of the Tablet
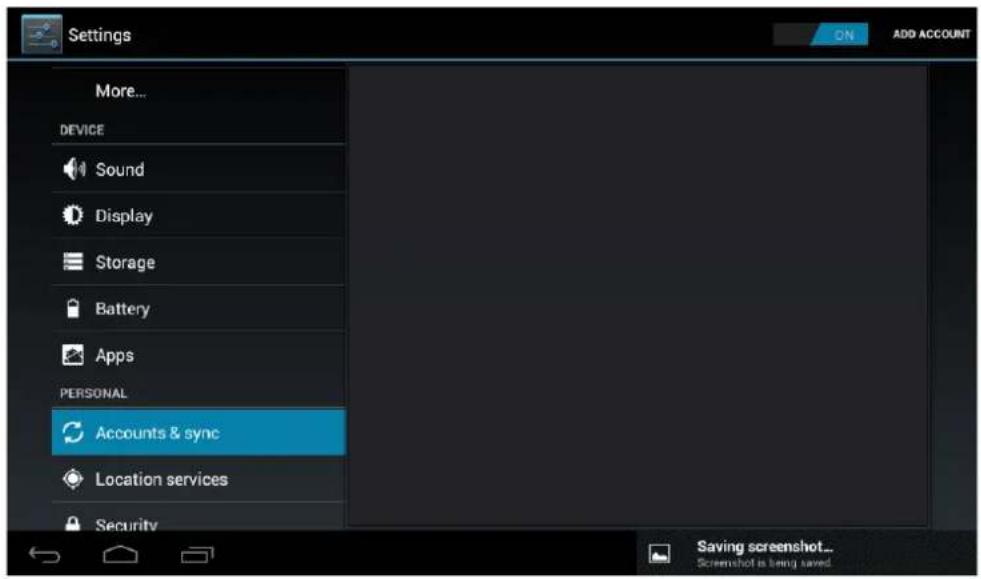
4.9 Accounts and synchronization: Allows you to manage the accounts of different mail applications, Skype etc., Which can be synchronized in real time or not.
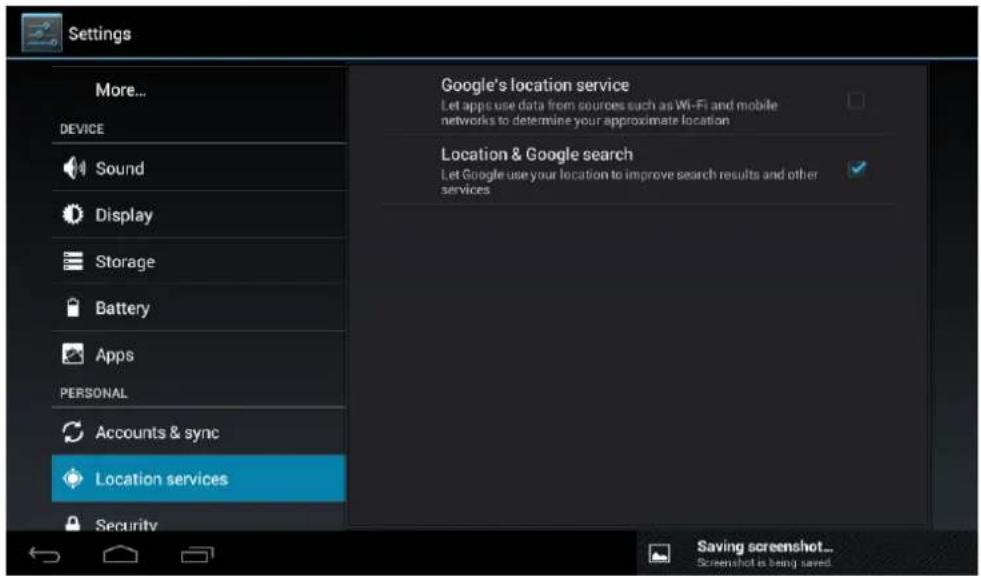
4.10 Location Services: allows applications such as Google use your data to determine your location
4.11 Security: various security settings like screen lock, displayed or hidden passwords, etc.
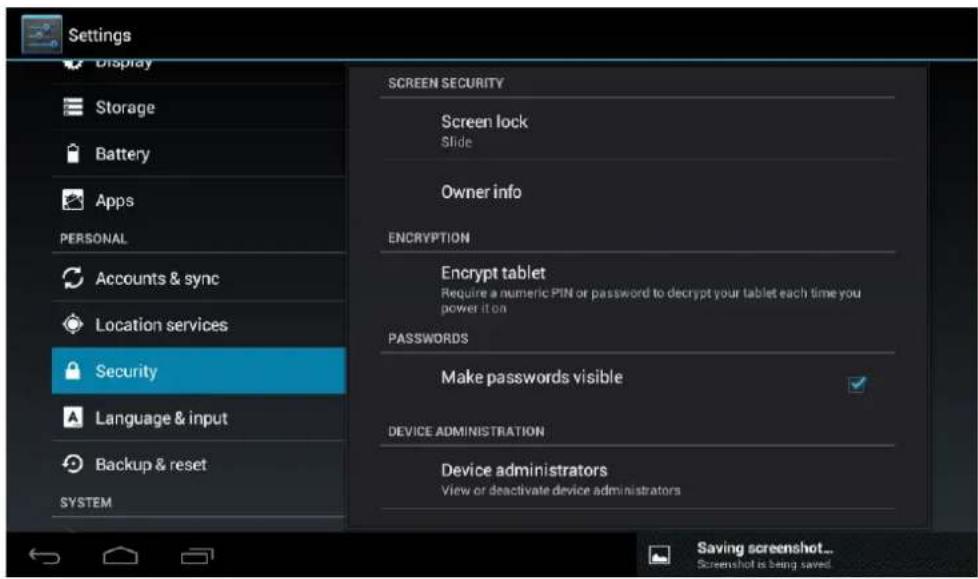
Unknown sources: Click "Unknown sources" and followed by "OK" to allow installation of unknown origin applications (applications not certified by Google, which does not mean they are not reliable sources)
4.12 Language and Keyboard: Change the language to use the Tablet, set the automatic spell correction, keyboard type, etc.

Select Language: 54 languages are available
Remark: Android system can support 54 kind of language, now main interface just support 14 kind of language,
Android keyboard: Android keyboard setting
Sound on Key-press
Auto-capitalization
Show suggestions: Display suggested words while typing
Auto-complete: Spacebar and punctuation automatically insert highlighted word
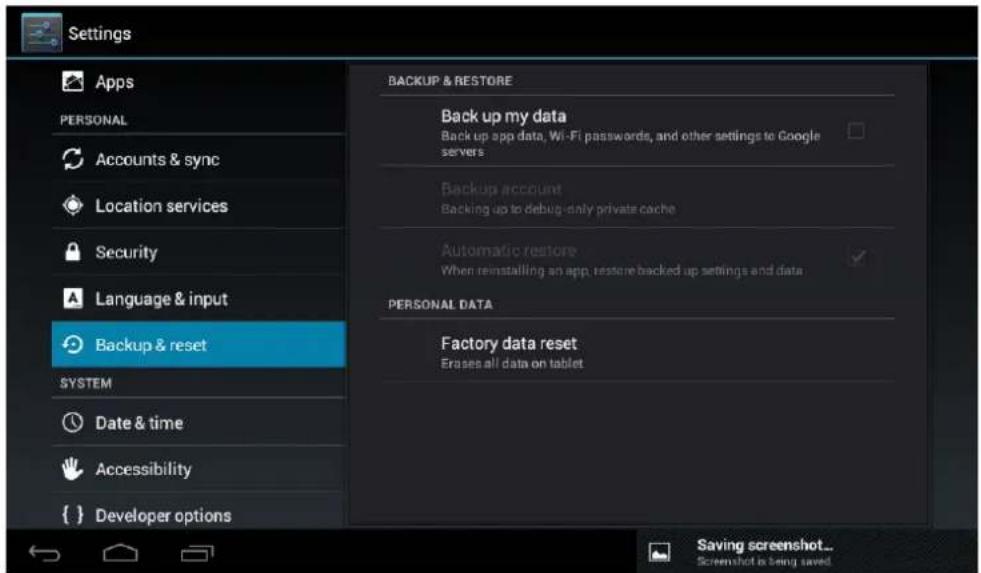
4.13 Backup: Allows automatic backup of application data, passwords and other settings so that if you reset the operating system applications can be recovered under the above conditions. In this option settings can be restored original factory data.
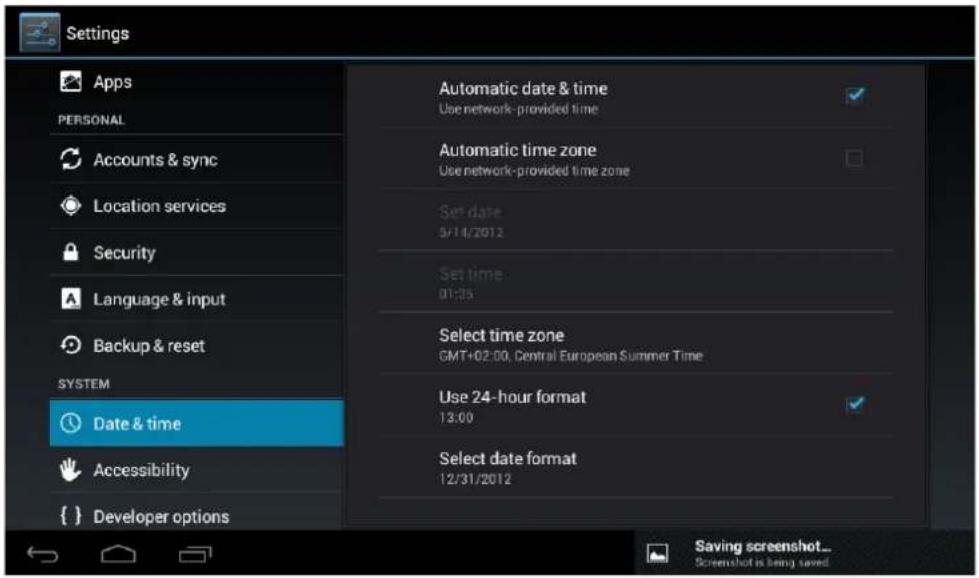
4.14 Date & time setting: Set date, set time, Select time zone and select date format
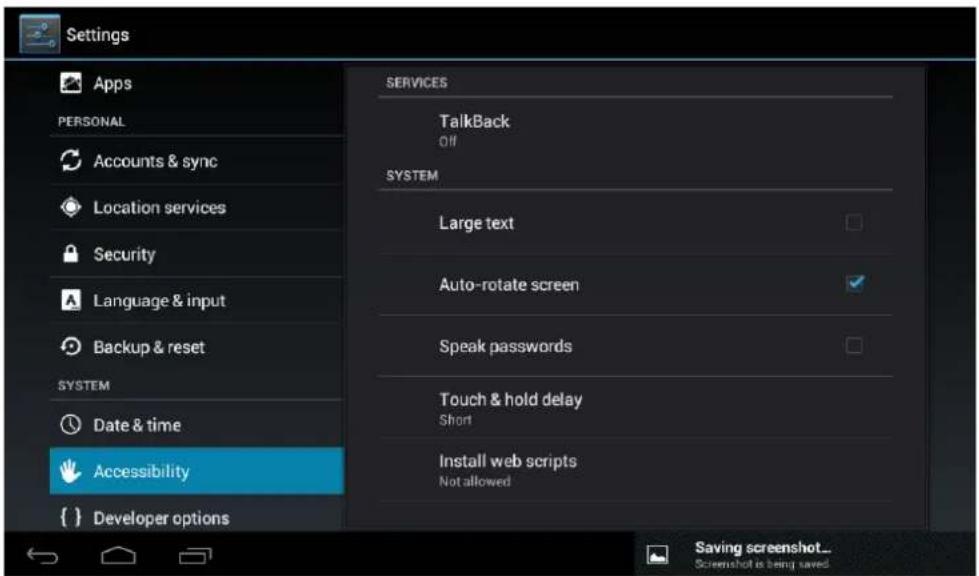
4.15 Accessibility: Different options to facilitate the accessibility of the Tablet
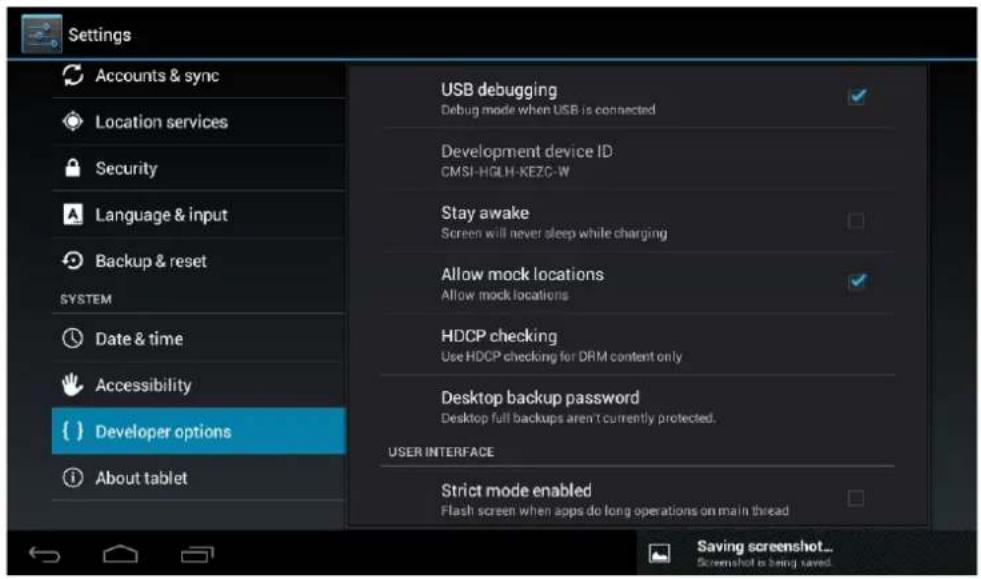
4.16 Development options: Options for developers.
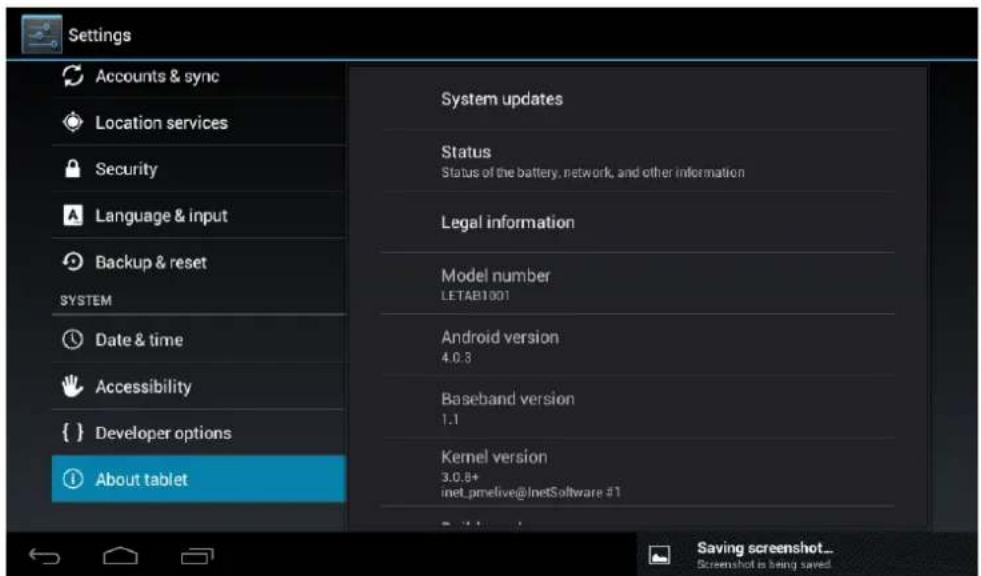
4.17 About the unit: Displays information about the Tablet and the OS
- Problem solution
Device can't to open
1) Check the battery power
2) Connect adaptor first, then check again
3) After charging then can't to open, Please contact with the supplier
After startup the screen or the opening picture has been appear, the device appear shutdown
1) Power is not enough, please charge
Headset can't hear the voice
1) Please check the volume whether set to 0
2) Check the music file weather damaged. Try playing other music, if the file is damaged may lead to serious noise or hop sounds.
Can copy file or play music and so on
1) Please check between computer and device is correct connection
2) check the memory storage space is already full
3) check the USB cable is good or not
4) USB connection is disconnected
6. Specifications
Display screen: 10.1" TFT Capacitive touch ,
Resolution: 1024*600
Operation System: Android 4.1 (Flash support)
RAM: DDR311024MB
CPU processor speed: CPU: Rockchip 2928 (Cortex-A9) 1.2GHz
GPU Mali 400
Flash Memory: 8G
TF card: 128M-32G
USB: USB Host / OTG
G-sensor 3D
Record: built-in microphone
Full HD 1080p HDMI output for playback of content on your TV (cable not included)
Video: HD2160P, AVI H.264, DIVX, DIVX, XVID, rm, rmvb, WMV, MOV, MP4 H.264, MPEG
DIVX, XVID), DAT VCD), VOB DVD), MPEG, MPG, FLV H.263 H.264), ASF, TS, TP, 3GP, MPG
etc (support to 2160P:3840x2160)
Audio: MP3/WMA/APE/FLAC/OGG/WAV/AAC
Photo: JPG, JPEG, GIF, BMP, PNG
Ebook: TXT, Epub, PDF, WORD, EXCEL, POWERPOINTS
Battery and capacity: rechargeable Built-in type polymer battery, 4500 mAH 3,7V
Size: 263mm × 165mm × 10,5mm
Weight: 700g
Guarantee and responsibility
The manufacturer gives a guarantee for 24 months for the player and the accessories provided. The guarantee includes the damage and defects related to defective materials and imperfect preparation. The guarantee does not cover the damage that can occur for incorrect or inadequate use, or for repairs of changes in the apparatus made without the authorization of the manufacturer. The manufacturer does not assume the responsibility for damage incurred due to redundant profit.
Support and Technical Service
For any technical consultation you can go to the place of purchase or contact the technical service of LEOTEC.
Visit our website and stay always updated in the download section of your product
There is more available information in the website: www.leotec.com or by means of the e-mail: support@leotec.com
DECLARATION OF CONFORMITY
Brand:LEOTEC
Supplier name: World Driver S.A.
Address: Ctra de l'Hospitalet 66 - 68
We declare under our sole responsibility that the product:
L-PAD UNIVERSE LETAB1008
Country of manufacture: China
Referred to this statement, with the standard (s) or other document (s) policy (s) in accordance with the provisions of Directive 93/68/EEC, the European Parliament and of the Council of 22 July 1993, transposed into Spanish law by Royal Decree 1950/1995, of December 1, 1995.

Reference symbol both in the product and its user manual, indicates that at the end of life electrical and / or electronic, they should be recycled separately from your household waste. There are adequate means to collect this material for proper recycling. For more information, contact the local authority or your retailer where you purchased the product.
Note: The device LETAB1008 may contain links to web sites or pages operated by parties other than LEOTEC and / or World Driver SA. These links are included and are available for your information, LEOTEC and / or World Driver SA not responsible for their availability, content, adequacy or accuracy. These external sites may contain or reference trademarks, patents, proprietary information, technologies, products, processes, or other property rights belonging to others. All copyrights are property of their respective owners.
ITALIANO
Gentile Cliente,