
LPad Cosmos II LETAB805 - Tablet Leotec - Free user manual and instructions
Find the device manual for free LPad Cosmos II LETAB805 Leotec in PDF.

Frequently Asked Questions - LPad Cosmos II LETAB805 Leotec
User questions about LPad Cosmos II LETAB805 Leotec
0 question about this device. Answer the ones you know or ask your own.
Ask a new question about this device
Download the instructions for your Tablet in PDF format for free! Find your manual LPad Cosmos II LETAB805 - Leotec and take your electronic device back in hand. On this page are published all the documents necessary for the use of your device. LPad Cosmos II LETAB805 by Leotec.
USER MANUAL LPad Cosmos II LETAB805 Leotec
natural_image
Autumn maple leaves in a forested sky with a small 2160P camera overlay (no text or symbols on the main image)natural_image
Autumn maple leaves in a forested sky with a small UI panel showing 'Open' and 'Cluster' buttons (no readable text or symbols on the main image)This handbook contains important security measures and the correct use of the product information, in order to avoid accidents. Please make sure to reading the manual carefully before use the device.
- Please don't be in high temperature, moisture or very dust place
- Please don't be in high temperature, especially in summer don't put the device in the car when Windows closed.
- Avoid fall or Violent collision of the device, don't make the TFT display screen were violent tremor. This could cause TFT display screen abnormal or damage.
-
Please choose the appropriate volume, Use headphones should not be too big volume, If feel tinnitus, Lower the volume or stop using it please charge In the following condition,
-
The battery power ICONS shows have no power
- The system automatically shut off, startup after power off soon
- Operation buttons no response
-
The machine that the top right corner show red icons
-
When the device in the format or ongoing upload and download file, please don't suddenly disconnect. This could cause application error.
- For those who because of damage to the product, repair, or other causes of erased the memory, The company shall not be liable for any responsibility, please follow the user manual for the standardized operation to use the device.
- Don't disassemble the product, don't use alcohol Thinner or benzene to scrubbing products
- Don't use the device one of the place of prohibit to use electronic equipment in regional (such as the plane)
- Please don't using the Tablet PC when you in driving or walking down the street,
- USB just only be used for data transmission
The company reserves the right to improve product, products specification and design have any change. The information is subject to changes without prior notice.
(This tablet is no waterproof function)
Remark All pictures in this manual is just for your reference. products specification and design have any change. The information is subject to changes without prior notice.
1. Appearance and button:
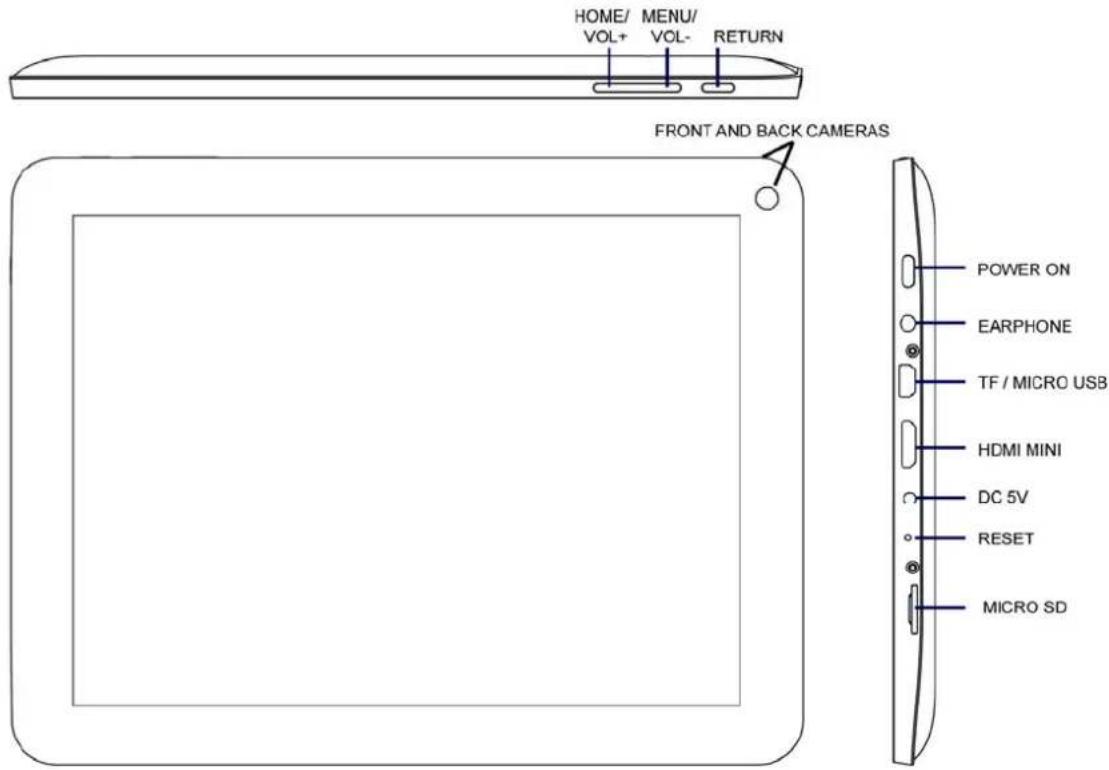
1.1 Touch panel
8" Capacitive touch panel: In the Operation, to click, dragging on the touch panel
1.2 POWER
Start up: Long Press and hold the power button, the system will enter the main interface shutdown: In the main menu interface, Press the power button about 5 second to shutdown, The system can hint "power off" option, Click "ok". you can safely shut down.
Lock screen: Short press Power button to lock screen or unlock screen.
Remark 1. When power is empty, system will shut down automatically.
- Illegal turn off the device, restart will scan and restore the disk, it may take longer time to enter into system
1.3 RETURN key
Short Press RETURN KEY button will return the last interface.
The Tablet under normal operating conditions, short press M button will Back to the home screen
1.4 HOME / Volume +, MENU / Volume-
Press Volume + to return to main interface. Press and hold to increase the volume,
Press Volume- to show menu options depending on the current app. Press and hold to decrease volume
1.5 Earphone jack
3.5 mm standard earphone jack
1.6 HDMI
HDMI output interface
1.7 TF card
TF-CARD slot: external T-FLASH card
1.8 Mini USB
Mini USB jack: you can use it to connect the computer for data transmission, charging and external connection USB flash drive
1.9 RESET
Remark: unless unable to shutdown, otherwise don't use the reset, suggest you to shutdown by normal, or it will easy to damage the machine system.
1.10DC insert the charger to charge
First use
Battery management and charge
Before first use, please set the device's battery is fully charged
Just need to connect the adaptor or USB interface, then you can charge
The first two times charging please keep about 6 hours, after that you just need 4 hours to charge.
Remark: This tablet using Built-in type polymer battery, Charge must be to choose standard adaptor (Input: AC110\~240V 50/60Hz Max180MA.. Output: DC5.0\~5.5V/1.5A), this device without supply DC charging, USB interface can charge, Choose USB interface to charger
During the charging, the battery icon will scroll
When finished charging, battery icon will become green and stop rolling
In order to prolong the service life of the machine, suggest use out battery power before charge it
Remark:
1 If you long time don't to use this Tablet, ,in order to avoid power consumption caused damage, Please charge/play the battery once a month.
2 After low battery shut down, connect DC adaptor, device will remind low battery, charging, need to wait some time until the battery is enough power to enter into main menu.
3 Device charging should be in standby status for reach normal charging time.
Because with device and screen consumption, it may cause longer charging time.
2. Connection with PC
Use USB cable to connect device to PC, device will pop up the USB connection window, click Turn on USB storage to connect to PC
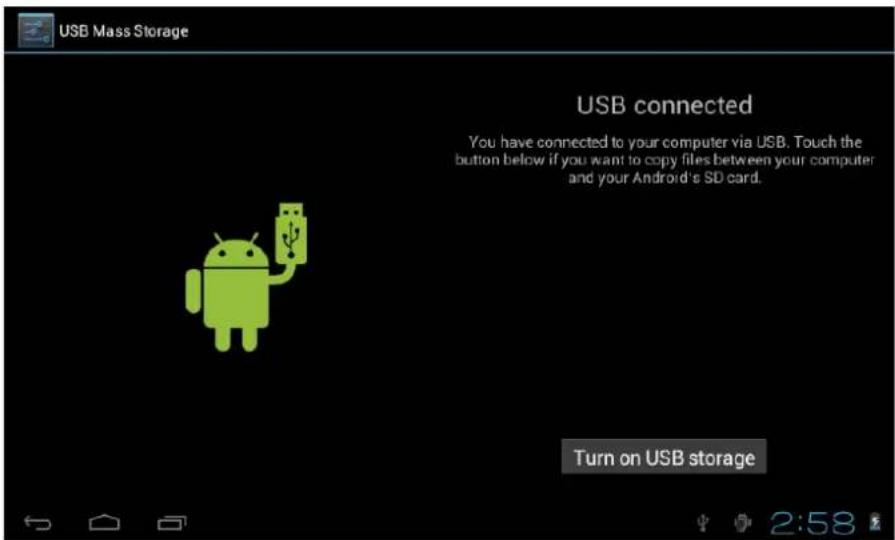
Into the load mode, you can copy, delete the file on the device and the file on the memory card.
3. Equipment operation interface
3.1 Main interface describe
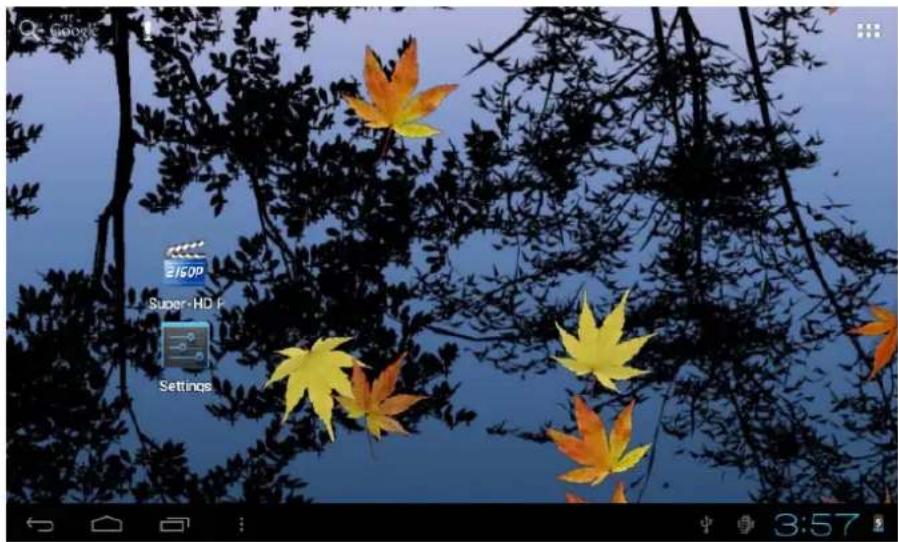
After startup will enter the main interface
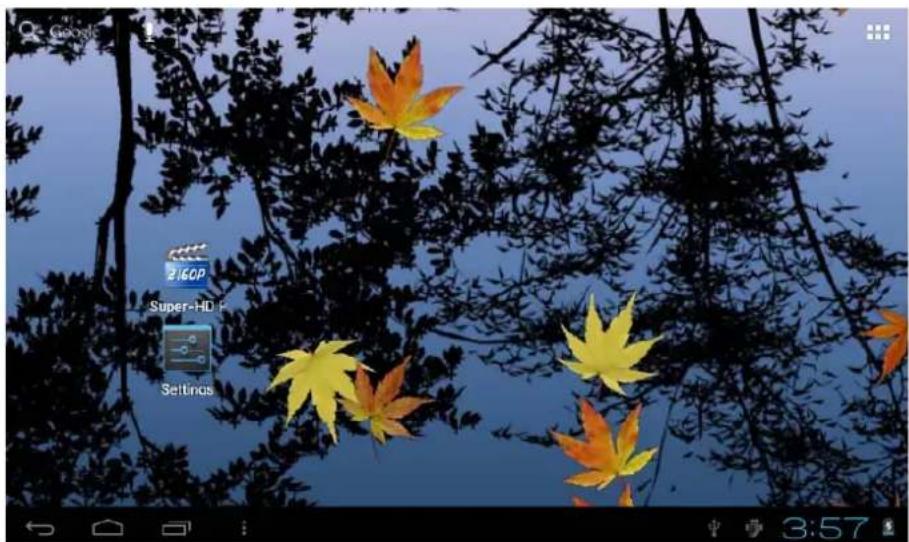
natural_image
Autumn maple leaves in a forest setting under a blue sky, displayed within a mobile app interface (no text on the leaf image itself)In the main interface, you can:
Management main interface software ICONS: long press the icons 3 second, after the icons will bigger, then you can drag anywhere in the interface.
Delete icons: long press the icons 3 second, drag the icons to the Recycle Bin icon, once it become red, Loosen your hand, after that you can delete icon
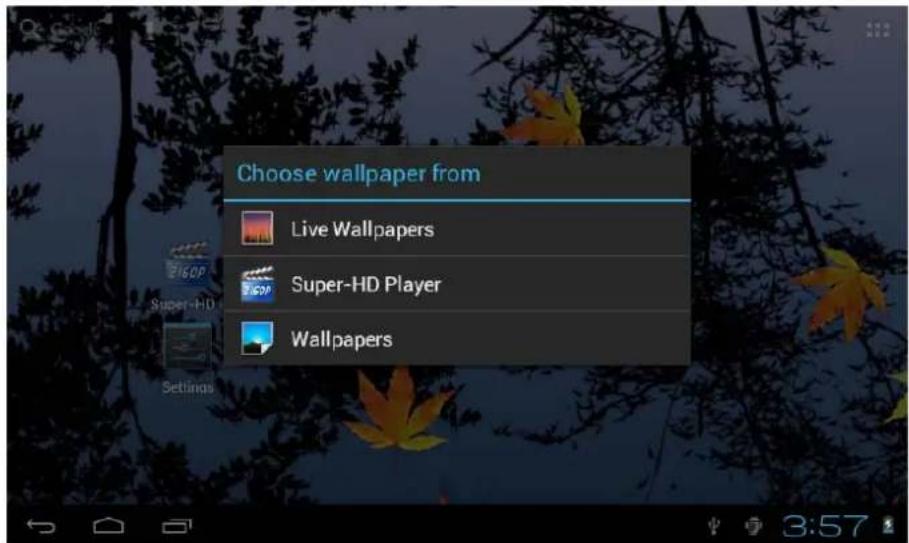
You touch the screen keep a time, appear the dialog box" Add you Home screen" as shown below:
3.2 Status bar describe

The status bar above of the screen
Bottom left displays Back, Home and Recent apps buttons
Top right display battery charge icons, current time, T-Flash card, USB connection status and so on
3.3 Use touch panel
Device equipped with a 8" touch screen. Following the main touch screen area is described, and describes some of the tips for how to use the touch screen.
No matter which interface you are on the screen, can go back to main screen through pressing the soft key 📄 the bottom left corner of the main screen.
Attention: The main screen soft key ☐ acts as the machine back key Home / Volume + In different applications, by tapping the back soft key ☐ on the bottom left corner on the touch screen, you can return to its interface on the up floor.
In different applications, by tapping the menu key ☐ on the bottom left corner of touch screen, the screen will appear the operation setting interface as follows,
Remark: The main screen soft key functions as the machine button Menu / Volume -
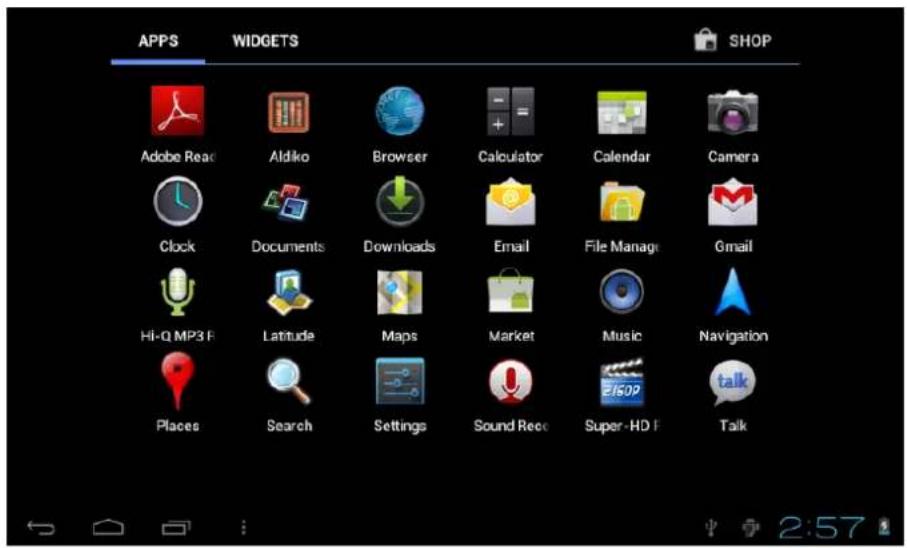
natural_image
Desktop screenshot showing autumn maple leaves against a blue sky, with no visible text or symbols on the main image area.In the main interface, you can touch the icon to open the APPS
In different browser (file, music, video, pictures), You shift and drag the scroll bar, so that the file list can up or down to roll.
4. Equipment basic set
Setting: Click setting icons

enter setting interface
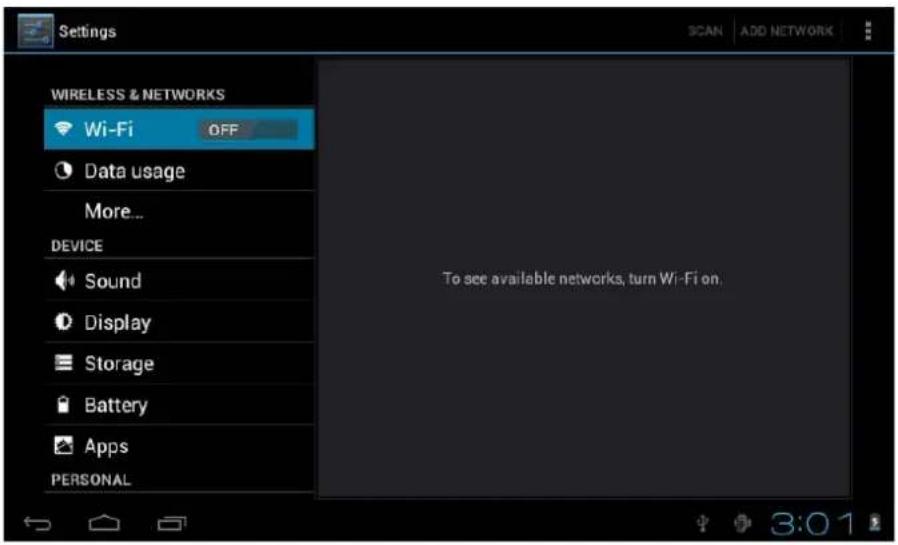
4.1 Silent mode, Volume, Notification ringtone, Audible selection, Screen lock sounds,
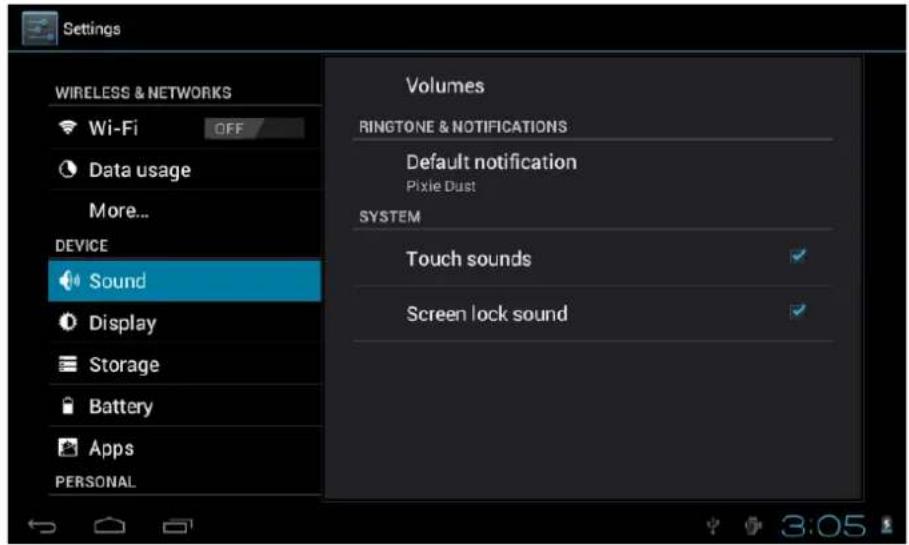
Display: Change wallpaper, display properties, font size, set sleep time, etc

4.2 Application
Manage applications
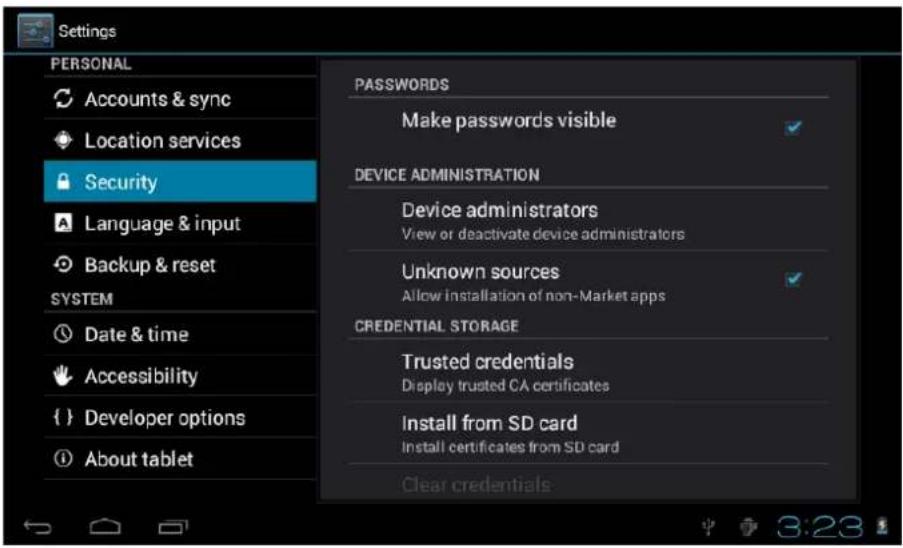
Unknown sources: Click "Unknown Sources", then click "OK"
Manage application: manager and uninstall Application
Remark: when you Firmware Upgrade, Please close the USB connect
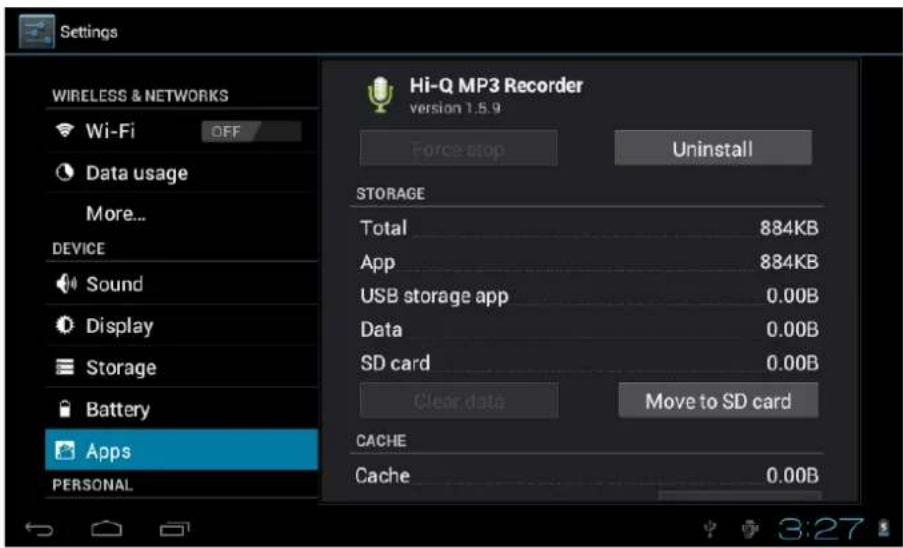
How to uninstall?

(1). Enter Settings "setting">"Application">"Manage application" And then there will be installed the program list
(2). Click you want to uninstall icons, will enter the following interface
(3). Click Uninstall, then you can delete the application
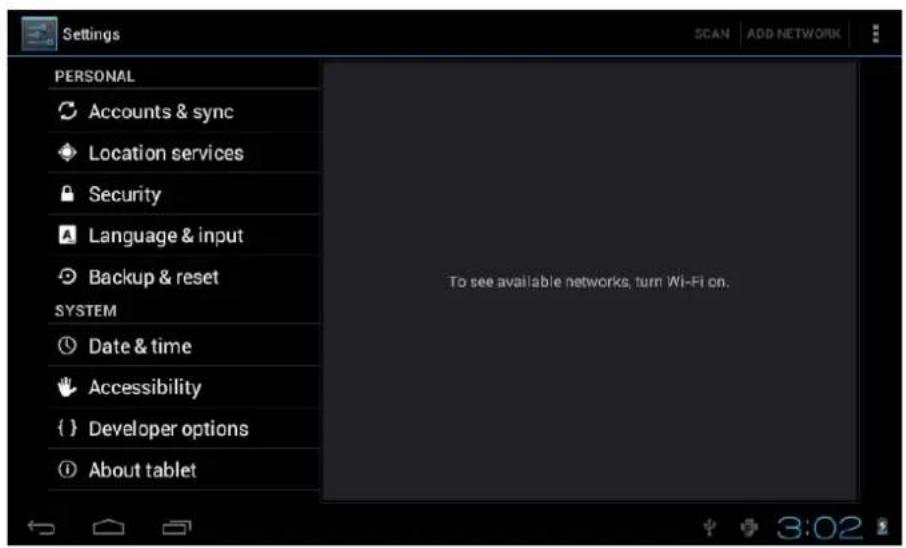
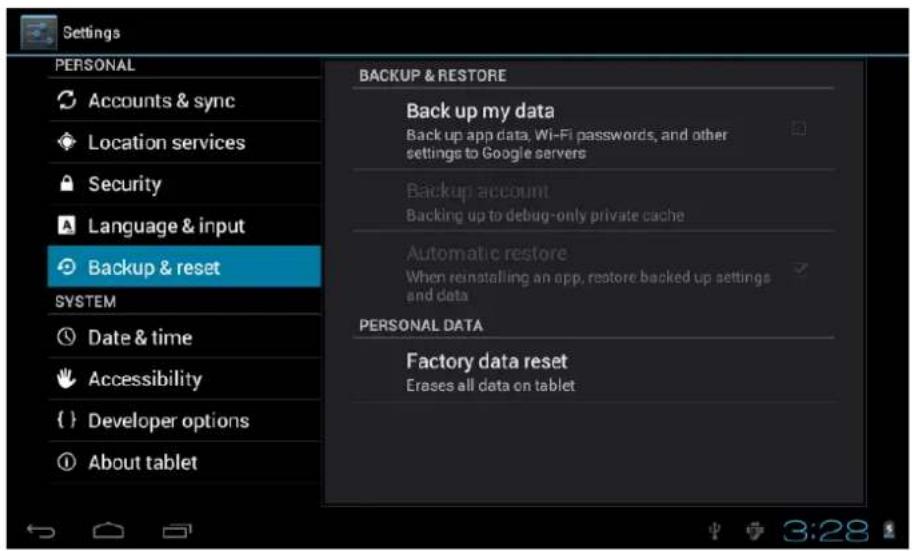
4.3 Privacy
Factory data reset
4.4 Storage
Remove TF card, view of the available storage space

Remark: Please touch option "Dismount SD card", so that can safety to remove SD card
4.5. Language & keyboard
Setting: (Language), text input and automatic error correction options;

Select Language: 54 kind of national languages are available
Remark: Android system can support 54 kind of language, now main interface just support 14 kind of language,
Android keyboard: Android keyboard setting
Sound on Key-press
Auto-capitalization
Show suggestions: Display suggested words while typing
Auto-complete: Spacebar and punctuation automatically insert highlighted word
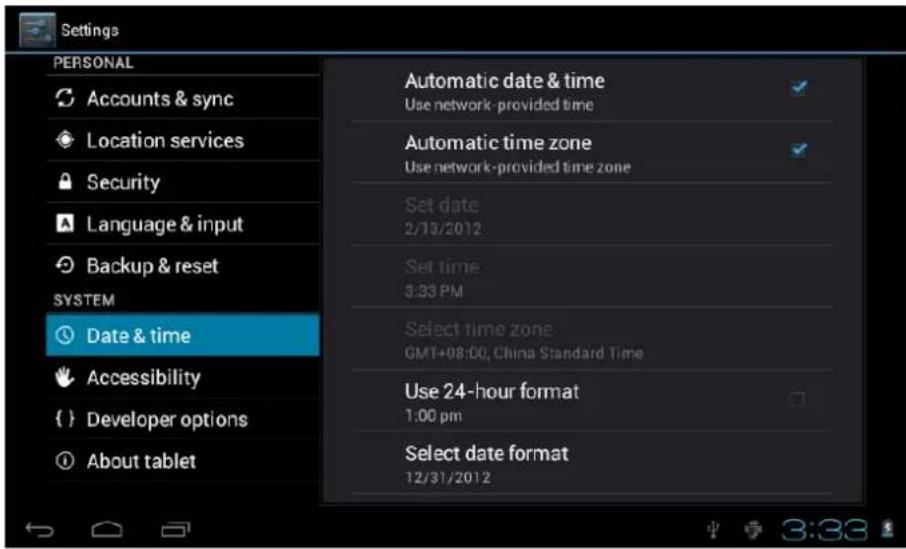
4.6. Date & time setting
Set date, set time, Select time zone and select date format
4.7 USB Mode Select
Choose USB work pattern: OTG/HOST/SLAVE.....
4.8 About device

5. Apps Install and manage
5.1 App installer
This Tablet can support Android APP in market by third party, most Apps can install in the network, can copy to NAND FLASH or SD card.
Click App installer icon, will appear Install, manage, Exit options.
Install: Click install, enter APK install interface
Separately for Internal Memory disk and SD Card disk.
Select the APK you would like to install, click it to install, go back to main menu, will display the installed app you just selected.
Manage: click manage, enter third party interface
Click install icon, will enter Action interface
5.2 Stores
Another way to find applications for our Tablet is accessing Markets stores or available online. An example is www.1mobile.com, accessing from the browser you can download your application and enjoy thousands of programs and games.
5.3 WARNING
The manufacturer does not guarantee the compatibility of the version installed on your
Android device with all the applications available for this platform.
The manufacturer is not liable for damage to the device for any malware, worm, trojan or virus as a result of the installation, implementation, or downloading programs.
The manufacturer is not liable for the misuse by a user with the device and download and installation of proprietary software without authorization from the owner.
6. Problem solution
Device can't to open
1) Check the battery power
2) Connect adaptor first, then check again
3) After charging then can't to open, Please contact with the supplier
After startup the screen or the opening picture has been appear, the device appear shutdown
1) Power is not enough, please charge
Headset can't hear the voice
1) Please check the volume whether set to 0
2) Check the music file weather damaged. Try playing other music, if the file is damaged may lead to serious noise or hop sounds.
Can copy file or play music and so on
1) Please check between computer and device is correct connection
2) check the memory storage space is already full
3) check the USB cable is good or not
4) USB connection is disconnected
7. Specifications
Display screen: 8" TFT Capacitive touch,
Resolution: 800*600
Operation System: Android 4.0
RAM: DDRIII 512MB
CPU processor speed: Boxchip A10 (Cortex -A8) 1.2GHz(Up to 1.5GHz)
Memory: 8G
TF card: 128M-32G
USB: USB Host OTG
G-sensor 3D
Record: built-in microphone
Front webcam (640x480) and rear 2.0 mp
Video: HD2160P, AVI H.264, DIVX, DIVX, XVID, rm, rmvb, WMV, MOV, MP4 H.264, MPEG,
DIVX, XVID), DAT VCD), VOB DVD), MPEG, MPG, FLV H.263 H.264), ASF, TS, TP, 3GP, MPG etc (support to 2160P:3840x2160)
Audio: MP3/WMA/APE/FLAC/OGG/WAV/AAC
Photo: JPG, JPEG, GIF, BMP, PNG
Ebook: TXT, EPUB, PDF, WORD, EXCEL, POWERPOINTS
Battery and capacity: rechargeable Built-in type polymer battery, 5000MAH
Size: 200mm × 154mm × 11mm
Guarantee and responsibility
The manufacturer gives a guarantee for 24 months for the player and the accessories provided. The guarantee includes the damage and defects related to defective materials and imperfect preparation. The guarantee does not cover the damage that can occur for incorrect or inadequate use, or for repairs of changes in the apparatus made without the authorization of the manufacturer. The manufacturer does not assume the responsibility for damage incurred due to redundant profit.
Support and Technical Service
For any technical consultation you can go to the place of purchase or contact the technical service of LEOTEC.
Visit our website and stay always updated in the download section of your product
There is more available information in the website: www.leotec.com or by means of the e-mail: support@leotec.com
ITALIANO
Attenzione
1.4 Home / Volume +, Home / Volume -
natural_image
Autumn maple leaves partially obscured by tree branches against a blue sky (no text or symbols visible)natural_image
Autumn maple leaves partially obscured by tree branches against a blue sky, with no visible text or symbols.natural_image
Autumn maple leaves in a forested background under a blue sky (no text or symbols visible)natural_image
Autumn maple leaves in a forested sky with a blue sky and no visible text or symbolsDimensions: 200mm ×154mm×11mm