
Stratus PCL506 - Air purifier Profile - Free user manual and instructions
Find the device manual for free Stratus PCL506 Profile in PDF.
| Product type | Air purifier |
| Brand | Profile |
| Model | Stratus PCL506 |
| Power supply | AC 230 V, 50 Hz |
| Power consumption | 80 W |
| Dimensions (L × l × H) | 343 × 255 × 610 mm |
| Weight | 6.85 kg |
| Max. air volume | 0.3 m³/min |
| Programmable cycles | 1, 2 or 8 hours |
| Max. recommended area | 170 m³ |
| Purification technology | Ionization + HEPA filter + UV |
| Ventilation levels | 5 (Silent, Low, Medium, High, Auto) |
| Sensors | Odors, dust, air quality |
| Remote control | Yes |
| Filters | Pre-filter, electrostatic, HEPA, TiO₂ |
| UV lamp | Lifespan 5,000 hours |
| Filter cleaning | Every 2 to 3 months |
| Warranty | 2 years |
Frequently Asked Questions - Stratus PCL506 Profile
User questions about Stratus PCL506 Profile
0 question about this device. Answer the ones you know or ask your own.
Ask a new question about this device
Download the instructions for your Air purifier in PDF format for free! Find your manual Stratus PCL506 - Profile and take your electronic device back in hand. On this page are published all the documents necessary for the use of your device. Stratus PCL506 by Profile.
USER MANUAL Stratus PCL506 Profile
natural_image
Exterior view of a white Air purifier with control panel and power button (no readable text or symbols beyond branding)STRATUS
AIR PURIFIER
LUCHTZUIVERAAR
PURIFICATEUR D'AIR
LUFTREINIGER
PCL-506
flowchart
graph LR
    A["1 HOUR"] --> B["2 HOUR"] --> C["8 HOUR"]
natural_image
Line drawing of a boat's internal compartments and fan structure (no text or symbols)text_image
Technical diagram of a boat's internal structure with labeled parts ① and ②natural_image
Diagram of a solar panel installation with labeled components (no text or symbols present)text_image
Diagram showing a hand inserting into a device with labeled parts and directional arrows indicating process flow.
natural_image
Diagram of a roof structure with decorative elements and a hand holding a tray (no text or symbols)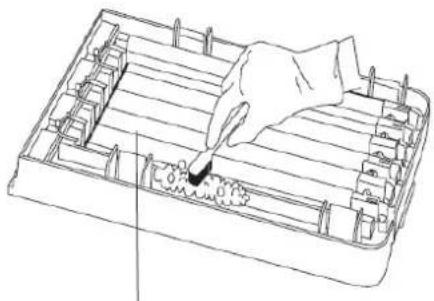
natural_image
Line drawing of a hand inserting a plug into a rectangular device (no text or symbols)text_image
Do not reverse the front and back of the filter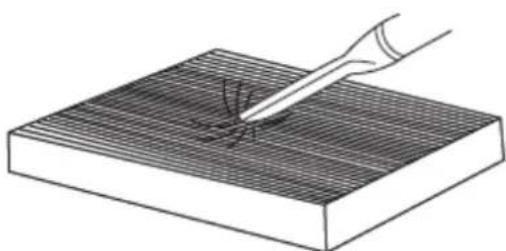
natural_image
Illustration of a hand using a tool to mark a surface defect on a grid-patterned base (no text or symbols)natural_image
Technical line drawing of a boat's side panel with internal compartments and a directional arrow indicating flow or movement (no text or symbols)text_image
H1 HED LOW QUIET AUTO FLOW ON IN INDICATOR CLEAN RENTOR DOOR DUCT ALIENDER POWER Timer BH 201 194 CLEAN METAL GRID REPLACE FILTER RESETtext_image
H1 MED LOW QUIET AUTO FLOW XIN UV INDICATOR 8th 2nd 1st CLEAN METAL GRID REPLACE FILTER RESET GREEN MONITOR OBOR DUST ALLERGEN TIMER POWERflowchart
graph LR
    A["1 HOUR"] --> B["2 HOUR"] --> C["8 HOUR"]
natural_image
Line drawing of a boat's interior compartments with numbered parts and directional arrows indicating flow (no text or symbols)text_image
Technical diagram of a boat's internal structure with labeled parts ① and ②natural_image
Technical diagram of a solar panel assembly with labeled components (no text or symbols present)text_image
Diagram showing a hand inserting a grid into a device with labeled components and directional arrows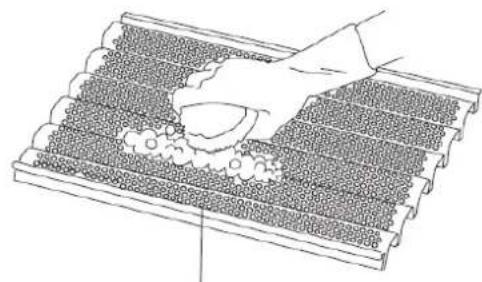
natural_image
Line drawing of a tiled roof with decorative elements and a hand placing a bowl (no text or symbols)
natural_image
Line drawing of a hand using a tool to press or inspect a component inside a rectangular frame (no text or symbols)text_image
Do not reverse the front and back of the filter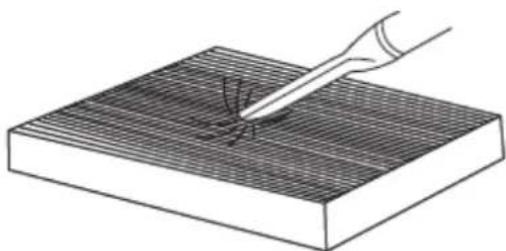
natural_image
Illustration of a hand using a tool to test material on a textured surface (no text or symbols)natural_image
Technical line drawing of a boat's side panel showing internal compartments and structural components (no text or labels)natural_image
Technical line drawing of a mechanical component with no visible text or symbolstext_image
HI MED LOW QUIET AUTO FLOW ON LA INDICATOR 8H 2H 1H CLEAN METAL GRID REPLACE FILTER RESET CLEAN NOVITOR OBOR DUST ALLERGEN TIMER POWERflowchart
graph LR
    A["1 HOUR"] --> B["2 HOUR"] --> C["8 HOUR"]
natural_image
Technical line drawing of a boat's internal compartments and side blades (no text or symbols)text_image
Technical diagram of a boat's internal structure with labeled parts ① and ②text_image
Technical diagram of a solar panel assembly with labeled components and directional arrows indicating flow or movement.text_image
Diagram showing a hand inserting a grid into a device with labeled parts and directional arrows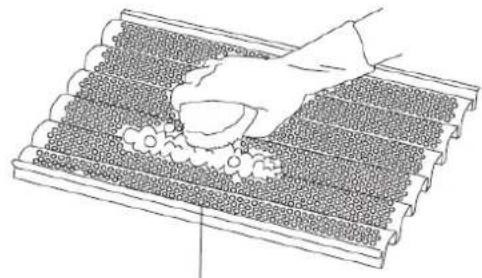
natural_image
Diagram of a hand placing a small object onto a grid-patterned surface, with no visible text or symbols.
natural_image
Line drawing of a hand using a tool to press or install a component on a tray (no text or symbols)Do not reverse the front and back of the filter
natural_image
Line drawing of a boat's interior structure showing handle, side panel, and gear mechanism (no text or symbols)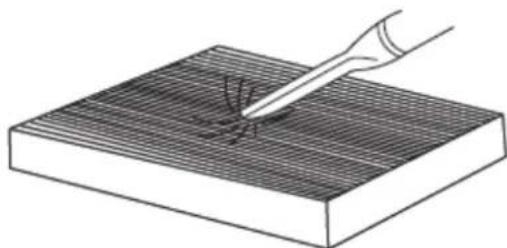
natural_image
Illustration of a hand using a tool to apply material to a grid-patterned surface (no text or symbols)We thank you for the purchase of this Profile product. Note: It is important that you read this manual before using the product. Then keep this manual in a safe place.
Technical information
■ Power: AC 230V 50Hz
■ Dimensions: 343 x 255 x 610 mm.
■ Weight: 6850g.
■ Power consumption: 80W
■ Active oxygen output: ≤ 0.05 ppm
- Air volume: Max. 0.3m^3/Min .
■ Cycle repeat: 1/2/8 hours.
■ Functions fully electronically
■ Functions based on the ionising principle
■ ionisation output: ≥ 2 x 10 ^6 /cm ^3
■ Suitable for spaces up to 170 m ^4 .
■ Standing model
■ This model is fitted with a HEPA filter.
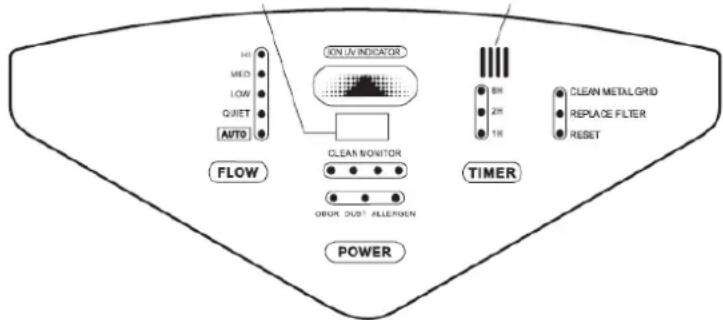
display:
receiver
remote control
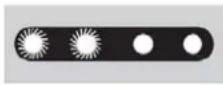
odour sensor
text_image
MAX MED LOW QUIET AUTO FLOW XIN UV INDICATOR GREEN GREEN GREEN GREEN GREEN GREEN GREEN GREEN GREEN GREEN GREEN GREEN GREEN GREEN GREEN GREEN GREEN GREEN GREEN GREEN GREEN GREEN GREEN GREEN GREEN GREEN GREEN GREEN GREEN GREEN GREEN GREEN GREEN GREEN GREEN GREEN GREEN GREEN GREEN GREEN GREEN GREEN GREEN GREEN GREEN GREEN GREEN GREEN GREEN GREEN Green Metal Grid Replace Filter ResetOperation and installation
- This appliance is suitable for ventilating spaces up to 170m ^3 .
- Place the appliance at least 30 cm from the wall.
- Keep the appliance away from children.
■ Before starting to use the appliance allow fresh air into the space through open windows. Insert the air purifier plug in the plug socket and press the ON/OFF button. The odour sensor will memorise the freshness of the air then clean the air in the living room to the measured level. - Once started the odour sensor will flash while the fresh air is measured. After approximately 2 minutes the odour sensor will indicate that memorising has ended.
- NOTE: each time you pull the plug out of the plug socket the memory will be deleted.
- When the ionizer is working a blue indicator will dim on and off every 5 seconds.
- When the air purifier detects soiling such as smoke the odour indicator lights up.
- The dust indicator will also light up when much dust is detected in the air.
- Finally, the appliance also has an air quality indicator that indicates how much soiling there is in the air.

No
soiling
detected.
A
little
soiling
det

Serious
soiling
d
- Press the ON/OFF button to switch the appliance on. Press again to switch the appliance off again.
- This air purifier has 5 different ventilation levels to clean the air.

flowchart
graph LR
    A["QUIET"] --> B["LOW"]
    B --> C["MED"]
    C --> D["HI"]
    D --> E["AUTO"]
- To automatically operate the air purifier press the FAN button until the LED displays AUTO.
- When the appliance is set to AUTO it will itself select the level (medium – low) depending on the amount of soiling in the air. When the air has been sufficiently cleaned the appliance will automatically go into stand-by mode.
- Press the AUTOTIMER button to set the duration. You can choose a cycle of 1/2 to 8 hours by repeatedly pressing the button. When the air is sufficiently clean the appliance switches to the stand-by position. The cycle repeats according to the set cycle time.

flowchart
graph LR
    A["1 HOUR"] --> B["2 HOUR"] --> C["8 HOUR"]
- You can switch the ionisation function on and off with the ION-UV button.
- The air purifier also has a remote control.
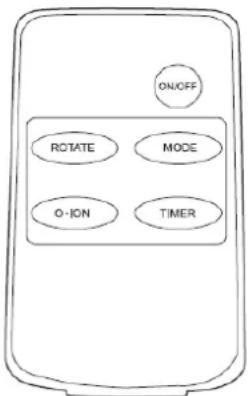
text_image
ON/OFF ROTATE MODE O-ION TIMERCleaning and protection
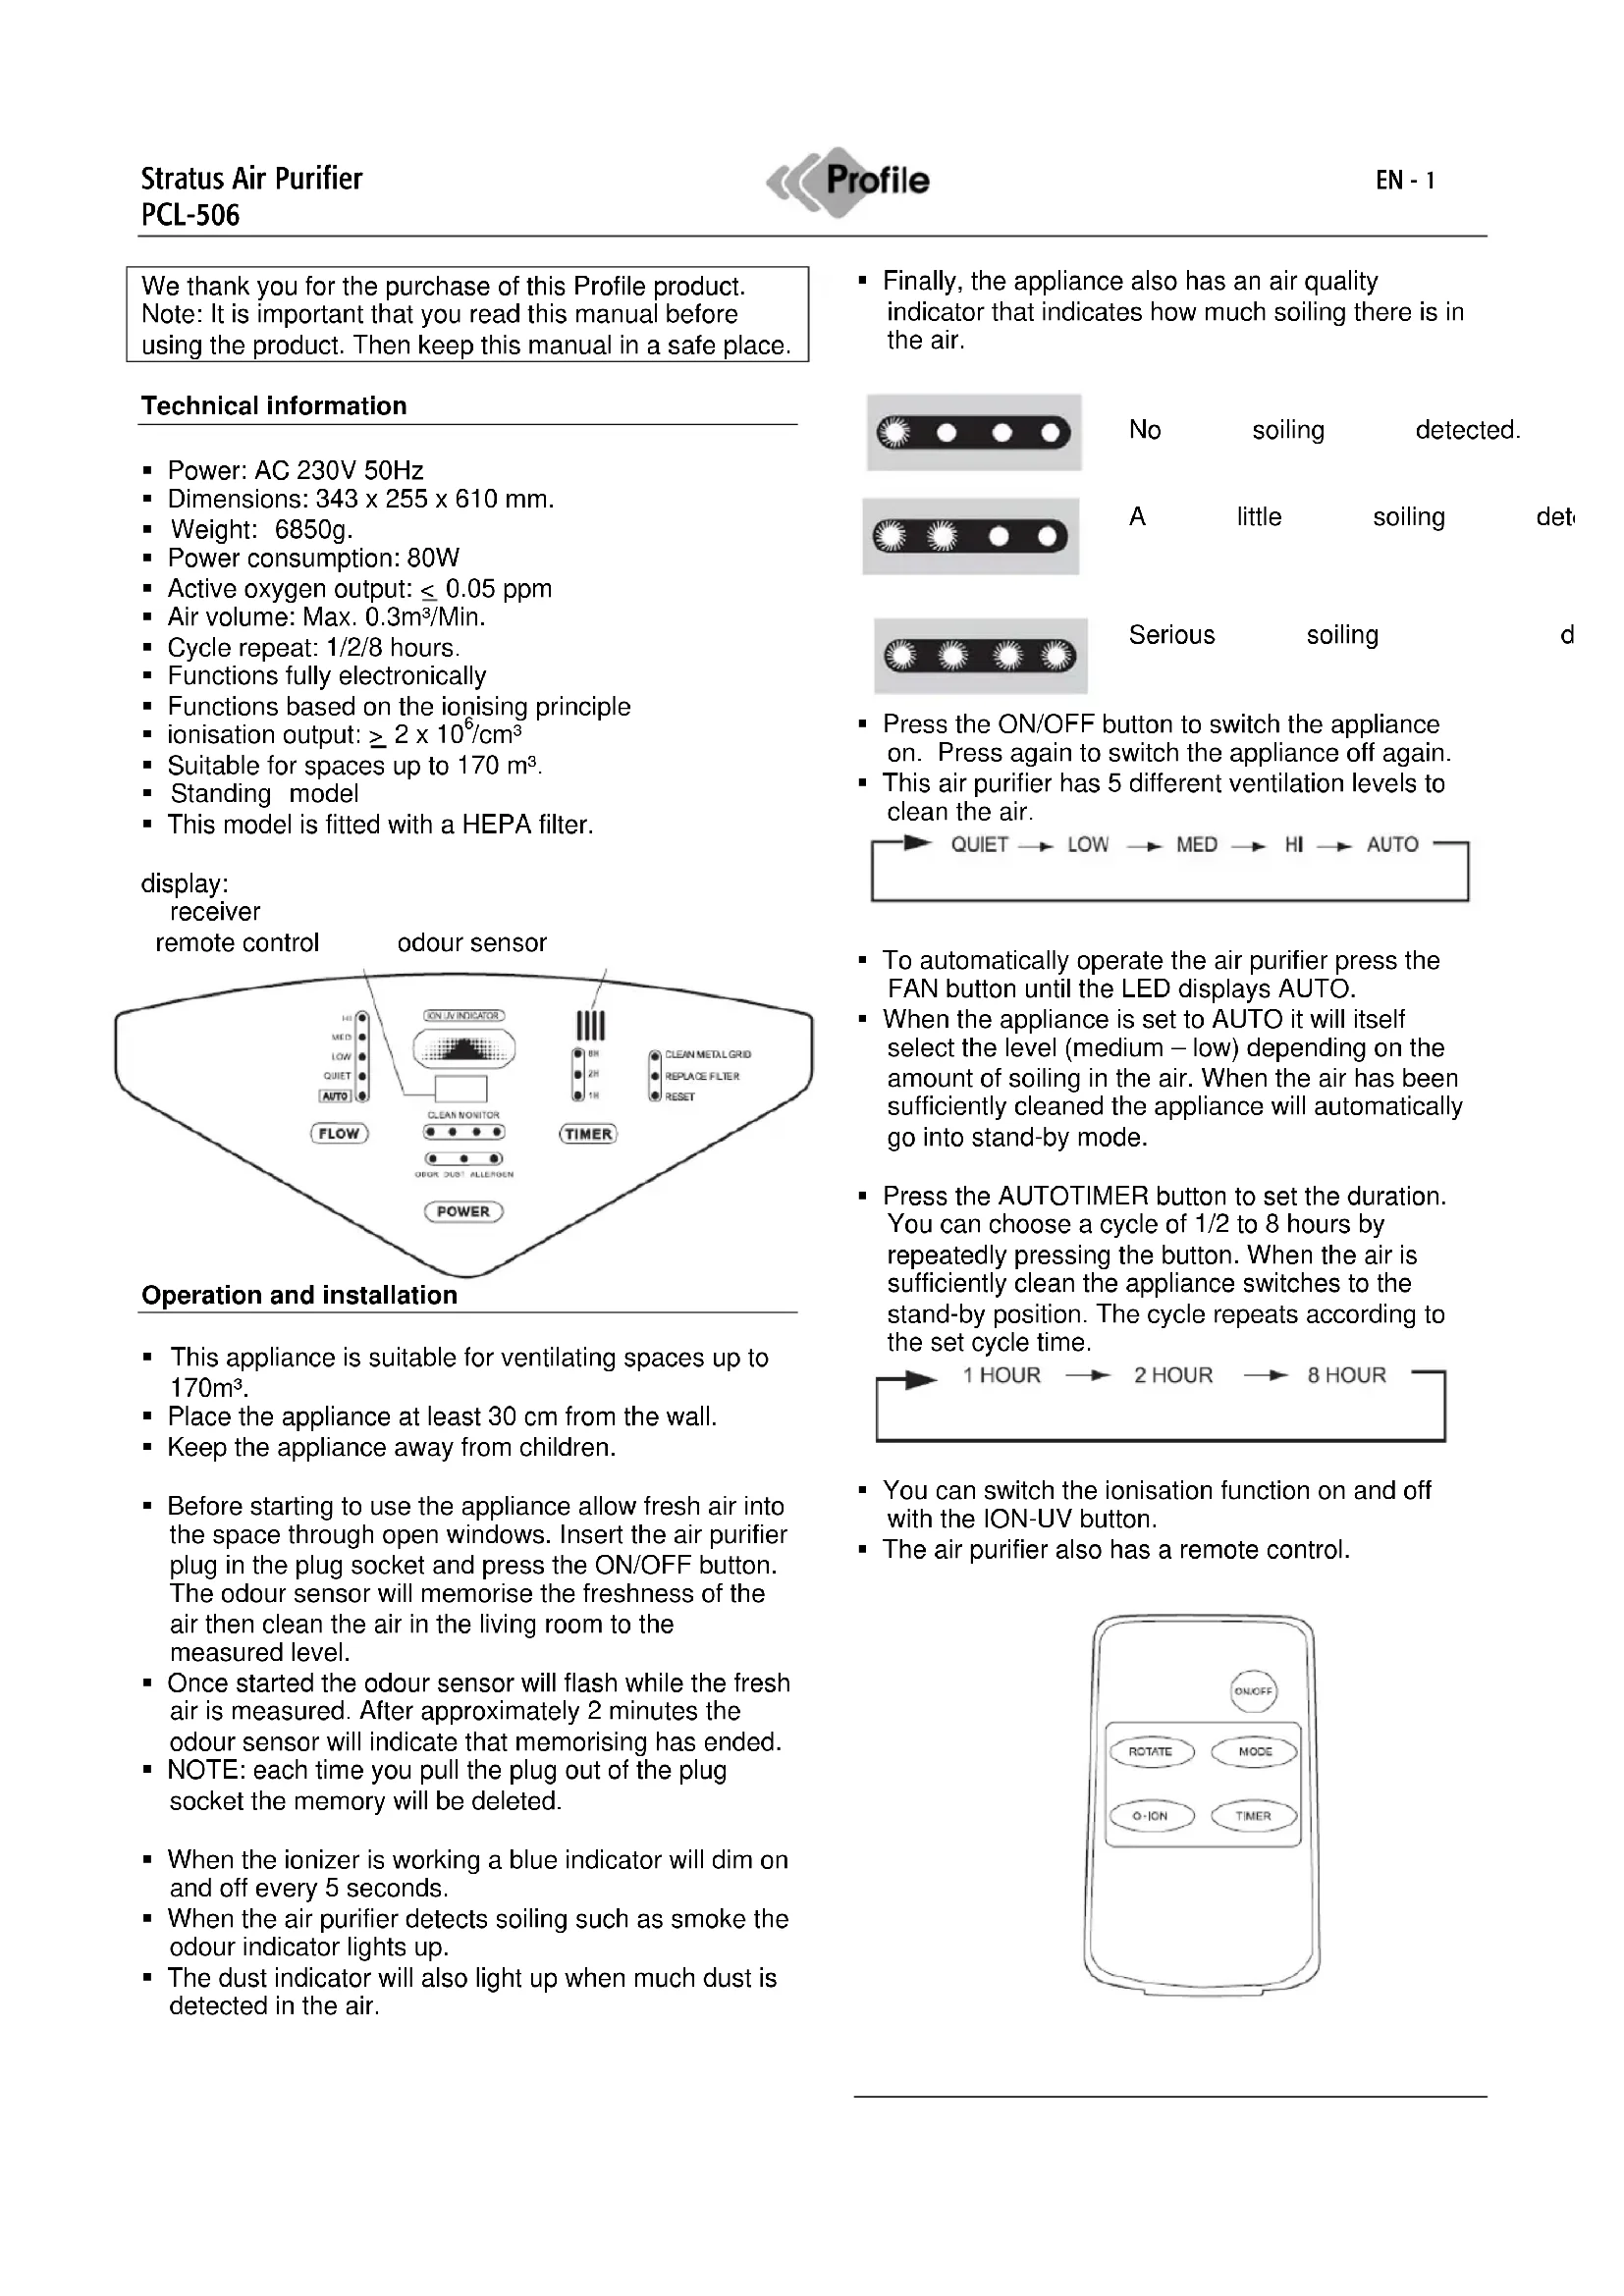
■ Always pull the plug out of the plug socket before cleaning the filter.
- Clean the filter and the metal parts every 2 to 3 months with a damp cloth.
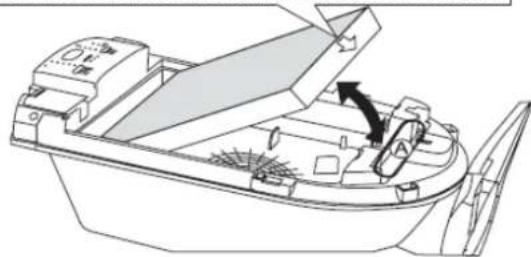
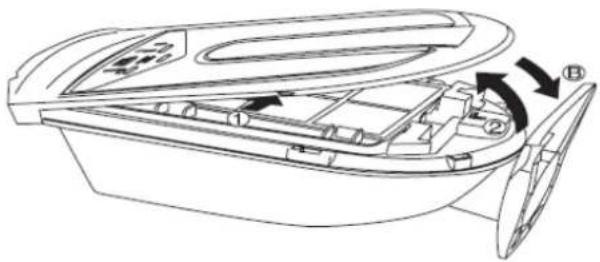
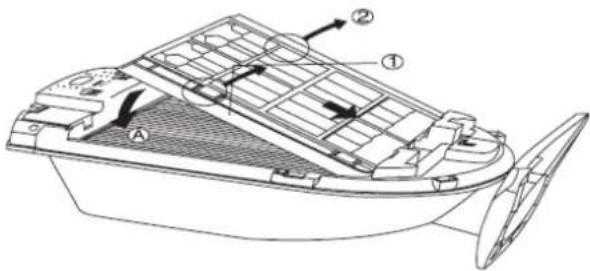
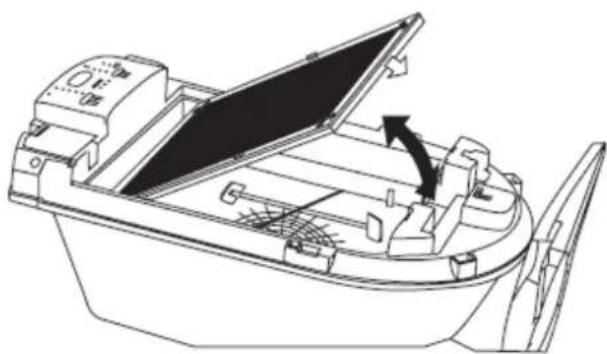
- Carefully place the air purifier with the back on the ground and open as follows:
- Open the front by pressing both tabs simultaneously.
natural_image
Line drawing of a boat's internal compartments and side blades, showing no text or symbols- Take the dust collection tray out of the air purifier.
① Press the dust collection tray to the bottom of the appliance.
② Hold the 2 tabs and take the filter out.
text_image
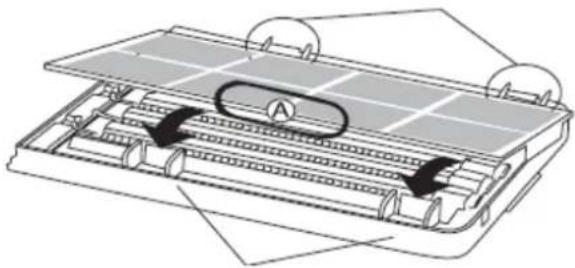
Technical diagram of a boat's internal structure with labeled parts ① and ②- Take the first filter out of the air purifier. This filter may be cleaned with cold water.
natural_image
Technical diagram of a mechanical assembly with labeled component A, showing internal components and motion arrows (no text or symbols beyond label)- The electrostatic filter be can cleaned with hot water and a brush. Note: use safety gloves to prevent cut wounds.
text_image
Diagram showing a hand inserting a grid into a device with labeled components and directional arrows
natural_image
Diagram of a roof structure with decorative elements and a hand holding a tray (no text or symbols)
natural_image
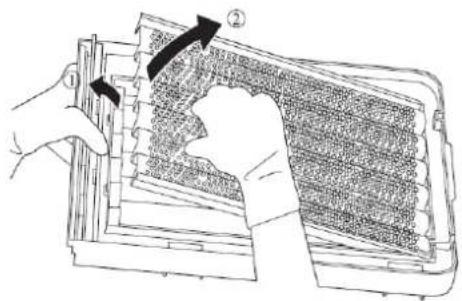
Line drawing of a hand inserting a plug into a rectangular device (no text or symbols)- Take the HEPA filter out of the air purifier. Note the top and bottom sides when replacing this filter!
You clean this filter with a vacuum purifier.
Do not reverse the front and back of the filter
natural_image
Line drawing of a boat's interior structure showing handle, hull, and side panels (no text or symbols)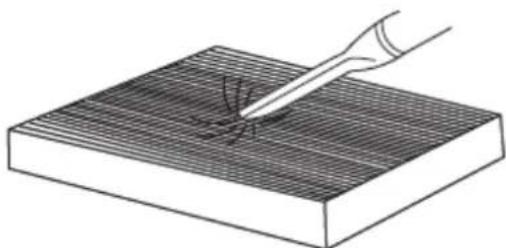
natural_image
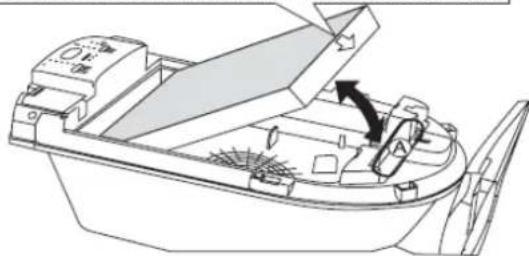
Illustration of a hand using a pipette to test material on a grid-patterned surface (no text or symbols)- Take the TiO2 filter out of the air purifier. To do this press in the clips on the sides. You clean this filter with a dry towel or by blowing out the dust.
natural_image
Line drawing of a small boat's interior with open lid and side panels, showing structural components (no text or symbols)- All plastic parts may be washed with a damp cloth and water.
- Also always remove the UV light while you are cleaning the appliance.
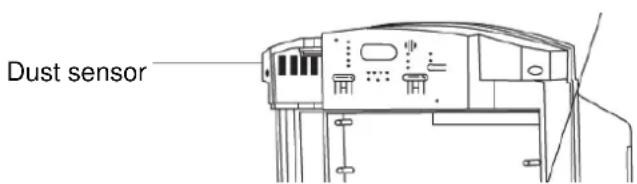
- Clean the sensor with a dry cloth
text_image
Dust sensor- The UV light in the appliance works for 5,000 hours You must replace the UV light sooner if you see a blue sheen in the housing. To be able to replace the light you must first take all filters out of the air purifier. Always replace the UV light with a new light of the same type as the old light.
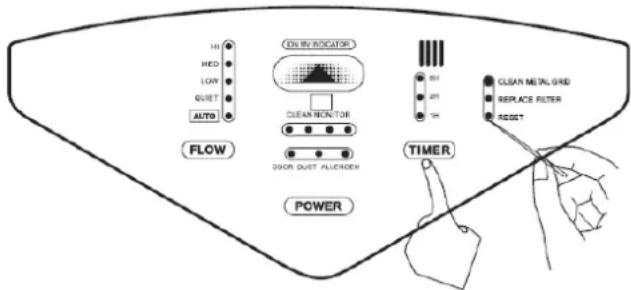
After the cleaning of the filters the PIN CLEAN and FILTER REPLACE LED lights must be reset.
Otherwise these will remain on after you have cleaned the appliance.
Resetting takes place in 2 stages while the air purifier is off.
A) press TIMER + RESET
text_image
HI HED LOW QUIET AUTO FLOW ON IN INDICATOR CLEAN MONITOR DOOR DUST ALUERDER POWER TIMER BH 2P1 TH CLEAN METAL GRID REPLACE FILTER RESET- Why is there only 1 LED on for the sensor for air quality?
– Because the air is fully clean.
- Because the appliance is too far away from the soiled air.
- Why are there 2 LEDs continuously on for the sensor for air quality?
- Because the air is soiled and not yet clean enough according to the detected level. Make sure that soiled air cannot enter the space from outside.
■ Why is the air quality sensor flashing?
- Because your appliance is probably too close to a source of interference such as a telephone, TV or wireless connection. Place the air purifier further from the source of interference.
- Why is the dust sensor flashing continuously?
- Because the sensor is soiled. Solve the problem by cleaning the sensor.
■ Why is the odour sensor not working?
- Have the appliance measure fresh air again. (See pag. 1)
- If you have only just bought the appliance or if the appliance has not been used for a longer period the sensor is less active. After 1 to 2 days the sensor will start working better and its sensitivity will increase.
- Why is it so difficult to eliminate dust and odours?
- Check if the filters need to be cleaned.
- Why can I not switch the appliance on.
- Check that the plug is in the plug socket.
- Check that all filters have been correctly replaced after they have been cleaned.
- If one of the filters is not correctly fitted the air purifier will not work.
Guarantee
The guarantee period for the PCL-506 amounts to 2 years and commences on the date of purchase. During the guarantee period Eltra NV will repair any defects attributable to material or production faults. Eltra NV may choose to either repair or replace a defective appliance.
ELTRA NV is not obliged to repair or replace appliances if they have become defective as a result of damage, inappropriate use, or modifications or adaptations made after the purchase date.
Bring the defective appliance, together with the original receipt, back to the shop where the appliance was bought. Always add a note with a description of the problem.
Damage
Eltra NV can under no circumstances whatsoever be held responsible for damage of whatever nature if the appliance was not correctly installed according to the specified installation instructions, nor for damage as a result of unforeseen circumstances such as natural disasters, lightening strike, etc. All such resulting costs are consequently at the expense of the buyer and are not covered by the guarantee conditions.
www.profile.eu