AVV206 - Fridge AVINTAGE - Free user manual and instructions
Find the device manual for free AVV206 AVINTAGE in PDF.
| Product type | Wine storage cellar |
| Brand | Avintage |
| Model | AVV206 |
| Bottle capacity | 196 bottles (Bordeaux type 75 cl) |
| Gross / net volume | 384 L / 332 L |
| Dimensions (W x D x H) | 700 x 710 x 1330 mm |
| Net weight | 72 kg |
| Electrical supply | 220-240 V ~ 50 Hz |
| Energy consumption | 161 kWh/year (0.44 kWh/24h) |
| Energy class | A |
| Adjustable temperature range | 6 °C to 20 °C |
| Defrost | Automatic (No Frost) |
| Climate class | SN (10 °C to 32 °C) |
| Noise level | 38 dB(A) |
| Installation type | Free-standing |
| Refrigerant | R600a (isobutane), 0.025 kg |
| Filtration system | Activated carbon filter (annual replacement) |
| Anti-vibration | Compressor on silent blocks, polyurethane foam |
| Hygrometry | Automatic regulation (55-70% RH) |
| Winter system (frost-free) | Yes (0 °C to 32 °C) |
| Anti-UV treatment | Yes (glass door) |
| Interior lighting | Dimmable LED, separate switch |
| Door lock | Yes, with key provided |
| Shelves | Solid wood, supports with rubber pads |
| Maximum load per shelf | Indicated inside the cellar (example: xx kg) |
| Maintenance | Cleaning: warm water and mild detergent; replace charcoal filter annually |
Frequently Asked Questions - AVV206 AVINTAGE
User questions about AVV206 AVINTAGE
0 question about this device. Answer the ones you know or ask your own.
Ask a new question about this device
Download the instructions for your Fridge in PDF format for free! Find your manual AVV206 - AVINTAGE and take your electronic device back in hand. On this page are published all the documents necessary for the use of your device. AVV206 by AVINTAGE.
USER MANUAL AVV206 AVINTAGE
natural_image
Black double-b longevity refrigerator with shelves filled with wine bottles, open door open (no visible text or labels)FR - MANUEL D'UTILISATION p. 2
GB - USE INSTRUCTIONS p. 21
natural_image
Simple line drawing of a rectangular device with a side panel and two arrows pointing to it (no text or symbols)natural_image
Close-up of a black cylindrical object with blue dotted arrows indicating direction (no text or symbols)Sens du retrait
natural_image
Close-up of a perforated circular object mounted on a metal grid base (no text or symbols visible)natural_image
Close-up of a car's dashboard and rearview mirror (no visible text or symbols)Vue de l'intérieur
natural_image
Wooden rack holding multiple wine bottles (no visible text or labels)natural_image
Illustration of various wine bottles with green and blue colors, some labeled with white tags, shown in 3D perspective without any text or symbols.natural_image
Two green plastic bottles with red caps, connected by a white gap (no text or symbols)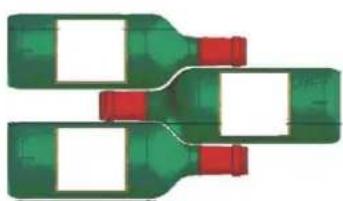
natural_image
Three green wine bottles with red caps, arranged in a staggered layout (no text or symbols visible)7. ENTRETIEN
Before use, please read and follow the safety rules and operating instructions in this manual.
Firstly, we would like to thank you for purchasing a product from AVINTAGE brand and hope that this appliance fully lives up to your expectations.
1. GENERAL SAFETY INSTRUCTIONS
- For your own safety and for the proper utilisation of the appliance, read this manual carefully, including the warnings and recommendations, before installing the appliance and using it for the first time. In order to avoid damage to the appliance and/or personal injury, persons using the appliance should be fully familiar with its operation and safety functions. Keep these recommendations close to the appliance, for future reference, and ensure that the document is transferred with the appliance, if it is sold or in the case of moving. This will ensure optimum operation of the appliance.
- To avoid any risk of injury, keep this manual. The manufacturer declines any liability whatsoever in the case of operating/handling errors concerning the appliance.
Safety of children and other vulnerable persons
- This appliance may be used by children aged 8 years and above, and by persons who are physically, sensorially or mentally handicapped, or who have not learned to use the appliance, providing they are supervised by a person familiar with the appliance and who is aware of the risks involved. Children should not be allowed to play with the appliance. User cleaning and servicing operations should not be carried out by children, unless they are more than 8 years old and are supervised.
- Keep all packaging out of the reach of children, as there is a risk of suffocation.
- If you decide to scrap the appliance, disconnect it from the wall socket, cut the connection cable (as close to the appliance as possible) and remove the door, in order to prevent children playing
with it, with the resulting risk of electric shock or being trapped inside.
- If an appliance with a magnetic door seal is being replaced by another appliance with a latch on the door or on the seal, ensure that the latch is disabled before selling or scrapping the old appliance. This will prevent the appliance from being transformed into a trap for children.
- Keep the appliance and its power cable out of reach of children less than 8 years old.
General safety
- CAUTION — This appliance is intended to be used in household and similar applications such as:
- staff kitchen areas in shops, offices and other working environments;
- farm houses and by clients in hotels, motels and other residential type environments,
- bed and breakfast type environments;
- catering and similar non-retail applications
- CAUTION — Never store inflammable substances, such as aerosols, inside the appliance, as they could leak or release fluids.
- CAUTION — A damaged power cable should be immediately replaced by the manufacturer or by a qualified retailer, in order to avoid any risk of electric shock.
- CAUTION — Keep the ventilation openings well open and ensure that air can circulate, especially if the appliance is recessed into a wall.
- CAUTION — Do not damage the refrigerating circuit.
- CAUTION — Do not use electrical appliances inside the compartment, unless they are tolerated by the manufacturer.
- CAUTION — The refrigerating and insulating systems contain inflammable gases. When the appliance is scrapped, it should be deposited at an accredited collection centre. Do not expose the appliance to fire.
Refrigerating fluid
The refrigerating circuit in the appliance uses refrigerating isobutane (R600a), which is a highly inflammable natural gas and is therefore dangerous for the environment. When transporting or installing the appliance, ensure that no element of the refrigerating circuit is damaged. The refrigerating fluid (R600a) is inflammable.
Caution: Fire risk
If the refrigerating circuit is damaged:
- Avoid open flames or any source of combustion.
- Ensure that the room in which the appliance is installed is well ventilated.
It is dangerous to change the specification of the appliance in any way whatsoever.
Damage to the power cable may cause a short circuit and/or electric shock.
Electrical safety
- We decline any liability in respect of incidents caused by poor electrical installation.
- Do not extend the power cable. Do not use an extension cable, or adapter, or multi-way socket.
- Check that the wall socket is not damaged. A wall socket in poor condition may cause the appliance to overheat and explode.
- Check that the wall socket used for the appliance is properly accessible.
- Never pull on the main power cable.
- Ensure that the appliance is always electrically earthed.
- If the wall socket is loose, do not connect the cable, as there is a risk of electric shock or fire.
- Do not use the appliance if the interior lighting cover is not installed.
- Disconnect the appliance before replacing the lighting bulb
- The appliance operates on a single phase 220\~240 V / 50 Hz power supply. The appliance must be connected to an earthed wall socket, in accordance with applicable recommendations.
- Do not attempt to replace a damaged power cable, contact your after-sales service.
- The power socket must be easily accessible but out of reach of children. In case of doubt, contact your installation technician.
Daily utilisation
- Do not store inflammable substances or fluids inside the appliance. This would create a risk of explosion.
- Do not operate other electrical equipment inside the appliance (mixers, whirling rotor for ice cream, etc.).
- When disconnecting the appliance, grip the plug firmly and do not pull on the cable.
- Do not expose the appliance to direct sunlight.
- Keep the appliance away from candles, luminaires and open flames, in order to avoid fire risk.
- This appliance is only designed to store wines and drinks.
- The appliance is heavy. Be careful when moving it.
-
If your appliance is equipped with castors, remember that these are only designed to facilitate minor movements. Do not move the appliance over long distances.
-
Do not lean or climb on the appliance or its elements.
- In order to avoid falling objects and to prevent damage to the appliance, do not overload the compartments of the appliance.
Caution! Cleaning and servicing
- Before carrying out servicing, switch off the power supply and disconnect the appliance.
- When cleaning the appliance, do not use metal objects, steam systems, volatile fluids, organic solvents or abrasive substances.
- Do not use sharp or pointed objects to remove ice. Use a plastic scraper.
Important information concerning installation
- To ensure proper electrical connection, follow the recommendations given in the present manual.
- Unpack the appliance and visually check that it is not damaged. Do not connect a damaged appliance. Inform your retailer or point of sale of any damage. In such a case, keep the packaging.
- It is recommended that the appliance be allowed to settle for at least 4 hours before connecting the electrical power supply, so that the compressor fluid feed is correct.
- Proper air circulation is necessary to avoid overheating. To ensure sufficient ventilation, observe the installation recommendations provided.
- In order to avoid fire risk, wherever possible, ensure that the appliance is not in contact with walls or with any hot element (compressor, condenser). Observe the installation recommendations.
- The appliance should not be placed close to radiators or cooking hot plates or gas rings.
- Check that electrical sockets remain accessible when the
appliance is installed.
Power saving
- To limit the electricity consumption of your appliance:
- Install it in an appropriate place (see “Installing your wine cellar”).
- Leave the doors open as little time as possible.
- To ensure that the appliance operates properly, clean the condenser regularly (see “Maintenance”).
- Regularly inspect the door seals and ensure that they are still closing properly. If this is not the case, contact your after-sales service.
Trouble shooting
- Any electrical work should be carried out by a qualified and skilled technician.
- The appliance should be repaired by an accredited repair centre, using only manufacturer's original spare parts.
The appliance is designed for home use only. The manufacturer declines any liability whatsoever in the case of other utilisation.
R600a
Safety instructions
- Caution — Do not obstruct the ventilation grills on the appliance. Keep ventilation openings in the appliance enclosure or in the structure for building-in clear of obstruction.
. Caution — Do not store explosive substances, such as aerosol
cans containing an inflammable propellant, in the appliance.
- Caution — Do not damage the refrigerating circuit in the appliance.
- Caution — The refrigerating units use isobutane (R600a), and should not be placed close to ignition sources (for example, electrical contacts that are exposed or open contacts that could be closed by the refrigerating fluid in the event of a leak). The refrigerating fluid type is specified on the power cabinet identification plate.
- Caution — Do not use electrical equipment in the compartments of the appliance, unless they are of the type recommended by the manufacturer.
This appliance meets the requirements of all applicable European directives and their amendments, and notably complies with the following standards:
- 1907/2006 (REACH)
- 2011/65/EU (ROHS)
- 2014/35/EU relating to electrical safety
- 2014/30/EU relating to electro-magnetic compatibility
- 2008/48 relating to electro-magnetic fields
- 2010/30 and 1060/2010 relating to energy labels
CE
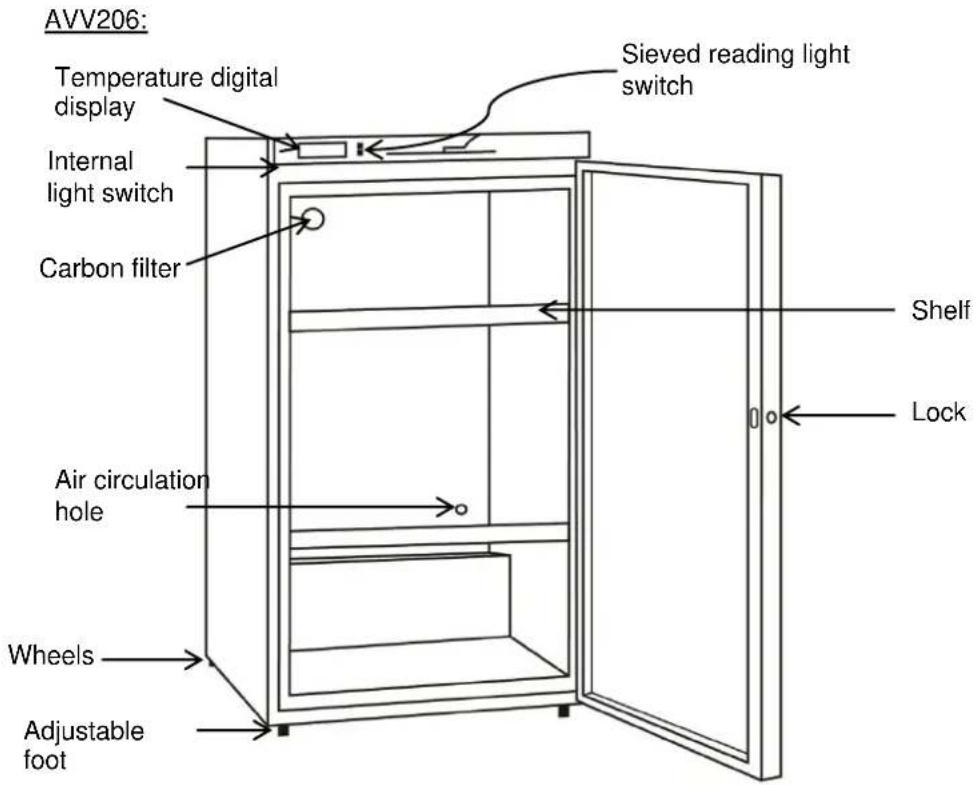
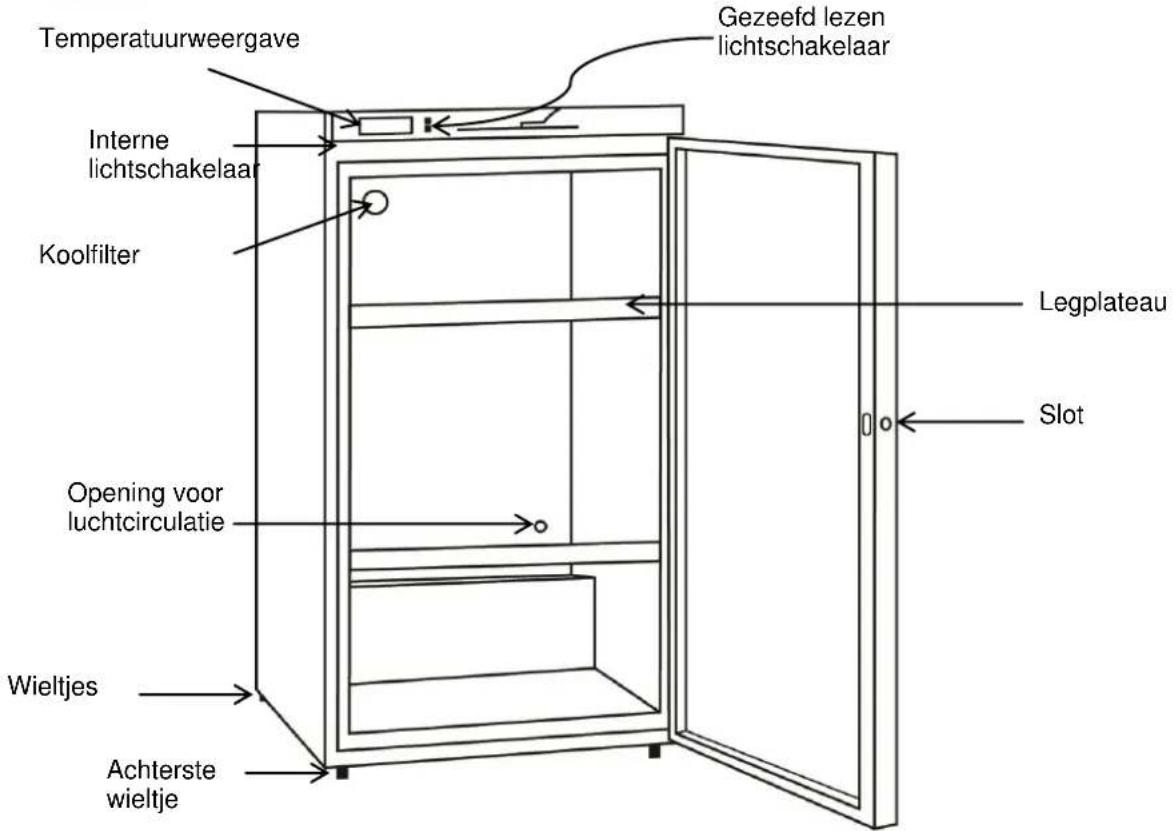
2. DESCRIPTION OF THE APPLIANCE
text_image
AVV206: Temperature digital display Internal light switch Carbon filter Air circulation hole Wheels Adjustable foot Sieved reading light switch Shelf Lock3. TECHNICAL CHARACTERISTICS
Below is an example of the nameplate:
text_image
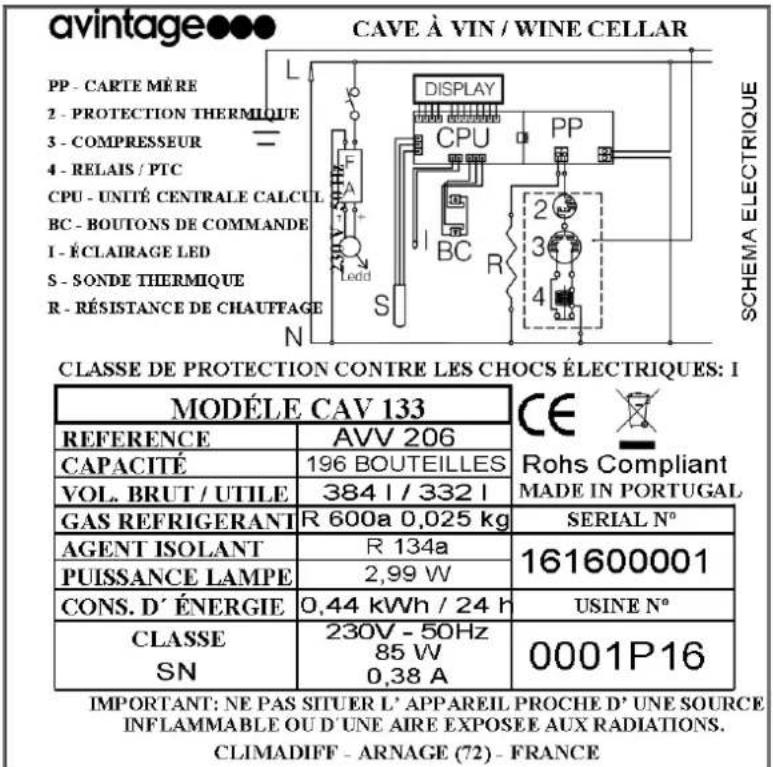
avintage CAVE À VIN / WINE CELLAR PP - CARTE MÈRE 2 - PROTECTION THERMIQUE 3 - COMPRESSEUR 4 - RELAIS / PTC CPU - UNTIÉ CENTRALE CALCUL BC - BOUTONS DE COMMANDE I - ÉCLAIRAGE LED S - SONDE THERMIQUE R - RÉSISTANCE DE CHAUFFAGE N DISPLAY CPU PP BC R 2 3 4 SCHEMA ELECTRIQUE CLASSE DE PROTECTION CONTRE LES CHOCS ÉLECTRIQUES: I MODELE CAV 133 REFERENCE AVV 206 CAPACITÉ 196 BOUTEILLES VOL. BRUT / UTILE 384 l / 332 l GAS REFRIGERANT R 600a 0,025 kg SERIAL N° AGENT ISOLANT R 134a 161600001 PUISSANCE LAMPE 2,99 W CONS. D' ÉNERGIE 0,44 kWh / 24 h USINE N° CLASSE 230V - 50Hz 0001P16 SN 85 W 0,38 A IMPORTANT: NE PAS SITUER L' APPAREIL PROCHE D' UNE SOURCE INFLAMMABLE OU D' UNE AIRE EXPOSEE AUX RADIATIONS. CLIMADIFF - ARNAGE (72) - FRANCEThe name plate attached to the inside or rear of the appliance (depending on the model) includes all the information specific to your wine cellar.
We recommend that you make a note of its serial number in this booklet prior to installation, so that you can refer to it later (technical work, request for assistance, etc.)

natural_image
Empty rectangular frame with no text, symbols, or content insideOnce it is installed and loaded, access to it is not so easy.
CAUTION: No assistance can be provided without this information.
4. INSTALLATION INSTRUCTIONS
Before using your wine cellar
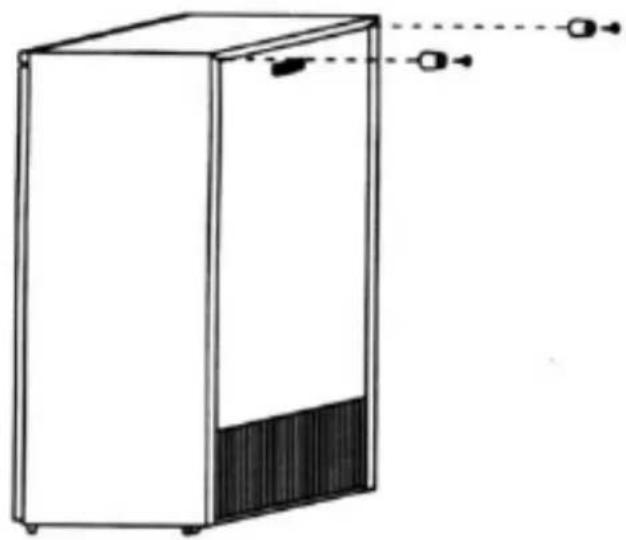
- Remove the inner and outer packaging. Remove your wine cellar from the transport pallet by unscrewing the two screws on the frame at the back of the device.
- Before connecting the cellar to the electrical socket, leave it in position for 24 hours. This will reduce the possibility of malfunction of the refrigeration circuit due to transport.
- Clean the inside using a soft cloth and lukewarm water.
Using your wine cellar
Your wine cellar must be positioned in a room with an ambient temperature between +10°C and +32°C. Alternatively, if the cellar is fitted with the winter system, the range is extended to 0°C to 32°C.
Installing your wine cellar
- This wine cellar is designed for free-standing installation.
- Position it in a place with sufficient strength to support its weight when loaded.
- To get the best from your appliance with the lowest energy consumption, do not place the appliance close to a heat source (heater, cooker, etc.), do not expose it to direct sunlight, and do not place it in a room which is too cold.
- Screw the stopper supplied inside the wine cellar to maintain a 10cm minimum distance between the back of the cellar and the wall in front of it is placed. Ensure that your wine cellar is perfectly horizontal, then slightly raise the two front feet. (Use of a spirit level is recommended). This will prevent any movement due to instability, causing noise and vibration, and will ensure that the door seals perfectly.
natural_image
Line drawing of a rectangular refrigerator with a side panel and hanging items, connected by dashed lines (no text or symbols)Adjusting the thermostat
Please have a look at the document enclosed named « Intelitherm Plus© ».
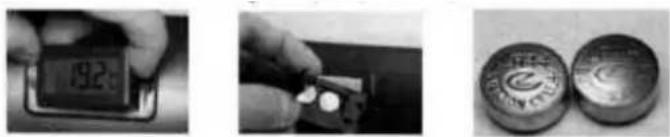
Replacing the batteries on the digital display (depending on model)
- Remove the display unit
- Open it and change the batteries (2 x LR44)
- Close it and reinsert it
5. EQUIPMENT
The ventilation system: charcoal filter
Pure air continually changed and filtered.
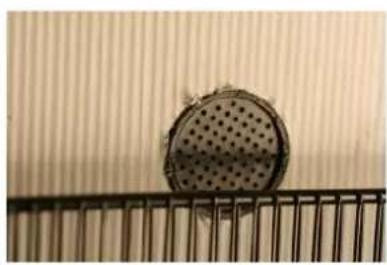
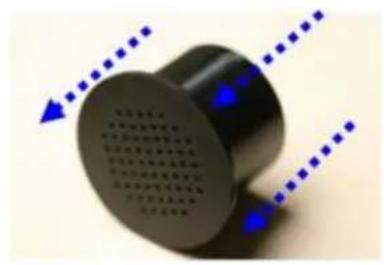
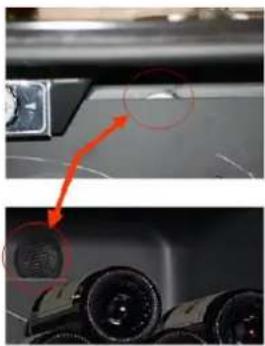
Your Avintage wine cellar is equipped with a continuous fresh air system, filtered by a charcoal filter. This is a 5 cm diameter black plastic washer in the top left of the cellar at the back. It should be replaced annually and can be bought from the accessories section of our web site at www.avintage.com.
To remove it, push it inwards and do not be afraid to tap it a little to break its seal with the insulation. Finish removing it by putting your hand behind the evaporator cover. The hole visible in the rear lower section is normal and provides negative pressure, to ensure internal air circulation.
natural_image
Close-up of a black cylindrical object with blue dotted arrows indicating direction (no readable text or symbols)Direction for removal

natural_image
Close-up of a perforated circular object mounted on a metal grid base, against a plain wall (no text or symbols visible)View from the back of the cellar
natural_image
Close-up of a car dashboard and interior camera frame with red arrows pointing to specific components (no visible text or symbols)View from inside
The anti-vibration system
Wine does not like to be disturbed. It especially dislikes vibration. This is why your wine cellar's slow-cycle compressor is mounted on special shock absorbers called "silent blocks".
Likewise, the inner container is insulated from the body by a thick layer of polyurethane foam which also has the particular feature of absorbing vibration.
Depending on the model, the wine bottle shelves are made of solid wood and absorb vibration better than metal. On some models, the shelf supports are also equipped with rubber pads. Your bottles are enjoying perfect peace!
Hygrometry
Your Avintage cellar is equipped with a dynamic humidity system, which regulates the humidity level in the cabinet entirely automatically. No addition of water is required.
It is necessary to wait a few days after start-up for the average (between 55 and 70%) to stabilise in the cabinet. Frost will form at the bottom of the cabinet: no cause for worry, this is a normal phenomenon, which may appear when the appliance is used for the first time during the hotter periods of the year and which will disappear when the natural inertia level is reached.
The winter system (optional on some models)
The winter kit is a frost protection system which enables the cellar to operate in an environment where the temperature is between 0 and 32°C. A sensor located outside the appliance triggers a low power electrical element when the ambient temperature in the room falls to around 8°C in case. This is a low power element to avoid sudden rises in the temperature of the wine and so avoid thermal shocks that are damaging to the preservation of the wine. The kit is intended to raise the cellar's internal temperature even before there is a thermal exchange with the bottles.
IMPORTANT: If the temperature in the room where your wine cellar is located is about 12^ C ( ± 2^ C), no production of warm or cold air will be observed. The appliance is then completely silent and this is quite normal. It should not be considered as a malfunction.
The anti-UV system
Models with a glass door are UV treated, thus filtering out damaging ultraviolet rays: your wines are therefore protected.
Defrosting
Your appliance is equipped with an automatic defrost cycle. When a cooling cycle finishes, the appliance's refrigerated surfaces are defrosted automatically. The defrost water is channelled into a condensates evaporation tray which is located in the back of the appliance near the compressor. The heat produced by the compressor then evaporates the condensates collected in the tray.
Lock (depending on model)
For cellars fitted with a lock, the keys can be found in the bag along with the manual. To open the cellar, turn the key anti clockwise.
Subdued reading light (depending on model)
When the door is opened, the switch located under the top panel provides you a low emissive LED light to make it easier to read labels in a dark room. Don't forget to switch it off after closing your wine cabinet by pressing the switch symbolized by the "lamp" icon.
Shelves
Each cellar has its own type of bottle shelf.
Note that there is no ideal storage arrangement. A collection of bottles of wine is rich when it is varied. It is up to you to arrange the storage capacity of your wine cellar according to your collection.
Additional shelves may be ordered as a chargeable option from your retailer or after-sales service, or from our web site www.avintage.com.
Tip: to prevent damage to the door seal, ensure that the door is fully open before pulling out the shelves to add or remove bottles.
natural_image
Wooden rack holding multiple wine bottles, no visible text or labelsMaximum loading:
Do not exceed maximum loads, which you will find in the cellar on a label (similar to the one shown below).
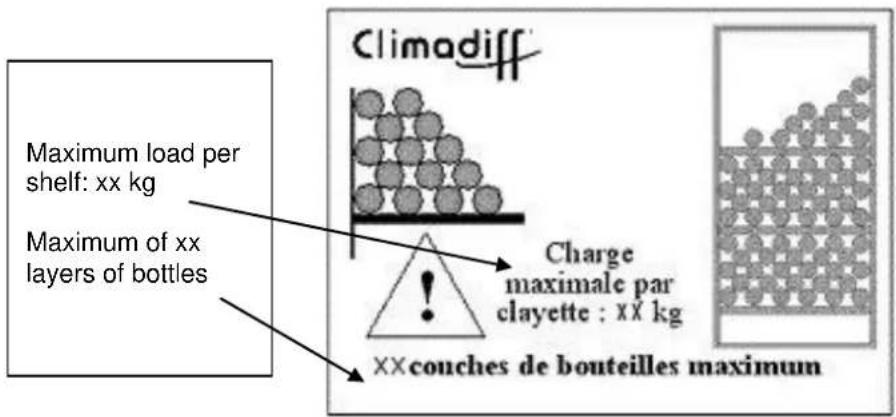
text_image
Maximum load per shelf: xx kg Maximum of xx layers of bottles Climadiff Charge maximale par clayette : xx kg xx couches de bouteilles maximumEnhanced safety
Since this range of appliances is intended for storing items of value, we have been careful to select quality components and to design suitable manufacturing techniques to ensure optimum safety in operation.
6. LOADING
The maximum recommended bottle loading quantities are guidelines and are not contractually binding; they provide a quick estimate of the size of the appliance (similar to the litre capacities of refrigerators).
They relate to tests conducted with a standard bottle: the "75 cl traditional Bordeaux" bottle.
How to fill and maintain your wine cellar:
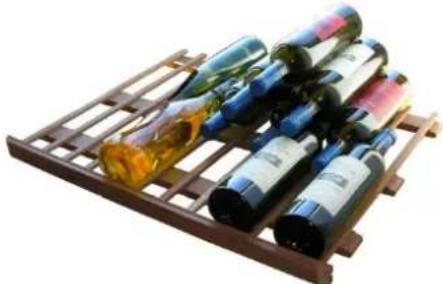
Your wine cellar is delivered with one or more wine bottle trays made of metal or wood.
Start by loading the lower part of your wine cellar. Then simply stack the bottles with their bases facing backward in the back row and conversely for the front row. The bottle shelves should be arranged according to the size of your wine cellar and the shapes of your wine bottles. It is very important not to exceed the load limit for each shelf (refer to the load written inside your cellar). Do not exceed the designated maximum capacity (warning: do not obstruct the charcoal filter).
The shelves should be arranged according to the size of your wine cellar and the shape of your wine bottles. In reality and in extreme cases, you could store more bottles by stacking the same type of bottle without using shelves, but a “varied cellar” comprises a wide variety of bottles and the “practical” aspect of everyday cellar management limits its capacity. You will therefore probably load to a little less capacity than the nominal maximum capacity.
Types of bottle:
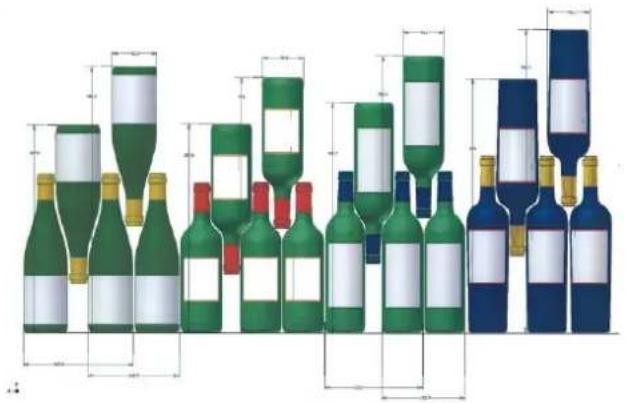
natural_image
Illustration of multiple wine bottles with green and blue labels, shown in 3D perspective without any text or symbols.We see here 4 kinds of 75 cl wine bottles: Burgundy and Bordeaux wine bottles of different dimensions. There are many others of all shapes and sizes. You will note the storage differences depending on bottle heights, diameters and alternating position method.
For example, if a wine cellar is loaded only with Burgundy wine bottles, there will be approximately 30% fewer bottles than the initial quantity calculated for Bordeaux bottles.
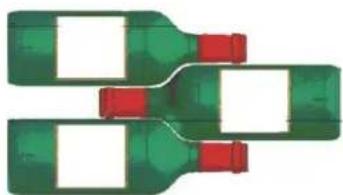
Types of staggered storage:
Top-to-bottom neck-to-neck:
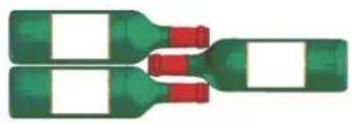
natural_image
Three green plastic bottles with red caps, arranged in a row (no text or symbols visible)Note the difference in depth!
Top-to-bottom neck between bottle bodies:
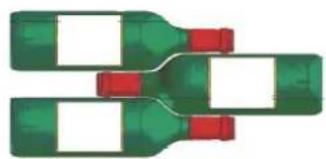
natural_image
Three green wine bottles with red caps, arranged in a row (no text or symbols visible)7. MAINTENANCE
Before cleaning your appliance (something that should be done regularly), disconnect it by removing the plug or by pulling the fuse on the circuit.
Before using your appliance for the first time and regularly thereafter, we recommend that you clean the inside and outside (front, sides and top) with warm water mixed with a gentle cleaning product. Rinse with clean water and allow to dry before reconnecting. Do not use solvents or abrasives.
Wash the plastic coating on the steel shelves with a mild detergent solution and then dry with a soft cloth. Wooden shelves require no particular maintenance. When the appliance is switched on for the first time, there may be a residual odour. In that case, run the appliance empty for a few hours at the coldest possible temperature. The cold will kill any odours.
8. STORING YOUR WINE CELLAR
If you will not be using your appliance for short periods, leave the control panel with its usual settings.
- Remove all bottles from the appliance
- Unplug the appliance
- Thoroughly clean the inside and outside of the appliance
- Leave the door open to prevent condensation, unpleasant odours and mould
9. WHAT TO DO IN THE EVENT OF A POWER CUT
Most power cuts are resolved within a short time. A power cut of 1 or 2 hours will not affect the temperature in your cabinet. To protect your wines during a power cut, avoid opening the door as much as possible.
During very long power cuts, take the necessary measures to protect your wine.
- If the appliance is disconnected or if there is a power cut, you must wait three to five minutes before re-starting. If you try to re-start before this time, the compressor will only re-start after 3 to 5 minutes (if the temperature requires).
- When switching on for the first time or following a prolonged shutdown, it is possible that when restarting, the temperatures selected and those displayed are not the same. This is normal. It will take a few hours before they stabilise.
10. IF YOU NEED TO MOVE YOUR WINE CELLAR
- First, disconnect your cellar
- Remove all the bottles from the cellar and secure moving parts
- To avoid damaging the levelling screws on the feet, screw them tightly into the base
- Move the appliance in an upright position (preferably) or take note of the direction in which the appliance may be laid down by looking at its packaging.
11. IN THE EVENT OF A BREAKDOWN
Despite the care we take during production, a breakdown can never be totally ruled out. Before contacting your retailer's after-sales department, please check that:
• The appliance is properly plugged in
• There is not a power cut in progress
- The breakdown is not one of those described in the table at the end of this manual
IMPORTANT: if the power cable supplied is damaged, it must be replaced by the manufacturer, a service centre approved by the brand or the retailer. In all events, it must be replaced by qualified personnel in order to avoid any risk of injury.
IF THESE CHECKS REVEAL NOTHING, THEN CONTACT YOUR RETAILER'S AFTER-SALES DEPARTMENT.
CAUTION!
Unplug the appliance before carrying out any maintenance or repair work.
12. PROBLEMS AND SOLUTIONS
You can solve many simple problems with your wine cellar yourself, thus avoiding having to contact your after-sales department. Try the following suggestions.
| PROBLEM | POSSIBLE CAUSES |
| The cellar will not start | The cellar is not plugged in.If your wine cellar is in an unheated room, refer to the section "Winter Kit".The fuse in your electrical installation has blown. |
| The cellar does not cool sufficiently | The thermostat position is set to provide insufficient cooling: adjust it.The external temperature is beyond the cellar's operating temperature. |
| The cellar is too cold | The thermostat is set to provide excessive cooling: adjust it. |
| The humidity level is too highBottle labels are coming unstuck | Humidity is regulated by the principle of thermodynamics. During a cooling period, a frost forms (cold air dries the air), humidity will fall to 40%. During a heating period, the frost melts and humidity may reach 70%.Taking an average of these two values, we obtain an average humidity of 55%. It is essential to calculate an average value over several cycles and not from a single reading.There are two alternatives for reducing the cellar's humidity:- Replace the charcoal filters- Decrease the temperature slightly inside the cellar |
| The humidity level is too low | Humidity is regulated by the principle of thermodynamics. During a cooling period, a frost forms (cold air dries the air), humidity will fall to 40%. During a heating period, the frost melts and humidity may reach 70%.Taking an average of these two values, we obtain an average humidity of 55%. It is essential to calculate an average value over several cycles and not from a single reading.To increase the humidity in the cellar, there are two alternatives:- Place a jar of water in the upper part of the cellar- Raise the temperature slightly inside the cellar |
| The temperature in the cellar is not consistent | The actual temperature to take into account is the temperature in the bottle. The temporary variations which you observe correspond to the compressor's operating cycles.It is through this principle of a series of small variations in the air inside your wine cellar that a suitable average temperature is obtained, ensuring the best conditions for maturing your wine.If the temperature noted in your wine cellar is different from that usually seen and it does not change continuously (over several hours and except when located in a non-heated room with a temperature of between 10 and 12°C), please contact your retailer's after-sales service. |
| The cellar's compressor runs continuously | If no cold is being produced, call your retailer's after-sales service. |
| Vibration | Check to ensure that the cellar is indeed level and that all the feet are resting on the ground. |
| The cellar makes a lot of noise | The compressor is noisy: check that it is fixed to the rubber shock absorbers (silent blocks) and whether it is in contact with another element.Small rattling sounds are heard: they result from the circulation of gas in the pipes and are part of the normal operation of your wine cellar. |
| There are unpleasant smells in the cellar | Clean the cellar and ventilate it for several days.Replace the charcoal filters. |
| The bottle shelves sag when loaded | Check that you are not exceeding the load capacity and that the shelves are correctly positioned. |
| There is water in the bottom of the cellar | This is not detrimental to your wine and is a normal phenomenon during the first few days of use.Ensure that the two front feet are slightly raised.Ensure that the condensation water evacuation pipe is not blocked. |
| The door does not close correctly | The cellar is not level.The door seal is dirty or damaged.The shelves are not positioned correctly.A part of the contents is preventing the door from closing. |
13. SOME USEFUL INFORMATION
Examples of serving temperatures
To be followed when tasting, to avoid missing out on the rich aromas of your wines!
Opinions vary, and the ambient temperature too, but many people agree on the following:
| Prestigious Bordeaux wines – Reds | 16 – 17°C |
| Prestigious Burgundy wines – Reds | 15 – 16°C |
| Prestigious dry white vintages | 14 – 16°C |
| Light, young, fruity reds | 11 – 12°C |
| Provence rosés, primeur wines | 10 – 12°C |
| Dry whites and vin de pays reds | 10 – 12°C |
| Vin de pays whites | 8 – 10°C |
| Champagnes | 7 – 8°C |
| Sweet wines | 6°C |
Maturity table in years
| APPELLATION | WHITE - ROSÉ | RED |
| Alsace | 1 - 4 | |
| Alsace Grands Crus | 8 - 12 | |
| Beaujolais (crus) | 1 - 4 | |
| Beaujolais primeur | 1 - 2 | |
| Bergerac | 2 - 3 | 3 - 4 |
| Bordeaux | 2 - 3 | 3 - 4 |
| Burgundy | 5 | 7 |
| Cahors | 5 - 10 | |
| Cotes de Provence | 1 - 2 | 2 - 5 |
| Cote Rotie, Hermitage | 8 | 8 - 15 |
| Burgundy grand crus | 8 - 10 | 10 - 15 |
| Bordeaux grand crus | 8 - 10 | 10 - 15 |
| Jurancon mellow, liquoreux | 6 - 10 | |
| Jurancon dry | 2 - 4 | |
| Languedoc | 1 - 2 | 2 - 4 |
| Loire | 5 - 10 | 5 - 12 |
| Loire mellow, liquoreux | 10 - 15 | |
| Mâcon | 2 - 3 | 1 - 2 |
| Montbazillac | 6 - 8 | |
| Savoie | 1 - 2 | 2 - 4 |
| Rhone Valley | 2 | 4 - 8 |
| Yellow wine | 20 |
14. ENVIRONMENT
This appliance is marked according to the European directive 2012/19/CE on Waste Electrical and Electronic Equipment (WEEE). By ensuring this product is disposed of correctly, you will help prevent potential negative consequences for the environment and human health, which could otherwise be caused by inappropriate waste handling of this
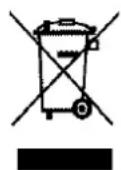
product.
The symbol on the product, or on the documents accompanying the product, the Crossed Out Wheelie Bin, indicates that this appliance may not be treated as household waste. Instead it shall be handed over to the applicable collection point for the recycling of electrical and electronic equipment, or, if you are buying an equivalent product, to the retailer of the new product.
The user is responsible for taking the appliance to the appropriate collection centre at the end of its useful life. Selective and appropriate collection for the recycling of no longer used appliances and their disposal and destruction in an environmentally friendly manner, helps to prevent potential negative effects on the environment and health, and encourages the recycling of materials used to make the product.
For more detailed information about treatment, recovery and recycling of this product, please contact your local authority, your household waste disposal service or the retailer where you purchased the product.
15. WARNING
As we continuously improve our products for the benefit of our customers, we reserve the right to modify technical characteristics without notice.
Warranties for AVINTAGE brand products are offered exclusively by selected retailers. No part of these instructions may be considered as a supplementary guarantee.
FRIO ENTREPRISE cannot be held liable for errors or technical or editorial omissions in this document.
Non-binding document.
EUROPEAN DATA SHEET
according to the regulations (UE) N°1060/2010
CONSERVATION WINE CABINET
| BRAND | AVINTAGE |
| COMMERCIAL REFERENCE | AVV206 |
| POWER SUPPLY | 220-240 V / 50 Hz |
| PRODUCT DIMENSIONS (W x D x H) | 700 x 710 x 133 mm |
| NET WEIGHT | 72 kg |
| APPLIANCE CATEGORY | 2 |
| ENERGY EFFICIENCY CLASS | A |
| ENERGY CONSUMPTION | Energy consumption 161 kWh per year calculated on the basis of results obtained over 24 hours in standardized test conditions. Actual energy consumption depends on conditions of use and the location of the appliance. |
| NET VOLUME | 332 L |
| ADJUSTABLE TEMPERATURES | 6 – 20°C |
| NO FROST | Automatic defrost |
| CLIMATE CLASS | Climate class: SNThis appliance is designed to be used at an ambient temperature of between 10°C (lowest) and 32°C (highest). |
| ACOUSTIC EMISSIONS IN AIR IN dB(A) RE 1 pW | 38 dB(A) |
| INSTALLATION TYPE | Free-standing installation |
This appliance is intended exclusively for the storage of wine.
natural_image
Line drawing of a rectangular refrigerator with a side panel and two hanging items, connected by dashed lines (no text or symbols)text_image
Close-up of a black cylindrical object with blue arrows pointing to it, containing Chinese text and symbols.Ausbaurichtung

natural_image
Close-up of a perforated circular object mounted on a metal grate against a plain wall (no text or symbols visible)natural_image
Close-up of a car dashboard and interior camera lens (no visible text or symbols)Innenansicht
Schwingungsdämpfung
natural_image
Wooden rack holding multiple wine bottles, no visible text or labelsnatural_image
Illustration of multiple wine bottles with green and blue colors, some labeled with white tags, shown in 3D perspective (no text or symbols)natural_image
Two green plastic bottles with red caps, connected by a double-headed arrow (no text or symbols)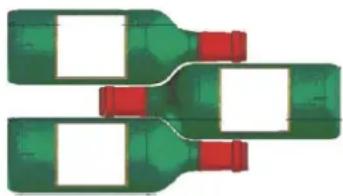
natural_image
Three green wine bottles with red caps, arranged in a staggered layout (no text or symbols visible)7. INSTANDHALTUNG
2. BESCHRIJVING VAN HET APPARAAT
AVV206:
natural_image
Line drawing of a refrigerator with a side panel and indicator lights (no text or symbols)text_image
Close-up of a black mechanical component with blue dotted arrows pointing to its features and text, likely indicating a technical or engineering annotation.natural_image
Close-up of a perforated circular object mounted on a metal grid base (no text or symbols visible)natural_image
Close-up of a car dashboard with a red arrow pointing to a keyhole and a close-up of the camera lens (no visible text or symbols)natural_image
Wooden rack holding multiple wine bottles, no visible text or labelsnatural_image
Illustration of multiple wine bottles with green and blue colors, some labeled with white and red text (no readable labels or symbols)natural_image
Two green plastic bottles with red caps, connected by a white plastic container (no text or symbols visible)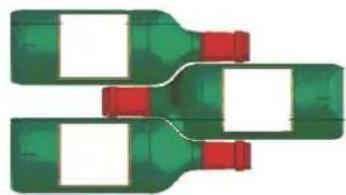
natural_image
Three green wine bottles with red caps, arranged in a staggered layout (no text or symbols visible)7. ONDERHOUD
natural_image
Line drawing of a refrigerator with a door and side panel, showing airflow direction (no text or symbols)text_image
Close-up of a black cylindrical object with blue dotted arrows pointing to it, containing engraved text in Chinese characters.natural_image
Close-up of a perforated circular object mounted on a metal grate, against a textured wall background (no text or symbols visible)natural_image
Close-up of a car dashboard and rear camera lens (no visible text or symbols)Vista del interior
natural_image
Wooden rack holding multiple wine bottles, no visible text or labelsnatural_image
Illustration of various wine bottles with green and red labels, shown in a stacked layout with dimension lines (no text or symbols)natural_image
Two green plastic bottles with red caps, connected by a white gap (no text or symbols)