
DX8G2 - Remote control toy SPEKTRUM - Free user manual and instructions
Find the device manual for free DX8G2 SPEKTRUM in PDF.


| Product type | Radio transmitter for model aircraft (plane, helicopter, glider, multirotor) |
| Model | Spektrum DX8G2 |
| Frequency | 2.4 GHz DSMX / DSM2 (DSM2 not available in Europe) |
| Number of channels | 8 |
| Model memories | Up to 250 |
| Power supply | Built-in 2000 mAh Li-Ion battery (charges via dedicated port, AC charger included SPM9551) |
| Display | LCD screen with adjustable backlight |
| Main functions | Full programming, real-time telemetry, voice alerts, wired and wireless training, 5 flight modes, programmable mixing, throttle and pitch curves, servo management, range test, data logging to SD card |
| Storage | SD card (included) for AirWare updates, model transfer, audio files |
| Maintenance and cleaning | Clean with a soft, dry cloth. Do not use solvents. Protect from moisture and extreme temperatures. |
| Safety | For ages 14 and up. Always turn on the transmitter first and turn it off last. Check batteries before flight. Perform a range test. Do not fly in adverse weather conditions. |
| Spare parts and repairability | Contact an authorized Horizon Hobby dealer for repairs. Paid repairs possible upon quotation. 6-month warranty (depending on country). |
| General information | Advanced hobby product, not intended for children without supervision. The full manual is available on the Horizon Hobby website. |
Frequently Asked Questions - DX8G2 SPEKTRUM
User questions about DX8G2 SPEKTRUM
0 question about this device. Answer the ones you know or ask your own.
Ask a new question about this device
Download the instructions for your Remote control toy in PDF format for free! Find your manual DX8G2 - SPEKTRUM and take your electronic device back in hand. On this page are published all the documents necessary for the use of your device. DX8G2 by SPEKTRUM.
USER MANUAL DX8G2 SPEKTRUM
Bind-N-Fly* Ready to fly, redefined.
8 -Channel 2.4GHz DSMX® Aircraft System
NOTICE
All instructions, warranties and other collateral documents are subject to change at the sole discretion of Horizon Hobby, LLC. For up-to-date product literature, visit horizonhobby.com and click on the support tab for this product.
Meaning of Special Language
The following terms are used throughout the product literature to indicate various levels of potential harm when operating this product:
NOTICE: Procedures, which if not properly followed, create a possibility of physical property damage AND little or no possibility of injury.
CAUTION: Procedures, which if not properly followed, create the probability of physical property damage AND a possibility of serious injury.
WARNING: Procedures, which if not properly followed, create the probability of property damage, collateral damage and serious injury OR create a high probability of superficial injury.

WARNING: Read the ENTIRE instruction manual to become familiar with the features of the product before operating. Failure to operate the product correctly can result in damage to the product, personal property and cause serious injury.
This is a sophisticated hobby product. It must be operated with caution and common sense and requires some basic mechanical ability. Failure to operate this Product in a safe and responsible manner could result in injury or damage to the product or other property. This product is not intended for use by children without direct adult supervision. Do not attempt disassembly, use with incompatible components or augment product in any way without the approval of Horizon Hobby, LLC. This manual contains instructions for safety, operation and maintenance. It is essential to read and follow all the instructions and warnings in the manual, prior to assembly, setup or use, in order to operate correctly and avoid damage or serious injury.

WARNING AGAINST COUNTERFEIT PRODUCTS
Always purchase from a Horizon Hobby, LLC authorized dealer to ensure authentic high-quality Spektrum product. Horizon Hobby, LLC disclaims all support and warranty with regards, but not limited to, compatibility and performance of counterfeit products or products claiming compatibility with DSM or Spektrum.
NOTICE: This product is only intended for use with unmanned, hobby-grade, remote-controlled vehicles and aircraft. Horizon Hobby disclaims all liability outside of the intended purpose and will not provide warranty service related thereto.
Age Recommendation: Not for Children under 14 years. This is not a toy.
Warranty Registration
Visit spektrumrc.com today to register your product.
NOTICE: While DSMX allows you to use more than 40 transmitters simultaneously, when using DSM2 receivers, DSMX receivers in DSM2 mode or transmitters in DSM2 mode, do not use more than 40 transmitters simultaneously.
General Notes
• Models are hazardous when operated and maintained incorrectly.
• Always install and operate a radio control system correctly.
- Always pilot a model so the model is kept under control in all conditions.
- Please seek help from an experienced pilot or your local hobby store.
- Contact local or regional modeling organizations for guidance and instructions about flying in your area.
- When working with a model, always power on the transmitter first and power off the transmitter last.
- After a model is bound to a transmitter and the model is set up in the transmitter, always bind the model to the transmitter again to establish failsafe settings.
Pilot Safety
• Always make sure all batteries are fully charged before flying.
- Time flights so you can fly safely within the time allotted by your battery.
- Perform a range check of the transmitter and the model before flying the model.
- Make sure all control surfaces correctly respond to transmitter controls before flying.
- Do NOT fly a model near spectators, parking areas or any other area that could result in injury to people or damage to property.
- Do NOT fly during adverse weather conditions. Poor visibility, wind, moisture and ice can cause pilot disorientation and/or loss of control of a model.
- When a flying model does not respond correctly to controls, land the model and correct the cause of the problem.
Dx8 FEATURES
- "Roll" to telemetry screens without entering the Settings menu
- Switch between Function List and System Settings menus without powering off the transmitter
• Voice alerts for telemetry, warnings, and other conditions - Selectable sound menu lets you activate or inhibit specific DX8G2 sounds
- Assign five Airplane flight modes to any combination of up to two switches
• Virtually Unlimited Model Memory (250 models) - Wireless trainer
• Multi-Rotor Airware

BEFORE USING YOUR TRANSMITTER:
Before going any further, visit the Spektrum Community website at spektrumrc.com to register your transmitter and download the latest AirWare™ firmware updates. A registration reminder screen occasionally appears until you register your transmitter. When you register your transmitter, the reminder screen does not appear again.
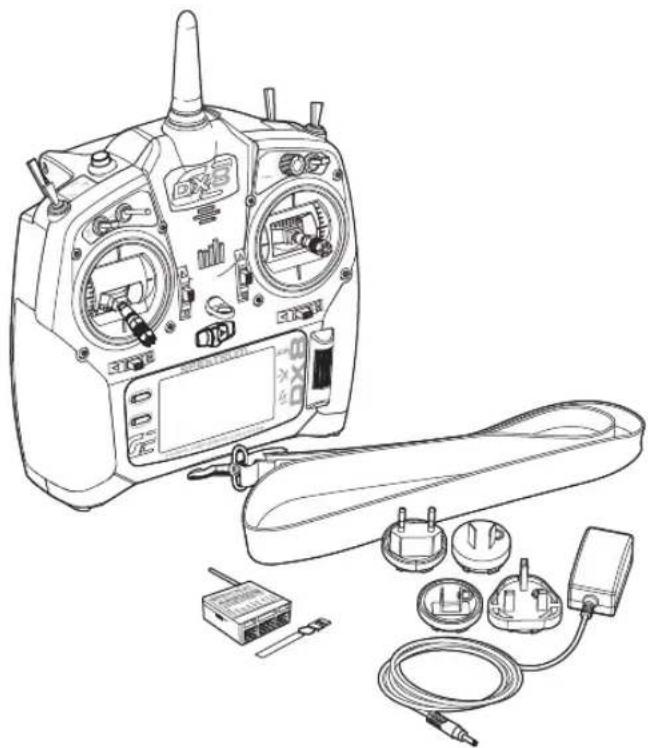
BOX CONTENTS
- DX8G2 Transmitter
• AR8000 Receiver (Not included w/ Transmitter only versions)
• 2000mAh Li-Ion Transmitter Pack (Installed in transmitter)
• Global Power Supply - Manual
- DX8G2 Neck Strap
- DX8G2 Decal Sheet
natural_image
Line drawing of a multi-rotor communication system with control panel, power cord, and wiring (no text or symbols)Support Videos:
For helpful videos on programing the Spektrum DX8 and other AirWare equipped Spektrum Transmitters go to https://www.spektrumrc.com/
TABLE OF CONTENTS
Battery and Charging Precautions and Warnings......5
Charging the Lithium Ion Battery Pack....5
Transmitter Functions....6
Transmitter Functions....7
Main Screen 8
Navigation 8
Auto Switch Select 8
SD Card....9
Installing the SD Card....9
Registering the Transmitter with Spektrum 9
Update AirWare™ Software....10
Binding 11
Receiver Power System Requirements ....12
Programming Failsafe Positions....13
SmartSafe™ Failsafe 13
Hold Last Command....13
Preset Failsafe 13
Model Type Programming Guide ....14
System Setup ....15
Model Select....15
Model Type 15
F-Mode Setup....16
Spoken Flight Mode Setup....17
Channel Assignment....17
Channel Input Configuration....17
Trim Setup....18
Model Utilities ......18
Create New Model....18
Delete Model 18
Copy Model 19
Model Reset 19
Sort Model List....19
Warnings....19
Telemetry 20
Telemetry Settings....20
Telemetry Auto-Configuration 20
AS3X Gain Live View (ACRO and SAIL Types Only) 20
Telemetry Alarms 21
Preflight Setup 21
Frame Rate....21
Bind 21
TRAINER....22
Wired Trainer 22
Wireless Trainer 23
Trainer FPV Mode....24
SYSTEM SETTINGS ....25
User Name 25
Contrast 25
Backlight 25
Mode 26
Battery Alarm 26
Selecting a Language....26
Inactive Alarm 26
Extra Settings 27
Serial Number....28
Exporting the Serial Number to the SD Card....28
Locating the Transmitter AirWare Software Version 28
Calibrate....28
Transfer SD card....29
Import Model 29
Export Model 29
Updating Spektrum DX8 Sound Files 30
Update AirWare Software 30
FUNCTION LIST ....31
Servo Setup....31
Travel Adjust 31
Sub-Trim 31
Reverse....31
Speed 32
Balance 32
AS3X Gain Live View (ACRO and SAIL Types only)....32
D/R & Exponential 33
Differential (ACRO and SAIL Types only) 33
Throttle Cut (ACRO and HELI Types only)....33
Throttle Curve (ACRO and HELI Types only) 33
Mixing 34
Assigning a Mix to a Switch 34
Back Mixing....35
Range Test....35
Timer 35
Telemetry 36
Custom Voice Setup 36
System Setup 37
Monitor....37
ACRO (Airplane)....38
Elevon Servo Control 39
Aileron....39
Elevator 39
Flap System....39
ACRO Mixing 39
HELI (Helicopter) 40
Swash Type 40
Collective Type 40
Pitch Curve....40
Swashplate 41
Gyro 41
Tail Curve 41
Mixing 41
SAIL (sailplane) 42
Motor 42
Camber Preset 42
Camber System 42
SAIL Mixing 43
V-Tail Differential....43
MULTI (Multirotor) 44
Multirotor Model Type 44
F-Mode Setup....44
Trim Setup....44
D/R & Exponential 45
Motor Cut 45
Motor Curve 45
PHYSICAL TRANSMITTER ADJUSTMENTS......46
Transmitter Mode Conversion 46
Programming Conversion......46
Mechanical Conversion....46
Changing the Throttle Ratchet 46
Adjusting the Elevator Centering Screw 47
Moving the Throttle Limiting Wedges 47
Re-assembling the Transmitter 47
Adjusting the Throttle Ratchet Strap 48
Control Stick Length Adjustment 48
TROUBLESHOOTING GUIDE....49
1-YEAR LIMITED WARRANTY ....50
WARRANTY AND SERVICE CONTACT INFORMATION......51
FCC INFORMATION....51
ANTENNA SEPARATION DISTANCE ....51
IC INFORMATION....51
FAA INFORMATION....51
AMA NATIONAL MODEL AIRCRAFT SAFETY CODE....51
COMPLIANCE INFORMATION FOR THE EUROPEAN UNION .52
Instructions for disposal of WEEE by users in the
European Union....52
BATTERY AND CHARGING PRECAUTIONS AND WARNINGS
Failure to exercise caution while using this product and comply with the following warnings could result in product malfunction, electrical issues, excessive heat, FIRE, and ultimately injury and property damage.
- Read all safety precautions and literature prior to use of this product
• Never allow minors to charge battery packs
• Never drop charger or batteries
• Never attempt to charge damaged batteries - Never attempt to charge a battery pack containing different types of batteries
- Never charge a battery if the cable has been pinched or shorted
- Never allow batteries or battery packs to come into contact with moisture at any time
- Never charge batteries in extremely hot or cold places (recommended between 50–80° F or 10–27° C) or place in direct sunlight
• Always disconnect the battery after charging, and let the charger cool between charges
• Always inspect a new battery before charging
• Always terminate all processes and contact Horizon Hobby if the product malfunctions - Always keep batteries and charger away from any material that could be affected by heat (such as ceramic and tile), as they can get hot
- Always end the charging process if the charger or battery becomes hot to the touch or starts to change form (swell) during the charge process
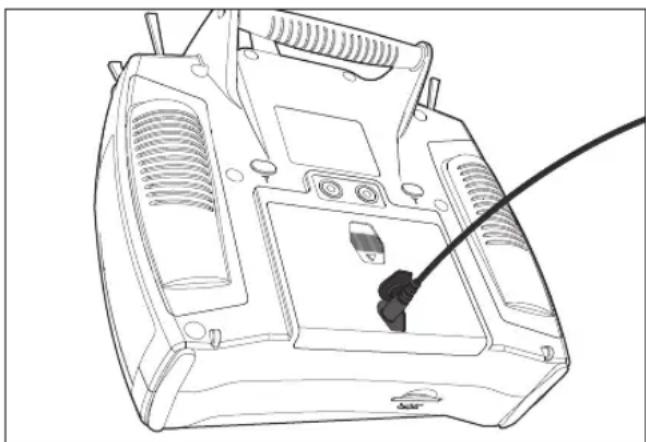
The installed Li-lon battery has an internal charger designed to quick charge at a rate of 0.5 amps. The charge port on the battery is not polarity-dependent.
NOTICE: Never connect an external battery charger to your DX8 transmitter.
Always charge the transmitter on a heat-resistant surface.
- Power off your transmitter.
- Connect the power supply (SPM9551) connector to the Li-Ion charge port located under the rubber flap on the battery door.
- Connect the power supply to a power outlet using the appropriate adapter.
- Disconnect the transmitter from the power supply once charging is complete and disconnect the power supply from the power outlet.
natural_image
Line drawing of a portable electronic device with ventilation grilles and a cable inserted (no text or symbols)
CAUTION: Never leave a charging battery unattended.

CAUTION: Never charge a battery overnight.
Battery Alarm
The System Settings Screen allows you to change the battery type and low voltage alarm settings. See "System Settings" for more information.
- An alarm will sound when the battery reaches the low voltage limit (6.4V for LiPo/Li-Ion).

CAUTION: Never change the low voltage limit for LiPo/Li-Ion batteries from 6.4V. Doing so could over-ge the battery and damage both battery and transmitter.
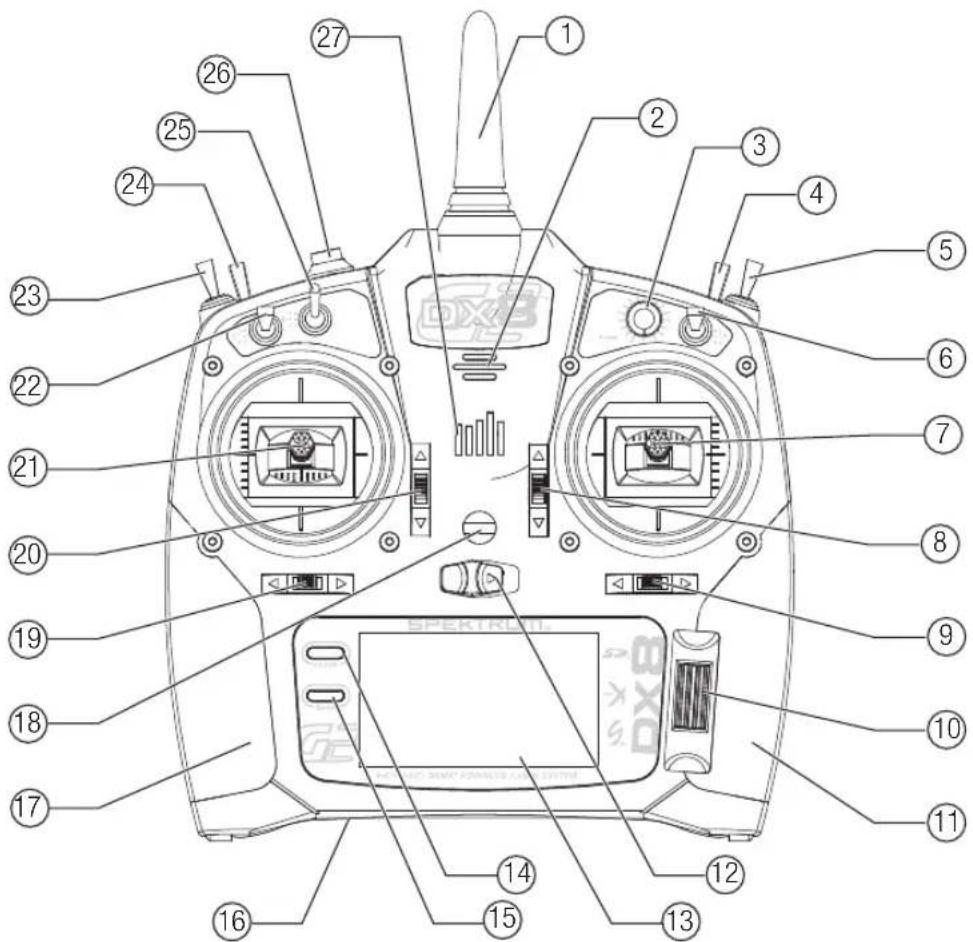
TRANSMITTER FUNCTIONS
Function
| 1 | Antenna |
| 2 | Speaker Grill |
| 3 | R Knob |
| 4 | Switch H |
| 5 | Switch G |
| 6 | Switch F |
| 7 | Throttle/Aileron Stick (Mode 1)Elevator/Aileron Stick (Mode 2)Throttle/Rudder Stick (Mode 3)Elevator/Rudder Stick (Mode 4) |
Function
| 8 | Elevator Trim (Mode 2, 4) Throttle Trim (Mode 1, 3) |
| 9 | Aileron Trim (Mode 1,2) Rudder Trim (Mode 3,4) |
| 10 | Scroll wheel |
| 11 | Right Side Grip |
| 12 | On/Off Switch |
| 13 | LCD |
| 14 | Clear Button |
| 15 | Back Button |
| 16 | SD Card Opening |
Function
| 17 | left Side Grip |
| 18 | Neck Strap Mount |
| 19 | Rudder Trim (Mode 1,2)Aileron Trim (Mode 3,4) |
| 20 | Elevator Trim (Mode 1,3)Throttle Trim (Mode 2,4) |
| 21 | Elevator/Rudder Stick(Mode 1)Throttle/Rudder Stick(Mode 2)Elevator/Aileron Stick(Mode 3)Throttle/Aileron Stick(Mode 4) |
Function
| 22 | Switch C |
| 23 | Switch B |
| 24 | Switch A |
| 25 | Switch D |
| 26 | Bind/Switch I |
| 27 | LED |
The transmitter comes with a thin, clear plastic film applied to some front panels for protection during shipping. Humidity and use may cause this film to come off. Carefully remove this film as desired.
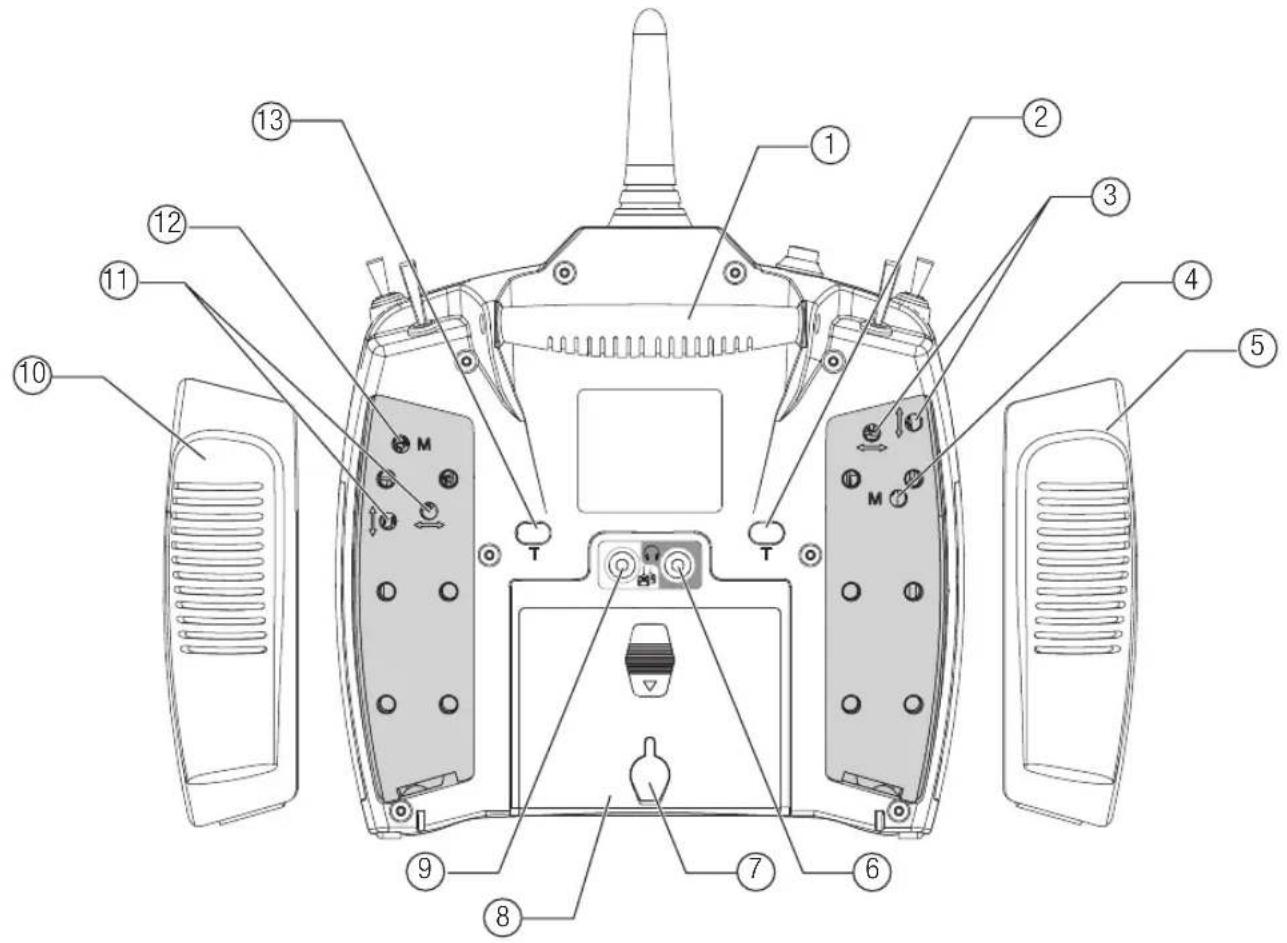
TRANSMITTER FUNCTIONS
| Function | |
| 1 | Handle/ Antenna |
| 2 | Throttle Spring Tension Adjustment (Mode 2,4) |
| 3 | Gimbal Stick Tension Adjustment |
| 4 | Mode Change |
| 5 | Left Rear Grip |
| Function | |
| 6 | Audio Jack |
| 7 | Lithium Ion BatteryCharge Port |
| 8 | Battery Cover |
| 9 | Trainer Port |
| 10 | Right Rear Grip |
| Function | |
| 11 | Gimbal Stick Tension Adjustment |
| 12 | Mode Change |
| 13 | Throttle Spring Tension Adjustment (Mode 1,3) |
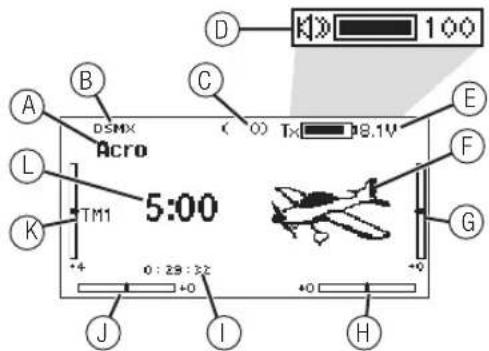
MAIN SCREEN
| Function | |
| A | Model Name |
| B | DSMX/DSM2 If not shown, this indicates not bound |
| C | Displays throttle position |
| D | Displays the Volume Level when the BACK button is pressed |
| E | Digital Battery Voltage (an alarm sounds and the screen flashes when battery charge gets down to 6.4V for a LiPo/Li lon battery.) |
| F | Model Type |
| G | Elevator Trim (Modes 2 and 4)Throttle Trim (Modes 1 and 3) |
| H | Aileron Trim (Modes 1 and 2)Rudder Trim (Modes 3 and 4) |
| I | Model Memory Timer |
| A | Model Name |
| B | DSMX/DSM2 If not shown, this indicates not bound |
| C | Displays throttle position |
| D | Displays the Volume Level when the BACK button is pressed |
| E | Digital Battery Voltage (an alarm sounds and the screen flashes when battery charge gets down to 6.4V for a LiPo/Li Ion battery.) |
| F | Model Type |
| G | Elevator Trim (Modes 2 and 4)Throttle Trim (Modes 1 and 3) |
| H | Aileron Trim (Modes 1 and 2)Rudder Trim (Modes 3 and 4) |
| I | Model Memory Timer |
| Function | |
| J | Rudder Trim (Modes 1 and 2)Aileron Trim (Modes 3 and 4) |
| K | Throttle Trim (Mode 2 and 4)Elevator Trim (Mode 1 and 3) |
| L | Timer |
NAVIGATION
- Scroll the scroll wheel to move through the screen content or change programming values. Press the scroll wheel to make a selection.
- Use the Back button to go to the previous screen (for example, to go from the Mixing Screen to the Function List).
- Use the Clear button to return a selected value on a screen to the default setting.
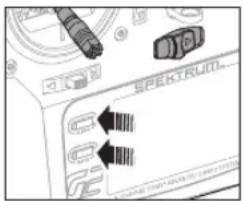
- Direct Model Access enables you to access the Model Select screen without powering off the transmitter. Anytime the transmitter power is on, press the Clear and Back buttons to access the Model Select screen.
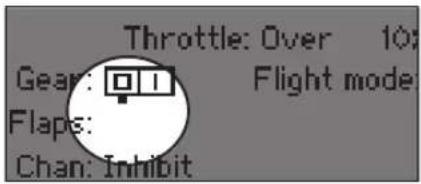
Tip: The tick mark below shows the current switch position. Rolling and clicking the scroll wheel turns the selected box black, indicating that the value or condition will act on that position.
- Press and hold the scroll wheel while powering on the transmitter to show the System Setup list. No radio transmission occurs when a System Setup screen is displayed, preventing accidental damage to linkages and servos during changes to programming.
- At the main screen you can scroll to view the servo monitor.
- The Main Screen appears when you power on the transmitter. Press the scroll wheel once to display the Function List.
- When you want to change a value in a screen for a particular control position, move the control to the desired position to highlight the value you want to change, such as 0/1/2, up/down or left/right.
Enter, Choose or Exit
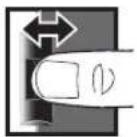
ScrollHoldPress
Move between options or change value in an option
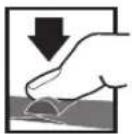
Hold for 3
seconds and
release to move to
the Main Screen
Auto Switch Select
To easily select a switch in a function, such as a program mix, roll with the scroll wheel to highlight the switch selection box, and press the scroll wheel. The box around the switch should now flash. To select a switch, toggle the switch you wish to select. Verify the switch selection is now displayed as desired. When correct, press the scroll wheel to select this switch and complete the switch selection.
SD CARD
Installing the SD Card
The SD Card (not included) enables you to:
- Import (copy) models from any compatible* Spektrum AirWare™ transmitter
- Export (transfer) models to any Spektrum AirWare transmitter*
- Update AirWare software in the transmitter
• Install/Update sound files
To install the SD Card:
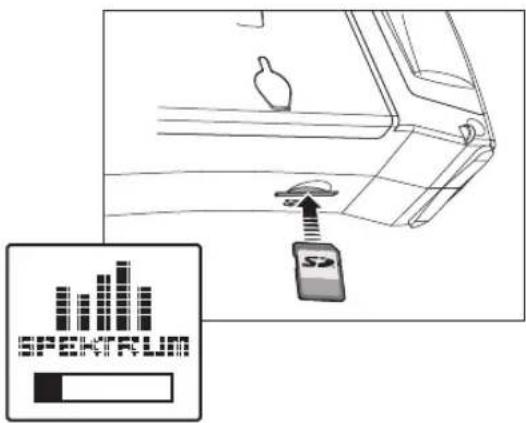
- Power off the transmitter.
- Remove the battery door.
- Press the SD Card into the card slot with the card label facing up as shown.
*DX20, DX18SE, DX18G2, DX18G1, DX18QQ, DX9Black, DX9, DX18t, DX10t, DX7G2 and DX6G2
Registering the Transmitter with Spektrum
Exporting the transmitter serial number to the SD Card allows you to upload the serial number directly into the registration screen at www.spektrumrc.com.
To export the serial number:
- Press and hold the scroll wheel while powering the transmitter on until the System Setup list appears.
- Scroll to the System Settings menu. Press the scroll wheel once to open the menu.
- Select NEXT on the System Settings and Extra Settings screens.
- When the Serial Number screen appears, select EXPORT.
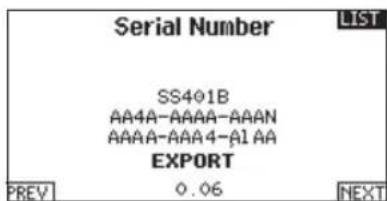
- Power off the transmitter and remove the SD Card from the transmitter.
To Upload the serial number to www.spektrumrc.com:
- Insert the SD Card in your computer and check the contents of the SD card on your computer for a "My_DX8.xml" file.
- In your favorite browser navigate to www.spektrumrc.com and find the Product Registration link on the top of the page as shown.
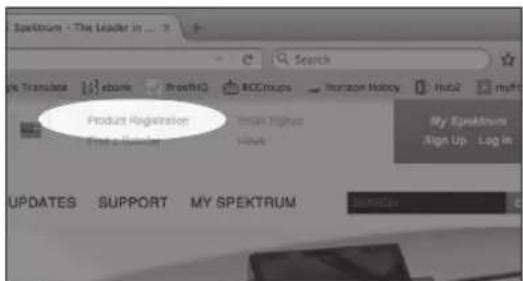
- If you do not already have an account, create one now. If you have an account login in with your secure login.
- Once logged in go to the "My Spektrum" page. Fill out all relevant information. Once you select your transmitter model from the pull down menu you will be asked to upload the serial number.
- Click on the Select button to navigate to the "My_DX8.xml" file on the SD card that is in your computers SD card reader and select the file.
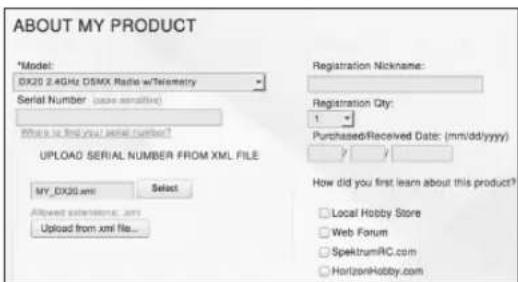
- Click on the Upload from xml file... button and the serial number will populate into the Serial Number fields.
- Click REGISTER at the bottom of the screen to finish registering your new Spektrum Transmitter.
Alternately you can copy the serial number from the .xml file and paste directly into the Serial Number field.
![chat version="1.0" embeddings="UTF-8"> spektravodio: .sn= "http://www.his.comnobsy.com/spektravodio.com" version="1.0.0.3"> 0264 =[(DATA[59481BAAABAAABVAABAAABALAA]]p=serial> 0.84](/content/2026/02/392383/images/9d077cdfd7943ff8df09a279c9cb58493b49f7c196e6cda7ecf4039699544d16.jpg)
Screen shots from www.spektrumrc.com are correct at time of printing but may change at a future date.
SD CARD
Update AirWare™ Software
NOTICE: The orange LED Spektrum bars flash and a status bar appears on the screen when AirWare software updates are installing. Never power off the transmitter when updates are installing. Doing so may damage the system files.
NOTICE: Before installing any AirWare files, always Export All Models to an SD Card separate from the SD Card containing the update. The update may erase all model files.
For more information on AirWare software updates, visit www.spektrumrc.com
Automatically Installing AirWare Software Updates
- In your favorite browser navigate to www.spektrumrc.com and find the Firmware Updates link inside the Setups/Updates tab on the top of the page as shown.
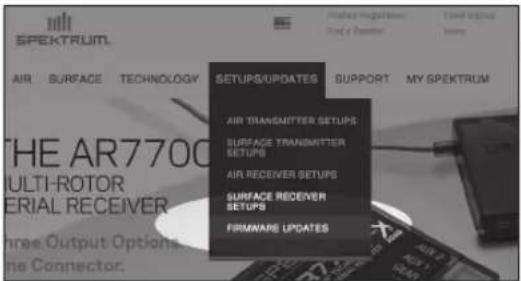
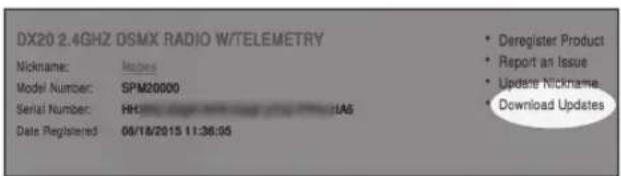
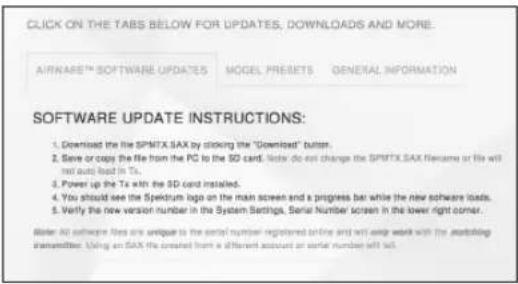
- find your registered transmitter in the MY PRODUCTS list and click on Download Updates. Follow directions on the screen for downloading the update to your computer and SD card.
- Eject SD card from the computer.
- Make sure the transmitter is powered off and install the SD card into the transmitter.
- Power on the transmitter and the update automatically installs in the transmitter.
Manually Installing AirWare Software Updates
- Save the desired AirWare version to the SD Card.
- Install the SD card into the transmitter.
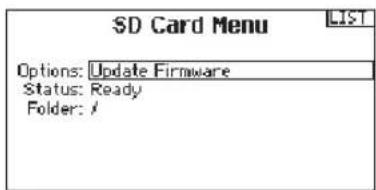
- Select Update Firmware in the SD Card Menu options. The Select File screen appears.
- Select the desired AirWare version from the File List. When updates are installing, the transmitter screen is dark. The orange LED Spektrum bars flash and the update status bar appears on the screen.
NOTICE: Do not power off the transmitter when updates are installing. Doing so will damage the transmitter.
Screen shots from www.spektrumrc.com are correct at time of printing but may change at a future date.
BINDING
Binding is the process of programming the receiver to recognize the GUID (Globally Unique Identifier) code of a single specific transmitter. You must bind the AR8000 receiver to your transmitter before it will operate. The AR8000 requires the remote receiver to be connected to bind.
Binding Using the Receiver and Receiver Battery
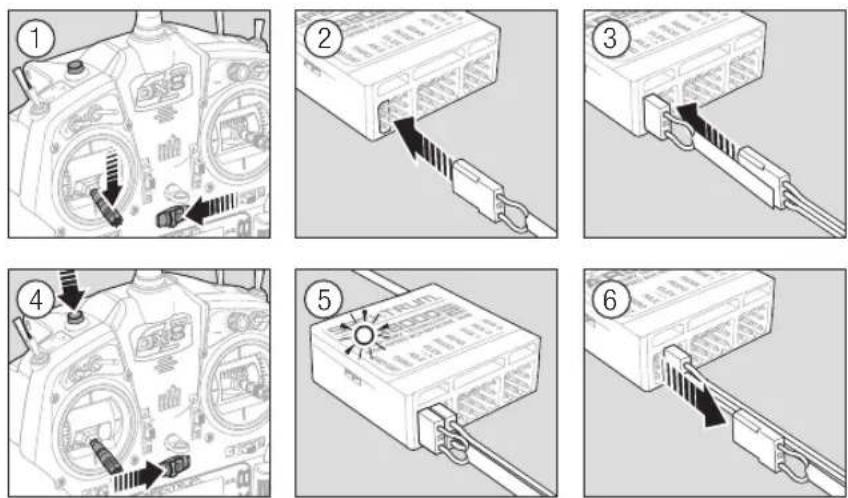
- Lower throttle to the lowest position and make sure the transmitter is powered off.
- Insert the bind plug into the BIND/DATA port.
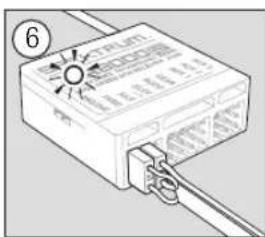
- Insert the receiver battery into ANY open port. The receiver's LED will flash when the receiver is ready to bind.
-
While pressing the Bind button, power on the transmitter.
-
Release the Bind button after the receiver has stopped flashing rapidly, once the receiver's LED stays illuminated; this indicates the receiver is bound to the transmitter. The transmitter screen also provides binding information.
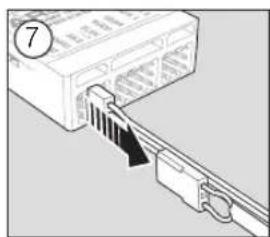
- Remove the bind plug from the receiver.
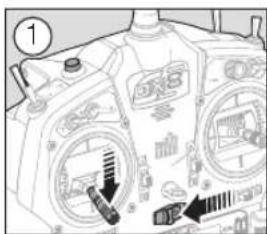
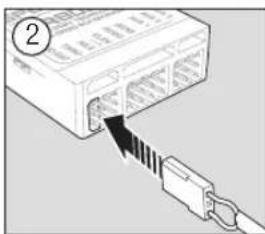
Binding Using the Receiver and ESC
natural_image
Diagram of a computer interface with an attached cable and connector (no text or symbols)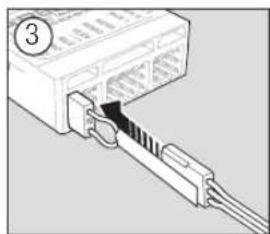
natural_image
Diagram of an Ethernet cable connector with a pin labeled '3' (no text or symbols on the diagram itself)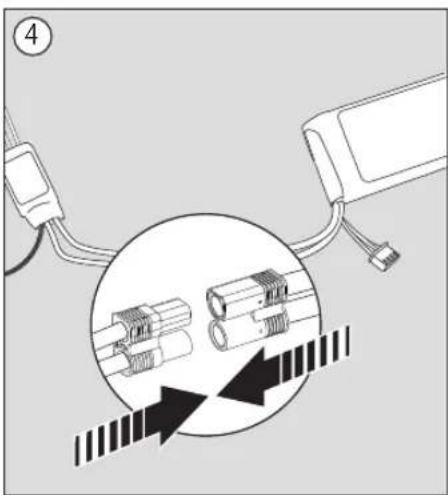
natural_image
Diagram showing cable connections and connector components (no text or symbols)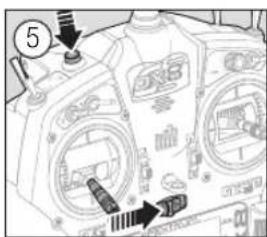
natural_image
Diagram of a computer port with an Ethernet cable inserted, showing internal structure and cable routing (no text or symbols)- Lower the throttle to the lowest position and make sure the transmitter is powered off.
- Insert the bind plug into the BIND/DATA port.
- Insert the ESC plug into the THRO port.
-
Connect the battery to ESC and turn on the ESC switch, if available. The receiver's LED will flash rapidly when the receiver is ready to bind.
-
While pressing the Bind button, power on the transmitter.
- Release the Bind button after the receiver's LED stays illuminated. This indicates the receiver is bound to the transmitter. The transmitter screen also provides binding information.
- Remove the bind plug from the receiver.
RECEIVER POWER SYSTEM REQUIREMENTS
Inadequate power systems that do not provide the necessary minimum voltage to the receiver during flight have become the number one cause of in-flight failures. Some of the power system components that affect the ability to properly deliver adequate power include:
- Receiver battery pack (number of cells, capacity, cell type, state of charge)
- The ESC's capability to deliver current to the receiver in electric aircraft
• The switch harness, battery leads, servo leads, regulators etc.
The AR8000 has a minimum operational voltage of 3.5 volts; it is highly recommended the power system be tested per the guidelines below.
Recommended Power System Test Guidelines
If you are using a questionable power system, (e.g. a small or old battery, an ESC that may not have a BEC that will support high-current draw, etc.), perform the following test with a voltmeter. The Hangar 9 ^® Digital Servo & Rx Current Meter (HAN172) or the Spektrum Flight Log (SPM9540) work well for this test.
Connect the voltmeter to an open channel port in the receiver and, with the system on, load the control surfaces (apply pressure with your hand) while monitoring the voltage at the receiver. The voltage should remain above 4.8 volts, even when all servos are heavily loaded.

CAUTION: When charging Ni-MH batteries, make sure the battery fully charges. Ni-MH batteries charged with
peak detection fast chargers have a tendency to false peak (i.e. not fully charge), which could lead to a crash.
European Union Receiver Requirements
EU versions of the DX8 are not compatible with DSM2 ^® receivers. Make sure all receivers are DSMX ^® compatible.
QuickConnect™ Technology with Brownout Detection (DSM2 Only)
Your AR8000 features QuickConnect technology with Brownout Detection.
- Should an interruption of power occur (brownout), the system will reconnect immediately when power is restored.
- The LED on the receiver will flash slowly, indicating a power interruption (brownout) has occurred.
- Brownouts can be caused by an inadequate power supply (weak battery or regulator), a loose connector, bad switch, inadequate BEC when using an electronic speed controller, etc.
- Brownouts occur when the receiver voltage drops below 3.5 volts. This interrupts control, as the servos and receiver require a minimum of 3.5 volts to operate.
How QuickConnect Technology with Brownout Detection Works
- When the receiver voltage drops below 3.5 volts, the system drops out (ceases to operate).
- When power is restored, the receiver immediately attempts to reconnect to the last two frequencies it was connected to.
- If the two frequencies are present (the transmitter was left on), the system reconnects typically in about 4/100 of a second.
QuickConnect with Brownout Detection is designed to allow you to fly safely through most short duration power interruptions. However, you must correct the cause of these interruptions before your next flight to prevent a crash.

CAUTION: If a brownout occurs in flight, determine the cause of the brownout and correct it before attempting gain.
PROGRAMMING FAILSAFE POSITIONS
You establish failsafe positions when you bind your transmitter and receiver. If the radio signal connection is lost between the transmitter and receiver, the receiver immediately moves the aircraft control surfaces to the failsafe positions. If you assign the receiver THRO channel to a transmitter channel other than throttle, we recommend using Preset failsafe with the throttle in the low position.
NOTICE: Failsafe features vary according to receiver. Always consult the receiver instruction manual for failsafe features.
Before flight, ALWAYS confirm the failsafe functions as you would expect.
SmartSafe™ Failsafe
SmartSafe failsafe is a technology that only acts on the throttle channel and offers the following benefits:
- Prevents electric motors from operating when the receiver power is on and the transmitter power is off.
- Prevents the speed controller from arming until the throttle is moved to the low throttle position.
- Powers off an electric motor and reduces gas/glow engines to idle if signal is lost.
To Program SmartSafe:
Move the throttle to the low or off position before putting the transmitter into bind mode.
To Test the SmartSafe failsafe
- Power the transmitter and receiver on.
- Power off the transmitter. The throttle should immediately move to the failsafe position.

CAUTION: Make sure the aircraft is fully restrained on the ground. If the failsafe is not set correctly, your aircraft might be to mid or full throttle.
Hold Last Command
The Hold Last Command failsafe maintains the last command on all channels except throttle. If the radio signal is lost, the aircraft maintains the commanded control inputs until the receiver regains signal. To program Hold Last Command, follow the provided binding instructions in this instruction manual.
To Test Hold Last Command:
- Power on the transmitter and receiver.
- Move one of the control sticks to the desired Hold Last Command position and hold the input.
- While holding the control input (for example, a small amount of rudder) power off the transmitter. The rudder should maintain the input command.

CAUTION: Make sure the aircraft is fully restrained on the ground. If the failsafe is not set correctly, the aircraft throttle advance to mid or full throttle.
Preset Failsafe
The Preset failsafe moves all channels to their programmed failsafe positions.
We recommend using Preset failsafe to deploy spoilers on sailplanes to prevent a flyaway if the radio signal is lost.
To program Preset failsafe:
- Insert the bind plug in the bind port on the receiver and power on the receiver.
-
Remove the bind plug when the orange LED on the main receiver and all attached remote receivers flash rapidly. The orange receiver LEDs will continue flashing.
-
Move the transmitter control sticks and switches to the desired Preset failsafe position. Power the transmitter on.
- Failsafe programming is complete when the orange LEDs on the transmitter and all receivers turn solid.

CAUTION: Make sure the aircraft is fully restrained on the ground. If the failsafe is not set correctly, the aircraft throttle dvance to mid or full throttle.
IMPORTANT: Not all receivers support Preset Failsafe. Consult your receiver manual for more information.
MODEL TYPE PROGRAMMING GUIDE
Menu options show up on model type selection. These menu options vary between Model Types (Airplane, Helicopter, Sailplane and Multirotor), but are identical for all models in that type. Subsequent aircraft type (Aircraft, Swashplate, Sailplane or Multirotor) selections make other menu options appear.
System Setup List:
Model Select
Model Type
Model Name
Aircraft Type
F-Mode Setup
Spoken Flight Mode
Channel Assign
Trim Setup
Model Utilities
Warnings
Telemetry
Preflight Setup
Frame Rate
Bind
Trainer
Digital Switch Setup
Sound Utilities
System Settings
Function List:
Servo Setup
D/R and ExPo
Differential
U-Tail Differential
Throttle Cut
Throttle Curve
AS3X Gains
Flap System
Mixing
Range Test
Timer
Telemetry
Custom Voice Setup
System Setup
Monitor
System Setup List!
Model Select
Model Type
Model Name
Sailplane Type
F-Mode Setup
Spoken Flight Mode
Channel Assign
Trim Setup
Model Utilities
Warnings
Telemetry
Preflight Setup
Frame Rate
Bind
Trainer
Digital Switch Setup
Sound Utilities
Function List!
Servo Setup
D/R and Expo
Differential
U-Tail Differential
Throttle Cut
Motor Curve
A53X Gains
Camber Presets
Camber System
Mixing
Range Test
Timer
Telemetry
Custom Voice Setup
System Setup
Monitor
System Setup List:
Model Select
Model Type
Model Name
Quasplate Type
F-Mode Setup
Spoken Flight Mode
Channel Assign
Trim Setup
Model Utilities
Warnings
Telemetry
Preflight Setup
Frame Rate
Bind
Trainer
Digital Switch Setup
Sound Utilities
System Settings
Transfer SD Card
Function List:
Servo Setup
D/R and Expo
Throttle Cut
Throttle Curve
Pitch Curve
SwashPlate
Gyro
Tail Curve
Mixing
Range Test
Timer
Telemetry
Custom Voice Setup
System Setup
Monitor
System Setup List:
Model Select
Model Type
Model Name
Aircraft Type
F-Mode Setup
Spoken Flight Mode
Channel Assign
Trim Setup
Model Utilities
Warnings
Telemetry
Preflight Setup
Frame Rate
Bind
Trainer
Analog Switch Setup
System Settings
Model Utilities
Transfer SD Card
Function List:
Servo Setup
D/R and Expo
Throttle Cut
Throttle Curve
Pitch Curve
Camera Gimbal
Motor Cut
Motor Curve
Mixing
Sequencer
Range Test
Timer
Telemetry
Custom Voice Setup
System Setup
Monitor
SYSTEM SETUP
Press and hold the scroll wheel while powering on the transmitter to show the System Setup list. No radio transmission occurs when a System Setup screen is displayed, preventing accidental damage to linkages and servos during changes to programming.
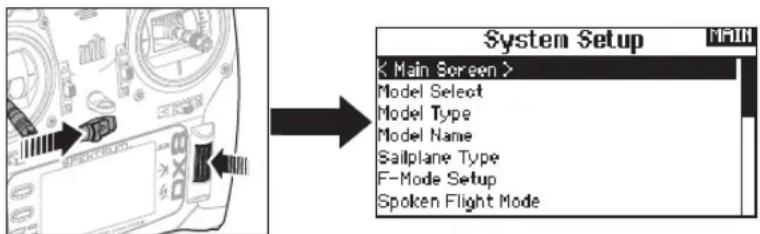
You can also enter the System Setup from the Function list without turning the transmitter off. A Caution screen will appear that warns that RF will be disabled (the transmitter will no longer transmit). Press YES if you are sure and want to access the System List. If you are not sure, press NO to exit to the main screen and continue operation.
If you do not press YES or NO, the system will exit to the main screen and continue operation within approximately 10 seconds.
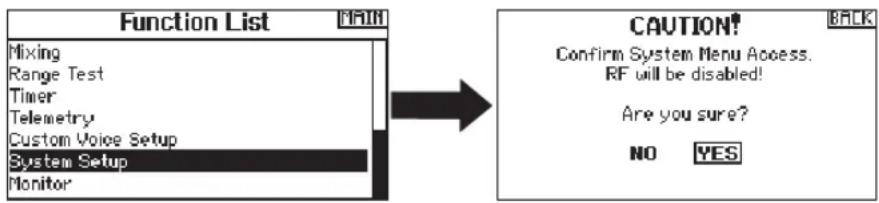

WARNING: Do not press YES unless the model is turned off or the model is secured.
Model Select
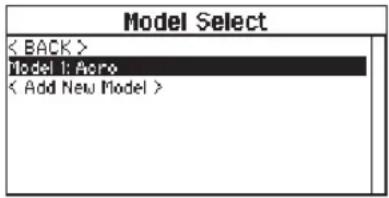
Model Select enables you to access any of the 250 internal model memory locations in the Model Select list.
- Scroll to the desired model memory in the Model Select list.
- When the desired model memory is highlighted, press the scroll wheel once to select the model. The transmitter returns to the System Setup List.
- Add a new model by rolling to the bottom of the list. You will then be prompted with the Create New Model screen, with the option to create a new model or cancel. If you select Cancel, the system will return to the Model Select function. If you select Create, the new model will be created and now be available in the model select list.
Direct Model Access
Press the Clear and Back buttons from the Main Screen or a telemetry screen to access Model Select.
Model Type
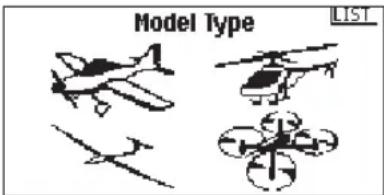
Select from Airplane, Helicopter, Sailplane or Multicopter model types.
IMPORTANT: When you select a new model type, you will delete any programming data in the current model memory. Always confirm the desired model memory before changing model types. It will be necessary to re-bind after resetting the model type.
To change the model type:
- Scroll to the desired model type and press the scroll wheel. The Confirm Model Type screen appears.
- Select Yes and press the scroll wheel to confirm the model type. All data will be reset. Selecting No will exit the Confirm Model Type screen and return to the Model Type screen.
SYSTEM SETUP
Model Name
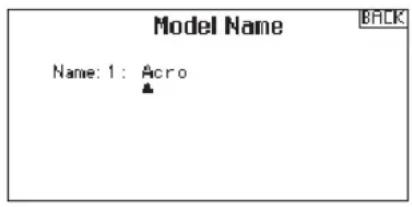
Model Name enables you to assign a custom name to the current model memory. Model names can include up to 20 characters, including spaces.
To add letters to a Model Name:
- Scroll to the desired letter position and press the scroll wheel once. A flashing box appears.
- Scroll left or right until the desired character appears. Press the scroll wheel once to save the character.
- Scroll to the next desired letter position. Repeat Steps 1 and 2 until the Model Name is complete. Insert a character by selecting <+> or delete a character by selecting <->.
- Select BACK to return to the System Setup list.
To erase a character:
- Press CLEAR while the character is selected.
- Press CLEAR a second time to erase all characters to the right of the cursor.
Aircraft Type
This menu only available in Airplane Mode. See ACRO (Airplane) section for set up.
Sailplane Type
This menu only available in Sailplane Mode. See SAI L (Sailplane) section for set up.
Swash Type
This menu only available in Helicopter Mode. See HELi (Helicopter) section for set up.
Aircraft Options
This menu only available in Multirotor Mode. See MULTI (Multirotor) section for set up.
F-Mode Setup
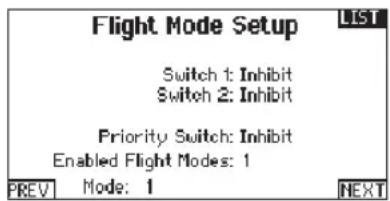
Use the Flight Mode Setup menu to assign switches to flight modes.
| Mode | Number of Switches | Number of Flight Modes |
| ACRO | 2 | 5 |
| HELI | 3 (including Throttle Hold) | 5 (including Throttle Hold) |
| SAIL | 3 | 10 |
| MULTI | 2 | 5 |
Sailplane Flight Mode Setup
You can assign up to five flight modes using any combination of up to two switches. You can also assign a priority switch. When the priority switch position is active, only the current flight mode is active, regardless of other switch positions.
Sailplane Flight Mode Table
You can assign the available flight modes (up to 5 for Sail) to each of the switch positions (up to 2 switches can be used for sailplane). Press NEXT from the Flight Mode Name page to access the flight mode table assignment page when Custom flight mode has been selected in the Flight Mode Setup page. The combination of up to 2 switches can be used to access all of the flight modes available.
| Number of Flight Modes | 2 3 3* 4 4 5 | |||||
| Switch 1 (number of positions) | 2P 3P | 2P 2P 3P | 3P | |||
| Switch 2 (number of positions) | 2P 3P | 2P 3P | ||||
| Flight Mode 1 | Launch | Launch | Launch | Launch | Launch | |
| 2 Cruise | Cruise | Cruise | Cruise | Cruise | ||
| 3 | Land | Land | Land | |||
| 4 | Thermal | Thermal | Thermal | Thermal | ||
| 5 | Speed | Speed | ||||
*Must be set up in a 4/5 flight mode.
SYSTEM SETUP
Spoken Flight Mode Setup
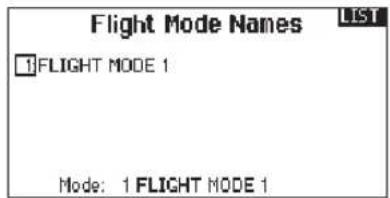
Enables you to assign custom names to the Flight Mode positions. Flight Mode names can include up to 20 characters, including spaces.
To change the Flight Mode name:
- Scroll to the Flight Mode name you wish to change and press the scroll wheel.
- Scroll to the character position you wish to change and press the scroll wheel once. A flashing box appears.
- Scroll left or right until the desired character appears. Press the scroll wheel once to save the character. Insert a character by selecting <+> or delete a character by selecting <->.
- Repeat Steps 2 and 3 until the Model Name is complete.
- Select BACK to return to the Flight Mode Names list.
Spoken Flight Mode:
The Spoken Flight Mode option enables you to activate audio flight mode alerts. As you change between flight modes, the transmitter will "speak", informing you of the active flight mode. You can select a word or phrase for each flight mode.
To activate Spoken Flight Mode:
- Enter the Spoken Flight Mode menu option.
- Scroll to
(default), then press the scroll wheel. - Scroll left or right to view the options.
- Press the scroll wheel again to save the selection.

Channel Assignment
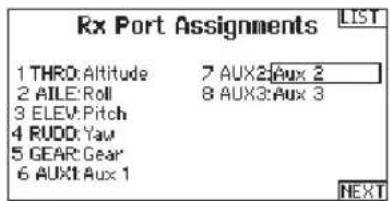
The Channel Assignment function allows you to reassign almost any receiver channel to a different transmitter channel. For example, the receiver gear channel could be re-assigned to the transmitter throttle channel.
- Scroll to the receiver channel you wish to change.
- Press the scroll wheel once and scroll left or right to change the receiver input selection.
- Press the scroll wheel a second time to save the selection.
IMPORTANT: You cannot assign a mix to a channel that has been moved. Create the mix first, then move the channel.
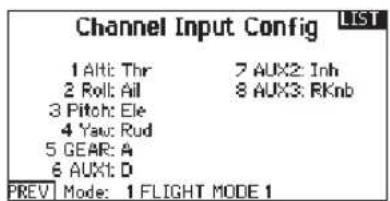
Channel Input Configuration
The Channel Input Configuration screen enables you to assign a transmitter channel to a different control stick or switch.
- Select NEXT on the RX Port Assignments screen to access the Channel Input Configuration screen.
- Scroll to the transmitter channel you wish to re-assign and press the scroll wheel. The box around the current input selection flashes.
- Scroll left or right to select the desired control stick or switch.
- Press the scroll wheel to save the selection.
SYSTEM SETUP
Trim Setup
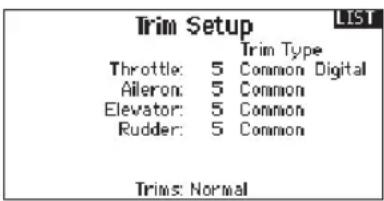
Use the Trim Setup screen to change the size of the trim step and the trim type.
Trim Step
Adjusting the trim step value determines how many “clicks” of trim you input each time you press the trim button. Changing the trim step value to 0 disables the trim for the channel.
To change the trim step value:
- Scroll to the trim step channel you wish to change.
- Select the trim step value and scroll left or right to change the value.
- Press the scroll wheel to save the selection.
Trim Type
The two Trim Type options are Common and F Mode.
Common trim type maintains the same trim values for all flight modes.
F Mode trim type enables you to save trim values for individual flight modes if you find, for example, the aircraft requires aileron trim in Flight Mode 1 but not in Flight Mode 2.
Trim Assignment
In a few instances, you can reassign a trim to a different location.
Aircraft Model Type
Throttle
• Throttle Digital trim button (default)
Throttle Trim Type
- Common
- Flight Mode
Trim Location
Normal and Cross trim types are available. Normal trims align with the control stick; for example, the throttle trim is next to the throttle stick.
Cross trims reverse the position of the trims; for example, the throttle trim is next to the elevator stick and vice versa.
To change the Trim Position from Normal to Crossed, select Normal at the bottom of the Trim Setup screen and press the scroll wheel.
IMPORTANT: Crossed trims will cross both sets of trims for both gimbals.
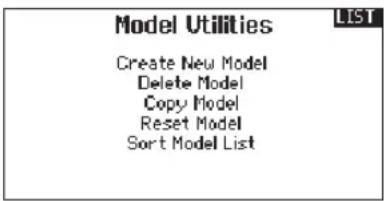
Model Utilities
In the Model Utilities function you can create a new model, delete a model, copy a model, reset a model to default settings and sort the model list.
▶ Create New Model
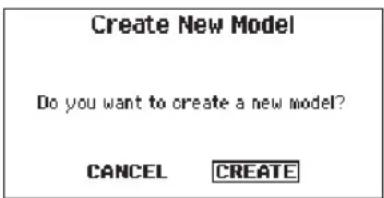
Use this selection to create a new model in the model select list.
- Select Create New Model. Within this screen, you will have the option to create a new model or cancel.
- If you select Cancel, the system will return to the Model Select function.
- If you select Create, the new model will be created and now be available in the model select list.
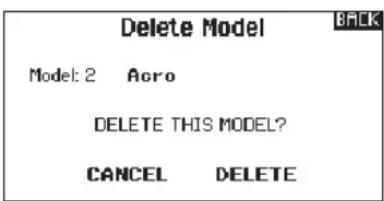
▶ Delete Model
Use this selection to permanently delete a model from the model select list. If you do not wish to delete a model, select Cancel to exit the page.
- To delete a model, highlight the model listed. Press to select then roll to the model name. Press the scroll wheel to select.
- Select DELETE to delete the model.
SYSTEM SETUP
▶ Copy Model
The Model Copy menu enables you to duplicate model programming from one Model List location to another.
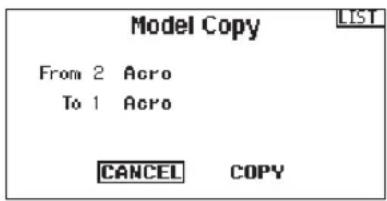
Use Model Copy to:
- Save a default model copy before experimenting with programming values
- Expedite programming for a model using a similar programming setup
IMPORTANT: Copying a model program from one model memory to another will erase any programming in the "To" model memory. To copy model programming:
- Make sure the model program you wish to copy is active. If the desired model program is not active, select Cancel and change the active model in the Model Select menu.
- Select the model memory next to "To" and scroll to the desired model memory. Press the scroll wheel once to save the selection.
- Select Copy and the Confirm Copy screen appears.
- Select Copy to confirm. Selecting Cancel will return to the System Setup screen.
- Select the "To" model as the current model, then bind the transmitter and receiver. Copying a model does not copy the bind from the original model.
You cannot use the Model Copy screen to copy model programming to an SD Card. To copy model programming to the SD Card, please see "Transfer SD Card".
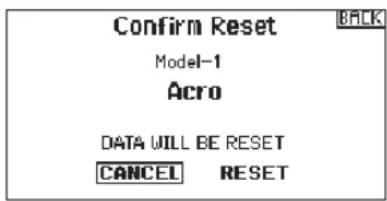
▶ Model Reset
Use the Model Reset menu to delete all model programming in the active model memory. Reset returns all model settings to the default settings and erases all programming in the selected model.
After a model reset, it is necessary to re-bind.
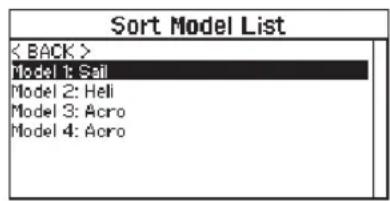
▶ Sort Model List
With this function you can sort the model order in the model select function. This is helpful to group similar models together to make them easy to find. To move a model, highlight the model that you wish to move with the scroll wheel, then press the scroll wheel to select it. Scroll the scroll wheel to move the selected model to the position desired. Press the scroll wheel when you have the model in the position desired.
Warnings
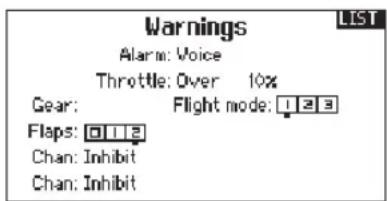
The Warnings menu enables you to program a voice, tone or vibration alert during power on of the transmitter for any selected switch or channel position.
The alarm activates and an alert message appears on the screen if a specific switch or control stick is in an unsafe position when you power the transmitter on.
Return the switch or control stick to the safe position to silence the alarm.
For safety reasons, the default throttle alarm activates if the throttle position is above 10%.
SYSTEM SETUP
TELEMETRY
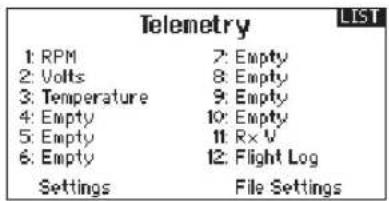
Installing the optional telemetry module and sensors enables the display of aircraft performance data on the transmitter screen.
You can also enable Data Logging to save a telemetry file on the SD Card and view the data in the Spektrum STi™ mobile application.
▶ Telemetry Settings
Display
Telemetry display options include:
Tele: When you press the scroll wheel, the Telemetry screens appear and the Main Screen is disabled.
Main: Telemetry alerts appear on the Main screen, but all Telemetry screens are disabled.
Roller (Default): Allows you to toggle between the Telemetry screens and the main screen by pressing the scroll wheel.
Auto: The Telemetry screen automatically appears as soon as the transmitter receives data from the telemetry module.
Units
Scroll to Units and press the scroll wheel to change between US and Metric.
▶ Telemetry Auto-Configuration
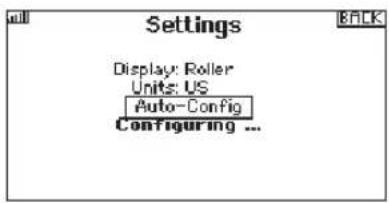
IMPORTANT: The Auto-Config option is not available from the System Setup>Telemetry menu. RF signal must be transmitting when you use the Auto-Config option. When the System Setup menu is active, RF signal is off.
The DX8 transmitter features telemetry Auto-Configuration, allowing the transmitter to detect new telemetry sensors.
To use Telemetry Auto-Config:
- Make sure all telemetry components are bound to the transmitter and receiver.
- Power on the transmitter, then power on the receiver.
- Select Telemetry from the Function List, then select Auto Config. "Configuring" flashes for 5 seconds and any new sensors appear in the list.
- Adjust the sensor alert values as necessary.
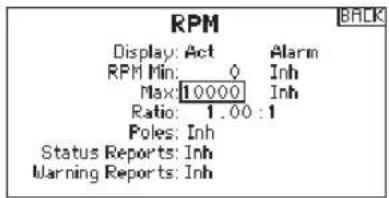
Status Reports:
Status Reports determines how often the transmitter refreshes the data on the screen. Each telemetry sensor can be adjusted independently.
For example, the RPM status report can refresh every 10 seconds while the altimeter sensor refreshes every 15 seconds.
Warning Reports:
Warning Reports determines how often a telemetry alert occurs, if an alert is active.
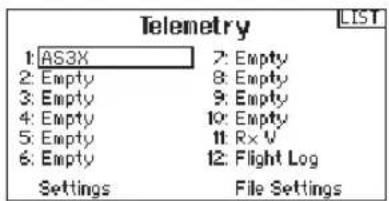
▶ AS3x Gain Live View (ACRO and SAIL Types Only)
When using an AS3X receiver (AR636, AR6335, AR9350, etc.), AS3X Live Gain View allows:
• Real time display of gain values for Roll, Pitch and Yaw
• Gains to be adjusted from the roller
- Selection of the channel that is used to adjust gains (must match application)
• Selection of the switch that is used to change flight modes
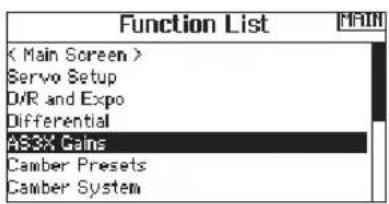
To activate AS3X Gain Live View:
- Enter the Telemetry screen from either the Function List or the System Setup list.
- Scroll to the desired "Empty" channel to use for gain adjustment.
- Press and scroll to select AS3X. The AS3X Gain menu is now available in the Function List.
SYSTEM SETUP
▶ Telemetry Alarms
Select Inh under Alarm to select the type of alarm desired. Options include Inh, Tone, Voice.
Status Reports (Spoken Telemetry)
- Select Inh next to Status Reports in each telemetry setting to add spoken telemetry feedback as desired.
- Scroll to select how often you want to hear the status report.
Warning Reports (Spoken Telemetry)
- Select Inh next to Warning Reports in each telemetry setting to add spoken telemetry feedback for telemetry warnings as desired.
- Scroll to select how often you want to hear the telemetry warning.
File Settings
This is used to select the data logging settings.
File Name
- Select File Name to assign a custom file name.
- The File Name screen appears, allowing you to name the file as you would for a Model Name or Flight Mode Name. The file name can include a maximum of 8 characters.
- Press BACK to save the name.
Start
- Select Start to assign a specific switch position or stick position that activates Data Logging.
- Press the scroll wheel once to save the selection.
Enabled
When Enabled is set to NO, Data Logging is turned off. Select YES to save Telemetry data to the SD Card. The SD Card must be installed in the transmitter to select YES.

CAUTION: If you access the Telemetry menu from the Function List, you may see a Frame Loss appear when you menu. The Frame Loss is not an error, but there will be a tary loss of radio signal when exiting the Telemetry screen.
DO NOT access the Telemetry menu during flight.
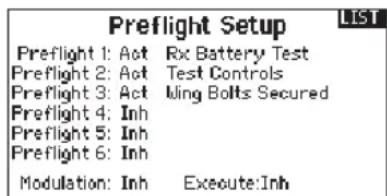
Preflight Setup
The Preflight Setup menu option enables you to program a pre-flight checklist that appears each time you power on the transmitter or when you select a new model memory. Each item on the list must be confirmed before you can access the Main Screen.
Frame Rate
The Frame Rate menu enables you to change the frame rate and modulation mode. Select the option you wish to change and press the scroll wheel.
You must use digital servos if you select 11ms frame rate. Analog and digital servos can be used with a 22ms frame rate.
Modulation Mode
We recommend using DSMX ^® (default) modulation mode. When DSMX is active, the transmitter operates in DSMX with DSMX receivers and DSM2* with DSM2 ^® receivers. The transmitter automatically detects DSM2 or DSMX during binding and changes the mode accordingly to match the receiver type you are using. If you select DSM2, the transmitter operates in DSM2 regardless of whether it is bound to a DSM2 or DSMX receiver. ^* DSM2 is not available in the EU.

NOTICE: While DSMX allows you to use more than 40 transmitters simultaneously, do not use more than 40 transmitters simultaneously when using a DSM2 receiver or a transmitter in DSM2 mode.
NOTICE: For EU versions, DSM2 operation is not available.
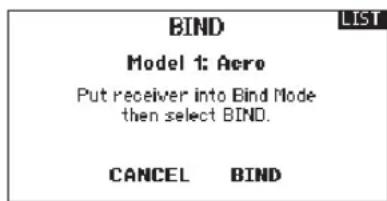
Bind
The Bind menu enables you to bind a transmitter and receiver without powering off the transmitter. This menu is helpful if you are programming a model and need to bind the receiver for failsafe positions.
See "Programming Failsafe Positions" for more information.
SYSTEM SETUP
TRAINER
The DX8 features a programmable trainer function with 4 wired trainer modes, 2 wireless trainer modes and a trainer FPV mode.
The transmitter assigns the trainer function to Switch I.
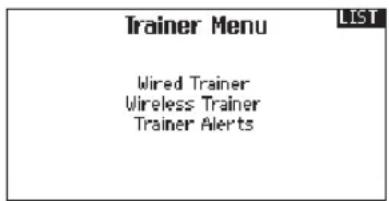
▶ Wired Trainer
The 4 wired trainer modes include:
Inhibit
In Inhibit, the slave transmitter must have the same programming as the master transmitter (e.g., servo reversing, travel adjust, sub-trim, trims).
Programmable Master
Programmable mode enables you to program the master transmitter to transfer any or all individual channels when you activate the trainer switch. This mode is ideal for beginners learning to control individual channels while the master transmitter maintains control of all other channels.
The slave transmitter should be in Inhibit mode, if available. The Master and Slave transmitters MUST have the same programming.
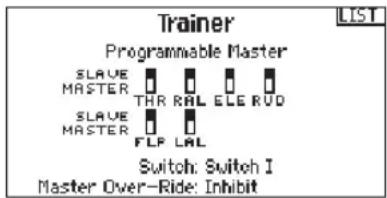
Pilot Link Master
Pilot Link Master enables you to program the master transmitter to transfer any or all individual channels when you activate the trainer switch. Pilot Link Master is ideal for complex models, as the master transmitter can maintain control of all secondary functions—for example flight modes, retracts, flaps and brakes. Secondary functions can be individually assigned to the Slave transmitter as necessary. It is not necessary to have model programming in the slave transmitter. It may be necessary for the slave transmitter to be in Inhibit mode to allow trim changes to transfer over from the master transmitter.
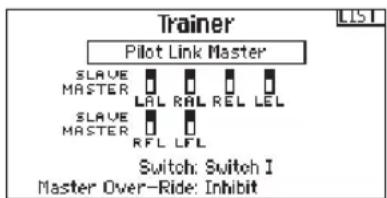
Slave
Use Slave mode when using the DX8 as a slave transmitter and Pilot Link is active in the master transmitter.

Dx8 Wired Trainer Operation
- Bind the master transmitter to the model.
- Connect the trainer cord (SPM6805) to the back of the master transmitter.
- Make sure the master and slave transmitter battery packs are fully charged.
- Make sure the slave transmitter is powered off. The slave transmitter will power on when you connect the trainer cord.
- Connect the trainer cord to the slave transmitter.
- The slave transmitter screen displays information but does not send a signal to the model.
- Press the trainer button on the master transmitter to transfer model control from the master to the slave.
- While moving the trainer switch between the off and on positions, watch for movement on the control surfaces. Adjust the trims as necessary before flying.
- Release the trainer button and the master transmitter regains control of the model.
Master Override
The Master Override feature enables the instructor to immediately regain control of the model by moving the control sticks. After you activate Master Override, the slave transmitter cannot control the model until you reset the trainer switch. To reset the trainer switch:
- Move the trainer switch to the OFF position.
- Move the trainer switch to the ON position to activate the slave transmitter.
SYSTEM SETUP
▶ Wireless Trainer
Wireless Trainer works just like the Wired Trainer, without the wire. Select Wireless Trainer to bind a DSM2 or DSMX slave transmitter to the master transmitter. With this option, when the master presses the trainer button or switch, control is given to the currently bound slave transmitter. After binding, the slave transmitter will remain bound to the master transmitter until a different transmitter is bound to the master, or the slave transmitter is bound to another receiver or a wireless master transmitter. ModelMatch™ technology applies to the wireless trainer system; the master transmitter will be bound to the slave in the bound model used. Also, if the slave transmitter has ModelMatch technology, it will only be bound to the master transmitter in the selected model during binding.
Inhibit
In Inhibit, the wireless trainer function will be inhibited and will not function.
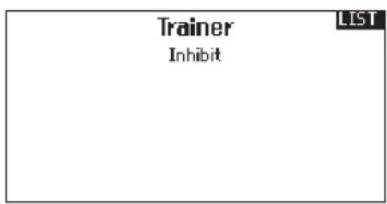

CAUTION: Select Inhibit in the Trainer menu when you aren't using the wireless trainer function. Failure to select Inhibit may loss of control of the aircraft.
Programmable Master
Programmable mode enables you to program the master transmitter to transfer any or all individual channels when you activate the trainer switch. This mode is ideal for beginners learning to control individual channels while the master transmitter maintains control of all other channels. The slave transmitter should be in Inhibit mode, if available. The Master and Slave transmitters MUST have the same programming.
Pilot Link Master
Pilot Link Master enables you to program the master transmitter to transfer any or all individual channels when you activate the trainer switch. Pilot Link Master is ideal for complex models, as the master transmitter maintains control of all secondary functions, such as flight modes, retracts, flaps and brakes.
Secondary functions can be individually assigned to the Slave transmitter as necessary. It is not necessary to have model programming in the slave transmitter.
Dx8 Wireless Trainer Operation
- Enter an unused model on the slave transmitter (computer transmitter only).
- Bind the master transmitter to the model.
- Make sure the master and slave transmitter battery packs are fully charged.
- Make sure the slave transmitter is powered off.
- Either in the Wireless Programmable Master setup page or the Wireless Pilot Link Master setup page, select BIND. This will put the master transmitter's wireless trainer receiver into bind mode. You should see the following screen:
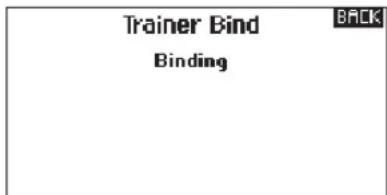
-
Enter bind mode on the slave transmitter following the instructions provided with that transmitter.
-
After a successful bind, the following screen should appear:
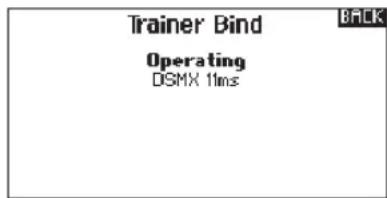
- Press the trainer button on the master transmitter to transfer model control from the master to the slave.
- Release the trainer button and the master transmitter regains control of the model.
Master Override
The Master Override feature enables the instructor to immediately regain control of the model by moving the control sticks. After you activate Master Override, the slave transmitter cannot control the model until you reset the trainer switch. To reset the trainer switch:
- Move the trainer switch to the OFF position.
- Move the trainer switch to the ON position to activate the slave transmitter.
SYSTEM SETUP
▶ Trainer FPV Mode
The Trainer FPV function enables you to control FPV head-tracking in either wired or wireless mode. You may assign incoming head-tracker channels to any available output channel in the transmitter. To use the FPV mode:
- Select Wired Trainer or Wireless Trainer from the Trainer menu.
- Change the trainer mode from Inhibit to FPV.
- Select the switch you wish to use for the head tracker, then select NEXT.
- Select the Output Channel where the head tracker servo is connected.
- Change Mode: Master to Mode: Slave.
- Select Input Channel.
- Test the head tracker movement. Move the head tracker switch to the On position, then move your head. The camera should move accordingly.
- Adjust the Scale value to change the amount of camera movement. If the camera moves in the wrong direction, change the Direction option from Normal to Reverse.
IMPORTANT: Consult local laws and ordinances before operating FPV (first person view) equipment. In some areas, FPV operation may be limited or prohibited. You are responsible for operating this product in a legal and responsible manner.
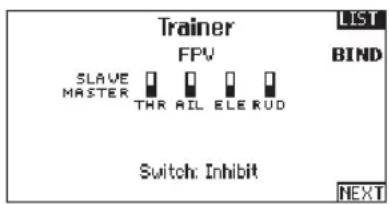
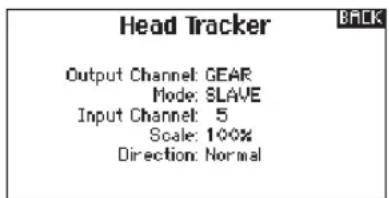
Digital Switch Setup
Digital Switch Setup allows you to define the position values of each digital switch and flight mode switch. The switch can be assigned to a channel in the Channel Input Config function, and the output of the channel set in the Digital Input Setup screen. Additionally, the Flight Mode switch can have position values defined for each flight mode, and may be used as a mix input or channel input source, with the values defined in Digital Input Setup.
To use the Digital Switch Setup function:
- Enter the Digital Input Setup screen, and press the roller with Inhibit selected.
- Roll to select the switch or Flight Mode switch and press to select.
- Roll to the desired position to adjust, and press the roller to select.
- Roll to select the desired value, then press to select.
- Repeat step 4 and 5 for all positions that you wish to adjust.
- If you want to select a switch to control a channel, roll to select Channel: Inhibit on the bottom of the screen and press the roller. This will take you to the Channel Input Config screen to assign a channel to a switch.
- Repeat 2 through 6 for all switches desired.
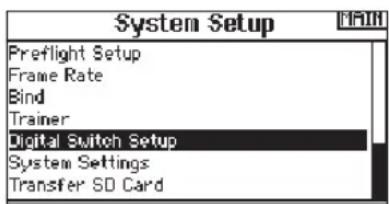
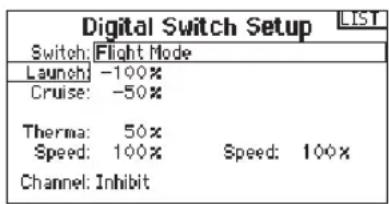
IMPORTANT: After you exit the Digital Input Setup screen, the return screen will show Inhibit at the top of the screen. If you wish to adjust a previously set value, select the switch and the previously set values can then be viewed and re-adjusted as desired.
SYSTEM SETUP
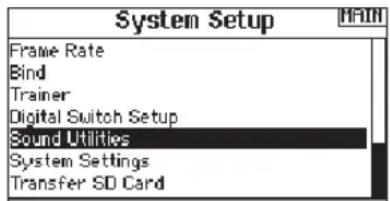
Sound Utilities
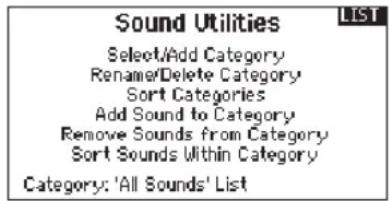
The transmitter includes a set of default sound categories, with the option to add your own (up to a total of 16 categories). You may also modify or remove the default sound categories. Sound Categories can be accessed from any screen that enables you to select a sound.
- To select a sound, highlight the sound and then press the roller.
- To select a sound from a different Sound Category, highlight Select Category and then press the roller. Select the desired sound from the list.
- To add a sound to a different Sound Category, select Add Sound to Category. A sound can appear in as many categories as you wish.
- The default Sound Category is All Sounds. To change the default Sound Category, select Sort Categories then move the desired category to the top of the list.
- To remove a Sound Category, select Rename/Delete Category and then edit the name. Change the first character of the name to a blank space. When you exit the screen, the category will be removed.
SYSTEM SETTINGS
The System Settings menu consists of four screens: System Settings, Extra Settings, Serial Number and Calibrate.
Select NEXT or PREV to move between screens.
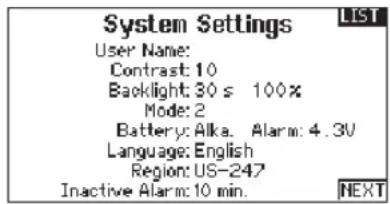
▶ User Name
The User Name field displays your name in the lower right corner of the main screen.
To Program a User Name:
-
Scroll to User Name and press the scroll wheel. The User Name screen appears.
-
Scroll to the desired character position and press the scroll wheel. Scroll left or right to change the character and press the scroll wheel to save the selection. The User Name can contain a maximum of 20 characters, including spaces.
- Press the Back button to save the User Name and return to the System Settings screen.
▶ Contrast
To adjust the screen contrast:
- Scroll to Contrast and press the scroll wheel.
- Scroll left or right to adjust the contrast value. Lower numbers lighten the contrast, higher numbers darken it.
- Press the scroll wheel once to save the selection.
▶ Backlight
The Backlight field adjusts the backlight appearance time and brightness. You have the option to turn the backlight off for models you fly during the day and turn the backlight on for night flying models.
The backlight time options are:
Off: Appears for a short time when you power on the transmitter.
On: The backlight is always on.
Set Time: The backlight is on for 3, 10, 20, 30, 45 or 60 seconds before automatically turning off. Press the scroll wheel once to turn the backlight on.
The backlight percentage adjusts the backlight intensity and it is adjustable in 10% increments from 10% (darker) to 100% (brighter).
SYSTEM SETUP
▶ Mode
You can change transmitter modes among Modes 1, 2, 3 and 4. This conversion requires both a programming and a mechanical change. Please refer to Transmitter Mode Conversion for directions on making the necessary mechanical changes. If mechanical changes are required for the mode you need to change to, complete the mechanical changes first, then follow the instructions below for the software setting change.
To change the gimbal stick mode:
- Scroll to Mode and press the scroll wheel.
- Scroll left or right to change the gimbal stick mode. Press the scroll wheel to save the selection.
- Select NEXT in the lower left corner until the Calibration screen appears.
- Move all transmitter controls to the center position and complete the calibration process before exiting the System Settings menu. See "Calibrating Your Transmitter" for more information.
▶ Battery Alarm
Battery Alarm enables you to change the transmitter battery type and the alarm voltage limit. The alarm activates when the battery reaches the low voltage limit.
To change the battery alarm:
- Scroll to the battery type and press the scroll wheel once to change the type to LiPo/Li-Ion or NiMH.
- Scroll to the battery voltage and press the scroll wheel. Turn the scroll wheel left or right to change the voltage level. Press the scroll wheel again to save the selection.

CAUTION: Never select NiMH when a LiPo/Li-Ion battery is installed in the transmitter. Doing so may over-discharge the battery and damage the battery, transmitter or both.

CAUTION: Never adjust the low voltage limit for the LiPo/Li-Ion battery pack below 6.4V. Doing so could over-ge the battery pack and damage both battery pack and litter.
▶ Selecting a Language
In the Systems Settings screen, scroll to highlight Language, then press the scroll wheel to select the Language function. Scroll to select the desired Language. When the desired Language is selected, press the scroll wheel to accept that Language. Names you input will not be affected by language change. After changing the language for the text, you may also want to change the language for the spoken alerts. See the "Spoken" and "SD Card" sections for more information.
▶ Inactive Alarm
An alarm activates if the transmitter sees a period of inactivity for a certain amount of time. The alarm is helpful in reminding you to power off the transmitter and avoiding a situation where the transmitter battery completely discharges.
The Inactive Alarm options are:
• Inh (No alarm sounds)
- 5 min
• 30 min
• 10 min (Default)
60 min
To change the Inactive alarm time:
- Scroll to the current alarm time and press the scroll wheel.
- Scroll left or right to change the alarm time. Press the scroll wheel to save the selection.
SYSTEM SETUP
▶ Extra Settings
The Extra Settings screen enables you to:
- Turn sounds off or on
• Change the appearance of the trim indicators
• Change system voice volume settings
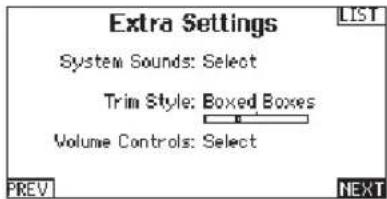
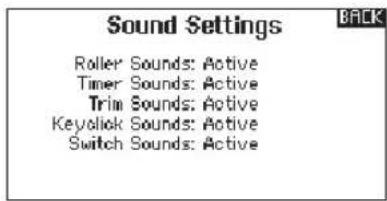
System Sounds:
Scrolling to System Sounds and pressing the scroll wheel turns sounds on (Active) or off (Inhibit).
You may disable all sounds by changing the volume to 0.
Trim Style:
Trim style changes the shape of the trim indicators on the Main Screen. Display options include:
- Boxed Boxes (Default)—The indicators appear as an outlined box when you adjust the trim.
- Boxed Arrows—The indicators appear as outlined arrows when you adjust the trim.
- Arrows on Lines—The indicators appear as arrows on lines when you adjust the trim.
Inhibit removes all trim bars and indicators from the Main Screen.
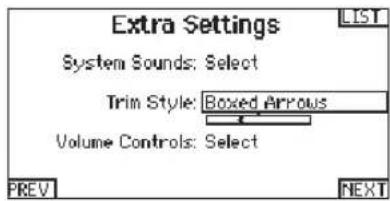
To change the Trim style:
- Scroll to Trim style and press the scroll wheel once.
- Scroll left or right to change the Trim style option. Press the scroll wheel to save the selection.
Volume Controls:
Volume control enables you to change the volume levels for individual sound events. System volume level can be changed from the Voice Volume Control screen or the Main Screen.
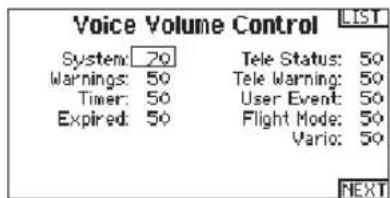
System Warnings:
Select NEXT from the Voice Volume Control screen to enter the System Warning screen.
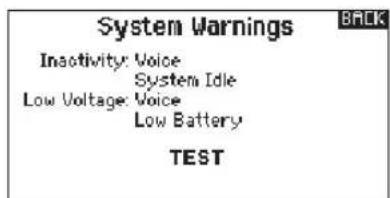
The System Warnings screen enables you to:
- Set Inactivity Alarm—Inh, Tone, Voice
- Set Low Voltage Alarm—Inh, Tone, Voice
TEST
SYSTEM SETUP
▶ Serial Number
The Serial Number screen displays the transmitter serial number and AirWare software version.
Reference the Serial Number screen any time you need to register your transmitter or update the AirWare software from the Spektrum Community website.
▶ Exporting the Serial Number to the SD Card
You may find it helpful to export the transmitter serial number to a text file for your personal records or when you are registering the transmitter on the Spektrum Community.
To export the transmitter serial number:
- Insert an SD Card in the card slot on the transmitter.
- Scroll to EXPORT and press the scroll wheel. The SD Status screen appears and should display MY_DX8.xml in the middle of the screen.
- Press the scroll wheel again to return to the Serial Number screen.
-
Power off the transmitter and remove the SD Card from the transmitter.
-
Install the SD Card in a card reader connected to your computer.
- Open the MY_DX8.xml file from the SD Card location. You can then copy and paste the serial number into your personal records or to the Spektrum Community website.
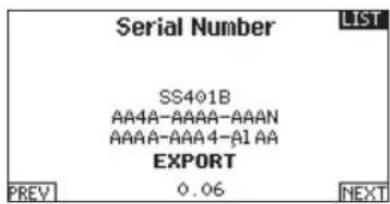
▶ Locating the Transmitter AirWare Software Version
The transmitter AirWare software version appears between PREV and NEXT at the bottom of the Serial Number screen. Register your DX8 to get AirWare software updates and other news at spektrumrc.com
IMPORTANT: AirWare files are specific to the transmitter serial number and you cannot transfer AirWare files between transmitters, ie., downloading an AirWare software update once and attempting to install it on multiple transmitters.
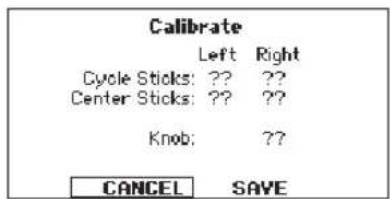
▶ Calibrate
The Calibration screen stores the potentiometer endpoints for all proportional controls. It is mandatory to complete the calibration after changing the stick mode selection.
Calibrating the Transmitter
- Carefully move the gimbal sticks in a + shape moving from left to right, then up and down. Press gently on the gimbals at the stops to achieve an accurate calibration. Return both gimbal sticks to the center position.
- Select SAVE to store the calibration.
SYSTEM SETUP
Transfer SD card
The SD Card enables you to:
- Import (copy) models from another DX8 transmitter
• Export (transfer) models to another DX8 transmitter - Update AirWare™ software in the transmitter
• Install/Update sound files
▶ Import Model
Back up your models currently in your transmitter on an SD card separate from the transmitter before performing these functions.
To import an individual model file from the SD Card:
- Save the model file to the SD Card and insert into the transmitter.
- In the Transfer SD Card menu, scroll to Options and press the scroll wheel once.
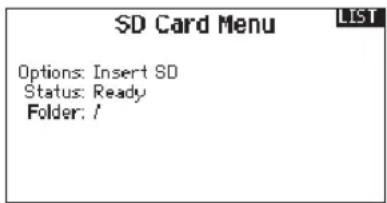
- Scroll to Import Model and press the scroll button again to save the selection. The Select File screen appears.
- Select the model file you wish to import. The Import Model screen appears.
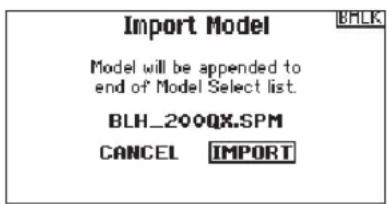
IMPORTANT: When you select Import, the transmitter leaves the System Setup List.
- Select IMPORT to save the model to the transmitter. The new model will be appended to the end of the model list. See Sort Model List section on Page xx for information on sorting the model list.
Import All Models
To import all models from the SD Card:
- Select Import All Models.
- Confirm by selecting IMPORT.
IMPORTANT: After importing a model, you must rebind the transmitter and receiver. The Main Screen must show DSM2 or DSMX in the upper left corner.
You can import a model to any location you want. If you prefer to use Import All, you can use your PC to rename the SPM file. The first two digits (01 to 50) are the destination model number. Your SD card can only contain 50 models. Save files to folders on the card then remove from the card all unused models. Files are selected by their position in the directory table.
▶ Export Model
You can use the Export Model option to export a single model file to the SD Card.
- Make sure the active model file is the one you wish to Export.
- In the Transfer SD Card menu, scroll to Options and press the scroll wheel once.
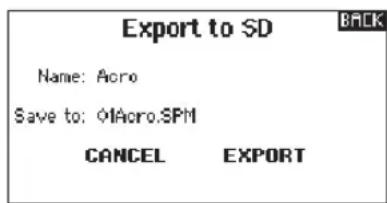
- Scroll to Export Model and press the scroll wheel again to save the selection. The Export to SD screen appears. The first two characters of the file name correspond to the Model List number (01, for example).
- (Optional) If you wish to rename the model file before exporting it to the SD Card:
a. Scroll to "Save to:" and press the scroll wheel. The File Name screen appears.
b. Assign a new file name. The file name can contain up to 25 characters including the .SPM file extension.
c. When you are done assigning the new file name, press the Back button to return to the Export to SD screen.
- Select Export to save the file to the SD Card. When the export is complete, the transmitter returns to the SD Card Menu screen.
Export All Models
To export all models to the SD Card:
- Select Export All Models in the Transfer SD Card Menu options. The Export All Models screen appears.
IMPORTANT: Export All Models will overwrite any model files that Have the same name. Always save model files to a different SD card if you are not sure.
- Select Export to overwrite files on the SD Card or Cancel to return to the SD Card Menu.
SYSTEM SETUP
▶ Updating Spektrum Dx8 Sound Files
NOTICE: NEVER disconnect the battery from the transmitter while the file transfer is in process. Doing so will damage the transmitter, and the transmitter will need to be returned for service.
You have the option of installing new sound files in the DX8 transmitter. Before updating the sound files, make sure the transmitter battery is fully charged.
To install new sound files:
- Download the desired sound file from the Spektrum Community at www.SpektrumRC.com. Save the file to the SD card for your transmitter.
- Insert the SD card in the DX8 transmitter.
- Enter System Setup in the transmitter.
-
Select the SD Card menu, and then select Update Sound.
-
Select the new sound file you want to install. The transmitter will scan the file and check for any errors.
- The Transfer SD Card screen reappears when the file transfer is complete.
IMPORTANT: The sound file will take approximately 30 minutes to update. Do not disconnect the battery or power off the transmitter during the update.
▶ Update AirWare Software
NOTICE: The orange LED Spektrum bars flash and a status bar appears on the screen when AirWare software updates are installing. Never power off the transmitter when updates are installing. Doing so may damage the system files.
Before installing any AirWare files, always Export All Models to an SD Card separate from the SD Card containing the update. The update may erase all model files.
For more information on AirWare software updates, visit spektrumrc.com
Automatically Installing AirWare Software Updates
To install the most recent update:
- Download the update from spektrumrc.com and save it to the SD Card.
- Power off the transmitter and install the SD Card in the transmitter.
- Power on the transmitter and the update automatically installs in the transmitter.
Manually Installing AirWare Software Updates
- Save the desired AirWare version to the SD Card.
- Select Update Firmware in the SD Card Menu options. The Select File screen appears.
- Select the desired AirWare version from the File List. When updates are installing, the transmitter screen is dark. The orange LED Spektrum bars flash and the update status bar appears on the screen.
NOTICE: Do not power off the transmitter when updates are installing. Doing so will damage the transmitter.
FUNCTION LIST
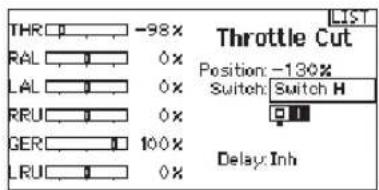
The Main Screen appears when you power on the transmitter. Press the scroll wheel once to display the Function List.

Servo Setup
The Servo Setup menu contains the following functions:
- Travel Adjust
- Sub-Trim
- Reverse
- Speed
• Balance
▶ Travel Adjust
Travel Adjust sets the overall travel or endpoints of the servo arm movement.
To adjust travel values:
- Scroll to the channel you wish to adjust and press the scroll wheel. When adjusting travel values assigned to a control stick:
a. Center the control stick to adjust both directions at the same time.
b. To adjust travel in one direction only, move the control stick in the direction you wish to adjust. Continue holding the control stick in the desired direction while you are adjusting the travel value. - Scroll left or right to adjust the travel value. Press the scroll wheel to save the selection.
IMPORTANT: ALT, ROL, PIT and YAW replaces THR, AIL, ELE and RUD channels in multirotor to more closely reflect the flight axis in the multirotor aircraft. This change is throughout the multirotor menu options.
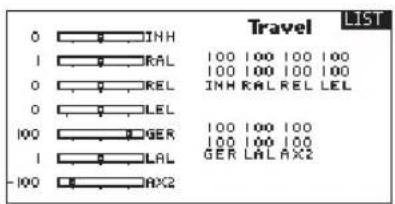
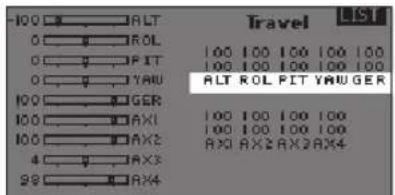
▶ Sub-Trim
Sub-Trim adjusts the servo travel center point.

CAUTION Use only small sub-trim values or you may cause damage to the servo.
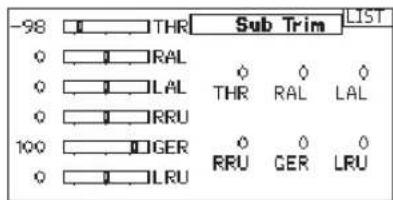
▶ Reverse
Use the Reverse menu to reverse the channel direction. For example, if the elevator servo moves up and it should move down.
To reverse a channel direction:
- Scroll to Travel and press the scroll wheel. Scroll left until Reverse appears and press the scroll wheel again to save the selection.
- Scroll to the channel you wish to reverse and press the scroll wheel.
If you reverse the Throttle channel, a confirmation screen appears. Select YES to reverse the channel. A second screen appears, reminding you to bind your transmitter and receiver.
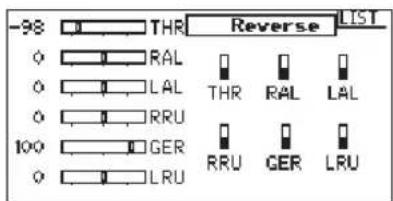
CAUTION: Always rebind the transmitter and receiver after reversing the Throttle channel. Failure to do so will result throttle moving to full throttle if failsafe activates.
Always perform a control test after making adjustments to confirm the model responds properly.

CAUTION: After adjusting servos, always rebind the transmitter and receiver to set the failsafe position.
FUNCTION LIST
▶ Speed
The Speed menu enables you to slow the response time on any individual channel (such as retracts).
The Speed is adjustable in the following ranges:
• Nor (No Delay) – 0.9s in 0.1 second increments
• 1s – 2s in 0.2-second increments
• 2s – 8s in 1-second increments
To adjust the Speed:
- Scroll to the channel you wish to adjust and press the scroll wheel.
- Scroll left or right to adjust the speed and press the scroll wheel to save the selection.
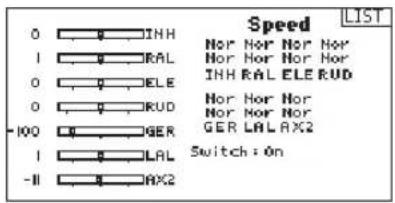
Balance
Balance is available on all channels to fine-tune the servo position at up to 7 points. This is a precision curve mix that is normally used to prevent binding when multiple servos are used on a single control surface.
You can also use the Balance menu option to match throttle response on twin engine aircraft or level the swashplate on a helicopter.

▶ AS3x Gain Live View (ACRO and SAIL Types only)
When using a compatible AS3X receiver (AR636, AR6335, AR9350, etc.), Gain Live View allows
• Real time display of gain values for Roll Pitch and Yaw
- Allows gains to be adjusted from the roller
- Selection of the channel that is used to adjust gains (must match application)
• Selection of the switch that is used to change flight modes
To activate AS3X gain Live View:
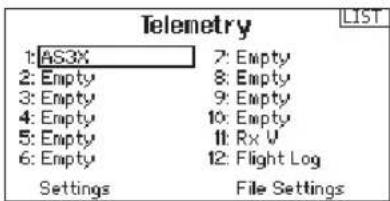
- In the telemetry screen in one of the empty positions select AS3X and activate the Display. This will activate the AS3X Gain menu in the Function List.
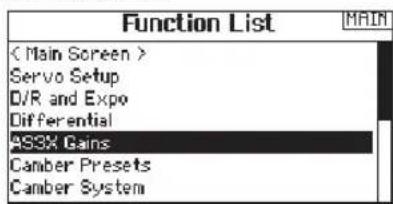
- In the Function List Access the AS3X Gain menu. If an AS3X receiver is bound to the transmitter and the receiver and transmitter are on, live gain values will be displayed on this screen.
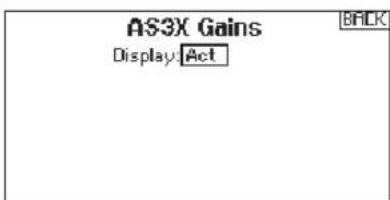
Axis: Roll Pitch and Yaw gain are displayed to the right of each Axis Rate: Rate gain values are displayed here
Heading: Heading gain values are displayed here
Actual: The current gain value is displayed here. Note that this value takes into account the priority gain and the stick position of that channel
Gain: This value represents the position of the input (roller or knob)
Input: Allows the selection of the roller to be used to adjust the gain
Channel: Must correspond to the channel selected in the AS3X application in the FM Channel Assignment screen
FM Switch: Selects the switch on the transmitter that is used to select the flight modes in the AS3X system
Note that relative (REL) must be selected in the application's gain screen to allow adjustable gain from the transmitter.
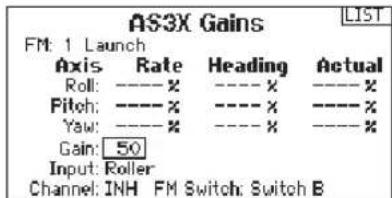
Please see the following web address for videos and information about setting up the AS3X application, Live View and adjusting the gain from the transmitter.
http://www.spektrumrc.com/Technology/AS3X.aspx
FUNCTION LIST
▶ D/R & Exponential
Dual Rates and Exponential are available on the aileron, elevator and rudder channels.
To adjust the Dual Rate and Exponential:
- Scroll to the channel and press the scroll wheel once. Scroll left or right to select the channel you wish to change and press the scroll wheel again to save the selection.
- Scroll to Switch and select the switch to activate D/R and Expo for that channel.
- Scroll to dual rate and press the scroll wheel. Scroll left or right to change the value and press the scroll wheel again to save the selection.
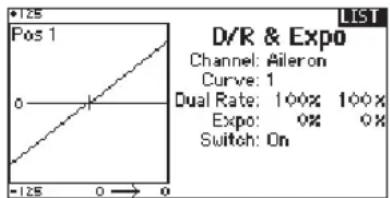
Exponential affects control response sensitivity around center but has no affect on overall travel. Positive exponential decreases the sensitivity around the center of gimbal movement.
▶ Differential (ACRO and SAIL Types only)
The Differential screen enables you to increase or decrease the amount of differential between aileron control surface throws. Positive Differential values decrease the amount of "down" travel without affecting the "up" travel on the opposite control surface. Negative Differential values decrease the amount of "up" travel without affecting the amount of "down" travel on the opposite control surface.
The Differential menu option only appears when a multi-servo aileron wing type is active in Aircraft Type.
To adjust the Differential:
-
Scroll to Switch and press the scroll wheel. Scroll right to select On (Differential is always on) or assign the differential to a switch position.
-
Press the scroll wheel a second time to save the selection.
- Scroll to the percentage selection and press the scroll wheel once to change the value.
- Press the scroll wheel again to save the selection.
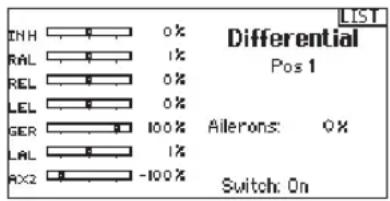
▶ Throttle Cut (ACRO and HELI Types only)
The Throttle Cut menu option enables you to assign a switch position to stop an engine or motor. Throttle Cut activates regardless of Flight Mode. When you activate Throttle Cut, the throttle channel moves to the pre-programmed position (normally Off). You may need to use a negative value to move the Throttle channel to the off position.

CAUTION: Always test the model after making adjustments to make sure the model responds to its as desired.
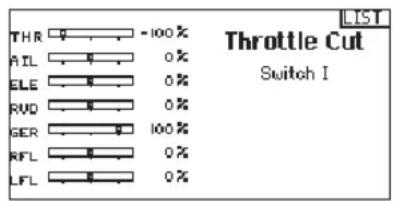
▶ Throttle Curve (ACRO and HELI Types only)
You can use the Throttle Curve menu option to optimize the throttle response. A maximum of 7 points are available on the throttle curve.
To add points to a Throttle Curve:
- Move the throttle stick to the position where you wish to add the new point.
- Scroll to Add Pt. and press the scroll wheel to add the point.
To remove points from a Throttle Curve:
- Move the Throttle stick until the cursor is near the point you wish to remove.
- Scroll to Remove Pt. and press the scroll wheel once to remove the point.
If you program multiple throttle curves and you wish to edit one of the curves, that curve must be active in the Throttle Curve screen before you can make any changes.
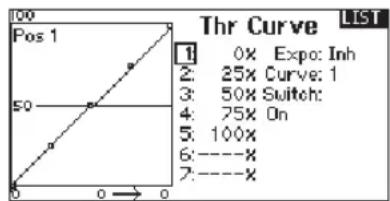
FUNCTION LIST
The following menu options are only available when they are enabled from the Model Type screen.
V-Tail Differential ▶ Only available in Sailplane Type when V-Tail A or V-Tail B is active. See SAIL (Sailplane) section for set up.
 | ▶ Only available in Sailplane Type when a 2+ aileron wing type is selected. See SAIL (Sailplane) section for set up. |
 | ▶ Only available in Sailplane Type when a 2+ aileron wing type is selected. See SAIL (Sailplane) section for set up. |
 | ▶ Only available in Airplane Type when a flap-enabled wing type is selected. See ACRO (Airplane) section for set up. |
 | ▶ Only available in Helicopter Type. See HELI (Helicopter) section for set up. |
 | ▶ Only available in Helicopter Type. See HELI (Helicopter) section for set up. |
 | ▶ Only available in Helicopter Type. See HELI (Helicopter) section for set up. |
 | ▶ Only available in Helicopter Type. See HELI (Helicopter) section for set up. |
 | ▶ Only available in Multicopter Type. See MULTI (Multicopter) section for set up. |
 | ▶ Only available in Multicopter Type. See MULTI (Multicopter) section for set up. |
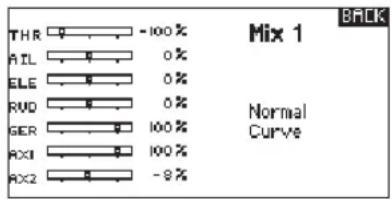
Mixing
Mixing allows control input for a channel to affect more than one channel at a time. Mixing functions support:
• Mixing a channel to another channel.
- Mixing a channel to itself.
- Assigning offset to a channel.
• Linking primary to secondary trim.
These mixes are available for each model memory:
• 8 programmable mixes
• Cyclic to Throttle (HELI)
- Swashplate (HELI)
• Elevator to Flap (ACRO)
• Aileron to Rudder (ACRO)
• Rudder to Aileron/Elevator (ACRO).
- Aileron>Rudder (SAIL)
- Aileron>Flap (SAIL)
- Elevator>Flap (SAIL)
- Flap>Elevator (SAIL)
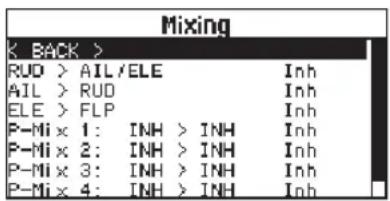
Select a channel for master and slave. Inputs for the master channel control both the master and slave channels. For example, Elevator to Flap makes elevator the master channel and flap the slave channel.
Offset
Change the Offset value to move the effective center position of the slave channel. Positive or negative value determines the direction of the offset. Offset is not available for curve mixes.
Trim
If the master channel trim should also adjust the slave channel, set Trim to Act. A channel monitor on the left side of the screen shows how channels respond to input. To view a switch-assigned mix on the monitor, the mix switch must be in the active position.
Assigning a Mix to a Switch
If you wish to assign a mix to a switch position:
- Make sure you are in the desired mix screen.
- Move the switch you want to assign the mix to.
- Scroll to the switch position where you want the mix to be active.
- Press the scroll wheel to activate the mix. When the box is filled, the mix is active.
The mix is Active when the box is filled and Inactive when the box is open. You can assign a mix to be active in multiple switch positions (0, 1 or 2).
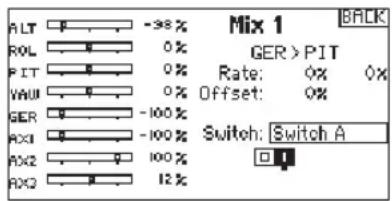
Tip: Use Auto Switch Select to select the switch.

CAUTION: Always do a Control Test of your model after changing mixes.
FUNCTION LIST
Back Mixing
Back Mixing applies to all related servos in a multi servo Aileron/Flapped wing or a multi servo split elevator. Creating a mix to RAL (Right Aileron) or LAL (Left Aileron) will create different results and enables you to use fewer mixes to achieve the desired response.
Example 1: Creating a mix AIL > RAL will move the ailerons in opposite directions, while creating a mix AIL > LAL will move the ailerons in the same direction.
Example 2: Create a mix ELE > REL will move the elevator halves together, while mixing ELE > LEL will move the elevator halves in the opposite direction (tailerons).
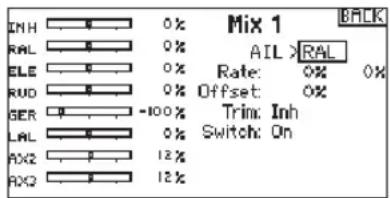
IMPORTANT: Be sure the right aileron is connected into the AIL port on the receiver and the left Aileron is connected into the Aux1 port on the receiver.
Range Test
The Range Test function reduces the power output. This allows for a range test to confirm the RF link is operating correctly. Perform a range check at the beginning of each flying session to confirm system operation.
To Access the Range Test screen:
- With the transmitter on and the main or telemetry screen displayed, press the scroll wheel. The Function list displays.
- Scroll to highlight Range Test, then press the scroll wheel to access the Range Test function.
- With the Range Test screen displayed, push and hold the trainer button. The screen displays Reduced Power. In this mode the RF output is reduced allowing for an operational range test of your system.
- If you let go of the trainer button, the transmitter will go back to Full Power.
IMPORTANT: Telemetry alarms are disabled during the Range Test.
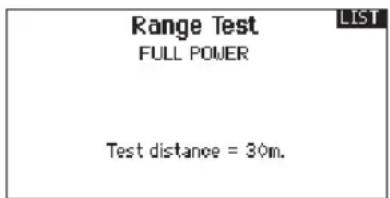
Range Testing the DX8
- With the model restrained on the ground, stand 30 paces (approx. 90 feet/28 meters) away from the model.
- Face the model with the transmitter in your normal flying position and place the transmitter into Range Test mode (see above). Then push the trainer button; the power output will be reduced.
- Operate the controls. You should have total control of your model with the transmitter in Range Test mode.
- If control issues occur, contact the appropriate Horizon Product Support office for assistance.
- If performing a range test while a telemetry module is active, the display will show flight log data.
Timer
The DX8 Timer function allows you to program a countdown timer or stop watch (count up timer) to display on the main screen. An alarm sounds when the programmed time is reached. You can program the timer to start using the assigned switch position or automatically when throttle is raised above a programmed position. Two internal timers are available that show run time for a specific model displays on the Main Screen. A total system timer is also available.
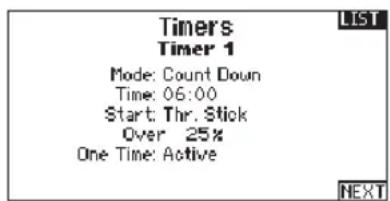
FUNCTION LIST
▶ Timer Event and Timer Control Alerts
Press NEXT to select the Timer Event Alerts settings. These include options for the alerts at every minute for down timers, 1 minute remaining alert, 30 seconds remaining alert, 10 second to 1 second remaining alerts, expiration alert, and every minute up alert. Press NEXT again to select the Timer Control Alerts settings. Available options include Timer Start alert, Timer Stop alert, and Timer Reset alert.
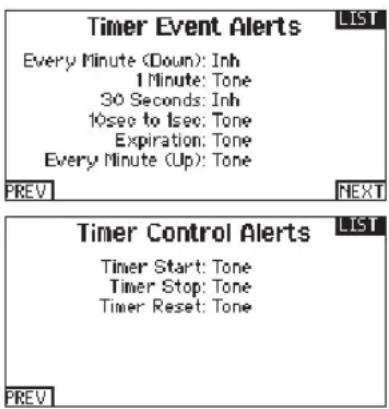
Telemetry
Telemetry is in both the system setup and the function list so you can access the telemetry functions from either list.
You must power off the receiver and transmitter, then power them both on to reset the telemetry data. You can reset min/max values by pressing the CLEAR button.
NEVER change Telemetry settings when the aircraft is powered on. There is a brief interruption in RF output when exiting the Telemetry screen, and may cause a "Hold" condition.
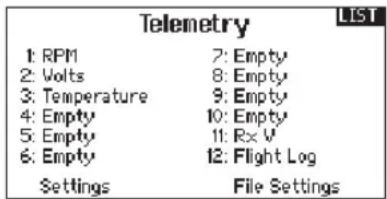
Custom Voice Setup
Use the custom voice setup function to set up custom voice alerts or messages. For example, with the custom voice setup function you can be alerted to a switch change report or a sequence of alerts using the Stepping Events option. To add a new custom voice alert or command, enter the Custom Voice Setup function and select Add New Sound Event with the scroll wheel. Select either Switch Change Report or Stepping Events.
Switch Change Report
Use this feature to have telemetry read in a certain switch position, current switch position, or a variety of other alerts such as “Landing Flaps” or “Mix On”. Begin by selecting the switch you wish to use for the spoken alert, then select the desired setting next to each switch position.
Stepping Events
Stepping Events can be used to provide voice alerts when a switch is moved, stepping through a list of events. Begin by selecting the switch desired to trigger each step through the list (when the switch is triggered as selected, the system will move to the next item on the list going through the list of user-defined selections one by one.) Auto-Cycle can be selected to Inhibit or Active. If inhibited, the system will go through the list 1 time only. If the switch is triggered again when at the final item in the list, it will not begin at the top of the list. If Active, the system will restart at the beginning of the list after the last item on the list with the next switch trigger.
Steps are used to select the number of items on the list for the system to call. This can be set from 0 to 16 so there can be up to 16 items called to the pilot triggered by the switch selected. Next, select the alert to be spoken for each stepped event on the list as desired. A variety of alerts can be chosen from the list, including telemetry alerts and a variety of flight conditions and commands.
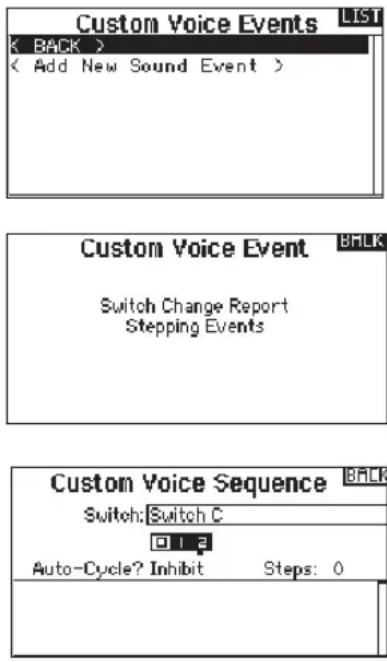
FUNCTION LIST
System Setup
Use System Setup to enter the System List from the Function list without turning the transmitter off. A Caution screen will appear that warns that RF will be disabled (the transmitter will no longer transmit). Press YES if you are sure and want to access the System List. If you are not sure, press NO to exit to the main screen and continue operation.
If you do not press YES or NO, the system will exit to the main screen and continue operation within approximately 10 seconds.
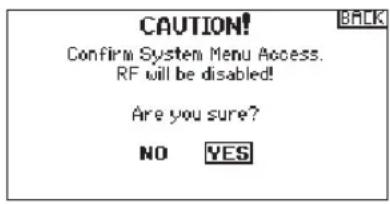

WARNING: Do not press YES unless the model is turned off or the model is secured.
Monitor
The Monitor screen displays the servo positions for each channel graphically and numerically. This is useful to verify programming functions, trim settings, mix directions, etc. The numeric value is directly relative to the travel adjust and mix values (e.g., 100% travel adjust equals 100% value in the Monitor).
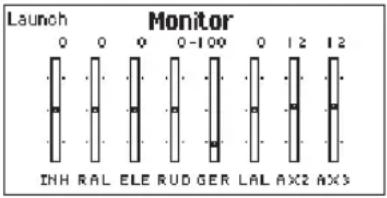
ACRO (AIRPLANE)
Acro Model Type
NOTICE: Refer to your airplane manual for recommended control throws.

CAUTION: Always do a Control Test of your model with the transmitter after programming to make sure your model responds as desired.
Aircraft Type
Use the Aircraft Type Screen to select wing and tail types to match your airplane model. Diagrams and setup names show on the transmitter screen to show the available setups.
Refer to spektrumrc.com for more information about new DX8 AirWare software updates to support these options.
Select wing and tail types before doing any other programming.
Wing
Normal
- Flaperon*
- Dual Aileron*
• 1 Aileron 1 Flap*
• 1 Aileron 2 Flap*
• 2 Ailerons 1 Flap*
• 2 Aileron 2 Flap*
• Dual Rudder/Elevator
- Elevon A*
- Elevon B*
Tail
Normal
• V-Tail A**
• V-Tail B**
- Dual Elevator
- Dual Rudder
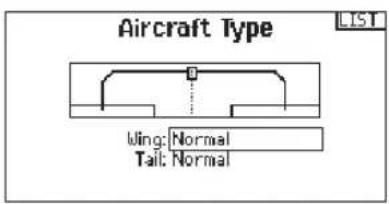
* Selection of multiple ailerons activates the Differential menu option.
** "V-Tail A" and "V-Tail B" function as internal servo reversing. If V-Tail A does not work correctly with your aircraft, try V-Tail B.
Recommended Servo Connections
Dual Aileron Wing
Type Connection
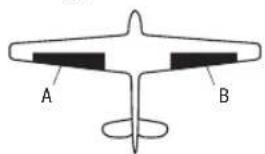
Elevon Wing Type Connection
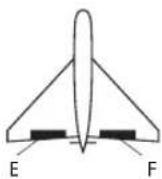
V-Tail Type Connection
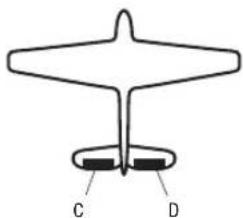
natural_image
Simple line drawing of a star-shaped object with two labeled points C and D (no text or symbols beyond labels)A AUX1 servo port (left aileron)
B AILE servo port (right aileron)
C ELEV servo port (left V-tail)
D RUDD servo port (right V-tail)
E AILE servo port (left aileron)
F ELEV servo port (right aileron)
Icon
To change the Aircraft Icon:
- In the Aircraft Type Screen, select NEXT at the bottom right of the screen. This will access the Aircraft Options screen.
- Scroll to the image and click once. Roll the scroll wheel left or right for optional images.
- Click on the image you wish to select.
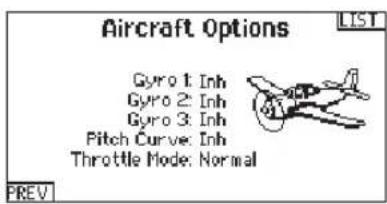
ACRO (AIRPLANE)
Elevon Servo Control
The possible servo reversing options for a delta wing model are:
| Aileron Elevator | |
| Normal Reverse | |
| Normal Normal | |
| Reverse Reverse | |
| Reverse Normal | |
Tip: If you test all servo reversing options and the control surfaces do not move in the correct direction, change the Elevon wing type in the System Setup list from Elevon-A to Elevon-B.
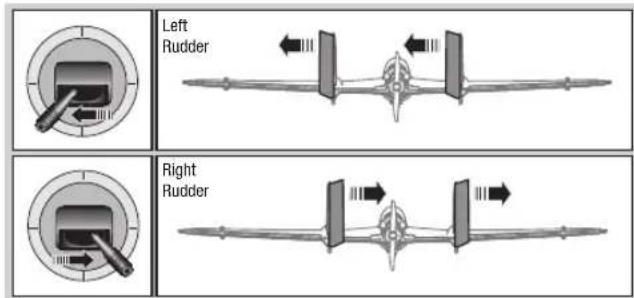
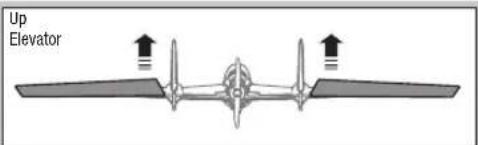
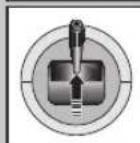
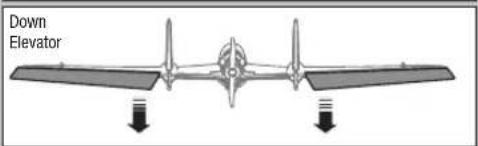
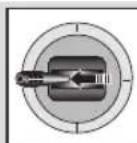
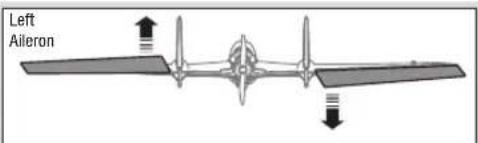
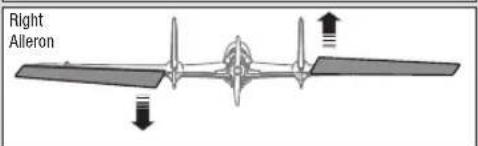
Flap System
The Flap System menu option enables flap programming as well as elevator mixing. You must select a flap-enabled wing type in Aircraft Type or the Flap System menu does not appear.
To activate the Flap System:
- Access the System Setup list and select Aircraft Type.
- Select a flap-enabled wing type and exit the System Setup list.
- Access the Function List from the Main Screen and select Flap System.
-
Select Inhibit and scroll to the switch or lever you wish to use to control the flap channel.
-
Assign the Flap travel values and any desired Elevator mixing.
- Select a Flap speed, if desired. Norm (default) does not have a delay. Flap speed options range from 0.1s to 30 seconds.
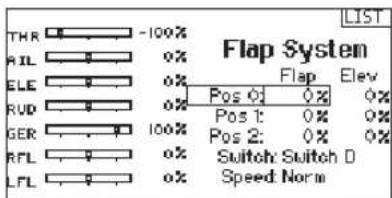
ACRO Mixing
Rudder to Aileron/Elevator
Rudder to Aileron/Elevator mixing corrects coupling in knife edge flight.
- Add Elevator mixing if the aircraft pitches toward the landing gear or canopy
- Add Aileron mixing if the aircraft rolls in knife edge flight
Aileron to Rudder
Use Aileron to Rudder mixing to overcome adverse yaw characteristics with certain types of aircraft (such as high-wing aircraft).
Elevator to Flap
Elevator to Flap mixing enables Flap movement when the Elevator stick moves. Use Elevator to Flap mixing to add the spoiler function to 3D aerobatic aircraft. This mix is available when a flap or dual aileron wing type is selected.
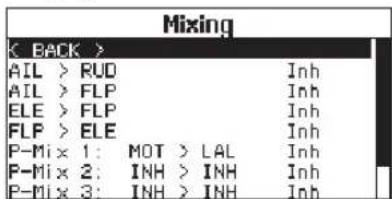
HELI (HELICOPTER)
Heli Model Type
NOTICE: Refer to your helicopter, gyro and governor manuals for programming recommendations.

CAUTION: Always do a Control Test of your model with the transmitter after programming changes to make sure your model responds as desired.
To change the Helicopter Icon:
From the Collective Type Screen, select NEXT at the bottom right of the screen. This will access the Heli image screen. Scroll to the icon and click once. Roll the scroll wheel left or right for optional icons.
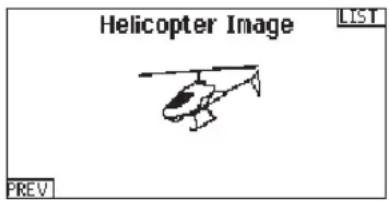
Swash Type
The Swash Type menu option assigns the swash type for your particular helicopter model.
Select the Swash Type before completing any programming in the Function List. The Swash Type will affect menu options in the Function List.
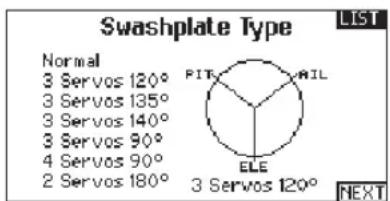
pie
Swashplate Type LIST | Category | Percentage (%) | |---|---| | Normal | 3 Servos 120° | | 3 Servos | 3 Servos 135° | | 3 Servos | 3 Servos 140° | | 3 Servos | 3 Servos 90° | | 4 Servos | 4 Servos 90° | | 2 Servos | 2 Servos 180° | | PIT | 3 Servos 120° | | RAIL | 3 Servos 120° | | ELE | 3 Servos 120° | | NEXT | 3 Servos 120° |Collective Type
The collective type is used to turn on “Pull” collective for reversed collective. Available settings are Normal and Reverse. Press NEXT from the Swashplate Type screen to access the Collective Type screen. The Collective Type allows the throttle/pitch stick to operate in reverse and ensures trims, curves and all other functions that are to work in reverse function properly.
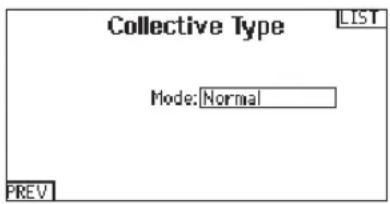
Pitch Curve
This function supports adjustment of collective pitch in 5 flight modes.
To adjust the Pitch Curve:
- Select the Pitch Curve you wish to edit (N, 1 or 2).
- Scroll right to select the points on the curve and edit the respective values.
- Press the BACK button to save the Pitch Curves and return to the Function List.
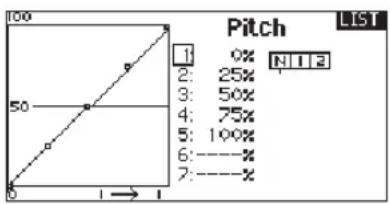
line
| Pitch | Percentage | |-------|----------| | 1 | 0% | | 2 | 25% | | 3 | 50% | | 4 | 75% | | 5 | 100% | | 6 | - | | 7 | - |HELI (HELICOPTER)
Swashplate
The Swashplate menu option enables you to adjust the following:
- Swashplate Mix
- Exponential
E-Ring - Elevator Compensation
Use positive or negative Swashplate mix values as needed for correct direction response of the helicopter.
Before making adjustments to the Swashplate mix, make sure the throttle/collective pitch input moves the entire swashplate up or down. If the servos are not moving in the same direction, reverse them as necessary in the Servo Setup menu option.
When the entire swashplate moves up or down:
- Adjust the mix value for the Aileron and Elevator channels. If the servos do not move in the correct direction, change the direction of the mix—for example, a positive value instead of a negative value.
- Adjust the mix value for the Pitch. If the swashplate does not move in the correct direction, change the direction of the value (negative instead of positive).
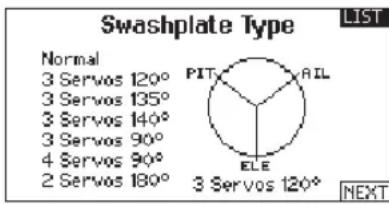
pie
Swashplate Type LIST | Category | Value | |---|---| | Normal | 3 Servos 120° | | 3 Servos | 3 Servos 135° | | 3 Servos | 3 Servos 140° | | 3 Servos | 3 Servos 90° | | 4 Servos | 4 Servos 90° | | 2 Servos | 2 Servos 180° | | PIT | 3 Servos 120° | | RIL | 3 Servos 120° | | ELE | 3 Servos 120° | | NEXT | (Not labeled) |Always enable Expo when using a standard rotating-arm servo. The Expo delivers linear movement of the swashplate from a standard rotary servo. When Expo is inhibited, the arm on a rotary servo moves on a curved path with decreased swashplate movement at the extremes of the servo arm travel.
NOTICE: Do not enable Expo when using a linear servo.
Electronic E-Ring
This feature prevents over driving servos by limiting servo travel if the sum of your cyclic and pitch inputs exceeds servo limits.
Gyro
The Gyro menu option enables you to assign a gyro gain value to an independent switch or a Flight Mode. Assign the receiver channel connected to the gyro, then assign the switch for gyro options. You can also assign values to available switch positions (from 1 to 4 rates are available, depending on the switch assigned). Make sure the gyro operates correctly and compensates in the correct direction.
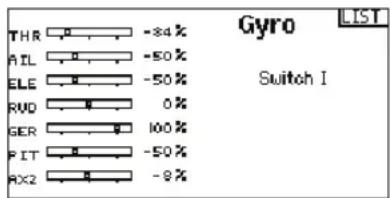
Tail Curve
The Tail Curve function mixes tail rotor input with the throttle/collective function to counter torque from the main rotor blades when using a non-heading hold (tail lock) gyro or when using rate mode on a gyro. See Pitch Curve for more information on programming curves.
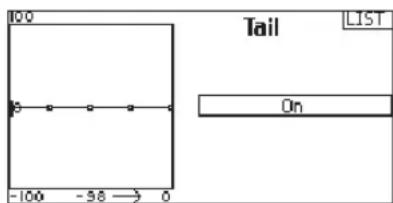
Mixing
Cyclic to Throttle
Cyclic to Throttle mix prevents rpm loss when aileron, elevator or rudder inputs are given. This mix advances the throttle position with cyclic or rudder control to maintain rpm. At full throttle, Cyclic to Throttle mixing prevents the throttle from over driving the servo.
IMPORTANT: Do not use Cyclic to Throttle mix when using a governor.
To verify that the Cyclic to Throttle mix is working properly and in the correct direction, move the flight mode switch to one of the active positions. Move the programmed cyclic or rudder channel, noting the throttle position. The throttle position should increase.
If the throttle decreases, then the opposite value (positive vs. negative) is needed.
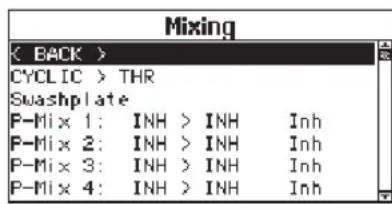
Swashplate
The Swashplate Mix typically corrects swashplate timing issues by mixing Aileron to Elevator and Elevator to Aileron. When adjusted correctly, the Swashplate causes the helicopter to roll and pitch accurately with minimal interaction.
SAIL (SAILPLANE)
Sailplane Model Type
NOTICE: Refer to your sailplane manual for recommended control throws.

CAUTION: Always do a Control Test of your model with the transmitter after programming to make sure your model responds as desired.
Sailplane Type
Use the Sailplane Type Screen to select wing and tail types to match your sailplane model. Diagrams and setup names show on the transmitter screen to show the available setups.
Refer to spektrumrc.com for more information about new DX8 AirWare updates to support these options.
Wing
• 1 Servo
• 2 Aileron*
• 2 Aileron 1 Flap*
• 2 Aileron 2 Flap*
Normal
• V-Tail A**
• V-Tail B**
- Inhibit
- Assign to a
Switch (optional)
Tail
Motor
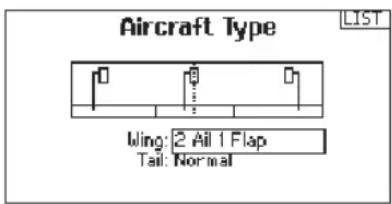
* Selection of multiple ailerons activates the Differential menu option.
** "V-Tail A" and "V-Tail B" function as internal servo reversing. If V-Tail A does not work correctly with your aircraft, try V-Tail B.
Sailplane Icon
In the Sailplane Type Screen, select NEXT at the bottom right of the screen. This will access the Sailplane Image screen. Click once on the image and roll the scroll wheel left or right to for optional images.
Camber Preset
Camber Preset is only available when 2 aileron wing type is selected in Sailplane Type. The Camber Preset function enables you to program the ailerons, flaps, wing tips and elevator for a specific position in each Flight Mode.
If flight modes are not active, only one preset position is available and it is always active.
The Camber Preset Speed enables the control surfaces to transition over a period of time, up to 30 seconds, when you change flight modes.
Move the flight mode switch to the desired position to change the Camber Preset values.
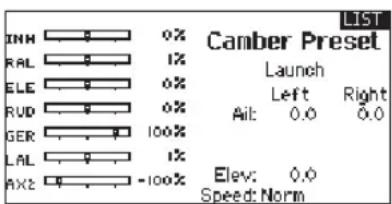
Camber System
Camber System is only available when 2 aileron wing type is selected in Sailplane Type. The Camber System allows in-flight camber adjustment and is also used as the braking system, often referred to as Crow or Butterfly. The Camber System enables you to assign the Camber System to a different switch in each flight mode.
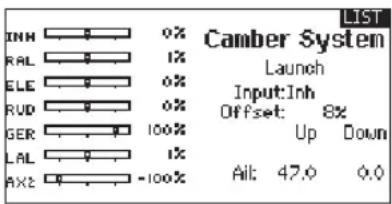
SAIL (SAILPLANE)
SAIL Mixing
For each of these mixes, you can program each flight mode with different mix values or at 0% if no mix is desired for that specific flight mode. Programming values include independent control of the direction and amount a slave surface moves in relationship to the master surface.
Aileron to Rudder
The Aileron to Rudder mix is commonly used for coordinated turns. When active, as aileron is applied the rudder moves in the same direction as the turn (right aileron input results in right rudder output). If you assign the flight mode to a switch, a Sub Switch option allows you to assign an additional switch to activate up to 3 Aileron to Rudder mixes for that flight mode.
Aileron to Flap
The Aileron to Flap mix allows the entire trailing edge of the wing (aileron and flap) to operate as ailerons. When active, as aileron is applied the flaps also move. Always program the flaps to move in the same direction as the turn (so that right aileron is equivalent to flaps moving as right ailerons).
Elevator to Flap
Elevator to Flap mix creates additional lift, allowing a tighter turn. The entire trailing edge of the wing (aileron and flap) operates as flaps (camber increase) when you apply elevator. An offset is provided, which is typically used for Snap Flaps. With Snap Flap, no Elevator to Flap mix occurs until the offset value is reached. Typically, this offset is at 70% up elevator so that beyond 70% the down flap mix comes in, providing additional lift for more aggressive turning (for tight thermals or racing turns).
Flap to Elevator
Flap to Elevator mix prevents pitch up tendency that occurs when you apply Crow or Butterfly. This mix is typically used only with the Camber System. The Flap to Elevator mix operates as a curve so that the elevator moves down the most during the first 20% of flap deployment, decreases over the next 40%, then remains the same from 60 to 100% of flap travel.
For sailplanes with ailerons/tips/flaps, make sure an appropriate Sailplane Type is selected so that tips appear in the transmitter as RAIL and LAIL. Decrease or increase travel on the tip ailerons by creating an AIL > RAIL mix.
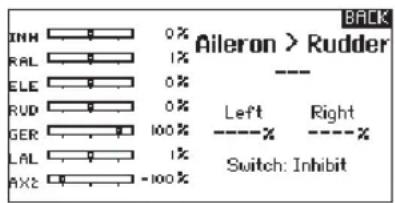
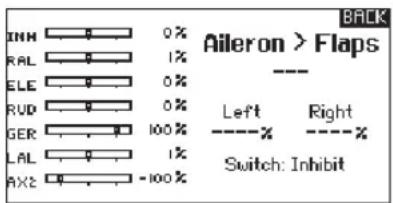
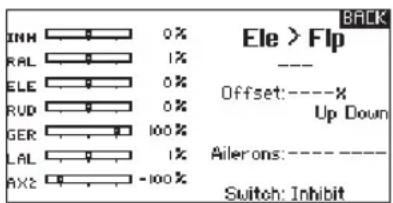
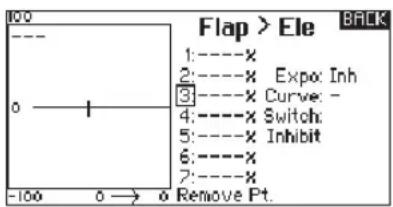
V-Tail Differential
The V-Tail Differential screen enables you to increase or decrease the amount of differential between control surface throws.
Positive Differential values decrease the amount of "down" travel without affecting the "up" travel on the opposite control surface. Negative Differential values decrease the amount of "up" travel without affecting the amount of "down" travel on the opposite control surface.
The V-Tail Differential menu option only appears when V-Tail A or V-Tail B is active in Aircraft Type.
To adjust the V-Tail Differential:
- Scroll to Switch and press the scroll wheel. Scroll right to select On (Differential is always on) or assign the differential to a switch position.
- Press the scroll wheel a second time to save the selection.
- Scroll to Diff: and press the scroll wheel once to change the value.
- Press the scroll wheel again to save the selection.
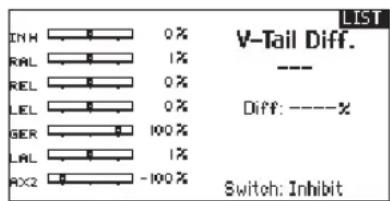
MULTI (MULTIROTOR)

Multirotor Model Type
NOTICE: Refer to your multirotor manual for programming recommendations.

CAUTION: Always do a Control Test of your model with the transmitter after programming to make sure your model responds as desired.
The Aircraft Options menu allows you to select a camera gimbal axis. Select None, 1-Axis, 2-Axis or 3-Axis from the Camera Options box.
The model icon can be changed by selecting the icon and scrolling left or right to select.
Multirotor Image
In the Aircraft Options Screen, roll to the image. Click once on the image and roll the roller left or right for optional images.

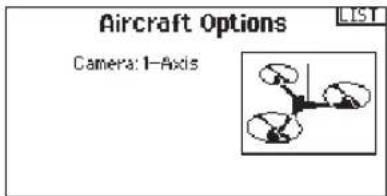
F-Mode Setup
By default switch B is assigned 3 Flight Modes. You can assign up to five flight modes using any combination of up to two switches.
Channel Assign
Scroll and Select Channel to assign channel inputs and outputs for each Flight Mode. Each channel can be assigned any switch on the transmitter including but not limited to trim switches, gimbals and the Clear/Back buttons.
Example: Assign Flight Mode 1 to be your primary flight mode where your gimbals control primary flight axis. Switching to Flight Mode 2, you can have the gimbals control the camera axis and the trim buttons control primary flight axis.
Tip: You can also access the Channel Assign from the Channel Assign Menu in System Setup.
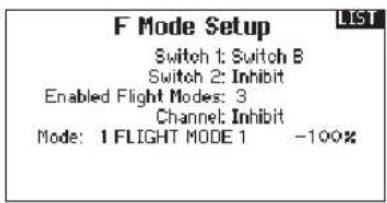

Trim Setup
By default Trims are setup for F Mode.
F Mode trim type enables you to save trim values for individual flight modes if you find, for example, the aircraft requires Roll trim in Flight Mode 1 but not in Flight Mode 2.
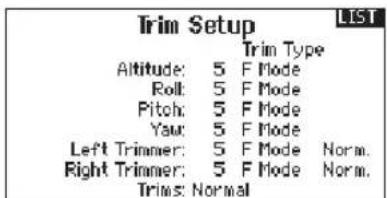
MULTI (MULTIROTOR)
D/R & Exponential
Dual Rates and Exponential are available on the PIT, ROL and YAW channels.
To adjust the Dual Rate and Exponential:
- Scroll to the channel and press the scroll wheel once. Scroll left or right to select the channel you wish to change and press the scroll wheel again to save the selection.
- Scroll to Switch and press the scroll wheel to select. Move the switch you want to assign to D/R.
- Scroll to dual rate and press the scroll wheel. Scroll left or right to change the value and press the scroll wheel again to save the selection.
Exponential affects control response sensitivity around center but has no affect on overall travel. Positive exponential decreases the sensitivity around the center of gimbal movement.
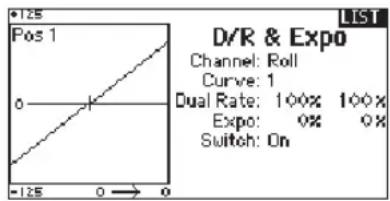
Motor Cut
The Motor Cut menu option enables you to assign a switch position to stop the motor. Motor Cut activates regardless of Flight Mode.
When you activate Motor Cut, the ALT channel moves to the pre-programmed position (normally Off).
You may need to use a negative value to move the ALT channel to the off position.

CAUTION: Always test the model after making adjustments to make sure the model responds to controls sired.
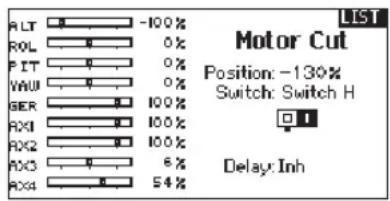
Motor Curve
You can use the Motor Curve menu option to optimize the throttle response. A maximum of 7 points are available on the throttle curve.
To add points to a Motor Curve:
- Move the throttle stick to the position where you wish to add the new point.
- Scroll to Add Pt. and press the scroll wheel to add the point.
To remove points from a Motor Curve:
- Move the Motor stick until the cursor is near the point you wish to remove.
- Scroll to Remove Pt. and press the scroll wheel once to remove the point.
If you program multiple throttle curves and you wish to edit one of the curves, that curve must be active in the Motor Curve screen before you can make any changes.
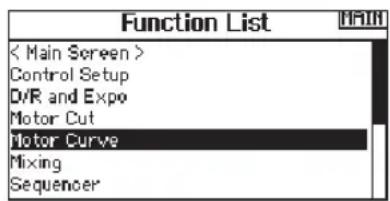
PHYSICAL TRANSMITTER ADJUSTMENTS
TRANSMITTER MODE CONVERSION
You can change transmitter modes among Modes 1, 2, 3 and 4. This conversion requires both a programming and a mechanical change.
Programming Conversion
- Access the System Settings menu from the Setup List and select the desired Mode. If you are changing between Modes 2/4 or 1/3, you can STOP after Step 1.
- Exit the System Settings menu to save the selection.
- Power off the transmitter and remove the transmitter battery pack.
After you change the transmitter Mode in the Setup List, you will need to make mechanical changes to the transmitter gimbals.
Mechanical Conversion

CAUTION: Always power off the transmitter, disconnect and remove the battery before adjusting stick tension or friction straps. Not doing so could result in property damage or injury.
Mechanical conversion is required to change between Modes 1 and 2 or between Modes 3 and 4. The mechanical conversion consists of the following steps:
- Change the Throttle Ratchet
- Adjust the Elevator Centering Screw
- Move the Throttle Limit Wedges
Changing the Throttle Ratchet
- Disconnect and remove the battery from the transmitter and set aside.
- Remove the eight Phillips head screws that secure the rear transmitter case half.
- Put the transmitter face down on a piece of foam or a towel and remove the rear case.

CAUTION: Use care to not pull or disconnect any of the wires attached to the back transmitter half.
- Locate the silver throttle friction straps on both gimbals. One strap engages a serrated section on the gimbal for a ratcheted throttle, while the other strap engages the smooth section on the gimbal.
- To change the throttle ratchet, loosen the throttle strap so it does not touch the throttle gimbal. Tighten the opposite throttle strap to engage the desired throttle ratchet.
If you only need to adjust the throttle friction, see the Adjust Throttle Friction Straps section.
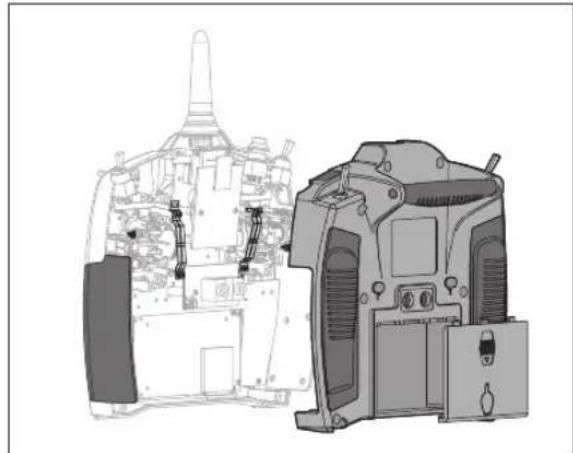
natural_image
Technical line drawing of a mechanical device with internal components and housing (no text or symbols)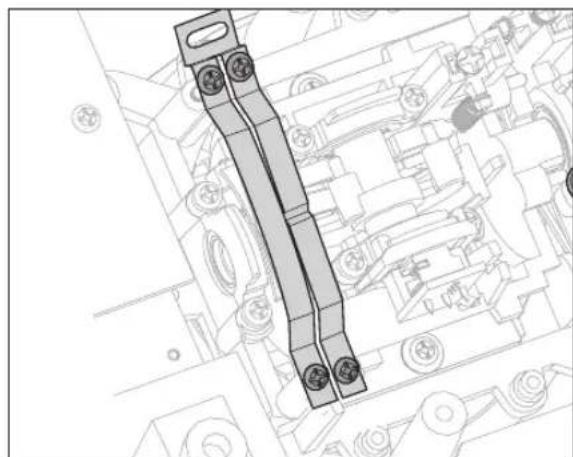
natural_image
Technical line drawing of a mechanical assembly with gears and shafts (no text or symbols)PHYSICAL TRANSMITTER ADJUSTMENTS
Adjusting the Elevator Centering Screw
When changing between Modes 1 and 2, or between Modes 3 and 4, you must adjust the elevator centering screw.
- Hold the Elevator or Throttle stick in the full up or full down position when you are adjusting the elevator centering screw. Holding the gimbal stick reduces the load on the elevator centering mechanism and makes it easier to adjust the centering screw.
- Locate the gimbal where the elevator centering spring is engaged. Use a Phillips screwdriver to tighten the elevator centering screw. Tightening the screw will disengage the centering spring.
- Using a Phillips screwdriver, loosen the opposite elevator centering screw until the lever engages.
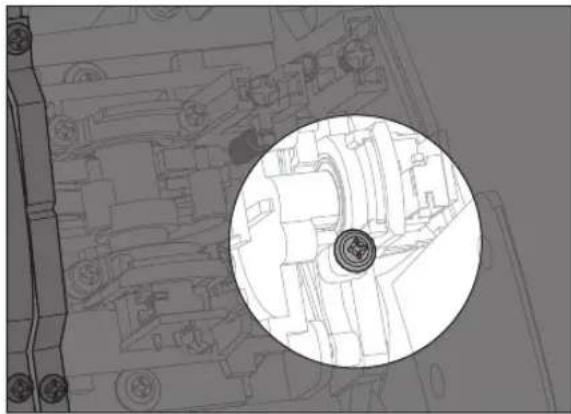
natural_image
Technical line drawing of a mechanical assembly with a circular inset showing a central component (no text or symbols)Moving the Throttle Limiting Wedges
Throttle limiting wedges are used to limit the maximum throttle travel. When changing between Modes 1 and 2, or between Modes 3 and 4, you must move the throttle limit wedges.
- Move the gimbals a small amount to remove a screw and wedge from the top and bottom of the throttle gimbal.
- Install the wedges on the other gimbal using two screws.
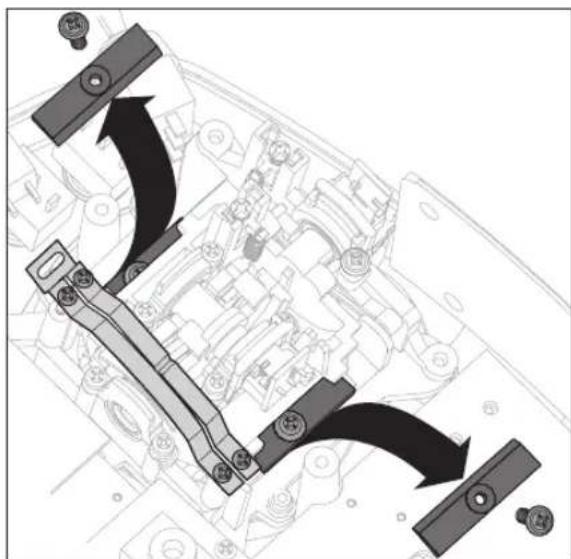
natural_image
Technical diagram of a mechanical assembly with arrows indicating motion or force direction (no text or symbols present)Re-assembling the Transmitter
- Put the rear of the transmitter case on the main case, taking care to not pinch any wires.
- Install and tighten the eight Phillips screws.
- Reinstall the battery holder or optional battery.
- Power on the transmitter. When a calibration screen shows, move the control sticks to extremes and to centers as directed to correctly calibrate controls.
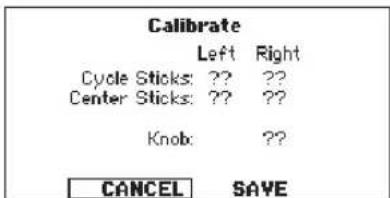
PHYSICAL TRANSMITTER ADJUSTMENTS
Adjust Stick Tension
Adjust stick tension using the screws on the stick gimbals through holes in the back of the transmitter.
- Pull up the top of the rear grip on the back of the transmitter to adjust the stick gimbal tension. Only the top of the grip must be pulled up to access the adjustment screw. The entire grip does not need to be removed.
- Turn the screws in these holes marked with a vertical or horizontal arrow a small amount using a small Phillips screwdriver.
NOTICE: Always do a test of stick tension while turning these screws to ensure stick tension is not too loose or too tight. Tightening a screw too much can damage a spring. Loosening a screw too much can let a spring fall off and cause short-circuit in the transmitter.

CAUTION: Always power off the transmitter, disconnect and remove the battery before adjusting stick tension or friction. Not doing so could result in property damage or injury.
Adjust Throttle Friction Straps
To adjust Throttle Friction:
- Remove rubber plugs from holes on the back of the transmitter.
- Use a small Phillips screwdriver to tighten or loosen the screw for the friction strip.
- Reinstall the plug after completing the adjustment as desired.

CAUTION: Always power off the transmitter, disconnect and remove the battery before adjusting stick tension or friction. Not doing so could result in property damage or injury.
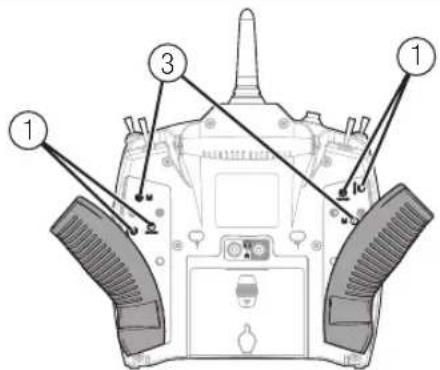
| Function | |
| 1 | Gimbal spring access |
| 2 | Throttle friction strip tension cover |
| 3 | Mode change access |
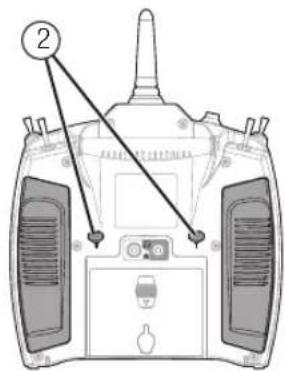
Adjusting the Throttle Ratchet Strap
The user can loosen the friction strap screw and tighten the ratchet screw if desired by pulling the top of the grip through the throttle adjustment opening.
No installation required, no need to remove the case back. You can adjust the Throttle Ratchet Strap to use either a smooth throttle or ratchet throttle.
To adjust the Throttle Ratchet Strap:
- Remove the rubber plugs from the holes on the back of the transmitter.
- Using a #0 Phillips screwdriver, loosen or tighten the Throttle Ratchet Strap screw to adjust the ratchet to your liking.
- Re-install the plug.
Control Stick Length Adjustment
To adjust the Control Stick Length:
- Using a 2mm Allen wrench, turn the setscrew in the stick counterclockwise to loosen it.
- Make the stick shorter by turning it clockwise or longer by turning it counterclockwise.
- After adjustment of stick length, tighten the setscrew.
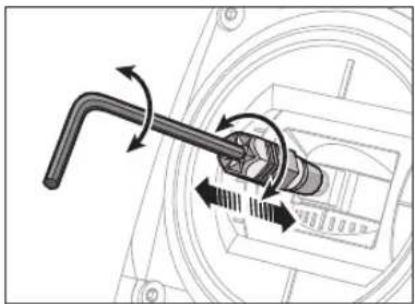
natural_image
Mechanical diagram showing a pipe fitting with rotational arrows indicating motion (no text or symbols)TROUBLESHOOTING GUIDE
| Problem Possible Cause Solution | ||
| Aircraft will not Bind (during binding) to transmitter | Transmitter too near aircraft during binding process | Move powered transmitter a few feet from aircraft, disconnect and reconnect flight battery to aircraft |
| Aircraft or transmitter is too close to large metal object | Move the aircraft or transmitter away from the large metal object | |
| The bind plug is not installed correctly in the bind port | Install bind plug in bind port and bind the aircraft to the transmitter | |
| Flight battery/Transmitter battery charge is too low | Replace/recharge batteries | |
| Transmitter is a DX8 EU version and receiver is DSM2 | The DX8 EU version is not compatible with DSM2 receivers | |
| Aircraft will not link (after binding) to transmitter | Transmitter too near aircraft during linking process | Move powered transmitter a few feet from aircraft, disconnect and reconnect flight battery to aircraft |
| Aircraft or transmitter is too close to large metal object | Move the aircraft or transmitter away from the large metal object | |
| Bind plug left installed in bind port | Rebind transmitter to the aircraft and remove the bind plug before cycling power | |
| Aircraft bound to different model memory (ModelMatchTM radios only) | Select correct model memory on transmitter | |
| Flight battery/Transmitter battery charge is too low | Replace/recharge batteries | |
| Transmitter may have been bound using different DSM protocol | Bind aircraft to transmitter | |
| Damaged remote receiver or receiver extension. | Required remote receiver is not connected | |
| The receiver goes into failsafe mode a short distance away from the transmitter | Check the receiver antenna to be sure it is not cut or damaged | Replace or contact Horizon Product Support |
| Main and remote receivers too near each other | Install main and remote receivers at least 2 inches (51mm) apart | |
| Receiver quits responding during operation | Low battery voltage Completely recharge flight battery | |
| Loose or damaged wires or connectors between battery and receiver | Do a check of the wires and connection between battery and receiver. Repair or replace wires and/or connectors | |
| Receiver loses its bind | Bind button pressed before transmitter powered on | Rebind by performing binding instructions |
| Receiver slowly blinking at landing (DSM2 Only) | Loss of power to the receiver during flight Check battery voltage | |
| System powered on and connected, then receiver powered off without powering off transmitter | Power off transmitter when receiver is powered off | |
| Flight log registers undesirable number of fades, losses or holds or aircraft responds irregularly to controls | Poor signal reception | Reposition remote receivers for improved RF signal path diversity |
| Electronic feedback | Check for and stop feedback from servos or motor systems to the ESC or receiver | |
| Low power | Check aircraft power draw and increase battery power or decrease power demand by installed systems. Ensure all aircraft batteries are fully charged. Ensure the installed BEC for an electric aircraft is adequate for the power demand | |
1-YEAR LIMITED WARRANTY
What this Warranty Covers
Horizon Hobby, LLC, (Horizon) warrants to the original purchaser that the product purchased (the "Product") will be free from defects in materials and workmanship for a period of 1 year from the date of purchase.
What is Not Covered
This warranty is not transferable and does not cover (i) cosmetic damage, (ii) damage due to acts of God, accident, misuse, abuse, negligence, commercial use, or due to improper use, installation, operation or maintenance, (iii) modification of or to any part of the Product, (iv) attempted service by anyone other than a Horizon Hobby authorized service center, (v) Product not purchased from an authorized Horizon dealer, (vi) Product not compliant with applicable technical regulations or (vii) use that violates any applicable laws, rules, or regulations.
OTHER THAN THE EXPRESS WARRANTY ABOVE, HORIZON MAKES NO OTHER WARRANTY OR REPRESENTATION, AND HEREBY DISCLAIMS ANY AND ALL IMPLIED WARRANTIES, INCLUDING, WITHOUT LIMITATION, THE IMPLIED WARRANTIES OF NON-INFRINGEMENT, MERCHANTABILITY AND FITNESS FOR A PARTICULAR PURPOSE. THE PURCHASER ACKNOWLEDGES THAT THEY ALONE HAVE DETERMINED THAT THE PRODUCT WILL SUITABLY MEET THE REQUIREMENTS OF THE PURCHASER'S INTENDED USE.
Purchaser's Remedy
Horizon's sole obligation and purchaser's sole and exclusive remedy shall be that Horizon will, at its option, either (i) service, or (ii) replace, any Product determined by Horizon to be defective. Horizon reserves the right to inspect any and all Product(s) involved in a warranty claim. Service or replacement decisions are at the sole discretion of Horizon. Proof of purchase is required for all warranty claims. SERVICE OR REPLACEMENT AS PROVIDED UNDER THIS WARRANTY IS THE PURCHASER'S SOLE AND EXCLUSIVE REMEDY.
Limitation of Liability
HORIZON SHALL NOT BE LIABLE FOR SPECIAL, INDIRECT, INCIDENTAL OR CONSEQUENTIAL DAMAGES, LOSS OF PROFITS OR PRODUCTION OR COMMERCIAL LOSS IN ANY WAY, REGARDLESS OF WHETHER SUCH CLAIM IS BASED IN CONTRACT, WARRANTY, TORT, NEGLIGENCE, STRICT LIABILITY OR ANY OTHER THEORY OF LIABILITY, EVEN IF HORIZON HAS BEEN ADVISED OF THE POSSIBILITY OF SUCH DAMAGES. Further, in no event shall the liability of Horizon exceed the individual price of the Product on which liability is asserted. As Horizon has no control over use, setup, final assembly, modification or misuse, no liability shall be assumed nor accepted for any resulting damage or injury. By the act of use, setup or assembly, the user accepts all resulting liability. If you as the purchaser or user are not prepared to accept the liability associated with the use of the Product, purchaser is advised to return the Product immediately in new and unused condition to the place of purchase.
Law
These terms are governed by Illinois law (without regard to conflict of law principals). This warranty gives you specific legal rights, and you may also have other rights which vary from state to state. Horizon reserves the right to change or modify this warranty at any time without notice.
WARRANTY SERVICES
Questions, Assistance, and Services
Your local hobby store and/or place of purchase cannot provide warranty support or service. Once assembly, setup or use of the Product has been started, you must contact your local distributor or Horizon directly. This will enable Horizon to better answer your questions and service you in the event that you may need any assistance. For questions or assistance, please visit our website at www.horizonhobby.com, submit a Product Support Inquiry, or call the toll free telephone number referenced in the Warranty and Service Contact Information section to speak with a Product Support representative.
Inspection or Services
If this Product needs to be inspected or serviced and is compliant in the country you live and use the Product in, please use the Horizon Online Service Request submission process found on our website or call Horizon to obtain a Return Merchandise Authorization (RMA) number. Pack the Product securely using a shipping carton. Please note that original boxes may be included, but are not designed to withstand the rigors of shipping without additional protection. Ship via a carrier that provides tracking and insurance for lost or damaged parcels, as Horizon is not responsible for merchandise until it arrives and is accepted at our facility. An Online Service Request is available at http://www.horizonhobby.com/content/_service-center_render-service-center. If you do not have internet access, please contact Horizon Product Support to obtain a RMA number along with instructions for submitting your product for service. When calling Horizon, you will be asked to provide your complete name, street address, email address and phone number where you can be reached during business hours. When sending product into Horizon, please include your RMA number, a list of the included items, and a brief summary of the problem. A copy of your original sales receipt must be included for warranty consideration. Be sure your name, address, and RMA number are clearly written on the outside of the shipping carton.
NOTICE: Do not ship LiPo batteries to Horizon. If you have any issue with a LiPo battery, please contact the appropriate Horizon Product Support office.
Warranty Requirements
For Warranty consideration, you must include your original sales receipt verifying the proof-of-purchase date. Provided warranty conditions have been met, your Product will be serviced or replaced free of charge. Service or replacement decisions are at the sole discretion of Horizon.
Non-Warranty Service
Should your service not be covered by warranty, service will be completed and payment will be required without notification or estimate of the expense unless the expense exceeds 50% of the retail purchase cost. By submitting the item for service you are agreeing to payment of the service without notification. Service estimates are available upon request. You must include this request with your item submitted for service. Non-warranty service estimates will be billed a minimum of 12 hour of labor. In addition you will be billed for return freight. Horizon accepts money orders and cashier's checks, as well as Visa, MasterCard, American Express, and Discover cards. By submitting any item to Horizon for service, you are agreeing to Horizon's Terms and Conditions found on our website http://www.horizonhobby.com/content/_service-center_render-service-center.
ATTENTION: Horizon service is limited to Product compliant in the country of use and ownership. If received, a non-compliant Product will not be serviced. Further, the sender will be responsible for arranging return shipment of the un-serviced Product, through a carrier of the sender's choice and at the sender's expense. Horizon will hold non-compliant Product for a period of 60 days from notification, after which it will be discarded.
WARRANTY AND SERVICE CONTACT INFORMATION
Country of Purchase Horizon Hobby Contact Information Address
| United States of America | Horizon Service Center (Repairs and Repair Requests) | servicecenter.horizonhobby.com/RequestForm/ | 4105 Fieldstone RdChampaign, Illinois, 61822 USA | |
| Horizon Product Support (Product Technical Assistance) | productsupport@horizonhobby.com | |||
| 877-504-0233 | ||||
| Sales | websales@horizonhobby.com | |||
| 800-338-4639 | ||||
| United Kingdom | Service/Parts/Sales: Horizon Hobby Limited | sales@horizonhobby.co.uk | Units 1–4 , Ployters Rd, Staple TyeHarlow, Essex, CM18 7NS, United Kingdom | |
| +44 (0) 1279 641 097 | ||||
| Germany | Horizon Technischer Service service@horizonhobby.de | Christian-Junge-Straße 125337 Elmshorn, Germany | ||
| Sales: Horizon Hobby GmbH +49 (0) 4121 2655 100 | ||||
| France | Service/Parts/Sales: Horizon Hobby SAS | infofrance@horizonhobby.com | 11 Rue Georges Charpak77127 Lieusaint, France | |
| +33 (0) 1 60 18 34 90 | ||||
FCC INFORMATION
This device complies with part 15 of the FCC rules. Operation is subject to the following two conditions:
- This device may not cause harmful interference.
- This device must accept any interference received, including interference that may cause undesired operation.

CAUTION: Changes or modifications not expressly approved by the party responsible for compliance could be user's authority to operate the equipment.
This product contains a radio transmitter with wireless technology which has been tested and found to be compliant with the applicable regulations governing a radio transmitter in the 2.400GHz to 2.4835GHz frequency range.
Antenna Separation Distance
When operating your Spektrum transmitter, please be sure to maintain a separation distance of at least 5 cm between your body (excluding fingers, hands, wrists, ankles and feet) and the antenna to meet RF exposure safety requirements as determined by FCC regulations.
The following illustration shows the approximate 5 cm RF exposure area and typical hand placement when operating your Spektrum transmitter.
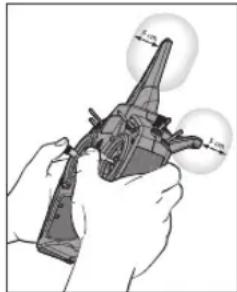
natural_image
Illustration of a hand holding a firearm with two circular gauges labeled 3.00 and 4.00 (no text or symbols on the firearm itself)IC INFORMATION
This device complies with Industry Canada licence-exempt RSS standard(s). Operation is subject to the following two conditions:
(1) this device may not cause interference, and (2) this device must accept any interference, including interference that may cause undesired operation of the device.
FAA INFORMATION
Prior to flying, contact your local or regional modeling organizations for guidance and familiarize yourself with the current local rules and FAA regulations governing model aviation in your location.
More information about model aviation can be found at www.modelaircraft.org.
The Federal Aviation Administration can be found online at www.faa.gov.
AMA NATIONAL MODEL AIRCRAFT SAFETY CODE
http://www.modelaircraft.org/files/105.PDF
COMPLIANCE INFORMATION FOR THE EUROPEAN UNION

Horizon Hobby, LLC hereby declares that this product is in compliance with the essential requirements and other relevant provisions of the R&TTE, EMC and LVD Directives.
A copy of the EU Declaration of Conformity is available online at: http://www.horizonhobby.com/content/support-render-compliance.

Instructions for disposal of WEEE by users in the European Union
This product must not be disposed of with other waste. Instead, it is the user's responsibility to dispose of their waste equipment by handing it over to a designated collections point for the recycling of waste electrical and electronic equipment. The separate collection and recycling of your waste equipment at the time of disposal will help to conserve natural resources and ensure that it is recycled in a manner that protects human health and the environment. For more information about where you can drop off your waste equipment for recycling, please contact your local city office, your household waste disposal service or where you purchased the product.

HINWEIS
natural_image
Line drawing of a multi-rotor communication device with control panels, power supply, and wiring (no text or symbols)INHALTSVERZEICHNIS
SmartSafe Failsafe 64
Hold Last Command....64
Preset Failsafe 64
Exporting the Serial Number to the SD Card....79
Finden der AirWare Software Version 79
Kalibrieren....79
D/R & Exponential 84
HUB. (HUBSCHRAUBER)....91
Heli Model Type 91
Taumelscheibentyp....91
Gas / Pitch Richtung....91
Pitch Kurve....92
Kreisel 92
Heckmischer....92
Mischer 92
MULTI (Multirotor) 95
Multirotor Model Type 95
Flugmodesetup 95
Trimeinstellung 95
natural_image
Line drawing of a portable electronic device with ventilation slots and a cable inserted (no text or symbols)Akku
SENDER FUNKTIONEN
DISPLAY
SD kARTE
*DX20, DX18SE, DX18G2, DX18G1, DX18QQ, DX9Black, DX9, DX18t, DX10t, DX7G2 und DX6G2
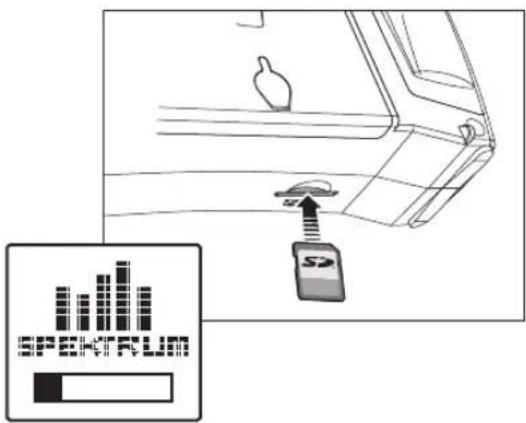
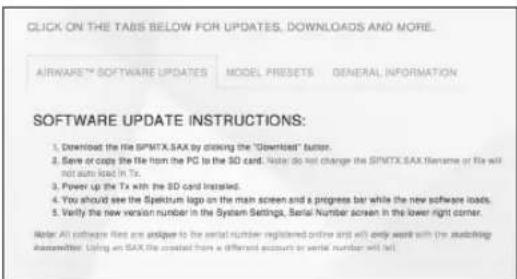
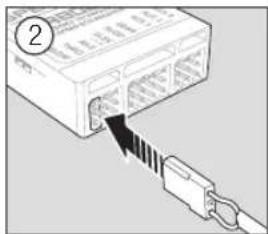
natural_image
Diagram showing a computer interface with an attached cable and a black arrow pointing to the cable (no text or symbols present)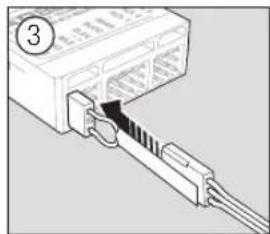
natural_image
Diagram of an Ethernet cable connector with a pin labeled '3' (no text or symbols on the diagram itself)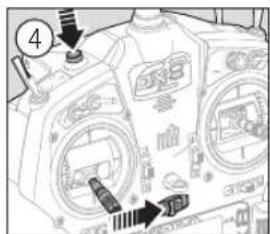
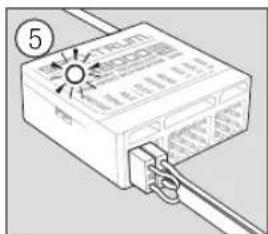
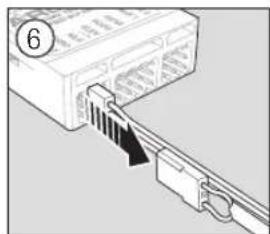
natural_image
Diagram of a computer interface showing an Ethernet cable connector inserted into a drive (no text or symbols visible)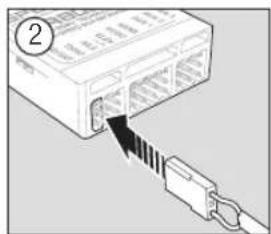
natural_image
Diagram of a computer interface with an Ethernet cable inserted, showing signal flow from the port to the cable (no text or symbols present)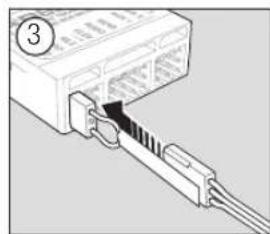
natural_image
Diagram of an electronic device with a connector inserted into a housing (no text or symbols visible)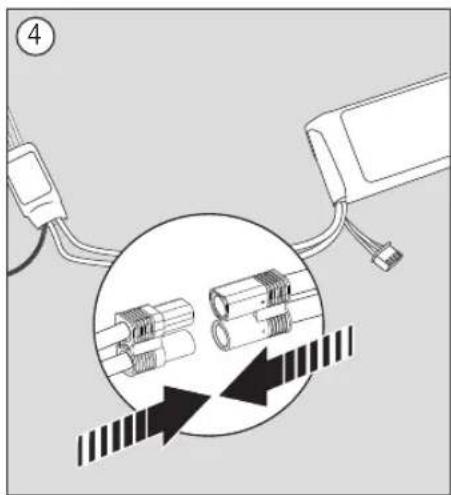
natural_image
Diagram showing cable connections with connectors and a circular diagram highlighting internal components (no text or symbols)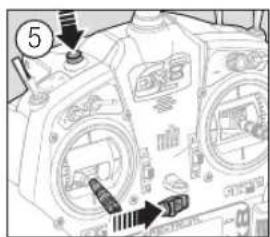

natural_image
Diagram of a device with labeled ports and wiring, no readable text or symbols present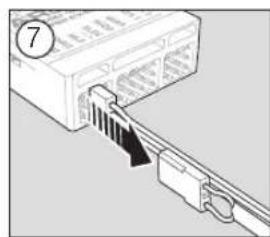
natural_image
Diagram of a computer interface showing an Ethernet cable inserted into a port, with a numbered label (7) in the corner (no text or symbols on the diagram itself)*Must be set up in a 4/5 flight mode.
SYSTEMEINSTELLUNG
You may find it helpful to export the transmitter serial number to a text file for your personal records or when you are registering the transmitter on the Spektrum Community.
▶ Laufrichtung
▶ Gas aus
Offset
Reichweitentest
natural_image
Simple line drawing of a star-shaped object with labeled points C and D (no text or symbols beyond labels)ACRO Mischer
Taumelscheibentyp
Wölbklappen
Klappensystem
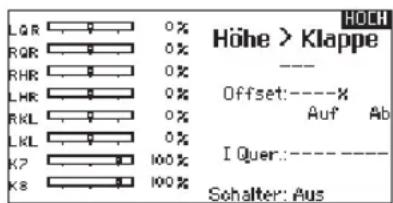
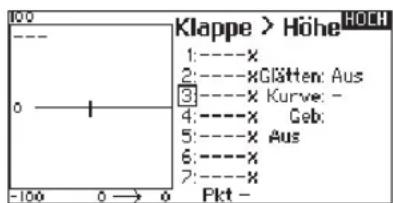
MULTI (MULTIROTOR)
Multirotor Model Type
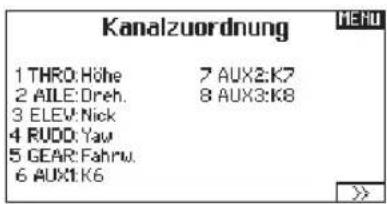
Trimeinstellung
natural_image
Technical line drawing of a mechanical device with internal components and mounting brackets (no text or symbols)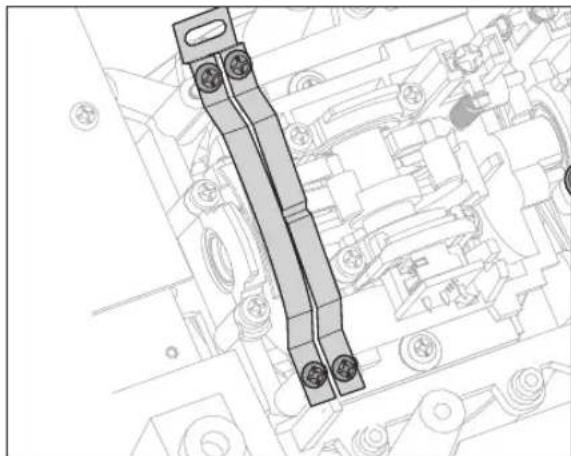
natural_image
Technical line drawing of a mechanical assembly with no visible text or symbolsnatural_image
Technical line drawing of a mechanical assembly with a circular inset showing a component detail (no text or symbols)natural_image
Mechanical assembly diagram showing motor components and directional arrows indicating motion (no text or labels)Montage des Senders
natural_image
Mechanical assembly diagram showing a pipe with directional arrows indicating motion (no text or symbols)natural_image
Line drawing of a multi-rotor RF controller with attached wiring and power supply components (no text or symbols)TABLE DES MATIÈRES
natural_image
Line drawing of a portable electronic device with ventilation grilles and a cable inserted (no text or symbols)Alarme batterie
ÉCRAN PRINCIPAL
*DX20, DX18SE, DX18G2, DX18G1, DX18QQ, DX9Black, DX9, DX18t, DX10t, DX7G2 et DX6G2
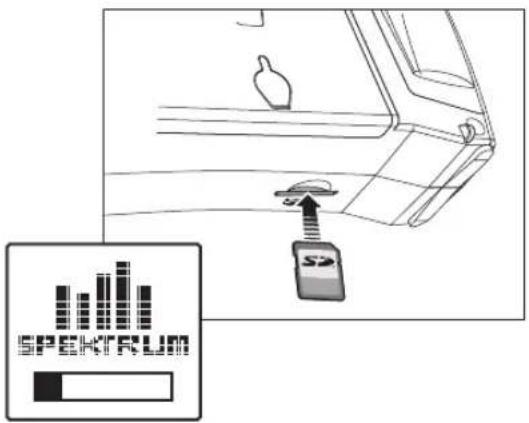
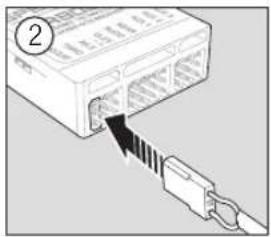
natural_image
Diagram of a computer interface with an external cable and connector (no text or symbols)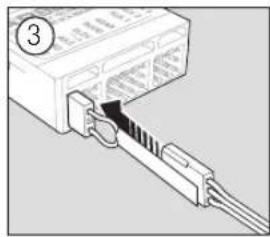
natural_image
Diagram of an Ethernet cable connector with a pin inserted, showing internal structure (no text or symbols)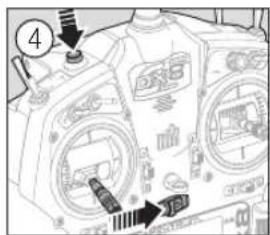
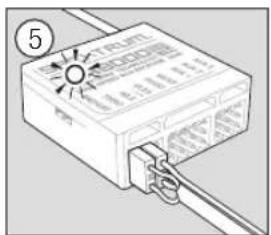
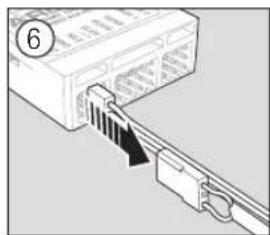
natural_image
Diagram of a computer interface showing an inserted port with a cable, no text or symbols present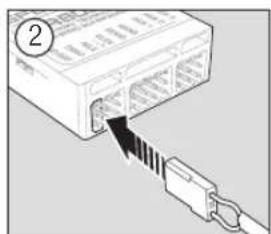
natural_image
Diagram of a computer interface with an Ethernet cable inserted, showing signal flow from the port to the cable (no text or symbols present)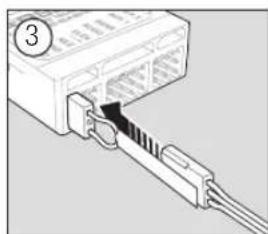
natural_image
Diagram of an Ethernet cable connector with a pin inserted, showing internal structure (no text or symbols)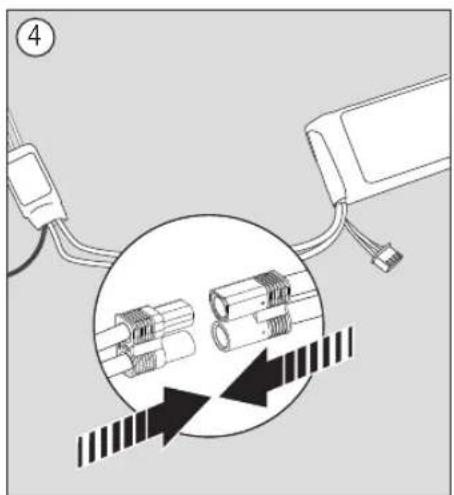
natural_image
Diagram showing two connectors connected to a circular connector with internal components, no text or symbols present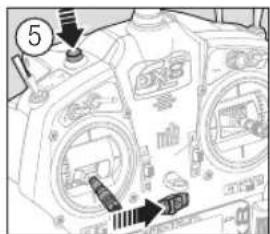
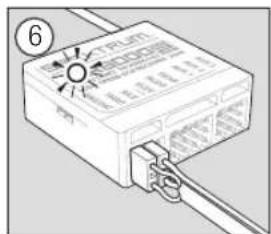
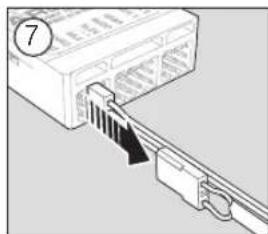
natural_image
Diagram of a computer interface showing an inserted cable or connector with a numbered label (7), no text or symbols present.Affectation/Affairage
PARAMÈTRES DU SYSTÈME
Recommended Servo Connections
natural_image
Simple line drawing of a star-shaped object with two labeled points C and D (no text or symbols beyond labels)Type de plateau
Système de courbure
MULTI (MULTIROTOR)
Type de Multi-Rotor
natural_image
Technical line drawing of a mechanical device with internal components and housing (no text or symbols)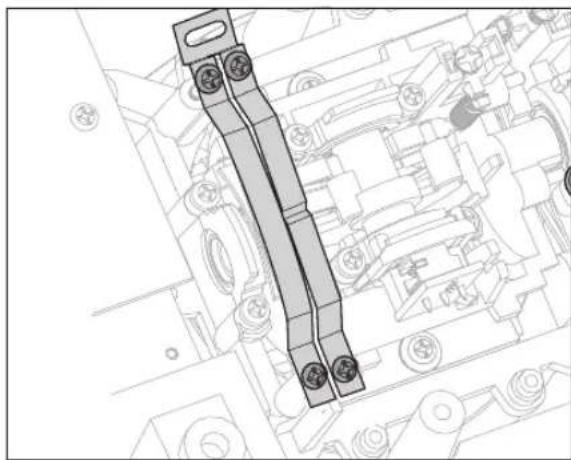
natural_image
Technical line drawing of a mechanical assembly with no visible text or symbolsnatural_image
Architectural line drawing of a building complex with circular overlay (no text or symbols)natural_image
Mechanical assembly diagram showing motor components and directional arrows indicating motion (no text or labels)natural_image
Mechanical assembly diagram showing a pipe with directional arrows indicating motion (no text or symbols)GUIDE DE DÉPANNAGE
http://www.horizonhobby.com/content/support-render-compliance.

natural_image
Line drawing of a multi-rotor RF controller with attached wiring and power supply components (no text or symbols)INDICE
Connessione (Binding)....162
natural_image
Line drawing of a portable electronic device with ventilation grilles and a cable inserted (no text or symbols)Allarme batteria
FUNZIONI DEL TRASMETTITORE
SCHERMATA PRINCIPALE
*DX20, DX18SE, DX18G2, DX18G1, DX18QQ, DX9Black, DX9, DX18t, DX10t, DX7G2 e DX6G2
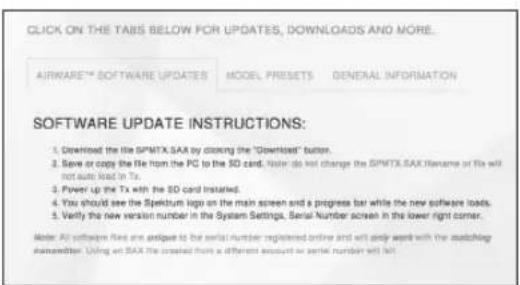
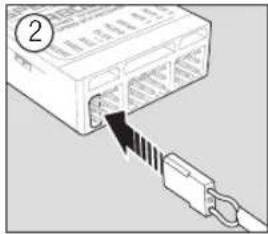
natural_image
Diagram of a computer interface with an Ethernet cable inserted, showing signal flow (no text or symbols)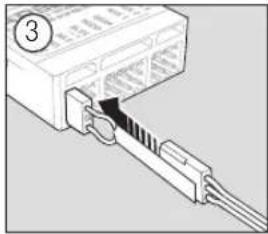
natural_image
Diagram of an electronic device showing a connector with cable and internal components (no text or symbols)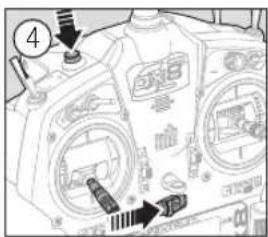
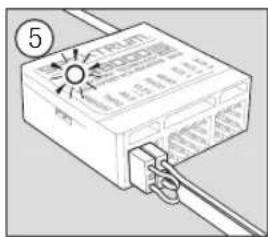
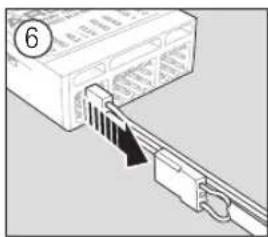
natural_image
Diagram of a computer interface showing a cable being inserted into a drive (no text or symbols visible)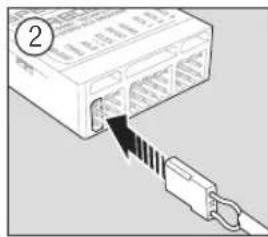
natural_image
Diagram of a computer interface with an Ethernet cable inserted, showing internal port and cable routing (no text or symbols)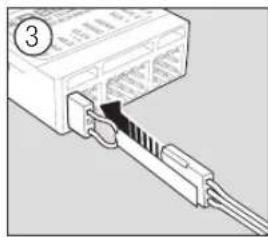
natural_image
Diagram of an Ethernet cable connector with a pin inserted, showing internal structure and wiring (no text or symbols)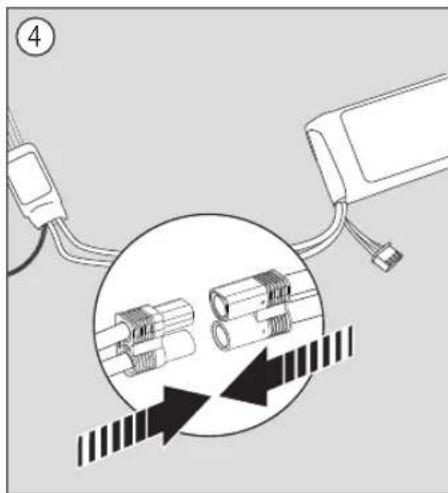
natural_image
Diagram showing cable connections and a magnified view of two connectors with directional arrows (no text or symbols)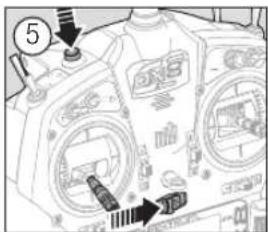
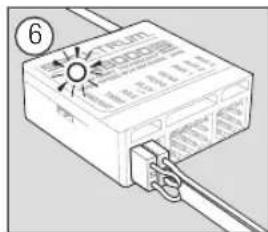
natural_image
Diagram of a computer interface with a power connector and indicator lights (no text or symbols)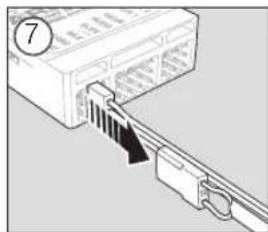
natural_image
Diagram of a computer interface showing an inserted cable or connector with a numbered label (7), no text or symbols present.
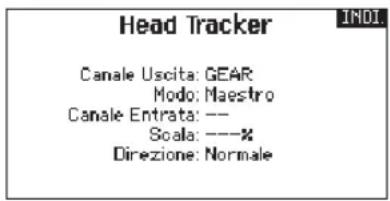
• Corsa assoluta (Abs. travel)
- Bilanciamento
▶ Inversione corse

Switch Change Report
HELI (HELICOPTER)
Piatto oscillante
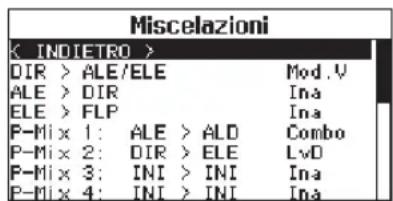
Piatto oscillante
Sistema profilo
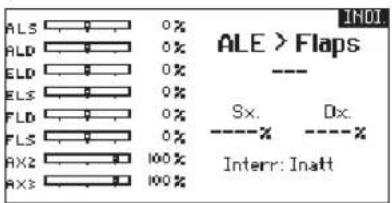
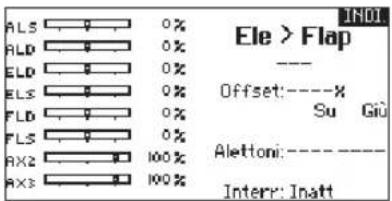
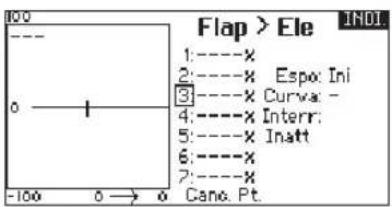
MULTI (MULTIROTOR)

Multirotor Model Type
natural_image
Technical line drawing of a mechanical device with internal components and housing (no text or symbols)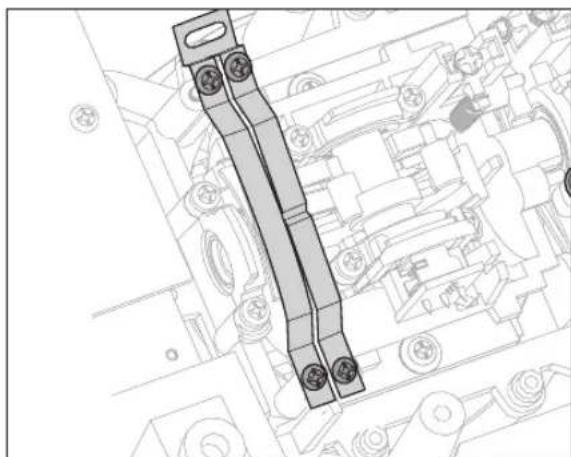
natural_image
Technical line drawing of a mechanical assembly with no visible text or symbolsREGOLAZIONI MECCANICHE SUL TRASMETTITORE
natural_image
Technical line drawing of a mechanical assembly with a circular inset showing a component detail (no text or symbols)natural_image
Technical diagram showing mechanical assembly with arrows indicating direction of movement (no text or symbols present)Funzione
natural_image
Mechanical assembly diagram showing a pipe with directional arrows indicating motion (no text or symbols)GUIDA ALLA SOLUZIONE DEI PROBLEMI
natural_image
Line drawing of a DDX 422-DC system with control panel, wiring, and power plug (no text or symbols)ÍNDICE
Charging the Lithium Ion Battery Pack....206
Failsafe SmartSafe 214
Failsafe Predefinido 214
natural_image
Line drawing of a portable electronic device with ventilation grilles and a cable inserted (no text or symbols)Alarma de batería
FUNCIONES DE LA EMISORA
PANTALLA PRINCIPAL
Consejo:
*DX20, DX18SE, DX18G2, DX18G1, DX18QQ, DX9Black, DX9, DX18t, DX10t, DX7G2 e DX6G2
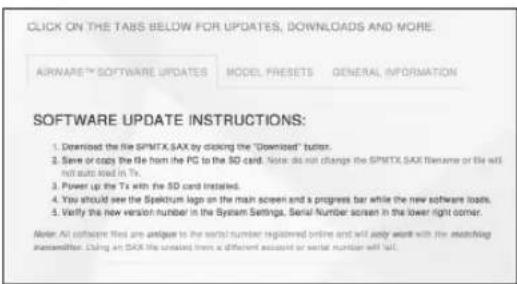
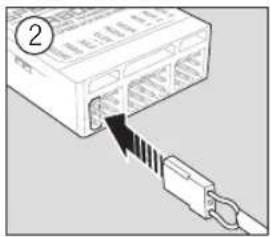
natural_image
Diagram showing a computer interface with an attached cable and connector (no text or symbols)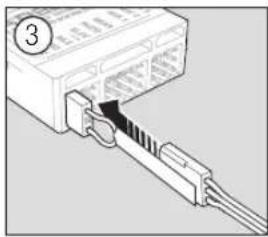
natural_image
Diagram of an electronic device showing a connector with cable and internal structure (no text or symbols)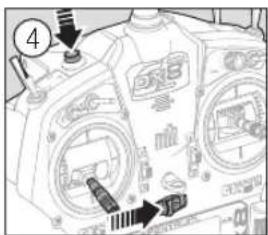
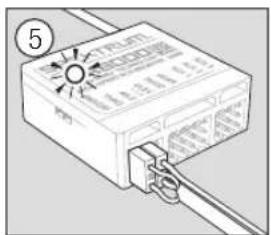
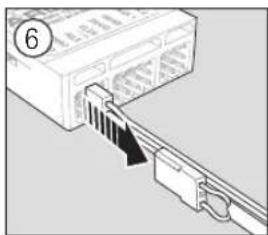
natural_image
Diagram of a computer interface showing an open port with a cable inserted, no text or symbols present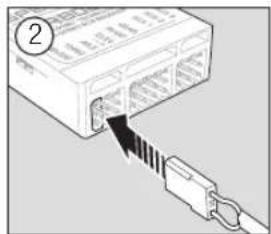
natural_image
Diagram of a computer interface with an attached cable and a connector (no text or symbols visible)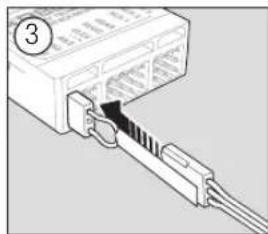
natural_image
Diagram of an Ethernet cable connector with a pin inserted, showing internal structure and cable routing (no text or symbols)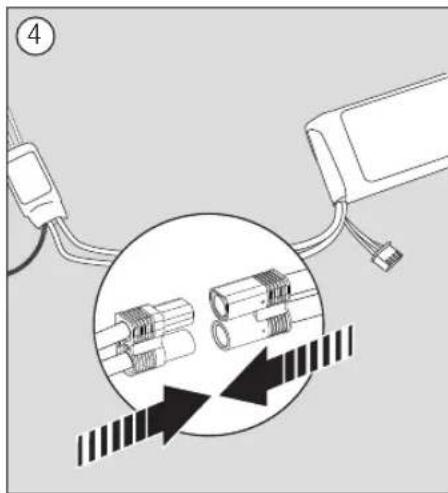
natural_image
Diagram showing cable connections with a magnified inset of two connectors (no text or symbols)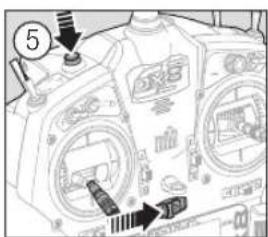
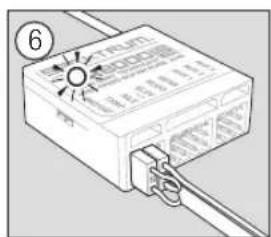
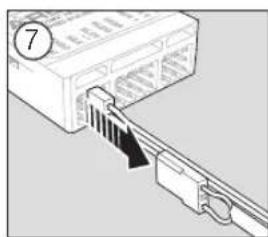
natural_image
Diagram of a computer interface showing an Ethernet cable being inserted into a port (no text or symbols present)IMPORTANT: Not all receivers support Preset Failsafe. Consult your receiver manual for more information.
*Must be set up in a 4/5 flight mode.
AJUSTES DEL SISTEMA
Frame Rate
flowchart
graph LR
    A["1: Acro"] --> B["5:00"]
    B --> C["→"]
    C --> D["Function List"]
    D --> E["<< Main Screen>>"]
    E --> F["Servo Setup"]
    E --> G["DVR and Expo"]
    E --> H["Differential"]
    E --> I["Throttle Cut"]
    E --> J["Throttle Curve"]
    E --> K["Flap System"]
Ajuste de Servo
▶ Inversor
Eje: Roll Pitch and Yaw gain are displayed to the right of each Axis.
Offset
Back Mixing applies to all related servos in a multi servo Aileron/Flapped wing or a multi servo split elevator. Creating a mix to RAL (Right Aileron) or LAL (Left Aileron) will create different enables you to use fewer mixes to achieve the desired response.
Example 1: Creating a mix AIL > RAL will move the ailerons in opposite directions, while creating a mix AIL > LAL will move the ailerons in the same direction.
Example 2: Create a mix ELE > REL will move the elevator halves together, while mixing ELE > LEL will move the elevator halves in the opposite direction (tailerons).
IMPORTANT: Be sure the right aileron is connected into the AIL port on the receiver and the left Aileron is connected into the Aux1 port on the receiver.
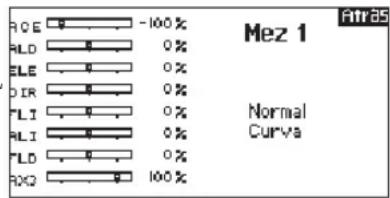
natural_image
Simple line drawing of a symmetrical object with labeled points C and D (no text or symbols beyond labels)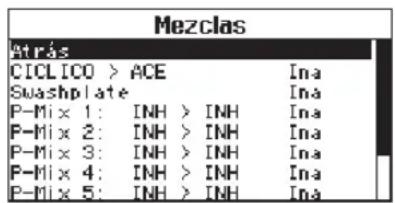
Cíclico
* Selection of multiple ailerons activates the Differential menu option.
** "V-Tail A" and "V-Tail B" function as internal servo reversing. If V-Tail A does not work correctly with your aircraft, try V-Tail B.
Imagen de aeroplano
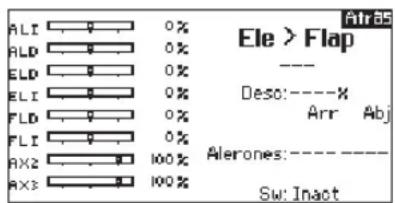
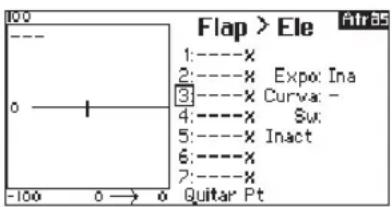
Diferencial Cola-V
MULTI (ROTORES MÚLTIPLES)
Multirotor Model Type
natural_image
Technical line drawing of a mechanical device with internal components and housing (no text or symbols)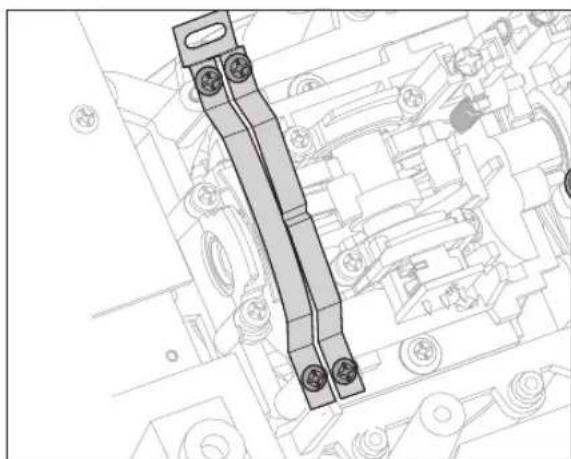
natural_image
Technical line drawing of a mechanical assembly with no visible text or symbolsAJUSTES FÍSICOS DE LA EMISORA
natural_image
Technical line drawing of a mechanical assembly with a circular inset showing a component detail (no text or symbols)natural_image
Mechanical assembly diagram showing two directional arrows pointing to components in a vehicle chassis (no text or labels)Montar la emisora
Función
natural_image
Mechanical assembly diagram showing a pipe with directional arrows indicating motion (no text or symbols)Horizon Hobby, LLC hereby declares that this product is in compliance with the essential requirements and other relevant provisions of the R&TTE, EMC and LVD Directives.
A copy of the EU Declaration of Conformity is available online at: http://www.horizonhobby.com/content/support-render-compliance.

© 2016 Horizon Hobby, LLC
DSM, DSM2, DSMX, the DSMX logo, the BNF logo, AirWare, ModelMatch, X-Plus, AS3X, SmartSafe, Hangar 9 and the Horizon Hobby logo are trademarks or registered trademarks of Horizon Hobby, LLC. The Spektrum trademark is used with permission of Bachmann Industries, Inc.
The SD Logo is a trademark of SD-3C, LLC
US 7,391,320. Other patents pending.
www.spektrumrc.com
Created 02/16 · 51450 · SPM8000-80001

- NOTICE
- Meaning of Special Language
- WARNING AGAINST COUNTERFEIT PRODUCTS
- Age Recommendation: Not for Children under 14 years. This is not a toy.
- Warranty Registration
- General Notes
- Pilot Safety
- Dx8 FEATURES
- BEFORE USING YOUR TRANSMITTER:
- BOX CONTENTS
- Support Videos:
- TABLE OF CONTENTS
- BATTERY AND CHARGING PRECAUTIONS AND WARNINGS
- Battery Alarm
- TRANSMITTER FUNCTIONS
- MAIN SCREEN
- NAVIGATION
- Auto Switch Select
- SD CARD
- Installing the SD Card
- To install the SD Card:
- Registering the Transmitter with Spektrum
- To export the serial number:
- To Upload the serial number to www.spektrumrc.com:
- Update AirWare™ Software
- Automatically Installing AirWare Software Updates
- Manually Installing AirWare Software Updates
- BINDING
- Binding Using the Receiver and Receiver Battery
- Binding Using the Receiver and ESC
- RECEIVER POWER SYSTEM REQUIREMENTS
- Recommended Power System Test Guidelines
- European Union Receiver Requirements
- QuickConnect™ Technology with Brownout Detection (DSM2 Only)
- How QuickConnect Technology with Brownout Detection Works
- PROGRAMMING FAILSAFE POSITIONS
- SmartSafe™ Failsafe
- Hold Last Command
- Preset Failsafe
- MODEL TYPE PROGRAMMING GUIDE
- SYSTEM SETUP
- Model Select
- Direct Model Access
- Model Type
- Model Name
- To add letters to a Model Name:
- To erase a character:
- Aircraft Type
- Sailplane Type
- Swash Type
- Aircraft Options
- F-Mode Setup
- Sailplane Flight Mode Setup
- Sailplane Flight Mode Table
- Spoken Flight Mode Setup
- To change the Flight Mode name:
- Spoken Flight Mode:
- To activate Spoken Flight Mode:
- Channel Assignment
- Channel Input Configuration
- Trim Setup
- Trim Step
- To change the trim step value:
- Trim Type
- Trim Assignment
- Aircraft Model Type
- Throttle Trim Type
- Trim Location
- Model Utilities
- ▶ Create New Model
- ▶ Delete Model
- ▶ Copy Model
- Use Model Copy to:
- ▶ Model Reset
- ▶ Sort Model List
- Warnings
- TELEMETRY
- ▶ Telemetry Settings
- Display
- Units
- ▶ Telemetry Auto-Configuration
- To use Telemetry Auto-Config:
- Status Reports:
- Warning Reports:
- ▶ AS3x Gain Live View (ACRO and SAIL Types Only)
- To activate AS3X Gain Live View:
- ▶ Telemetry Alarms
- Status Reports (Spoken Telemetry)
- Warning Reports (Spoken Telemetry)
- File Settings
- File Name
- Start
- Enabled
- Preflight Setup
- Frame Rate
- Modulation Mode
- Bind
- TRAINER
- ▶ Wired Trainer
- Inhibit
- Programmable Master
- Pilot Link Master
- Slave
- Dx8 Wired Trainer Operation
- Master Override
- ▶ Wireless Trainer
- Dx8 Wireless Trainer Operation
- ▶ Trainer FPV Mode
- Digital Switch Setup
- To use the Digital Switch Setup function:
- Sound Utilities
- SYSTEM SETTINGS
- ▶ User Name
- To Program a User Name:
- ▶ Contrast
- To adjust the screen contrast:
- ▶ Backlight
- The backlight time options are:
- ▶ Mode
- ▶ Battery Alarm
- To change the battery alarm:
- ▶ Selecting a Language
- ▶ Inactive Alarm
- The Inactive Alarm options are:
- To change the Inactive alarm time:
- ▶ Extra Settings
- System Sounds:
- Trim Style:
- To change the Trim style:
- Volume Controls:
- System Warnings:
- The System Warnings screen enables you to:
- ▶ Serial Number
- ▶ Exporting the Serial Number to the SD Card
- To export the transmitter serial number:
- ▶ Locating the Transmitter AirWare Software Version
- ▶ Calibrate
- Calibrating the Transmitter
- Transfer SD card
- ▶ Import Model
- Import All Models
- ▶ Export Model
- Export All Models
- ▶ Updating Spektrum Dx8 Sound Files
- To install new sound files:
- ▶ Update AirWare Software
- To install the most recent update:
- FUNCTION LIST
- Servo Setup
- ▶ Travel Adjust
- To adjust travel values:
- ▶ Sub-Trim
- ▶ Reverse
- To reverse a channel direction:
- ▶ Speed
- Balance
- ▶ D/R & Exponential
- To adjust the Dual Rate and Exponential:
- ▶ Differential (ACRO and SAIL Types only)
- To adjust the Differential:
- ▶ Throttle Cut (ACRO and HELI Types only)
- ▶ Throttle Curve (ACRO and HELI Types only)
- To add points to a Throttle Curve:
- To remove points from a Throttle Curve:
- Mixing
- Offset
- Trim
- Assigning a Mix to a Switch
- Back Mixing
- Range Test
- Range Testing the DX8
- Timer
- ▶ Timer Event and Timer Control Alerts
- Custom Voice Setup
- Switch Change Report
- Stepping Events
- Monitor
- ACRO (AIRPLANE)
- Acro Model Type
- Select wing and tail types before doing any other programming.
- Wing
- Tail
- Recommended Servo Connections
- Icon
- To change the Aircraft Icon:
- Elevon Servo Control
- Flap System
- To activate the Flap System:
- ACRO Mixing
- Rudder to Aileron/Elevator
- Aileron to Rudder
- Elevator to Flap
- HELI (HELICOPTER)
- Heli Model Type
- Collective Type
- Pitch Curve
- Swashplate
- Electronic E-Ring
- Gyro
- Tail Curve
- Cyclic to Throttle
- SAIL (SAILPLANE)
- Sailplane Model Type
- Motor
- Sailplane Icon
- Camber Preset
- Camber System
- SAIL Mixing
- Aileron to Flap
- Flap to Elevator
- V-Tail Differential
- To adjust the V-Tail Differential:
- MULTI (MULTIROTOR)
- Multirotor Model Type
- Multirotor Image
- Channel Assign
- D/R & Exponential
- Motor Cut
- Motor Curve
- To add points to a Motor Curve:
- To remove points from a Motor Curve:
- PHYSICAL TRANSMITTER ADJUSTMENTS
- TRANSMITTER MODE CONVERSION
- Programming Conversion
- Mechanical Conversion
- Changing the Throttle Ratchet
- Adjusting the Elevator Centering Screw
- Moving the Throttle Limiting Wedges
- Re-assembling the Transmitter
- Adjust Stick Tension
- Adjust Throttle Friction Straps
- Adjusting the Throttle Ratchet Strap
- Control Stick Length Adjustment
- 1-YEAR LIMITED WARRANTY
- What this Warranty Covers
- What is Not Covered
- Purchaser's Remedy
- Limitation of Liability
- Law
- WARRANTY SERVICES
- Questions, Assistance, and Services
- Inspection or Services
- NOTICE: Do not ship LiPo batteries to Horizon. If you have any issue with a LiPo battery, please contact the appropriate Horizon Product Support office.
- Warranty Requirements
- Non-Warranty Service
- WARRANTY AND SERVICE CONTACT INFORMATION
- FCC INFORMATION
- Antenna Separation Distance
- IC INFORMATION
- FAA INFORMATION
- AMA NATIONAL MODEL AIRCRAFT SAFETY CODE
- COMPLIANCE INFORMATION FOR THE EUROPEAN UNION
- Instructions for disposal of WEEE by users in the European Union
- HINWEIS
- INHALTSVERZEICHNIS
- (HUBSCHRAUBER)....91
- MULTI (Multirotor) 95
- Akku
- SENDER FUNKTIONEN
- SD kARTE
- SYSTEMEINSTELLUNG
- ▶ Laufrichtung
- ▶ Gas aus
- Reichweitentest
- ACRO Mischer
- Taumelscheibentyp
- Wölbklappen
- Klappensystem
- Trimeinstellung
- Montage des Senders
- TABLE DES MATIÈRES
- Alarme batterie
- ÉCRAN PRINCIPAL
- Affectation/Affairage
- PARAMÈTRES DU SYSTÈME
- Type de plateau
- Système de courbure
- Type de Multi-Rotor
- INDICE
- Allarme batteria
- FUNZIONI DEL TRASMETTITORE
- SCHERMATA PRINCIPALE
- ▶ Inversione corse
- Piatto oscillante
- Sistema profilo
- REGOLAZIONI MECCANICHE SUL TRASMETTITORE
- ÍNDICE
- Alarma de batería
- FUNCIONES DE LA EMISORA
- PANTALLA PRINCIPAL
- Consejo:
- AJUSTES DEL SISTEMA
- Ajuste de Servo
- ▶ Inversor
- Cíclico
- Imagen de aeroplano
- Diferencial Cola-V
- MULTI (ROTORES MÚLTIPLES)
- AJUSTES FÍSICOS DE LA EMISORA
- Montar la emisora
Brand : SPEKTRUM
Model : DX8G2
Category : Remote control toy