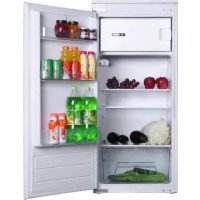
MKRV122 - Fridge M-SYSTEM - Free user manual and instructions
Find the device manual for free MKRV122 M-SYSTEM in PDF.


| Brand | M-System |
| Model | MKRV122 |
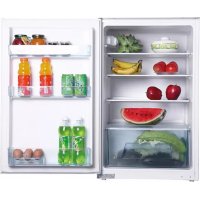
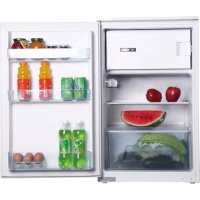
| Product Type | Combined refrigerator with freezer compartment |
| Total Capacity | 122 L (estimated) |
| Refrigerator Capacity | 100 L (estimated) |
| Freezer Capacity | 22 L (estimated) |
| Dimensions (H x W x D) | 850 x 550 x 600 mm (estimated) |
| Net Weight | 30 kg (estimated) |
| Power Supply | 220-240 V ~ 50 Hz |
| Energy Class | Not specified |
| Thermostat | Positions 1 to 7, temperature setting |
| Interior Lighting | 240 V, 10 W bulb, E14 socket |
| Refrigerator Defrosting | Automatic |
| Freezer Defrosting | Manual |
| Ice Cube Production | Ice cube tray provided |
| Door Reversal | Possible, reversible hinges |
| Shelves | Glass, adjustable |
| Vegetable Drawer | 1 drawer |
| Door Balconies | Bottle holders and egg supports |
| Minimum Rear Distance for Ventilation | 38 mm |
| Required Ventilation Opening | 200 cm² minimum |
| Cleaning | Soft cloth, no abrasive products |
| Mandatory Earthing | Yes |
| Rest Period Before First Use | 30 minutes |
Frequently Asked Questions - MKRV122 M-SYSTEM
User questions about MKRV122 M-SYSTEM
0 question about this device. Answer the ones you know or ask your own.
Ask a new question about this device
Download the instructions for your Fridge in PDF format for free! Find your manual MKRV122 - M-SYSTEM and take your electronic device back in hand. On this page are published all the documents necessary for the use of your device. MKRV122 by M-SYSTEM.
USER MANUAL MKRV122 M-SYSTEM
E info.be @ boretti.com
Belgium
Inhoud
JYJ-systeem....1
natural_image
Line drawing of an open refrigerator with shelves and door (no text or symbols)Temperatuurregelaar
flowchart
graph TD
    A["Received Apples"] --> B["Processing Box"]
    B --> C{To Receive Animal?}
    C --> D["Processed Food Item"]
    D --> E["Finished Fruit"]
    E --> F["Finished Fruit with Arrow"]
    style A fill:#f9f,stroke:#333
    style F fill:#bbf,stroke:#333
- Fruit, groenten en salades
Cautions for cold storage
* Hot food must be cooled to room temperature before storing in the refrigerator
* Dry any water droplets on the food before placing it in the refrigerator.
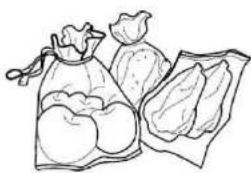
* It is recommended that food be sealed in suitable storage bags before being placed in the refrigerator; this will prevent moisture in the food from evaporating and prevent vegetables and fruit from withering or altering in flavor.
natural_image
Line drawing of various household items including a bag, leafy greens, and a tray (no text or symbols)natural_image
Technical line drawing of a precision measuring tool with a hand operating it (no text or symbols present)Instructions for food storage
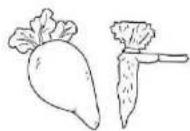
*Storage period will be extended if vegetables are placed with their roots towards the cold source.
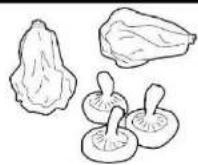
*Leaves of carrots or turnips should be removed before storage.
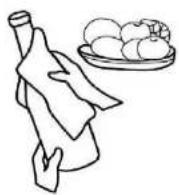
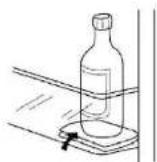
*Put a wad of tissue on the bottle holder before placing bottles on it so that later cleaning is easier
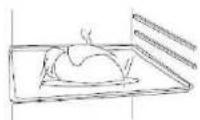
*Frozen food can be placed in the cold compartment before serving, as this will conserve energy.
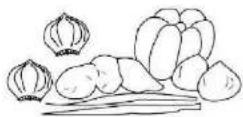
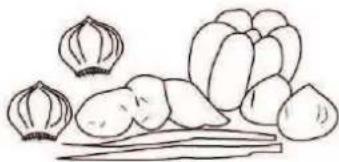
*Onions, garlic, ginger, water chestnuts and other root vegetables should not be stored in the refrigerator, as these foods are suitable for long-term storage at normal temperatures.
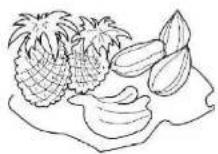
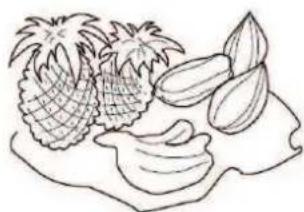
*Ripe squash, melon, papaw, bananas and pineapples should not be stored in the refrigerator. Freezing will accelerate the ripening process.
natural_image
Isometric line drawing of a rectangular tray with multiple compartments (no text or symbols)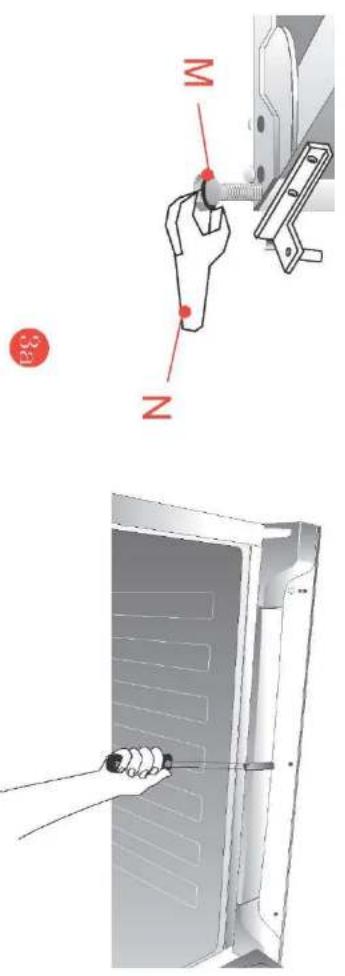

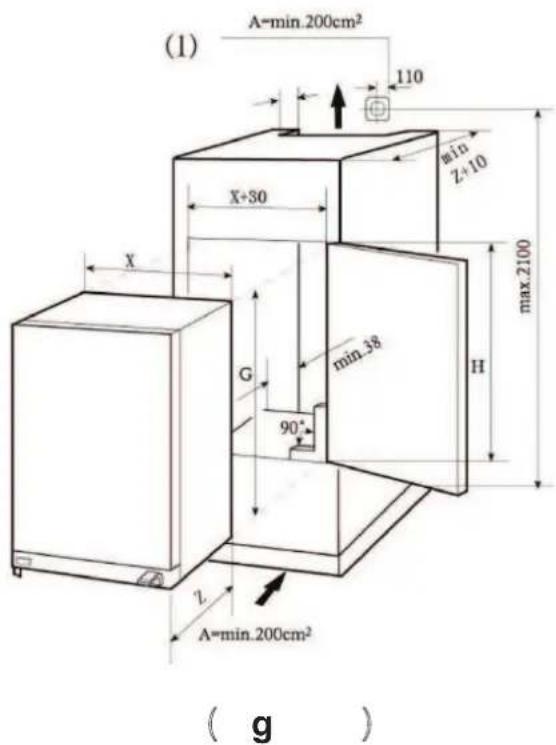
Ventilation (Figure 1)
natural_image
Technical line drawing of a mechanical device with a dial and circular component (no text or symbols)natural_image
Line drawing of an open refrigerator with shelves and doors, no text or symbols presentThermostat
flowchart
graph TD
    A["Apple"] --> B["Water Bubble"]
    B --> C["Tea Bubble"]
    C --> D["Sugar Bubble"]
    D --> E["Vegetable Fruit"]
    E --> F["Green Box"]
    F --> G["Red Arrow Down"]
    G --> H["Arrow Up Down"]
    H --> I["Arrow Left Down"]
    I --> J["Arrow Right Down"]
    J --> K["Arrow Down Right"]
    K --> L["Arrow Left Right"]
    L --> M["Arrow Up Left"]
    M --> N["Arrow Down Left"]
    N --> O["Arrow Up Right"]
natural_image
Simple line drawing of a hand holding a bottle next to a plate of round fruits (no text or symbols)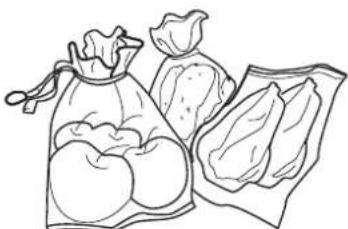
natural_image
Line drawing of various household items including a bag, apples, and leafy greens (no text or symbols)natural_image
Diagram of a hand holding a tool with a bracket, no text or symbols presentnatural_image
Line drawing of a mechanical measuring tool with no visible text or symbolsnatural_image
Line drawings of three types of vegetables: a leafy root, a whole onion, and two mushrooms (no text or labels)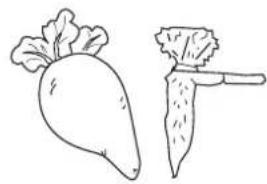
natural_image
Line drawing of two radishes: one with leafy top, the other with a knife (no text or symbols)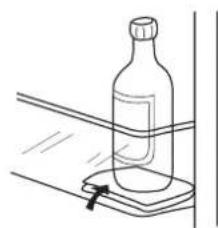
natural_image
Line drawing of a bottle on a surface with a small object attached (no text or symbols)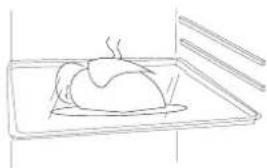
natural_image
Simple line drawing of a steaming chicken inside a tray (no text or symbols)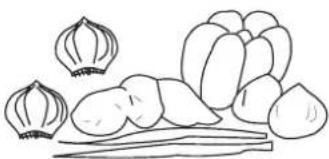
natural_image
Simple line drawing of various vegetables including bell peppers, garlic bulbs, and stems (no text or symbols)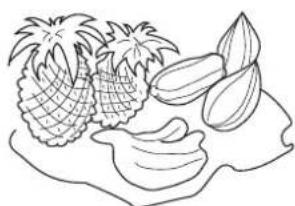
natural_image
Line drawing of pineapples and fruits on a stylized human head (no text or symbols)natural_image
Isometric line drawing of a rectangular mold or container with multiple square cavities (no text or symbols)natural_image
3D architectural diagram of a multi-level cabinet or enclosure with red directional arrows indicating flow or placement (no text or symbols present)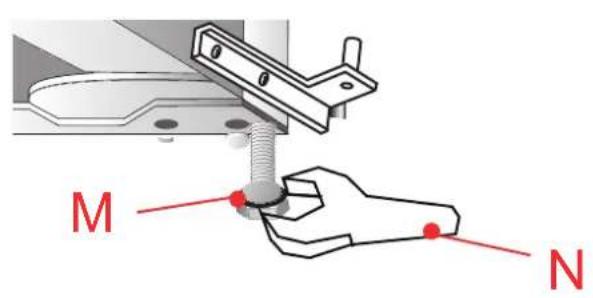


natural_image
Illustration of a hand holding a tool inside a ceiling-mounted device (no text or symbols visible)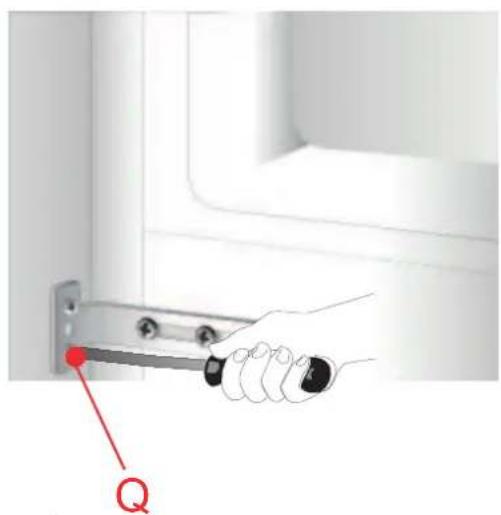

natural_image
Illustration of a hand holding a cable or wire near a door, with a red circle above indicating a point (no text or symbols present)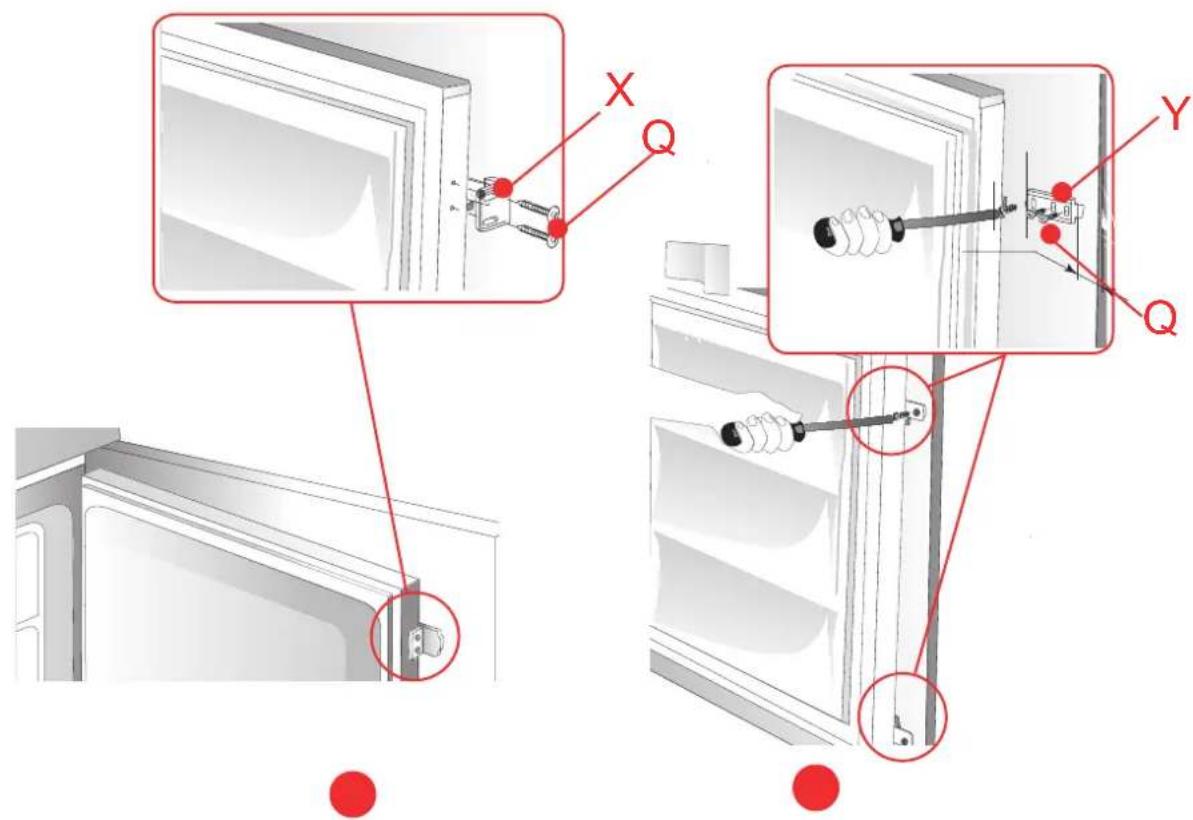
natural_image
Technical line drawing of a mechanical device with a dial and circular component (no text or symbols)Temperaturregelung
natural_image
Line drawing of an open refrigerator with shelves and door, no text or symbols presentThermostat
natural_image
Line drawing of a knife holding a knife next to a plate of round fruits (no text or symbols)natural_image
Line drawing of a set of items including a bag, apples, and a packet (no text or symbols)natural_image
Diagram of a hand holding a tool with a bracket, no text or symbols presentnatural_image
Line drawing of a mechanical measuring tool with no text or symbolsnatural_image
Line drawings of three types of vegetables: a leaf, a pear, and a cluster of apples (no text or labels)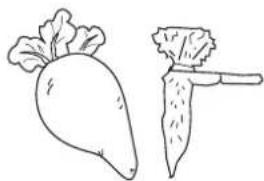
natural_image
Line drawing of two radishes: one with leafy top and one with a knife (no text or symbols)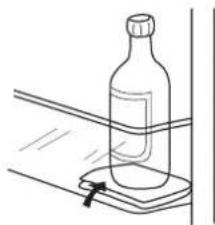
natural_image
Simple line drawing of a bottle placed on a surface with a ruler, no text or symbols present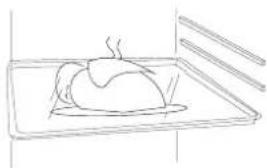
natural_image
Simple line drawing of a chicken inside an oven (no text or symbols)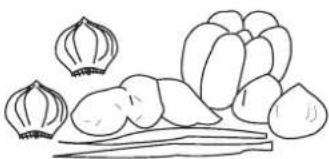
natural_image
Simple line drawing of various vegetables including bell peppers, tomatoes, and stems (no text or symbols)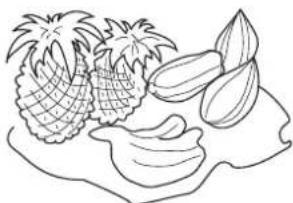
natural_image
Line drawing of pineapple, pineapple fronds, and fruit pieces on a human head (no text or symbols)natural_image
Isometric line drawing of a rectangular tray with multiple square cavities (no text or symbols)natural_image
3D architectural diagram of a modular kitchen or storage unit with red dimension arrows indicating internal structure (no text or symbols)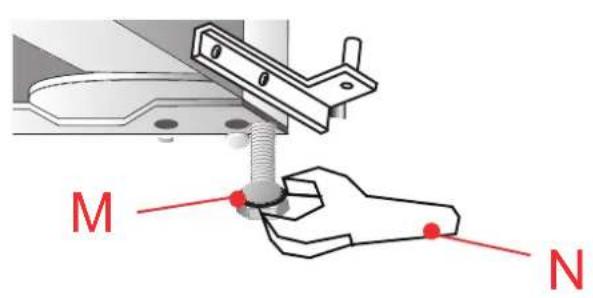

natural_image
Illustration of a hand holding a tool inside a ceiling-mounted device (no text or symbols visible)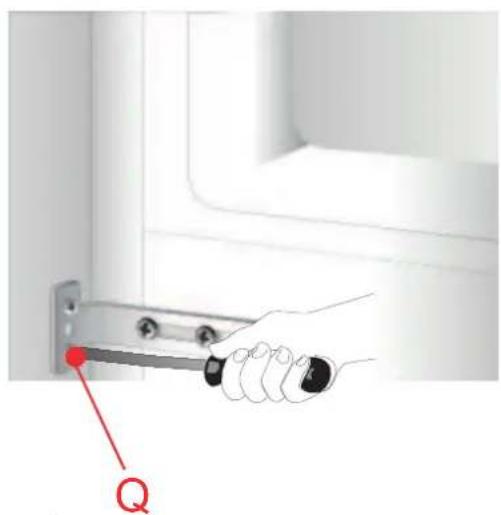

natural_image
Illustration of a hand holding a cable or wire near a door, with a red circle above indicating a point (no text or symbols present)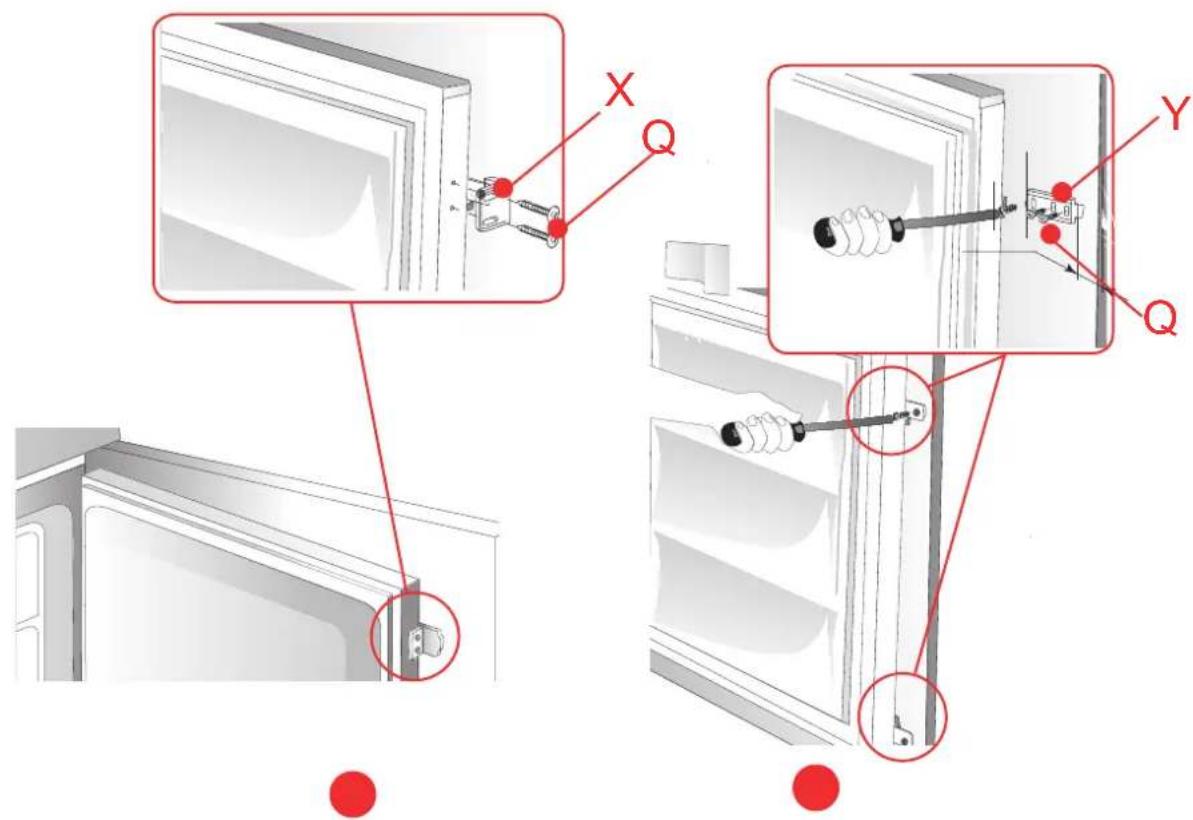
Defrosting, cleaning and de-commissioning----11\~12
Trouble shooting----13
Disposal of the old appliance
Before disposing an old appliance, please make sure it's inoperative and safe. Unplug the appliance and remove or destroy all of the springs, latches, or bolt-locks in order to avoid the risk of child entrapment.
It must be noted that the refrigeration system contains insulating gases and refrigerants, which require specialized waste disposal. The valuable materials contained in a refrigerator can be recycled. Contact your local waste disposal center for proper disposal of an old appliance and contact your local authority or your dealer if you have any question. Please ensure that the pipe work of your refrigerator dose not get damaged prior to being picked up by the relevant waste disposal center, and contribute to environmental awareness by insisting on an appropriate, any-pollution method of disposal.
Disposal of the packaging of your new appliance
All the packaging materials employed in the package of your new appliance may be disposed without any danger to the environment.
The cardboard box may be broken or cut into smaller pieces and given to a waste paper disposal service. The wrapping foil is made of polyethylene and the polyethylene pads and stuffing contain no fluorochloric hydrocarbon.
All these valuable materials may be taken to a waste collecting center and used again after adequate recycling.
Consult your local authorities for the name and address of the waste materials collecting centers and waste paper disposal services nearest to your house.
Safety Instructions and Warnings
Before starting the appliance, read the information given in the User's Guide carefully.
The User's Guide contains very important observations relating to the assembly,
operation and maintenance of the appliance.
Keep the User's Guide in a safe place and remember to hand it over to the subsequent owner, if you ever sell the appliance.
The manufacturer does not accept responsibility for any damages that may arise due to non-observation of the following instruction.
*Damaged appliances are not to be put into operation. In case of doubt, consult your supplier.
Cautions
*Connection and installation of the appliance are not to be carried out in strict compliance with the relative instructions set forth in the Use's Guide.
*For the purpose of safety, the appliance must be properly grounded in accordance with specifications.
*Always remember to unplug the appliance before cleaning. To disconnect the appliance, pull at the plug itself not the cord.
*Keep alcoholic beverages in airtight bottles or containers and always store in an upright position. In addition, do not store any explosive substances inside the appliance-Danger of explosion!
*Do not damage any parts of the appliance that carry refrigerant by piercing or perforating the refrigerant's grooves with sharp or pointed items, crushing or twisting any tubes, or scraping the coatings off the surfaces. If the refrigerant spurts out and gets into eyes, it may result in serious eye injuries.
*Do not obstruct or cover the ventilation grille of the appliance.
*Do not allow children to play with the appliance. In no case should children be allowed to sit on the drawers or hang onto the door.
Should you have bought your new fridge / freezer to replace an old appliance, please make sure that all existing latch-or bolt-locks on the old appliance are destroyed, before you dispose of it.
This will ensure that a child cannot get trapped inside.
Please have the old appliance ecologically disposed of by a company specialised in environmental protection, since the appliance may contain harmful components in the refrigerant and this must be removed with special equipment. Please check with your dealer or with your local authority.
Make sure that the refrigerating system containing the refrigerant, especially the heat exchanger at the back of the appliance, is not damaged during transportation to the disposal or collection site, so that you can be sure that the refrigerant does not leak out. Details concerning the type of refrigerating/isolating agent used can be found on the appliance's rating plate.
*Warning: Keep ventilation openings in the appliance enclosure or in the structure for building in ,clear of obstruction.
*Warning: Do not use mechanical devices or other means to accelerate the defrosting process, other than those recommended by the manufacturer.
*Warning: Do not damage the refrigerant circuit.
*Warning: Do not use electrical appliances inside the food storage of the appliance.
*It is necessary to have the plug accessible after installation.
*If the supply cord is damaged, it must be replaced by a supplied cord or assembly available from the manufacturer or its service agent.
*Connection of power supply and installation should be conducted in accordance with the instructions in the operation manual.
*Only the tools regulated by the manufacturer can be used for defrosting.
Specifications
*This appliance is designed for food refrigeration, ice making and frozen food storage.
*It is intended strictly for household use. If using it for industrial or commercial purpose be sure to observe the relevant norms and regulations.
*The refrigerating circuit is leak-proof.
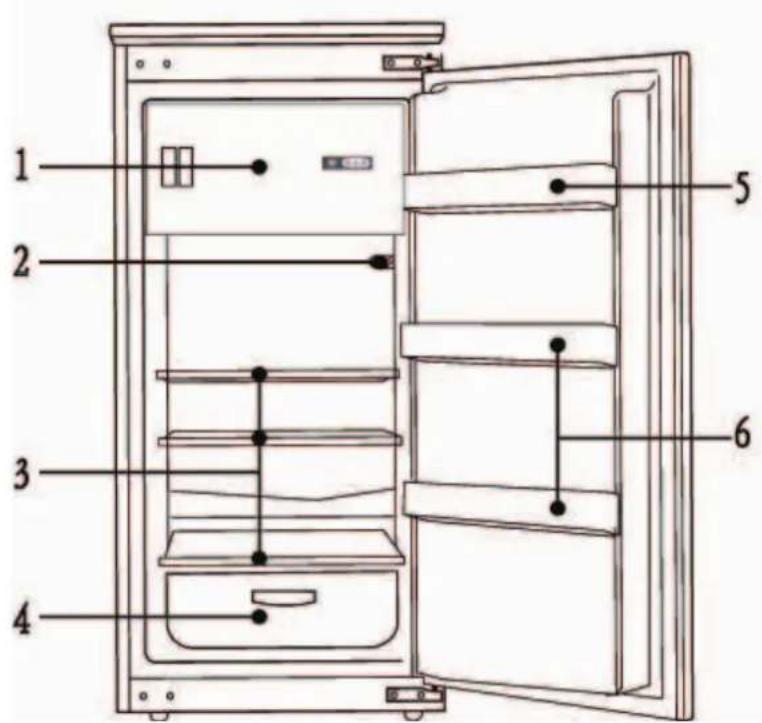
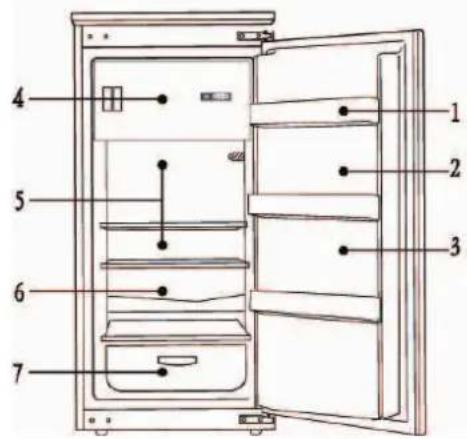
- Freezing compartment
3.Shelves
5.Egg tray
-
Temperature Controller
-
Vegetable and fruit tray
6.Bottle racks
This diagram may vary slightly with the layout of the refrigerator you have
just purchased due to technical improvements.
Unpacking
Remove all packing materials.
Check attachments and materials
Checking should be conducted with reference to the Packing List. Contact the local distributor if discrepancies are found.
Ensure proper location of the refrigerator.
Clean the refrigerator before use.
(See the following section "Cleaning")
Idle time
After the refrigerator has been sited and cleaned, let it stand for more than 30 minutes before connecting the power source.
( )
*Level the kitchen cabinet unit with a spirit level and a try square. Level the unit by placing packing material underneath if required.
*A minimum gap of 38mm must be maintained at the back of the appliance for ventilation.
*Air inlet A must be at least 200 cm square and air must flow through the panel in the cabinet plinth.
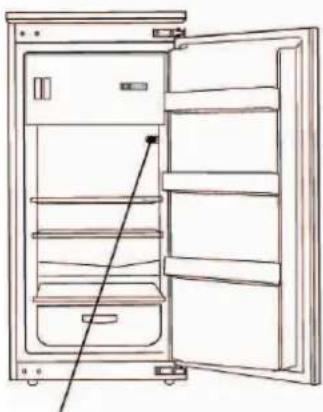
*Check that the position of the power socket (1) is correct. AC voltage in the location at which the appliance is to be used must comply with that as shown on the data plate located on the left inside wall of the appliance next to the vegetable bins. The power supply must be suitably earthed.
( )
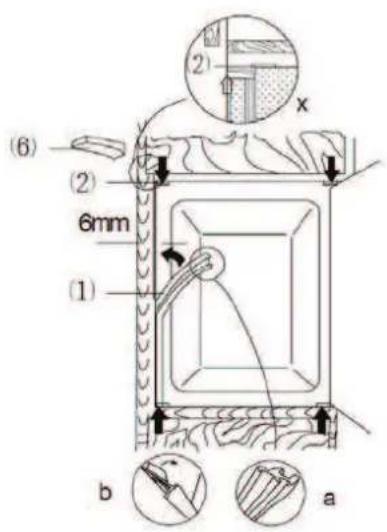
- Check that the kitchen unit door is in the correct operating position.
- Run the mains cable through the unit such that it can be connected to the power supply after installing the appliance. Remove the cover (6) only if space is restricted.
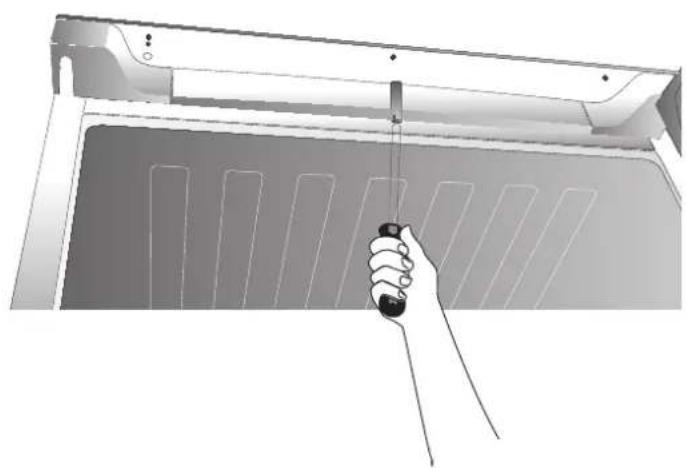
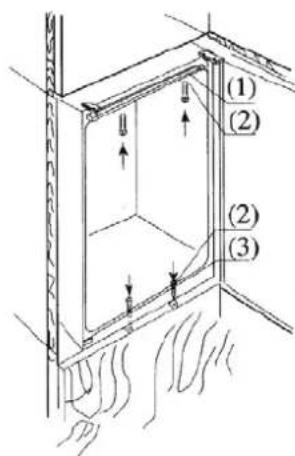
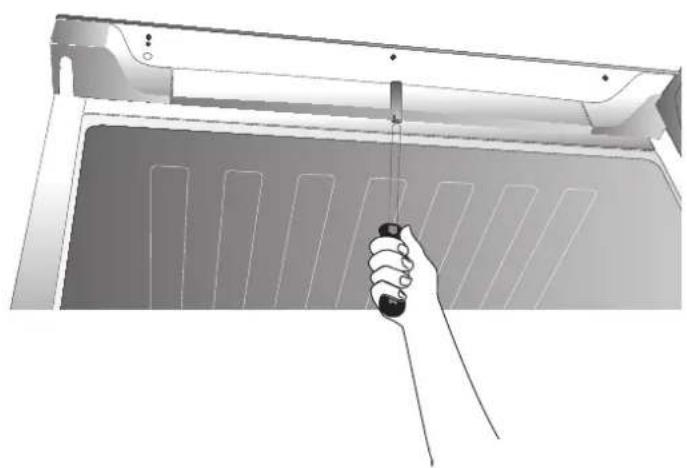
- Place the refrigerator into the kitchen unit. Fix the mountings (1) with screws (2) onto the upper frame when two third of the refrigerator has been pushed in. Then push the refrigerator in completely, ensuring that the gib clamp of the mountings stuck on the horizontal frame of the kitchen unit. Adjust the position of the refrigerator making a 6mm space between inside wall of the kitchen unit and external sides of the refrigerators. Fix the mountings to the horizontal frame of the kitchen unit with screws.
- Insert the seal in the aperture (approx. 10mm) between the lower front frame and bottom board of the kitchen. Fix lower mountings (3) to the lower front frame with screws (2). Fix the lower mountings to the bottom board of the kitchen unit with screws (2).
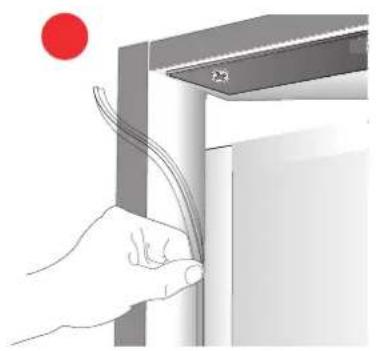
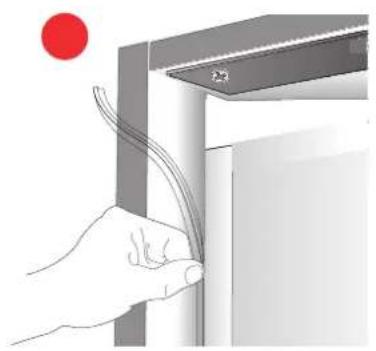
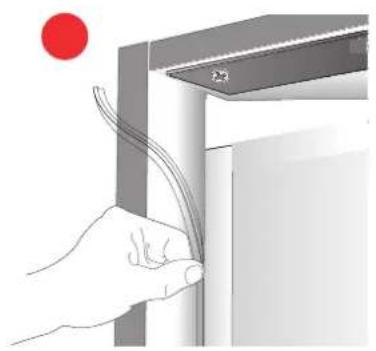
- Properly insert seals in the apertures on the left, upper and right sides of the refrigerator.
-
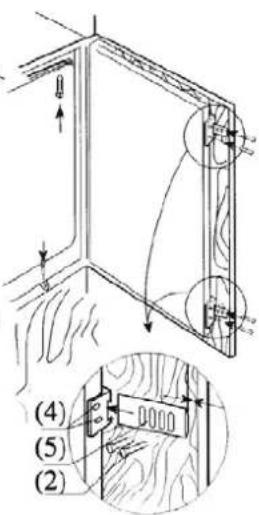
Fix the door to the holders (4) (each upper and lower position has one) with screws (2). Press close the doors of the refrigerator and of the kitchen unit, and then completely open the doors, and then place the connecting plate (5) to the corresponding holder and fix it to the door of the kitchen unit (space between the connecting plate and the edge of the kitchen unit "t" equals to the thickness of the external board of the kitchen unit, about 20mm). Adjust the connecting element so that the handle side of the kitchen unit door does not make contact with the unit body when closed. (Approximately 1mm gap for large appliances), mount the second door connecting element where appropriate.
-
Plug the open hole in the appliance door.
( g )
Starting the refrigerator
After connecting to the power supply, turn the temperature controller clockwise from position 0 to any position between 1 and 7 to start the refrigerator. The refrigerator compressor will stop when the temperature controller is at position 0.
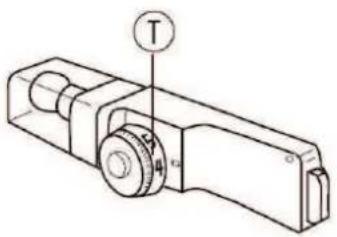
Adjusting the temperature:
The temperature inside the refrigerator is adjusted by turning the temperature controller. Positions 1 to 7 represent different temperatures from the lowest to the highest.
| Position | Conditions |
| 1-2 | Summer or ambient temperature between 25-35^ |
| 3-4 | Spring, autumn or ambient temperature between 15-25^ |
| 4-5 | Winter, or ambient temperature between 5-15^ |
| 6-7 | Quick freeze |
Caution: Some time will be required for the refrigerator to reach the set level when temperature adjustments are made. The length of this period is determined by difference in the existing and set temperatures, the ambient temperature, the frequency with which the door is opened and closed and the amount of food in storage.
Caution: If ambient temperature is below 16 °C, please turn on the "Low-temp Controller".
Loading the refrigerator with food
When the refrigerator is switched on, do not load
for cold storage or deep freezing can be loaded when the temperature inside the compartment reaches the set point.
natural_image
Line drawing of an open refrigerator with shelves and doors (no text or symbols)Temperature Controller
Cold storage is for short-term food
Storage or for daily consumption.
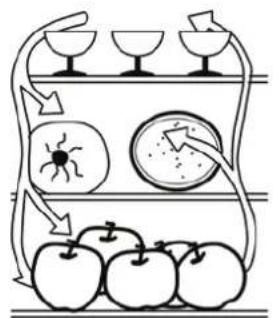
Although the temperature in most parts of the cold storage compartment can be regulated between 0 and 10 degrees Centigrade, extended periods of food storage is not recommended. Cold storage should only be used for short-term storage.
flowchart
graph TD
    A["House with eggplant"] --> B["Vegetable bowl with spider icon"]
    B --> C["Apple with apples"]
    C --> D["Tree with fruit and arrow indicating flow path"]
    D --> E["Tree with leaf and arrow indicating flow path"]
Cold storage compartment
- Eggs and butter
- Pickled food and seasonings
- Beverages and bottled food
- Food to be frozen
- Cookies, cooked food and milk
- Meat and sausages
- Fruits, vegetables and salads
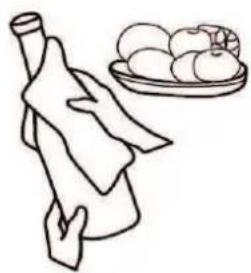
Cautions for cold storage
* Hot food must be cooled to room temperature before storing in the refrigerator
* Dry any water droplets on the food before placing it in the refrigerator.
* It is recommended that food be sealed in suitable storage bags before being placed in the refrigerator; this will prevent moisture in the food from evaporating and prevent vegetables and fruit from withering or altering in flavor.
natural_image
Simple line drawing of a hand holding a bottle next to a plate of round fruits (no text or symbols)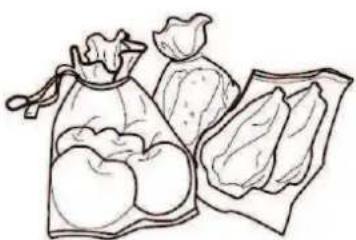
natural_image
Line drawing of three bread bags and a packet with two items, no text or symbols present* Do not store excess quantities or weights of food; food should be stored with spaces in between for better storage results. Never overload shelves, as they may collapse under excessive loads.
* Food to be stored should be sorted according to consumer requirements. Food consumed daily should be placed in the most convenient area, this will minimize opening periods for the door. Do not place food too close to the internal walls.
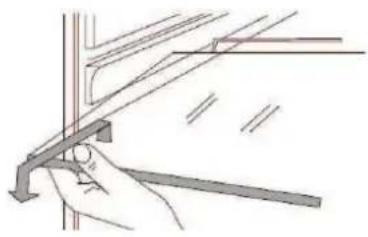
Food holder cleaning
* Food holders can be taken out for cleaning
natural_image
Illustration of a hand using a tool to adjust or install a mechanical component (no text or symbols visible)Lamp & Replacement:
Lamp: 240V, 10W
Lamp holder: E14 (lamps exceeding 15W must not be used)
* For replacement, unplug to disconnect the power
* Remove the lamp by turning anti-clockwise
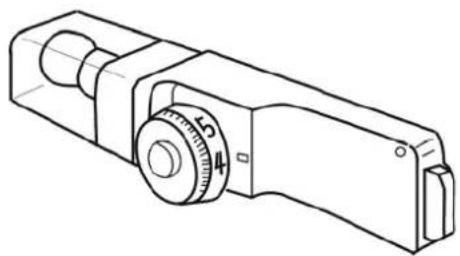
natural_image
Line drawing of a mechanical measuring tool with a dial and handle (no text or symbols)Instructions for food storage
*Storage period will be extended if vegetables are placed with their roots towards the cold source.
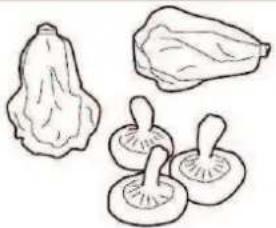
natural_image
Line drawings of four different types of mushrooms: gourd-shaped, bulbous, and three-celled mushrooms (no text or labels)*Leaves of carrots or turnips should be removed before storage.
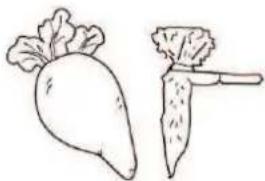
natural_image
Simple line drawing of two radishes, one with leafy top and one with a long rod (no text or symbols)*Put a wad of tissue on the bottle holder before placing bottles on it so that later cleaning is easier
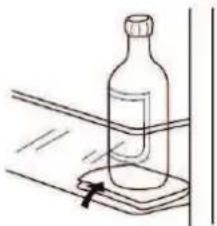
natural_image
Simple line drawing of a bottle on a surface with a ruler and arrow indicating measurement (no text or symbols)*Frozen food can be placed in the cold compartment before serving, as this will conserve energy.
natural_image
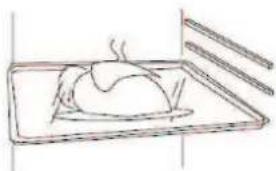
Simple line drawing of a chicken inside a tray with chopsticks (no text or symbols)*Onions, garlic, ginger, water chestnuts and other root vegetables should not be stored in the refrigerator, as these foods are suitable for long-term storage at normal temperatures.
natural_image
Simple line drawing of various vegetables including bell peppers, garlic bulbs, and garlic cloves (no text or symbols)*Ripe squash, melon, papaw, bananas and pineapples should not be stored in the refrigerator. Freezing will accelerate the ripening process.
natural_image
Line drawing of pineapple, pineapple drop, and peach (no text or symbols)Long-term storage of food
As the freezer storage temperature is very low, fresh food can be stored in the freezer compartment for a long time. Food requiring long-term storage can be stored in the frozen food compartment. Attention should be paid to the storage information printed on the food packing.
Frozen food storage
* The recommended weight of fresh food is less than 2 kg.
* Hot food should not be stored in the refrigerator until it has cooled down to room temperature.
* The outside of any food packing should dried before storage in the freezer, and any packing materials should be odor-free, airtight, non-poisonous and nontoxic.
* Only remove the required amount of food from the refrigerator. Defrosted food cannot be re-stored in the freezer unless it is first cooked.
* Food cut into small portions will freeze faster and be easier to defrost and cook. The recommended weight for each portion is less than 1.5kg.
* Do not put in bottled beer or drinks.
* Do not touch frozen food wet-handed.
Making water-Ice
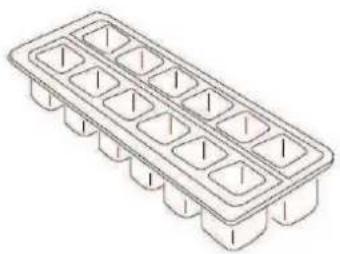
* Pour water into the water ice mould up to three-quarters of the mould volume, and then place the mould in the freezing compartment.
* Do not a use knife or other metal tools to take the ice out of the mould.
* The ice can be easily removed by hand after the mould has been placed in warm water for a short time.
natural_image
Isometric line drawing of a rectangular plastic container with multiple compartments (no text or symbols)Defrosting the cold storage compart-
ment
The cold storage compartment is designed for automatic defrosting. Frost formed on the back wall will melt and flow via the drainpipe to the evaporating container over the compressor on the back of the refrigerator, where the heat generated by the compressor will evaporate the water.
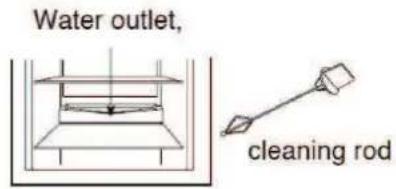
Caution: Always keep the drain over the vegetable and fruit tray clear to ensure the normal flow of defrosted water. Use the rod provided to clear any blockages.
Defrosting the freezer
After a period of operation, a layer of frost will form on the surface of the freezer. Additional electricity will be consumed if this layer becomes too thick. The defrosting process must be carried out when a thick layer of frost has been formed.
To defrost the freezer, first disconnect the power by unplugging the refrigerator, and then remove any food from the refrigerator and place it in a cool place. Use a plastic defrost-ing tool.
After ice and frost are melted, wipe up the inside of the freezer compartment.
Caution: Never use a metal tool or electrical heater for defrosting.
After the defrosting is completed, plug in the refrigerator and it starts operation again.
Power failure
Even in summer, food can be stored in the refrigerator for a few hours after a power failure.
* Don't put additional food into the refrigerator during a power failure.
* Avoid opening the door during power failures
* If prior notice of a power failure is given, make some ice and put it in a container in the top of the cold storage compartment.
Caution: temperature in the refrigerator will rise during a power failure or in the event of technical problems, and the storage period will be reduced.
Cleaning
The refrigerator should be cleaned regularly to prevent the formation of bad odors.
* Disconnect the power before cleaning the refrigerator.
* Do not use a hard brush, steel brush, detergent, gasoline or other solvents, hot water, acid or alkali for cleaning.
* Wipe water drops on the surface of the refrigerator with a soft cloth.
(1) Do not use excessive amounts of water for cleaning the refrigerator
(2) Use a dry cloth to clean the switch, the lamp and the temperature controller
* Always keep the rubber door seal clean
* Clean the back and sides of the refrigerator regularly.
Cessation of Operation
If the power failure lasts for an extended period, unplug the refrigerator and clean the refrigerator as previously described.
Keep the door of refrigerator open when the power is turned off to prevent any food remaining in the compartment from producing bad odors.
Caution: It is recommended that the refrigerator is not turned off
During Vacations
* Remove any food from refrigerator is the vacation is short. Turn the temperature selection knob to the proper position, and make sure that the door of the refrigerator is properly closed.
* If the vacation is long, take out the food from the refrigerator and disconnect the power. When the frost inside melts, clean and dry the compartment.
Discarding
* Remove the door of the refrigerator when you get rid of it, in case children may get trapped in.
Moving the refrigerator
* Unplug the refrigerator
* Remove any food
* Tightly close the door with tape
Events below are not problems:
* The temperature of the refrigerator and the compressor will rise and the compressor will run for comparatively longer periods when the refrigerator is first started.
* Wipe water drops on the external surface of the refrigerator with a soft cloth.
* When the refrigerator is opened frequently or stay open too long in humid seasons, the cavity will be dampened.
* A slight sound will be heard when the liquid refrigerant circulates or when the compressor switches on and off.
* A slight sound will be heard when defrosted water drops into the evaporating dish.
* The compressor will operate for comparatively longer periods if excessive quantities of food are stored or the ambient temperature is high.
* The evaporator will produce odors if the compartment is not cleaned.
Caution: The refrigerator should never be restarted until a period of at least five minutes has elapsed.
Please determine the cause of the problem before making any repairs.
| Phenomena | Causes |
| Refrigerator will not start. | * Bad connection to power source (plug, socket and fuse)* The temperature knob is at the 0 position* Low voltage |
| The lamp does not blink. | * Bulb failure* Power supply not connected* The temperature knob is at the 0 position |
| Excessive noise. | * Uneven placement* Contact between the refrigerator and a wall or other article |
| Compressor operates for a long period or temperature does not reach set point. | * First time of operation* Excessive food stored* Frequent opening of the refrigerator door due to hot weather* The temperature controller is not set properly* Refrigerator is in direct sunlight, or close to a heat source* Poor ventilation, or dirt on the condenser |
| Food dry | * Food not properly covered or sealed |
| Thick frost on frozen food | * Door is not properly closed.* Frequent opening of the refrigerator door* Frost inside food bags is normal |
| Strange odor | * Failure to seal food properly* Rotting food inside refrigerator* Refrigerator should be cleaned. See "Cleaning" |

natural_image
3D architectural diagram of a modular kitchen or storage unit with red dimension arrows indicating internal structure (no text or symbols)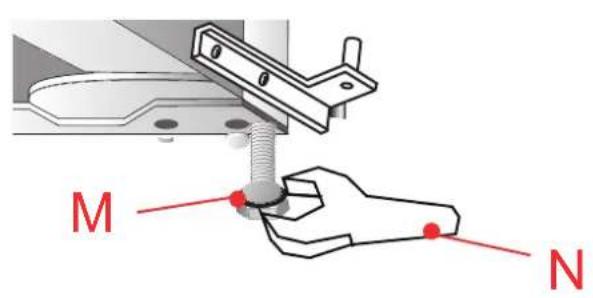

natural_image
Illustration of a hand holding a tool inside a ceiling-mounted device (no text or symbols visible)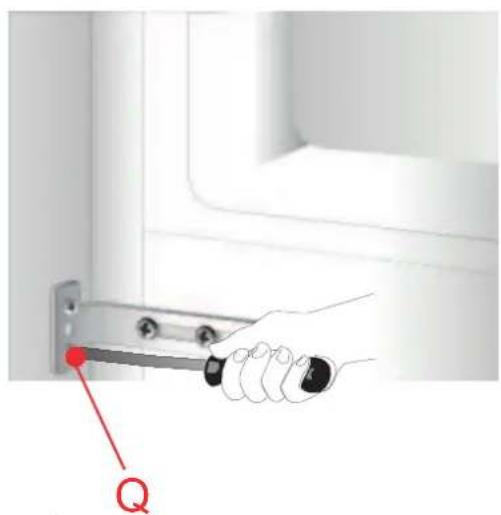

natural_image
Illustration of a hand holding a cable or wire near a door, with a red circle above indicating a point (no text or symbols present)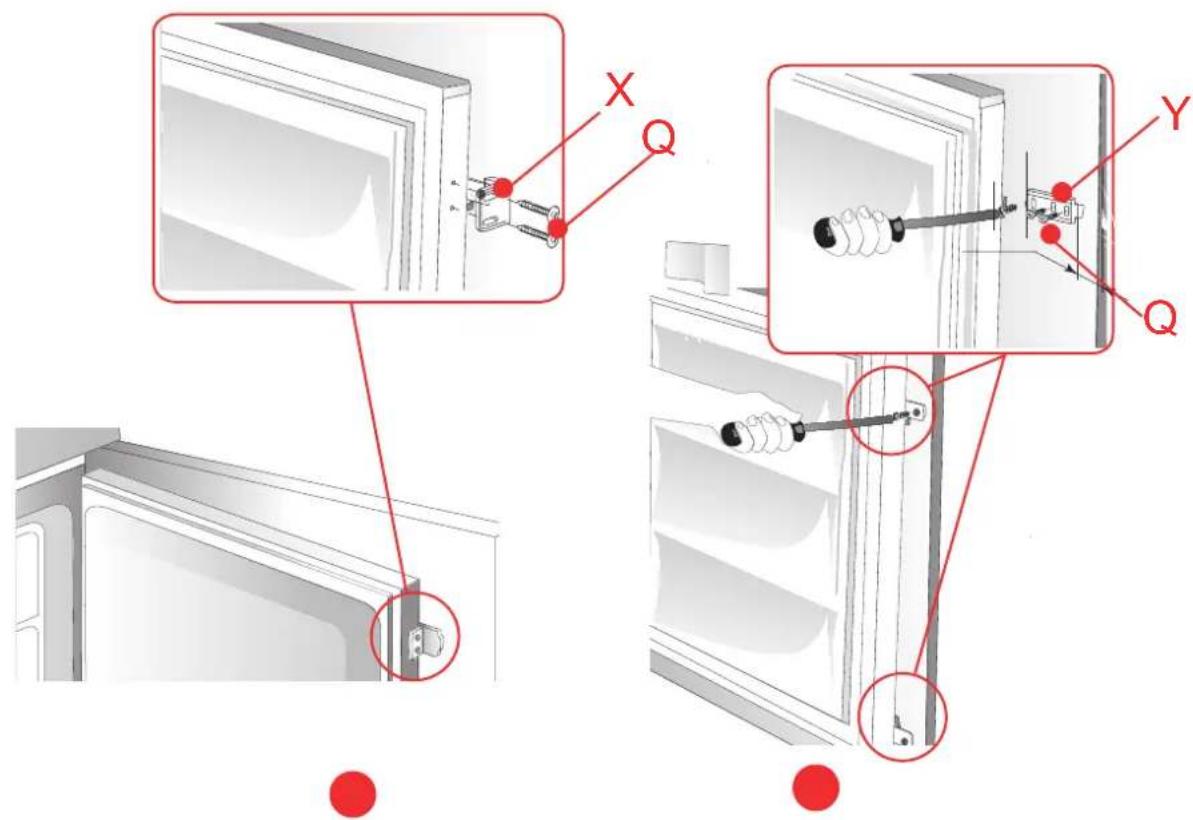
Positioning and installing the appliance
-
Once the appliance has been unpacked, check the main voltage is the same as that indicated on the rating plate.
-
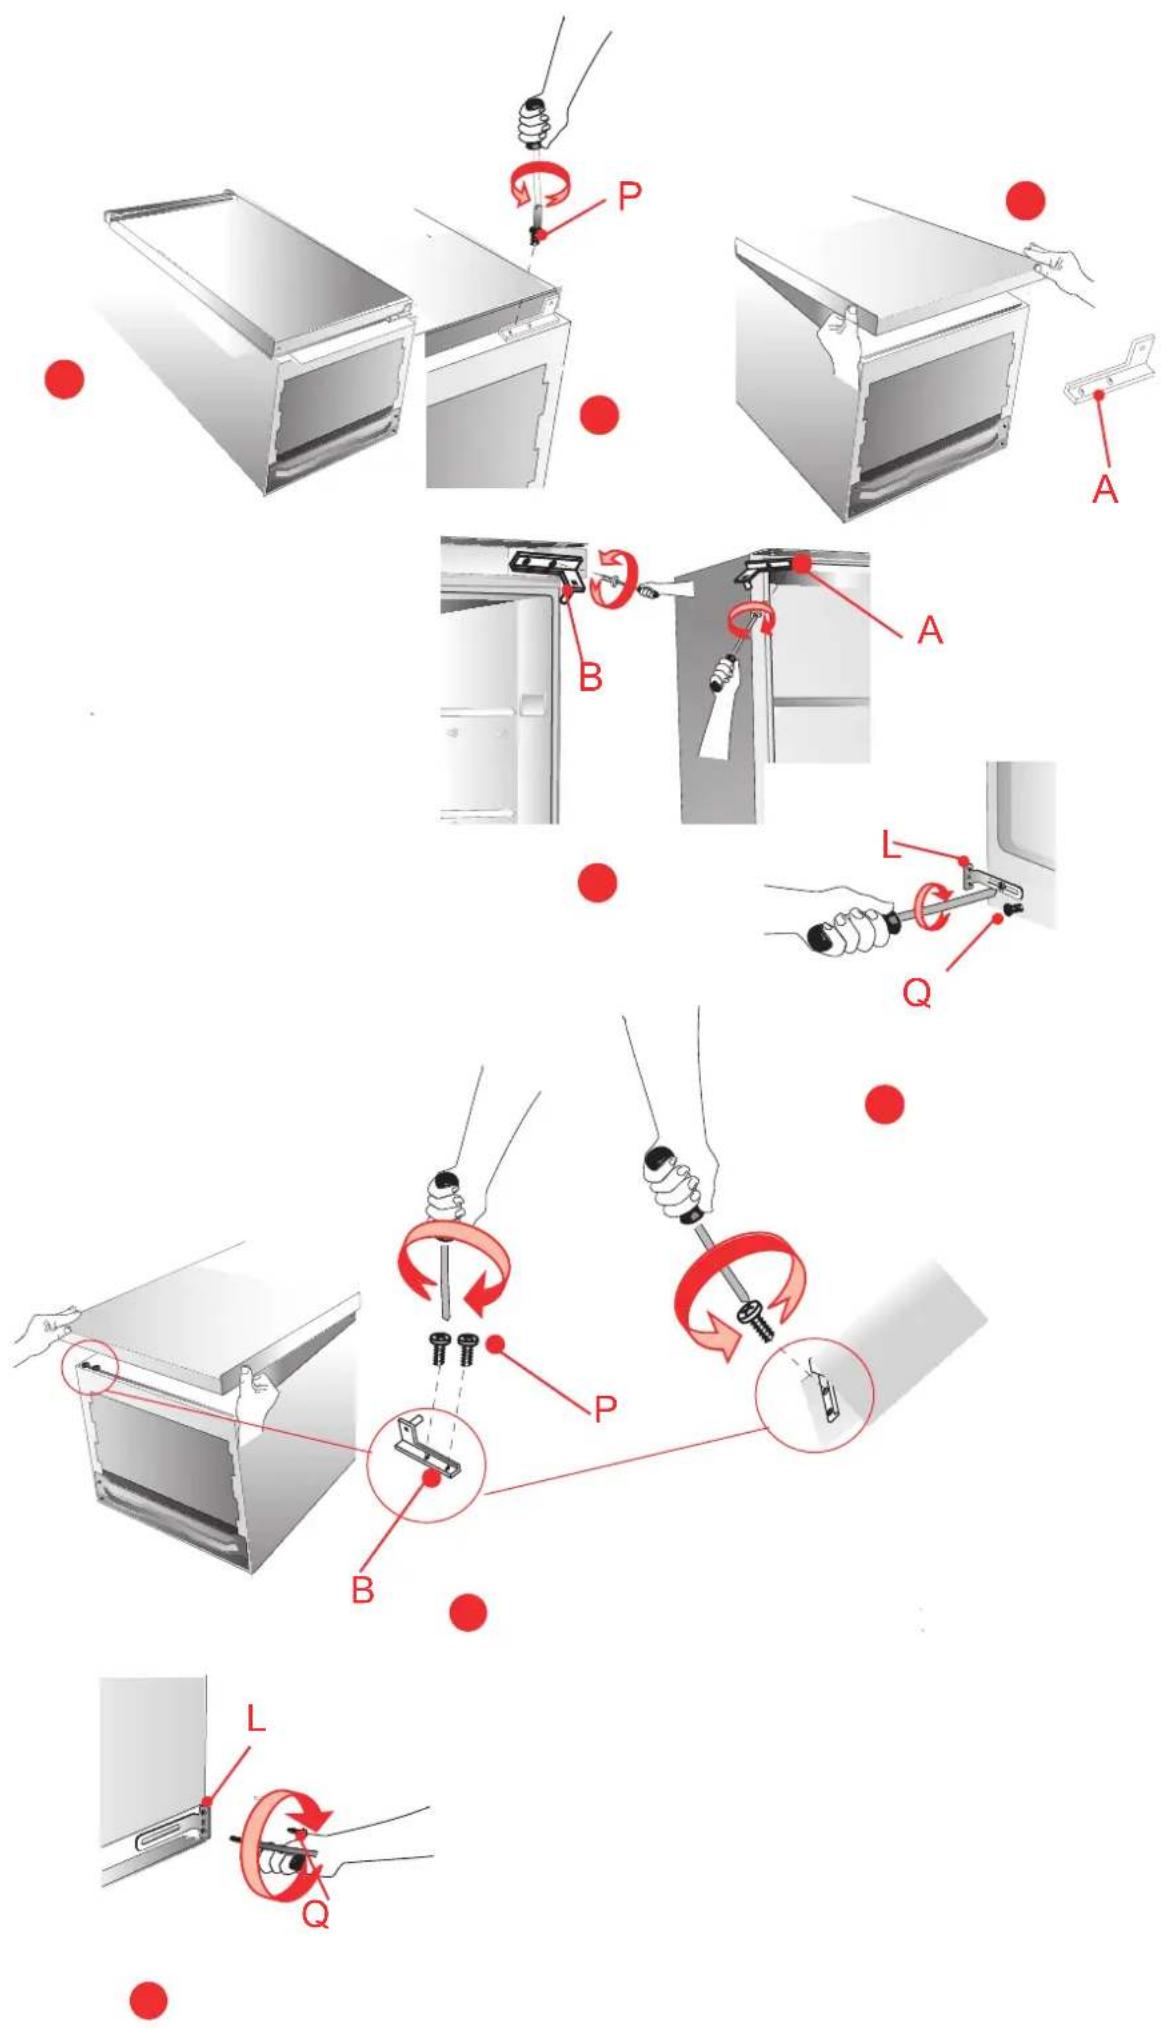
If the door opening direction is as required, go to Point 3. Otherwise, reverse the position of the hinges. To do this, carefully place the on its back, user spacers to prevent crushing the condenser pipes and damaging the compressor unit.
2a Remove the lower hinge pin P.
2b Remove the lower hinge A and free the door.
2c Remove upper hinge B, and fit the hinge A to the opposite side.
2d Remove the bottom support L.
2e Refit the door and the hinge B one the left side.
2f Refit the bottom support L to the opposite side.
When installing the appliance, remember the following:
A Do not install it near to sources of heat such as heaters, radiators, cookers, etc. or in direct sunlight.
B Make sure that during the automatic defrost, any water on the back wall of the compartment runs into the drain channel.
C After the appliance has been placed in its final position, leave it for about at least an hour before connecting it to the power supply.
D Make sure that the appliance is working properly before placing any food in it.
WARNING: DO NOT INSTALL THE APPLIANCE NEAR TO ANY HEAT SOURCES AND LEAVE A GAP OF AT LEAST 5 CM ABOVE IT.
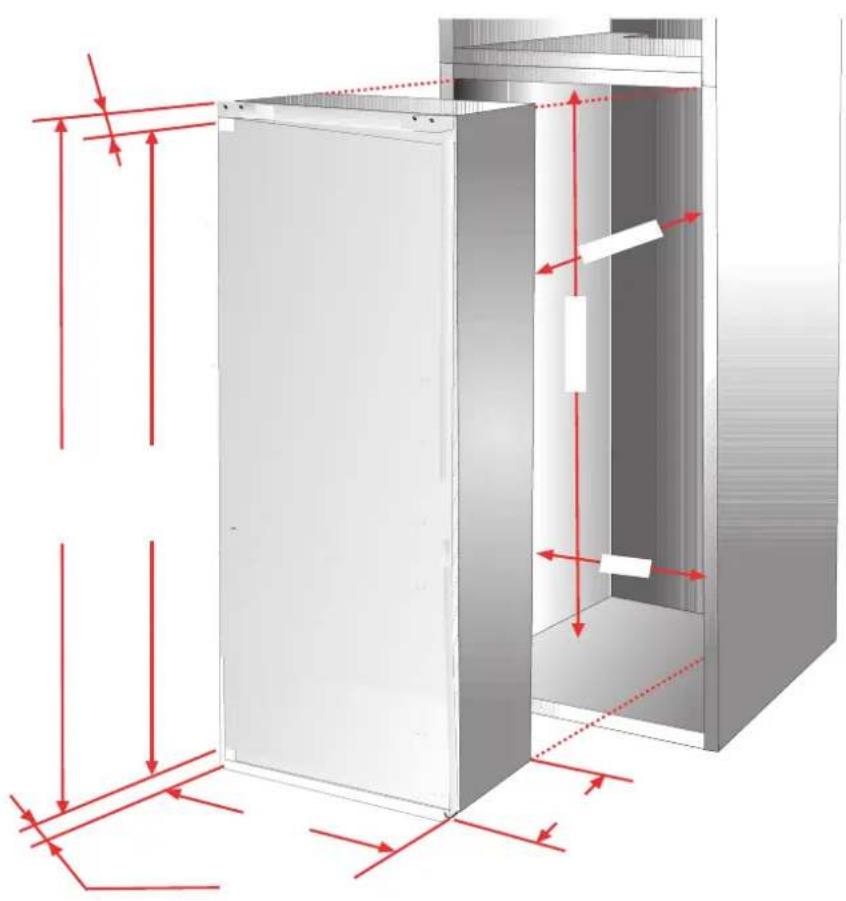
INSTALLATION IN THE TALL UNIT HOUSING
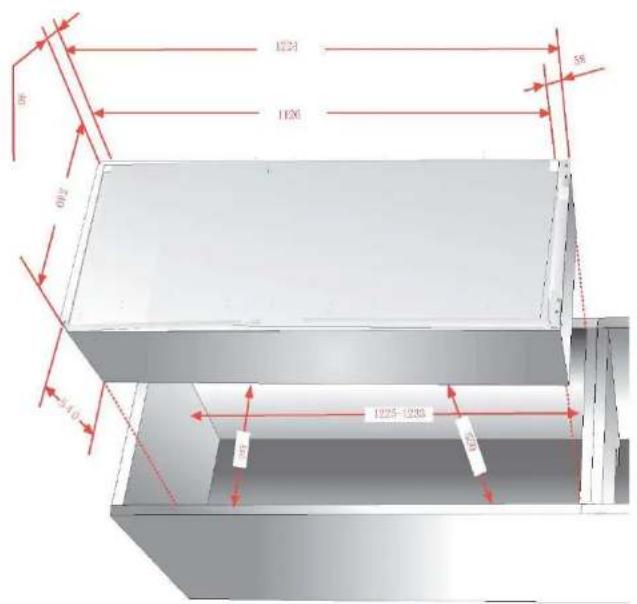
The dimensions of the tall unit housing must be correspond to those reported in the figure.
3 insert the appliance in the housing against the side panel adjacent to the opening.
3a adjust the foot until the top panel is not in contact with the unit, and anchor the upper part of the appliance, using the screws supplied, in the pre-drilled panel over front fascia.
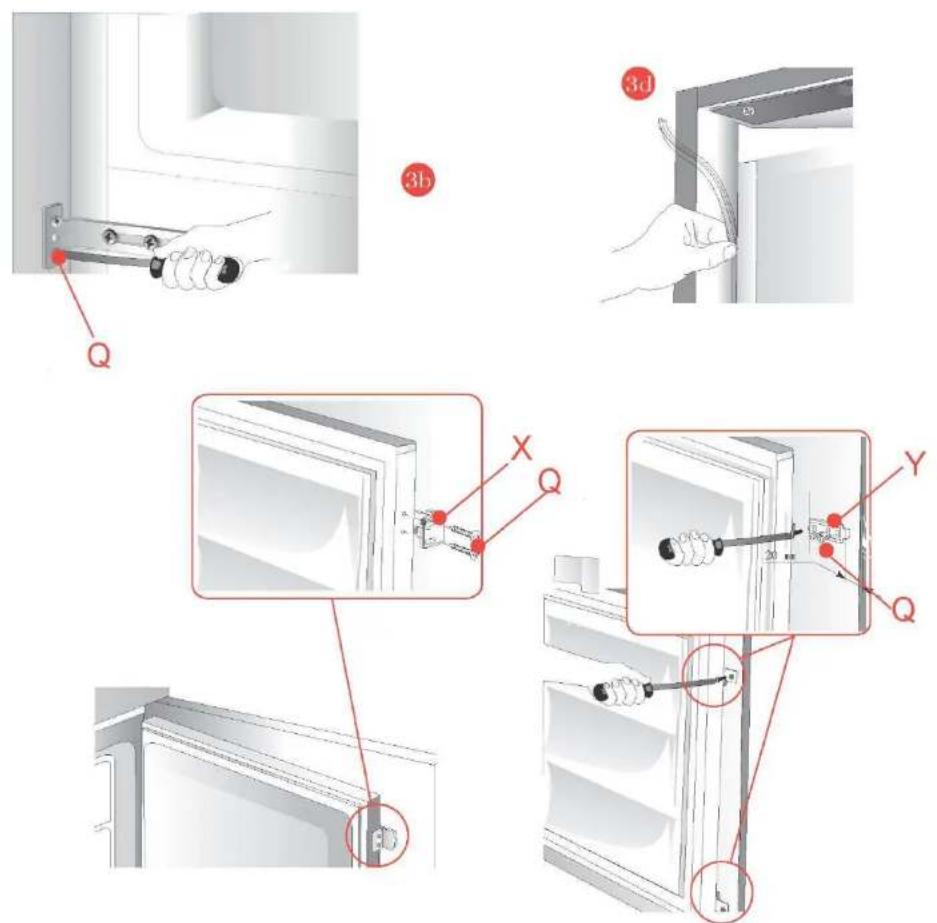
3b Anchor the bottom of the appliance to the wall of the unit using the special brackets.
3c Fix the two bottom feet in the holes in the base of the unit.
3d where provided, apply the plastic joint gasket.
3e Anchor the part X with screws on the appliance door.
3f Fit the sliding part Y with screws, after adjusting the housing door.

- Inhoud
- Temperatuurregelaar
- Cautions for cold storage
- Instructions for food storage
- Ventilation (Figure 1)
- Temperaturregelung
- Disposal of the old appliance
- Disposal of the packaging of your new appliance
- Safety Instructions and Warnings
- Cautions
- Specifications
- Unpacking
- Check attachments and materials
- Ensure proper location of the refrigerator.
- Idle time
- ( )
- Starting the refrigerator
- Adjusting the temperature:
- Loading the refrigerator with food
- Cold storage is for short-term food
- Storage or for daily consumption.
- Cold storage compartment
- Food holder cleaning
- Lamp & Replacement:
- Long-term storage of food
- Frozen food storage
- Making water-Ice
- Defrosting the cold storage compart-
- ment
- Defrosting the freezer
- Power failure
- Cleaning
- Cessation of Operation
- During Vacations
- Discarding
- Moving the refrigerator
- Events below are not problems:
- Please determine the cause of the problem before making any repairs.
- Positioning and installing the appliance
- When installing the appliance, remember the following:
- WARNING: DO NOT INSTALL THE APPLIANCE NEAR TO ANY HEAT SOURCES AND LEAVE A GAP OF AT LEAST 5 CM ABOVE IT.
- INSTALLATION IN THE TALL UNIT HOUSING
Brand : M-SYSTEM
Model : MKRV122
Category : Fridge