A160 GT - Freezer AEG - Free user manual and instructions
Find the device manual for free A160 GT AEG in PDF.
| Features | Details |
|---|---|
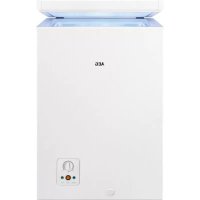
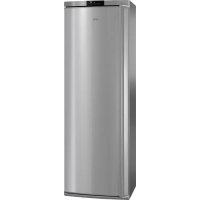
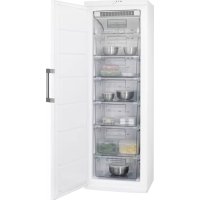
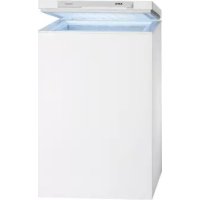
| Product type | Freezer |
| Usable capacity | 160 liters |
| Energy class | A+ |
| Dimensions (HxWxD) | 85 x 55 x 58 cm |
| Weight | 40 kg |
| Cooling system | Static cooling |
| Noise level | 42 dB |
| Additional features | Adjustable temperature control |
| Usage | Ideal for storing frozen food |
| Maintenance | Manual defrost recommended |
| Annual energy consumption | 250 kWh |
| Warranty | 2 years |
| Safety measures | Protection against electrical overload |
| General information | Designed for domestic use, ideal for small kitchens |
Frequently Asked Questions - A160 GT AEG
Download the instructions for your Freezer in PDF format for free! Find your manual A160 GT - AEG and take your electronic device back in hand. On this page are published all the documents necessary for the use of your device. A160 GT by AEG.
USER MANUAL A160 GT AEG
Dear Customer, Please read these operating instruc-tions carefully. Above all please observe the safety information on the first pages of these operating instruc-tions! Please keep these operating instructions for later reference. Pass them on to any subsequent owner of the appliance. Description of the Appliance 1 Dust container2 Dust filter3 Release button4 On/off switch5 Charge control display6 Charge socket7 Wall mounting and charger8 Mains plug9 Jack plug10 Fold-down crevice nozzle 1 Safety instructions
- Do not vacuum wet surfaces.• Do not use the vacuum cleaner on sur-faces that have been treated with flammable solvents until they are com-pletely dry.• Do not use your vacuum cleaner to vacuum hot items such as a glowing cigarette end.• Never use the vacuum cleaner to pick up combustible dust.• Under no circumstances should you oil or grease the motor.• Do not expose the vacuum cleaner to direct sunlight or any source of heat.• For maintenance and repair please contact your local dealer or authorised service personnel. Never attempt to carry out repairs to the vacuum cleaner yourself.• Only use the appropriate original charging devices for this model. This appliance complies with the fol-lowing EC directives: – 73/23/EWG dated 19.02.1973 “Low Voltage Directive“, including Direc-tive Amendment 93/68/EWG – 89/336/EWG dated 03.05.1989 “EMC Directive“, including Amendment Directive 92/31/EWG Before using for the first time Before using your vacuum cleaner for the first time you should charge the battery for approx. 16-18 hours.With a fully charged battery you can vacuum for approx. 8 minutes with model ZB 250 and for approx. 9 minutes with model ZB 254. Attaching the wall mounting (Fig. A) Select a position near a room socket to attach the wall mounting.0 Hold the mounting against the wall and mark the points for the fastening screws. 0 Use a drill to drill the holes for the screws and push in the plastic plugs provided.0 Position the wall mounting and then insert the screws so that they project by at least 7 mm.0 Then lower the wall mounting and tighten the screws. The appliance can equally well be stored standing on a table, the floor or any other horizontal surface. Charging (Fig. B) The charger (7) may only be connected to a power source of 230V, 50Hz. 0 Insert the vacuum cleaner into the wall mounting (7) and check that the jack plug (9) on the wall mounting fits cor-rectly into the charge socket (6) on the vacuum cleaner. Zb_250.book Seite 7 Donnerstag, 10. August 2000 10:08 10g
The charge control display (5) will come on and charging will begin. It will also come on if the battery is already fully charged. Always leave your vac-uum cleaner in the wall mounting when not in use in order to guarantee optimal suction power.To return to full suction capacity once a battery has been completely dis-charged requires a charging period of 18 hours.If a fully charged battery works for less than 8 minutes it might be the result of a build up of resistance to charging which occurs if the vacuum cleaner is always used only for short periods. If this happens you should charge the battery fully and use the vacuum cleaner until the battery is empty.After this recharge the battery. Repeat this procedure if necessary.Information: The battery should not be charged in room temperatures below 0 °C or above 40 °C. The charger can heat up during charg-ing. Using the vacuum cleaner (Fig. C) 0 Remove your vacuum cleaner from the wall mounting by pushing it straight upwards.0 To switch on the appliance push the on/off switch (4) forwards.To switch the appliance off, push the on/off switch backwards. Recharge your vacuum cleaner after use. Using the crevice nozzle 0 Pull out the crevice nozzle (10) and fold upwards (E). 0 To lock in place push the crevice nozzle in. Maintenance and care (Fig. D) Cleaning the dust filter and dust container Ensure that the vacuum cleaner is switched off.0 Press the release button (3) downwards and slowly pull the dust container (1) forwards.0 Remove the dust filter (2).0 Empty the dust container into the rub-bish bin.0 To clean the dust filter (2) you can use your normal household vacuum cleaner. If neceessary wash the dust fil-ter in lukewarm soapy water and rinse it out thoroughly.Important: Do not wash synthetic parts of the vacuum cleaner in a machine.Ensure that the filter is fully dry before you insert it again. After cleaning do not forget to put the dust filter back into the vacuum cleaner before using it again.Damaged or excessively dirty dust fil-ters should be replaced. Filters can be obtained as spare parts. 2 Disposal (Figs. F and G) Your vacuum cleaner contains a re-chargable NiCd battery.The vacuum cleaner can be re-charged many times and has a long life-span if the suction power is repeatedly topped up. Should it nonetheless be necessary one day to replace your battery-powered vacuum, please dispose of it with due consideration for the environment.0 Switch the vacuum cleaner on and let it run until the battery has run down commpletely.0 Open the battery vacuum casing. Zb_250.book Seite 8 Donnerstag, 10. August 2000 10:08 10g
0 Ensure that the battery has not short- circuited. Remove the batteries and pull the connection leads off the bat- tery connections. 0 Do not put the removed battery into the dustbin but hand it in at a repair workshop or at a public battery col- lecting point. Customer Service Our products are of the highest quality. Should you nevertheless have ques- tions concerning the use of this appli- ance, please write to us. Only with your support can we be sure to develop appliances to suit your needs. Zb_250.book Seite 9 Donnerstag, 10. August 2000 10:08 10f