USER MANUAL PA3600 SCANSONIC
natural_image
Line drawing of a portable electronic device with control panel and display screen (no text or symbols)
UK User Manual
DK Brugervejledning
2 Contents
IMPORTANT SAFETY INSTRUCTIONS
When used in the directed manner, this unit has been designed and manufactured to ensure your personal safety. However, improper use can result in potential electrical shock or fire hazards. Please read all safety and operating instructions carefully before installation and use, and keep these instructions handy for future reference. Take special note of all warnings listed in these instructions and on the unit.
Water and Moisture
The unit should not be used near water. For example: near a bathtub, washbowl, kitchen sink, laundry tub, swimming pool or in a wet basement.
Ventilation
The unit should be situated so that its location or position does not interfere with its proper ventilation. For example, it should not be situated on a bed, sofa, rug or similar surface that may block the ventilation openings. Also, it should not be placed in a built-in installation, such as a bookcase or cabinet, which may impede the flow of air through the ventilation openings.
Heat
The unit should be situated away from heat sources such as radiators, heat registers, stoves or other appliances (including amplifiers) that produce heat.
Power Source
The unit should be connected to a power supply only of the type described in the operating instructions or as marked on the appliance.
Cleaning
The unit should be cleaned only as recommended. See the section “Care and Maintenance” of this manual for cleaning instructions. Object and Liquid Entry Care should be taken so that objects do not fall and liquids are not spilled into any openings or vents located on the product.
Lightning and Power Surge Protection
Unplug the unit from the wall outlet. This will prevent damage to the product due to lightning and power-line surges.
Overloading
Do not overload wall outlets, extension cords, or integral convenience receptacles as this can result in a risk of fire of electric shock.
Damage Requiring Service
This unit should be serviced by qualified service personnel when: Objects have fallen into or liquid has been spilled into the enclosure. The unit has been exposed to rain.
The unit has been dropped or the enclosure damaged.
The unit exhibits a marked change in performance or does not operate normally.
Periods of Nonuse
If the unit is to be left unused for an intended period of time, such as a week or longer, the power cord should be unplugged from the unit to prevent damage or corrosion.
Servicing
The user should not attempt to service the unit beyond those methods described in the user's operating instructions. Service methods not covered in the operating instructions should be referred to qualified service personnel.
CAUTION:
Danger of explosion if battery is incorrectly replaced. Replace only with the same or equivalent type.
WARNING:
1) The mains plug of adapter is used as disconnect device, the adapter shall remain readily operable.
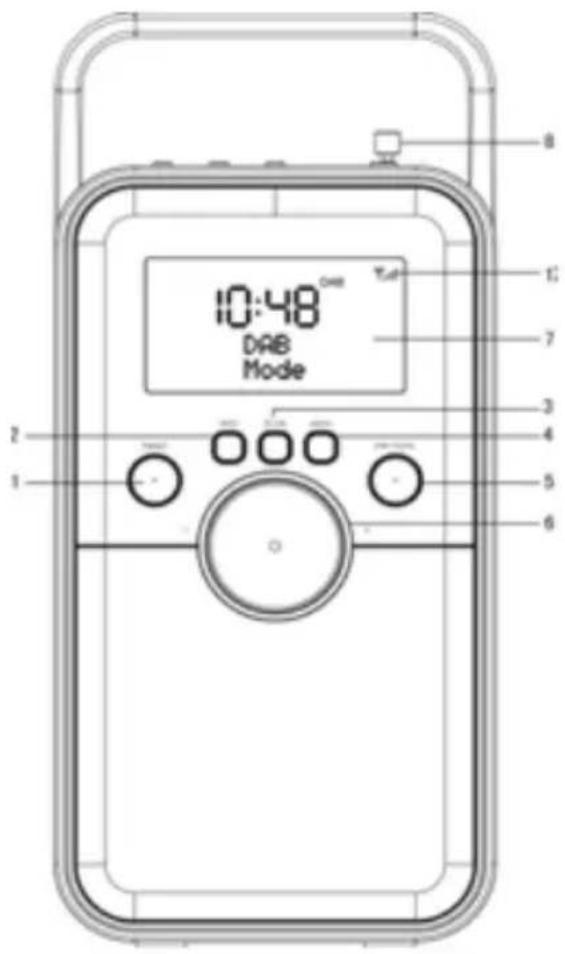
LOCATIONS OF CONTROLS
FRONT VIEW
text_image
10:48
DAB
Mode
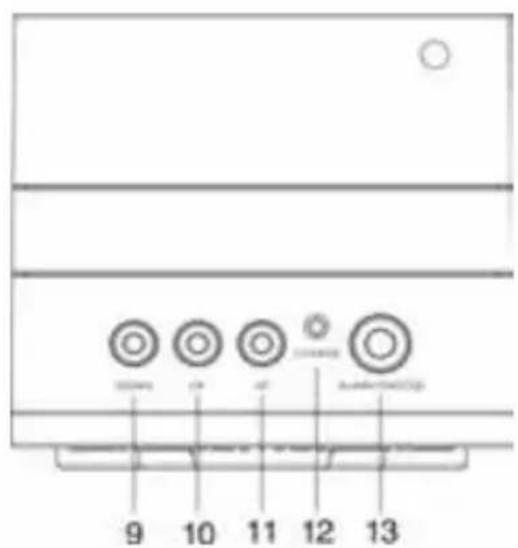
TOP VIEW
text_image
9
10
11
12
13
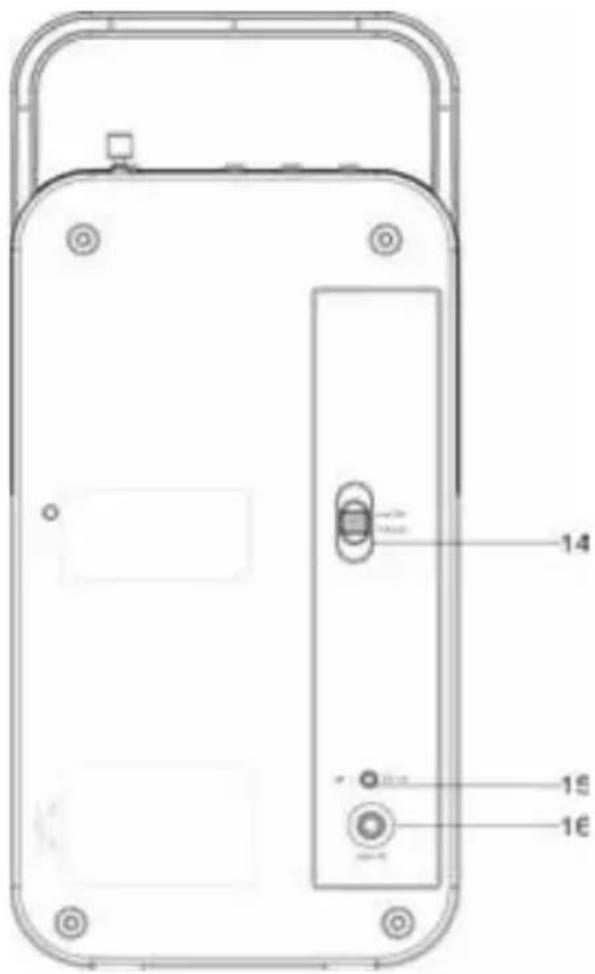
BACK VIEW
text_image
14
15
16
Short press this button to enter the radio station presets recalling mode.
Press and hold this button to enter the radio station storing mode.
- In DAB/FM mode: Cycle through further information screens and return to the normal Now Playing Screen.
In DAB/FM mode: scan for station automatically.
In any operating mode: press and hold this button for ECO test mode (for manufacturer use only).
Short press to show menu for the current mode, Press it again to show Now Playing screen.
Press and hold this button set the sleep timer.
- Press & hold this button to toggle between "Power On" and "Stand-by" mode.
- Short press this button during "Power On" mode to select different play modes: DAB, FM or Aux In.
6. VOLUME KNOB
- To adjust volume level
7. LCD DISPLAY
8. Telescopic Antenna
- To scroll though a Menu or DAB station list.
In FM mode:
Short press this button to manually search through the station from current frequency toward the lower frequency.
Press and hold this button to search through the lower station frequency with strong signal and stop on the first station signal it finds automatically.
- To select current option.
- To scroll though a Menu or DAB station list.
In FM mode:
Short press this button to manually search through the station from current frequency toward the higher frequency.
Press and hold this button to search through the higher station frequency with strong signal and stop on the first station signal it finds automatically.
12. Battery charging indicator
13. ALARM/SNOOZE
To activate the snooze function when the alarm is activated.
To turn LCD backlight Bright/DIM/OFF.
Press and hold this button during Power On mode to set the alarms.
14. Power ON/OFF Switch
15. DC 5V Jack
16. 3.5mm AUX-IN Jack
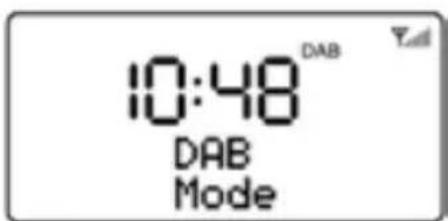
17. Signal intension for DAB/FM
The slide bar indicates how strong the received signal is, the stronger the signal, the longer the bar will be shown from left to right.
Installation
Read the manual thoroughly before operating the device!
Choose a suitable location for the device. Suitable locations are dry, even and anti-slip surfaces on which you may operate the device easily.
Make sure there is proper ventilation for the device!
Remove, if necessary, the protection sheet from the display.
Power supply (Adaptor)
- Insert the grid plug into a properly installed AC socket. Connect the device with the plug connector by inserting its plug into the DC 5V - - + jack of the device.
- Make sure the grid voltage corresponds to the figures on the rating plate.
CAUTION:
Only use the supplied power adaptor for this device.
Only use the original AC adapter. This adapter has been specially designed for the built-in battery in order to gradually charge the battery. Any other adapter can shorten the battery life or can damage it or the device.
NOTE:
Disconnect from mains power supply during longer periods of non-use.
Charging the battery
Before you can operate the device with the battery, you need to charge it first.
Turn off the device by setting the ON/OFF switch (14) to the "OFF" position.
Connect the device to a wall socket with the power adaptor. The battery charging indicator (12) lights up Yellow and the battery is being charged. Once the battery has been charged completely, the charging indicator turns Green.
CAUTION:
Never leave the device unattended during the charging process.
NOTE:
The duration of the charging process depends on the state of charge of the battery.
General operation
Switch the unit on/off
Switch the unit on by sliding the Power ON/OFF switch on the back of the unit to ON position, the display on the unit will light and display "Welcome to Digital Radio", and then the time digits "00:00" flashes in the display.
Standby/operating mode: You may then toggle between standby and operating mode by pressing and holding the STBY/FUNC button (5).
To switch off the unit, slide the Power ON/OFF switch to OFF position.
Notes:
When the unit is powered on the first time, it will enter FM mode as default, short press the STBY/FUNC button to change the operating mode circularly: AUX-IN, DAB, FM.
Time and date can automatically update on-air when the DAB radio is operated. Anyway, it also can be set manually in any Operating mode.
ECO design:
ECO Test Mode: The unit returns to standby mode after 10 seconds. When you are in the DAB/AUX mode, press and hold the INFO button to ON or OFF, a 10 sec count down will be shown on the screen, then back to normal operation. It is the test mode for the factory, this function can't be removed.
Normal ECO Mode: Standby mode will be activated after 60 minutes under different surface:
AUX mode: When there is No connection of external device/No sound/Minimum volume comes from the unit.
DAB mode: When there is no signal comes from the unit.
The unit will not activate to Standby mode when no signal/no sound/minimum volume in FM mode.
The unit will not activate to Standby mode when no sound/minimum volume in DAB mode.
The display light will dim after 10 seconds automatically during Stand-by mode.
OPERATING THE UNIT IN DAB MODE
DAB radio mode receives DAB/DAB+ digital radio and displays information about the station.
Auto Scan
Fully extend the telescopic antenna.
Press and hold the STBY/FUNC button to turn on the unit during standby mode.
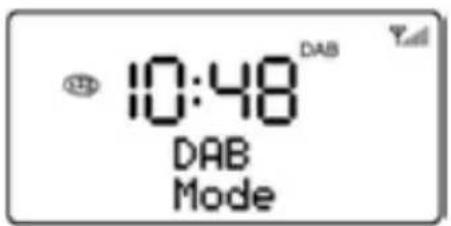
Short press the STBY/FUNC button to select DAB mode.
text_image
10:48 DAB
DAB
Mode
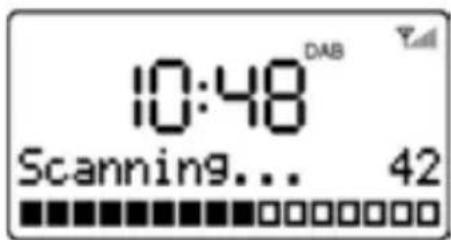
For the first time use or if the station list is empty, the radio automatically performs a full scan to see what stations are available, the display shows the scan progress and the total channel number during the scanning.
text_image
10:48 DAB
Scanning... 42
When the scan progress is completed, it will then set the time and start playing the first station on the station list it finds.
To change the station, press "DOWN" or "UP" button to scroll through the list of stations and press OK button to tune to the displayed station. The Now playing screen is displayed with the new station details.
If no stations are detected during the scan the display will show "NO DAB Station".
Notes:
Just like Digital TV there are some areas where it may still be difficult to get a good DAB signal. The broadcasters are constantly improving DAB coverage, so in some cases it may be necessary to wait before some or all DAB services become available. You can check coverage for your area.
You may also need to start a scan manually to update the list of stations for one of the following reasons:
New stations may become available from time to time.
Stations close or can no longer be received (In the station list, invalid stations are indicated with a question mark “?” in front of their name).
If reception was not good for the original scan (for example the antenna was not up), this may result in an empty or incomplete list of available stations.
- If you have poor reception of some stations causing the audio to break up, you may wish to list only stations with good signal strength.
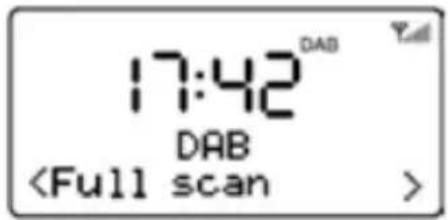
How to re-do a full scan
To re-do a full scan, you may either short press the SCAN button or press the MENU button to show the menu and then press OK button to select Full Scan.
text_image
17:42
DAB
DAB
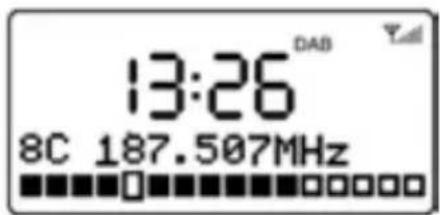
Manual Tune
As well as the normal method of scanning, you can also manually tune to a particular channel/frequency. This can be useful for adjusting your antenna to achieve the best possible reception and scanning a particular channel to update the station list.
Press Menu button and then press "UP" to show the submenu: Manual tune, press the OK button to enter.
Press "DOWN" or "UP" to display a particular channel/frequency, press OK button to tune to that channel/frequency. The display shows a live indication of the received signal strength on the selected frequency. Adjustments to your antenna will be manifested in the received signal strength displayed.
text_image
13:26
DAB
8C 187.507MHz
Note: The slightly larger rectangle indicates the audio quality threshold – if the signal strength, as indicated by the solid rectangles, falls below this threshold the audio quality will deteriorate.
To remove stations that are listed but unavailable
Press Menu button and then press "DOWN" or "UP" to show the submenu: Prune, press the OK button to enter the Prune option.
Press "UP" to select "Yes" and then press OK button to confirm to prune.
Note: this removes all invalid stations indicated in the station list with a '?' in front of the station name.
Station Presets
The unit allows you to store up to 20 DAB stations for easy recall at any time.
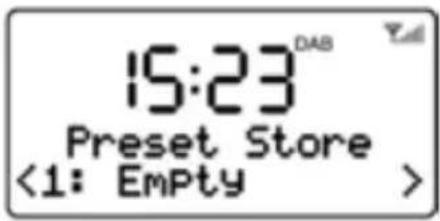
To save a station
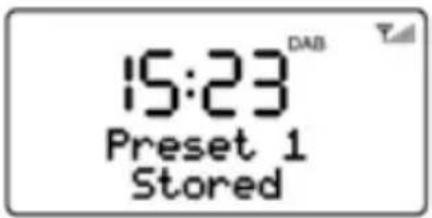
If you have found the desired station, press and hold the PRESET button until the display shows Preset Store.
Press "DOWN" or "UP" button to choose the preset memory position, press the OK button to confirm the settings.
text_image
15:23
Preset Store
<1: Empty >
text_image
15:23
Preset 1
Stored
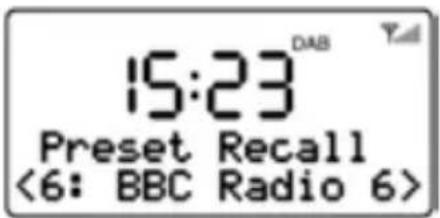
To recall a station
Short press the PRESET button during DAB mode to enter the preset memory selecting mode.
Press "DOWN" or "UP" button to select the preset station.
Press OK button to choose and play the displayed station.
text_image
15:23
DAB
Preset Recall
<6: BBC Radio 6>
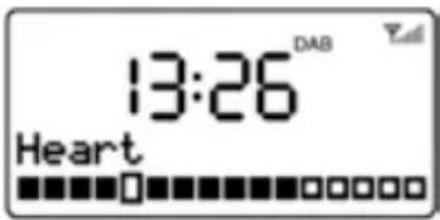
While a station is playing, the screen shows its name and DLS (Dynamic Label Segment) information broadcast by the station such as programme name, track title and contact details. Long DLS info, over 16 characters scrolls across the display.
text_image
13:26
Heart
Drivetime with E
Each time you press INFO button, the next set of information is displayed, cycling through: DLS text, DL Plus information (this is only displayed if broadcast by the station), signal strength, programme type, ensemble name, channel number/frequency, signal error rate, bit rate, codec/DAB variant, time and date.
text_image
13:26 DAB
Heart
Note: DL Plus presents additional information that can be broadcast by stations and stored temporarily on your radio.
To return to the default Now playing screen at any time, press and hold the INFO button.
Dynamic range compression (DRC)
This function reduces the difference between the loudest and quietest audio being broadcast. Effectively, this makes quiet sounds comparatively louder, and loud sounds comparatively quieter.
Note: DRC only works if it is enabled by the broadcaster for a specific station.
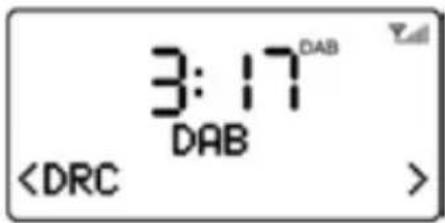
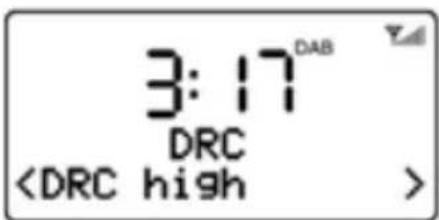
To change the DRC setting
Select Menu > DRC, then press OK button to enter the DRC submenu.
text_image
3:17
DAB
Press "DOWN" or "UP" to select the available options: DRC off, high, low.
text_image
3:17
DRC
DRC off: DRC is switched off.
DRC high: DRC is switched on; the default setting recommended for noisy environment.
DRC low: DRC is set to half normal level.
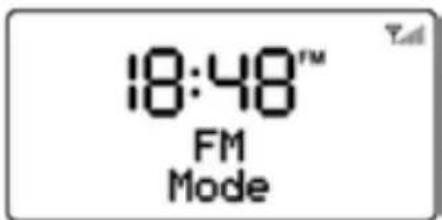
OPERATING THE UNIT IN FM MODE
FM radio mode receives analogue radio from the FM band (87.5-108MHz) and display RDS (Radio Data System) information about the station.
Fully extend the telescopic antenna.
Press and hold the STBY/FUNC button to turn on the unit during standby mode.
Short press the STBY/FUNC button to select FM mode.
text_image
18:48™
FM
Mode
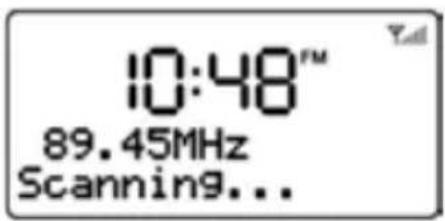
Press the SCAN button or press and hold the "DOWN"/"UP" button to search the station, it will then stop automatically at the first station it finds.
Short press "DOWN" or "UP" button to tune the radio up or down in 50 KHz steps for fine tuning.
If the reception is too weak and there is noise on the received station, try to improve the reception by changing the position of the telescopic antenna.
text_image
10:48™
89.45MHz
Scanning...
Station presets
The unit allows you to store up to 20 FM stations which work in the same way as described in DAB mode.
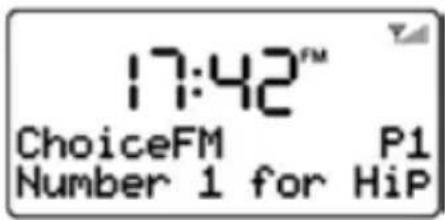
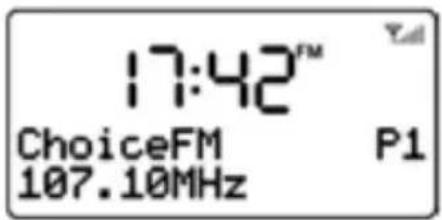
While FM radio is playing, the screen shows its frequency, or if RDS information is available, station name and any further 'RadioText' information. If no information is available, just the frequency and a No Radio Text message is shown.
text_image
17:42™
ChoiceFM P1
Number 1 for HiP
Each time you press INFO button, the next set of information is displayed, cycling through: RDS RadioText, programme type, frequency, mono/stereo, time and date.
Press and hold the INFO button to return to the default Now playing screen.
text_image
17:42™
ChoiceFM P1
107.10MHz
OPERATING THE UNIT IN AUX-IN MODE
Aux In mode plays audio from an external source such as an MP3 player.
Plug one end of the 3.5 mm audio cable (included) into the headphone or line out jack on your player, plug the other end of cable into the unit AUX-IN jack on the back of the unit.
Turn on the external audio source and play your device.
Press and hold the STBY/FUNC button to turn on the unit during standby mode.
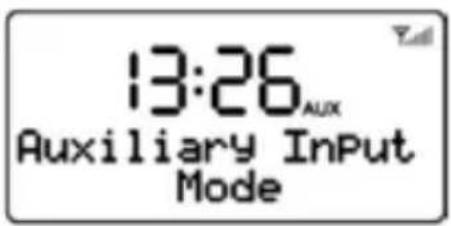
Short press the STBY/FUNC button until the "Auxiliary Input Mode" appears on the display to select AUX-IN mode.
The volume level can now be controlled through the main unit. Operate all other functions on the external device as usual.
text_image
13:26
Auxiliary InPut
Mode
Notes:
1) If you're connected to the Line out Jack of your external device, then you only need to adjust the volume control of this unit. If you're connected to the Headphone Jack of your external device, then you may need to adjust both the volume control of your external device and the volume control of this unit to find the most desirable volume setting.
2) Slide the Power ON/OFF switch to OFF position to turn off the unit when you finish listening.
Don't forget to switch off the power of your external device as well.
Sleep Timer Setup
- During operating mode, press and hold the MENU button to enter sleep timer setting mode, press "DOWN" or "UP" to adjust the sleep delay time in minutes from: Sleep off /1/20/30/60/90/120, the sleep icon "ZZZ" flashes on the display.
text_image
10:48
DAB
DAB
Mode
- Press the OK button to confirm the setting, the sleep icon "ZZZ" will stop flashing.
- Select "Sleep off" to cancel the sleep mode, the sleep icon "ZZZ" disappears simultaneously.
- When the sleep timer is active, press and hold the MENU button to show the current sleep time, press "DOWN" or "UP" to modify the setting.
SETTING AND USING THE ALARM
As well as a clock/calendar, there are two versatile wake-up alarms with snooze facility. Each alarm can use a buzzer or a selection from any of the audio sources for the alarm sound, an active alarm is indicated by a bell icon in the left of the LCD display.
Note: the alarm parameters can only be set when the radio is on.
Set the Alarm 1
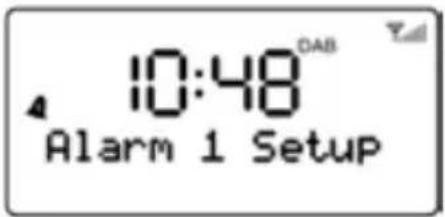
During operating mode, press & hold the ALARM/SNOOZE button until the Alarm 1 menu is shown, meanwhile, the alarm 1 alert icon flashes on the display.
Press OK button to enter Alarm 1 Wizard, the alarm wizard prompts you for the following parameters. Select a value for each parameter in turn by using "DOWN" or "UP" button and then press OK to confirm and move on to the next parameter.
text_image
10:48
Alarm 1 Setup
text_image
10:48
Alarm 1 wizard
Alarm On
Alarm Parameters:
- On time – hours and minutes
Duration – 15 | 30 | 45 | 60 | 90 minutes. If the alarm is not cancelled, the radio returns to standby after this time period.
Source – DAB | FM | Buzzer, If DAB or FM is chosen as the audio source you will also be prompted to select the last played station or one of the preset stations (if set).
Daily | Once | Weekends | Weekdays, choose the days on which the alarm is active.
Alarm – Off | On
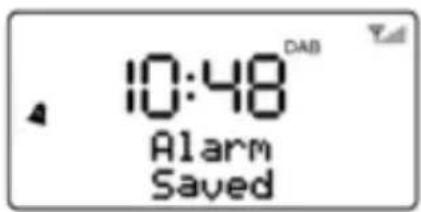
After Alarm on is selected, the alarm1 will be armed automatically, the alarm1 alert icon stops flashing.
text_image
10:48 DAB
Alarm
Saved
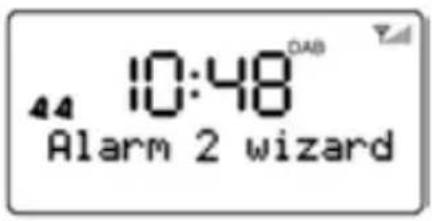
Set the Alarm 2
During operating mode, press & hold the ALARM/SNOOZE button twice until the Alarm 2 menu is shown, meanwhile, the alarm 2 alert icon flashes on the display.
text_image
44 10:48
Alarm 2 wizard
The other setting of Alarm2 refers to Alarm1 setting described above.
At the set time, the alarm will sound, quietly at first, then gradually building up to the set volume. When an alarm sounds, the bell icon in the display flashes.
To cancel the Alarm when it is activated, press and hold the ALARM/SNOOZE button or STBY/FUNC button, the unit goes to standby.
Snooze
When the alarm is activated (waking you), short press the ALARM/SNOOZE button will stop the alarm one time. The Alarm icon “SNOOZE” will show on the display & the alert icon flashes simultaneously to show it is on Snooze status.
The alarm will sound again after 10 minutes (default nap time).
System Settings
Time
The time and date can be updated manually or automatically. With auto-update, the time and date are automatically synchronized with national time signals broadcast over DAB and FM (when available). You can also select the display format for the time and date.
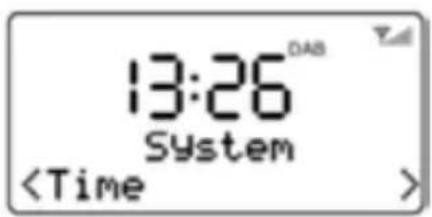
- Select Menu > System, then press OK button to enter the System menu.
text_image
13:26
System
\- Press OK button again to enter the Time setting submenu. The Time submenu contains the following options:
- Set Time/Date - (see below)
- Auto update - Update from Any | Update from DAB | Update from FM | No Update
- Set 12/24 hour - 12hour | 24hour
- Set date format
- mm-dd-yyyy | dd-mm-yyyy.

text_image
10:15
Set time
10:15
Set The Time And Date Manually
This option is for manually setting the time and date displayed. The time displays as "hh:mm", with the first value "hh" active (flashing). Adjust each value using the "DOWN" or "UP" button, then press OK button to confirm.
The next value then becomes active and flashes. The date values follow and are set in the same way.
Note: The date displays as mm-dd-yyyy or dd-mm-yyyy depending on your choice of date format.
Language
The language used for display messages can be selected from:
English/Francais/Deutsch/Italiano

text_image
10:43
System
(Language)
Factory Reset
A factory reset clears all user defined settings, replacing them with the original default values, so time/date, DAB/FM station list and preset stations are all lost.

text_image
10:43
System
If you select Factory Set, you are asked to confirm by selecting Yes.

text_image
10:43 DAB Yall
Factory reset?
Yes
SW Version
Select Menu > System > SW version, then press OK button to see the display the current software version.

text_image
10:48
System

text_image
10:48 DAB
SW version
dab-P-fm-mmi.ref
TROULBSHOOTING AND ERROR MESSAGES
1. Error Messages
Message Description DAB mode Service not available No DAB reception Signal error The DAB signal has been interrupted. No DAB Station The listed station cannot be found. (No name) The current station does not broadcast an identity name. No stations found No DAB stations are available – check aerial. FM mode No Radio Text No RDS text information is available on this station. No PTY No RDS programme type information is available. No Name No RDS station name is being broadcast. General messages Time is not set No time value is currently set on this platform. Time Not saved Any changes made to the time settings will be lost. Alarm Not saved Any changes made to the Alarm settings will be lost. Invalid Date The entered value does not match a valid date. ? List Invalid
2. Troubleshooting
Problem Cause Solutions The unit cannot be operated The unit is blocked and “hangs” Pull the mains plug for approximately 5 seconds.Then connect the unit again. No sound Volume is too low Increase the volume Poor sound quality Radio signal too weak Try to adjust the antenna position. Battery almost empty Charge the battery or operate the device with the power supply unit. FM: HissDAB: intermittent cut-outDAB: “No stations available” message Low signal strength Check/move antennaMove radioRescan local
CARE AND MAINTENANCE
- Do not subject the unit to excessive force, shock, dust or extreme temperature.
- Do not tamper the internal components of the unit.
- Clean the unit with a damp (never wet) cloth except metal contact or speaker grille, Solvent or detergent should never be used.
- Avoid leaving your unit in hot, humid or dusty places.
- Keep your unit away from heating appliances and sources of electrical noise such as fluorescent lamps or motors.
- Always keep your finger dry and clear before touching all the buttons.
- Do not dispose of batteries in fire, batteries may explode or leak.
SPECIFICATION
Power adaptor (included) Input AC 100-240V ~ 50/60Hz Output DC 5V 2A Battery capacity (included) 1000 mAH Max Play Time (with battery) 3 Hours Power Consumption 8 W Standby Power Consumption <1W DAB Frequency 174-240 MHz FM Frequency 87.5-108 MHz Working Temperature -5°C ~ +40°C Working Humidity 20% ~ 80%
The right to make technical and design modifications in the course of continuous product development remains reserved.
This device has been tested according to all relevant current CE guidelines, such as electromagnetic compatibility and low voltage directives, and has been constructed in accordance with the latest safety regulations.

text_image
CE
Bærbar
DAB+/DAB/FM Radio

natural_image
Line drawing of a portable electronic device with control panel and display screen (no text or symbols)
DK Brugervejledning
Indhold
2 Indhold
3 Information
5 Funktioner og Knapper
9 Generel betjening
19 Fejlfinding og fejlmeddelelser
21 Specifikationer
VIGTIGE SIKKERHEDSANVISNINGER
Denne radio er designet og fremstillet således, at din personlige sikkerhed sikres, såfremt du anvender radioen som beskrevet i denne vejledning. Uautoriseret brug kan derimod udgøre en potentiel fare for elektrisk stød og brand. Læs omhyggeligt alle sikkerheds- og betjeningsinstrukser, inden du sætter radioen op og tager den i brug, og gem denne vejledning, så du kan slå op i den senere. Vær især opmærksom på alle advarsler i denne vejledning og på selve radioen.
Vand og fugt
Undlad at anvende radioen nær vand. For eksempel: nær et badekar, håndvask, køkkenvask, vaskebalje, swimming pool eller i en fugtig kælder.
Ventilation
Apparatet bør placeres således, at den nødvendige luftcirkulation omkring det ikke hindres. Radioen bør f.eks. ikke placeres på en seng, sofa, gulvtæppe eller lignende blød overflade, der kan blokere ventilationsåbningerne. Ligeledes bør apparatet ikke indbygges i et skab eller en bogkasse, da den frie luftcirkulation gennem apparatets ventilationsåbninger derved nedsættes eller hindres.
Varme
Radioen bør placeres på passende afstand af varmekilder så som radiatorer, ovne eller andre apparater (inkl. forstærkere), der afgiver varme.
Strømkilde
Radioen bør udelukkende tilsluttes en strømkilde af den type og spænding, der er angivet i denne vejledning og på apparatets mærkeplade.
Rengøring
Radioen bør altid rengøres i overensstemmelse med vejledningen. Se afsnittet "Pleje og Vedligeholdelse" i denne vejledning for rengøringsanvisninger. Genstande og væsker; Stik aldrig nogen former for genstande ind i radioen gennem dens ventilationsåbninger, og pas på aldrig at spilde nogen former for væske ned i den.
Lynnedslag og fejlstrømsbeskyttelse
Tag stikket ud af stikkontakten. Derved undgår du skade på produktet i tilfælde af lynnedslag og fejlstrøm.
Overbelastning
Undlad at overbelaste stikkontakter, forlængerledninger eller multistikdåser, da dette kan medføre fare for brand eller elektrisk stød.
Skade, der kræver serviceeftersyn
Denne radio bør kontrolleres af en faguddannet reparatør under følgende omstændigheder:
Du har tabt en genstand på eller spildt væske ned i radioen.
Radioen har været udsat for regn.
Radioen har været tabt, eller kabinettet er blevet beskadiget.
Radioen opfører sig mærkbart anderledes end den plejer eller kan ikke betjenes på normal vis.
Perioder uden brug
Undgå risiko for skader eller korrosion ved at tage stikket til netledningen ud af stikkontakten, hvis apparatet ikke skal bruges i længere tid, dvs. en uge eller længere.
Service
Forsøg aldrig selv at servicere radioen ud over, hvad der er beskrevet i betjeningsvejledningen. Al service, der ikke udtrykkeligt er beskrevet i denne vejledning, bør overlades til kvalificeret servicepersonale.
FORSIGTIG:
Eksplosionsfare, hvis batteriet erstattes med et batteri af forkert type. Skift altid batteriet med et andet af samme eller tilsvarende type.
ADVARSEL:
1) Stikproppen fungerer som hovedafbryder. Sørg for, at der altid er fri adgang til den stikkontakt, apparatet er tilsluttet.
2) Batterier må ikke udsættes for stærk varme som f.eks. direkte sollys.
3) Nedsæt risikoen for brand eller elektrisk stød ved aldrig at udsætte dette apparat for regn eller fugt. Apparatet må ikke udsættes for dryp eller stænk. Undlad at placere væskefyldte beholdere, som f.eks. vaser, ovenpå apparatet.
KNAPPER OG KONTROLLER
FRONTPANEL

text_image
10:48
DAB
Mode
TOPPANEL

text_image
9
10
11
12
13
BAGPANEL

text_image
14
15
16
1. FAST STATION KNAP
- Tryk kort på denne knap for at genkalde de faste stationer, der ligger i radioen.
- Tryk og hold knappen, hvis du vil lagre faste stationer i radioen.
2. INFO-KNAP
\- I DAB/FM-tilstand: Bladrer gennem yderligere oplysninger på displayet og vender tilbage til normaldisplayet Now Playing.
3. Kanalsøgning-KNAP
- I DAB/FM-tilstand: søger automatisk efter stationer.
- I enhver anden tilstand: tryk og hold denne knap for at gennemføre ECO-test (kun til brug for producenten).
- Kort tryk for at vise menuen for den aktuelle tilstand, tryk igen for at vise displayet Now Playing.
- Tryk og hold knappen for at indstille autosluk.
5. STBY/FUNK-KNAP
- Tryk & hold denne knap for at skifte mellem "Tændt" og "Stand-by".
- Kort tryk på knappen, mens radioen er tændt, hvis du vil have adgang til andre afspilningsfunktioner: DAB, FM eller Aux In.
6. VOLUMENDREJEKNAP
\- Til justering af lydstyrken
7. LCD-SKAERM
8. Teleskopantenne
9. <-KNAP
\- Til søgning i en Menu eller DAB stationsliste.
I FM-tilstand:
- Tryk kort på knappen for at søge manuelt på frekvensbåndet fra den aktuelle frekvens og nedad mod lavereliggende frekvenser.
- Tryk og hold knappen for at søge nedad gennem frekvensbåndet og automatisk standse ved den første station, der går klart igennem.
10. OK-KNAP
\- Bekræfter det aktuelle valg.
11. >-KNAP
\- Til søgning i en Menu eller DAB stationsliste.
I FM-tilstand:
- Tryk kort på knappen for at søge manuelt på frekvensbåndet fra den aktuelle frekvens og opad mod højereliggende frekvenser.
- Tryk og hold knappen for at søge opad gennem frekvensbåndet og automatisk standse ved den første station, der går klart igennem.
12. Batteri ladeindikator
13. ALARM/SNOOZE
- Aktiverer snooze-funktionen, när alarmen lyder.
- Omskifter for LCD baggrundslys Lyst/Dæmpet/FRA.
- Tryk og hold knappen, mens radioen er tændt, hvis du vil indstille alarmerne.
14. POWER ON/OFF-KONTAKT
15. DC 5 V stik
16. 3,5 mm AUX-IN-stik
17. Signalstyrke for DAB/FM
Bjælkerne angiver signalstyrken for modtagesignalet, jo flere bjælker fra venstre mod højre, jo stærkere signal.
Opsætning
- Læs vejledningen grundigt, inden du begynder at betjene radioen!
- Vælg en passende placering til radioen. En passende placering vil sige på et tør, plan overflade, der ikke er så glat, at radioen glider, når du betjener den.
- Sørg for, at der er fri luftcirkulation omkring radioen!
- Fjern om nødvendigt den beskyttende plastikfilm fra displayet.
Strømforsyning (Adapter)
- Sæt stikket til adapteren i en korrekt installeret stikkontakt. Forbind adapteren til radioen ved at sætte DC 5 V-stikket -i radioen.
- Kontrollér, at spændingen på brugsstedet modsvarer den angivne spænding på radioens mærkeplade.
FORSIGTIG:
- Brug kun den medfølgende adapter til denne radio. Må ikke anvendes til andre enheder.
- Brug kun den originale AC-adapter. Denne adapter er specielt designet til brug med og gradvis opladning af det indbyggede batteri. Brug af en anden adapter kan nedsætte batteriets levetid eller beskadige batteriet eller radioen.
BEMAERK:
Tag stikket ud af stikkontakten, hvis du ikke skal bruge radioen i længere tid.
Opladning af batteriet
Før du kan anvende radioen med batteriet, skal du oplade det.
1. Sluk radioen ved at stille kontakten ON/OFF (14) over på "OFF".
2. Forbind radioen til en stikkontakt via adapteren. Batteri ladeindikatoren (12) tænder og lyser Gult, mens batteriet oplades. Når batteriet er fuldt opladet, skifter ladeindikatoren til Grønt.
FORSIGTIG:
Efterlad aldrig radioen uden overvågning, mens den oplader.
BEMÆRK:
Ladetiden kan variere afhængigt af, hvor meget strøm batteriet mangler til en fuld opladning.
Generel betjening
Tænde og slukke radioen
- Tænd radioen ved at skubbe kontakten Power ON/OFF på bagsiden af radioen over på ON. Displayet lyser op, viser velkomstmeddelelsen "Welcome to Digital Radio", hvorefter urets cifre blinker på displayet med "00:00".
- Standby/tændt: Herefter kan du skifte mellem standby og tændt ved at trykke og holde knappen STBY/FUNC (5).
- Hvis du vil slukke radioen helt, skal du skubbe kontakten Power ON/OFF over på OFF.
Bemærk:
1. Første gang, du tænder radioen, starter den som standard op i FM-tilstand. Tryk kort på knappen STBY/FUNC for at skifte mellem funktionerne på cirkulær vis: AUX-IN, DAB, FM.
2. Tid og dato kan automatisk opdateres via luftbårne signaler, når du stiller ind på DAB-radio. Men uret kan også indstilles manuelt i en hvilken som helst driftsmodus.
3. ECO design:
\- ECO Test-tilstand: Radioen vender tilbage til standby efter 10 sekunder. Når du anvender funktionen DAB/AUX og skubber knappen INFO over på ON eller OFF, vises en 10 sek. nedtællingstimer på displayet, hvorefter radioen vender tilbage til normal drift. Dette er en testfunktion til fabriksbrug, og funktionen kan ikke fjernes.
\- Normal ECO-tilstand: Standby aktiveres efter 60 minutter under forskellige omstændigheder:
AUX tilstand: Hvis der ingen forbindelse er til en ekstern enhed/Ingen lyd/Minimumsvolumen.
DAB-tilstanden: Hvis der intet signal kommer fra radioen.
Radioen går ikke på Standby ved intet signal/Ingen lyd/Minimumsvolumen i FM-tilstand.
Radioen går ikke på Standby ved intet signal/Ingen lyd/Minimumsvolumen i DAB-tilstand.
4. Lyset i displayet dæmpes automatisk efter 10 sekunder i Standby.
BETJENING AF RADIOEN I DAB-TILSTAND
DAB-radio modtager DAB/DAB+ digital radio og viser oplysninger om stationen.
Automatisk kanalsøgning
1. Stræk teleskopantennen helt ud.
2. Tryk og hold STBY/FUNC-knappen for at tænde radioen fra standby.
3. Tryk kort på STBY/FUNC for at aktivere DAB-tilstand.

text_image
10:48 DAB
DAB
Mode
Ved første ibrugtagning, eller hvis stationslisten er tom, gennemfører radioen automatisk en fuld kanalsøgning for at se, hvilke stationer, der er tilgængelige. Søgeprocessen vises på displayet sammen med det samlede antal kanaler fundet under søgningen.

text_image
10:48
DAB
Scanning... 42
4. Når søgningen er gennemført, indstiller radioen uret og begynder afspilning af den første station, den finder på stationslisten.
5. Hvis du vil skifte station, skal du trykke på knappen "DOWN" eller "UP" for at rulle gennem listen med stationer og trykke på knappen OK for at stille ind på den viste station. Displayet Now Playing vises med oplysninger om den nye station.
6. Hvis der ingen stationer findes under søgningen, viser displayet "NO DAB Station".
Bemærk:
1. Ligesom med Digital TV kan der være områder, hvor det stadig er svært at få et godt DAB-signal. Udbyderne forbedrer konstant DAB-dækningen, så i visse tilfælde kan det være nødvendigt at vente på, at nogle eller alle DAB-services bliver tilgængelige. Du kan tjekke dækningen i dit område.
2. Det kan også blive nødvendigt at søge manuelt for at opdatere stationslisten af en af følgende årsager:
- Nye stationer bliver fra tid til anden tilgængelige.
- Stationer lukker og kan ikke længere modtages (På stationslisten markeres ugyldige stationer med et spørgsmålstegn “?” foran navnet).
- Hvis modtagelsen ikke var god, da den indledende kanalsøgning blev gennemført (f.eks. hvis antennen ikke var strakt ud), kan det medføre en tom eller ukomplet liste over tilgængelige stationer.
- Hvis du har et dårligt signal på visse stationer, således at lyden falder ud, foretrækker du måske en stationsliste bestående udelukkende af stationer med god signalstyrke.
Sådan gentager du en fuld kanalsøgning
Hvis du vil gentage en fuld kanalsøgning, skal du enten trykke kort på SCAN-knappen eller trykke på MENU-knappen for at vise menuen og dernæst trykke på OK for at vælge fuld kanalsøgning.

text_image
17:42
DAB
DAB
Manuel Tune
Ud over den almindelige søgemetode kan du også vælge at søge manuelt efter bestemte kanaler eller frekvenser. Dette kan være nyttigt, hvis du har justeret antennen for at modtage signalet bedst muligt og vil søge efter en bestemt kanal for at opdatere stationslisten.
1. Tryk på Menu-knappen og tryk dernæst på "UP" for at se undermenuen: Mmanuel kanalsøgning, tryk på OK for at åbne.
2. Tryk på "DOWN" eller "UP" for at se en bestemt kanal/frekvens, tryk på OK-knappen for at stille ind på kanalen/frekvensen. Displayet viser en live indikation af signalstyrken fra den valgte frekvens. Justeringer af antennen vil have indflydelse på signalstyrken i signalet, der modtages.

text_image
13:26
DAB
8C 187.507MHz
Bemærk: Den lidt større firkant angiver en lydkvalitetstærskel – hvis signalstyrken, som angivet med de massive firkanter, ligger under dette niveau, vil lydkvaliteten være af dårlig kvalitet.
Fjerner stationer fra listen, som ikke er tilgængelige
1. Tryk på MENU-knappen og tryk dernæst på "DOWN" eller "UP" for at vise undermenuen: Udlugning, tryk på OK-knappen for at åbne undermenuen.
2. Tryk på "UP", vælg "Yes" og tryk dernæst på OK-knappen for at bekræfte udlugningen.
Bemærk: Dette fjerner alle ugyldige stationer markeret med et '?' foran stationens navn fra stationslisten.
Faste stationer
Du kan gemme op til 20 DAB-stationer i radioen, så du har nem adgang til dem när som helst.
Sådan gemmer du en station
1. Hvis du har fundet en station, du vil gemme, skal du trykke og holde PRESET-knappen, indtil displayet viser Preset Store.
2. Tryk på "DOWN" eller "UP" for at vælge den faste programplads, hvor du vil gemme stationen, og tryk på OK-knappen for at bekræfte.
Sådan genkalder
du en station
1. Tryk kort på PRESET-knappen i DAB-tilstand for at få adgang til de faste stationer i radioen.
2. Tryk på "DOWN" eller "UP" for at markere den ønskede faste station.
3. Tryk på OK-knappen for at vælge afspilning af den viste station.
Oplysningerne i Nu Afspilles
Mens en station afspilles, viser displayet stationens navn og DLS (Rulletekst) oplysninger udsendt af stationen som f.eks. programmets navn, titlen på musikstykket og kontaktoplysninger. Lange DLS-oplysninger på over 16 tegn ruller over displayet.
Hvis du vil se flere oplysninger
Hver gang, du trykker på INFO-knappen, vises næste sæt oplysninger på cirkulær vis som følger: DLS-tekst, DL Plus oplysninger (dette vises kun, hvis stationen udsender det), signalstyrke, programtype, multiplex navn, kanalnummer/frekvens, signal fejlrate, bitrate, codec/DAB-variant, tid og dato.

text_image
15:23
Preset Store
<1: Empty >

text_image
15:23
Preset 1
Stored

text_image
15:23
Preset Recall
<6: BBC Radio 6>

text_image
13:26
Heart
Drivetime with E

text_image
13:26 DAB
Heart
Bemærk: DL Plus angiver yderligere oplysninger, der kan sendes af stationen og lagres midlertidigt i din radio.
Du kan når som helst vende tilbage til standard Now Playing -displayet ved at trykke og holde INFO-knappen.
Komprimering af dynamisk område (DRC)
Denne funktion indskrænker forskellen mellem de mest højlydte og mest lydsvage passager i udsendelsen. Effektivt set gør funktionen de stille passager højere og de høje lyde gøres mere lavmælte.
Bemærk: DRC kan kun anvendes, hvis den aktuelle station tilbyder det.
Sådan ændres indstillingen for DRC
Vælg Menu > DRC og tryk dernæst på OKknappen for at åbne undermenuen DRC.

text_image
3:17
DAB
Tryk på "DOWN" eller "UP" for at vælge mellem indstillingerne: DRC fra, høj, lav.
DRC fra: DRC er deaktiveret.
DRC høj: DRC er slået til; dette anbefales som standardindstilling i et miljø med baggrundsstøj.
DRC lav: DRC er slået til, men kører på halv kraft.

text_image
3:17
DABC
BETJENING AF RADIOEN I FM-TILSTAND
FM radio-tilstand modtager analog radio fra FM-båndet (87,5-108 MHz) og viser RDS (Radio Data System) oplysninger om stationen.
1. Stræk teleskopantennen helt ud.
2. Tryk og hold knappen STBY/FUNC for at tænde radioen fra standby.
3. Tryk kort på STBY/FUNC for at vælge FM-tilstand.

text_image
18:48™
FM
Mode
4. Tryk på SCAN-knappen eller tryk og hold knappen "DOWN"/"UP" for at søge efter en station. Radioen standser automatisk ved den første station, den finder.
5. Tryk kort på "DOWN" eller "UP" for at finindstille ved at ændre frekvensen opad eller nedad i trin à 50 KHz.
6. Hvis modtagelsen er for dårlig, og hvis der er støj på stationen, kan du prøve at forbedre modtagelsen ved at justere teleskopantennens position.

text_image
10:48™
89.45MHz
Scanning...
Faste stationer
Du kan gemme op til 20 faste FM-stationer i radioen på samme måde som beskrevet i afsnittet DAB-tilstand.
Oplysningerne i Nu Afspilles
Mens en FM-station afspilles, viser displayet stationens frekvens eller, hvis der er RDS-oplysninger tilgængelige, stationens navn og evt. yderligere 'RadioTekst'. Hvis der ingen oplysninger er tilgængelige, vises blot frekvensen, og ingen Radio Tekst vises.

text_image
17:42™
ChoiceFM P1
Number 1 for HiP
Hvis du vil se flere oplysninger om udsendelsen
Hver gang, du trykker på INFO-knappen, vises næste sæt oplysninger på cirkulær vis som følger: RDS RadioTekst, programtype, frekvens, mono/stereo, tid og dato.
Tryk og hold INFO-knappen for at vende tilbage til standarddisplayet Now Playing.

text_image
17:42™
ChoiceFM P1
107.10MHz
BETJENING AF RADIOEN I AUX-IN-TILSTAND
Med Aux In kan du afspille audio fra en ekstern signalkilde som f.eks. en MP3-afspiller.
1. Forbind den ene ende af det medfølgende 3,5 mm audiokabel til stikket mærket headphone eller line out på den eksterne afspiller og forbind kablets andet stik til terminalen mærket AUX-IN på bagsiden af denne radio.
2. Tænd den eksterne signalkilde og start afspilningen.
3. Tryk og hold STBY/FUNC-knappen for at tænde radioen fra standby.
4. Tryk kort på STBY/FUNC-knappen, indtil "Auxiliary Input Mode" vises på displayet, for at aktivere afspilning via AUX-IN.
5. Lydstyrken kan nu justeres på radioen.
Betjen den eksterne enhed på sædvanlig vis.

text_image
13:26
Auxiliary Input
Mode
Bemærk:
1) Hvis radioen er forbundet til Line out på din eksterne enhed, kan du nøjes med at justere lydstyrken på denne enhed. Hvis radioen er forbundet til hovedtelefonstikket på din eksterne enhed, kan det være nødvendigt at justere lydstyrken både på den eksterne enhed og på denne radio for at finde den ønskede indstilling for lydstyrke.
2) Skub knappen Power ON/OFF over på OFF for at slukke radioen, när du er færdig med at lytte.
Glem ikke at slukke din eksterne enhed også.
Opsætning af autosluk
\- Mens radioen er tændt, kan du trykke og holde MENU-knappen for at aktivere opsætning af sleep timer. Tryk på "DOWN" eller "UP" for at vælge hvor mange minutter, perioden for autosluk skal være på: Sleep fra /1/20/30/60/90/120. Ikonet for autosluk "ZZZ" blinker på displayet.

text_image
10:48
DAB
DAB
Mode
\- Tryk på OK-knappen for at bekræfte din indstilling, ikonet for autosluk "ZZZ" holder op med at blinke.
\- Vælg "Sleep off" for at annullere autosluk, samtidig forsvinder ikonet for autosluk "ZZZ" fra displayet.
\- Når autosluk er aktiveret, kan du trykke og holde MENU-knappen for at se den timerens aktuelle visning og trykke på "DOWN" eller "UP" for at ændre indstillingen.
OPSÆTNING OG BRUG AF ALARMEN
Ud over ur/kalender har radioen to nyttige alarmer, begge med snooze-funktion. Hver af alarmerne kan indstilles til vækning med buzzer eller med et udvalg fra en hvilken som helst audiokilde. En aktiveret alarm vises på displayet med et klokke-ikon i venstre side af LCD-displayet.
Bemærk: alarmen kan kun indstilles, mens radioen er tændt.
Indstilling af Alarmen 1
1. Tryk og hold knappen ALARM/SNOOZE, mens radioen er tændt, indtil menuen for Alarmen 1 vises på displayet. Samtidig blinker ikonet for Alarmen 1 på displayet.
2. Tryk på OK-knappen for at åbne for indstillingen af Alarmen 1, hvor du bliver bedt om at indsætte følgende oplysninger. Vælg en værdi for hver parameter efter hinanden ved at trykke på "DOWN" eller "UP" og tryk dernæst på OK for at bekræfte og gå videre til næste parameter.

text_image
4 10:48
Alarm 1 Setup

text_image
10:48
Alarm 1 wizard
Alarm On
Parametre for alarmen:
- Starttid – timer og minutter
- Varighed – 15 | 30 | 45 | 60 | 90 minutter. Hvis alarmen ikke slås fra, vender radioen tilbage til standby efter den valgte periode.
- Signalkilde – DAB | FM | Buzzer. Hvis du vælger DAB eller FM som signalkilde, vil du blive bedt om at vælge mellem den sidst hørte station eller en af de faste stationer (hvis nogen findes).
- Dagligt | Én gang | Weekends | Hverdage; vælg de dage, hvor alarmen skal være aktiv.
- Alarmen – fra | til
Når du vælger Alarm til, lyder alarmen 1 automatisk på de valgte tidspunkter, og ikonet for alarmen 1 holder op med at blinke.

text_image
10:48 DAB
Alarm
Saved
Indstilling af Alarmen 2
1. Tryk langt på knappen ALARM/SNOOZE to gange, mens radioen er tændt, indtil menuen for Alarmen 2 vises på displayet. Samtidig blinker ikonet for Alarmen 2 på displayet.

text_image
44 10:48
Alarm 2 wizard
2. De andre indstillinger for Alarmen 2 svarer til indstilling af Alarmen 1, som beskrevet herover.
- På det valgte tidspunkt lyder alarmen, først stilfærdigt, siden skrues der gradvist op for lydstyrken. Når alarmen lyder, blinker klokke-ikonet på displayet.
- Hvis du vil deaktivere alarmen, mens den er aktiveret, skal du trykke og holde knappen ALARM/SNOOZE eller STBY/FUNC. Radioen går på standby.
Snooze
- Når alarmen aktiveres (dvs. vækker dig), kan du trykke kort på knappen ALARM/SNOOZE for at afbryde alarmen for en tid. Alarm-ikonet "SNOOZE" vises på displayet, og samtidig blinker alarmikonet som angivelse af, at Snooze er aktiveret.
- Alarmen lyder igen efter 10 minutter (standardperioden for snooze).
Systemindstillinger
Tidspunkt
Klokkeslet og dato kan opdateres manuelt eller automatisk. Med auto-opdatering synkroniseres tid og dato automatisk med de nationale tidssignaler, der sendes over DAB og FM (hvis tilgængelige). Du kan også vælge i hvilket format, dato og tid skal vises.
\- Vælg Menu > System og tryk dernæst på OK-knappen for at åbne menuen System.

text_image
13:26
System
\- Tryk på OK-knappen igen for at åbne undermenuen tidsindstillinger. Undermenuen Tidsindstillinger indeholder følgende punkter:
- Opsætning af tid/dato - (se herunder)
• Auto-opdatering - Opdatér fra alle | Opdatér fra DAB | Opdatér fra FM | Ingen opdatering
• Vælg tidsformat 12/24 timer - 12 hour | 24 hour
- Indstilling af datoformat
- mm-dd-yyyy | dd-mm-yyyy.

text_image
10:15
Set time
10:15
Manuel opsætning af Tid og Dato
Under dette punkt kan du manuelt indsætte den dato og tid, der skal vises. Tidsdisplayet viser "hh:mm", med første værdi "hh" aktiv (blinker). Justér værdien med knapperne "DOWN" eller "UP" og tryk på OK for at bekræfte. Den næste værdi bliver aktiv og blinker. Værdierne for dato indsættes på samme måde.
Bemærk: Datoen vises som mm-dd-yyyy eller dd-mm-yyyy afhængigt af det valgte datoformat.
Sprog
Du kan vælge sprog til visning af oplysningerne på displayet blandt følgende:
Engelsk/Fransk/Tysk/Italiensk

text_image
10:43
System
(Language)
Nulstilling til fabriksindstillinger
En nulstilling sletter alle brugerdefinerede indstillinger og gendanner de originale standardværdier, således at tid/dato, DAB/FM stationslister og faste stationer alle går tabt.

text_image
10:43
System
Hvis du vælger Factory Set, vil du blive bedt om at bekræfte ved at vælge Yes.

text_image
10:43
Factory reset?
Yes
SW-version
Vælg Menu > System > SW version og tryk på OK-knappen for at se den aktuelle softwareversion.

text_image
10:48
System

text_image
10:48 DAB
SW version
dab-P-fm-mmi.ref
FEJLFINDING OG FEJLMEDDELELSER
1. Fejlmeddelelser
Meddelelse Beskrivelse DAB-tilstand Ingen service tilgængelig Ingen modtagelse af DAB Signalfejl DAB-signalet er blevet afbrudt. Ingen DAB-stationer Den valgte station kan ikke findes. (Intet navn) Den aktuelle station udsender ikke et navn, hvorved den kan identificeres. Ingen stationer fundet Ingen DAB-stationer tilgængelige – tjek antennen. FM-tilstand Ingen Radio Tekst Ingen RDS tekstoplysninger tilgængelige fra denne station. Ingen PTY Ingen RDS programtypeoplysninger tilgængelige. Intet Navn Intet RDS stationsnavn udsendes. Generelle meddelelser Ur ikke indstillet Uret er ikke indstillet. Ur ikke gemt Alle ændringer i tidsindstillingerne vil gå tabt. Alarm ikke gemt Alle ændringer i alarmindstillingerne vil gå tabt. Ugyldig dato Den indtastede værdi udgør ikke en gyldig dato. ? Liste ugyldig
2. Fejlfinding
Problem Årsag Løsning Radioen kan ikke betjenes Radioen er blokeret og “hænger” Tag stikket ud af stikkontakten i ca. 5 sekunder.Tilslut så radioen igen. Ingen lyd Der er skruet for langt ned for lyden Skru op for lyden Dårlig lydkvalitet Radiosignalet er for svagt Prøv at justere antennen. Batteriet er næsten tomt Lad batteriet op eller lad radioen køre på lysnet via strømforsyningen. FM: SusenDAB: lyden falder udDAB: Meddelelsen “No stations available” Lav signalstyrke Tjek/flyt antennenFlyt radioenForetag en ny kanalsøgning
PLEJE OG VEDLIGEHOLDELSE
- Udsæt ikke radioen for unødig kraft, stød, støv eller ekstreme temperaturer.
- Forsøg aldrig selv at pille ved radioens indre dele.
- Rengør radioen med en let fugtet (aldrig våd) klud, undtagen på metalkontakter og højttalergitter. Brug aldrig opløsningsmidler eller rengøringsmidler.
- Efterlad ikke radioen på varme, fugtige eller støvede steder.
- Hold radioen på afstand af varmekilder og elektriske støjkilder som f.eks. lysstofrør og motorer.
- Hav altid tørre og rene fingre, når du berører radioens knapper.
- Kast aldrig batterier på ilden, batterierne kan eksplodere eller lække.
SPECIFICATIONER
Strømforsyning (medfølger) Indgangsspænding AC 100-240 V ~ 50/60 Hz Udgangsspænding DC 5 V 2 A Batterikapacitet (medfølger) 1000 mAH Afspilningstid (med batteri) 3 Timer Strømforbrug 8 W Standby Strømforbrug <1 W DAB Frekvensområde 174-240 MHz FM Frekvensområde 87,5-108 MHz Driftstemperatur -5°C - +40°C Luftfugtighed på brugssted 20% - 80%
Ret til tekniske og designmæssige ændringer forbeholdes. Radioen undergår stadig produktudvikling.
Denne radio er testet i overensstemmelse med alle relevante nugældende EU-retningslinjer, som f.eks. direktivet om elektromagnetisk kompatibilitet og lavstrømsdirektivet, og er fremstillet i overensstemmelse med de nyeste sikkerhedsbestemmelser.

text_image
CE
Tragbares DAB+/DAB/UKW-Radio

natural_image
Line drawing of a portable electronic device with control panel and display screen (no text or symbols)
DE Bedienungsanleitung
Inhalt
2 Inhalt
3 Informationen
5 Funktionen und Bedienelemente
9 Allgemeiner Bedienung
19 Fehlerbehebung und Fehlermeldungen
21 Technische Daten
WICHTIGE SICHERHEITSHINWEISE
Gestaltung und Herstellungsweise des Gerätes gewährleisten Ihre persönliche Sicherheit, vorausgesetzt, es wird den Anweisungen gemäß verwendet. Unsachgemäße Verwendung kann hingegen Stromschlag oder Feuer verursachen. Bitte diese Sicherheits- und Betriebsanleitung vor dem Installieren und der Benutzung des Gerätes vollständig lesen und für zukünftigen Zugriff an einem zugänglichen Ort aufbewahren. Besonders alle in dieser Anleitung und auf dem Gerät angeführten Warnhinweise beachten.
Wasser und Feuchtigkeit
Das Gerät nicht in nassem Umfeld benutzen. Zum Beispiel: in der Nähe von Badewannen, Waschbecken, Küchenspülen, Waschkessel, Schwimmbecken oder in feuchten Kellern.
Lüftung
Das Gerät an einem Ort und in einer Position platzieren, die ausreichende Lüftung gewährleisten. Z.B., nicht auf einem Bett, Sofa, Teppich oder ähnlichen Oberflächen platzieren, wo die Lüftungsöffnungen blockiert werden könnten. Es sollte auch nicht in geschlossenen Möbeln wie Bücherschränken oder Regalschränken platziert werden, die den Luftstrom in den Lüftungsöffnungen behindern könnten.
Hitze
Das Gerät fern von Wärmequellen wie Heizungen, Wärmeregler, Öfen oder anderen Hitze erzeugenden Geräten platzieren (einschließlich Verstärker).
Stromquellen
Das Gerät nur an Stromquellen anschließen, die in der Betriebsanleitung genannt werden oder auf dem Gerät bezeichnet sind.
Reinigen
Das Gerät sollte nur gemäß der Empfehlung gereinigt werden. Siehe Reinigungshinweise im Abschnitt Pflege und Wartung in dieser Anleitung. Eindringen von Gegenständen und Flüssigkeiten - Es ist darauf zu achten, dass keine Gegenstände oder Flüssigkeiten in Öffnungen und Lüftungsöffnungen des Gerätes hineinfallen oder eindringen.
Schutz vor Blitzschlag und Spannungsspitzen
Bei Gewitter das Stromkabel von der Steckdose abziehen, um einer Beschädigung des Gerätes durch Blitzschlag oder Spannungsspitzen vorzubeugen.
Überlastung
Steckdosen, Verlängerungskabel, oder integrierte Gerätesteckdosen nicht überlasten, um einem Risiko von Feuer oder Stromschlag vorzubeugen.
Falls Reparaturen anfallen
Das Gerät ausschließlich von qualifiziertem Servicepersonal warten lassen, wenn:
Gegenstände oder Flüssigkeiten in das Gehäuse geraten sind.
Das Gerät Regen ausgesetzt war.
Das Gerät heruntergefallen ist oder das Gehäuse beschädigt wurde.
Sich die Leistung des Gerätes verändert hat oder es nicht normal funktioniert.
Wenn das Gerät nicht benutzt wird
Wird das Gerät über einen längeren Zeitraum – eine Woche oder länger - nicht benutzt, das Stromkabel vom Gerät abziehen, um Beschädigung oder der Entstehung von Rost vorzubeugen.
Wartung
Über die in der Betriebsanleitung angeführten Methoden hinaus dürfen Benutzer das Gerät nicht zu warten versuchen. Wartungsarbeiten, die in der Betriebsanleitung nicht angeführt sind, dürfen nur von qualifiziertem Servicepersonal ausgeführt werden.
VORSICHT:
Es besteht Explosionsgefahr, wenn die Batterien falsch eingesetzt werden. Ersetzen Sie die Batterien nur durch Batterien oder Batterien mit gleichen Eigenschaften.
WARNUNG:
1) Der Stecker des Netzadapters wird als Trennvorrichtung verwendet; die Trennvorrichtung muss immer betriebsbereit sein.
2) Schützen Sie Batterien vor übermäßiger Hitze wie etwa direktem Sonnenlicht, Feuer usw.
3) Um eine Gefährdung durch Feuer oder Stromschlag auszuschließen, das Gerät weder Regen noch Feuchtigkeit aussetzen. Schützen Sie das Gerät vor tropfenden oder spritzenden Flüssigkeiten, und stellen Sie keine mit Flüssigkeiten gefüllten Gefäße (z. B. Vasen) auf das Gerät.
TASTENBELEGUNG
VORDERANSICHT

text_image
10:48
DAB
Mode
DRAUFSICHT

text_image
9 10 11 12 13
RÜCKANSICHT

text_image
14
15
16
1. SENDERSPEICHER-Taste
- Drücken Sie kurz diese Taste, um den Senderspeicher-Abrufmodus aufzurufen.
- Halten Sie die Taste gedrückt, um den Speichermodus für Sender aufzurufen.
2. INFO-Taste
\- Im DAB/UKW-Modus: Geht zyklisch durch weitere Informationsbildschirme und kehrt wieder zum normalen „Now Playing“-Bildschirm zurück.
3. SUCHLAUF-Taste
- Im DAB-/UKW-Modus: Automatischer Sendersuchlauf.
- In jeder Betriebsart: Halten Sie diese Taste für den ECO-Testmodus gedrückt (nur zum Gebrauch durch den Hersteller).
4. MENÜ-Taste
- Zum Anzeigen des Menüs für den aktuellen Modus kurz drücken. Erneut drücken, um den Bildschirm „Now Playing“ anzeigen.
- Halten Sie diese Taste zum Einstellen des Einschlaftimers gedrückt.
5. STBY/FUNK-Taste
- Halten Sie diese Taste gedrückt, um zwischen Betriebs- und Standby-Modus umzuschalten.
- Drücken Sie im Betriebs-Modus kurz diese Taste um verschiedene Wiedergabemodi auszuwählen: DAB, UKW oder AUX-IN.
6. LAUTSTÄRKEREGLER
\- Einstellen der Lautstärke
7. LCD-DISPLAY
8. Teleskopantenne
9. ABWÄRTS-Taste
\- Scrollt durch ein Menü oder die DAB-Senderliste.
Im UKW-Modus:
- Drücken Sie kurz diese Taste, um einen Sender ab der aktuellen Frequenz in Richtung niedrigerer Frequenzen manuell zu suchen.
- Halten Sie diese Taste gedrückt, um Sender in Richtung niedrigerer Frequenzen mit einem starken Signal suchen. Beim ersten gefundenen Sendersignal hält der Suchlauf an.
10. OK-Taste
\- Auswählen der aktuellen Option.
11. AUFWÄRTS-Taste
\- Scrollt durch ein Menü oder die DAB-Senderliste.
Im UKW-Modus:
- Drücken Sie kurz diese Taste, um einen Sender ab der aktuellen Frequenz in Richtung höhere Frequenzen manuell zu suchen.
- Halten Sie diese Taste gedrückt, um Sender in Richtung höherer Frequenzen mit einem starken Signal suchen. Beim ersten gefundenen Sendersignal hält der Suchlauf an.
12. Batterieladeanzeige
13. WECK-/SCHLUMMERFUNKTION
- Aktiviert die Schlummerfunktion bei eingeschaltetem Wecker.
- Stellt die LCD-Hintergrundbeleuchtung auf Hell/Abgedunkelt/Aus ein.
- Halten Sie diese Taste im Betriebs-Modus gedrücktt, um die Wecker einzustellen.
14. EIN-/AUSSCHALTER
15. DC 5 V Buchse
16. 3,5 mm AUX-IN-Klinkenbuchse
17. Signalanzeige für DAB/UKW
Auf dem Display wird ein Balken zur Anzeige der Signalstärke angezeigt. Je stärker das Signal ist, umso länger wird der Balken (von rechts nach links) dargestellt.
Installation
- Lesen Sie die Bedienungsanleitung sorgfältig durch, bevor Sie das Gerät in Betrieb nehmen!
- Wählen Sie einen geeigneten Standort für das Gerät. Geeignete Standorte sind trocken und sie haben eine ebene und rutschfeste Oberfläche, auf der Sie das Gerät leicht bedienen können.
- Achten Sie auf eine ausreichende Belüftung des Geräts!
- Entfernen Sie, falls erforderlich, die Schutzfolie vom Display.
Stromversorgung (Netzadapter)
\- Schließen Sie den Netzstecker an eine vorschriftsmäßig installierte Steckdose an. Verbinden Sie das Gerät mit dem Netzadapter durch Einstecken seines Steckers in die DC 5 V —●— + Buchse am Gerät.
\- Vergewissern Sie sich, dass die Netzspannung der auf dem Typenschild entspricht.
VORSICHT:
\- Verwenden mit diesem Gerät nur den im Lieferumfang enthaltenen
Netzadapter.
Nicht für andere Geräte verwenden.
\- Verwenden Sie nur den mitgelieferten Netzadapter. Dieser Adapter wurde speziell zum schrittweisen Aufladen der integrierten Batterie entworfen. Alle anderen Adapter können die Lebensdauer der Batterie verkürzen oder die Batterie und das Gerät beschädigen.
HINWEIS:
Bei längerer Nichtbenutzung den Netzstecker ziehen.
Batterie laden
Bevor Sie das Gerät in Betrieb nehmen können, müssen Sie zuerst seine Batterie aufladen.
1. Schalten Sie das Gerät mit dem ON/OFF schalter (14) aus, indem Sie ihn in die Stellung „OFF“ schieben.
2. Schließen Sie den Netzadapter an eine Steckdose an und verbinden Sie ihn mit dem Gerät. Die Batterieladeanzeige (12) leuchtet gelb auf und die Batterie wird geladen. Sobald die Batterie vollständig aufgeladen ist, leuchtet die Ladeanzeige grün auf.
VORSICHT:
Lassen Sie während des Ladevorgangs das Gerät niemals unbeaufsichtigt.
HINWEIS:
Die Dauer des Ladevorgangs hängt vom Ladezustand der Batterie ab.
Allgemeiner Bedienung
Gerät ein- oder ausschalten
- Schalten Sie das Gerät ein, indem Sie ON/OFF schalter auf der Rückseite des Geräts in die Stellung „ON“ schieben. Das Display des Geräts leuchtet auf und zeigt „Welcome to Digital Radio“ an. Anschließend blinken auf dem Display die Ziffern der Uhrzeit „00:00“.
- Standby-/Betriebs-Modus: Halten Sie die STBY/FUNC-Taste (5) zum Wechseln zwischen Standby- und Betriebs-Modus gedrückt.
- Schieben Sie zum Ausschalten des Geräts den ON/OFF-schalter in die Stellung „OFF“.
Hinweise:
1. Wenn das Gerät das erste Mal eingeschaltet wurde, ruft es standardmäßig den UKW-Modus auf. Drücken Sie zum zyklischen Wechseln der Betriebsart kurz die STBY/FUNC-Taste: AUX-IN, DAB, UKW
2. Datum und Uhrzeit können bei Betrieb des DAB-Radios automatisch aktualisiert werden. Sie können jedoch in allen Betriebsarten auch manuell eingestellt werden.
3. ECO-Design:
\- ECO-Testmodus: Das Gerät kehrt nach 10 Sekunden in den Standby-Modus zurück. Halten Sie im DAB-/AUX-Modus zum Ein- oder Ausschalten die INFO-Taste gedrückt. Auf dem Bildschirm wird ein 10 Sek. langer Countdown angezeigt und anschließend kehrt das Gerät wieder zum normalen Betrieb zurück. Dies ist der Werkstest-Modus. Diese Funktion kann nicht entfernt werden.
\- Normaler Energiesparmodus: Der Standby-Modus wird bei verschiedenen Betriebsarten nach 60 Minuten aktiviert:
AUX-Modus: Wenn kein externes Geräten angeschlossen wurde, kein Tonsignal oder eine minimale Lautstärke vom Gerät kommt.
DAB-Modus: Wenn vom Gerät kein Signal kommt.
Das Gerät aktiviert nicht den Standby-Modus, wenn im UKW-Modus kein Signal, kein Ton oder minimale Lautstärke vorliegt.
Das Gerät aktiviert nicht den Standby-Modus, wenn im DAB-Modus kein Ton oder minimale Lautstärke vorliegt.
4. Die Displaybeleuchtung wird im Standby-Modus nach 10 Sekunden automatisch abgedunkelt.
BEDIENUNG DES GERÄTES IM DAB-MODUS
Der DAB-Radiomodus empfängt DAB/DAB+ Digitalradio und zeigt Informationen über den Sender an.
Suchlauf
1. Ziehen Sie die Teleskopantenne voll aus.
2. Halten Sie zum Einschalten des Geräts aus dem Standby-Modus die STBY/FUNC-Taste gedrückt.
3. Wählen Sie mit einem kurzen Tastendruck auf STBY/FUNC den DAB-Modus.

text_image
10:48 DAB
DAB
Mode
Beim ersten Gebrauch oder wenn die Senderliste leer ist, führt das Radio automatisch einen vollständigen Sendersuchlauf durch. Das Display zeigt den Suchvortschritt und die vollständige Kanalnummer während des Suchvorgangs an.

text_image
10:48
DAB
Scanning... 42
4. Wenn der Suchlauf abgeschlossen ist, wird die Uhrzeit eingestellt und mit der Wiedergabe des ersten gefundenen Senders in der Senderliste begonnen.
5. Scrollen Sie zum Ändern des Senders mit den Tasten „DOWN“ und „UP“ durch die Senderliste und drücken Sie OK-Taste, um den angezeigten Sender einzustellen. Der Bildschirm „Aktuelle Wiedergabe“ zeigt die Einzelheiten des neuen Senders an.
6. Wenn während des Suchlaufs kein Sender gefunden wurde, zeigt das Display „NO DAB Station“ an.
Hinweise:
1. Wie beim Digital-TV gibt es einige Gebiete, in denen es möglicherweise schwierig ist, ein gutes DAB-Signal zu empfangen. Die Rundfunkanbieter verbessern ständig die DAB-Abdeckung, so dass Sie in einigen Fällen warten müssen, bevor einige oder alle DAB-Dienste verfügbar sind. Sie können die Abdeckung für Ihr Gebiet überprüfen.
2. Möglicherweise müssen Sie einen Suchlauf auch manuell starten, um die Senderliste aus einem der folgenden Gründe zu aktualisieren:
- Von Zeit zu Zeit sind neue Sender verfügbar.
- Sender wurden geschlossen oder können nicht mehr empfangen werden (In der Senderliste werden ungültige Sender mit einem Fragezeichen „?“ vor dem Namen gekennzeichnet).
- Wenn beim ersten Suchlauf der Empfang nicht gut war (z. B. die Antenne war nicht ganz ausgezogen), kann dies zu einer leeren oder unvollständigen Liste der verfügbaren Sender führen.
- Bei schlechtem Empfang kommt es bei einigen Sendern zu Tonaussetzern und Sie möchten nur Sender mit hoher Signalstärke anzeigen.
Erneutes Ausführen eines vollständigen Suchlaufs
Drücken Sie zum erneuten Ausführen eines vollständigen Suchlaufs kurz die Taste SCAN oder drücken Sie die MENU-Taste, um das Menü anzuzeigen und drücken Sie dann OK, um „Vollständigen Suchlauf“ auszuwählen.

text_image
17:42
DAB
DAB
Manuelle Sendersuche
Ebenso wie auch bei der normalen Suchmethode können Sie auch einen bestimmten Kanal/eine bestimmte Frequenz manuell einstellen. Dies kann zum Anpassen der Antenne für den bestmöglichen Empfang und zum Suchen eines bestimmten Kanals zum Aktualisieren der Senderliste nützlich sein.
1. Drücken Sie die Menu-Taste und drücken Sie dann „UP“, um das Untermenü aufzurufen: Manuelle Abstimmung. Drücken Sie anschließend zum Aufrufen die Taste OK.
2. Drücken Sie zum Anzeigen eines bestimmten Kanals/Frequenz die Taste „DOWN“ oder „UP“ und drücken Sie die Taste OK, um diesen Kanal oder diese Frequenz einzustellen. Das Display zeigt die Echtzeit-Anzeige der empfangenen Signalstärke der gewählten Frequenz an. Anpassungen der Antenne wirken sich auf die angezeigte Empfangs-Signalstärke aus.

text_image
13:26
8C 187.507MHz
Hinweis: Das etwas größere Rechteck zeigt den Schwellenwert der Audioqualität an - Wenn die Signalstärke, wie durch dies massiven Rechtecke angezeigt, unter diesen Schwellenwert fällt, verschlechtert sich die Audioqualität.
Löschen von Sendeern, die zwar aufgelistet werden, jedoch nicht verfügbar sind
1. Drücken Sie die Menü-Taste und drücken Sie dann „DOWN“ oder „UP“, um das Untermenü aufzurufen: Bereinigen. Rufen Sie mit der OK-Taste die Bereinigungsoption auf.
2. Wählen Sie mit „UP“ die Option „Yes“ und bestätigen Sie dann das Bereinigen mit OK.
Hinweis: Dies entfernt alle ungültigen Sender aus der Senderliste, die mit einem „?“ vor dem Namen des Sender gekennzeichnet sind.
Senderspeicher
Das Gerät kann jederzeit bis zu 20 DAB-Sender für schnelles Abrufen speichern.
Speichern eines Senders
1. Wenn Sie den gewünschten Sender gefunden haben, halten Sie die PRESET-Taste gedrückt, bis das Display „Preset Store“ anzeigt.
2. Wählen Sie mit der Taste „DOWN“ oder „UP“ die Senderspeicherposition und betätigen die Einstellung mit OK.

text_image
15:23
Preset Store
<1: Empty >

text_image
15:23
Preset 1
Stored
Abrufen eines Senders
1. Drücken Sie im DAB-Modus kurz die PRESET -Taste, um den Senderpeicher-Auswahlmodus aufzurufen.
2. Wählen Sie mit der Taste „DOWN“ oder „UP“ den vorbelegten Sender.
3. Wählen Sie ihn mit der OK-Taste aus und starten Sie die Wiedergabe des angezeigten Senders.

text_image
15:23
Preset Recall
<6: BBC Radio 6>
Während der Wiedergabe eines Senders zeigt der Bildschirm seinen Namen und DLS (Dynamisches Label-Segment)-Informationen an, die vom Sender übertragen werden, wie Programmname, Titel und Kontaktdaten. Eine lange DLS-Information mit mehr als 16 Zeichen scrollt über das Display.

text_image
13:26
Heart
Drivetime with E
Jedes Mal, wenn Sie die Taste INFO drücken, wird die nächste Informationsgruppe zyklisch angezeigt: DLS-Text, DL Plus-Informationen (diese wenden nur angezeigt, wenn sie vom Sender übertragen werden), Signalstärke, Programmtyp, Ensemblename, Kanalnummer/Frequenz, Signal-Fehlerrate, Bitrate, Codec/DAB-Variante, Zeit und Datum.

text_image
13:26
Heart
Hinweis: DL Plus enthält zusätzliche Informationen, die von den Sendern übermittelt und vorübergehend in Ihrem Radio gespeichert werden können. Um jederzeit wieder zum Bildschirm Now Playing zurückzukehren, halten Sie die INFO-Taste gedrückt.
Dynamik-Komprimierung (DRC)
Diese Funktion verringert den Unterschied zwischen den lautesten und leisesten übertragenen Passagen. Tatsächlich erhöht dies die relative Lautstärke der leisen Töne und verringert die Lautstärke der lauten Töne.
Hinweis: DRC funktioniert nur, wenn sie vom Rundfunkanbieter eines bestimmten Senders aktiviert wurde.
Ändern der DRC-Einstellung
Wählen Sie Menu > DRC und rufen Sie dann mit der OK-Taste das DRC-Untermenü auf.

text_image
3: 17
DAB
Wählen Sie mit der Taste „DOWN“ oder „UP“ die verfügbaren Optionen: DRC Aus, Hoch, Niedrig.

text_image
3:17
DAB
DRC
DRC Aus: DRC ist ausgeschaltet.
DRC Hoch: DRC ist eingeschaltet. Die
Standardeinstellung ist für laute Umgebungen ratsam.
DRC Niedrig: DRC ist auf die Hälfte des
normalen Pegels eingestellt.
BEDIENUNG DES GERÄTES IM UKW-MODUS
Der UKW-Radiomodus empfängt analoges Radio im UKW-
Frequenzbereich (87,5 bis 108 MHz) und zeigt RDS (Radio Data System)-Informationen über den Sender an.
1. Ziehen Sie die Teleskopantenne voll aus.
2. Halten Sie zum Einschalten des Geräts aus dem Standby-Modus die STBY/FUNC-Taste gedrückt.
3. Drücken Sie kurz die STBY/FUNC-Taste, um den UKE-Modus auszuwählen.
4. Drücken Sie die SCAN-Taste oder halten Sie die Taste „DOWN“ oder „UP“ zum Suchen der Sender gedrückt. Beim ersten gefundenen Sender hält der Suchlauf automatisch an.
5. Drücken Sie kurz die Taste „DOWN“ oder „UP“, um das Radio für eine Feineinstellung in 50 KHz-Schritten aufwärts oder abwärts abzustimmen.
6. Wenn der Empfang zu schwach und der empfangene Sender verrauscht ist, versuchen Sie durch Ändern der Position der Teleskopantenne den Empfang zu verbessern.

text_image
18:48™
FM
Mode

text_image
10:48™
89.45MHz
Scanning...
Senderspeicher
Das Gerät kann bis zu 20 UKW-Sender speichern. Das erfolgt auf die gleiche Weise wie beim oben beschriebenen DAB-Modus.
Bei der UKW-Wiedergabe eines Senders zeigt der Bildschirm dessen Frequenz, oder wenn RDS-Informationen vorhanden sind, den Sendernamen und weitere Radiotext-Informationen an. Wenn keine Informationen verfügbar sind, wird nur die Frequenz und die Meldung „Kein Radiotext“ angezeigt.

text_image
17:42™
ChoiceFM P1
Number 1 for HiP
Jedes Mal, wenn Sie die Taste INFO drücken, wird die nächste Informationsgruppe zyklisch angezeigt: RDS-Radiotext, Programmtyp, Frequenz, Mono/Stereo, Datum und Uhrzeit. Halten Sie die Taste INFO gedrückt, um zum Standardbildschirm „Now Playing“ zurückkehren.

text_image
17:42™
ChoiceFM P1
107.10MHz
BEDIENUNG DES GERÄTES IM AUX-IN-MODUS
Im Aux In-Modus kann Audio von einer externen Quelle wiedergegeben werden, wie z. B. einem MP3-Player.
1. Schließen Sie das eine Ende des 3,5 mm Audiokabels (im Lieferumfang enthalten) an die Kopfhörer- oder Line-Out-Buchse Ihres Players und das andere Ende des Kabels an der AUX-IN-Buchse auf der Rückseite des Geräts an.
2. Schalten Sie die externe Audioquelle ein und starten Sie die Wiedergabe am externen Gerät.
3. Halten Sie zum Einschalten des Geräts aus dem Standby-Modus die STBY/FUNC-Taste gedrückt.
4. Drücken Sie zum Auswählen des AUX-IN-Modus kurz die STBY/FUNC-Taste, bis auf dem Display „Auxiliary Input Mode“ angezeigt wird.
5. Die Lautstärke kann nun über das Hauptgerät geregelt werden. Bedienen Sie alle anderen Funktionen wie gewohnt am externen Gerät.

text_image
13:26
Auxiliary Input
Mode
Hinweise:
1) Wenn Sie mit der Line out-Buchse des externen Geräts verbunden sind, dann können Sie die Lautstärke nur an diesem Gerätanpassen. Wenn Sie mit der Kopfhörerbuchse des externen Geräts verbunden sind, dann müssen Sie unter Umständen den Lautstärkeregler des externen Geräts und den des Hauptgeräts anpassen, um die optimale Lautstärkeeinstellung zu suchen.
2) Wenn die Wiedergabe beendet ist, schieben Sie den ON/OFF schalter in die Stellung OFF, um das Gerät auszuschalten.
Vergessen Sie nicht, auch die Stromversorgung des externen Geräts auszuschalten.
Einschlaftimer-Einrichtung
\- Halten Sie während des Betriebs die Taste MENU gedrückt, um den Einschlaftimer-Modus aufzurufen. Stellen Sie mit Taste „DOWN“ oder „UP“ die Einschalt-Zeitdauer in Minuten ein: Einschlafen Aus /1/20/30/60/90/120. Das Einschlafsymbol „ZZZ“ blinkt auf dem Display.
\- Bestätigen Sie mit der OK-Taste die Einstellung. Das Einschlafsymbol „ZZZ“ hört auf zu blinken.

text_image
10:48
DAB
DAB
Mode
\- Wählen Sie „Sleep off“, um den Einschlaftimer-Modus zu beenden. Das Einschlafsymbol „ZZZ“ wird nicht mehr angezeigt.
\- Halten Sie bei aktiviertem Einschlaftimer die Taste MENU gedrückt, um die aktuelle Einschlafzeit anzuzeigen. Drücken Sie zum Ändern der Einstellung Taste „DOWN“ oder „UP“.
EINSTELLUNG UND GEBRAUCH DES WECKERS
So wie bei einer Uhr oder einem Kalender gibt zwei vielseitige Wecker mit Schlummerfunktion. Jeder Wecker kann einen Summer oder eine der Audioquellen als Alarmsignal auswählen. Ein aktiver Alarm wird durch ein Glockensymbol auf der linken Seite des LCD-Displays angezeigt.
Hinweis: Die Alarmparameter können nur dann eingestellt werden, wenn das Radio eingeschaltet ist.
Wecker 1 einstellen
1. Halten Sie während des Betriebs die ALARM/SNOOZE-Taste gedrückt, bis das Weckalarm 1-Menü angezeigt wird. Das Weckalarm 1-Symbol blinkt auf dem Display.

text_image
4 10:48 DAB
Alarm 1 Setup
2. Rufen Sie mit der OK-Taste den Wecker 1-Assistenten auf. Der Assistent verlangt die Eingabe folgender Parameter. Wählen Sie der Reihe nach mit der Taste „DOWN“ oder „UP“ einen Wert für jeden Parameter, bestätigen Sie dann mit OK und gehen Sie zum nächsten Parameter.

text_image
10:48
Alarm 1 wizard
Alarm On
Wecker-Parameter:
• Einschaltzeit - Stunden und Minuten
\- Dauer – 15 | 30 | 45 | 60 | 90 Minuten. Wenn der Weckalarm nicht abgebrochen wird, kehrt das Radio nach diesem Zeitraum in den Standby-Modus zurück.
\- Quelle – DAB | UKW | Summer. Wenn DAB oder UKW als Audioquelle gewählt wurde, werden Sie auch zur Auswahl des zuletzt eingestellten Senders oder eines der voreingestellten Sender (sofern eingerichtet) aufgefordert.
\- Täglich | Einmal | Wochenende | Wochentage. Wählen Sie die Tage aus, an denen der Weckalarm aktiv ist.
• Wecker - Aus | Ein
Nachdem „Wecker Ein“ gewählt wurde, wird der Weckalarm1 automatisch scharfgeschaltet. Das Weckalarm1-Symbol blinkt nicht mehr.

text_image
10:48 DAB
Alarm
Saved
Wecker 2 einstellen
1. Halten Sie während des Betriebs die ALARM/SNOOZE-Taste zweimal gedrückt, bis das Weckalarm 2-Menü angezeigt wird. Das Weckalarm 2-Symbol blinkt auf dem Display.

text_image
44 10:48 DAB
Alarm 2 wizard
2. Die anderen Einstellungen von Weckalarm2 erfolgen wie bei der oben beschriebenen Einstellung von Weckalarm1.
- Zur eingestellten Zeit ertönt der Weckalarm zuerst leise und wird dann schrittweise bis zur eingestellten Lautstärke erhöht. Wenn ein Weckalarm ertönt, blinkt das Glockensymbol im Display.
- Halten Sie zum Löschen eines aktivierten Weckalarms die ALARM/SNOOZE- oder die STBY/FUNC-Taste gedrückt. Das Gerät wechselt in den Standby-Modus.
Schlummerfunktion
- Wenn der Weckalarm aktiviert wurde (Wecken), drücken Sie kurz die ALARM/SNOOZE-Taste, um den Weckalarm zu beenden.
Das Weckalarmsymbol SNOOZE wird auf dem Display angezeigt und gleichzeitig blinkt das Warnsymbol um anzuzeigen, dass die Schlummerfunktion aktiv ist.
• Der Weckalarm ertönt nach 10 Minuten nochmals.
Systemeinstellungen
Uhrzeit
Uhrzeit und Datum können manuell oder automatisch aktualisiert werden. Bei Auto-Aktualisierung werden Zeit und Datum automatisch mit den von DAB und UKW (wenn verfügbar) übertragenen Ortszeitsignalen synchronisiert. Sie können auch das Anzeigeformat für Uhrzeit und Datum wählen.
\- Wählen Sie Menu > System und rufen Sie dann mit der Taste OK das Menüsystem auf.

text_image
13:26
System
\- Rufen Sie mit der OK-Taste das Untermenü Zeiteinstellung- auf. Das Zeituntermenü enthält die folgende Optionen:
- Zeit/Datum einstellen - (siehe unten)
- Auto-Aktualisierung - -Aktualisierung von jeder Quelle | -Aktualisierung von DAB | Aktualisierung von UKW | Keine Aktualisierung
• 12/24-Format einstellen - 12- | 24-Stunden
\- Datumsformat einstellen
\- mm-tt-jjjj | dd-mm-jjjj.

text_image
10:15
Set time
10:15
Datum und Uhrzeit manuell einstellen
Diese Option dient der manuellen Einstellung der Uhrzeit- und
Datumsanzeige. Die Zeit wird als hh:mm angezeigt, wobei der ersten Wert hh aktiviert (blinkt) ist. Stellen Sie jeden Wert mit der Taste „DOWN“ oder „UP“ ein und bestätigen Sie dann mit der OK-Taste. Der nächste Wert wird dann aktiviert und blinkt. Die aktuellen Datumswerte folgen und werden auf die gleiche Weise eingestellt.
Hinweis: Das Datum wird je nach Wahl des Datumsformats als mm-dd-jjjj oder dd-mm-jjjj angezeigt.
Sprache
Die Sprache der Displaymeldungen kann gewählt werden:
English/Francais/Deutsch/Italiano

text_image
10:43
System
(Language)
Auf Werkseinstellung zurücksetzen
Das Rücksetzen auf die Werkseinstellungen löscht alle vom Benutzer definierten Einstellungen, so dass Zeit/Datum, DAB/UKW-Senderliste und die voreingestellten Sender verloren sind.

text_image
10:43
System
Wenn Sie die Option „Factory Set“ wählen, müssen Sie die Auswahl mit „Yes“ bestätigen.

text_image
10:43
DAB
Tall
Factory reset?
Yes
Softwareversion
Wählen Sie Menu > System > SW-Version und drücken Sie anschließend die OK-Taste, um die aktuelle Software-Version anzuzeigen.

text_image
10:48
System

text_image
10:48 DAB
SW version
dab-P-fm-mmi.ref
FEHLERBEHEBUNG UND FEHLERMELDUNGEN
1. Fehlermeldungen
Nachricht Beschreibung DAB-Modus Dienst nicht verfügbar Kein DAB-Empfang Signalfehler Das DAB-Signal wurde unterbrochen. Kein DAB-Sender Der aufgeführte Sender kann nicht gefunden werden. (Kein Name) Der aktuelle Sender überträgt keinen Identitätsnamen. Keine Sender gefunden Keine DAB-Sender verfügbar - Antenne überprüfen. UKW-MODUS Kein Radiotext Keine RDS-Textinformationen für diesen Sender verfügbar. Kein PTY Keine RDS-Programmtyp-Informationen verfügbar. Kein Name Es wurde kein RDS-Sendername übertragen. Allgemeine Meldungen Uhrzeit ist nicht eingestellt Auf diesem Gerät ist momentan kein Uhrzeitwert eingestellt. Uhrzeit nicht gespeichert Alle Änderungen an den Uhrzeiteinstellungen gehen verloren. Weckalarm nicht gespeichert Alle Änderungen an den Weckalarm-Einstellungen gehen verloren. Ungültiges Datum Der eingegebene Wert entspricht keinem gültigen Datum. ? Liste ungültig
2. Störungsbehebung
Problem Ursache Lösungen Das Gerät kann nicht in Betrieb genommen werden Das Gerät ist blockiert und hat sich „aufgehängt“ Ziehen Sie den Netzstecker für ca. 5 Sekunden.Schließen Sie dann das Gerät erneut an. Kein Ton Lautstärke ist zu niedrig Lautstärke erhöhen Schlechte Tonqualität Radiosignal ist zu schwach Richten Sie die Antenne neu aus. Batterie ist fast leer Laden Sie die Batterie oder betreiben Sie das Gerät mit dem Netzadapter. UKW: RauschenDAB: UnterbrochenesAussetzenDAB: Meldung „No stations available“ Geringe Signalstärke Antenne überprüfen/ausrichtenDas Radio umsetzenOrtssender erneutsuchen
PFLEGE UND WARTUNG
- Setzen Sie das Gerät nicht übermäßiger Kraftanwendung, Stößen, Staub oder extremen Temperaturen aus.
- Manipulieren Sie nicht die internen Komponenten des Geräts.
- Reinigen Sie das Gerät, außer den Metallteilen oder dem Lautsprechergitter, mit einem feuchten (niemals nassen) Tuch. Niemals Lösungsmittel oder Reinigungsmittel verwenden.
- Bewahren Sie das Gerät nicht in heißen, feuchten oder staubigen Umgebungen auf.
- Halten Sie das Gerät von Heizgeräten und elektrischen Störquellen wie Leuchtstofflampen oder Motoren fern.
- Berühren Sie die Tasten nur mit trockenen und sauberen Fingern.
- Entsorgen Sie Batterien niemals im Feuer, diese könnten explodieren oder auslaufen.
TECHNISCHE DATEN
Netzadapter (im Lieferumfang enthalten) Eingang AC 100-240 V ~ 50/60 Hz Ausgang DC 5 V, 2 A Batteriekapazität (Batterie im Lieferumfang enthalten) 1000 mAh Max. Wiedergabezeit (mit Batterie) 3 Stunden Leistungsaufnahme 8 W Leistungsaufnahme in Standby < 1 W DAB-Frequenz 174 bis 240 MHz UKW-Frequenz 87,5 bis 108 MHz Betriebstemperatur -5°C bis +40°C Betriebsluftfeuchtigkeit 20% bis 80%
Technische und konstruktive Designänderungen im Laufe der fortgesetzten Produktentwicklung vorbehalten.
Dieses Gerät wurde unter Berücksichtigung aller aktuellen CE-Richtlinien getestet, wie elektromagnetischer Verträglichkeit und Niederspannungsrichtlinie und entspricht den aktuellen Sicherheitsvorschriften.

text_image
CE
Portable
Radio DAB+/DAB/FM

natural_image
Line drawing of a portable electronic device with control panel and display screen (no text or symbols)
FR Guide d'instructions
Table des matières
2 Table des matières
3 Informations
5 Fonctions des Touches de Commande
9 Principales opérations
19 Guide de dépannage et messages d'erreur
21 Spécifications
CONSIGNES DE SECURITE IMPORTANTES
Cet appareil a été conçu et fabriqué pour fonctionner en toute sécurité pour l'utilisateur, sous réserve de respecter toutes les instructions de ce guide.
Cependant, toute erreur de manipulation peut présenter un danger potentiel de choc électrique ou de début d'incendie. Lisez toutes les instructions de sécurité et de fonctionnement avant d'utiliser votre appareil et conservez-les instructions pour référence ultérieure. Respectez tous les avertissements rapportés dans ce guide et sur l'appareil.
Eau et humidité
N'utilisez pas cet appareil près d'une source d'eau. Par exemple : près d'une baignoire, d'un lavabo, d'un évier de cuisine, d'un bac à laver le linge, d'une piscine ou d'une cave humide.
Ventilation
Posez l'appareil dans un endroit et dans une position lui assurant une ventilation suffisante. Par exemple, ne le posez pas sur un lit, un canapé, un tapis ou toute autre surface risquant d'obstruer les ouvertures de ventilation. Également, ne le placez pas à l'intérieur d'un meuble encastré, telle une bibliothèque ou un autre meuble risquant d'entraver la bonne circulation de l'air par les ouvertures de ventilation.
Chaleur
Éloignez l'appareil de toute source de chaleur telle qu'un radiateur, une ouverture d'air chaud, un four et tout autre appareil dégageant de la chaleur (y compris un amplificateur).
Alimentation électrique
Branchez l'appareil uniquement sur une alimentation électrique du type décrit dans les instructions d'utilisation ou marqué sur le produit même.
Nettoyage
Nettoyez l'appareil uniquement de la manière indiquée dans ce guide. Reportez-vous à la section « Nettoyage et entretien » de ce guide pour les instructions détaillées. Ouvertures d'aération : veillez à ce qu'aucun objet ni liquide ne pénètrent à l'intérieur de l'appareil via les ouvertures d'aération.
Protection contre la foudre et les pointes de courant
Débranchez l'appareil de la prise secteur. Vous évitez ainsi que la foudre et les pointes de courant n'endommage l'appareil.
Surcharge
Ne surchargez pas vos prises secteur, rallonges électriques et boîtiers de raccordement pour éviter de vous exposer alors à des risques de début d'incendie et de choc électrique.
Dommage nécessitant une réparation
Vous devez apporter votre appareil à un technicien qualifié lorsque :
Un liquide ou un objet est tombé à l'intérieur de l'appareil ;
L'appareil a été exposé à la pluie ;
L'appareil est tombé ou présente des signes extérieurs de dommage ;
L'appareil affiche une baisse de performances ou ne fonctionne pas normalement.
Périodes de non-utilisation
Débranchez votre appareil de la prise secteur si vous n'envisagez pas de l'utiliser avant longtemps (une semaine ou plus). Vous éviterez qu'il ne se détériore sous l'effet de phénomènes électriques ou de la corrosion.
Réparation
Seules les opérations de maintenance indiquées dans ce guide sont permises à l'utilisateur. Toutes les autres sont du seul ressort d'un technicien professionnel qualifié.
ATTENTION :
Toute erreur de positionnement de la pile vous expose à un risque d'explosion. Remplacez la pile uniquement par une pile de même type ou d'un type équivalent.
AVERTISSEMENT :
1) Votre seule option pour éliminer toute tension à l'intérieur de l'appareil est de débrancher celui-ci du secteur. Aussi, prévoyez que la prise soit facilement accessible à tout moment.
2) N'exposez pas vos piles à une chaleur excessive (soleil, etc.).
3) Pour éviter des risques d'incendie et de choc électrique, n'exposez pas votre appareil à la pluie ou à l'humidité. Ne placez pas votre appareil dans un endroit l'exposant à un contact avec un liquide (par égouttement, éclaboussure, etc.) et ne posez dessus aucun objet rempli d'un liquide, tel un vase.
EMPLACEMENT DES ÉLÉMENTS DE COMMANDE
VUE AVANT

text_image
10:48
DAB
Mode
VUE DE DESSUS

text_image
9 10 11 12 13
VUE ARRIÈRE

text_image
14
15
16
1. TOUCHE DE PRÉSÉLECTION
- Appuyez brièvement sur cette touche pour passer en mode rappel des stations de radio présélectionnées.
- Appuyez sur cette touche et maintenez-la enfoncée pour passer en mode présélection de station.
2. Touche INFO
\- En mode radio numérique/FM : Chaque pression sur la touche INFO affiche une information différente, jusqu'à revenir à la page-écran de diffusion normale.
3. Recherche de stations
- En mode radio numérique/FM : démarre la recherche automatique de stations.
- Depuis tout mode de fonctionnement : appuyez sur cette touche et maintenez-la enfoncée pour passer en mode test ECO (réservé au fabricant uniquement).
- Appuyez brièvement sur cette touche pour accéder au menu du mode actuel.
Réappuyez sur cette touche pour revenir à la page Lecture en cours.
- Appuyez sur cette touche et maintenez-la enfoncée pour configurer la fonction d'arrêt automatique.
5. Touche Veille/Fonction
- Appuyez sur cette touche et maintenez-la enfoncée pour passer du mode « Marche » au mode « Veille » et vice-versa.
- Appuyez brièvement sur cette touche depuis le mode « Marche » pour sélectionner un mode de fonctionnement parmi les suivants : DAB, FM ou Aux In.
6. BOUTON DE VOLUME
\- Ajuste le volume sonore
7. ECRAN LCD
8. Antenne télescopique
9. Touche <
\- Permet de parcourir les options d'un menu ou les entrées d'une liste de stations numériques.
En mode FM :
- Appuyez brièvement sur cette touche pour démarrer une recherche de stations dans le sens décroissant des fréquences, depuis la fréquence actuelle.
- Appuyez sur cette touche et maintenez-la enfoncée pour démarrer une recherche de stations dans le sens décroissant des fréquences et l'arrêter sur la première station dont le signal est suffisamment fort.
10. Touche OK
\- Sélectionne l'option actuelle.
11. Touche >
\- Permet de parcourir les options d'un menu ou les entrées d'une liste de stations numériques.
En mode FM :
- Appuyez brièvement sur cette touche pour démarrer une recherche de stations dans le sens croissant des fréquences, depuis la fréquence actuelle.
- Appuyez sur cette touche et maintenez-la enfoncée pour démarrer une recherche de stations dans le sens croissant des fréquences et l'arrêter sur la première station dont le signal est suffisamment fort.
12. Indicateur de chargement de la pile
13. Réveil/Rappel de réveil
- Active le mode rappel lorsque la source sonore de réveil retentit.
- Modifie l'intensité d'éclairage de l'écran (Fort/Faible/Désactivé).
- Appuyez sur cette touche et maintenez-la enfoncée en mode Marche pour configurer la fonction réveil.
14. COMMUTATEUR DE MARCHE/ARRÊT
15. Entrée d'alimentation 5 V CC
16. Entrée AUX-IN, 3,5 mm
17. : Force du signal pour la diffusion numérique/FM
Diagramme à barres illustrant la force du signal. Plus les barres sont longues et développées vers la droite et plus le signal est fort.
Installation
- Lisez complètement ce guide avant d'utiliser l'appareil !
- Choisissez un emplacement approprié pour y poser l'appareil. La surface choisie doit être sèche et antidérapante afin de pouvoir utiliser facilement l'appareil.
- Prévoyez une ventilation suffisante de l'appareil.
- Le cas échéant, retirez le film de protection sur l'écran.
Alimentation électrique (adaptateur)
\- Branchez l'extrémité appropriée de l'adaptateur sur une prise secteur.
Branchez l'autre extrémité sur l'entrée DC 5 V — Ⓐ + de votre appareil.
\- Vérifiez que la tension fournie par le secteur correspond à celle marquée sur la plaquette de spécifications électriques de l'appareil.
ATTENTION :
- Utilisez uniquement l'adaptateur électrique qui a été fourni avec l'appareil. Ne le branchez sur aucun autre appareil.
- Utilisez uniquement l'adaptateur original du fabricant. Il a été spécialement conçu pour charger progressivement la pile de votre appareil. Tout autre adaptateur risque de raccourcir la durée de vie de la pile et d'endommager la pile ou l'appareil.
REMARQUE :
Débranchez l'appareil du secteur lorsque vous n'envisagez pas de l'utiliser avant longtemps.
Chargement de la pile
Pour pouvoir utiliser votre appareil, vous devez auparavant charger sa pile.
1. Éteignez l'appareil en poussant le commutateur ON/OFF (14) sur la position « OFF ».
2. Branchez-le sur le secteur à l'aide de l'adaptateur électrique. Le chargement de la pile commence immédiatement et l'indicateur correspondant (12) s'allume en jaune. Dès que le chargement est terminé, l'indicateur passe en vert.
ATTENTION :
Ne laissez jamais l'appareil sans surveillance pendant le chargement de la pile.
REMARQUE :
La durée de chargement dépend du niveau actuel de tension de la pile.
Principales opérations
Mise en marche et arrêt de l'appareil
- Pour mettre en marche votre appareil, poussez le commutateur de ON/OFF sur la position ON. L'écran s'allume, le message « Welcome to Digital Radio » apparaît brièvement puis les chiffres de l'horloge « 00:00 » commencent à clignoter.
- Mode veille/marche : Pour passer du mode veille au mode marche et vice-versa, appuyez sur la touche STBY/FUNC (5) et maintenez-la enfoncée.
- Pour éteindre l'appareil, poussez le commutateur de ON/OFF sur la position OFF.
Remarques :
1. Lorsque vous allumez l'appareil pour la première fois, il se place automatiquement en mode FM. Appuyez alors brièvement sur la touche STBY/FUNC pour modifier le mode de fonctionnement, selon la séquence suivante : AUX-IN, DAB, FM.
2. En mode radio numérique, vous pouvez activer la synchronisation automatique de l'heure et de la date. Le réglage manuel, lui, est possible depuis tout mode de fonctionnement.
3. Conception ECO :
\- Mode test ECO : L'appareil retourne en mode veille après 10 secondes. Depuis les modes DAB/AUX, appuyez sur la touche INFO et maintenez-la enfoncée. Le compte à rebours sur 10 s commence sur l'écran puis la radio retourne en mode de fonctionnement normal. Ce mode est utilisé comme test en usine ; vous ne pouvez pas supprimer cette fonction.
\- Mode ECO normal : Le mode veille sera activé comme suit après 60 minutes : Mode AUX : Aucune connexion avec un appareil externe/Pas de son/Volume minimum en provenance de l'appareil.
Mode DAB : Aucun signal en provenance de l'appareil.
L'appareil ne passe pas en mode veille dans les conditions aucun signal/pas de son/volume minimal en mode FM.
L'appareil ne passe pas en mode veille dans les conditions pas de son/volume minimal en mode radio numérique.
4. L'écran s'éteint automatiquement après 10 secondes en mode veille.
UTILISATION DE L'APPAREIL EN MODE RADIO NUMÉRIQUE
Le mode radio numérique permet de diffuser le contenu de stations numériques DAB/DAB+ et d'afficher des informations sur la station.
Recherche automatique de stations
1. Déployez complètement l'antenne télescopique.
2. Appuyez sur la touche STBY/FUNC et maintenez-la enfoncée pour allumer l'appareil depuis le mode veille.
3. Appuyez brièvement sur la touche STBY/FUNC pour sélectionner le mode radio numérique DAB.

text_image
10:48 DAB
DAB
Mode
Lorsque vous activez le mode radio numérique pour la première fois ou lorsque la liste des stations est vide, la radio procède à une recherche automatique de toutes les stations qui sont accessibles. Le déroulement de la recherche et le nombre de stations localisées sont affichés sur l'écran.

text_image
10:48
DAB
Scanning... 42
4. Lorsque la recherche est terminée, la radio synchronise l'heure et diffuse les programmes de la première station de la liste.
5. Pour écouter une autre station, sélectionnez-la dans la liste des stations à l'aide des touches « DOWN » et « UP » puis appuyez sur la touche OK pour confirmer votre choix. La page-écran Lecture en cours apparaît, avec diverses informations sur la station.
6. Si la radio ne détecte aucune station, elle affiche le message « NO DAB Station » sur l'écran.
Remarques :
1. Comme pour la télévision numérique, la réception des signaux peut se révéler insuffisante dans certaines régions. Les diffuseurs s'emploient constamment à améliorer la couverture numérique, mais vous pouvez encore, dans certains endroits, avoir à attendre la disponibilité de certains ou tous les services numériques. Vérifiez la couverture numérique de votre région.
2. Vous pouvez être amené à démarrer manuellement une recherche de stations pour l'une des raisons suivantes :
- De nouvelles stations deviennent accessibles.
- Des stations ferment ou ne sont plus accessibles (elles sont alors repérées par un point d'interrogation « ? » dans la liste des stations).
- La réception était trop faible lors de la première recherche (par exemple si vous aviez oublié de déployer l'antenne) et la liste des stations qui a été générée était vide ou incomplète.
- La réception de certaines stations, trop faible, provoque le décrochement de la radio et vous voulez ne conserver que les stations de signal suffisamment fort.
Démarrage d'une nouvelle recherche complète des stations
Pour démarrer une nouvelle recherche de toutes les stations disponibles, appuyez brièvement sur la touche SCAN ou appuyez sur la touche MENU puis sur la touche OK pour sélectionner l'option Recherche complète.

text_image
17:42
DAB
DAB
Recherche manuelle
En plus du balayage de la bande de fréquences, vous pouvez rechercher manuellement un canal ou une fréquence spécifique. Cette fonction est utile pour ajuster la position de l'antenne afin d'optimiser la réception et pour rechercher un canal spécifique et mettre à jour la liste des stations.
1. Appuyez sur la touche Menu puis sur la touche « UP » pour sélectionner l'option. Recherche manuelle. Appuyez sur la touche OK pour confirmer votre choix.
2. Appuyez sur la touche « DOWN » ou « UP » jusqu'à afficher le canal ou la fréquence que vous désirez et appuyez sur la touche OK pour rechercher ce canal ou cette fréquence. L'écran affiche la force des signaux reçus sur la fréquence correspondante. Tout ajustement de la position de l'antenne est immédiatement répercuté sur la force des signaux reçus qui est affichée à l'écran.

text_image
13:26
8C 187.507MHz
Remarque : Le rectangle légèrement plus grand repère le seuil de la qualité audio. Lorsque la force de signal, indiquée par les rectangles pleins, chute en dessous de ce seuil, la qualité audio devient insuffisante.
1. Appuyez sur la touche Menu puis sur la touche « DOWN » pour sélectionner l'option. Purger ; appuyez sur la touche OK pour confirmer votre choix.
2. Appuyez sur la touche « UP » pour sélectionner « Yes » puis sur la touche OK pour confirmer votre choix.
Remarque : Cette opération supprime toutes les stations de la liste qui sont repérées par un ‘?’.
Présélection de station
Vous pouvez présélectionner jusqu'à 20 stations numériques afin d'y accéder ensuite plus rapidement.
Pour présélectionner une station de radio
1. Recherchez la station si ce n'est pas déjà fait, appuyez sur la touche PRESET et maintenez-la enfoncée jusqu'à afficher le message Preset Store.
2. Choisissez une position mémoire pour cette station à l'aide des touches « DOWN » ou « UP » et appuyez sur la touche OK pour confirmer votre choix.

text_image
15:23
Preset Store
<1: Empty >

text_image
15:23
Preset 1
Stored
Pour entendre le contenu d'une station de radio présélectionnée
1. Appuyez brièvement sur la touche PRESET depuis le mode radio numérique. La radio se place en mode rappel de présélection.
2. Appuyez sur la touche « DOWN » ou « UP » jusqu'à sélectionner la position mémoire de la station que vous voulez entendre.
3. Appuyez sur la touche OK pour valider votre choix et diffuser le contenu de la station.

text_image
15:23
DAB
Preset Recall
<6: BBC Radio 6>
Pendant la diffusion d'une station, la radio affiche son nom et le radiotexte (DLS pour Dynamic Label Segment) éventuellement fourni par la station (nom de l'émission, titre de la chanson, coordonnées de contact, etc.). Lorsque les informations DLS occupent plus de 16 caractères, elles défilent à l'écran.
Chaque pression sur la touche INFO affiche une information différente, selon la séquence suivante : Texte DLS, informations DL Plus (si de telles informations sont transmises par la station), force du signal, type de programme, nom de l'ensemble, canal/fréquence, taux d'erreur dans le signal, débit binaire, codec/variant DAB, heure et date.

text_image
13:26
Heart
Drivetime with E

text_image
13:26
Heart
DAB
Remarque : DL Plus affiche les informations supplémentaires envoyées par certaines stations et stockées temporairement sur la radio.
Vous pouvez revenir à tout moment à la page-écran par défaut Lecture en cours en appuyant sur la touche INFO et la maintenant enfoncée.
Compression dynamique (DRC pour Dynamic Range Compression)
Cette fonction réduit l'écart entre le niveau sonore le plus faible et le niveau sonore le plus fort. Pour cela, elle augmente le volume des plages de faible niveau sonore et diminue celui des plages de fort niveau sonore.
Remarque : La compression dynamique ne fonctionne que si le diffuseur l'autorise expressément pour une station spécifique.
Sélectionnez Menu > DRC et appuyez sur la touche OK pour accéder au sous-menu correspondant.

text_image
3:17
DAB
Appuyez sur la touche « DOWN » ou « UP » jusqu'à sélectionner l'option que vous désirez parmi les suivantes : Comp. désactivée, Comp. élevée, Comp. faible.

text_image
3:17
DABC
Comp. désactivée : Aucune compression dynamique n'est appliquée.
Comp. élevée : Une forte compression dynamique est appliquée ; valeur par défaut, recommandée dans un environnement bruyant.
Comp. faible : Une compression dynamique moitié moindre que la compression normale est appliquée.
UTILISATION DE L'APPAREIL EN MODE FM
Le mode FM vous permet de recevoir les stations analogiques de la bande FM (87,5-108 MHz) et d'afficher les informations RDS (Radio Data System).
1. Déployez complètement l'antenne télescopique.
2. Appuyez sur la touche STBY/FUNC et maintenez-la enfoncée pour allumer l'appareil depuis le mode veille.
3. Appuyez brièvement sur la touche STBY/FUNC pour sélectionner le mode FM.

text_image
18:48™
FM
Mode
4. Appuyez sur la touche SCAN ou appuyez sur la touche « DOWN/UP » et maintenez-la enfoncée pour démarrer une recherche de station et l'arrêter sur la première station localisée.
5. Pour affiner la réception, le cas échéant, appuyez brièvement sur la touche « DOWN » ou « UP » pour diminuer ou augmenter la fréquence de 50 KHz.
6. Si la réception est faible et perturbée par du bruit, essayez de modifier la position de l'antenne télescopique.

text_image
10:48™
89.45MHz
Scanning...
Présélection de station
Vous pouvez présélectionner jusqu'à 20 stations FM sur votre appareil. La procédure est identique à celle qui a été décrite pour le mode radio numérique.
Pendant que vous écoutez le contenu d'une station FM, sa fréquence et, si ses données RDS sont disponibles, son nom et le radiotexte transmis par le poste émetteur, sont affichés sur l'écran de votre appareil. Si aucune information n'est disponible, la fréquence et le message Aucun radiotexte sont affichés sur l'écran.

text_image
17:42™
ChoiceFM P1
Number 1 for HiP
Chaque pression sur la touche INFO affiche une information différente, selon la séquence suivante : Radiotexte RDS, type de programme, fréquence, mono/stéréo, heure et date.
Appuyez sur la touche INFO et maintenez-la enfoncée pour revenir à la page-écran par défaut Lecture en cours.

text_image
17:42™
ChoiceFM P1
107.10MHz
UTILISATION DE L'APPAREIL EN MODE AUX
Le mode Aux vous permet d'écouter sur votre radio le contenu audio d'un appareil externe, par exemple un lecteur MP3.
1. Branchez une extrémité du câble audio 3,5 mm (fourni) sur la sortie écouteurs ou ligne de la source externe et branchez l'autre extrémité sur l'entrée AUX-IN de votre radio.
2. Allumez la source externe et démarrez la lecture d'un contenu sur cet appareil.
3. Appuyez sur la touche STBY/FUNC et maintenez-la enfoncée pour allumer votre radio si elle est en mode veille.
4. Appuyez brièvement sur la touche STBY/FUNC jusqu'à afficher « Auxiliary Input Mode » sur l'écran pour sélectionner ce mode.
5. Vous contrôlez le volume depuis l'unité principale. Pour toutes les autres fonctions, procédez depuis la source audio externe.

text_image
13:26
Auxiliary Input
Mode
Remarques :
1) Si vous avez connecté le câble audio sur la sortie ligne de la source externe, il vous suffit d'ajuster le volume sur la source. Si vous avez connecté le câble audio sur la sortie écouteurs de la source externe, vous devez ajuster le volume à la fois sur la source et sur la radio jusqu'à trouver le niveau sonore qui vous convient.
2) Poussez le commutateur de marche/arrêt de la radio sur la position OFF lorsque vous ne voulez plus écouter le contenu audio.
N'oubliez pas d'éteindre également la source audio externe.
Fonction arrêt automatique
\- En mode marche, appuyez sur la touche MENU et maintenez-la enfoncée pour configurer la fonction arrêt automatique. Sélectionnez un délai avant l'arrêt à l'aide des touches « DOWN » et « UP ». Vous avez le choix entre les valeurs suivantes : Désactivé/1/20/30/60/90/120. L'icône « ZZZ » clignote sur l'écran.

text_image
10:48
DAB
DAB
Mode
\- Appuyez sur la touche OK pour confirmer votre choix. L'icône « ZZZ » cesse de clignoter sur l'écran.
\- Sélectionnez « Désactivé » pour désactiver la fonction arrêt automatique. L'icône « ZZZ » disparaît de l'écran.
\- Après que vous avez choisi un délai avant arrêt, appuyez sur la touche MENU et maintenez-la enfoncée pour l'afficher sur l'écran. Le cas échéant, appuyez sur la touche « DOWN » ou « UP » pour choisir un autre délai.
RÉGLAGE ET UTILISATION DE LA FONCTION RÉVEIL
Comme avec une horloge/calendrier, vous pouvez définir deux heures de réveil et utiliser la fonction de rappel pour chacune. Vous sélectionnez, à votre gré, la source sonore de vos réveils ; l'icône d'une cloche s'allume sur la gauche de l'écran LCD lorsque la fonction réveil est active.
Remarque : vous ne pouvez régler la fonction réveil que lorsque la radio est en marche.
Réglage du réveil 1
1. Depuis le mode marche, appuyez sur la touche ALARM/SNOOZE et maintenez-la enfoncée jusqu'à afficher Menu réveil 1. L'icône de réveil clignote alors sur l'écran.
2. Appuyez sur la touche OK pour accéder à l'assistant de réglage du réveil et définir les paramètres indiqués ci-dessous. Pour chacun, sélectionnez une valeur à l'aide des touches « DOWN » et « UP » puis appuyez sur OK pour confirmer la modification et passer au paramètre suivant.

text_image
10:48
Alarm 1 Setup

text_image
10:48
Alarm 1 wizard
Alarm On
Paramètres de réveil :
\- Heure de réveil – heures et minutes
- Durée – 15 | 30 | 45 | 60 | 90 minutes. Si vous n'arrêtez pas le réveil, la radio retourne automatiquement en mode veille une fois que le délai que vous avez choisi est écoulé.
- Source – Radio num. | FM | Sonnerie. Si vous choisissez la radio numérique ou FM comme source audio de réveil, l'assistant vous invitera à choisir entre la dernière station que vous avez écoutée ou l'une des stations présélectionnées (si vous avez présélectionné des stations).
- Chaque jour | Une fois | Sam et dim | Lun à ven. Choisissez la fréquence de déclenchement du réveil.
- Réveil – Désactivé | Activé
Si vous choisissez l'option Activé, l'icône du réveil 1 s'arrête de clignoter et la source sonore de réveil retentira à l'heure que vous avez choisie.

text_image
10:48 DAB
Alarm
Saved
Réglage du réveil 2
1. Depuis le mode marche, appuyez deux fois sur la touche ALARM/SNOOZE et maintenez-la enfoncée jusqu'à afficher Menu réveil 2 ; l'icône correspondante clignote sur l'écran.

text_image
44 10:48 DAB
Alarm 2 wizard
2. Les paramètres configurables de cette fonction sont identiques à ceux qui ont été décrits pour la fonction réveil 1 ci-dessus.
\- À l'heure que vous avez fixée, la source sonore de réveil retentit, d'abord faiblement puis de plus en plus fort, jusqu'au niveau que vous avez choisi. Simultanément, l'icône de la cloche clignote sur l'écran.
\- Pour arrêter la source sonore de réveil, appuyez sur la touche ALARM/SNOOZE ou STBY/FUNC et maintenez-la enfoncée ; l'appareil retourne en mode veille.
Fonction rappel de réveil
- Lorsque vous entendez la source sonore de réveil, appuyez brièvement sur la touche ALARM/SNOOZE pour l'arrêter momentanément. L'icône « SNOOZE » s'allume sur l'écran et l'icône de réveil clignote pour vous indiquer que le mode rappel de réveil est actif.
- La source sonore de réveil retentira de nouveau 10 minutes plus tard (délai par défaut).
Paramètres système
Heure
Vous pouvez régler l'heure et la date manuellement ou activer leur synchronisation automatique. En mode synchro, l'heure et la date sont automatiquement synchronisées avec les signaux transmis sur la bande numérique ou FM (lorsque ces signaux sont disponibles). Vous pouvez sélectionner le format d'affichage de l'heure et de la date.
\- Sélectionnez Menu > System et appuyez sur la touche OK pour accéder au menu Système.

text_image
13:26
System
\- Réappuyez sur la touche OK pour accéder au sous-menu Heure. Ce sous-menu contient les options suivantes :
• Régler heure/date - (voir ci-dessous)
- Synchro - Synchro générale | Synchro num. | Synchro FM | Aucune synchro
- Format 12/24 h - 12 h | 24 h
- Format de la date
- mm-jj-aaaa | jj-mm-aaaa.

text_image
10:15
Set time
10:15
Réglage manuel de l'heure et de la date
Cette option vous permet de régler manuellement l'heure et la date qui sont affichées sur l'écran. L'heure apparaît sous le format « hh:mm » avec les chiffres de la partie « hh » qui clignotent. Ajustez ces chiffres à l'aide des touches « DOWN » et « UP » puis appuyez sur la touche OK pour confirmer le réglage. Les chiffres des minutes clignotent. Ajustez-les comme pour les heures. La date apparaît ensuite sur l'écran. Réglez-la comme pour l'heure.
Remarque : La date est affichée au format que vous avez choisi, mm-jj-aaaa ou jj-mm-aaaa.
Langue
Cette option vous permet de sélectionner la langue d'affichage des messages à l'écran. Vous avez le choix entre :
English/Francais/Deutsch/Italiano

text_image
10:43
System
(Language)
Rétablissement des réglages effectués en usine
La réinitialisation de votre appareil efface tous vos réglages de configuration pour les remplacer par les réglages initiaux du fabricant. Vos réglages de l'heure et de la date, la liste des stations numériques et FM, et vos présélections de station sont alors perdus.

text_image
10:43
System
Pour effectuer cette Factory Set, sélectionnez l'option Réinitialisation et répondez Yes au message de confirmation de l'opération.

text_image
10:43
Factory reset?
Yes
Version logicielle
Sélectionnez Menu > System > Version logicielle et appuyez sur la touche OK pour afficher la version actuelle du microprogramme sur l'écran.

text_image
10:48
System

text_image
10:48 DAB
SW version
dab-P-fm-mmi.ref
GUIDE DE DÉPANNAGE ET MESSAGES D'ERREUR
1. Messages d'erreur
Message Description Mode DAB Service non disponible Aucune réception de signaux numériques Erreur de signal La réception numérique a été interrompue. Aucune station num impossible de localiser la station indiquée. (Aucun nom) La station actuelle ne diffuse pas son identité. Aucune station localisée Aucune station numérique n'est accessible – vérifiez l'antenne aérienne. Mode FM Aucun texte radio Aucune information RDS n'est disponible pour cette station. Aucun PTY Aucune information RDS sur le type de programme n'est disponible. Aucun nom Aucun nom de station RDS n'est diffusé. Messages généraux Heure non réglée Aucune valeur n'a été définie pour l'horloge sur cette plateforme. Horloge non sauvegardée Toute modification apportée aux paramètres de l'horloge sera perdue. Réveil non sauvegardé Toute modification apportée aux paramètres du réveil sera perdue. Date incorrecte La valeur entrée ne correspond à aucune date valide. ? Liste non valide
2. Dépannage
Problème Cause Solutions L'appareil ne réagit à aucune commande L'appareil est bloqué et « décroche » Débranchez l'appareil pendant 5 secondes. puis rebranchez-le. Aucun son Le volume est trop bas Augmentez le volume Mauvaise qualité sonore Le signal radio est trop faible Essayez d'ajuster la position de l'antenne. La pile est presque complètement déchargée Chargez la pile ou branchez l'appareil sur le secteur. FM : SifflementDAB : coupure intermittenteDAB : Message « No stations available » Signaux trop faibles Vérifiez/déplacez l'antenneDéplacez la radioDémarrez une recherche locale de stations
NETTOYAGE ET MAINTENANCE
\- N'exposez pas l'appareil à des forces, des chocs, des températures et des taux d'humidité excessifs.
\- N'altérez aucun des composants internes de l'appareil.
\- Nettoyez l'appareil avec un chiffon légèrement humide (mais pas trop), sauf les contacts métalliques et la grille du haut-parleur. N'employez ni solvant ni détergent.
\- Ne laissez pas votre appareil dans un endroit chaud, humide ou poussiéreux.
\- Éloignez l'appareil de tout appareil de chauffage et de toute source de bruit électrique (tube fluorescent, moteur, etc.).
\- Ne touchez aucun des éléments de commande de l'appareil avec des doigts humides ou sales.
\- Ne jetez jamais des piles dans le feu, elles risquent d'exploser ou de laisser leur électrolyte s'échapper.
SPÉCIFICATIONS
Adaptateur électrique (fourni) Entrée : courant alternatif 100-240 V, 50/60 Hz Sortie : courant continu 5 V 2 A Capacité de la pile (fournie) 1000 mAH Autonomie maximale en lecture (avec la pile) 3 heures Consommation 8 W Consommation électrique en mode veille <1 W Fréquences numériques 174-240 MHz Fréquences FM 87,5-108 MHz Températures de fonctionnement -5°C à +40°C Taux d’humidité en fonctionnement 20% à 80%
Le fabricant se réserve le droit d'apporter des modifications techniques et de conception à ses produits dans le cadre de ses développements continus. Cet appareil respecte toutes les recommandations CE pertinentes et actuelles (directives de compatibilité électromagnétiques, directives sur les appareils à basse tension, etc.) et a été fabriqué conformément aux dernières réglementations en matière de sécurité.

text_image
CE
Radio DAB+/DAB/FM Portatile

natural_image
Line drawing of a portable electronic device with control panel and display screen (no text or symbols)
IT Manuale di istruzioni
Indice
2 Indice
3 Informazioni
5 Comandi e funzioni
9 Funzionamento generale
19 Messaggi di errore e risoluzione degli errori
21 Specifiche tecniche
ISTRUZIONI DI SICUREZZA IMPORTANTI
Se utilizzato in modo corretto, questo dispositivo è stato progettato e fabbricato per garantire la vostra sicurezza. Un suo utilizzo improprio può causare rischi di scosse elettriche o incendi. Leggete attentamente tutte le istruzioni di sicurezza e di funzionamento prima di installare e utilizzare il dispositivo. Conservate queste istruzioni per future consultazioni. In particolar modo, prendete nota di tutte le avvertenze presenti in queste istruzioni e sul dispositivo.
Acqua e umidità
Il dispositivo non deve essere utilizzato in prossimità dell'acqua, ad esempio vicino a vasche da bagno, lavandini, piscine o in uno scantinato.
Aerazione
Collocate il dispositivo in modo da non impedirne l'aerazione. Ad esempio, non dovete posizionare il dispositivo su letti, sofà, tappeti o superfici simili che potrebbero ostruire i fori di ventilazione. Inoltre, non dovete posizionare il dispositivo in strutture chiuse, come librerie o mobiletti, che potrebbero impedire il passaggio dell'aria all'interno dei fori di ventilazione.
Calore
Collocate il dispositivo lontano da fonti di calore come radiatori, bocchette dell'aria calda, stufe o altri apparecchi (compresi gli amplificatori) che producono calore.
Alimentazione
Collegate il dispositivo solo a fonti di alimentazione del tipo indicato nelle istruzioni di funzionamento o sul dispositivo.
Pulizia
Il dispositivo deve essere pulito solo come indicato. Consultate la sezione "Cura e manutenzione" di questo manuale per le istruzioni sulla pulizia. Evitate che cadano oggetti sul dispositivo o entrino liquidi attraverso le aperture o nelle ventole.
Protezione da fulmini e picchi di corrente
Scollegate il dispositivo dalla presa di corrente. In questo modo eviterete danni al prodotto causati da fulmini e picchi di corrente.
Sovraccarico
Non sovraccaricate le prese di corrente, le prolunghe o le prese sul dispositivo, in quanto questo potrebbe causare rischi di incendio o scosse elettriche.
Guasti che necessitano di riparazioni
Questo dispositivo deve essere riparato da personale qualificato se:
un oggetto o del liquido sono penetrati all'interno del dispositivo;
il dispositivo è stato esposto alla pioggia;
il dispositivo è caduto o si è danneggiato lo chassis;
il dispositivo mostra cambiamenti notevoli nelle prestazioni o non funziona
normalmente.
Periodi di non utilizzo
Se il dispositivo non viene utilizzato per periodi prolungati di tempo, una settimana o più, staccate il cavo di alimentazione dal dispositivo per evitare danni o corrosione.
Riparazione
Gli utenti non devono provare a effettuare riparazioni del dispositivo diverse da quelle indicate sul manuale di istruzioni. Le metodologie di riparazione non trattate nel manuale di istruzioni devono essere effettuate da personale qualificato.
ATTENZIONE:
pericolo di esplosione in caso di sostituzione scorretta della batteria.
Sostituire solo con lo stesso tipo di batteria o equivalente.
AVVERTENZA:
1) La spina dell'adattatore viene utilizzata per scollegare il dispositivo e deve essere sempre facilmente raggiungibile.
2) Le batterie non vanno esposte a calore eccessivo, come quello della luce solare.
3) Per ridurre il rischio di incendi o scosse elettriche, non esponete il dispositivo alla pioggia o all'umidità. Non esponete il dispositivo a schizzi e fate in modo che oggetti contenenti liquidi, come vasi, non vengano appoggiati sul dispositivo.
POSIZIONE DEI COMANDI
VISTA ANTERIORE

text_image
10:48
DAB
Mode
VISTA SUPERIORE

text_image
9 10 11 12 13
VISTA POSTERIORE

text_image
14
15
16
1. Pulsante MEMORIE
- Premete questo pulsante per accedere alla modalità di richiamo delle memorie rapide.
- Tenete premuto questo pulsante per accedere alla modalità di memorizzazione delle stazioni radio.
2. Pulsante INFO
\- In modalità DAB/FM: scorre fra le schermate delle informazioni e torna alla schermata Now Playing.
3. Pulsante SCANSIONE
- In modalità DAB/FM: ricerca automatica delle stazioni.
- In tutte le modalità: tenete premuto questo pulsante per attivare la modalità test ECO (riservata ai produttori).
- Premetelo per visualizzare il menu relativo alla modalità corrente.
Premetelo nuovamente per visualizzare la schermata Now Playing.
- Tenete premuto questo pulsante per impostare il timer della funzione sleep.
5. Pulsante STANDBY/FUNZIONE
- Tenete premuto questo pulsante per passare dalla modalità “Acceso” a quella “Standby”.
- Premete questo pulsante in modalità “Acceso” per selezionare una tra le modalità di riproduzione: DAB, FM o Aux In.
6. MANOPOLA VOLUME
\- Serve a regolare il volume
7. SCHERMÖ LCD
8. Antenna telescopica
9. Pulsante <
\- Serve a scorrere tra le voci del menu o all'interno dell'elenco delle stazioni DAB.
In modalità FM:
- Premete questo pulsante per effettuare la ricerca manuale delle stazioni partendo dalla frequenza attiva e scorrendo verso il basso.
- Se tenete premuto questo pulsante, il dispositivo cercherà fra le stazioni con una frequenza più bassa fermandosi automaticamente alla prima che abbia un segnale forte.
10. Pulsante OK
\- Serve a selezionare l'opzione corrente.
11. Pulsante >
\- Serve a scorrere tra le voci del menu o all'interno dell'elenco delle stazioni DAB.
In modalità FM:
- Premete questo pulsante per effettuare la ricerca manuale delle stazioni partendo dalla frequenza attiva e scorrendo verso l'alto.
- Se tenete premuto questo pulsante, il dispositivo cercherà fra le stazioni con una frequenza più alta fermandosi automaticamente alla prima che abbia un segnale forte.
12. Indicatore dello stato di carica
13. SVEGLIA/SNOOZE
- Serve ad attivare la funzione snooze quando la sveglia è attiva.
- Serve a impostare la retroilluminazione LCD su FORTE/TENUE/OFF.
- Tenete premuto questo pulsante in modalità Acceso per impostare le sveglie.
14. INTERRUTTORE ACCENSIONE/SPEGNIMENTO
15. Presa CC 5 V
16. Jack AUX-IN da 3,5 mm
17. Ψ: Intensità del segnale DAB/FM
La barra indica la forza del segnale: più forte è e più lunga sarà la barra (da destra a sinistra).
Installazione
- Leggete attentamente il manuale prima di utilizzare il dispositivo!
- Scegliete un posto adatto in cui collocare il dispositivo. Sono adatte superfici asciutte, pari e antiscivolo su cui è possibile utilizzare il dispositivo in modo semplice.
- Assicuratevi che il dispositivo abbia un'aerazione adeguata!
- Se necessario, rimuovete il foglio protettivo dallo schermo.
Alimentazione (adattatore)
- Inserite la spina in una presa di corrente CA adeguata. Collegiate il dispositivo al cavo inserendo un'estremità nella presa CC 5 V —●—+ del dispositivo.
- Assicuratevi che la tensione della presa corrisponda a quella indicata sulla targhetta del dispositivo.
ATTENZIONE:
- Utilizzate unicamente l'adattatore in dotazione con il dispositivo. Non utilizzate l'adattatore con altri dispositivi.
- Utilizzate solo l'adattatore CA originale. Questo adattatore è stato progettato specificamente per caricare gradualmente la batteria integrata nel dispositivo. Qualsiasi altro adattatore può accorciare la vita della batteria, danneggiarla o danneggiare il dispositivo.
NOTA:
scollegate il dispositivo dalla presa di corrente quando non lo utilizzate per periodi di tempo prolungati.
Caricare la batteria
Prima di poter utilizzare il dispositivo con la batteria è necessario caricare quest'ultima.
1. Spegnete il dispositivo spostando l'interruttore ON/OFF (14) sulla posizione "OFF".
2. Collegiate il dispositivo a una presa di corrente utilizzando l'adattatore. L'indicatore di carica della batteria (12) diventa giallo e la batteria inizia a caricarsi. Una volta terminata la carica, l'indicatore diventa verde.
ATTENZIONE:
non lasciate mai il dispositivo in carica incustodito.
NOTA:
il tempo di ricarica dipende dallo stato di carica della batteria.
Funzionamento generale
Accendere/spegnere il dispositivo
- Accendete il dispositivo spostando l'interruttore Power ON/OFF sul retro del dispositivo su ON. Il dispositivo si illuminerà e sullo schermo comparirà "Welcome to Digital Radio", poi le cifre dell'ora "00:00" lampeggeranno sullo schermo.
- Modalità di funzionamento/standby: a questo punto potete passare dalla modalità di funzionamento a quella di standby tenendo premuto il pulsante STBY/FUNC (5).
- Per spegnere il dispositivo, spostate l'interruttore Power ON/OFF su OFF.
Note:
1. Quando il dispositivo viene acceso per la prima volta, entra in modalità FM. Premete il pulsante STBY/FUNC per scorrere fra le varie modalità di funzionamento: AUX-IN, DAB, FM.
2. È possibile aggiornare automaticamente ora e data via etere mentre la radio DAB è in funzione. Oppure potete farlo manualmente da qualsiasi modalità di funzionamento.
3. Design ECO:
- Modalità test ECO: il dispositivo torna in modalità standby dopo 10 secondi. Quando siete in modalità DAB/AUX, tenete premuto il pulsante INFO per attivare o disattivare la modalità: sullo schermo comparirà un conto alla rovescia di 10 secondi, poi il dispositivo tornerà al funzionamento normale. Questa è la modalità test utilizzata dai produttori, una funzione che non può essere rimossa.
- Modalità ECO normale: la modalità standby si attiverà dopo 60 minuti in diversi casi:
Modalità AUX: nessun dispositivo esterno connesso/nessun suono/volume minimo proveniente dal dispositivo.
Modalità DAB: nessun segnale proveniente dal dispositivo.
Il dispositivo non entrerà in modalità standby in caso di assenza di segnale/assenza di suono/volume minimo in modalità FM.
Il dispositivo non entrerà in modalità standby in caso di assenza di suono/volume minimo in modalità DAB.
4. In modalità standby, l'illuminazione dello schermo si attenuerà automaticamente dopo 10 secondi.
UTILIZZARE IL DISPOSITIVO IN MODALITÀ DAB
In modalità radio DAB, il dispositivo riceve trasmissioni digitali DAB/DAB+ mostrandone le relative informazioni sullo schermo.
Scansione automatica
1. Estendete al massimo l'antenna telescopica.
2. Tenete premuto il pulsante STBY/FUNC per attivare il dispositivo in modalità standby.
3. Premete il pulsante STBY/FUNC per selezionare la modalità DAB.

text_image
10:48 DAB
DAB
Mode
Al primo utilizzo, o se l'elenco delle stazioni è vuoto, la radio effettuerà automaticamente una scansione completa in cerca delle stazioni disponibili. Sullo schermo comparirà lo stato della scansione e il numero di canali trovati nel corso della scansione.

text_image
10:48 DAB
Scanning... 42
4. A scansione completata, il dispositivo regolerà l'ora e inizierà a riprodurre la prima stazione presente in elenco.
5. Per cambiare la stazione, premete il pulsante "DOWN" o "UP" per scorrere fra le stazioni in elenco e premete il pulsante OK per sintonizzarvi sulla stazione selezionata. A questo punto comparirà la schermata Now Playing con le informazioni relative alla nuova stazione.
6. Se non vengono rilevate stazioni durante la scansione, sullo schermo comparirà la scritta "NO DAB Station".
Note:
1. Come per la TV digitale, in alcune zone potrebbe essere difficile ricevere un buon segnale DAB. Le emittenti stanno costantemente migliorando la copertura DAB, quindi in alcuni casi potrebbe rendersi necessario attendere prima che alcuni, o tutti, i servizi DAB diventino disponibili. Potete verificare la copertura nella vostra zona.
2. Potreste anche dover avviare una scansione manuale per aggiornare l'elenco delle stazioni per uno dei seguenti motivi:
- di tanto in tanto potrebbero comparire nuove stazioni;
- alcune stazioni cessano di trasmettere o non sono più ricevibili (nell'elenco delle stazioni, quelle non valide sono indicate con un punto interrogativo “?” davanti al nome);
- Se durante la scansione la ricezione non era buona (ad esempio perché l'antenna non era estesa), l'elenco potrebbe risultare vuoto o incompleto;
\- Se ricevete male alcune stazioni, e l'audio si interrompe, potreste voler ascoltare solo le stazioni con una buona potenza di segnale.
Come ripetere una scansione completa
Per ripetere una scansione completa, potete premere il pulsante SCAN o premere il pulsante MENU per visualizzare il menu e premere il pulsante OK per selezionare Scansione completa.

text_image
17:42
DAB
DAB
Sintonizzazione manuale
Oltre al normale metodo di scansione, potete anche sintonizzarvi manualmente su un canale o su una frequenza particolari. La cosa può essere utile per regolare l'antenna in modo da ottenere la migliore ricezione possibile e per cercare un canale specifico per aggiornare l'elenco delle stazioni.
1. Premete il pulsante Menu e poi premete "UP" per visualizzare il sottomenu sintonizzazione manuale e premete il pulsante OK per accedervi.
2. Premete "DOWN" o "UP" per visualizzare un canale o una frequenza particolari, poi premete il pulsante OK per sintonizzarvi su quel canale o su quella frequenza. Sullo schermo viene mostrata la potenza del segnale sulla frequenza selezionata. Le regolazioni dell'antenna si ripercuoteranno sulla potenza del segnale mostrata sullo schermo.

text_image
13:26
8C 187.507MHz
Nota: il rettangolo più grande indica la soglia minima della qualità audio. Se la potenza del segnale indicata dai rettangoli pieni scende sotto questa soglia la qualità audio peggiorerà.
Eliminare le stazioni in elenco non disponibili
1. Premete il pulsante Menu, poi "DOWN" o "UP" per visualizzare il sottomenu Elimina e premete il pulsante OK per accedervi.
2. Premete "UP" per selezionare "Yes", poi premete il pulsante OK per confermare l'eliminazione.
Nota: in questo modo verranno eliminate tutte le stazioni non valide presenti in elenco con un ‘?’ davanti al nome.
Memorie rapide
Potete memorizzare fino a 20 stazioni DAB nel dispositivo in modo da potervi accedere con facilità.
Memorizzare una stazione
1. Una volta trovata la stazione desiderata, tenete premuto il pulsante PRESET finché sullo schermo non compare la scritta Preset Store.
2. Premete il pulsante "DOWN" o "UP" per scegliere la memoria veloce su cui salvare la stazione, poi premete il pulsante OK per confermare.

text_image
15:23
Preset Store
<1: Empty >

text_image
15:23
DAB
Preset 1
Stored
Richiamare una stazione
1. Premete il pulsante PRESET in modalità DAB per accedere alla modalità di selezione della memoria rapida.
2. Premete il pulsante "DOWN" o "UP" per selezionare la stazione memorizzata.
3. Premete il pulsante OK per scegliere la stazione e riprodurla.

text_image
15:23
Preset Recall
<6: BBC Radio 6>
Mentre una stazione è in riproduzione, la schermata mostra il nome e le informazioni DLS (Dynamic Label Segment) trasmesse dalla stazione, come nome del programma, titolo del brano e informazioni di contatto. Le informazioni DLS lunghe più di 16 caratteri scorreranno lungo lo schermo.

text_image
13:26
Heart
Drivetime with E
Ogni volta che premete il pulsante INFO, sullo schermo compariranno nuove informazioni, nel seguente ordine ciclico: testo DLS, informazioni DL Plus (solo se trasmesse dalla stazione), potenza del segnale, tipo di programma, nome dell'ensemble, numero di canale/frequenza, tasso di errore del segnale, bit rate, codec/variante DAB, ora e data.

text_image
13:26 DAB
Heart
Nota: DL Plus presenta informazioni aggiuntive che possono essere trasmesse dalle stazioni e memorizzate temporaneamente sulla radio. Per tornare alla schermata Now Playing in qualsiasi momento, tenete premuto il pulsante INFO.
Compressione della gamma dinamica (DRC)
Questa funzione riduce la differenza fra i suoni dal volume più alto e quelli dal volume più basso. Questo fa sì che il volume dei suoni più deboli venga alzato e quello dei suoni più forti abbassato.
Nota: DRC funziona solamente se viene attivato dall'emittente per una stazione specifica.
Per cambiare le impostazioni del DRC
Selezionate Menu > DRC, poi premete il pulsante OK per accedere al sottomenu DRC.

text_image
3: 17
DAB
Premete "DOWN" o "UP" per selezionare le opzioni disponibili: DRC off, alto, basso.

text_image
3:17
DAB
DRC
DRC off: il DRC viene disattivato.
DRC alto: il DRC viene attivato con le impostazioni per ambienti rumorosi.
DRC basso: il DRC viene impostato a metà del livello normale.
UTILIZZARE IL DISPOSITIVO IN MODALITÀ FM
In modalità FM, la radio riceve stazioni analogiche sulla banda FM (87,5-108 MHz) e mostra le informazioni RDS (Radio Data System) relative alle stazioni.
1. Estendete al massimo l'antenna telescopica.
2. Tenete premuto il pulsante STBY/FUNC per attivare il dispositivo in modalità standby.
3. Premete il pulsante STBY/FUNC per selezionare la modalità FM.
4. Premete il pulsante SCAN o tenete premuto il pulsante "DOWN"/"UP" per cercare una stazione. Il dispositivo si fermerà automaticamente alla prima stazione trovata.
5. Premete il pulsante "DOWN" o "UP" per spostare la sintonia della radio in incrementi di 50 KHz verso l'alto o verso il basso.
6. Se la ricezione è troppo debole e sentite rumore quando ascoltate la stazione, provate a migliorarla cambiando la posizione dell'antenna telescopica.

text_image
18:48™
FM
Mode

text_image
10:48™
89.45MHz
Scanning9...
Memorie rapide
Potete memorizzare fino a 20 stazioni FM nel dispositivo, utilizzando la stessa procedura della modalità DAB.
Mentre la radio FM trasmette, sullo schermo compaiono la frequenza della stazione o, se sono disponibili informazioni RDS, il nome della stazione e altre eventuali informazioni aggiuntive. Se queste informazioni non sono disponibili, compariranno solo la frequenza e il messaggio “Nessuna informazione”.

text_image
17:42™
ChoiceFM P1
Number 1 for HiP
Ogni volta che premete il pulsante INFO, sullo schermo compariranno nuove informazioni, nel seguente ordine ciclico: informazioni RDS, tipo di programma, frequenza, mono/stereo, ora e data.
Tenete premuto il pulsante INFO per tornare alla schermata Now Playing.

text_image
17:42™
ChoiceFM P1
107.10MHz
FUNZIONAMENTO IN MODALITÀ AUX-IN
La modalità Aux In riproduce audio a partire da una fonte esterna, come un lettore MP3.
1. Inserite un'estremità del cavo audio da 3,5 mm (incluso) nel jack delle cuffie o line out del vostro lettore, e l'altra estremità nel jack AUX-IN sul retro del dispositivo.
2. Attivate la sorgente audio esterna e utilizzate il dispositivo per riprodurla.
3. Tenete premuto il pulsante STBY/FUNC per attivare il dispositivo in modalità standby.
4. Premete il pulsante STBY/FUNC finché sullo schermo non compare la scritta "Auxiliary Input Mode" per selezionare la modalità AUX-IN.
5. Potete regolare il volume dal dispositivo principale. Utilizzate tutte le altre funzioni sul dispositivo esterno, come di consueto.

text_image
13:26
Auxiliary Input
Mode
Note:
1) Se avete collegato il cavo al jack Line out del dispositivo esterno, dovete regolare solo il volume di questo dispositivo. Se avete collegato il cavo al jack delle cuffie del dispositivo esterno, è possibile che dobbiate regolare sia il volume di questo dispositivo che quello del dispositivo esterno per ottenere impostazioni ottimali.
2) Spostate l'interruttore di alimentazione ON/OFF su OFF per spegnere il dispositivo una volta terminato l'ascolto.
Non dimenticatevi di spegnere anche il dispositivo esterno.
Impostazione del timer della funzione sleep
\- In modalità di funzionamento, tenete premuto il pulsante MENU per entrare in modalità impostazione del timer della funzione sleep, premete "DOWN" o "UP" per regolare il numero di minuti: Sleep off /1/20/30/60/90/120: l'icona "ZZZ" della funzione sleep lampeggerà sullo schermo.

text_image
10:48
DAB
DAB
Mode
\- Premete il pulsante OK per confermare le impostazioni: l'icona "ZZZ" della funzione sleep lampeggerà sullo schermo.
\- Selezionate "Sleep off" per disattivare la modalità sleep: l'icona "ZZZ" della funzione sleep smetterà di lampeggiare.
\- Quando il timer della funzione sleep è attivo, tenete premuto il pulsante MENU per mostrare la sua attuale impostazione, e premete "DOWN" o "UP" per modificare le impostazioni.
IMPOSTARE E UTILIZZARE L'ALLARME
Il dispositivo è dotato di un orologio/calendario e di due versatili sveglie con funzione snooze. Entrambe le sveglie possono utilizzare un cicalino o una delle sorgenti audio disponibili. Se una delle sveglie è attiva, comparirà un'icona a forma di campanella sul lato sinistro dello schermo LCD.
Nota: i parametri della sveglia possono essere impostati solo quando la radio è attiva.
Impostare la sveglia 1
1. In modalità di funzionamento, tenete premuto il pulsante ALARM/SNOOZE finché non compare il menu Sveglia 1. Nel frattempo, l'icona indicante la sveglia 1 lampeggerà sullo schermo.
2. Premete il pulsante OK per accedere all'impostazione guidata della Sveglia 1. L'impostazione guidata vi chiederà i parametri indicati sotto. Selezionate un valore per ogni parametro utilizzando il pulsante "DOWN" o "UP", poi premete il pulsante OK per confermare e passate al parametro successivo.

text_image
10:48
Alarm 1 Setup

text_image
10:48
Alarm 1 wizard
Alarm On
Parametri della sveglia:
- Orario di attivazione: ore e minuti
- Durata: 15 | 30 | 45 | 60 | 90 minuti. Se la sveglia non viene spenta, passato il periodo di tempo impostato in questa voce, la radio tornerà in standby.
- Sorgente: DAB | FM | Cicalino. Se scegliete DAB o FM come sorgenti vi verrà anche chiesto di selezionare l'ultima stazione riprodotta o una delle memorie rapide (se impostate).
- Giornaliero | Una sola volta | Weekend | Infrasettimanali, scegliete i giorni nei quali la sveglia è attiva.
\- Sveglia: Off | On
Una volta selezionato On, la sveglia 1 si attiverà automaticamente, e l'icona della sveglia 1 smetterà di lampeggiare.

text_image
10:48 DAB
Alarm
Saved
Impostare la Sveglia 2
1. In modalità di funzionamento, tenete premuto il pulsante ALARM/SNOOZE due volte finché non compare il menu Sveglia 2. Nel frattempo, l'icona indicante la sveglia 2 lampeggerà sullo schermo.

text_image
44 10:48 DAS
Alarm 2 wizard
2. Le altre impostazioni della Sveglia 2 sono uguali a quelle della Sveglia 1.
- All'orario impostato, la sveglia suonerà, prima piano, poi sempre più forte fino al raggiungimento del volume impostato. Quando suona una sveglia, l'icona della campanella lampeggia sullo schermo.
- Per spegnere la sveglia quando si attiva, tenete premuto il pulsante ALARM/SNOOZE o il pulsante STBY/FUNC, e il dispositivo entrerà in modalità standby.
Snooze
- Quando suona la sveglia, premete il pulsante ALARM/SNOOZE per spegnerla temporaneamente. Sullo schermo comparirà l'icona "SNOOZE", e contemporaneamente l'icona della sveglia lampeggerà per mostrare che la sveglia si trova nello stato Snooze.
- La sveglia suonerà nuovamente dopo 10 minuti (tempo predefinito).
Impostazioni di sistema
Ora
L'ora e la data possono essere aggiornate manualmente o automaticamente. Con l'impostazione aggiornamento automatico, l'ora e la data vengono sincronizzate automaticamente con il segnale orario nazionale trasmesso via DAB e FM (se disponibile). Potete anche selezionare il formato di visualizzazione di ora e data.
\- Selezionate Menu > System e premete il pulsante OK per accedere al menu Sistema.

text_image
13:26
System
\- Premete nuovamente il pulsante OK per accedere al sottomenu Ora. Il sottomenu Ora contiene le seguenti opzioni:
- Impostazione ora/data: (vedere sotto)
- Aggiornamento automatico: aggiorna da una sorgente qualsiasi | Aggiorna da DAB | Aggiorna da FM | Non aggiornare
- Impostazione 12/24 ore: 12 ore | 24 ore
- Impostare il formato della data
- mm-gg-aaaa | gg-mm-aaaa.

text_image
10:15
Set time
10:15
Impostare manualmente ora e data
Questa opzione serve a impostare manualmente l'ora e la data mostrate. Sullo schermo compare l'ora nel formato "hh:mm", le due "h" lampeggiano. Regolate i valori utilizzando il pulsante "DOWN" o "UP", poi premete il pulsante OK per confermare. A quel punto il valore successivo inizierà a lampeggiare. Una volta impostata l'ora, utilizzate la stessa procedura per la data.
Nota: la data può comparire nel formato mm-gg-aaaa o gg-mm-aaaa a seconda del formato che avete scelto.
Lingua
Potete scegliere la lingua utilizzata per mostrare i messaggi fra:
Inglese/Francese/Tedesco/Italiano

text_image
10:43
System
(Language)
Ripristino delle impostazioni di fabbrica
Il ripristino delle impostazioni di fabbrica cancella tutti i valori impostati dall'utente sostituendoli con i valori predefiniti iniziali. Selezionando questa funzione andranno perse ora/data, elenco delle stazioni DAB/FM e memorie rapide.

text_image
10:43
System
Se selezionate Factory Set delle impostazioni di fabbrica, vi verrà chiesto di confermare selezionando Yes.

text_image
10:43
DAB
Tall
Factory reset?
Yes
Versione SOFTWARE
Selezionate Menu > System > Versione SW, poi premete il pulsante OK per visualizzare la versione corrente del software.

text_image
10:48
System

text_image
10:48 DAB
SW version
dab-P-fm-mmi.ref
MESSAGGI DI ERRORE E RISOLUZIONE DEGLI ERRORI
1. Messaggi di errore
Messaggio Descrizione Modalità DAB Servizio non disponibile Assenza del segnale DAB Errore segnale Il segnale le DAB ha subito un'interruzione. Stazione DAB non presente Il dispositivo non trova la stazione. (Nome assente) La stazione ione corrente non trasmette il nome. Nessuna stazione trovata Non ci sono stazioni DAB disponibili. Controllate l'antenna. Modalità FM RDS assente Questa stazione azione non trasmette informazioni RDS. PTY assente Non sono disponibili informazioni RDS sul tipo di programma. Nome assente Non vengono trasmesse informazioni RDS con il nome della stazione. Messaggi generali Ora non impostata Non avete impostato l'ora del dispositivo. Ora non salvata I cambiamenti apportati alle impostazioni dell'ora andranno perduti. Sveglia non salvata I cambiamenti apportati alle impostazioni della sveglia andranno perduti. Data non valida Il valore immesso non corrisponde a una data valida. ? Indica elementi non validi
2. Risoluzione dei problemi
Problema Causa Soluzioni Il dispositivo non funziona Il dispositivo si è bloccato e non risponde Scollegate la spina dalla corrente per circa 5 secondi.Poi ricollegatela. Nessun suono Il volume è troppo basso Aumentate il volume Scarsa qualità dell’audio Il segnale radio è troppo debole Provate a regolare la posizione dell’antenna. Batteria quasi scarica Caricate la batteria o utilizzate il dispositivo con l’alimentatore. FM: sibiloDAB: audio intermittenteDAB: messaggio “No stations available” Segnale scarso Controllate/spostate l’antennaSpostate la radioRieffettuate una scansione
MANUTENZIONE E CURA
\- Non sottoponete il dispositivo a urti, colpi, polvere o temperature estreme.
\- Non armeggiate con i componenti interni del dispositivo.
\- Pulite il dispositivo con un panno umido (mai bagnato), con l'eccezione dei contatti di metallo e delle griglie degli altoparlanti. Non utilizzate mai solventi o detergenti.
\- Evitate di lasciare il dispositivo in luoghi caldi, umidi o polverosi.
\- Tenete il dispositivo alla larga da apparecchiature che sprigionano calore e da sorgenti di interferenze elettriche, come lampade fluorescenti o motori.
\- Prima di toccare qualsiasi pulsante, assicuratevi di avere le mani asciutte e pulite.
\- Non gettate le batterie tra le fiamme: potrebbero esplodere o perdere liquido.
SPECIFICHE TECNICHE
Alimentatore (incluso) Ingresso CA 100-240 V, 50/60 Hz Uscita CC 5 V, 2 A Capacità della batteria (inclusa) 1000 mAh Tempo di riproduzione max.(con batteria) 3 ore Consumo energetico 8 W Consumo energetico in standby 1 W Gamma di frequenze DAB 174-240 MHz Gamma di frequenze FM 87,5-108 MHz Temperatura di funzionamento Da -5°C a +40°C Umidità di funzionamento Da 20% a 80%
Ci riserviamo il diritto di effettuare modifiche tecniche e di design nel corso dello sviluppo del prodotto.
Questo dispositivo è stato testato seguendo tutte le più importanti linee guida CE, come quelle sulla compatibilità elettromagnetica e sul basso voltaggio, ed è stato fabbricato nel rispetto dei più recenti regolamenti sulla sicurezza.

text_image
CE