HMH440 - Chauffage DELONGHI - Free user manual and instructions
Find the device manual for free HMH440 DELONGHI in PDF.
Download the instructions for your Chauffage in PDF format for free! Find your manual HMH440 - DELONGHI and take your electronic device back in hand. On this page are published all the documents necessary for the use of your device. HMH440 by DELONGHI.
USER MANUAL HMH440 DELONGHI
Ctktrnjh pf aeyrwbbnt
Adjustable base (only on some models)
Pedal switch (only on some models)
Jännite watt kts. arvokilpi ominaisuudet
A) If your appliance comes fitted with a plug, it will incorporate a 13 Amp fuse. If it does not fit your socket, the plug
should be cut off from the mains lead, and an appropriate plug fitted, as below.
WARNING: Very carefully dispose of the cut off plug after removing the fuse: do not insert in a 13 Amp socket
elsewhere in the house as this could cause a shock hazard.
With alternative plugs not incorporating a fuse, the circuit must be re-fitted when changing the fuse using a 13 Amp
Asta approved fuse to BS 1362. In the event of losing the fuse cover, the plug must NOT be used until a replace-
ment fuse cover can be obtained from your nearest electrical dealer. The colour of the correct replacement fuse
cover is that as marked on the base of the plug.
B) If your appliance is not fitted with a plug, please follow the instructions provided below:
IMPORTANT The wires in the mains lead are coloured in accordance with the followin code:
As the colours of the wires in the mains lead of this appliance may not correspond with the coloured markings iden-
tifying the terminals in your plug, proceed as follows:
The wire which is coloured blue must be connected to the terminal which is marked with the letter N or coloured black.
The wire which is coloured brown must be connected to the terminal which si marked with the letter L or coloured red.
ELECTRICAL CONNECTION (U.K. ONLY)
Db;nt nf,tkrfnf c rfxtcndfnf
ELECTRICAL CONNECTION
- Before using the appliance check that your supply voltage is the same of that shown on
the rating label of the unit.
- THIS APPLIANCE CONFORMS TO DIRECTIVE 89/336/CEE GOVERNING RADIO INTERFERENCE.
INSTALLATION The heater can be used on a horizontal surface.
Models with a motorised base can be wall-mounted, using 3 screws and 3 wall plugs.
To wall-mount, proceed as follows:
Drill holes in the wall, as shown in Fig.1, paying particular attention to the minimum distances
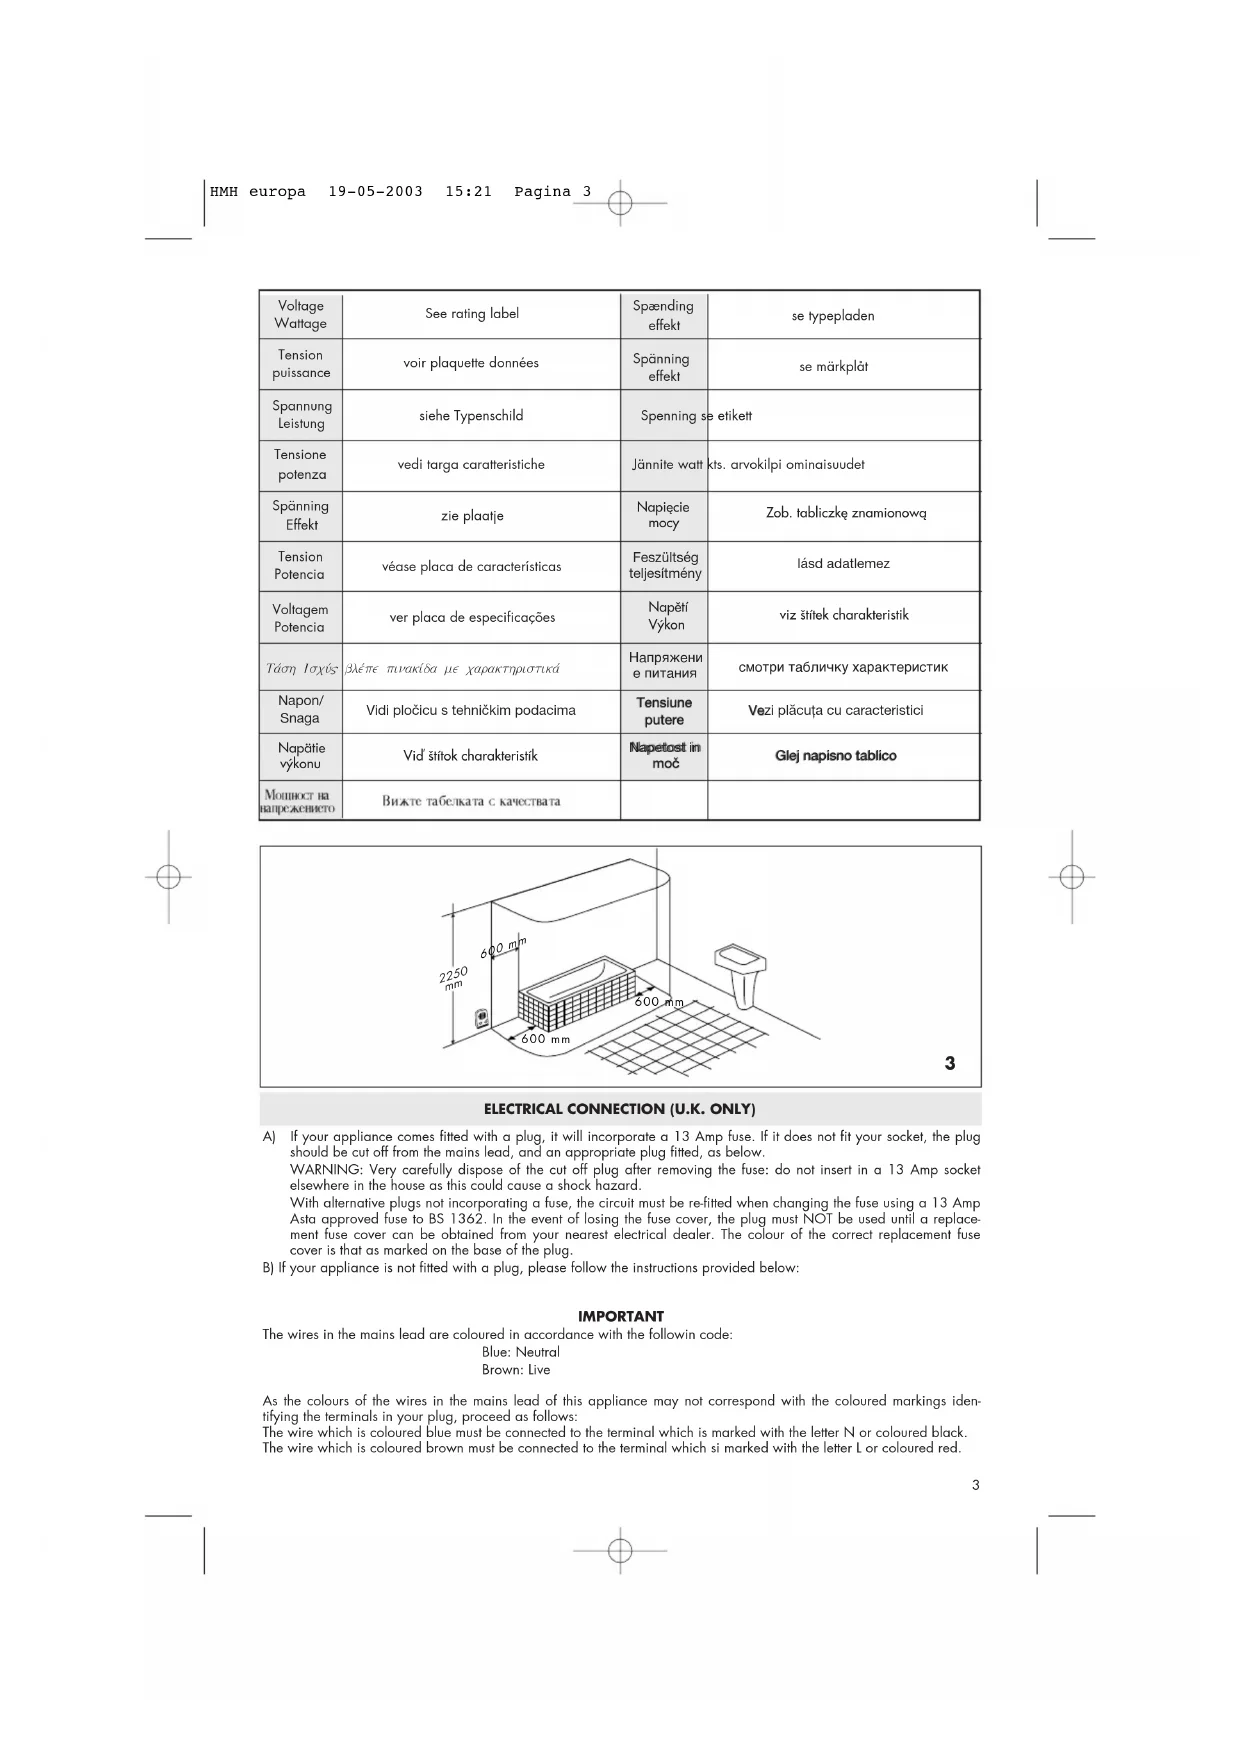
When the appliance is used in bathroom, remember to position it outside the areas in which
the presence of water may represent a source of danger (fig.3).
The appliance must not be positioned directly underneath a fixed power
FUNCTIONING AND USE Models with function selector and ambient thermostat
Turn the thermostat knob (right) in a clockwise direction until it reaches the maximum setting.
Summer service (ventilation only): turn the knob to setting .
Heating at reduced power: turn the knob (left) to setting 1 (the pilot light will come on).
Heating at full power: turn the knob (left) to setting 2.
Switching off: turn the knob (left) to setting 0.
Setting the thermostat:
When the room has reached the desired temperature, turn the thermostat dial slowly in an
anti-clockwise direction until the the pilot light goes out. The thermostat will then automati-
cally maintain the desired temperature level.
ANTIFREEZE SERVICE Turn the left knob to setting 2, then turn the right thermostat knob to setting . When it is set
in this way the appliance keeps the room at a temperature of approx. 5° C with minimal
Models with function selector only
Summer use: turn the function selector dial clockwise to position .
Min power operation: turn the function selector dial to position 1 (the pilot light will come on).
Max power operation: turn the function selector dial to position 2.
Switching the appliance off: turn the function selector to position “O”.
MODELS WITH 24 HOUR TIMER To set the heating periods proceed in the following manner:
- Check the time by your watch. Supposing it is 10.00 a.m. turn the numbered dial of the
time-clock in a clockwise direction until the number 10 coincides with the reference mark
▲ on the time-clock. Set the time period during which you wish the appliance to work by
pushing the notches towards the centre. Each notch corresponds to a period of 15 minu-
tes. At this point red sections will be visible corresponding to the working periods. Set in
this way the fan heater will function automatically every day during the set period. (Impor-
tant: the plug must always remain connected to power supply).
- To change the programmed time period, just bring back the black notches to their original
position and set the new working periods required.
- If you wish the appliance to function without programmed working periods push all the
GB HMH europa 19-05-2003 15:21 Pagina 45
notches towards the centre. In this case, to turn the appliance off totally the plug must be
pulled out apart from switching off, so as to avoid unnecessary working of the timer.
MODELS WITH MOTORISED ROTATING BASE Some models feature an adjustable motorised base and foot/pedal switch.
To distribute the air flow over a larger area, press the pedal. When activated in this way, the
appliance will oscillate. To stop the appliance in the desired position, simply press the pedal
- Always remove the plug out of its socket point before cleaning the heater.
- Periodically clean the air intake and outlet grilles.
- Do not use abrasive cleaning products or solvents.
- Do not make use of this heater in the immediate proximity of showers, bathrubs, swim-
- Always use the heater in an upright position.
- Do not cover the appliance when in operation as this could cause a fire risk.
- Do not use the heater to dry your laundry. Never obstruct the intake and outlet grilles
(danger of overheating).
- The heater must positioned at least 50 cm from furniture, walls, curtains, or other objects.
- When the appliance is used as a portable heater, do not place it close to walls, furniture,
- The use of extension leads is not reccomended, however if it is necessary then follow care-
fully the extension lead’s instructions, and most importantly ensure that the extension lead
is correctly rated in accordance with the heater being used and NEVER overloaded.
- If the power cable is damaged, it must be replaced by the manufacturer, an authorised servi-
ce centre or a qualified electrician in order to eliminate all risk.
- Do not use the appliance in rooms less than 4 m
The appliance is fitted with a tilt-switch which turns the appliance off if it should fall over. To
restart the appliance, simply place it upright again.
The heater is fitted with a safety device which will switch the heater off in case of acci-
dental overheating (eg. obstruction of air intake and outlet grilles, motor turning slowly or
not at all). To reset, disconnect the plug from the power socket for a few minutes, remove the
cause of overheating then plug the appliance in again.
Important: never cover this appliance in any manner whatsoever while it is
operating. To do so would cause a dangerous increase in the temperature of
the appliance itself.
HMH europa 19-05-2003 15:21 Pagina 56
F RACCORDEMENT AU RESEAU
for at undgå enhver form for risiko.
Yfukfcty gj njpb yfxby> hflbfnjh(n ot aeyrwbjybhf fdnjvfnbxyj dctrb lty> d