PS51F4900AW - Téléviseur SAMSUNG - Free user manual and instructions
Find the device manual for free PS51F4900AW SAMSUNG in PDF.
Download the instructions for your Téléviseur in PDF format for free! Find your manual PS51F4900AW - SAMSUNG and take your electronic device back in hand. On this page are published all the documents necessary for the use of your device. PS51F4900AW by SAMSUNG.
USER MANUAL PS51F4900AW SAMSUNG
Thank you for purchasing this Samsung product.
To receive more complete service, please register
touchthepowercordwithwethands.
• WARNING-TOPREVENTTHESPREADOFFIRE,KEEPCANDLESOROTHEROPENFLAMESAWAYFROMTHISPRODUCTATALLTIMES.
Warning! Important Safety Instructions
(Please read the safety instructions below before installing and using the product.)
CAUTION CAUTION:TOREDUCETHERISKOFELECTRICSHOCK,DONOTREMOVE
Thissymbolindicatesthatimportantliteratureconcerning
operationandmaintenance hasbeenincludedwiththis product . [PF4900-ZGZT]BN68-04783B.indb 2 2013-01-23 1:57:01English
For more information on how to use e-Manual (P. 9)
Figures and illustrations in this User Manual are provided for reference only and may differ from actual product appearance. Product
design and specifications may be changed without notice.
1. Functionalities related to Digital TV (DVB) are only available in countries/areas where DVB-T (MPEG2 and MPEG4 AVC) digital terrestrial signals are broadcasted
or where you are able to access to a compatible DVB-C (MPEG2 and MPEG4 AAC) cable-TV service. Please check with your local dealer the possibility to receive DVB-T or DVB-C signal. 2. DVB-T is the DVB European consortium standard for the broadcast transmission of digital terrestrial television and DVB-C is that for the broadcast transmission
of digital TV over cable. However, some differentiated features like EPG (Electric Programme Guide), VOD (Video On Demand) and so on, are not included in this specification. So, they cannot be workable at this moment. 3. Although this TV set meets the latest DVB-T and DVB-C standards, as of [August, 2008], the compatibility with future DVB-T digital terrestrial and DVB-C digital cable broadcasts cannot be guaranteed. 4. Depending on the countries/areas where this TV set is used some cable-TV providers may charge an additional fee for such a service and you may be required to agree to terms and conditions of their business. 5. Some Digital TV functions might be unavailable in some countries or regions and DVB-C might not work correctly with some cable service providers. 6. For more information, please contact your local Samsung customer care centre. ✎
The reception quality of TV may be affected due to differences in broadcasting method between the countries. Please check the TV performance in the
local SAMSUNG Authorized Dealer, or the Samsung Call Centre whether it can be improved by reconfiguring TV setting or not.
User Instructions • Screen Image retention Do not display a still image (such as on a video game) on the plasma display panel for more than several minutes as it can cause screen image retention. This image
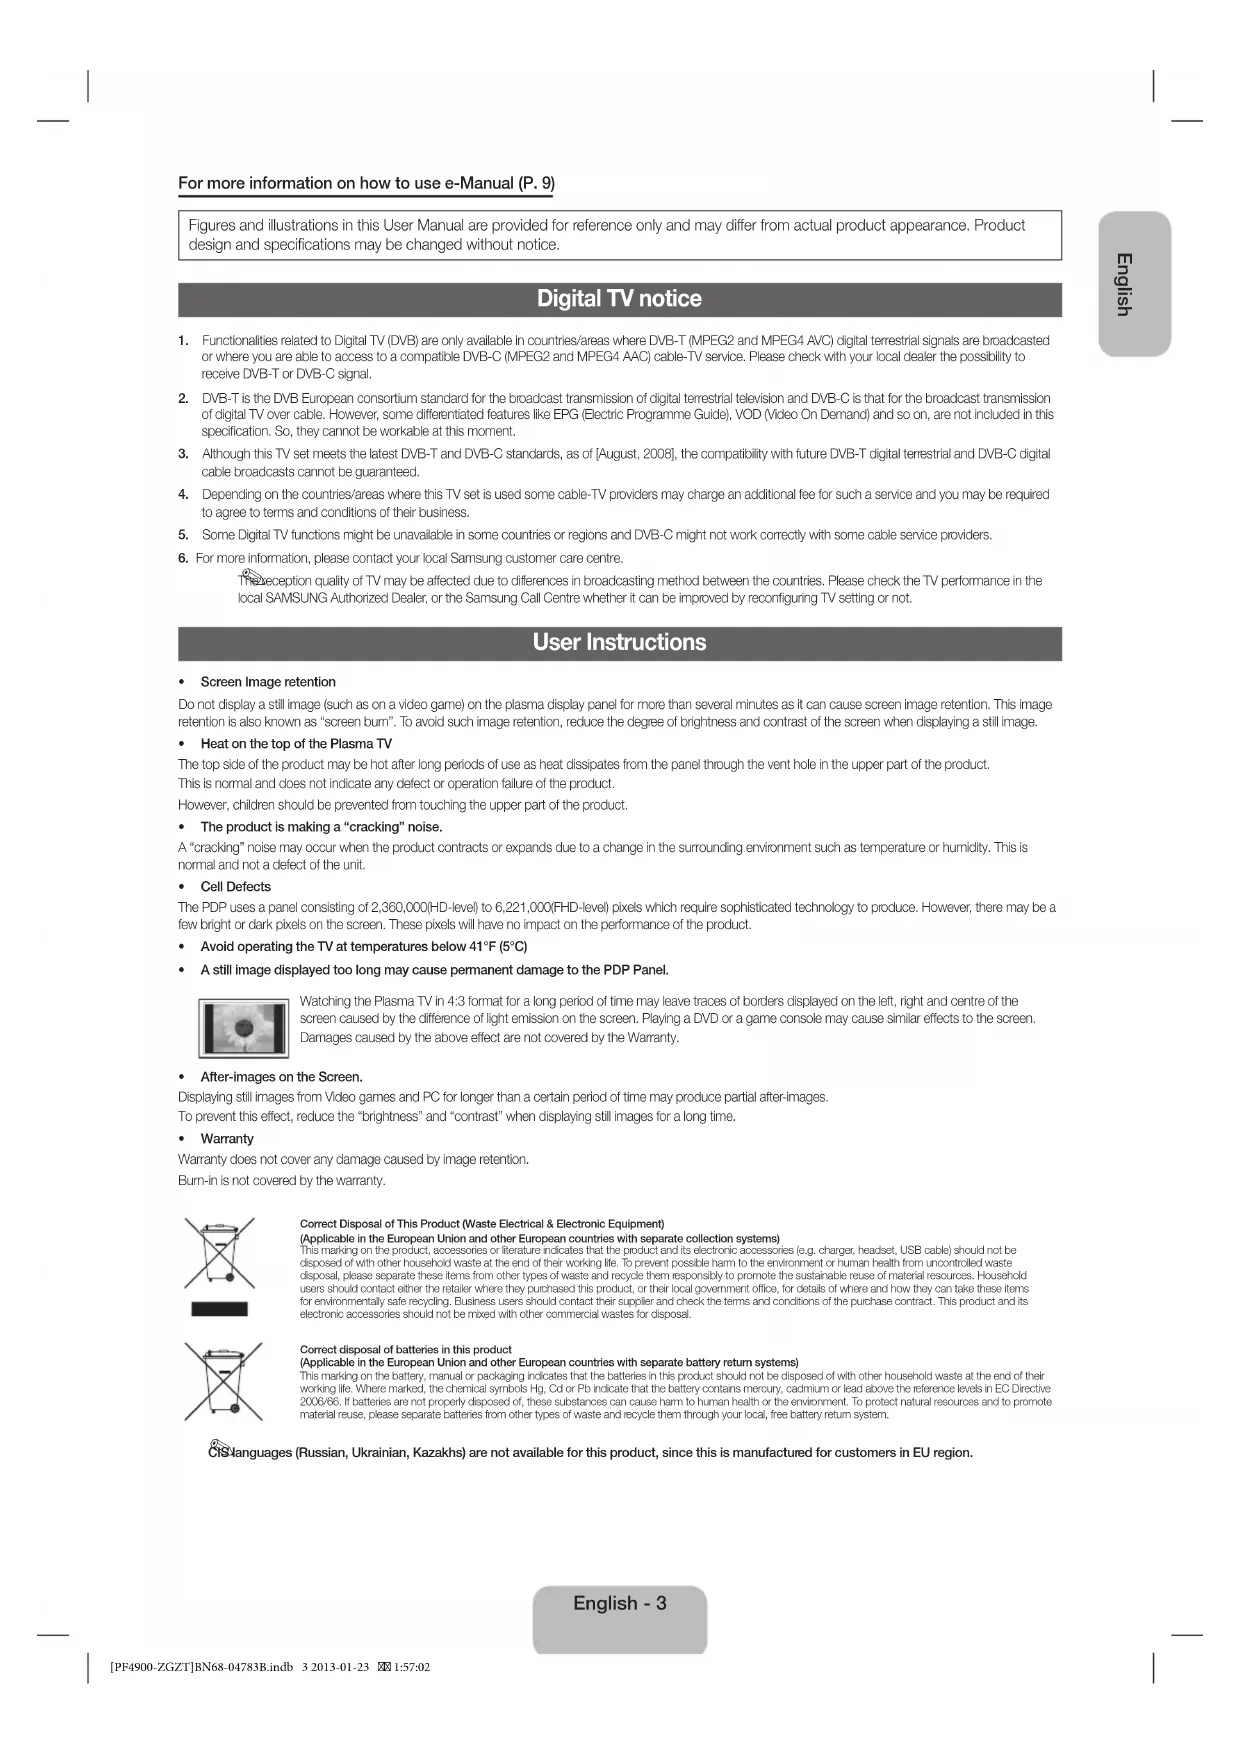
retention is also known as “screen burn”. To avoid such image retention, reduce the degree of brightness and contrast of the screen when displaying a still image. • Heat on the top of the Plasma TV The top side of the product may be hot after long periods of use as heat dissipates from the panel through the vent hole in the upper part of the product. This is normal and does not indicate any defect or operation failure of the product.However, children should be prevented from touching the upper part of the product.• The product is making a “cracking” noise. A “cracking” noise may occur when the product contracts or expands due to a change in the surrounding environment such as temperature or humidity. This is normal and not a defect of the unit.• Cell Defects The PDP uses a panel consisting of 2,360,000(HD-level) to 6,221,000(FHD-level) pixels which require sophisticated technology to produce. However, there may be a few bright or dark pixels on the screen. These pixels will have no impact on the performance of the product.• Avoid operating the TV at temperatures below 41°F (5°C)• A still image displayed too long may cause permanent damage to the PDP Panel. Watching the Plasma TV in 4:3 format for a long period of time may leave traces of borders displayed on the left, right and centre of the
screen caused by the difference of light emission on the screen. Playing a DVD or a game console may cause similar effects to the screen. Damages caused by the above effect are not covered by the Warranty.• After-images on the Screen. Displaying still images from Video games and PC for longer than a certain period of time may produce partial after-images. To prevent this effect, reduce the “brightness” and “contrast” when displaying still images for a long time.• WarrantyWarranty does not cover any damage caused by image retention.Burn-in is not covered by the warranty. Correct Disposal of This Product (Waste Electrical & Electronic Equipment)(Applicable in the European Union and other European countries with separate collection systems) This marking on the product, accessories or literature indicates that the product and its electronic accessories (e.g. charger, headset, USB cable) should not be
disposed of with other household waste at the end of their working life. To prevent possible harm to the environment or human health from uncontrolled waste
disposal, please separate these items from other types of waste and recycle them responsibly to promote the sustainable reuse of material resources. Household
users should contact either the retailer where they purchased this product, or their local government office, for details of where and how they can take these items
for environmentally safe recycling. Business users should contact their supplier and check the terms and conditions of the purchase contract. This product and its electronic accessories should not be mixed with other commercial wastes for disposal.Correct disposal of batteries in this product(Applicable in the European Union and other European countries with separate battery return systems) This marking on the battery, manual or packaging indicates that the batteries in this product should not be disposed of with other household waste at the end of their
working life. Where marked, the chemical symbols Hg, Cd or Pb indicate that the battery contains mercury, cadmium or lead above the reference levels in EC Directive
2006/66. If batteries are not properly disposed of, these substances can cause harm to human health or the environment. To protect natural resources and to promote
material reuse, please separate batteries from other types of waste and recycle them through your local, free battery return system.
CIS languages (Russian, Ukrainian, Kazakhs) are not available for this product, since this is manufactured for customers in EU region.
English - 3 [PF4900-ZGZT]BN68-04783B.indb 3 2013-01-23 1:57:02List of Features
3D This exciting new feature enables you to view 3D content from some broadcasting or 3D BD players.Media Play • Media Play connects your TV and compatible Samsung mobile phones/devices through a network. • Allows you to play music files, pictures, and movies saved on a USB device.e-Manual• Allows you to read on screen full manual. (p. 9) Accessories
✎ Please make sure the following items are included with your TV. If any items are missing, contact your dealer. ✎ The items’ colours and shapes may vary depending on the models. ✎ Cables not included in the package contents can be purchased separately.• Remote Control & Batteries (AAA x 2)• Warranty Card / Regulatory Guide• 3D Active Glasses• Power Cord• Owner’s Instructions• Cleaning Cloth• Holder-Wire Stand Assembling the Holder-Wire standFerrite Core (2EA)
✎ Ferrite Core for Power Cord: The ferrite cores are used to shield the cables from interference. When connecting a cable, open the ferrite core and clip it around the cable near the plug as shown in the figure. • A Maximum distance between the ferrite core and the end of the cord inserted in the TV: 3/4 inches• B Maximum distance between the ferrite core and the other end of the cord inserted in the AC outlet: 3/4 inches ✎ An administration fee may be charged if either (a) an engineer is called out at your request and there is no defect in the product(i.e. where you have failed to read this user manual)(b) you bring the unit to a repair centre and there is no defect in the product(i.e. where you have failed to read this user manual) ✎ The amount of such administration charge will be advised to you before any work or home visit is carried out. English - 4 [PF4900-ZGZT]BN68-04783B.indb 4 2013-01-23 1:57:03English
Viewing the Remote Control
This is a special remote control for the visually impaired persons and has Braille points on the Power, Channel, and Volume
Installing batteries (Battery size: AAA) ABCDE-MANUALAD/SUBT.MEDIA.PTurns the TV on and off.Displays and selects the available video sources.Returns to the previous channel.Cuts off the sound temporarily.Changes channels.Displays channel lists on the screen.Displays the EPG (Electronic Programme Guide). Displays information on the TV screen.Exits the menu.Press to directly access to channels.Adjusts the volume.Alternately select Teletext ON, Double, Mix or OFF. Displays the main on-screen menu. Quickly select frequently used functions. Displays Media Play.Returns to the previous menu.Selects the on-screen menu items and changes the values seen on the menu.Use these buttons according to the direction on screen. Use these buttons in a specific feature.For details, refer to the e-Manual.E-MANUAL: Displays the e-Manual guide. (p. 9) X : Sets the video, which provided with 3D signal.AD/SUBT.: Audio Description selection. (Not available in some locations) / Displays digital subtitles. English - 5 [PF4900-ZGZT]BN68-04783B.indb 5 2013-01-23 1:57:04Using the TV’s Controller (Panel Key)
The TV's Controller, a small joy stick like button on the rear left side of the TV, lets you control the TV without the remote control.
Some functions which require a PIN code may not be available.
The product colour and shape may vary depending on the model.
Exits the menu when pressing the controller more than 1 second.
When using the controller in the up/down/left/right directions, make sure you do not push the controller in first. If you push the
controller in first it will not move in the up/down/left right directions. Remote control sensorTV ControllerThe image is drawn by facing the front side of the TV.ReturnSelecting the Media Play Selecting a SourcePower offSelecting the MenuFunction menu Standby mode
Do not leave your TV in standby mode for long periods of time (when you are away on a holiday, for example). A small amount of electric
power is still consumed even when the power button is turned off. It is best to unplug the power cord.
When the TV is initially powered on, a sequence of on-screen prompts will assist in configuring basic settings. Press the POWER P
button. Setup is available only when the source is set to TV.
If You Want to Reset This Feature...
You should do Setup (MENU → System) again at home although you did in shop.
Select System - Setup (Initial Setup). Enter your 4 digit PIN number. The default PIN number is “0-0-0-0” (except Italy). If you want to
change the PIN number, use the Change PIN function.
If you forget the PIN code, press the remote control buttons in the following sequence in Standby mode, which resets the PIN to
“0-0-0-0” (Italy: “1-1-1-1”): POWER (off) → MUTE → 8 → 2 → 4 → POWER (on).
Changing the Input Source
TV / Ext. / HDMI1 / HDMI2/DVI / AV / Component
Use to select TV or other external input sources such as DVD / Blu-ray players / cable box / STB satellite receiver connected to the TV.
Press the SOURCE button. In the displayed Source list, connected inputs will be highlighted.
PC(D-Sub) input is not supported. If you want to connect PC to the TV, you can connect the HDMI to DVI cable with the HDMI IN
2(DVI) port on the TV.
Ext. always stays activated.
You can set an external input source name you want.
– When connecting a PC to the HDMI IN 2(DVI) port with HDMI cable, you should set the TV to PC mode under Edit Name.
– When connecting a PC to the HDMI IN 2(DVI) port with HDMI to DVI cable, you should set the TV to DVI PC mode under
– When connecting an AV devices to the HDMI IN 2(DVI) port with HDMI to DVI cable, you should set the TV to DVI Devices
mode under Edit Name.
You can see detailed information about the connected external device.
Component connection
The position of port may differ depending
The PDP device may interfere with an amateur radio or AM radio.
When using two-way radio mobile and portable units or amateur
radio or AM radio near by your TV, this may cause the TV to
• PC(D-Sub) and PC/DVI AUDIO IN input are not supported.
• Connecting through the HDMI cable may not be supported depending on the PC.
• If a DVI to HDMI cable is connected to HDMI IN 2(DVI) port, there will be no audio.
• For set-top box connection using HDMI cable, we highly recommend you to connect the HDMI IN 1(STB) port.
[PF4900-ZGZT]BN68-04783B.indb 7 2013-01-23 1:57:06Connecting to a COMMON INTERFACE slot (Your TV viewing Card Slot) To watch paid channels, the “CI or CI+ CARD” must be inserted.• If you do not insert the “CI or CI+ CARD”, some channels will display the message “Scrambled Signal”.• The pairing information containing a telephone number, the “CI or CI+ CARD” ID the Host ID and other information will be displayed in about 2~3 minutes. If an error message is displayed, please contact your service provider.• When the configuration of channel information has finished, the message “Updating Completed” is displayed, indicating the channel list is updated.• The image may differ depending on the model. ✎
NOTE • You must obtain a “CI or CI+ CARD” from a local cable service provider. • When removing the “CI or CI+ CARD”, carefully pull it out with your hands since dropping the “CI or CI+ CARD” may cause damage to it.• Insert the “CI or CI+ CARD” in the direction marked on the card.• The location of the COMMON INTERFACE slot may be different depending on the model. • “CI or CI+ CARD” is not supported in some countries and regions; check with your authorized dealer. • If you have any problems, please contact a service provider. • Insert the “CI or CI+ CARD” that supports the current aerial settings. The screen will be distorted or will not be seen.
Network Connection - Wireless
You can connect your TV to your LAN through a standard wireless router or modem. To connect wirelessly, you must first attach a
“Samsung Wireless LAN Adapter” (WIS12ABGNX, WIS09ABGNX - sold separately) to the USB port on the side of your TV. See the illustration below.The LAN Port on the WallLAN CableWireless IP sharer(wireless router having DHCP server)Samsung Wireless LAN AdapterUSB port on the side of the TV Samsung’s Wireless LAN adapter is sold separately and is offered by select retailers and Ecommerce sites. Samsung’s Wireless LAN
adapter supports the IEEE 802.11a/b/g and n communication protocols. Samsung recommends using IEEE 802.11n. When you play video over a network connection, the video may not be played smoothly. Most wireless network systems incorporate a security system that requires devices that access the network through an access point or wireless router (typically a wireless IP Sharer) to transmit an encrypted security code called an access key. If HIGH PURE THROUGHPUT (Greenfield) 802.11n mode is selected and the Encryption type is set to WEP for your wireless router, Samsung TVs will not support a connection in compliance with new Wi-Fi certification specifications. English - 8 [PF4900-ZGZT]BN68-04783B.indb 8 2013-01-23 1:57:07English
How to use the e-Manual
E-MANUAL You can find instructions about your TV’s features in the e-Manual in your TV. To use, press the E-MANUAL button on your remote. Move the cursor using the up/down/right/left buttons to highlight a category, then a topic, and then press the ENTER E button. The e-Manual displays the page you want to see.You can also access it through the menu:
Screen Display Operation Buttons } Index: Displays the index screen. E Enter: Selects a category or sub-menu. e Exit: Exit the e-Manual.<Viewing the Contents> a
Try now: Displays the OSD menu that corresponds to the topic. To return to the e-Manual screen, press the E-MANUAL button. b Home: Moves to the e-Manual home screen. L Page: Moves to previous or next page.{ Zoom: Magnifies a screen. – Press the {
(Zoom) button to magnify the screen. You can scroll through the magnified screen by
using the ▲ or ▼ buttons. To return to the screen to normal size, press the RETURN button. Basic FeaturesChanging the Preset Picture ModeAdjusting Picture SettingsChanging the Picture OptionsChanging the Preset Sound ModeAdjusting Sound Settings } Index E Enter e ExitCurrently displayed video, TV Programme, etc. The category list. Press ◄ or ► button to select the category you want.Displays the sub-menu list. Use the arrow buttons on your remote to move the cursor. Press ENTER E button to select the sub-menu you want. How to toggle between an e-Manual topic and the corresponding OSD menu(s).
✎ This function is not enabled in some menus. ✎ You cannot use the Try now function if the menu is not activated.Method 1 Method 2 1. If you want to use the menu that corresponds to an e-Manual topic, press the red button to select Try now. 2. To return to the e-Manual screen, press the E-MANUAL button. 1. Press the ENTER E
button when a topic is displayed. “Are you sure?” appears. Select Yes, and then press the ENTER E button. The OSD window appears. 2. To return to the e-Manual screen, press the E-MANUAL button.
How to search for a topic on the index page
✎ This function may not be supported depending on the language. 1. If you want to search a keyword, press the blue button to select Index.
2. Press the ◄ or ► button to select a character order you want.
3. Press the ▲ or ▼ button to select a keyword you want to see, and then press the ENTER E button.4. You can view the corresponding e-Manual instruction screen. ✎
To close the Index screen, press the RETURN button.
English - 9 [PF4900-ZGZT]BN68-04783B.indb 9 2013-01-23 1:57:09Teletext Feature
The index page of the Teletext service gives you information on how to use the service. For Teletext information to be displayed correctly,
channel reception must be stable. Otherwise, information may be missing or some pages may not be displayed.
You can change Teletext pages by pressing the numeric buttons on the remote control.
AD/SUBT.MEDIA.PE-MANUAL X A B C D 1
(mode): Selects the Teletext mode (LIST/FLOF). If pressed during LIST mode,
switches the mode to List save mode. In List save mode, you can save a Teletext page
into a list using the
(Teletext on/mix/off): Activates the Teletext mode for the current channel. Press
the button twice to overlap the Teletext mode with the current broadcasting screen.
Press it one more time to exit teletext.
(index): Displays the index (contents) page at any time while you are viewing Teletext.
(size): Displays the teletext on the upper half of the screen in double-size. To move
the text to the lower half of the screen, press it again. For normal display, press it once
(hold): Holds the display at the current page, in the case that there are several
secondary pages that follow automatically. To undo, press it again.
(page up): Displays the next Teletext page.
(page down): Displays the previous Teletext page.
(reveal): Displays the hidden text (answers to quiz games, for example). To display
the normal screen, press it again.
(cancel): Shrinks the Teletext display to overlap with the current broadcast.
Colour buttons (red, green, yellow, blue): If the FASTEXT system is used by the
broadcasting company, the different topics on a Teletext page are colour-coded and can
be selected by pressing the coloured buttons. Press the colour corresponding to the
topic of your choice. A new colour coded page is displayed. Items can be selected in
the same way. To display the previous or next page, press the corresponding coloured
The Teletext pages are organized according to six categories
A E F B C D A Selected page number.
B Broadcasting channel identity.
C Current page number or search indications.
Samsung's SSG-5100GB 3D glasses enable you to view 3D images on your
3D TV. The Samsung 3D glasses communicate with Samsung 3D TVs via the
The Samsung 3D glasses are only compatible with Samsung D, E, and
F series 3D TV's that were released in 2011, 2012, and 2013. These 3D
glasses cannot be connected to other Bluetooth devices.
For details on how to attach the glasses' temples and how to pair
the glasses with the TV, refer to the separate 3D glasses manual.
Pairing 3D Active Glasses
What is Pairing? Pairing is the process of connecting 3D glasses and a
3D TV so that the two devices can exchange data.
Ensure your Samsung TV and 3D glasses are no farther than 19.5 in (50
cm) apart from each other while pairing is in progress.
Operating rangeRecommended pairing distance 2~6m
Turning the glasses onPress the power button briefly. The green LED is turned on for 3 seconds. (Make sure that 3D is activated on the TV before using the 3D glasses.)
Turning the glasses offPress the power button briefly. The red LED is turned on for 3 seconds.
Performing the pairing processTurn the TV on and let it power up completely. Press and hold the Power button on the glasses. The green and the red LEDs blink alternately for 2 seconds. Recommended viewing distanceRecommended viewing distance2~6m (6.5 to 19.5 ft)Recommended pairing distance50 cm or less (19.5 in) ✎
Once the 3D glasses are paired, the remaining battery capacity is
displayed on the TV screen. (This feature only applies to Samsung F series
3D TVs and 3D glasses that have been available since 2013.)
If you keep trying to pair the glasses and the TV, the battery level will
decrease significantly. However, the battery level will recover to a certain
degree in about a minute.
The working distance depends on the existence of obstacles (a person,
metal, walls, etc.) between the glasses and the TV and the strength of the
Turn off the 3D glasses while they are not in use. If you leave the 3D
glasses on, the battery lifespan decreases.
1. Turn on the TV, and then move the glasses within 19.5 inches of the TV.
2. Press the power button on the 3D glasses briefly. The 3D glasses will
power on and pairing will start.
3. The message “3D glasses are connected to TV.” will be displayed on the
TV screen when the pairing is successfully completed.
If pairing fails, the 3D glasses will power off.
If the first attempt to pair fails, power the TV off and on again and
How to pair again: Press the power button on the 3D glasses for
<Pairing is needed again in the following situations:>
• If the 3D glasses do not function, even when the power button is pressed,
especially on the 3D TV after a repair.
• If you want to play 3D content on another Samsung 3D TV model that
belongs to the D, E, or F series released in 2011 through 2013. You must
pair the glasses with the other TV.
Replacing the Battery
If the red LED blinks every two seconds continually, replace the battery with a
new one. Pull the battery cover downwardOpen the battery coverRemove the batteryReplace the batteryPush the battery cover downwardClose the battery cover ✎
Insert the "+" side of the battery into the side marked with "+" in the
battery compartment.
To check the remaining battery capacity, refer to the pairing section in this
• When viewing a 3D video under a fluorescent lamp (50 Hz – 60 Hz) or
3-wavelength lamp, you may notice a small amount of screen flickering.
• If this occurs, dim or turn off the light.
• Switching the input mode while watching a 3D movie may disable the 3D
function on the TV. As a result, the 3D glasses may not function and the
movie may not be displayed properly.
• If the 3D glasses are moved outside of their working distance, the signal
from the TV will disconnect and the glasses' 3D function will turn off after
• The 3D glasses will power off after the 3D function turns off. When this
happens, the red LED will turn on for 3 seconds.
• Under some circumstances, the 3D glasses may malfunction due to
interference from other devices.
• Ensure you are within the working distance of the glasses when you view a
• The images may not be viewable in 3D if you move outside of the working
distance for 3 seconds.
• If you lie on your side while watching TV with 3D active glasses, the picture
may appear dark or may not be visible.
• The 3D glasses may not work properly due to interference from other 3D
products or electronic devices that operate on the 2.4GHz frequency such
as a microwave oven or Internet AP. If the 3D function malfunctions due to
interference, please move all other electronic or wireless communication
devices as far away from the glasses and the TV as possible.
3D Active Glasses - SSG-5100GB English - 11 PF4900-XC_ENG.indd 11 2013-02-07 �� 4:59:52• The 3D effect may be experienced differently depending on the viewer. You
may not notice the 3D effect at all if you wear glasses and have an unusual
• If a part of the 3D glasses or lenses is defective or damaged, it cannot be
repaired and the glasses should be replaced. If the glasses stop working
within the warranty period, the glasses can be repaired or replaced for
free. If the glasses have been damaged due to the fault of the customer
or the warranty period has expired, a new pair of glasses will have to be
IMPORTANT HEALTH AND SAFETY INFORMATION FOR 3D IMAGES. READ THE FOLLOWING CAUTIONS BEFORE YOU OR YOUR CHILD USE THE 3D FUNCTION.
• Adults should frequently check on children who are using the 3D function. If
there are any complaints of tired eyes, headaches, dizziness or nausea, stop
the child from viewing the 3D TV and ensure that they rest.
• Do not use the 3D glasses for other purposes such as general wear,
sunglasses, protective goggles, etc.
• Some viewers may experience discomfort such as dizziness, nausea and
headaches while viewing 3D TV. If you experience any of these symptoms,
stop viewing the 3D TV, remove the 3D glasses and rest for awhile.
• Watching 3D pictures for an extended period of time may cause eye strain.
If you experience any eye strain, stop viewing the 3D TV, remove the 3D
glasses and rest for awhile.
• Do not use the 3D function or 3D glasses while walking or moving around.
Using the 3D function or 3D Active Glasses while moving around may result
in injury from running into objects, tripping, and/or falling.
SAFETY PRECAUTIONS The following safety instructions are to ensure your personal
safety and prevent property damage. Please read them to
ensure the proper use of the product.
• Do not place the product in a location exposed to direct sunlight, heat, fire,
or water. Exposure may result in a product malfunction or fire.
• Do not apply force to the lenses of the 3D glasses. Do not drop or bend
the product. Applying force, dropping, or bending may result in a product
• Use only the specified standard batteries. When replacing the battery, insert
the battery so that its polarity (+, –) is correct. Failing to do so may damage
the battery or result in fire, personal injury or environmental damage caused
by liquid leaking from the battery.
• Keep the used battery out of the reach of children so that they do not
accidently swallow the battery. If your child has swallowed the battery,
consult your doctor immediately.
• When cleaning the product, do not spray water or cleaner directly onto the
surface of the product. Spraying water or cleaner directly onto the glasses
may result in fire or electric shock, damage to the product's surface, or
cause the indicator labels on the product's surface to come loose.
• Do not use chemicals containing alcohol, solvents, or surfactants, or
chemicals such as wax, benzene, thinner, mosquito repellant, lubricant or
cleaners. These may cause a discolouration of or cracks in the product
surface and cause the indicator labels on the product's surface to come
• Since the product surface and lens are easily scratched, make sure to use a
clean soft cloth (a cloth consisting of superfine fibers or cotton flannel) when
cleaning to avoid scratching either the surface or the lens. As the product
may become scratched if there are any foreign items on the cloth, make
sure to shake off any dust before using it.
• Never disassemble, repair, or modify the 3D glasses yourself. Do not use the
glasses when they are out of order or broken.
• Take care that you do not injure your eyes with the edges of the frame of the
3D glasses when wearing them.
• Use your hands to put on or remove the 3D glasses.
Troubleshooting If you encounter... Try this...My 3D glasses do not work.• Replace the battery.• The 3D glasses should be close to the TV. Make sure that the distance between the TV and your 3D glasses is less than 19.5 feet (6m) in a straight line. • Check the 3D function settings of your TV. The LED keeps blinking • The battery is dead. Replace the battery.
Specifications (Model Number: SSG-5100GB) OpticsShutters Liquid crystal Transmittance36±2%Recommended viewing distance2 ~ 6m (6.5 to 19.5 ft)Field Rate120 fields/secondWeight Glasses21.5g/.76 oz. (including the battery: 24.0±0.5g/.85.±.018oz.)Power GlassesOne 3V lithium/manganese dioxide battery 3V(CR2025)Power ConsumptionGlasses 0.85mA (Average) BatteryType 165mAh, 3.0V (CR2025)Operating time when On150 hours Operating ConditionsOperating Temperature
Product specifications may be changed without notice in order to
enhance product performance.
The continuous operating time may differ depending on the wireless
communication environment and usage conditions.
PF4900-XC_ENG.indd 12 2013-02-07 �� 4:59:54English
WARRANTY This Samsung product is warranted for the period of the listed period at the
table (Refer to the warranty period table by the country) from the original date
of purchase, against defective materials and workmanship. In the event that
warranty service is required, you should first return the product to the retailer
from whom it was purchased. However, Samsung Authorised Service Centres
will comply with this warranty during the Warranty Period. To obtain details,
please contact your nearest Authorised Service Centre.
PROCEDURE FOR MAKING A WARRANTY CLAIM To make a claim under the warranty, you must contact the Samsung Centre
during the Warranty Period to discuss the problems you are having with the
product. If a repair or replacement is required, you will be provided with a
Warranty Claim Number and address of an Authorised Service Centre.
If you are provided with a Warranty Claim Number, to obtain a repair or
replacement of the product, you must send the product to the Authorised
Service Centre advised together with:
• a copy of your completed warranty card or, if you have already provided this
to Samsung, your name, address and contact telephone number;
• your original receipt, invoice or sales slip for the purchase of the product as
• your Warranty Claim Number.
Samsung will then repair or replace the product and return it to you using
the contact details provided.
1. The warranty is only valid if the above procedure for making a warranty
2. Samsung’s obligations are limited to the repair or, at its discretion,
replacement of the product or the defective part.
3. Warranty repairs must be carried out by Samsung Authorised Service
Centres. No re-imbursement will be made for repairs carried out by service
centres or dealers that are not authorised by Samsung and any such repair
work and damage to the products caused by such repair work will not be
covered by this warranty.
4. This product is not considered to be defective in materials nor
workmanship by reason that it requires adaptation in order to conform
to national or local technical or safety standards in force in any country
other than the one for which the product was originally designed and
manufactured. This warranty will not cover, and no reimbursement will be
made for such adaptation, nor any damage which may result.
5. The warranty does not apply to any product that has been damaged or
rendered defective as a result of any of the following excluded reasons,
• as a result of accident, misuse, or abuse;
• through the failure to use this product for its normal purposes;
• by the use of parts not manufactured or sold by Samsung;
• by modification without the written permission of Samsung;
• by damage resulting from transit, neglect, power surge or failure;
• by damage resulting from lightning, water, fire, or acts of God;
• as a result of normal wear and tear; or
• differences in broadcasting methods or product standards between
6. This warranty is valid for any person who legally acquired possession of the
product during the warranty period.
7. NOTHING IN THESE WARRANTY CONDITIONS SHALL EXCLUDE OR LIMIT SAMSUNG’S LIABILITY FOR DEATH OR PERSONAL INJURY CAUSED BY THE PROVEN NEGLIGENCE OF SAMSUNG, UNLESS SUCH LIMITATION OR EXCLUSION IS PERMITTED BY APPLICABLE LAW.
8. WITH THE EXCEPTION OF SAMSUNG’S LIABILITY WHICH CANNOT BE EXCLUDED OR LIMITED BY LAW, SAMSUNG SHALL NOT BE LIABLE FOR: ANY INDIRECT, INCIDENTAL, SPECIAL OR CONSEQUENTIAL DAMAGES LOSSES OR EXPENSES; OR LOST PROFITS; OR LOSS OF USE OR LOSS OF DATA; OR DAMAGE TO GOODWILL, REPUTATION OR LOST BUSINESS, ARISING DIRECTLY OR INDIRECTLY, FROM THE PURCHASE, USE OR SALE OF THE PRODUCT, WHETHER OR NOT SAMSUNG WAS ADVISED OR AWARE OF THE POSSIBILITY OF SUCH DAMAGES, LOSSES OR EXPENSES.
10. UNLESS PROVIDED FOR IN THIS WARRANTY, ALL CONDITIONS,
WARRANTIES AND TERMS IMPLIED BY STATUTE OR OTHERWISE ARE HEREBY EXCLUDED TO THE MAXIMUM EXTENT PERMISSIBLE BY LAW.
11. The above warranty conditions do not affect your statutory rights as a
If the TV seems to have a problem, first try this list of possible problems and solutions. If none of these troubleshooting tips apply, visit
“www.samsung.com”, then click on Support, or call Samsung customer service centre.
Issues Solutions and Explanations
First of all, please perform the Picture Test and confirm that your TV is properly displaying test image. (go to MENU -
Support - Self Diagnosis - Picture Test) If the test image is properly displayed, the poor picture may caused by the
The TV image does not look as good
as it did in the store.
• If you have an analogue cable/set top box, upgrade to a digital set top box. Use HDMI or Component cables to deliver
HD (high definition) picture quality.
• Cable/Satellite subscribers: Try HD stations from the channel line up.
• Aerial connection: Try HD stations after performing Auto tuning.
• Many HD channels are up scaled from SD (Standard Definition) contents.
• Adjust the Cable/Set top box video output resolution to 1080i or 720p.
• Make sure you are watching the TV at the minimum recommended distance based on the size and definition of the
The picture is distorted: macroblock
error, small block, dots, pixelization
• Compression of video contents may cause picture distortion especially in fast moving pictures such as sports and
• Low signal level or bad quality can cause picture distortion. This is not a TV issue.
• Mobile phones used close to the TV (cca up to 1m) may cause noise in picture on analogue and digital TV.
Colour is wrong or missing.
• If you’re using a component connection, make sure the component cables are connected to the correct jacks. Incorrect
or loose connections may cause colour problems or a blank screen.
There is poor colour or brightness.
• Adjust the Picture options in the TV menu. (go to Picture Mode / Colour / Brightness / Sharpness)
• Adjust Energy Saving option in the TV menu. (go to MENU - System - Eco Solution - Energy Saving)
• Try resetting the picture to view the default picture settings. (go to MENU - Picture - Reset Picture)
There is a dotted line on the edge of
• If the picture size is set to Screen Fit, change it to 16:9.
• Change cable/satellite box resolution.
The picture is black and white.
• If you are using an AV composite input, connect the video cable (yellow) to the Green jack of component input 1 on the
When changing channels, the picture
freezes or is distorted or delayed.
• If connected with a cable box, please try to reset the cable box. Reconnect the AC cord and wait until the cable box
reboots. It may take up to 20 minutes.
• Set the output resolution of the cable box to 1080i or 720p.
First of all, please perform the Sound Test to confirm that your TV audio is properly operating. (go to MENU - Support -
Self Diagnosis - Sound Test)
If the audio is ok, the sound problem may be caused by the source or signal.
There is no sound or the sound is too
low at maximum volume.
• Please check the volume of the device (Cable/Sat Box, DVD, Blu-ray etc) connected to your TV.
The picture is good but there is no
• Set the Speaker Select option to TV Speaker in the sound menu.
• If you are using an external device, make sure the audio cables are connected to the correct audio input jacks on the
• If you are using an external device, check the device’s audio output option (ex. you may need to change your cable
box’s audio option to HDMI when you have a HDMI connected to your TV).
• If you are using a DVI to HDMI cable, a separate audio cable is required.
• Reboot the connected device by reconnecting the device’s power cable.
The speakers are making an
inappropriate noise.
• Check the cable connections. Make sure a video cable is not connected to an audio input.
• For aerial or cable connections, check the signal strength. Low signal level may cause sound distortion.
[PF4900-ZGZT]BN68-04783B.indb 14 2013-01-23 1:57:15English
Issues Solutions and Explanations
No Picture, No Video
The TV will not turn on.
• Make sure the AC power cord is securely plugged in to the wall outlet and the TV.
• Make sure the wall outlet is working.
• Try pressing the POWER button on the TV to make sure the problem is not the remote. If the TV turns on, refer to “The
remote control does not work” below.
The TV turns off automatically.
• Ensure the Sleep Timer is set to Off in the Time menu.
• If your PC is connected to the TV, check your PC power settings.
• Make sure the AC power cord is plugged in securely to the wall outlet and the TV.
• When watching TV from an aerial or cable connection, the TV will turn off after 10 ~ 15 minutes if there is no signal.
You can not play 3D videos in some
• Take out the disk from player and put it again, or restart the BD player.
There is no picture/video.
• Check cable connections (remove and reconnect all cables connected to the TV and external devices).
• Set your external device’s (Cable/Set top Box, DVD, Blu-ray etc) video outputs to match the connections to the TV
input. For example, if an external device’s output is HDMI, it should be connected to an HDMI input on the TV.
• Make sure your connected devices are powered on.
• Be sure to select the TV’s correct source by pressing the SOURCE button on the remote control.
• Reboot the connected device by reconnecting the device’s power cable.
Aerial (Air/Cable) Connection
The TV is not receiving all channels.
• Make sure the Aerial cable is connected securely.
• Please try Setup (Initial setup) to add available channels to the channel list. Go to MENU - System - Setup (Initial
setup) and wait for all available channels to be stored.
• Verify the Aerial is positioned correctly.
The picture is distorted: macro block
error small block, dots, pixelization
• Compression of video contents may cause picture distortion, especially on fast moving pictures such as sports and
• A low signal can cause picture distortion. This is not a TV issue.
The picture will not display in full
• HD channels will have black bars on either side of the screen when displaying up scaled SD (4:3) contents.
• Black bars on the top and bottom will appear during movies that have aspect ratios different from your TV.
• Adjust the picture size options on your external device or TV to full screen.
Plasma TV is making humming noise.
• Plasma TVs typically make a soft humming sound. This is normal. It’s caused by the electrical charges that are used to
create the images on the screen.
• If the humming sound is loud, you may have set the brightness on the TV too high. Try setting the brightness lower.
• You can also have loud humming if the back of your Plasma TV is too close to a wall or other hard surface. Also try
rerouting your connection cables.
• Improper installation of wall mount can create excessive noise.
Image Retention (Burn In) Issue.
• To minimize the possibility of screen burn, this unit is equipped with Pixel Shift screen burn reduction technology. Pixel
Shift lets you set the picture so it moves slightly up and down (Vertical Line) and side to side (Horizontal Dot). The
regular, slight movement of the picture reduces screen burn in.
The remote control does not work.
• Replace the remote control batteries with the poles (+/–) in the right direction.
• Clean the sensor’s transmission window on the remote.
• Try pointing the remote directly at the TV from 5~6 feet away.
The cable/set top box remote control
doesn’t turn the TV on or off, or
• Programme the Cable/Set top box remote control to operate the TV. Refer to the Cable/Set top box user manual for
A “Mode Not Supported” message
• Check the supported resolution of the TV, and adjust the external device’s output resolution accordingly.
[PF4900-ZGZT]BN68-04783B.indb 15 2013-01-23 1:57:16Issues Solutions and Explanations
There is a plastic smell from the TV. • This smell is normal and will dissipate over time.
The TV Signal Information is
unavailable in the Self Diagnosis
• This function is only available with digital channels from an Aerial / RF / Coax connection.
TV is tilted to the right or left side. • Remove the stand base from the TV and reassemble it.
There are difficulties assembling the
• Make sure the TV is placed on a flat surface. If you can not remove the screws from the TV, please use a magnetized
The Broadcasting menu is grey out
• The Broadcasting menu is only available when the TV source is selected.
Your settings are lost after 30 minutes
or every time the TV is turned off.
• If the TV is in the Store Demo mode, it will reset audio and picture settings every 30 minutes. If you want to change the
settings from Store Demo mode to Home Use, press the SOURCE button to select TV mode, and go to MENU →
You have intermittent loss of audio
• Check the cable connections and reconnect them.
• Loss of audio or video can be caused by using overly rigid or thick cables. Make sure the cables are flexible enough for
long term use. If mounting the TV to the wall, we recommend using cables with 90 degree connectors.
You see small particles when you
look closely at the edge of the frame
• This is part of the product’s design and is not a defect.
The PIP menu is not available. • PIP functionality is only available when you are using a HDMI or components source.
You turned the TV off 45 minutes
ago, and it turned on again.
• It is normal. The TV operates the OTA (Over The Aerial) function itself to upgrade firmware downloaded whilst your
The message “Scrambled Signal” or
“Weak or No Signal” appears.
• If you are using a CAM CARD (CI/CI+), check that it is installed into the common interface slot.
• If there is still a problem, pull the CAM CARD out of the TV and insert it into the slot again.
There are recurrent picture/sound
• Check and change the signal/source.
A reaction may occur between the
rubber cushion pads on the base
stand and the top finish of some
• To prevent this, use felt pads on any surface of the TV that comes in direct contact with furniture.
The message “This file may not be
playable properly.” appears.
• This may appear because of high bit rate of content. Content generally will play but could experience some playability
You can keep your TV in optimum operating condition by upgrading to the latest firmware (www.samsumg.com → support) by
[PF4900-ZGZT]BN68-04783B.indb 16 2013-01-23 1:57:17English
Installing the Wall Mount
The wall mount kit (sold separately) allows you to mount the TV on
the wall. For detailed information on installing the wall mount, see
the instructions provided with the wall mount. Contact a technician
for assistance when installing the wall mount bracket. We do not
advice you to do it yourself.
Samsung Electronics is not responsible for any damage to the
product or injury to yourself or others if you select to install the TV
Wall Mount Kit Specifications (VESA)
Wall mount kit is not supplied but sold separately.
Install your wall mount on a solid wall perpendicular to the
floor. When attaching to other building materials, please
contact your nearest dealer. If installed on a ceiling or
slanted wall, it may fall and result in severe personal injury.
• Standard dimensions for wall mount kits are shown in the
• When purchasing our wall mount kit, a detailed installation
manual and all parts necessary for assembly are provided.
• Do not use screws that do not comply with the VESA
standard screw specifications.
• Do not use screws longer than the standard dimension, as
they may cause damage to the inside of the TV set.
• For wall mounts that do not comply with the VESA
standard screw specifications, the length of the screws
may differ depending on their specifications.
• Do not fasten the screws too strongly, this may damage
the product or cause the product to fall, leading to
personal injury. Samsung is not liable for these kinds of
• Samsung is not liable for product damage or personal
injury when a non-VESA or non-specified wall mount
is used or the consumer fails to follow the product
installation instructions.
• Do not exceed 15 degrees tilt when mounting this TV. inches VESA Spec. (A * B) Standard Screw Quantity43~51 400 X 400M8 460~64 600 X 400 Do not install your Wall Mount
Kit while your TV is turned on. It
may result in personal injury due
Securing the TV to the Wall
Caution: Pulling, pushing, or climbing onto the
TV may cause the TV to fall. In particular, ensure
that your children do not hang over or destabilize
the TV; doing so may cause the TV to tip over,
resulting in serious injuries or death. Follow all
safety precautions provided on the included Safety
Flyer. For added stability, install the anti-fall device
for safety purposes, as follows.
To avoid the TV from falling
1. Put the screws into the clamps and firmly fasten them onto
the wall. Confirm that the screws have been firmly installed
You may need additional material such as an anchor
depending on the type of wall.
Since the necessary clamps, screws, and string are not
supplied, please purchase these additionally.
2. Remove the screws from the centre back of the TV, put the
screws into the clamps, and then fasten the screws onto the
Screws may not be supplied with the product. In this
case, please purchase the screws of the following
3. Connect the clamps fixed onto the TV and the clamps fixed
onto the wall with a strong string and then tie the string tightly.
• Install the TV near to the wall so that it does not fall
• It is safe to connect the string so that the clamps fixed
on the wall are equal to or lower than the clamps fixed
• Untie the string before moving the TV.
4. Verify all connections are properly secured. Periodically check
connections for any sign of fatigue for failure. If you have
any doubt about the security of your connections, contact a
professional installer.
English - 17 [PF4900-ZGZT]BN68-04783B.indb 17 2013-01-23 1:57:18Securing the Installation Space Keep the required distances between the product and other objects (e.g. walls) to ensure proper ventilation.Failing to do so may result in fire or a problem with the product due to an increase in the internal temperature of the product. ✎ When using a stand or wall-mount, use parts provided by Samsung Electronics only.• If you use parts provided by another manufacturer, it may result in a problem with the product or an injury due to the product falling. ✎ The appearance may differ depending on the product. ✎ Be careful when you contact the TV because some parts can be somewhat hot. Installation with a stand. 10 cm10 cm10 cm Installation with a wall-mount. 10 cm10 cm10 cm10 cm Storage and Maintenance
If you remove the attached sticker on the TV screen, clean
the residues and then watch TV.
The exterior and screen of the product can get scratched
during cleaning. Be sure to wipe the exterior and screen
carefully using a soft cloth to prevent scratches.
Do not spray water directly onto the
product. Any liquid that goes into the
product may cause a failure, fire, or
Clean the product with a soft cloth
dapped in a small amount of water.
Do not use a flammable liquid (e.g.
benzene, thinners) or a cleaning agent.
Anti-theft Kensington Lock
The Kensington Lock is not supplied by Samsung. It is a device
used to physically fix the system when using it in a public place.
The appearance and locking method may differ from the illustration
depending on the manufacturer. Refer to the manual provided with
the Kensington Lock for additional information on proper use.
” icon on the rear of the TV. A kensington
slot is beside the “
The position and colour may differ depending on the model.
To lock the product, follow these steps:
1. Wrap the Kensington lock cable around a large, stationary
object such as desk or chair.
2. Slide the end of the cable with the lock attached through the
looped end of the Kensington lock cable.
3. Insert the locking device into the Kensington slot on the
These are general instructions. For exact instructions, see
the User manual supplied with the locking device.
The locking device has to be purchased separately.
English - 18 [PF4900-ZGZT]BN68-04783B.indb 18 2013-01-23 1:57:19English
Specifications Environmental Considerations Operating Temperature Operating HumidityStorage Temperature Storage Humidity
) 10% to 80%, non-condensing
Design and specifications are subject to change without prior notice.
For information about power supply, and more about power consumption, refer to the label attached to the product.
Typical power consumption is measured according to IEC 62087 Ed.2
Recommendation - EU Only
• Hereby, Samsung Electronics, declares that this 3D Active Glasses is in compliance with the essential requirements and other relevant
provisions of Directive 1999/5/EC.
• Hereby, Samsung Electronics, declares that this PDP TV is in compliance with the essential requirements and other relevant provisions
of Directive 1999/5/EC.
• This equipment may be operated in all EU countries.
• The official Declaration of Conformity may be found at http://www.samsung.com, go to Support > Search Product Support and enter
LPCM ADPCM (IMA, MS)
AAC HE-AAC WMA DD+ MPEG (MP3)DTS (Core)G.711(A-Law, μ-Law)MPEG4 SP/ASPH.264 BP/MP/HPMotion JPEG 640 x 480 8Window Media Video v91920 x 1080 30 MPEG2 MPEG1*.webm WebM VP8 20 Vorbis ✎
• Video content will not play, or not play correctly, if there is an error in the content or the container.
• Sound or video may not work if the contents have a standard bit rate/frame rate above the compatible Frame/sec listed in the table.
• If the Index Table is in error, the Seek (Jump) function is not supported.
• Some USB/digital camera devices may not be compatible with the player.
• The menu can be displayed late if the video is over 10Mbps(bit rate). Video decoder Audio decoder • Supports up to H.264, Level 4.1 (FMO/ASO/RS are not supported.)
- Below 1280 x 720: 60 frame max
- Above 1280 x 720: 30 frame max
• VC1 AP L4 is not supported.
• GMC 2 or higher is not supported.
• WMA 10 Pro supports up to 5.1 channel and M2 profile.
• WMA lossless audio is not supported.
• Vorbis supports up to 2ch.
• DD+ supports up to 5.1 channel.
Supported Subtitle Formats
• External Name File extensionMPEG-4 timed text .ttxtSAMI .smiSubRip .srtSubViewer .subMicro DVD .sub or .txtSubStation Alpha .ssaAdvanced SubStation Alpha .assPowerdivx .psb • Internal Name Container Format Xsub AVI Picture Format
File Extension Type Resolution *.jpg*.jpegJPEG 15360 X 8640*.bmp BMP 4096 X 4096*.mpo MPO 15360 X 8640 ✎
The MPO type file does not support Zoom, Rotate and Slide
Show Effect functions.
Supported Music Formats
File Extension Type Codec Remark *.mp3 MPEG MPEG1 Audio Layer 3*.m4a*.mpa*.aacMPEG4 AAC *.flac FLAC FLAC Supports up to 2ch.
*.ogg OGG Vorbis Supports up to 2ch. *.wma WMA WMAWMA 10 Pro supports up to 5.1 channel and M2 profile. (WMA lossless audio is not supported.)*.wav wav wav*.mid*.midimidi midi type 0 and type 1 English - 20
[PF4900-ZGZT]BN68-04783B.indb 20 2013-01-23 1:57:22English
Full available resolution: 1024 X 768 @ 60 Hz
Optimal resolution is 1024 X 768 @ 60 Hz. See specification page for full available resolution.
Mode Resolution Horizontal Frequency (KHz) Vertical Frequency (Hz) Pixel Clock Frequency (MHz) Sync Polarity (H / V) IBM 720 x 400 31.469 70.087 28.322 -/+ MAC 640 x 480 35.000 66.667 30.240 -/-832 x 624 49.726 74.551 57.284 -/-VESA DMT640 x 480 31.469 59.940 25.175 -/-640 x 480 37.861 72.809 31.500 -/-640 x 480 37.500 75.000 31.500 -/-800 x 600 37.879 60.317 40.000 +/+800 x 600 48.077 72.188 50.000 +/+800 x 600 46.875 75.000 49.500 +/+1024 x 768 48.363 60.004 65.000 -/-1024 x 768 56.476 70.069 75.000 -/-1024 x 768 60.023 75.029 78.750 +/+ ✎
• The interlace mode is not supported.
• The set might operate abnormally if a non-standard video format is selected.
Licence Manufactured under license from Dolby Laboratories. Dolby and the double-D symbol are trademarks of Dolby Laboratories. Manufactured under a license from U.S. Patent No’s: 5,956,674, 5,974,380, 5,978,762, 6,487,535, 6,226,616, 7,212,872, 7,003,467,
7,272,567, 7,668,723, 7,392,195, 7,930,184, 7,333,929 and 7,548,853. DTS, the Symbol, and DTS and the Symbol together are registered trademarks & DTS Premium Sound | 5.1 is a trademark of DTS, Inc. ©2012 DTS, Inc. All Rights Reserved. Manufactured under a license from U.S. Patent No’s: 6,285,767, 8,027,477, 5,319,713, 5,333,201, 5,638,452, 5,771,295, 5,970,152,
5,912,976, 7,200,236, 7,492,907, 8,050,434, 7,720,240, 7,031,474, 7,907,736 and 7,764,802. DTS, the Symbol, and DTS and the
Symbol together are registered trademarks & DTS Studio Sound is a trademark of DTS, Inc. ©2012 DTS, Inc. All Rights Reserved.
The terms HDMI and HDMI High-Definition Multimedia Interface, and the HDMI Logo are trademarks or registered trademarks of HDMI Licensing LLC in the United States and other countries.DivX Certified® to play DivX® video up to HD 1080p, including premium content. ABOUT DIVX VIDEO: DivX® is a digital video format created by DivX, LLC, a subsidiary of Rovi Corporation. This is an official DivX Certified® device that plays DivX video. Visit divx.com for more information and software tools to convert your files into DivX videos. ABOUT DIVX VIDEO-ON-DEMAND: This DivX Certified® device must be registered in order to play purchased DivX Video-on-Demand (VOD) movies. To obtain
your registration code, locate the DivX VOD section in your device setup menu. Go to vod.divx.com for more information on how to complete your registration. Covered by one or more of the following U.S. patents : 7,295,673; 7,460,668; 7,515,710; 7,519,274 DivX®, DivX Certified® and associated logos are trademarks of Rovi Corporation or its subsidiaries and are used under license. Open source licence noticeIn the case of using open source software, Open Source Licences are available on the product menu.Open Source Licence Notice is written only English. English - 21 [PF4900-ZGZT]BN68-04783B.indb 21 2013-01-23 1:57:24- Deutsch -
• DieSchlitzeundÖffnungenimGehäuseundinderRückwandoderimBodensindfürdieBelüftungerforderlich.UmdenzuverlässigenBetriebdes
AD/SUBT.MEDIA.PE-MANUAL X A B C D 1
LPCM ADPCM (IMA, MS)
Lizenz In Lizenz von Dolby Laboratories gefertigt. Dolby und das Doppel-D-Symbol sind Warenzeichen von Dolby Laboratories. Manufactured under a license from U.S. Patent No’s: 5,956,674, 5,974,380, 5,978,762, 6,487,535, 6,226,616, 7,212,872, 7,003,467,
7,272,567, 7,668,723, 7,392,195, 7,930,184, 7,333,929 and 7,548,853. DTS, the Symbol, and DTS and the Symbol together are registered trademarks & DTS Premium Sound | 5.1 is a trademark of DTS, Inc. ©2012 DTS, Inc. All Rights Reserved. Manufactured under a license from U.S. Patent No’s: 6,285,767, 8,027,477, 5,319,713, 5,333,201, 5,638,452, 5,771,295, 5,970,152,
5,912,976, 7,200,236, 7,492,907, 8,050,434, 7,720,240, 7,031,474, 7,907,736 and 7,764,802. DTS, the Symbol, and DTS and the
Symbol together are registered trademarks & DTS Studio Sound is a trademark of DTS, Inc. ©2012 DTS, Inc. All Rights Reserved.
The terms HDMI and HDMI High-Definition Multimedia Interface, and the HDMI Logo are trademarks or registered trademarks of HDMI Licensing LLC in the United States and other countries.DivX Certified® to play DivX® video up to HD 1080p, including premium content. ABOUT DIVX VIDEO: DivX® is a digital video format created by DivX, LLC, a subsidiary of Rovi Corporation. This is an official DivX Certified® device that plays DivX video. Visit divx.com for more information and software tools to convert your files into DivX videos. ABOUT DIVX VIDEO-ON-DEMAND: This DivX Certified® device must be registered in order to play purchased DivX Video-on-Demand (VOD) movies. To obtain
your registration code, locate the DivX VOD section in your device setup menu. Go to vod.divx.com for more information on how to complete your registration. Covered by one or more of the following U.S. patents : 7,295,673; 7,460,668; 7,515,710; 7,519,274 DivX®, DivX Certified® and associated logos are trademarks of Rovi Corporation or its subsidiaries and are used under license. Hinweis zur Open Source-LizenzBei Verwendung einer Open Source-Software können die Open Source-Lizenzen über das Gerätemenü bezogen werden.Der Open Source-Lizenzhinweis ist in englischer Sprache gehalten. Deutsch - 21 PF4900-ZGZT_DEU.indd 21 2013-01-23 9:59:23- Français -
AD/SUBT.MEDIA.PE-MANUAL X A B C D 1
directive 1999/5/CE.
LPCM ADPCM (IMA, MS)
Fabriqué sous licence de Dolby Laboratories. Dolby et le symbole double-D sont des marques déposées de Dolby Laboratories.
Manufactured under a license from U.S. Patent No’s: 5,956,674, 5,974,380, 5,978,762, 6,487,535, 6,226,616, 7,212,872, 7,003,467,
7,272,567, 7,668,723, 7,392,195, 7,930,184, 7,333,929 and 7,548,853. DTS, the Symbol, and DTS and the Symbol together are registered trademarks & DTS Premium Sound | 5.1 is a trademark of DTS, Inc. ©2012 DTS, Inc. All Rights Reserved. Manufactured under a license from U.S. Patent No’s: 6,285,767, 8,027,477, 5,319,713, 5,333,201, 5,638,452, 5,771,295, 5,970,152,
5,912,976, 7,200,236, 7,492,907, 8,050,434, 7,720,240, 7,031,474, 7,907,736 and 7,764,802. DTS, the Symbol, and DTS and the
Symbol together are registered trademarks & DTS Studio Sound is a trademark of DTS, Inc. ©2012 DTS, Inc. All Rights Reserved.
The terms HDMI and HDMI High-Definition Multimedia Interface, and the HDMI Logo are trademarks or registered trademarks of HDMI Licensing LLC in the United States and other countries.DivX Certified® to play DivX® video up to HD 1080p, including premium content. ABOUT DIVX VIDEO: DivX® is a digital video format created by DivX, LLC, a subsidiary of Rovi Corporation. This is an official DivX Certified® device that plays DivX video. Visit divx.com for more information and software tools to convert your files into DivX videos. ABOUT DIVX VIDEO-ON-DEMAND: This DivX Certified® device must be registered in order to play purchased DivX Video-on-Demand (VOD) movies. To obtain
your registration code, locate the DivX VOD section in your device setup menu. Go to vod.divx.com for more information on how to complete your registration. Covered by one or more of the following U.S. patents : 7,295,673; 7,460,668; 7,515,710; 7,519,274 DivX®, DivX Certified® and associated logos are trademarks of Rovi Corporation or its subsidiaries and are used under license. Avis concernant les Licences libres En cas d’utilisation d’un logiciel libre (Open Source), les licences correspondantes sont disponibles dans le menu du produit. L’avis concernant les Licences libres est uniquement disponible en anglais. Français - 21 PF4900-ZGZT_FRA.indd 21 2013-01-23 11:34:44- Italiano -
AD/SUBT.MEDIA.PE-MANUAL X A B C D 1
messaggio “3D glasses are connected to TV” (Occhiali 3D collegati al
LPCM ADPCM (IMA, MS)
Licenza Prodotto su licenza di Dolby Laboratories. Dolby e il simbolo della doppia D sono marchi di Dolby Laboratories. Manufactured under a license from U.S. Patent No’s: 5,956,674, 5,974,380, 5,978,762, 6,487,535, 6,226,616, 7,212,872, 7,003,467,
7,272,567, 7,668,723, 7,392,195, 7,930,184, 7,333,929 and 7,548,853. DTS, the Symbol, and DTS and the Symbol together are registered trademarks & DTS Premium Sound | 5.1 is a trademark of DTS, Inc. ©2012 DTS, Inc. All Rights Reserved. Manufactured under a license from U.S. Patent No’s: 6,285,767, 8,027,477, 5,319,713, 5,333,201, 5,638,452, 5,771,295, 5,970,152,
5,912,976, 7,200,236, 7,492,907, 8,050,434, 7,720,240, 7,031,474, 7,907,736 and 7,764,802. DTS, the Symbol, and DTS and the
Symbol together are registered trademarks & DTS Studio Sound is a trademark of DTS, Inc. ©2012 DTS, Inc. All Rights Reserved.
The terms HDMI and HDMI High-Definition Multimedia Interface, and the HDMI Logo are trademarks or registered trademarks of HDMI Licensing LLC in the United States and other countries.DivX Certified® to play DivX® video up to HD 1080p, including premium content. ABOUT DIVX VIDEO: DivX® is a digital video format created by DivX, LLC, a subsidiary of Rovi Corporation. This is an official DivX Certified® device that plays DivX video. Visit divx.com for more information and software tools to convert your files into DivX videos. ABOUT DIVX VIDEO-ON-DEMAND: This DivX Certified® device must be registered in order to play purchased DivX Video-on-Demand (VOD) movies. To obtain
your registration code, locate the DivX VOD section in your device setup menu. Go to vod.divx.com for more information on how to complete your registration. Covered by one or more of the following U.S. patents : 7,295,673; 7,460,668; 7,515,710; 7,519,274 DivX®, DivX Certified® and associated logos are trademarks of Rovi Corporation or its subsidiaries and are used under license. Avviso di licenza per il software open sourceNel caso sia stato utilizzato software open source, le Licenze Open Source sono disponibili nel menu del prodotto.L’Avviso di licenza per il software open source è disponibile solo in lingua inglese. Italiano - 21 PF4900-ZGZT_ITA.indd 21 2013-01-23 11:25:10Italiano - 22 RGB HV&,Tuner(T/C)SLC NAND128MBDDR3-1330(128MB)STB MICOMWT61P6SPI flash256KBAV InEXT 1FA Net / DebugOpticalHP / Monitor Out