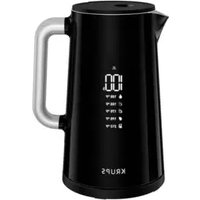
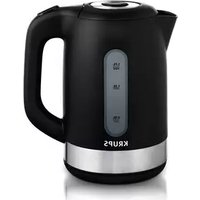
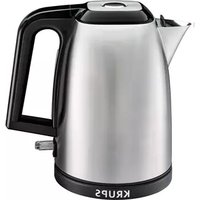
AquaControl Plus FLA143 - Kettle KRUPS - Free user manual and instructions
Find the device manual for free AquaControl Plus FLA143 KRUPS in PDF.
| Product Type | Electric Kettle |
| Brand | Krups |
| Model | AquaControl Plus FLA143 |
| Capacity | 1.7 L (max) - 0.3 L (min) |
| Automatic Shut-off Function | Yes, at boiling point |
| Overheat Protection | Yes, dry boil safety device |
| Operating Indicator Light | Yes |
| Removable Anti-scale Filter | Yes, housed in the spout |
| Hinged Lid with Lock | Yes, automatic click locking |
| Lid Opening Control | Yes, by button |
| Water Level Indicator | Yes, with MAX and MIN marks |
| Power Base with Cord Wrap | Yes |
| Spout | Yes, allows pouring without opening lid |
| Ergonomic Handle | Yes |
| Maintenance - Descaling | With white vinegar (water + 8% vinegar), then rinse |
| Maintenance - Exterior Cleaning | Damp cloth and non-abrasive detergent |
| Maintenance - Filter Cleaning | Rinse with clean water using a soft non-metallic brush |
| Safety | Automatic shut-off, overheat protection, lid lock |
| Usage | Heat water only |
| Spare Parts Available | Anti-scale filter (contact Krups authorized service center) |
Frequently Asked Questions - AquaControl Plus FLA143 KRUPS
User questions about AquaControl Plus FLA143 KRUPS
0 question about this device. Answer the ones you know or ask your own.
Ask a new question about this device
Download the instructions for your Kettle in PDF format for free! Find your manual AquaControl Plus FLA143 - KRUPS and take your electronic device back in hand. On this page are published all the documents necessary for the use of your device. AquaControl Plus FLA143 by KRUPS.
USER MANUAL AquaControl Plus FLA143 KRUPS
Thank you for choosing an appliance from the KRUPS range, which is intended exclusively for boiling water.
CAUTION: the safety precautions are part of the appliance. Read them carefully before using your new appliance for the first time. Keep them in a place where you can find and refer to them later on.
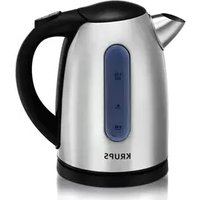
DESCRIPTION
A On/off switch (1/0)
B Indicator light
C Locking and hinged lid
D Lid opening control
E Pouring spout
F Limescale filter (depending on model)
G Body
H Water level indicator
Power base with integrated cord storage
J Handle
USING YOUR APPLIANCE FOR THE FIRST TIME
Before first use, rinse the interior of your kettle and boil 1 or 2 lots of water.
Place the base of your kettle on a stable surface and plug it in.
■ Remove the kettle from its base and fill it via the pouring spout (e) (1) or via the open lid by pressing the lid opening control (d) and lifting the rear section (2).
- Keep the water level within the MAX (1.7 l) and MIN (0.3 l) markings on the indicator (h) (1).
Check that the lid is firmly closed to prevent any spilling, escape of steam or faulty operation. Automatic locking is indicated by means of a "click" and the opening control (d) (3) pops up.
Switch on by positioning the switch (a) to "1", and the indicator light (b) will come on (4).
Important:
The appliance switches off automatically once the water reaches boiling point, the switch (a) returns to position "0" and the indicator light (b) goes out (5).
- You can also stop the kettle at any time during the heating cycle by setting the switch (a) to position "0".
The appliance is protected by a safety device which regulates the heating cycle if the kettle is switched on with too little water or no water at all. Pour cold water into the appliance, or wait for a few minutes to restart the heating cycle.
LIMESCALE FILTER (DEPENDING ON MODEL)
Depending on the hardness of the local water, a layer of limescale may form inside your kettle. If this happens, when the water boils, particles of limescale may be found in the water you pour. To prevent this from occurring, we have equipped the kettle with a special limescale filter which retains the particles of scale when you pour water.
- Avoid pouring water too quickly, so as to allow it to flow slowly through the limescale filter.
To remove the limescale filter, lift the kettle away from its base and allow the appliance to cool down. Never remove the filter when the appliance is full of hot water.
Press the control (d) to open the lid.
Swivel the filter and pull it upward to remove it from the pouring spout (6).
To replace the limescale filter, slide it into the pouring spout and lock it by pushing downwards.
Notes:
The filter is only suitable for this type of kettle.
The absence of a filter will not stop the kettle from working.
CLEANING
Unplug the kettle, remove it from its base and allow it to cool down.
To clean the external surfaces, use a damp cloth with a little washing-up liquid. Rinse and dry carefully.
Never immerse the kettle or the base in water.
Model with limescale filter
Clean the limescale filter at regular intervals.
Rinse it in fresh running water, using a soft non-metallic brush.
MAINTENANCE
Descaling
To allow water to reach boiling point, it is essential that you descale your kettle at regular intervals. To do this, we advise you to use wine vinegar:
Pour 1/2 litre water into the kettle.
Add 1/2 glass of 8^ wine vinegar.
Bring to the boil and leave to work for 15 minutes.
Then rinse your kettle several times in cold water.
Boil fresh water before using the kettle again.
Model with limescale filter
This same mixture (water + vinegar) can also be used to descale the limescale filter.
Pour a little of the hot mixture into a container.
Soak the filter in the mixture for several minutes, until the particles of tartar trapped in the pores of the filter have dissolved.
Then rinse the filter thoroughly in fresh water.
Note:
Our guarantee does not cover kettles which do not work or work poorly because they have not been descaled.
WHAT TO DO IF YOUR APPLIANCE DOES NOT WORK?
Check:
the electrical connection
that the kettle is correctly positioned on its base
that the switch is in position "I"
that the kettle has not been switched on without any water If this is the case, pour cold water in the kettle, wait for one minute before switching it on again
If your kettle works only intermittently before boiling, your appliance probably needs.
descaling.Refer to the section headed "Maintenance"
If your appliance still does not work: contact an approved KRUPS service centre (see list in the booklet «KRUPS Service»).
PROTECT THE ENVIRONMENT

Help protect the environment!
① Your appliance contains a number of materials that may be recovered or recycled.
② Take them to a collection point or an approved service centre so that they can be processed.
European directive 2012/19/UE on Waste Electrical and Electronic Equipment (WEEE), requires that old household electrical appliances are not thrown into the normal flow of municipal waste. Old appliances must beings collected separately in order to optimize the recovery and recycling of materials they contain and reduce the impact on human health and the environment.