
P4960 - Vacuum Cleaner P3 International - Free user manual and instructions
Find the device manual for free P4960 P3 International in PDF.
| Product Type | Robot vacuum cleaner |
| Brand | P3 International |
| Model | P4960 |
| Power Supply | Built-in rechargeable battery, charges via power cord |
| Charge Time | Approximately 16 hours for full charge |
| Battery Life | Approximately 12 hours of use after charge |
| Charge Indicator | Green LED when battery is full |
| Compatible Floor Types | Wood, tile, linoleum, short-pile carpets and rugs |
| Main Functions | Automatic cleaning, suction, dusting with microfiber cloth |
| Side Brush | One removable side brush for cleaning corners |
| Dustbin | Removable dustbin with filter, capacity not specified |
| Filter | Washable filter with water |
| Maintenance | Empty dustbin after each use, clean filter regularly, clean suction opening and side brush |
| Safety | Automatic shut-off on low battery, do not use outdoors or on wet floor |
| Included Accessories | Vacuum cleaner, dusting cloth holder, 3 dusting cloths, manual, side brush |
| Usage Conditions | Indoor only, dry surfaces, avoid long-pile carpets |
| Recycling | Remove battery before disposal, recycle according to local regulations |
Frequently Asked Questions - P4960 P3 International
User questions about P4960 P3 International
0 question about this device. Answer the ones you know or ask your own.
Ask a new question about this device
Download the instructions for your Vacuum Cleaner in PDF format for free! Find your manual P4960 - P3 International and take your electronic device back in hand. On this page are published all the documents necessary for the use of your device. P4960 by P3 International.
USER MANUAL P4960 P3 International
Safety Instructions 2
- Safety Instructions
- Battery and Recharging Instructions
Special Features 4
Components and Attachments 4
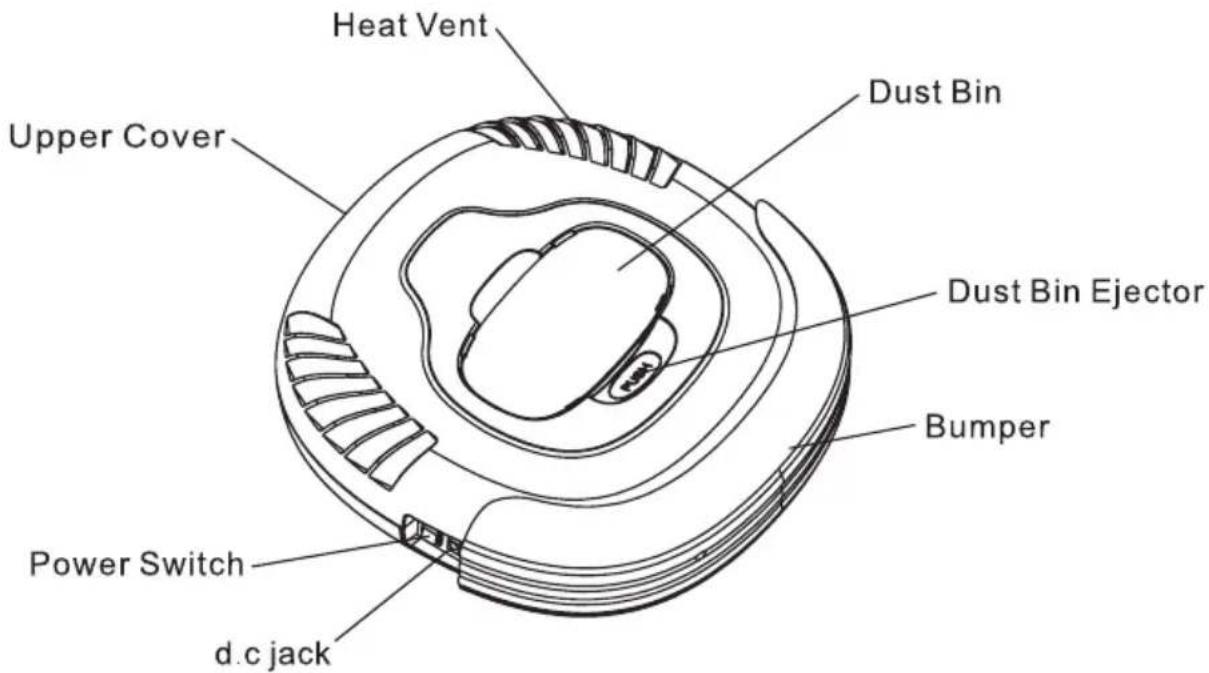
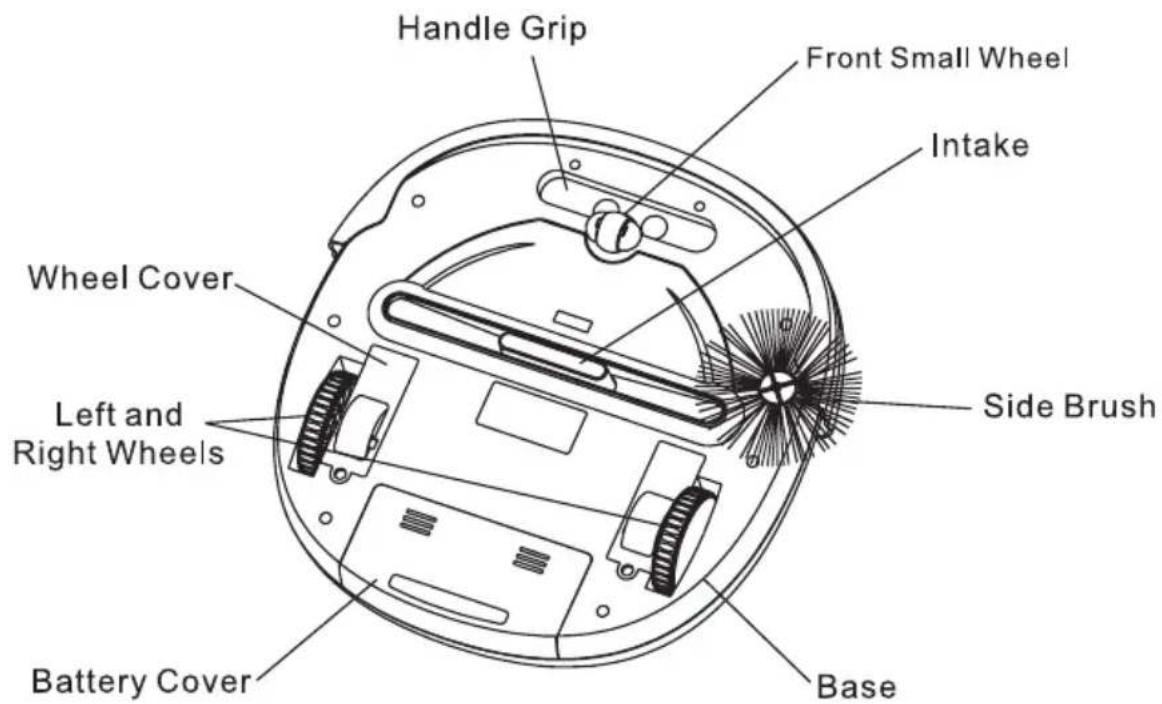
Product Features/Locations 5
Battery Installation and Removal 6
Recharging Battery 7
General Operation 7
- Preparation for Operation
- Starting Operation
Installing Sidebrush 8
Using Dust Cloths 8
Cleaning and Maintenance 9
- Maintenance Procedures
- Removing Dust Bin
- Emptying Dust Bin
- Cleaning Dust Bin
- Cleaning Intake
- Cleaning Side Brushes
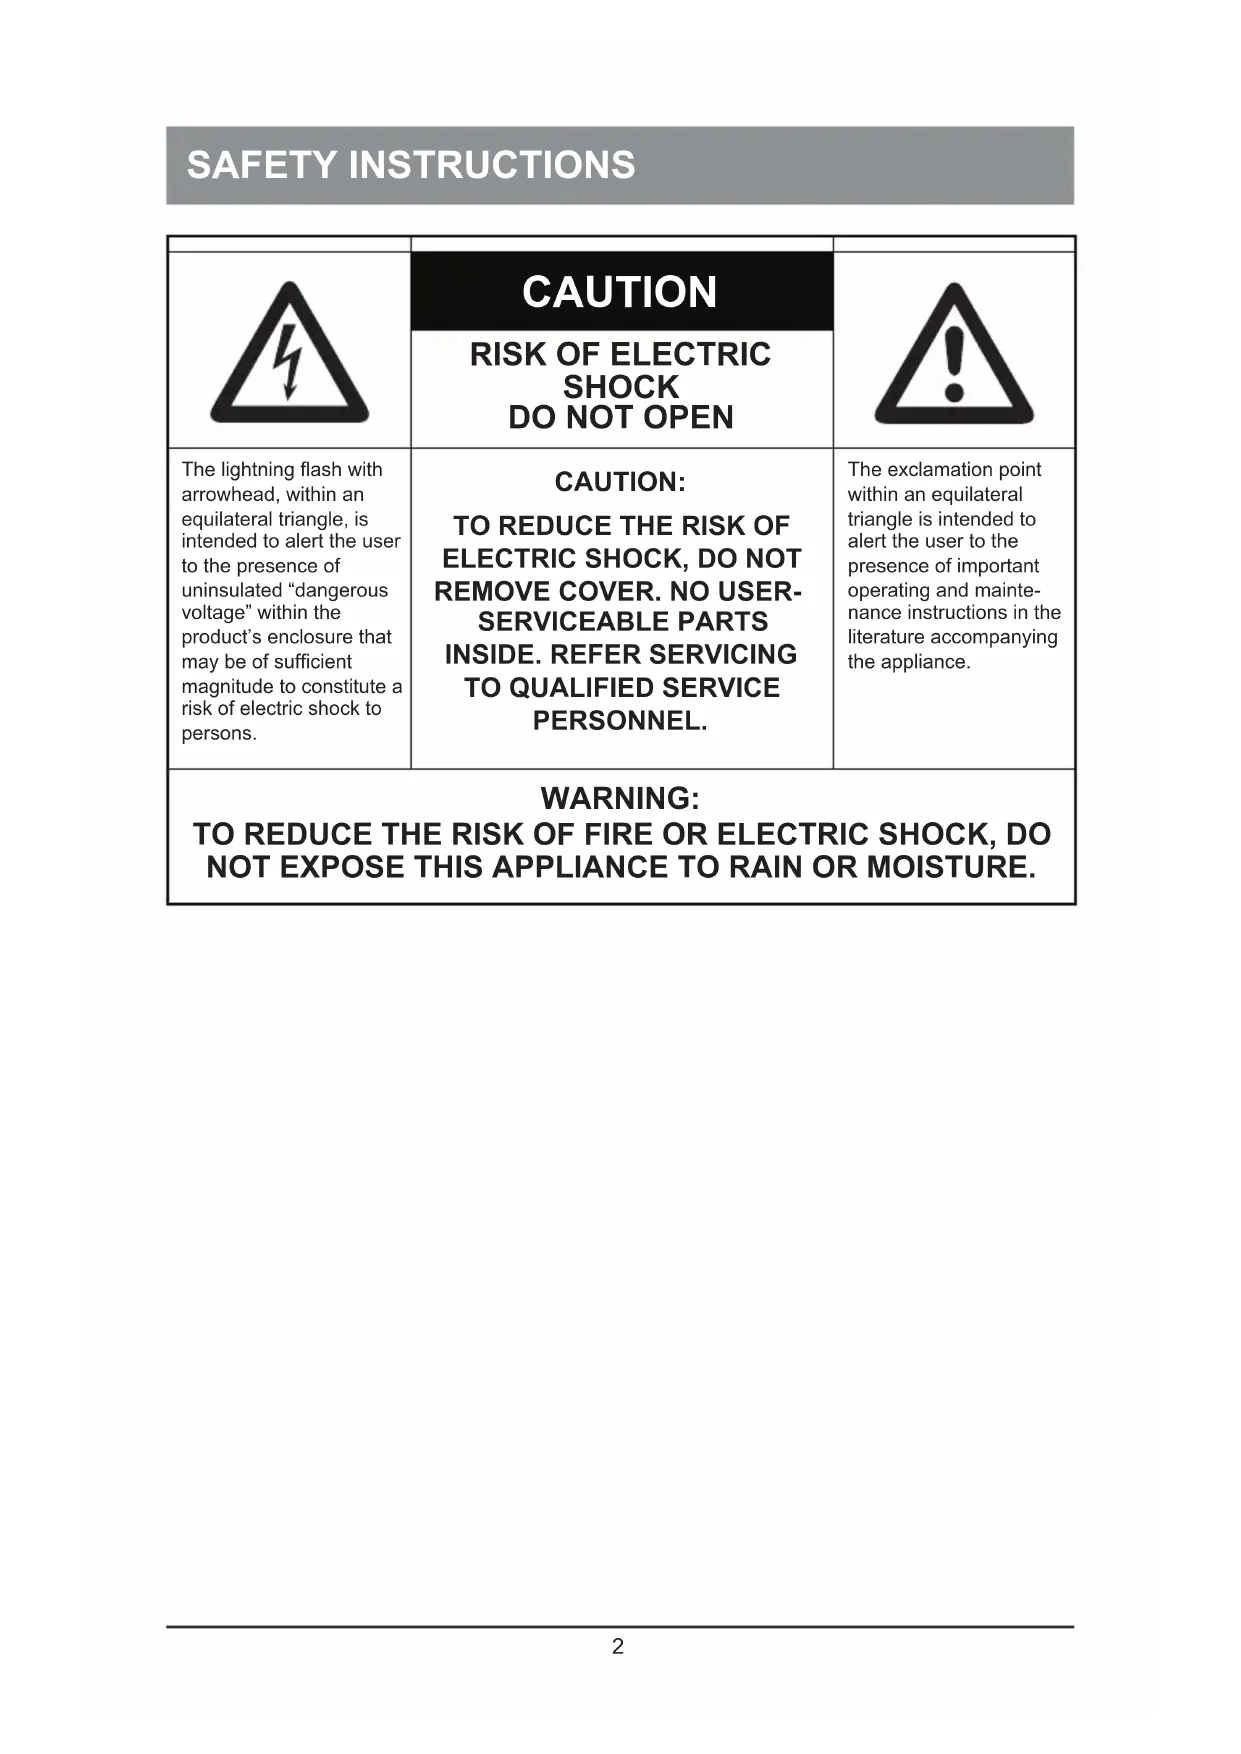
| CAUTION | ||
| RISK OF ELECTRIC SHOCK DO NOT OPEN | ||
| The lightning flash with arrowhead, within an equilateral triangle, is intended to alert the user to the presence of uninsulated “dangerous voltage” within the product’s enclosure that may be of sufficient magnitude to constitute a risk of electric shock to persons. | CAUTION: TO REDUCE THE RISK OF ELECTRIC SHOCK, DO NOT REMOVE COVER. NO USER- SERVICEABLE PARTS INSIDE. REFER SERVICING TO QUALIFIED SERVICE PERSONNEL. | The exclamation point within an equilateral triangle is intended to alert the user to the presence of important operating and maintenance instructions in the literature accompanying the appliance. |
| WARNING: TO REDUCE THE RISK OF FIRE OR ELECTRIC SHOCK, DO NOT EXPOSE THIS APPLIANCE TO RAIN OR MOISTURE. | ||
SAFETY INSTRUCTIONS
Please read through the safety instructions in this Operation Manual before operating this product and keep this manual handy for your future reference. Observe the basic safety rules to prevent any occurrence of fire, electric shock and personal injury.
Safety Instructions
- Please read through this Operation Manual before operation.
- Do not operate this unit outdoors.
- Keep the vacuum away from water, and never use it in any conditions where water could enter the unit or it could damage the unit.
- Before operating the vacuum remove any loose articles on the floor such as clothes, paper, loose cables and extension cords as well as making sure to lift curtains and drapes off the floor to avoid any possible accidents. In case the cable is entangled into this unit, the cable will move around as the cleaner is working and finally topple down the table, chairs, even cabinet and cupboard.
- Never stand on the vacuum. Be aware of children or pets while the vacuum is in operation.
- Never use the vacuum to pick up lighted smoking or fireplace materials.
- Never use the vacuum to clean combustible or highly volatile liquids such as gasoline.
- Make sure exit doors leading outdoors are closed.
- During operation, care should be taken to avoid the heat vent from becoming clogged during operation. This could damage the vacuum.
- If the cleaner is out of work or damaged, never use it regardless whatever the trouble will be.
- Be sure the power is off and remove the battery if the unit will not be in use for a long period of time.
Battery and Recharging Instructions
- The battery is rechargeable. Please use the voltage and current specified on the packaging. If you are not sure of the voltage and current of your house, contact your local power company or a licensed electrician.
- Use only the battery supplied with your vacuum.
- Use the charger indoors only.
- Use only the battery charger adaptor supplied with your vacuum.
- Never use the battery again if the cable or plug of the battery becomes damaged.
- Never touch the charger, plug or cable with wet hands.
- If the vacuum requires cleaning, unplug the unit and take out the battery.
- Before disposing off the unit, the battery pack has to be taken out.
- Please switch off the unit before taking out the battery.
- Please recycle and dispose the waste battery properly.
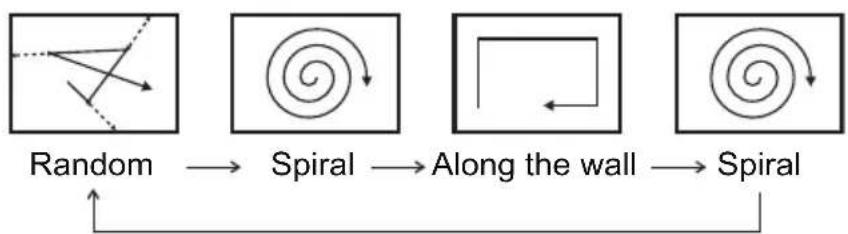
SPECIAL FEATURES
Congratulations on your purchase of the V.Bot® Robotic Vacuum. This revolutionary automatic vacuum is equipped with functions suitable for cleaning home and office floor surfaces such as wood, tile, linoleum, and most low-pile carpets.
You can also operate this unit with the provided micro fiber dust cloths to help you clean more effectively. The V.Bot® Robotic Vacuum Cleaner is definitely a household helper.
MAJOR COMPONENTS AND ATTACHMENTS
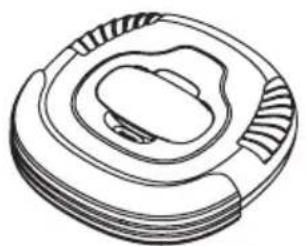
V.Bot® Vacuum x1
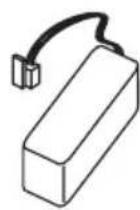
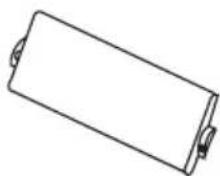
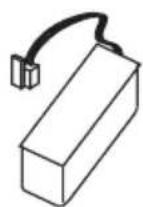
Rechargeable Battery x1
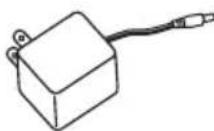
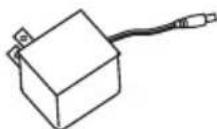
Adaptor x1

Dust Bin Filter x1
Dusting Paper Holder x1
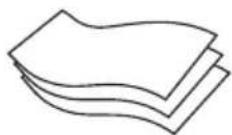
Dusting Paper x3
Operation Manual x1
Side Brushx1
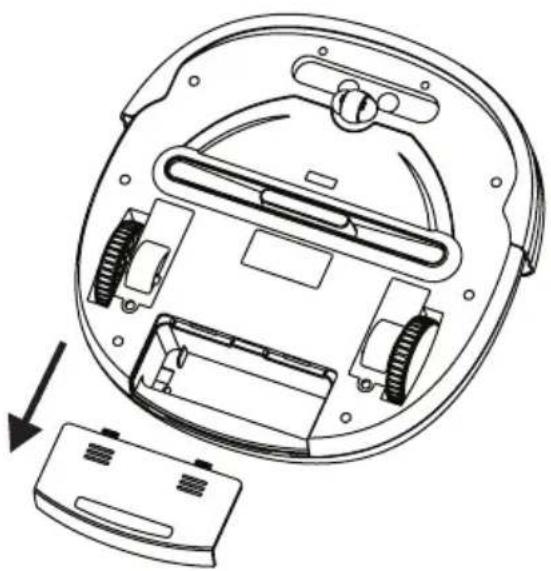
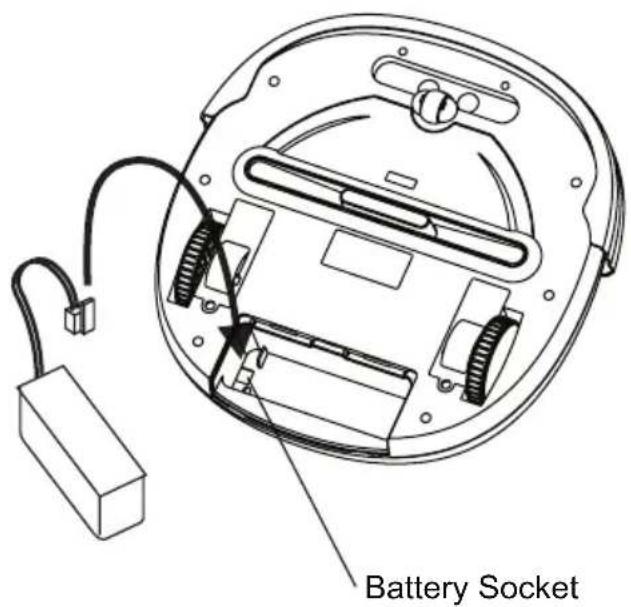
BATTERY INSTALLATION AND REMOVAL
- Make sure the vacuum is turned off.
- Press and slide the battery cover (see diagram below).
- Insert the battery plug into the socket (please note the direction).
- Place the battery in the battery reservoir and close the battery cover.
- To remove the batteries, follow step #3 above in reverse.
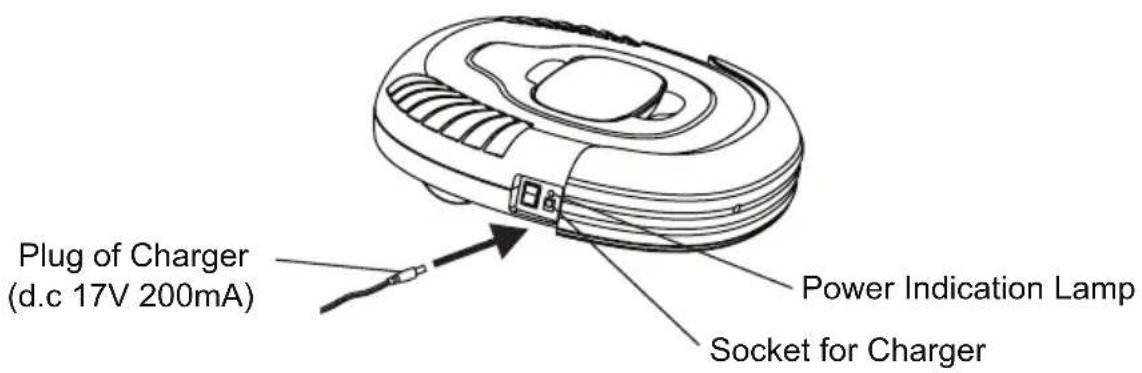
RECHARGING BATTERY
- To protect the rechargeable battery and lengthen its life, after the battery is charged for 16 hours, the charging function will be cut off automatically. After 12 hours of charging you may start using the vacuum even if the power indication lamp is still flashing.
- If the vacuum emits a warning buzz and stops moving, this indicates that the battery needs immediate charging.
- Make sure the vacuum is in the OFF position and the battery is installed.
- Plug one end of the AC adaptor into the jack on the vacuum and the other end into the wall outlet to charge.
- When the batteries are fully charged the power indication lamp will stay green.
GENERAL OPERATION
Preparation for Operation
To ensure the best working efficiency of the vacuum, make sure to remove clothes, paper, and electric cords from the floor, and roll up the any curtains or drapes that might cause the vacuum to become stuck. Should an electric cord become entangled in the vacuum, the lamp or appliance risks being pulled to the floor and damaged.
Do not use on the shag carpet.
Starting Operation
- Clean the dust bin.
- Place the vacuum on the floor and switch the unit to the ON position.
- When the vacuum runs out of power, it will emit a buzz and stop automatically.
- When the vacuum is not in use, or prior to recharging, make sure the power switch is in the OFF position.
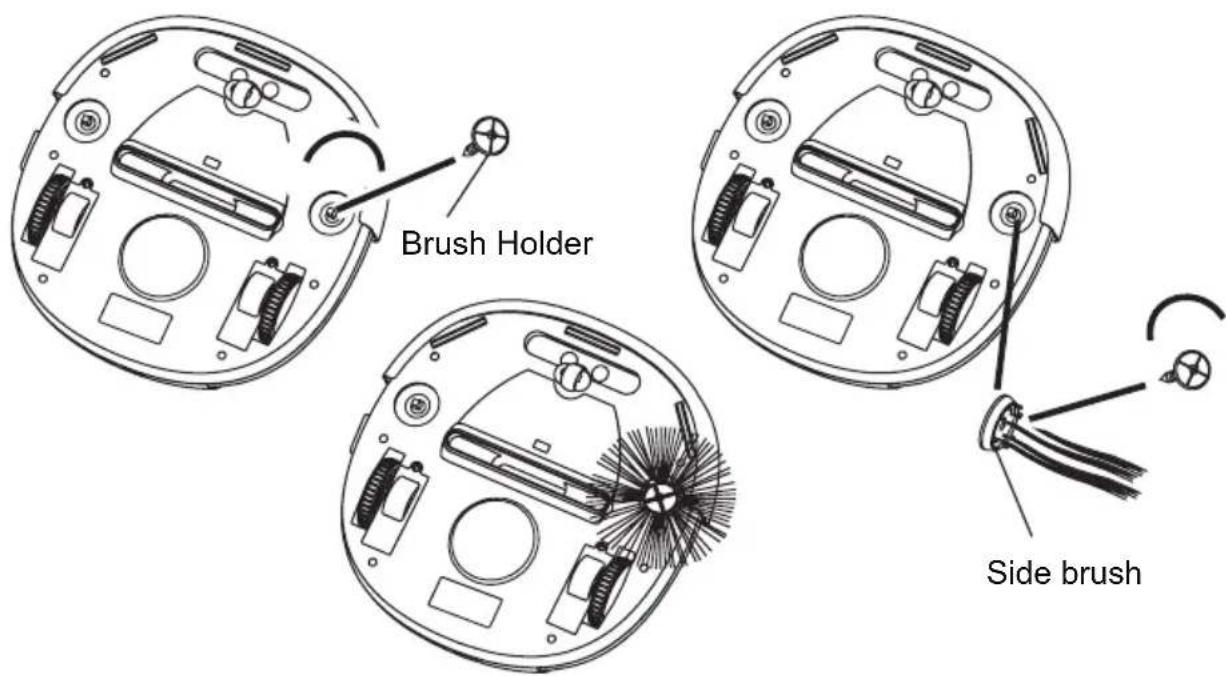
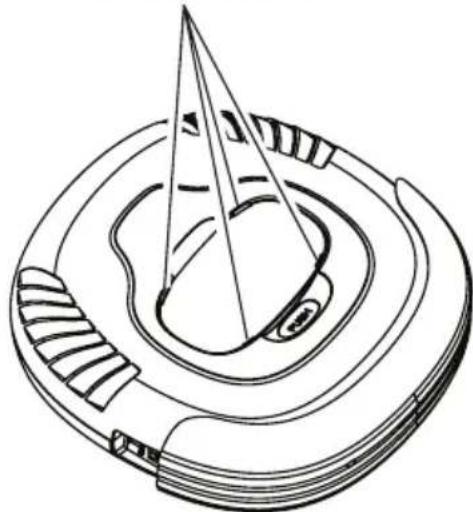
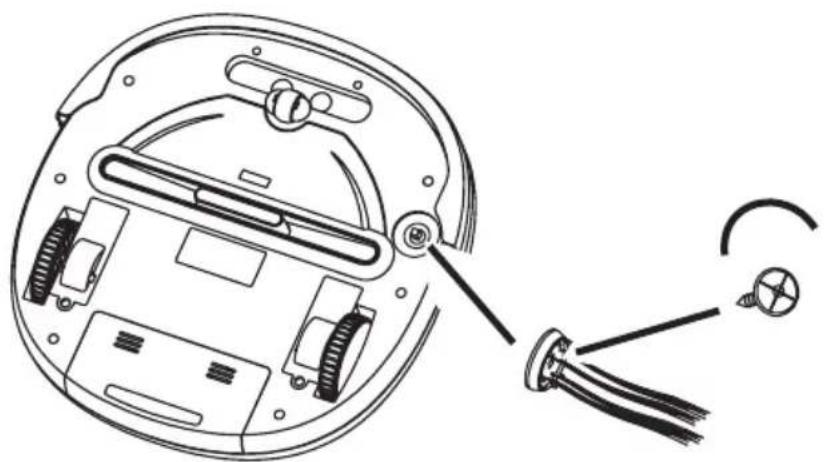
- Unscrew and remove the brush holder on the bottom of the unit by turning counter clockwise as shown in the following diagram
- Place the brush on the brush mount and then put the brush holder back by turning clockwise
- Bristles should extend from the center of the brush like the rise of the Sun.
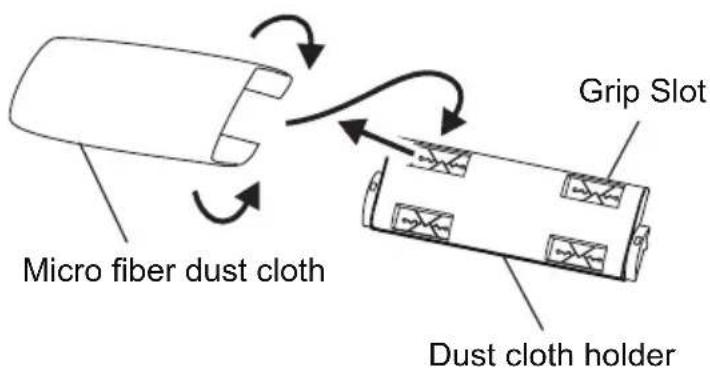
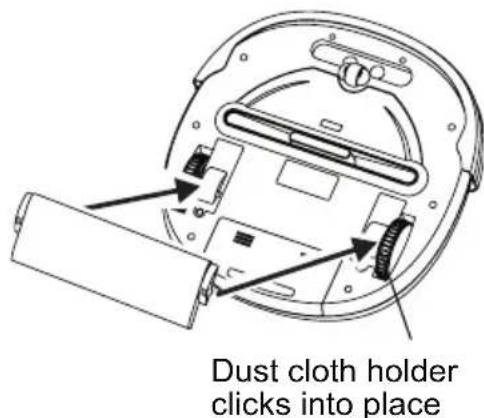
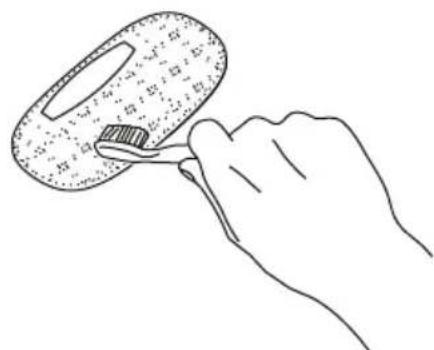
USING DUST CLOTHS
- Insert the edge of the micro fiber dust cloth into the grip slots on the dust cloth holder.
- Press the dust cloth holder onto the base of the vacuum as shown below until it clicks into place.
CLEANING AND MAINTENANCE
Maintenance Procedures
The operation and maintenance of the V.Bot® Robotic Vacuum is very simple. After each use, empty any dirt from the dust bin and clean the filter. It is not necessary to clean the intake after every use.
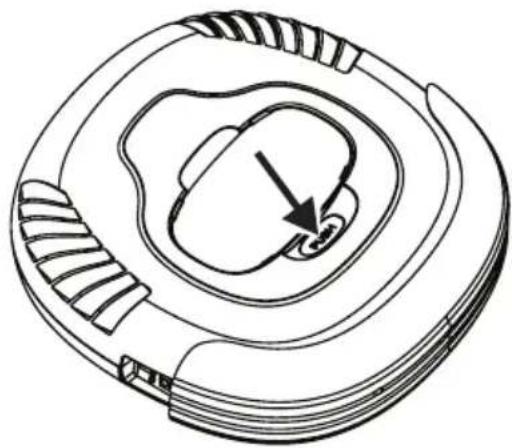
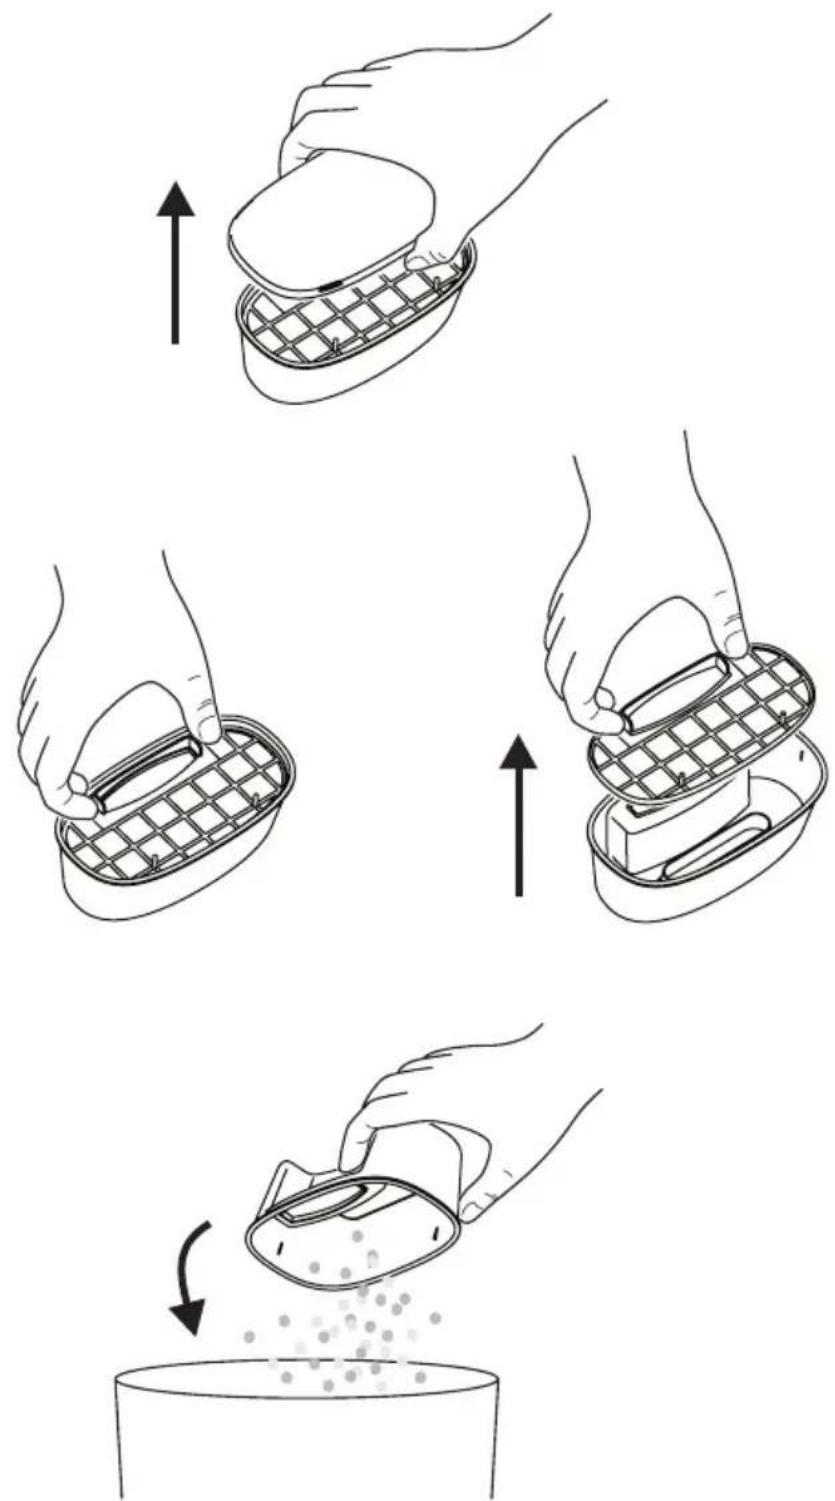
Removing Dust Bin
- Press the dust bin ejector button as shown below.
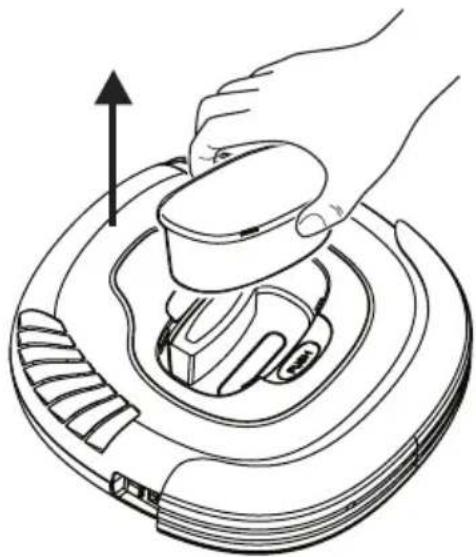
- Remove the dust bin by grasping it as shown and gently pulling it up and out of the vacuum.
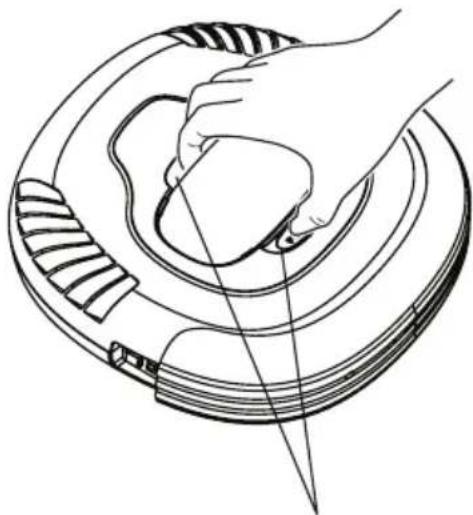
Grip slot for the dust bin
CLEANING AND MAINTENANCE
Emptying Dust Bin
- Open the upper cover of the dust bin.
- Remove the filter by lifting it out of the dust bin.
- Dispose of the dust and dirt which has collected in the dust bin.
CLEANING AND MAINTENANCE
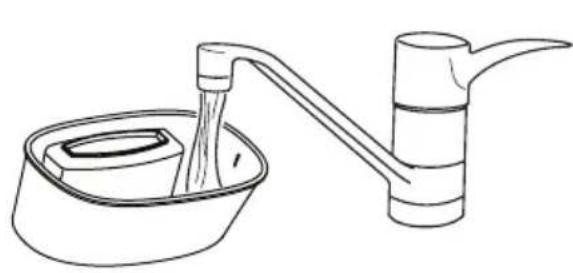
Cleaning Dust Bin
- Rinse the dust bin with tap water. It is not necessary to wash every time. DO NOT clean the dust bin by placing it in a dish washing machine.
- Periodically clean the filter with a soft bristle brush.
- Once dry, reinstall the filter and the dust bin lid.
- Place the dust bin back in the vacuum, making sure it is secured by the locking tabs as shown in the diagram below.

Dust bin locking tabs
CLEANING AND MAINTENANCE
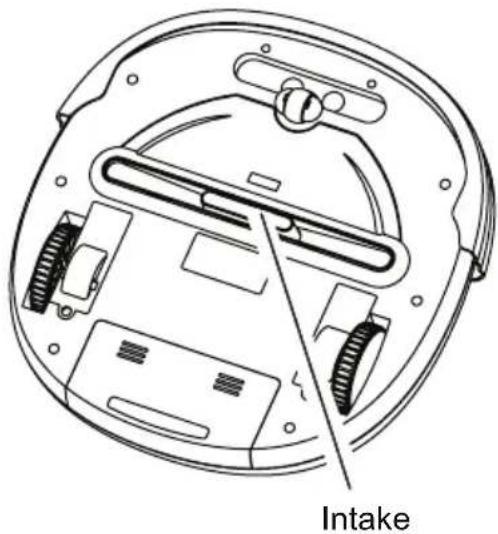
Cleaning Intake
After repeated use, dirt and dust can accumulate around the intake of the vacuum and the working efficiency can be reduced. To ensure the best performance and constant air flow, the intake should be cleaned periodically.
-
Turn the power to the OFF position and place the vacuum upside down on a flat surface such as the floor or a table.
-
Wipe and remove any hair or other material that may accumulate around the intake.
Cleaning Side Brushes
- Turn off the power, place bottom of the cleaner upward on a flat surface.
- Rotate and take off the brush lid and side brush and then clean up the hair or other matters by hand.(See diagram below)
- Install back the lid and brush after finishing.
- After being used for a period of time, the brush need to be replaced to clean more effectively.
- The side brush can be rinsed and if they become crooked, you can scald them in hot water to make them return to original shape.
P3 INTERNATIONAL CORPORATION LIMITED WARRANTY
P3 INTERNATIONAL CORPORATION ("P3") warrants to the original retail purchaser only, that its product is free from defects in material or workmanship under the condition of normal use and service for a period of six (6) months from the date of purchase. In the event that a defect, malfunction or failure occurs or is discovered during the warranty period, P3 will repair or replace at its option the product or component part(s) which shall appear in the reasonable judgment of P3 to be defective or not to factory specifications. A product requiring service is to be returned to P3 along with the sales receipt or other proof of purchase acceptable to P3 and a statement describing the defect or malfunction. All transportation costs shall be borne by the owner and the risk of loss shall be upon the party initiating the transportation. All items repaired or replaced thereunder shall be subjected to the same limited warranty for a period of six (6) months from the day P3 ships the repaired or replaced product. The warranty does not apply to any product that has been subject to misuse, tampering, neglect, or accident or as a result of unauthorized alterations or repairs to the product. This warranty is void if the serial number (if any) has been removed, altered, or defaced. This warranty is in lieu of all warranties expressed or implied, including the implied warranties of merchantability and fitness for a particular purpose which are expressly excluded or disclaimed. P3 shall not be responsible for consequential, incidental or other damages, and P3 expressly excludes and disclaims liability for any damages resulting from the use, operation, improper application, malfunction or defeat of any P3 product covered by this limited warranty. P3's obligation is strictly and exclusively limited to the replacement or repair of any defective product or component part(s). Some states do not allow the exclusion or limitation of incidental or consequential damages, so the above limitation or exclusion may not apply to you. P3 does not assume or authorize anyone to assume for it any other obligation whatsoever. Some states do not allow limitation on how long an implied warranty lasts, so the above limitations may not apply to you. It is the owner/user's responsibility to comply with local, state, or federal regulations, if any, that may pertain to P3 products or their use. This warranty gives you specific legal rights, and you may also have other rights which vary from state to state.
If you experience difficulty in the operation of your unit, or if your unit requires repair please contact:
P3 INTERNATIONAL CORPORATION TECHNICAL SUPPORT
Tel: 212-741-7289
Fax: 212-741-2288
Email: techsupport@p3international.com
Rev.0507
L'ASPIRATEUR AVEC BROSSE
Piles rechargeables x1
Prise electrique (AC) x1
Filtredubac apoussiere x1


- Safety Instructions 2
- Special Features 4
- Components and Attachments 4
- Product Features/Locations 5
- Battery Installation and Removal 6
- Recharging Battery 7
- General Operation 7
- Installing Sidebrush 8
- Using Dust Cloths 8
- Cleaning and Maintenance 9
- SAFETY INSTRUCTIONS
- Battery and Recharging Instructions
- SPECIAL FEATURES
- MAJOR COMPONENTS AND ATTACHMENTS
- BATTERY INSTALLATION AND REMOVAL
- RECHARGING BATTERY
- GENERAL OPERATION
- Preparation for Operation
- Starting Operation
- USING DUST CLOTHS
- CLEANING AND MAINTENANCE
- Maintenance Procedures
- Removing Dust Bin
- Emptying Dust Bin
- Cleaning Dust Bin
- Cleaning Intake
- Cleaning Side Brushes
- P3 INTERNATIONAL CORPORATION LIMITED WARRANTY
- L'ASPIRATEUR AVEC BROSSE
Brand : P3 International
Model : P4960
Category : Vacuum Cleaner