
CMP 546 BT - Cd player/recorder Trevi - Free user manual and instructions
Find the device manual for free CMP 546 BT Trevi in PDF.
| Brand | Trevi |
| Model | CMP 546 BT |
| Product type | Portable CD player/recorder with Bluetooth and FM radio |
| Power supply | AC 220-230V ~50Hz or 6 C size batteries (UM-2) |
| Power consumption | Standby < 0.5W |
| Supported formats | Audio CD, MP3 CD |
| CD playback functions | Play, pause, track skip, fast search, repeat one track, repeat disc, repeat folder (MP3), random play, program (up to 20 tracks) |
| Bluetooth | Yes, version not specified, device name "CMP 546BT", PIN code 0000 |
| FM radio | Yes, manual tuning, extendable FM antenna, stereo indicator |
| Auxiliary input | AUX IN socket (3.5 mm jack) |
| Speakers | Built-in |
| Display | LCD |
| Controls | Function selector, volume, TUNING, SKIP UP/DOWN, PLAY/PAUSE, STOP, PROG./P-MODE, FOLDER UP, Bluetooth pairing |
| Safety | Low-power laser system with safety, do not open, avoid exposure |
| Maintenance and cleaning | Clean with a soft, slightly damp cloth, avoid solvents and abrasives |
| Installation precautions | Place away from magnetic fields, heat sources, humidity, dust and vibration; leave at least 5 cm of side space for ventilation |
| Auto off | Switches to standby after 15 minutes of inactivity |
| Included accessories | Power cord, jack adapter (for AUX IN) |
| Weight | Not specified in the manual |
| Dimensions | Not specified in the manual |
Frequently Asked Questions - CMP 546 BT Trevi
User questions about CMP 546 BT Trevi
0 question about this device. Answer the ones you know or ask your own.
Ask a new question about this device
Download the instructions for your Cd player/recorder in PDF format for free! Find your manual CMP 546 BT - Trevi and take your electronic device back in hand. On this page are published all the documents necessary for the use of your device. CMP 546 BT by Trevi.
USER MANUAL CMP 546 BT Trevi
BLUETOOTH FM RADIO AUX-IN
Bluetooth: V2.1 + EDR
AUX-IN: Presa Jack 3.5mm
Dimensioni: 223x200x126mm
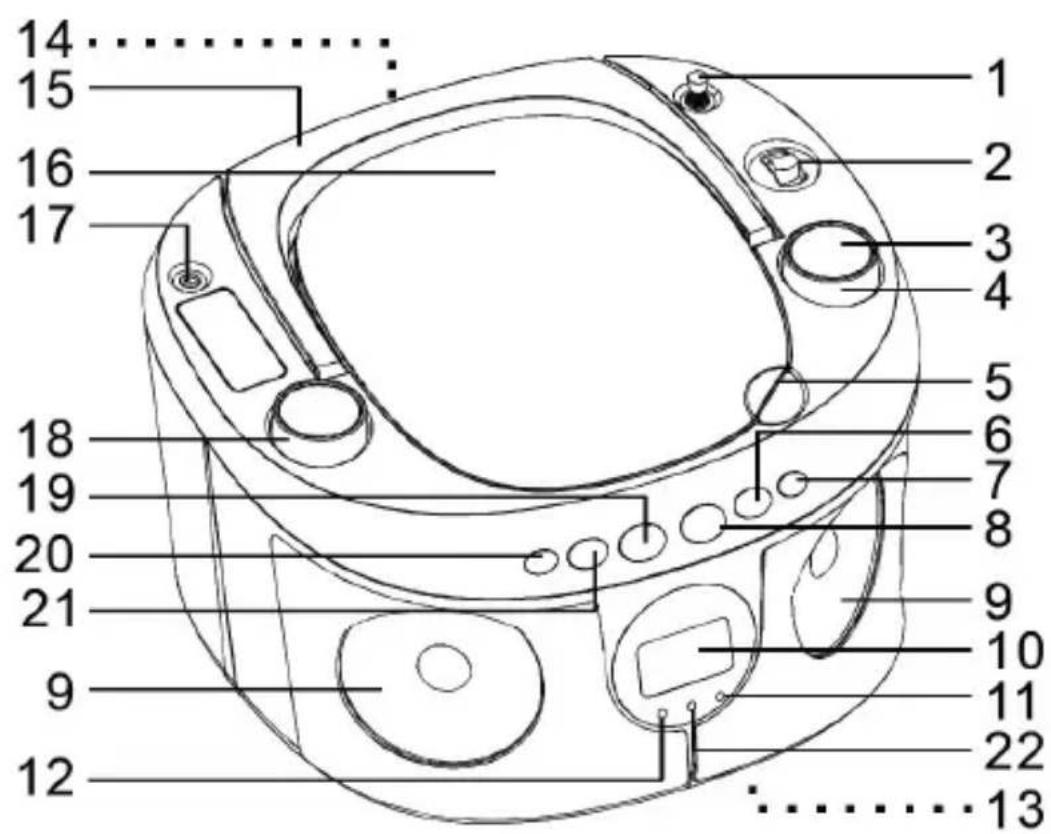
- TELESCOPIC ANTENNA
- FUNCTION SWITCH
- DIAL SCALE
- TUNING KNOB
- CD DOOR OPEN POSITION
- SKIPUP/SEARCHFORWARDBUTTON
- FOLDER UP BUTTON
- PLAY/PAUSE BUTTON
- SPEAKER
- LCD
- FM STEREO INDICATOR
-
ON INDICATOR
-
BATTERY COMPARTMENT DOOR (ON BOTTOM SIDE)
- AC SOCKET (ON BACKSIDE)
- HANDLE
- CD DOOR
- AUX IN JACK
- VOLUME KNOB
- STOP BUTTON
20.PROGRAM/MODEBUTTON - SKIP DOWN/SEARCH BACKWARD BUTTON
- BLUETOOTH INDICATOR
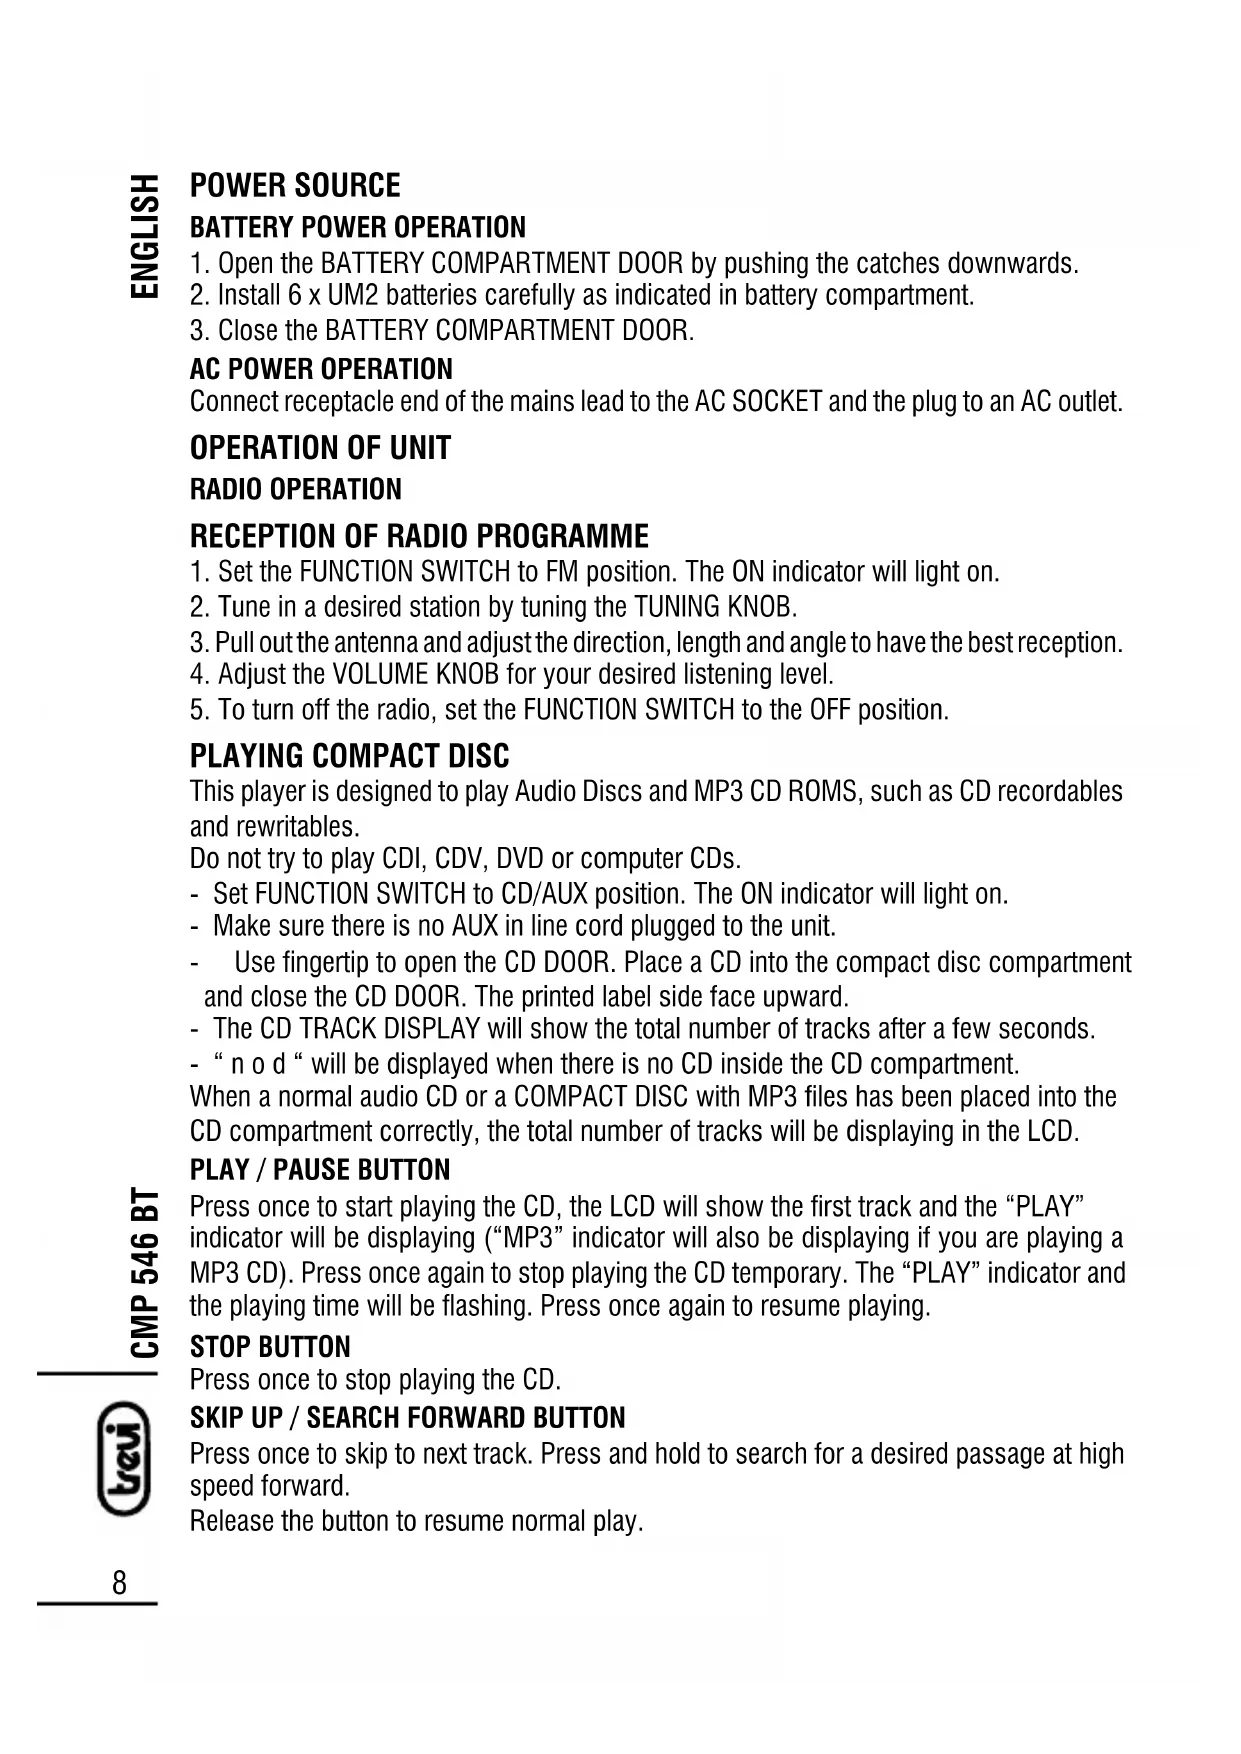
POWER SOURCE
- Open the BATTERY COMPARTMENT DOOR by pushing the catches downwards.
- Install 6 × UM2 batteries carefully as indicated in battery compartment.
- Close the BATTERY COMPARTMENT DOOR.
AC POWER OPERATION
Connect receptacle end of the mains lead to the AC SOCKET and the plug to an AC outlet.
OPERATION OF UNIT
RADIO OPERATION
RECEPTION OF RADIO PROGRAMME
- Set the FUNCTION SWITCH to FM position. The ON indicator will light on.
- Tune in a desired station by tuning the TUNING KNOB.
- Pull out the antenna and adjust the direction, length and angle to have the best reception.
- Adjust the VOLUME KNOB for your desired listening level.
- To turn off the radio, set the FUNCTION SWITCH to the OFF position.
PLAYING COMPACT DISC
This player is designed to play Audio Discs and MP3 CD ROMS, such as CD recordables and rewritables.
Do not try to play CDI, CDV, DVD or computer CDs.
- Set FUNCTION SWITCH to CD/AUX position. The ON indicator will light on.
- Make sure there is no AUX in line cord plugged to the unit.
- Use fingertip to open the CD DOOR. Place a CD into the compact disc compartment and close the CD DOOR. The printed label side face upward.
- The CD TRACK DISPLAY will show the total number of tracks after a few seconds.
- " n o d " will be displayed when there is no CD inside the CD compartment.
When a normal audio CD or a COMPACT DISC with MP3 files has been placed into the CD compartment correctly, the total number of tracks will be displaying in the LCD.
PLAY / PAUSE BUTTON
Press once to start playing the CD, the LCD will show the first track and the "PLAY" indicator will be displaying ("MP3" indicator will also be displaying if you are playing a MP3 CD). Press once again to stop playing the CD temporary. The "PLAY" indicator and the playing time will be flashing. Press once again to resume playing.
STOP BUTTON
Press once to stop playing the CD.
SKIP UP / SEARCH FORWARD BUTTON
Press once to skip to next track. Press and hold to search for a desired passage at high speed forward.
Release the button to resume normal play.
Press once to return to the beginning of the current track. Press repeatedly to skip back to previous track.
Press and hold to search for a desired passage at high speed backward. Release the button to resume normal play.
FOLDER UP BUTTON - PLAYING COMPACT DISC WITH MP3 FILES
-
When playing MP3 CD, press the FOLDER UP BUTTON once to skip up to the first track of next folder.
-
It can not function when playing normal audio CD.
To remove the CD from the unit, press STOP BUTTON and open the CD DOOR and take out the CD.
To turn off the CD playing, set the FUNCTION SWITCH to OFF position.
MODE BUTTON (PROGRAM/MODE BUTTON)
CD / MP3 playing mode can only be made when the CD / MP3 is playing.
(A) WHEN PLAYING NORMAL AUDIO CD
- Press once for single track repeat playing and the “ indicator will be flashing.
- Press twice for all tracks repeat playing and the " indicator will be displaying.
- Press three times for all tracks playing in a random order and the "RAND" INDICATOR will be displaying.
- To cancel the repeat / random play mode, press once or more until all the above indicators disappear.
(B) WHEN PLAYING COMPACT DISC WITH MP3 FILES
- Press once for single track repeat playing and the “ indicator will be flashing.
- Press twice to repeat all tracks within the current playing folder. " & " indicators will be displaying.
- Press three times to repeat all tracks in all folders. " " indicators will be displaying.
- Press four times for all tracks in the CD playing in a random order and the "RAND" INDICATOR will be displaying.
- To cancel the repeat / random play mode, press once or more until all the above indicators disappear.
PROGRAM PLAYBACK (PROGRAM/MODE BUTTON)
Programming can only be made when the CD / MP3 playing is stopped.
Programmed playback enables tracks on a disc (normal audio CD or MP3 CD) to be played in the desired order.
- Press the PROGRAM BUTTON, the "P" indicator will be displaying in the LCD.
- Press the SKIP UP / SEARCH FORWARD and/or SKIP DOWN / SEARCH BACKWARD to select the desired track no.
- Press once the PROGRAM BUTTON again to memorize the first selected track
- Repeat steps 2 and 3 until all desired tracks are programmed.
- Press the PLAY / PAUSE BUTTON to start playing..
-
Press the STOP BUTTON to stop programmed playback.
-
Open the CD DOOR or turn off the unit to clear the programmed memory.
AUX IN FUNCTION
To listen to an external audio source, you need a stereo 3.5mm plug cable (Not included)
- Connect one end of the 3.5mm plug into the output of the audio source, and the other end of the 3.5mm plug into the AUX IN JACK.
- Set the FUNCTION SWITCH to CD / AUX position. The ON indicator will light on and "AU" indicator will be displaying in the LCD.
- Play the audio source.
- Adjust the VOLUME KNOB for your desired listening level.
You can now listen to the audio playing from the audio source through the unit.
- To turn off the unit, set the FUNCTION SWITCH to the OFF position..
Note: Remeber always unplug the 3.5mm plug cable from the unit after used.
POWER SAVING - PLAYING CD / MP3 / AUX IN FUNCTION
When the unit is in CD / MP3 / AUX IN FUNCTION, it will be off automatically after 15 minutes in following situation :
1) PLAYING CD / MP3 : CD / MP3 playing is stopped, or
2) AUX IN FUNCTION: No sound coming from the external audio source.
There is no indication found in the LCD and the ON INDICATOR will light off when it entered power saving mode. Turn off the unit and turn on again for further use.
BLUETOOTH FUNCTION
- Set the FUNCTION SWITCH to BLUETOOTH position. The ON indicator will light on and BLUETOOTH indicator will flash.
- Turn on the Bluetooth function of your audio device (such as mobile phone) and make pair with the unit.
- If the pair process is successful, the BLUETOOTH indicator will flash in a slower speed.
- Play your audio device.
- Adjust the VOLUME KNOB for your desired listening level.
You can now listen to the audio playing from the audio source through the unit.
- To turn off the unit, set the FUNCTION SWITCH to the OFF position.
NOMINAL SPECIFICATIONS
Power Sources :AC230V~50Hz (UM2X6 Batteries - not included)
Power Consumption: .........Standby < 0.5W
Bluetooth: V2.1 + EDR
AUX-IN: Presa Jack 3.5mm
Dimensions: 223(L) x 200(D) x 126(H) MM

VOLTAGE DANGEREUX
FONCTIONNEMENT AUX-IN
Bluetooth: V2.1 + EDR
AUX-IN: .Prise Jack 3,5 mm
Dimensions: 223x200x126mm

Bluetooth: V2.1 + EDR
Bluetooth: V2.1 + EDR
Line IN: Toma Jack 3,5 mm
Dimensiones: 223x200x126mm

Precautions for correct disposal of the product.
The symbol shown on the equipment indicates that waste must be disposed of in "separate collection" and so the product must not be disposed of together with urban waste.
The user must take the product to special "separate waste collection centres" provided by local government, or deliver it to the retailer against the purchase of a new product.
Separate collection of waste and subsequent treatment, recycling and disposal operations promotes the production of equipment with recycled materials and limits negative effects on the environment and on health caused by improper handling of waste.
Illegal disposal of the product leads to the enforcement of administrative penalties.

Rimini, 11 November 2013
TREVI spa
Strada Consolare Rimini - San Marino 62 47924 Rimini Italia
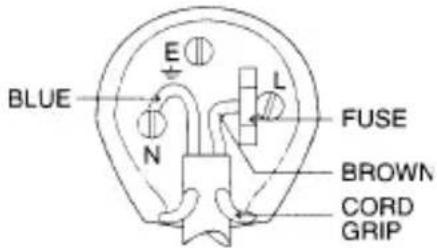
UK PLUG ONLY
WIRES CONNECTIONS TO A UK THREE-PIN PLUG
The wires in this mains lead are coloured in accordance with the following wiring codes:
Blue: Neutral
Brown: Live
The wires in this mains lead must be connected to the terminals in the plug as follows:
Blue wire: N or Black
Brown wire: L or Red
Neither wire is to be connected to the earth (E or W) terminal of three-pin plug.
Should the fuse fail in the plug remove the plug form the wall socket and replace the fuse with a 3 Amp. ASTA approved BS 1362 fuse.

MADE IN CHINA


- BLUETOOTH FM RADIO AUX-IN
- POWER SOURCE
- AC POWER OPERATION
- OPERATION OF UNIT
- RADIO OPERATION
- RECEPTION OF RADIO PROGRAMME
- PLAYING COMPACT DISC
- PLAY / PAUSE BUTTON
- STOP BUTTON
- SKIP UP / SEARCH FORWARD BUTTON
- FOLDER UP BUTTON - PLAYING COMPACT DISC WITH MP3 FILES
- MODE BUTTON (PROGRAM/MODE BUTTON)
- WHEN PLAYING NORMAL AUDIO CD
- WHEN PLAYING COMPACT DISC WITH MP3 FILES
- PROGRAM PLAYBACK (PROGRAM/MODE BUTTON)
- AUX IN FUNCTION
- POWER SAVING - PLAYING CD / MP3 / AUX IN FUNCTION
- BLUETOOTH FUNCTION
- NOMINAL SPECIFICATIONS
- VOLTAGE DANGEREUX
- FONCTIONNEMENT AUX-IN
- Precautions for correct disposal of the product.
- UK PLUG ONLY
- WIRES CONNECTIONS TO A UK THREE-PIN PLUG
Brand : Trevi
Model : CMP 546 BT
Category : Cd player/recorder