Optimus L7 P705 - Smartphone LG - Free user manual and instructions
Find the device manual for free Optimus L7 P705 LG in PDF.
Download the instructions for your Smartphone in PDF format for free! Find your manual Optimus L7 P705 - LG and take your electronic device back in hand. On this page are published all the documents necessary for the use of your device. Optimus L7 P705 by LG.
USER MANUAL Optimus L7 P705 LG
FRANÇAIS E N G L I S HLG-P705
Commission on Non-Ionizing
Radiation Protection (ICNIRP)
Android Wi-FiWi-Fi Directed
officePolaris Office
- MémoireRAM:512Moouplus
- Whiletheremaybedifferencesbetween theSARlevelsofvariousLGphonemodels, theyarealldesignedtomeettherelevant guidelinesforexposuretoradiowaves.7
- ThisdevicemeetsRFexposureguidelines whenusedeitherinthenormaluse positionagainsttheearorwhenpositioned atleast1.5cmawayfromthebody.When acarrycase,beltcliporholderisusedfor body-wornoperation,itshouldnotcontain metalandshouldpositiontheproduct atleast1.5cmawayfromyourbody.In ordertotransmitdatafilesormessages, thisdevicerequiresaqualityconnectionto thenetwork.Insomecases,transmission ofdatafilesormessagesmaybedelayed untilsuchaconnectionisavailable.Ensure theaboveseparationdistanceinstructions arefolloweduntilthetransmissionis completed.8 Guidelines for safe and efficient use Product care and maintenance WARNING Only use batteries, chargers and accessories approved for use with this particular phone model. The use of any other types may invalidate any approval or warranty applying to the phone and may be dangerous.
- Donotdisassemblethisunit.Takeittoa qualifiedservicetechnicianwhenrepair workisrequired.
- Repairsunderwarranty,atLG'sdiscretion, mayincludereplacementpartsorboards thatareeitherneworreconditioned, providedthattheyhavefunctionalityequal tothatofthepartsbeingreplaced.
- Keepawayfromelectricalappliancessuch asTVs,radiosandpersonalcomputers.
- Theunitshouldbekeptawayfromheat sourcessuchasradiatorsorcookers.
- Donothandlethephonewithwethands whileitisbeingcharged.Itmaycausean electricshockandcanseriouslydamage yourphone.
- Donotchargeahandsetnearflammable materialasthehandsetcanbecomehot andcreateafirehazard.
- Useadryclothtocleantheexteriorofthe unit(donotusesolventssuchasbenzene, thinneroralcohol).
- Donotchargethephonewhenitisonsoft furnishings.
- Useaccessorieslikeearphonescautiously. Donottouchtheantennaunnecessarily.
- Donotuse,touchorattempttoremove orfixbroken,chippedorcrackedglass. Damagetotheglassdisplaydueto abuseormisuseisnotcoveredunderthe warranty.
- Yourphoneisanelectronicdevicethat generatesheatduringnormaloperation. Extremelyprolonged,directskincontact intheabsenceofadequateventilation mayresultindiscomfortorminorburns. Therefore,usecarewhenhandling yourphoneduringorimmediatelyafter operation.11 Efficient phone operation Electronics devices Allmobilephonesmayreceiveinterference, whichcouldaffectperformance.
- Donotuseahand-heldphonewhile driving.
- Givefullattentiontodriving.
- Ifyouarelisteningtomusicwhilstoutand about,pleaseensurethatthevolumeisat areasonablelevelsothatyouareaware ofyoursurroundings.Thisisofparticular importancewhennearroads. Avoid damage to your hearing Damagetoyourhearingcanoccurifyouare exposedtoloudsoundforlongperiodsof time.Wethereforerecommendthatyoudo notturnonoroffthehandsetclosetoyour ear.Wealsorecommendthatmusicandcall volumesaresettoareasonablelevel.
- Donotusenearfuelorchemicals.
- Donottransportorstoreflammable gas,liquidorexplosivesinthesame compartmentofyourvehicleasyour mobilephoneoraccessories.14 Guidelines for safe and efficient use In aircraft Wirelessdevicescancauseinterferencein aircraft.
- Turnyourmobilephoneoffbefore boardinganyaircraft.
- Donotuseitonthegroundwithout permissionfromthecrew. Children Keepthephoneinasafeplaceoutofthe reachofsmallchildren.Itincludessmall partswhichmaycauseachokinghazardif detached. Emergency calls Emergencycallsmaynotbeavailableonall mobilenetworks.Thereforeyoushouldnever dependsolelyonyourphoneforemergency calls.Checkwithyourlocalserviceprovider. Battery information and care
- Youdonotneedtocompletelydischarge thebatterybeforerecharging.Unlikeother batterysystems,thereisnomemory effectthatcouldcompromisethebattery's performance.15
- Keepthemetalcontactsofthebattery clean.
- Replacethebatterywhenitnolonger providesacceptableperformance.The batterypackmayberechargedhundreds oftimesbeforeitneedsreplacing.
- Rechargethebatteryifithasnotbeen usedforalongtimetomaximiseusability.
- Donotexposethebatterychargertodirect sunlightoruseitinhighhumidity,suchas inthebathroom.
- Donotleavethebatteryinhotorcold places,asthismaydeterioratebattery performance.
- Thereisriskofexplosionifthebatteryis replacedwithanincorrecttype.16 Guidelines for safe and efficient use
- Disposeofusedbatteriesaccordingto themanufacturer'sinstructions.Please recyclewhenpossible.Donotdisposeas householdwaste.
- Actualbatterylifewilldependonnetwork configuration,productsettings,usage patterns,batteryandenvironmental conditions.
- Makesurethatnosharp-edgeditems suchasanimal’steethornails,comeinto contactwiththebattery.Thiscouldcause afire.17
DECLARATION OF CONFORMITY
Hereby, LG Electronics declares that this LG-P705 product is in compliance with the essential requirements and other relevant provisions of Directive 1999/5/EC. A copy of the Declaration of Conformity can be found at http://www.lg.com/global/support/cedoc/ RetrieveProductCeDOC.jsp Ambient temperatures Max: +50°C (discharging), +45°C (charging) Min: -10°C Notice: Open Source Software To obtain the corresponding source code under GPL, LGPL, MPL and other open source licences, please visit http://opensource.lge.com/ All referred licence terms, disclaimers and notices are available for download with the source code.18 Pleasechecktoseewhetheranyproblems youencounteredwithyourphoneare describedinthissectionbeforetakingthe phoneinforserviceorcallingaservice representative.
Extendyourbattery'slifebetweencharges byturningofffeaturesthatyoudon'tneedto havingrunningconstantlyinthebackground. Youcanmonitorhowapplicationsand systemresourcesconsumebatterypower. Extending your phone's battery life:
- Someapplicationsyouhavedownloaded mayreducebatterypower. To check the battery power level:
- Touch >Appstab>Settings > About phonefromtheSYSTEM>Status Thebatterystatus(chargingornotcharging) andlevel(percentagecharged)isdisplayed atthetopofthescreen.20 To monitor and control how battery power is being used:
Youcancombineseveralappiconsina folder.Droponeappiconoveranotheron aHomescreen,andthetwoiconswillbe combined. NOTE: After you open an app, you can usually adjust its settings by choosing items from its Menu icon near the top or bottom of the screen. Getting to know your phone21
4. Before installing an open
source application and OS WARNING If you install and use an OS other than the one provided by the manufacturer it may cause your phone to malfunction. In addition, your phone will no longer be covered by the warranty. WARNING To protect your phone and personal data, only download applications from trusted sources, such as Play Store™. If there are improperly installed applications on your phone, it may not work normally or a serious error may occur. You must uninstall those applications and all associated data and settings from the phone.22 Getting to know your phone
6. Opening and switching
applications MultitaskingiseasywithAndroidbecause youcankeepmorethanoneapplication runningatthesametime.There'sno needtoquitanapplicationbeforeopening another.Useandswitchbetweenseveral openapplications.Androidmanageseach application,stoppingandstartingthemas neededtoensurethatidleapplicationsdon't consumeresourcesunnecessarily. To return to view list recently used applications: SimplypressandholdtheHomekey. To stop applications: 1 Touch >Appstab>Settings> AppsfromtheDEVICE>Running 2 Scrollandtouchthedesiredapplication andtouchStoptostopit.24 Getting to know your phone
7. Installing PC Software
(LG PC Suite) "LGPCSuite"PCApplicationisaprogram thathelpsyouconnectyourdevicetoaPC viaaUSBcableandWi-Fi.Onceconnected, youcanusethefunctionsofyourdevice fromyourPC. With your "LG PC Suite" PC Application, You Can...
- Manageandplayyourmediacontents (music,movie,pictures)onyourPC.
- Backuptheapplicationsinyourdevice.
- PlaymultimediacontentsofyourPCfrom otherdevice. NOTE: You can use the Help menu from the application to find out how to use your "LG PC Suite" PC application.25 Installing "LG PC Suite" PC Application "LGPCSuite"PCapplicationcanbe downloadedfromthewebpageofLG. 1 Gotowww.lg.comandselectacountryof yourchoice. 2 GotoSupport>Mobile PhoneSupport >SelecttheModel(LG-P705). 3 ClickPC SyncfromDownload,and clickWINDOW PC Sync Downloadto download"LG PC Suite"PCsoftware. System Requirements for "LG PC Suite" PC software
- Memory:512MBorhigherRAMs
- Graphiccard:1024x768resolution, 32bitcolororhigher26 Getting to know your phone
- HDD:100MBormorefreeharddisk space(Morefreeharddiskspacemaybe neededdependingonthevolumeofdata stored.)
- Requiredsoftware:LGintegrateddrivers NOTE: LG Integrated USB Driver LG integrated USB driver is required to connect an LG device and PC and installed automatically when you install "LG PC Suite" PC software.
8. Synchronising your phone to
a computer via USB NOTE: To synchronise your phone with your PC using the USB cable, you need to install LG PC Suite onto your PC. Please refer to previous pages to install LG PC Suite. 1 UsetheUSBcabletoconnectyourphone toaUSBportonyourcomputer.Once connected,youwillreceiveanotification thataUSBconnectionhasbeenmade.27 2 Openthenotificationdrawerandtouch USBconnected. 3 TouchPC softwaretoconfirmthat youwanttotransferfilesbetweenyour phone'smicroSDcardandthecomputer. TIP! To use the microSD card on your phone again, you need to open the notification drawer and touch
Charge only. Duringthistime,youcan'taccessthe microSDcardfromyourphone,soyoucan't useapplicationsthatrelyonthemicroSD card. To disconnect your phone from the computer: Openthenotificationdrawerandtouch >Charge onlytodisconnectyour phonefromthecomputersafely.28 Getting to know your phone
9. Hold your phone upright
Holdyourmobilephonevertically,asyou wouldaregularphone.TheLG-P705hasan internalantenna.Becarefulnottoscratchor damagethebackofthephone,asthismay affectperformance. Whilemaking/receivingcallsorsending/ receivingdata,avoidholdingthelowerpart ofthephonewheretheantennaislocated. Doingsomayaffectcallquality.
10. When the screen freezes
If the screen freezes or the phone does not respond when you try to operate it: Removethebattery,reinsertit,thenturnthe phoneon.
- Switchyourphoneon/offbypressing andholdingthiskey.
- Shortpresstolock/unlockthe screen. Menu key
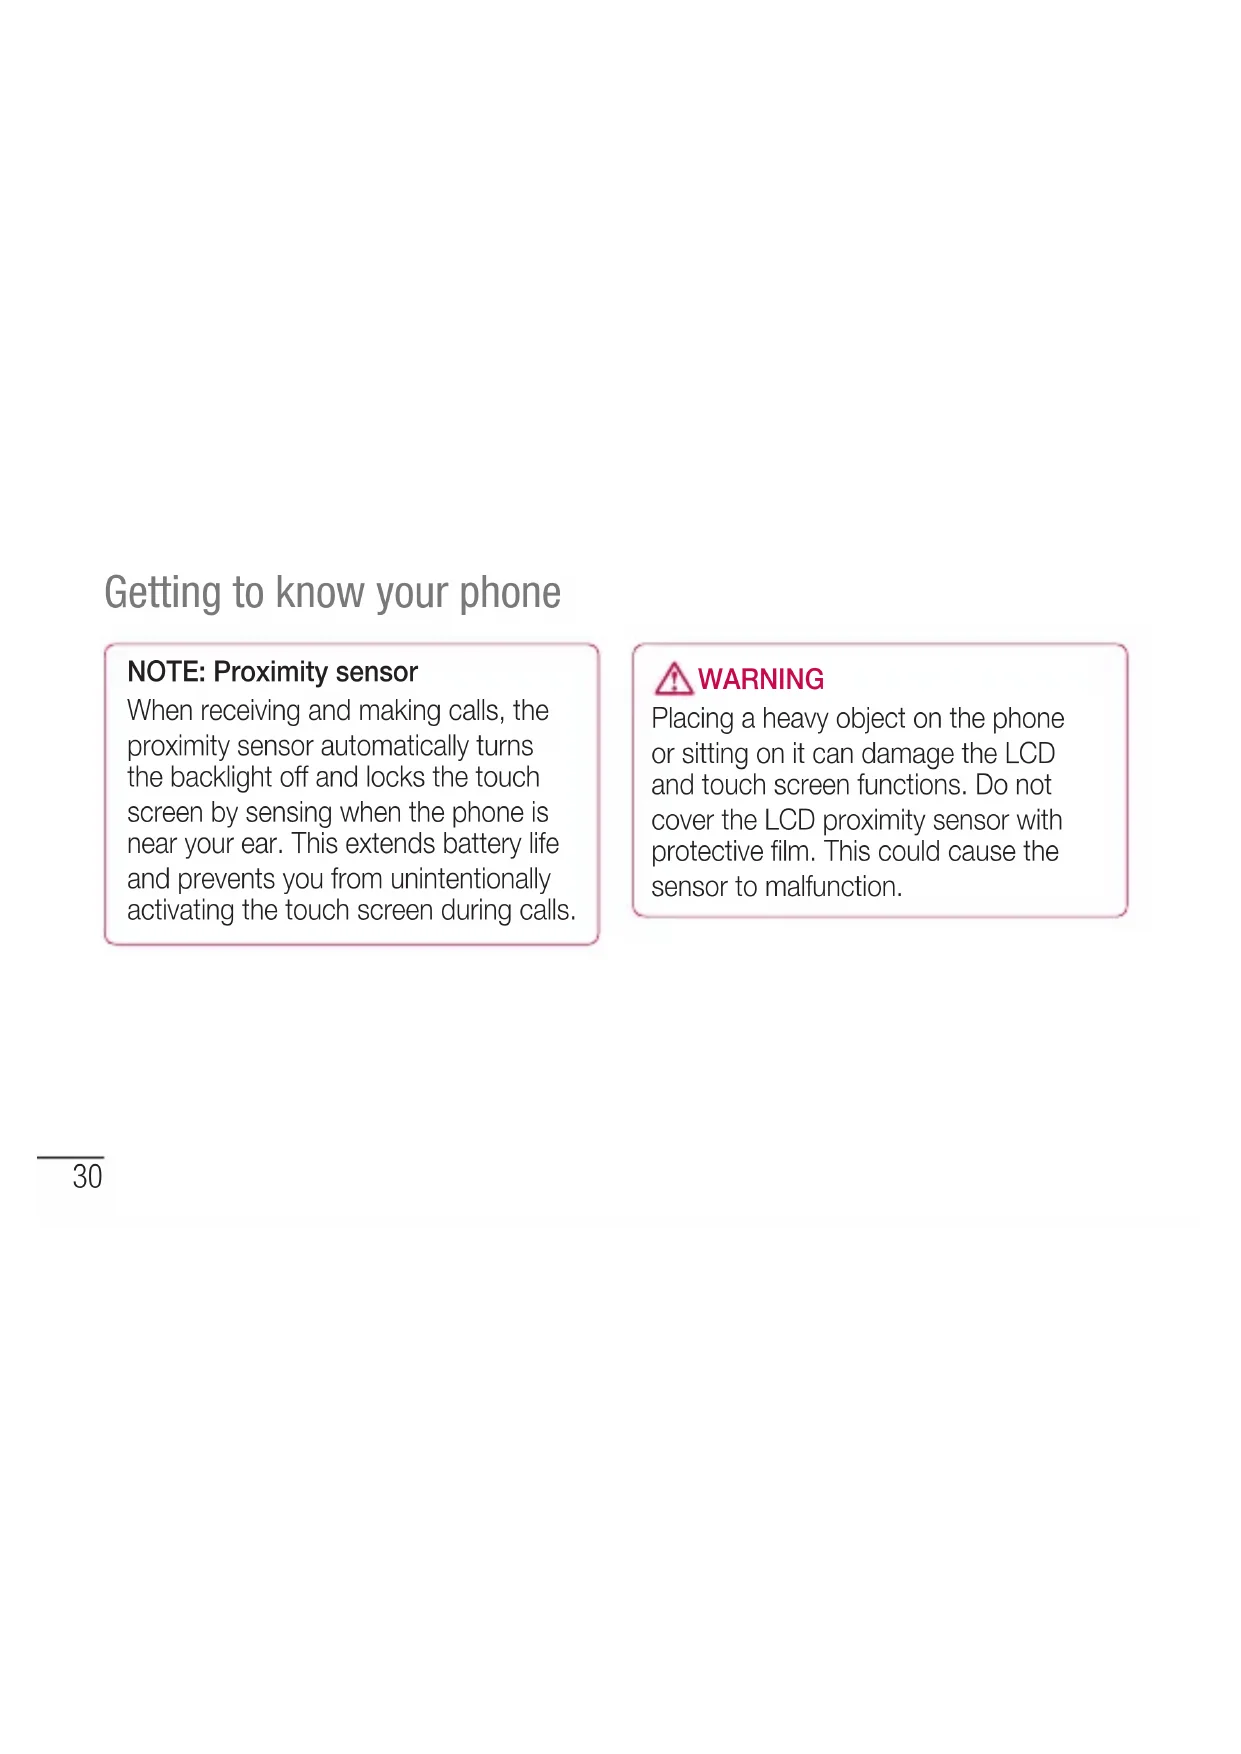
- Checkwhatoptionsareavailable.30 Getting to know your phone NOTE: Proximity sensor When receiving and making calls, the proximity sensor automatically turns the backlight off and locks the touch screen by sensing when the phone is near your ear. This extends battery life and prevents you from unintentionally activating the touch screen during calls. WARNING Placing a heavy object on the phone or sitting on it can damage the LCD and touch screen functions. Do not cover the LCD proximity sensor with protective film. This could cause the sensor to malfunction.31 Power/Lock key Charger/USB port Microphone Earphone Jack Volume keys
- Whenplayingatrack:Control volumecontinuously. Battery cover Camera lens microSD Card slot SIM card slot Speaker Battery32 Getting to know your phone Installing the SIM card and battery Beforeyoucanstartexploringyournew phone,you'llneedtosetitup.Toinsertthe SIMcardandbattery: 1 Toremovethebatterycover,holdthe phonefirmlyinonehand.Withyourother hand,liftoffthebatterycoverwithyour thumbnailasshowninfigure. NOTE: Put your thumbnail into the USB port hole and lift off the battery cover.33 2 SlidetheSIMcardintotheSIMcardslot. Makesurethegoldcontactareaonthe cardisfacingdownwards. 3 Insertthebatteryintoplacebyaligning thegoldcontactsonthephoneandthe battery(1)andpressingitdownuntilit clicksintoplace(2).34 Getting to know your phone 4 Alignthebatterycoveroverthebattery compartment(1)andpressitdownuntilit clicksintoplace(2). Charging your phone Thechargerconnectorisatthebottomof thephone.Insertthechargerandplugitinto anelectricaloutlet.35 NOTE: The battery must be fully charged initially to improve battery lifetime. NOTE: Do not open the battery cover during the charging your phone. Using the memory card To insert a memory card: Insertthememorycardintotheslot. Makesurethegoldcontactareaisfacing downwards. To remove the memory card safely: Touch >Appstab > Settings> StoragefromtheDEVICE>Unmount SD card>OK.36 Getting to know your phone NOTE: The LG-P705 supports memory cards up to 32 GB. WARNING Do not insert or remove the memory card when the phone is on. Doing so may damage the memory card as well as your phone, and the data stored on the memory card may get corrupted.37 To format the memory card: Yourmemorycardmayalreadybe formatted.Ifitisn't,youmustformatit beforeyoucanuseit. NOTE: All files on your memory card are deleted when it is formatted. 1 Onthehomescreen,touch >Apps tabtoopenthemenu. 2 ScrollandtouchSettings>Storage fromtheDEVICE. 3 TouchUnmount SD cardandtouchOK toconfirmit. 4 TouchErase SD card>Erase SD card >Erase everything,thenconfirmyour choice. 5 Ifyouhavesetapatternlock,input thepatternlockthenselectErase everything. NOTE: If there is content on your memory card, the folder structure may be different after formatting as all the files will be deleted.38 Getting to know your phone Locking and unlocking the screen Ifyoudonotusethephoneforawhile,the screenisturnedoffandlockedautomatically. Thishelpstopreventaccidentaltouchesand savesbatterypower. WhenyouarenotusingtheLG-P705,press thePower/Lock key tolockyour phone. Ifthereareanyprogramsrunningwhenyou setlockscreen,theymaybestillrunningin Lockmode.Itisrecommendedthatyouexit allprogramsbeforeenteringLockmodeto avoidunnecessarycharges(e.g.phonecalls, webaccessanddatacommunications). Towakeupyourphone,pressthePower/ Lock key .Thelockscreenwillappear. Touchandslidethelockscreeninany directiontounlockyourhomescreen.The lastscreenyouviewedwillopen.39 Secure your lock screen Youcanlockyourscreensothatonlyyou canunlockittoaccessyourphone. To set an Unlock Pattern, PIN or Password for the first time:
- Touch >Appstab>Settings > Lock screenfromtheDEVICE> Select screen lock > Swipe,None,Pattern,PINor Password NOTE: Precautions to take when using pattern lock. It is very important to remember the unlock pattern you set. You will not be able to access your phone if you use an incorrect pattern 5 times. You have 5 opportunities to enter your unlock pattern, PIN or password. If you have used all 5 opportunities, you can try again after 30 seconds.40 Getting to know your phone When you cannot recall your unlock pattern: IfyouloggedintoyourGoogleaccounton thephonebutfailedtoenterthecorrect pattern5times,taptheForgot pattern? button.Youarethenrequiredtologinwith yourGoogleaccounttounlockyourphone. IfyouhavenotcreatedaGoogleaccount onthephoneoryouforgotit,youhaveto performahardreset.41 Your Home screen Touch screen tips Herearesometipsonhowtonavigate aroundyourphone. Touch–Tochooseamenu/optionoropen anapplication,touchit. Touch and hold–Toopenanoptionsmenu orgrabanobjectyouwanttomove,touch andholdit. Drag–Toscrollthroughalistormove slowly,dragacrossthetouchscreen. Flick–Toscrollthroughalistormove quickly,flickacrossthetouchscreen(drag quicklyandrelease). NOTE:
- To select an item, touch the centre of the icon.
- Do not press too hard; the touch screen is sensitive enough to pick up a light, firm touch.
- Ifthenetworkisopen,youareaskedto confirmthatyouwanttoconnecttothat networkbytouchingConnect.
- Ifthenetworkissecured,youare promptedtoenterapasswordor othercredentials.(Askyournetwork administratorfordetails) 5 Thestatusbardisplaysiconthatindicate Wi-Fistatus. Bluetooth YoucanuseBluetoothtosenddataby runningacorrespondingapplication,not fromtheBluetoothmenuasonmostother mobilephones.54 Connecting to Networks and Devices TIP! With LG-P705, you can enjoy Bluetooth high speed. If the device you want to share files with also supports high speed Bluetooth, the files will automatically be transferred via the high-speed network. To use Bluetooth high speed data transfer, please make sure the Wi-Fi is OFF on your devices before use. The settings for Bluetooth high speed may be different depends on the device. Please check the device's settings with their service provider. Turning on Bluetooth and pairing up your phone with a Bluetooth device Youmustpairyourdevicewithanother devicebeforeyouconnecttoit. 1 Touch >Appstab>Settings>Set BluetoothtoONfromtheWIRELESS& NETWORKS 2 TapBluetoothmenuagain.Yourphone willscanforanddisplaytheIDsofall availableBluetoothin-rangedevices.If thedeviceyouwanttopairwithisn’ton thelist,makesurethetargetdeviceisset tobediscoverable,thentapSearch for55 devicesagain. 3 Choosethedeviceyouwanttopairup withfromthelist. Oncetheparingissuccessful,yourdevice willconnecttotheotherdevice. Sending pictures using Bluetooth 1 SelectaPicture> >Bluetooth 2 CheckwhetherBluetoothisON,then selectSearch for devices. 3 Choosethedeviceyouwanttosenddata tofromthelist. Sharing your phone's data connection USBtetheringandportableWi-Fihotspotare greatfeatureswhentherearenowireless connectionsavailable.Youcanshareyour phone'smobiledataconnectionwitha singlecomputerviaaUSBcable(USB tethering).Youcanalsoshareyourphone's dataconnectionwithmorethanasingle deviceatatimebyturningyourphoneintoa portableWi-Fihotspot. Whenyourphoneissharingitsdata connection,aniconappearsinthestatus56 Connecting to Networks and Devices barandasanongoingnotificationinthe notificationsdrawer. Forthelatestinformationabouttethering andportablehotspots,includingsupported operatingsystemsandotherdetails,visit http://www.android.com/tether. To change Portable Wi-Fi hotspot settings:
- Touch >Appstab>Settings> More fromtheWIRELESS&NETWORKS> Portable Wi-Fi hotspot>Chooseoptions thatyouwanttoadjust TIP! If your computer is running Windows 7 or a recent distribution of some flavours of Linux (such as Ubuntu), you don't usually need to prepare your computer for tethering. But if you're running an earlier version of Windows or another operating system, you may need to prepare your computer to establish a network connection via USB. For the most current information about which operating systems support USB tethering and how to configure them, visit http://www.android.com/tether.57 To rename or secure your portable hotspot Youcanchangethenameofyourphone's Wi-Finetworkname(SSID)andsecureits Wi-Finetwork. 1 OntheHomescreen,touch >Apps tab>Settings 2 TouchMorefromtheWIRELESS& NETWORKSandselectPortable Wi-Fi hotspot. 3 EnsurePortable Wi-Fi hotspotisticked. 4 TouchConfigure Wi-Fi hotspot.
- TheConfigure Wi-Fi hotspotdialogbox willopen.
- YoucanchangethenetworkSSID(name) thatothercomputersseewhenscanning forWi-Finetworks.
- YoucanalsotouchtheSecuritymenuto configurethenetworkwithWi-FiProtected Access2(WPA2)securityusingapre- sharedkey(PSK).58 Connecting to Networks and Devices
- IfyoutouchtheWPA2 PSKsecurity option,apasswordfieldisaddedtothe Configure Wi-Fi hotspotdialog.Ifyou enterapassword,youwillneedtoenter thatpasswordwhenyouconnecttothe phone'shotspotwithacomputerorother device.YoucansetOpenintheSecurity menutoremovesecurityfromyourWi-Fi network. 5 TouchSave. ATTENTION! If you set the security option as Open, you cannot prevent unauthorised usage of online services by other people and additional charges can be incurred. To avoid unauthorised usage, you are advised to keep the security option active.59 Using the Wi-Fi Cast Youcanshareyourmusic,pictureandvideo contentbetweenuserswhouseAndroid PhonesconnectedviathesameWi-Fi& Wi-FiDirectednetwork. CheckyourWi-Fi&Wi-FiDirectednetwork inadvanceandmakesuretheusersare connectedtothesamenetwork. 1 Touch >Appstab>Settings> MorefromtheWIRELESS&NETWORKS > Wi-Fi Direct 2 TouchtheWi-FiDirectcheckboxtoturn on. 3 Selectadevicetoconnectfromthe scanneddevicelist. 4 TouchConnect. Enabling Wi-Fi Direct to share through SmartShare Wi-FiDirectautomaticallyscansnearby Wi-FiDirectdevicesandthesearched devicesarelistedastheyarefoundand youcanselectaspecificdevicetoshare multimediadatathroughSmartShare. Wi-FiDirectcannotbeenabledwhileusing otherWi-Fifunctions.60 Connecting to Networks and Devices 1 Touch >Appstab>Settings > MorefromtheWIRELESS&NETWORKS >Wi-Fi Direct 2 Selectadevicetoconnectfromthe scanneddevicelist. CREATE GROUP–Touchtoactivategroup ownermode,whichenablesthelegacyWi-Fi devicestoconnectbyscanningyourphone. Inthiscaseyoumustenterthepassword thatissetinPassword. NOTE: When your phone becomes a group owner, it will consume more battery power than when it is a client. Wi-Fi Direct connection does not provide Internet service. Additional costs may be incurred when connecting and using online services. Check data charges with your network provider.61 Using SmartShare SmartShareusesDLNA(DigitalLiving NetworkAlliance)technologytosharedigital contentthroughawirelessnetwork. BothdevicesmustbeDLNAcertifiedto supportthisfeature. To turn SmartShare on and allow sharing contents 1 Touch >Appstab>SmartShare 2 Press andselectSettings. 3 TouchDiscoverablecheckboxtoturnoff.
- TouchAlways accept requestifyou wouldliketoautomaticallyacceptsharing requestsfromotherdevices.
- TouchReceive filesifyouwouldliketo automaticallyallowuploadfilestomy phonefromotherdevices. 4 UndertheMy Shared Contentssection, touchtocheckmarkthetypesofcontent youwouldliketoshare.Choosefrom Pictures,VideosandMusic. 5 SmartShareisnowactivatedandready tosharecontents.62 Connecting to Networks and Devices To share contents from remote content library to other devices Letyourrendererdevice(e.g.TV)play multimediacontentsfromyourremote contentlibrary(e.g.PC). NOTE: Make sure that the DLNA functionality of your devices is properly configured (e.g. TV and PC). 1 Touchthetoprightbuttontoorselectthe devicefromrendererlists. 2 Touchthetopleftbuttonandselectthe deviceoftheremotecontentlibrary. 3 Youcanbrowsethecontentlibrary. 4 Touchacontentthumbnailorpressthe MenukeyandselectPlaybutton. To share contents from your phone to your renderer device(e.g. TV) NOTE: Make sure that your renderer device is properly configured. 1 Whilebrowsingyourpicturesorvideos usingtheGalleryapplication,touch toselectfiles.Thenyouwillbeableto selectmultiplefilestobeshared.63 2 TouchShareonthemenuandselectthe SmartShare. 3 SmartShareisautomaticallylaunched withtheselectedfiles. 4 Selectthedevicefromrendererliststo playthefiles. NOTE: Follow the similar steps to use the Music Player, Camera and Video player to share contents. Notice: Check that your device is connected with your home network using Wi-Fi connection to use this application. Some DLNA enabled devices (e.g. TV) support only the DMP feature of DLNA and will not appear in the renderer device list. Your device might not be able to play some contents. To download contents from remote content library 1 Touch >Appstab>SmartShare 2 Touchthetopleftbuttonandselectthe deviceoftheremotecontentlibrary.64 Connecting to Networks and Devices 3 Youcanbrowsethecontentlibrary. 4 Touchacontentthumbnailthentouch Download menu key. Notice: A few types of contents are not supported. To upload contents from my phone to remote content library NOTE: Make sure that SD card is correctly mounted and the Receive files in settings menu is checked. 1 Touch >Appstab>SmartShare 2 TouchthetopleftbuttonandselectMy phone. 3 Youcanbrowsethecontentlibrary. 4 Touchandholdacontentthumbnailand thentouchtheUpload menu key. 5 Selectadeviceofremotecontentlibrary tobeuploaded. Notice: Some DLNA enabled devices do not support DMS upload functionality and will not be uploaded. A few types of contents are not supported.65 Calls Making a call 1 Touch toopenthekeypad. 2 Enterthenumberusingthekeypad.To deleteadigit,touchthe . 3 Touch tomakeacall. 4 Toendacall,touchtheEndicon . TIP! To enter "+" to make international calls, touch and hold
limit may vary from country to country depending on the language and how the SMS is coded.
WARNING: If an image, video or
audio file is added to an SMS message, it is automatically converted into an MMS message and you are charged accordingly. Threaded box Messages(SMS,MMS)exchanged withanotherpartycanbedisplayed inchronologicalordersothatyoucan convenientlyseeanoverviewofyour conversation.75 Using Smilies LivenupyourmessagesusingSmilies. Whenwritinganewmessage,pressthe Menukey,thenchooseInsert smiley. Changing your message settings YourLG-P705messagesettingsare predefined,soyoucansendmessages immediately.Youcanchangethesettings basedonyourpreferences.76 E-mail YoucanusetheEmailapplicationtoread emailsfromservicesotherthanGoogleMail. TheEmailapplicationsupportsthefollowing accounttypes:POP3,IMAPandExchange. Yourserviceproviderorsystemadministrator canprovidetheaccountsettingsyouneed. Managing an email account ThefirsttimeyouopentheE-mail application,asetupwizardopenstohelpyou tosetupanemailaccount. To add another email account:
- Touch >Appstab>E-mail>inthe accountscreen,touch >Settings> ADD ACCOUNT Aftertheinitialsetup,Emaildisplaysthe contentsofyourinbox.Ifyouhaveadded morethanoneaccount,youcanswitch amongaccounts. To change an email account's setting:
- Touch >Appstab>E-mail>inthe accountscreen,touch >Settings77 To delete an email account:
- Touch >Appstab>E-mail>inthe accountscreen,touch >Settings >touchanaccountyouwanttodelete> Remove account Email account screen YoucantouchanaccounttoviewitsInbox. Theaccountfromwhichyousendemailby defaultisindicatedwithatick. –Touchthefoldericontoopenthe accountfolders. Onlythemostrecentemailsinyouraccount aredownloadedtoyourphone. Working with account folders EachaccounthasanInbox,Outbox,Sent andDraftsfolder.Dependingonthefeatures supportedbyyouraccount'sserviceprovider, youmayhaveadditionalfolders. Composing and sending email To compose and send a message 1 WhileintheE-mailapplication,touch the .78 2 Enteranaddressforthemessage's intendedrecipient.Asyouentertext, matchingaddressesareofferedfromyour Contacts.Separatemultipleaddresses withsemicolon. 3 AddCc/Bccandaddattachmentfilesif required. 4 Enterthetextofthemessage. 5 Touchthe . Ifyouaren'tconnectedtoanetwork,for example,ifyou'reworkinginairplane mode,themessagesthatyousend arestoredinyourOutboxfolderuntil you'reconnectedtoanetworkagain.If itcontainsanypendingmessages,the OutboxisdisplayedontheAccounts screen. TIP! When a new email arrives in the inbox, you will receive a notification by sound or vibration. Tap the email notification to stop notifications. E-mail79 Camera Getting to know the viewfinder Switch lenses–Switchbetweentherear–facingcamera lensandthefront–facingcameralens. Zoom–Zoominorzoomout. Brightness–Thisdefinesandcontrolstheamountof sunlightenteringtheimage. Shot mode–ChoosefromNormal,Panoramaor Continuous shot. Settings–TouchthisicontoopentheSettingsmenu. Video mode–Touchthisicontoswitchtovideomode. Taking a photo Gallery–Touchtoviewthelastphotoyoucaptured.This enablesyoutoaccessyourgalleryandviewsavedphotos withincameramode.80 Camera Taking a quick photo 1 OpentheCameraapplication. 2 Holdthephone,pointthelenstowards thesubjectyouwanttophotograph. 3 Touchthescreenandafocusboxwill appearinthecentreoftheviewfinder screen. 4 Whenthefocusboxturnsgreen,the camerahasfocusedonyoursubject. 5 Clickonthe tocapturetheimage. Once you've taken the photo Touch toviewthelastphotoyou captured. Touchtoshareyourphotousing Bluetooth,E-mail,Gmail,Google+, Memo,Messaging,Picasaor SmartShare. TIP! If you have an SNS account and set it up on your phone, you can share your photo with the SNS community.81 Viewandeditthepicture. Selecttheimageresolution.Ifyou choosethehighresolution,thefilesizewill increase,whichmeansyouwillbeableto storefewerphotosinthememory. Improvescolourqualitiesindifferent lightingconditions. Appliesartisticeffectstothepictures. Appliestheadditionaloptionsfor pictures. Touchtodeletetheimage. Touch toopentheoptions. Set image as–Touchtousetheimageas aContactphoto,LockscreenWallpaperor Wallpaper. Move–Touchtomovetheimagetoother place. Rename–Touchtoeditthenameofthe selectedpicture. Rotate left/right–Torotateleftorright. Crop–Cropyourphoto.Moveyourfinger acrossthescreentoselectthearea.82 Camera Slideshow–Autoreviewautomatically showsyouthepictureyoujustrecorded. Details–Showthepictureinformation. Using the advanced settings Intheviewfinder,touch toopenall advancedoptions. –Restoreallcameradefaultsettings. –Touchwheneveryouwanttoknow howthisfunctionoperates.Thisprovidesyou withaquickguide. Changecamerasettingsbyscrollingthrough thelist.Afterselectingtheoption,touchthe Backkey. –Allowsyoutoturnontheflashwhen takingaphotoindarkconditions. –Focusesonthespecificspot. –Selecttheimageresolution.Ifyou choosethehighresolution,thefilesizewill increase,whichmeansyouwillbeableto storefewerphotosinthememory.83 –Findsthecolorandlightsettings appropriateforthecurrentenvironment. ChoosefromNormal,Portrait,Landscape, Sports,SunsetandNight. –TheISOratingdeterminesthe sensitivityofthecamera'slightsensor. ThehighertheISO,themoresensitivethe camerais.Thisisusefulindarkerconditions whenyoucannotusetheflash. –Improvescolourqualitiesindifferent lightingconditions. –Appliesartisticeffectstothepictures. –Setadelayafterthecapturebutton ispressed.Thisisidealifyouwanttobein thephoto. –Activatetouseyourphone'slocation- basedservices.Takepictureswherever youareandtagthemwiththelocation. Ifyouuploadtaggedpicturestoablog thatsupportsgeotagging,youcanseethe picturesdisplayedonamap.84 Camera NOTE: This function is only available when GPS is active. –Itautomaticallyshowsyouthepicture youjusttook. –Selectstoragetosaveimages. TIP! When you exit the camera, some settings return to their defaults, such as white balance, colour tone, timer and scene mode. Check these before you take your next photo. TIP! The Settings menu is superimposed over the viewfinder so, when you change elements of the image colour or quality, you see a preview of the image change behind the Settings menu.85 Video camera Getting to know the viewfinder Switch lenses–Switchbetweentherear–facingcamera lensandthefront-facingcameralens. Zoom–Zoominorzoomout. Brightness–Thisdefinesandcontrolstheamountof sunlightenteringthevideo. Flash–Allowsyoutoturnontheflashwhentakinga photoinadarkplace. Settings–Touchthisicontoopenthesettingsmenu. Camera mode–Touchthisicontoswitchtocamera mode. Start recording Gallery–Touchtoviewthelastvideoyourecorded.This enablesyoutoaccessyourgalleryandviewyoursaved videosfromwithinvideomode.86 Shooting a quick video 1 TouchtheCameramodebutton. 2 Thevideocameraviewfinderappearson thescreen. 3 Holdingthephone,pointthelenstowards thesubjectyouwanttocaptureinyour video. 4 PresstheRecord buttononcetostart recording. 5 Aredlightappearsatthetopcornerof theviewfinderwithatimershowingthe lengthofthevideo. 6 Touch onthescreentostoprecording. After shooting a video Yourcapturedvideowillappearonthe Gallery.Touch toviewthelastvideoyou captured. Touchtoplaythevideo. TouchtosharethevideoBluetooth, E-mail,Gmail,Messaging,SmartShare or YouTube. Video camera87 Touchtodeletethevideoyoujustmade. ConfirmbytouchingOK.Theviewfinder reappears. Touch toopentheoptions. Move–Touchtomovethevideotoother place. Rename–Taptoeditthenameofthe selectedvideo. Details–Taptoseeadetailedinformation, suchasthename,date,time,sizeandtype. Using the advanced settings Usingtheviewfinder,touch toopenall theadvancedoptions. –Restoreallvideocameradefault settings. –Touchifyouwanttoknowhowthis functionoperates.Thisprovidesyouwitha quickguide. Adjustthevideocamerasettingbyscrolling throughthelist.Afterselectingtheoption, touchtheBackkey.88 Video camera –Touchtosetthesize(inpixels)ofthe videoyouarerecording. –Improvescolourqualitiesindifferent lightingconditions. –Chooseacolourtonetouseforyour newview. –Activatetouseyourphone'slocation- basedservices. –ChooseOfftorecordavideowithout sound. –Autoreviewautomaticallyshowsyou thevideoyoujustrecorded. –Selectstoragetosavevideos. Adjusting the volume when viewing a video Toadjustthevolumeofavideowhileitis playing,usethevolumekeysontheleft- handsideofthephone.89 Youcanstoremultimediafilesonamemory cardforeasyaccesstoallyourimageand videofiles. Gallery Touch >Appstab>Gallery.Open alistofcataloguebarsthatstoreallyour multimediafiles. Music Player YourLG-P705hasabuilt-inmusicplayer thatletsyouplayallyourfavouritetracks.To accessthemusicplayer,Touch >Apps tab>Music Player. Transferring music files using USB mass storage devices 1 ConnecttheLG-P705toaPCusinga USBcable. 2 Ifyouhaven'tinstalledLGAndroid PlatformDriveronyourPC,youneed tochangethesettingsmanually. Choose >Appstab>Settings> Connectivity>USBconnectiontype, thenselectMedia sync (MTP). 3 Youcanviewthemassstoragecontent onyourPCandtransferthefiles. Multimedia90 Playing a song 1 IntheHomescreen,touch >Apps tab>Music Player. 2 TouchSongs. 3 Selectthesongyouwanttoplay. Touchtopauseplayback. Touchtoresumeplayback. Touchtoskiptothenexttrackinthe album,playlistorshuffle. Touchtogobacktothebeginningof thesong.Touchtwicetoreturntothe previoussong. Touchtomanagethemusicvolume. Touchtosetrepeatmode. Touchtoplaythecurrentplaylistin shufflemode. Touchtoseethecurrentplaylist. Touchtoseelyrics.Thisoptionisononly ifthesongincludesthelyrics. Multimedia91 Tochangethevolumewhilelisteningto music,presstheupanddownvolumekeys ontheleft-handsideofthephone. Touchandholdanysonginthelist.It displaysPlay,Add to playlist,Set as ringtone,Delete,Share,Searchand Detailsasoptions. NOTE: Music file copyrights may be protected by international treaties and national copyright laws. Therefore, it may be necessary to obtain permission or a licence to reproduce or copy music. In some countries, national laws prohibit private copying of copyrighted material. Before downloading or copying the file, check the national laws of the relevant country concerning the use of such material.92 Multimedia FM Radio YourLG-P705hasabuilt-inFMRadioso youcantuneintoyourfavouritestations andlistenonthego. NOTE: You need to use your headphones to listen to the radio. Insert it into the headphone jack. Searching for stations Youcantuneintoradiostations bysearchingforthemmanuallyor automatically.Theyarethensavedto specificchannelnumbers,soyoudon'thave tofindthemagain. Youcanstoreupto48channelsonyour phone. Tuning in automatically 1 IntheHomescreen,touch >Apps tab>FM Radio.93 2 Touch ,thenselectAuto scan. 3 Duringautoscanning,touchStopifyou wanttostopscanning.Onlyscanned channelsaresavedbeforeyoustop scanning. NOTE: You can also manually tune in to a station using the on-screen wheel. TIP! To improve radio reception, extend the headset cord as this also functions as the radio antenna. If you connect a headset not specifically made for radio reception, radio reception may be poor.94 LG SmartWorld LGSmartWorldoffersanassortmentof excitingcontent-games,applications, wallpaperandringtones-givingLGphone usersthechancetoenjoyricher"Mobile Life"experiences. How to Get to LG SmartWorld from Your Phone 1 Tapthe icontoaccessLG SmartWorld. 2 TapSigninandenterID/PWforLG SmartWorld.Ifyouhavenotyetsigned up,tapRegisterandgetaLGSmartWorld membership. 3 Downloadthecontentyouwant. NOTE: What if there is no icon? 1 Using a mobile Web browser, access LG SmartWorld (www.lgworld.com) and select your country. 2 Download LG SmartWorld App. 3 Execute and install the downloaded file. 4 Access LG SmartWorld by tapping the icon.95 How to use LG SmartWorld
- Tryotherusefulfunctionsaswell.(Content Detailscreen) NOTE: LG SmartWorld may not be available in all carriers or countries.96 Setting your alarm 1 Touch >Appstab>Alarm/Clock
video up to 640x480, including premium content DivX
and associated logos are trademarks of Rovi Corporation or its subsidiaries and are used under license. Settings113 Accessories TheseaccessoriesareavailableforusewiththeLG-P705.(Items described below may be optional.) Travel adaptor Battery Stereo headset Data cable Connectyour LG-P705and PC. User Guide Learnmore aboutyour LG-P705. NOTE:
- Always use genuine LG accessories.
- Failure to do this may void your warranty.