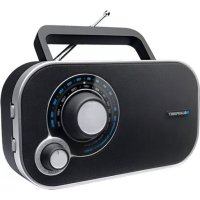
BTA6000 - Radio BLAUPUNKT - Free user manual and instructions
Find the device manual for free BTA6000 BLAUPUNKT in PDF.

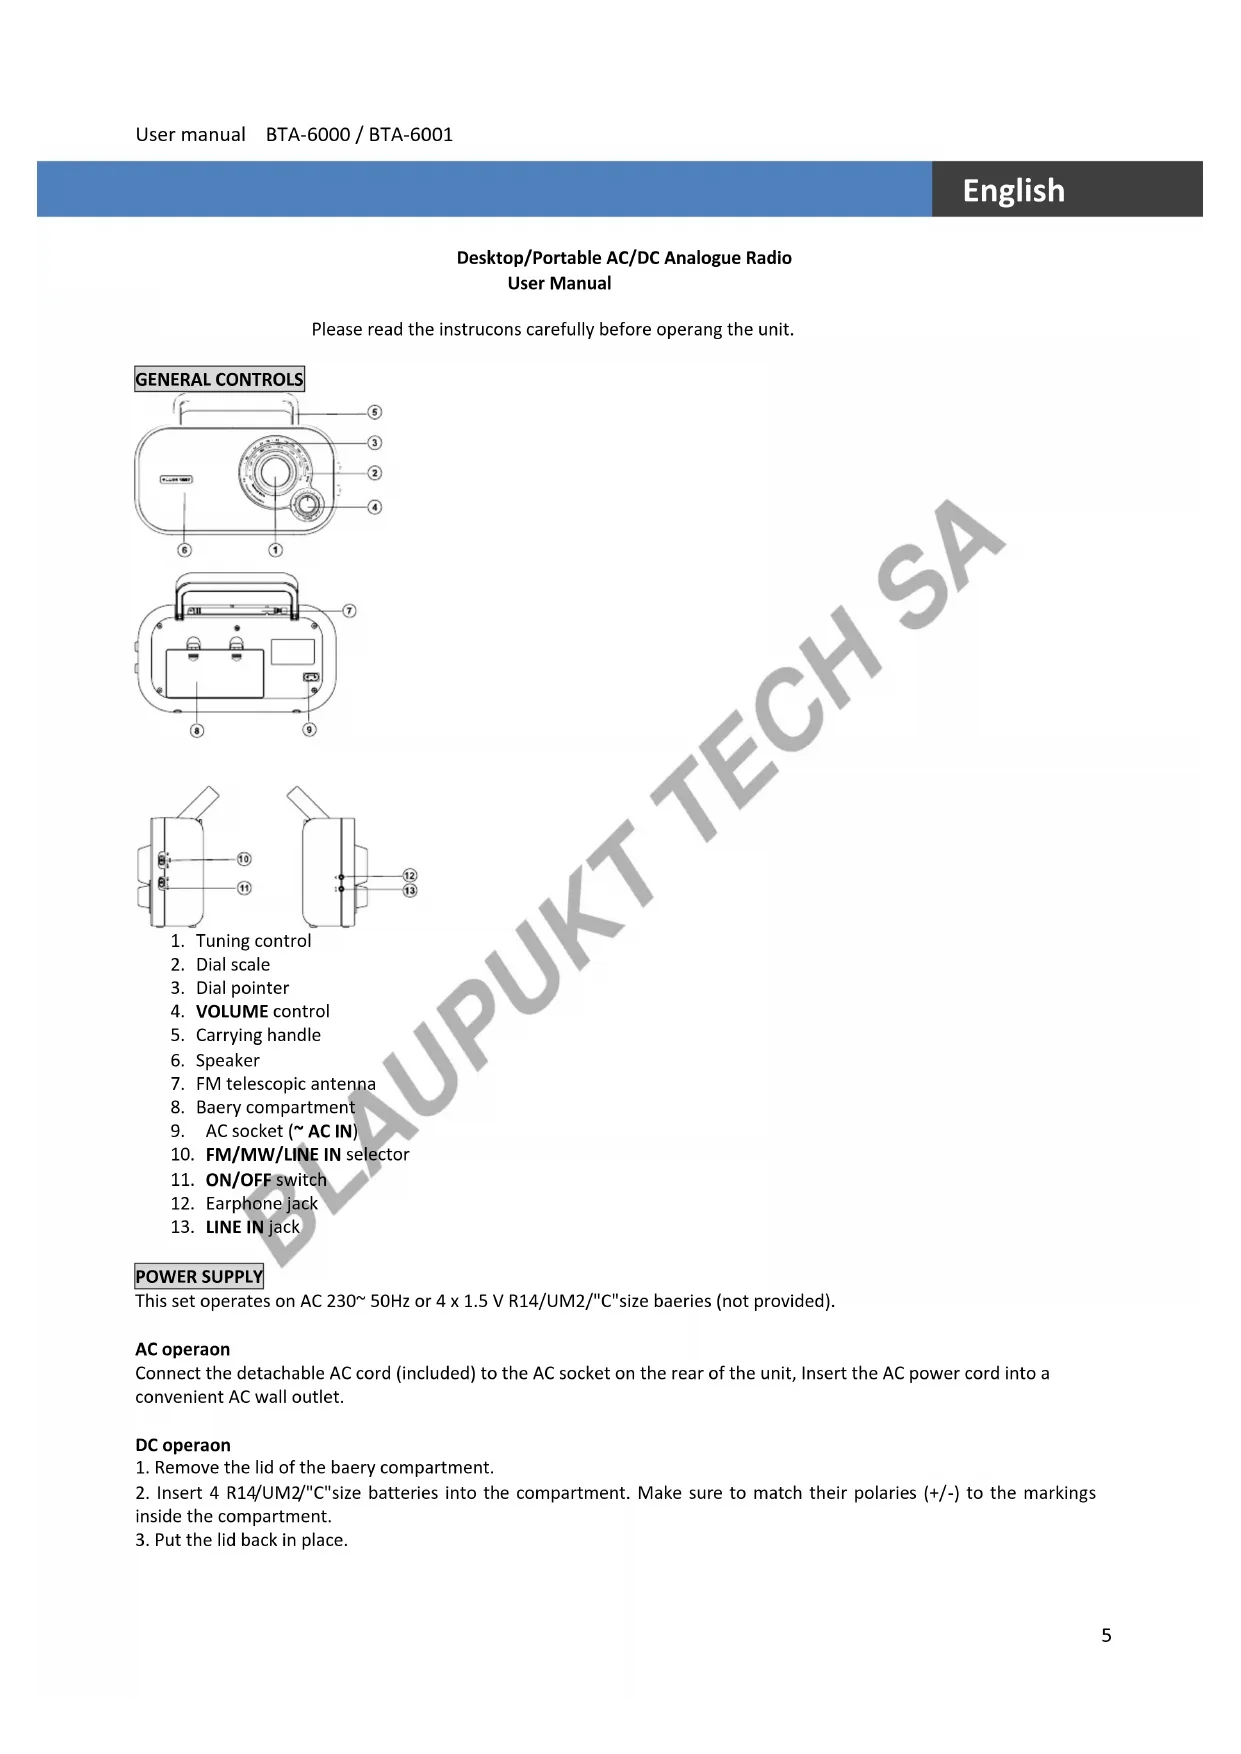


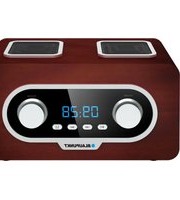
| Product type | AC/DC analog radio receiver, desktop/portable |
| Brand | Blaupunkt |
| Model | BTA6000 |
| Mains power supply | 230 V AC ~ 50 Hz |
| Battery power supply | 4 x 1.5 V batteries, type R14/UM2/C (not included) |
| Frequency bands | FM : 87,5 - 108,0 MHz ; MW : 530 - 1600 KHz |
| Main functions | FM/MW radio, AUX input, headphone output, telescopic FM antenna, built-in speaker |
| Controls | ON/OFF button, band selector (FM/MW/AUX IN), volume knob, tuning knob |
| Connections | Mains socket, headphone jack (3.5 mm), AUX IN jack (3.5 mm) |
| Battery life | Not specified, depends on type and usage |
| Maintenance and cleaning | Unplug the device before cleaning; use a dry, soft cloth. Do not use abrasive products. |
| Safety | Do not expose to water, open flames, or excessive heat. Allow free ventilation around the device. Unplug if not used for extended periods. |
| Spare parts and repairability | No user-serviceable parts. Contact qualified personnel for any repairs. |
| General information | Use in temperate climate. Rating plate on the back. Do not dispose of with household waste (WEEE recycling). |
Frequently Asked Questions - BTA6000 BLAUPUNKT
User questions about BTA6000 BLAUPUNKT
0 question about this device. Answer the ones you know or ask your own.
Ask a new question about this device
Download the instructions for your Radio in PDF format for free! Find your manual BTA6000 - BLAUPUNKT and take your electronic device back in hand. On this page are published all the documents necessary for the use of your device. BTA6000 by BLAUPUNKT.
USER MANUAL BTA6000 BLAUPUNKT
USER MANUALS
Models: BTA-6000 / BTA-6001
| Page 2 | German |
| Page 5 | English |
| Page 8 | French |
| Page 11 | Italian |
| Page 14 | Spanish |
| Page 17 | Portuguese |
| Page 20 | Dutch |
| Page 23 | Swedish |
| Page 26 | Danish |
| Page 29 | Finnish |
| Page 32 | Norwegian |
| Page 35 | Russian |
| Page 38 | Greek |
| Page 41 | Turkish |
| Page 44 | Polish |
| Page 47 | Bulgarian |
| Page 50 | Romanian |
| Page 53 | Czech |
| Page 56 | Hungarian |
| Page 59 | Japanese |
| Page 62 | Chinese |
| Page 65 | Arabic |
Please read the instrucons carefully before operang the unit.
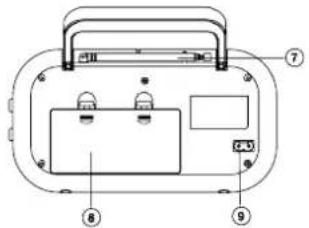
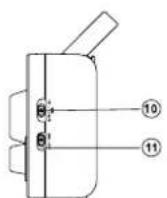
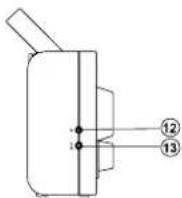
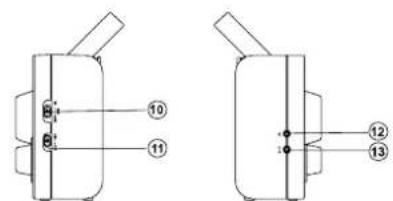
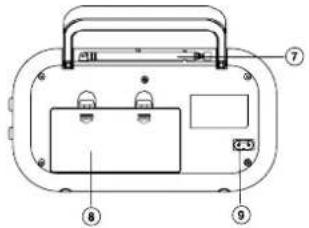
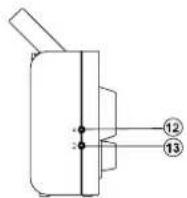
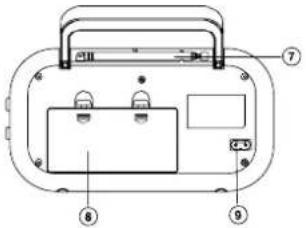
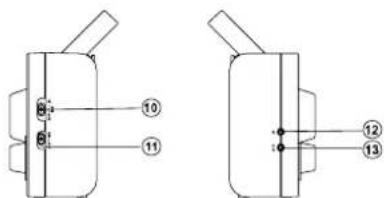
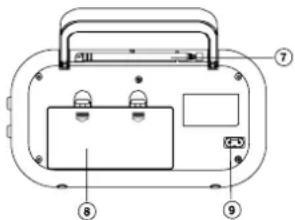
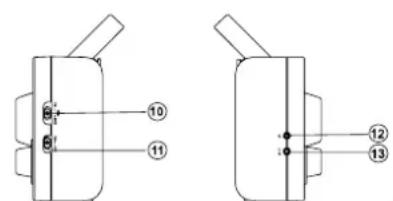
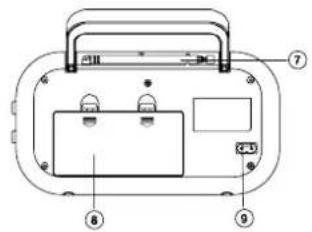
GENERAL CONTROLS
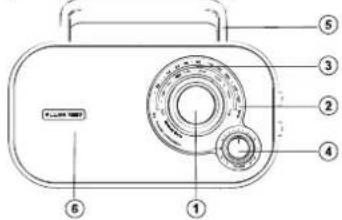
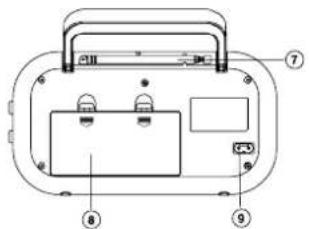
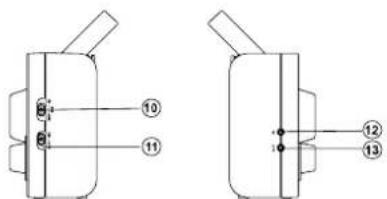
- Tuning control
- Dial scale
- Dial pointer
- VOLUME control
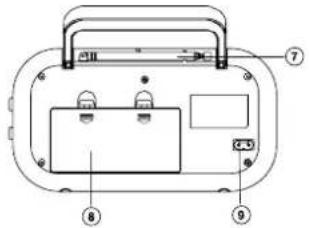
- Carrying handle
- Speaker
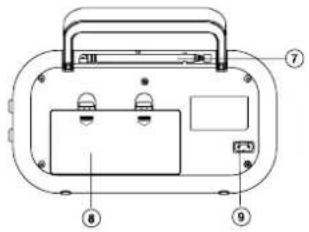
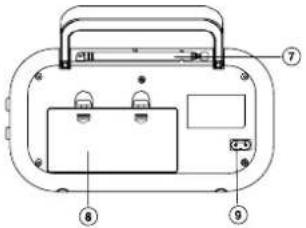
- FM telescopic antenna
- Baery compartment
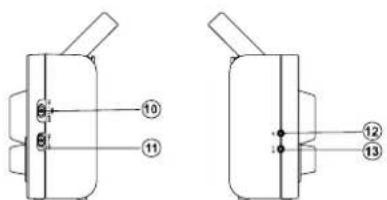
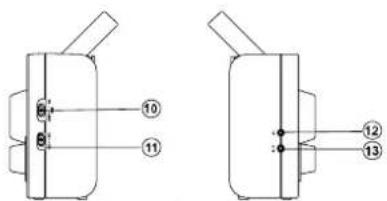
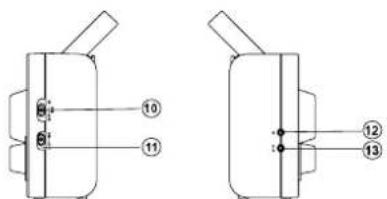
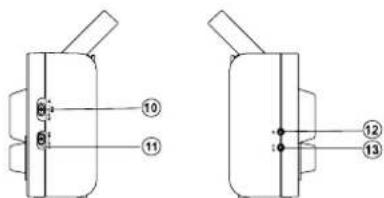
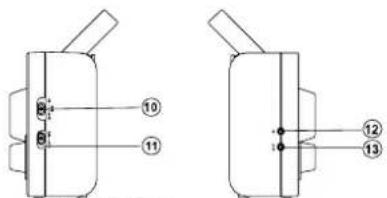
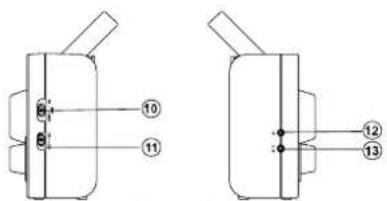
- AC socket (\~ AC IN)
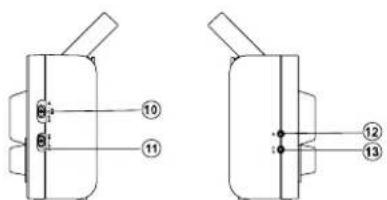
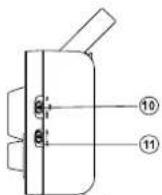
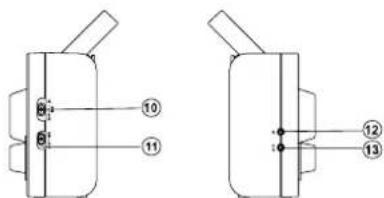
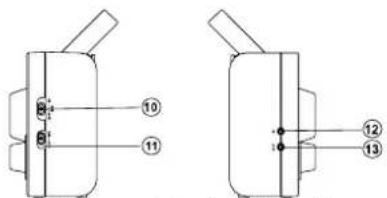
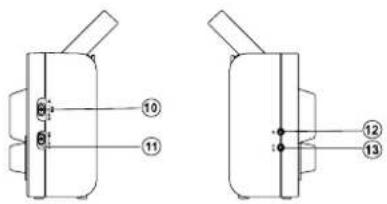
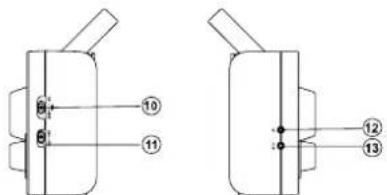
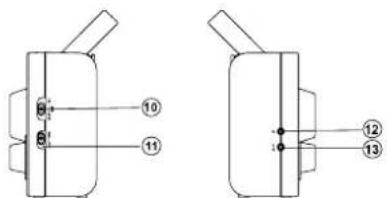
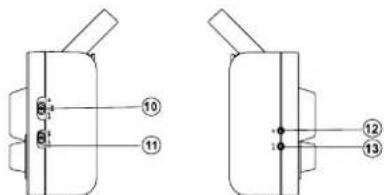
- FM/MW/LINE IN selector
- ON/OFF switch
- Earphone jack
- LINE IN jack
POWER SUPPLY
This set operates on AC 230\~50Hz or 4 x 1.5 V R14/UM2/"C" size baeries (not provided).
AC operaon
Connect the detachable AC cord (included) to the AC socket on the rear of the unit, Insert the AC power cord into a convenient AC wall outlet.
DC operaon
- Remove the lid of the baery compartment.
- Insert 4 R14/UM2/"C"size batteries into the compartment. Make sure to match their polaries (+/-) to the markings inside the compartment.
- Put the lid back in place.
Note:
-The AC cord must be unplugged from both the socket on the unit and the power outlet for the unit to run on the baeries.
- When the set is connected to the mains, the power source automacally switches to AC.
Notes on baeries (not supplied)
- Do not mix dierent types of baeries or old baeries with new ones.
·Never recharge the baeries, apply heat to them or take them apart.
- Baeries shall not be exposed to excessive heat such as sunshine, re or the like.
- Do not throw the baeries in re!
·Aenon should be drawn to the environmental aspects of baery disposal.
The baeries need to be replaced when: The volume decreases, or sound is distorted during operaon.
·In order to avoid leakage, remove the baeries when unit will not be used for a long period of me.
- Please respect the environment. Before throwing any baeries away, consult your distributor who may be able to take them back for specific recycling.
CAUTION:
Danger of explosion if baeries are incorrectly replaced. Replace only with the same or equivalent type.
USING THE RADIO
- Slide the ON/OFF switch to "ON" posion to turn on the radio.
- Use the FM/MW/LINE IN selector to select band.
- Use the Tuning control to tune to your desired radio staon.
- Adjust the volume level.
- Slide the ON/OFF switch to "OFF" posion to turn o the radio.
To enhance radio recepon ability:
FM: Extend the telescopic antenna.
MW: Rotate the unit horizontally for opmum recepon.
CONNECTING LINE IN SOURCE
- Connect your LINE IN source (e.g. mp3 player) to the LINE IN jack on the le side of the unit.
- Slide the FM/MW/LINE IN selector to LINE IN posion.
- Start playback from your LINE IN source.
- Adjust the volume to desired level.
- To stop playback, disconnect your LINE IN source from the LINE IN jack.
PRODUCT INFORMATION
Power consumpon: 5W
Frequency Range:
FM 87.5-108.0 MHz
MW 530-1600 KHz
LISTENING WITH EARPHONES
Connect earphones (not included) to the earphone jack on unit.

Connuous use of earphones at high volume can damage the user's hearing.
SAFETY INSTRUCTION

CAUTION: To reduce the risk of electric shock, do not remove the cover (or back). There are no
user serviceable parts inside the unit. Refer all servicing to qualify personnel.

The lightening ash with arrowhead symbol within the triangle is a warning sign alerng the user of “dangerous
voltage" inside the unit.

The exclamaon point within the triangle is a warning sign alerng the user of important instrucons accompanying product.
IMPORTANT!
- The venlaon should not be impeded by covering the openings with items such as newspapers, table-cloths, curtains, etc.
- No naked ame sources, such as lighted candles, should be placed on the apparatus.
- The use of apparatus in moderate climates.
- The apparatus should not be exposed to dripping or splashing.
- Ensure a minimum distance of 5cm around the apparatus for sucient venlaon.
- Do not place objects lled with liquids, such as vases, on the apparatus.
- The rang plate is located at back of unit.
-Excessive sound pressure from earphones and headphones can cause hearing loss. - Mains plug is used as the disconnect device and it shall remain readily operable. To be completely disconnected the power input, the mains plug of the apparatus shall be disconnected from the mains completely. The mains plug should not be obstructed or should be easily accessed during intended use.
- Under the inuence of electrical fast transient or/and electrostac phenomenon, the product may malfuncon and require user to power reset.
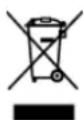
If at any me in the future you should need to dispose of this product please note that Waste electrical products should not be disposed of with household waste. Please recycle where facilities exist. Check with your Local Authority or retailer for recycling advice. (Waste Electrical and Electronic Equipment Directive)
Note: Design and specicaon are subject to change without noce.
© 2011 All rights reserved by Blaupunkt. This material may be reproduced, copied or distributed for personal use only.
INFORMATIONS PRODUIT
Consommaon : 5W
- Manopola Tuning
- Scala sintonia
- Lancea
- Manopola VOLUME
- Maniglia
- Altoparlante
- Antenna telescopica FM
- Vano baerie
- Presa CA
- Seleore FM/MW/LINE
- Interruore ON/OFF
- Presa auricolare
- Presa LINE
ALIMENTAZIONE
- Inställningskontroll
- Sierskala
- Siervisare
- VOLUME kontroll
- Bärbart handtag
- Högtalare
- FM teleskopantenn
- Baerifack
- AC anslutning
- FM/MW/LINE-IN väljare
- ON/OFF strömbrytare
- Hörlursuag
- LINE-IN jack
POWER SUPPLY
- Tuning kontrol
- Dial scale
- Dial pointer
- VOLUMEN kontrol
- Håndtag
- Højtaler
- FM Teleskopantennen
- Baerirum
- AC indgang
- FM/MW/LINE valg
- ON/OFF (TÆND/SLUK) knap
- Hovedtelefon indgang
- LINE in jack
STR∅MFORSYNING
ΤΡΟΦΟΔΟΣΙΑ
INFORMACJA O PRODUKCIE
Pobór mocy: 5W
INFORMATII DESPRE PRODUS
INFORMACE O PRODUKTU
Přikon: 5W
Rozsah frekvenční:
FM 87.5-108.0 MHz
MW 530-1600 KHz
POSLECH SE SLUCHÁTKY


- POWER SUPPLY
- AC operaon
- DC operaon
- Note:
- Notes on baeries (not supplied)
- CAUTION:
- USING THE RADIO
- CONNECTING LINE IN SOURCE
- PRODUCT INFORMATION
- LISTENING WITH EARPHONES
- SAFETY INSTRUCTION
- IMPORTANT!
- INFORMATIONS PRODUIT
- ALIMENTAZIONE
- STR∅MFORSYNING
- ΤΡΟΦΟΔΟΣΙΑ
- INFORMACJA O PRODUKCIE
- INFORMATII DESPRE PRODUS
- INFORMACE O PRODUKTU
- POSLECH SE SLUCHÁTKY
Brand : BLAUPUNKT
Model : BTA6000
Category : Radio