PI300SD - Alarm clock radio Svat - Free user manual and instructions
Find the device manual for free PI300SD Svat in PDF.


User questions about PI300SD Svat
0 question about this device. Answer the ones you know or ask your own.
Ask a new question about this device
Download the instructions for your Alarm clock radio in PDF format for free! Find your manual PI300SD - Svat and take your electronic device back in hand. On this page are published all the documents necessary for the use of your device. PI300SD by Svat.
USER MANUAL PI300SD Svat
Covert Alarm Clock DVR
with Built-In Color Camera
COVERT SYSTEM
EASY setup
USERMANUAL
MODEL #:PI300-SD

Support:
www.svat.com/support
DO NOT RETURN THIS PRODUCT TO THE STORE
NEED HELP?

Online live web chat: Visit www.svat.cor
Please contact a SVAT customer support representative first regarding additional information on product features, specifications or assistance with setup.
For more product information visit www.svat.com
Note: This is manual version 2.0 for this product, you may find updated versions by visiting our website.
IMPORTANT! PLEASE READ
PRODUCT WARRANTY INFORMATION
We take quality very seriously. That is why all of our products come with a one year warranty from the original purchase date against defects in workmanship and materials. If you have warranty or support issues please contact us using any of the following methods:
Support: www.svat.com/support Website: www.svat.com
SVAT USA
60 Industrial Parkway #Z64
Cheektowaga, NY
USA 14227
SVAT CANADA 4080 Montrose Road Niagara Falls, ON Canada L2H 1J9
Warranty Terms
- SVAT products are guaranteed for a period of one year from the date of purchase against defects in workmanship and materials. This warranty is limited to the repair, replacement or refund of the purchase price at SVAT's option.
- This warranty becomes void if the product shows evidence of having been mis used, mishandled or tampered with contrary to the applicable instruction manual.
- Routine cleaning, normal cosmetic and mechanical wear and tear are not covered under the terms of this warranty.
- The warranty expressly provided for herein is the sole warranty provided in connection with the product itself and no other warranty, expressed or implied is provided. SVAT assumes no responsibilities for any other claims not specifically Mentioned in this warranty.
- This warranty does not cover shipping costs, insurance, or any other charges.
- You MUST call SVAT before sending any product back for repair. You will be sent a Return Authorization number with return instructions. When returning the product for warranty service, please pack it carefully in the original box with all supplied accessories, and enclose your original receipt or copy, and a brief explanation of the problem and RA#.
- This warranty is valid only in Canada and the continental U.S.
- this warranty cannot be re-issued.

CAUTION
RISK OF ELECTRIC SHOCK,DO NOT OPEN MONITOR
TO REDUCE THE RISK OF ELECTRIC SHOCK,DO NOT REMOVE THE COVER (BACK). NO USER SERVICEABLE PARTS INSIDE.REFER SERVICING TO QUALIFIED SERVICE PERSONNEL.

PI300-SD
FEATURES
Covert DVR Disguised as an Alarm Clock
Hidden in a fully functional, Magnasonic LED alarm clock, you can privately monitor your office, employees, valuables or nanny with this unit's conventional appearance.
Record Over a Month of Footage with the Included 2GB SD Card
Capture over a month of high quality video when you record with the included 2 GB SD card. Easily remove the SD card to backup your footage to a computer.
Motion Activated Recording
Choose to record only when motion is detected and capture just the important events while conserving space on your SD card.
Easily Connect to a TV or Monitor
Review recorded footage easily by connecting the DVR to a television or monitor.
Fully Functional Alarm Clock
This unit also operates as a fully functional LCD alarm clock with alarm and snooze functions.
High Quality MPEG-4 Compression
MPEG-4 compressed recording allows for hours and hours of capturing footage without sacrificing video quality to conserve space.
Compatible With High Capacity SD Memory Cards up to 32 GB
The PI300 comes with an included 2 GB SD card, if you should require more memory for your system, you can install a SD card up to 32 GB.
Lifetime Customer Support
Our customer support team can be reached on our website at www.svat.com/support or via live web chat. Our experts will be happy to assist you in English, French and Spanish.
Disclaimers:
- Recording capacity may vary based on recording resolution and quality, lighting conditions and movement in the scene. Based on a 2GB SD card, using lowest quality settings.
- Product may not be exactly as shown on the package. Some images are used for illustration purposes only.
- SVAT does not endorse any SVAT products for illegal activities. SVAT is not responsible or liable in any way for any damage, vandalism, theft or any other action that may occur while an SVAT product is in use by the purchaser.
PI300-SD
TABLE OF CONTENTS
Need Help Page 1
Warranty Information 2
Features 3
Table of Contents 4
What's Included 4
Buttons and Connections 5
Installation 6
Introduction 7
Setting the LCD Alarm Clock 8
Main Menu 9
DVR Settings 10
Search and Play 10
Set Date/Time 10
Set Motion Detection 11
Motion Detection Sensitivity 11
Manual Record 12
Schedule Record 12
Motion Record 13
Continuous Record 13
SD Card Status 14
System Status 15
Power ON Setup 15
Factory Default 16
Camera Specifications 16
DVR Specifications 17
WHAT'S INCLUDED
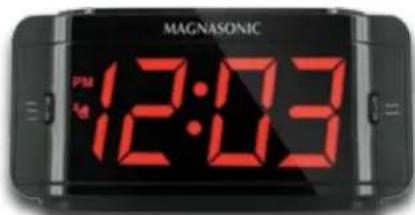

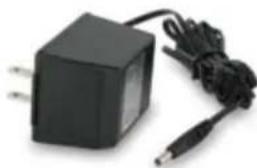
Covert DVR Alarm Clock 2GB SD Card
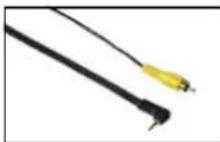
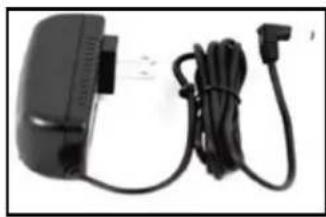
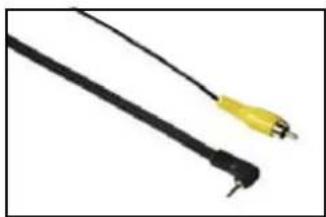
Power Adapter RCA Cable
- User Manual
Lifetime Live Customer Support
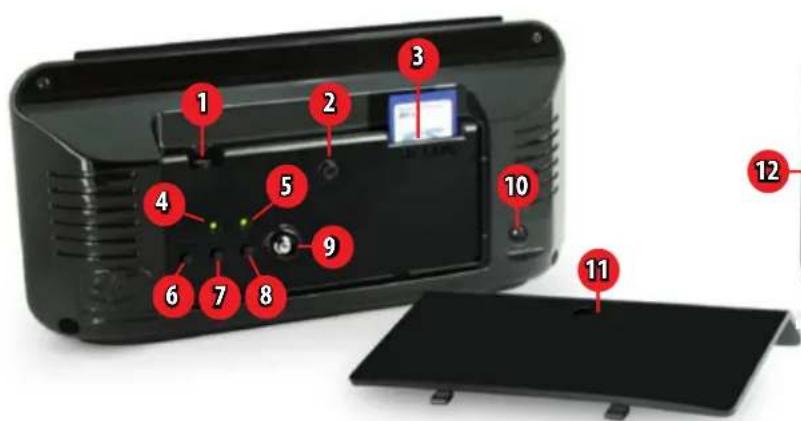
- 1/4" RCA Jack: Connect RCA video cable to this location
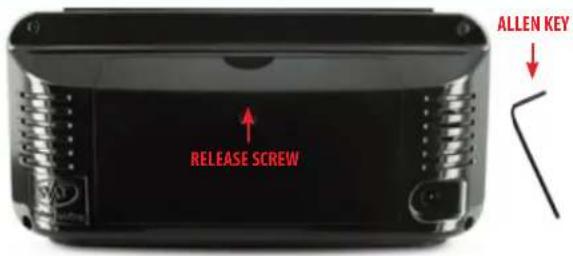
- Release Screw: Remove using provided Allen Key to remove back of alarm clock
- SD Card Slot: Insert SD Card in this slot
- Record LED: Indicates recording
- Power LED: Indicates unit is connected to power source
- Stop: Stop manual recording / stop playback / navigate back in menu
- Record: Start manual recording
- Play: Prompts playback / plays video
- Joystick: Operate the menu by moving up, down, left, right and select
menu options - AC Jack: Connect AC Adapter to this location
-
Rear Panel: Serves to disguise and limit access to the control panel
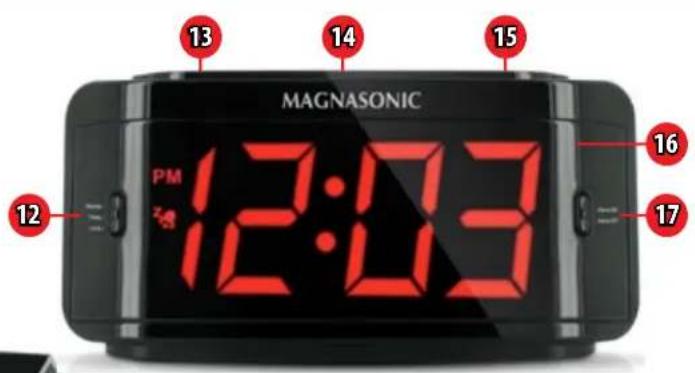
-
Time Switch: Select to adjust time, alarm or set to be locked
Up Alarm Set
Mid Time Set
Down Time Lock
- Hour: Increase hour by one
- Snooze: Snooze button, delays alarm for 9 minutes
- Minute: Increase minute by one
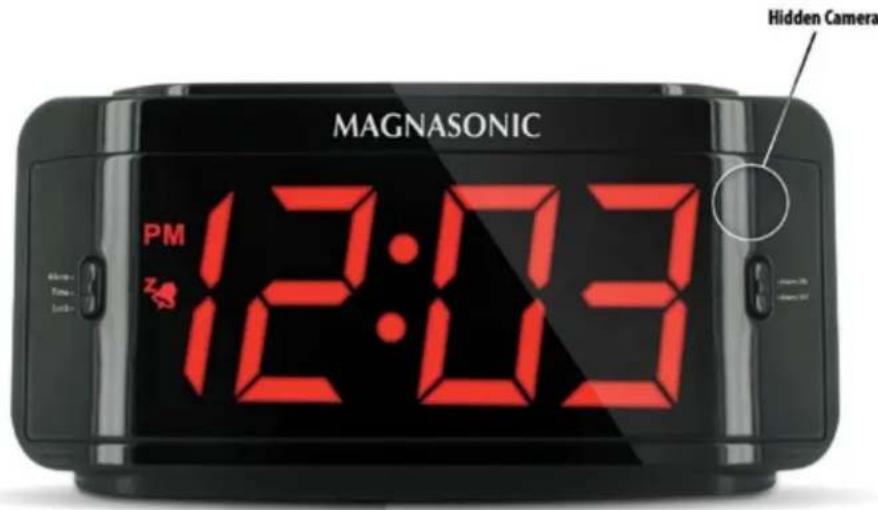
- Camera: Covert pinhole camera
- Alarm Switch:
Up
Alarm On
Down Alarm Off
INSTALLATION
PI300-SD was designed to be quick and easy to set up and to use. Please follow these simple instructions to get your covert DVR up and running in just a matter of minutes.
Powering your PI300
- Connect the included AC adapter to conventional AC outlet.
- Connect AC adapter to AC Jack (10) on the back side of PI300.
Remove the rear panel
- Using the included Allen Key, remove the Release Screw.
- Use your thumb to pull the rear panel away from the main unit.
Connect your PI300 to a TV
- Connect the included RCA cable to the RCA Jack (1) on the back of the PI300.
- Connect the RCA cable to the Yellow RCA Composite Video Input Jack of your television.
View your PI300 on a TV
- Once you have connected your PI300 to your TV, power both units on.
- Set your TV's input source to VIDEO, AUX or whichever source is required for viewing your connected devices.

INTRODUCTION
GETTING STARTED
As soon as you power on your PI300 you will automatically be brought to Monitoring Mode. From here you will be able to access the main menu, trigger manual recording or view previously recorded footage.
The top bar of your screen will display the date and time of your covert DVR. The bottom bar will feature icons indicating what actions are taking place on your PI300.
Please, take the time to read through this manual in its entirety to get the most out of your covert recording experience with the PI300-SD.
PI300-SD ICONS

Manual Record
Indicates manual record is on

Motion Record
Indicates motion record is on

Scheduled Record
Indicates scheduled continuous record is on

Recording
This circle will appear on your display while your covert DVR is recording

Quality Level
Indicates quality level: low (LQ) medium (MQ) and high (HQ)

Resolution
Indicates the resolution being recorded 320x240 or 640x480
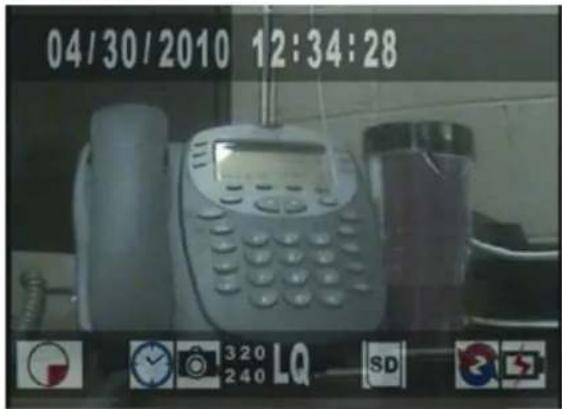
Monitoring Mode

Power
Indicates covert DVR is connected to power source

Overwrite
Indicates overwrite is enabled

SD Card
Indicates SD card is installed
PI300-SD
SETTING THE LCD ALARM CLOCK
PI300 is a covert DVR hidden inside of a fully functional Magnasonic LCD alarm clock. Follow these basic steps to setup the external alarm clock portion of your covert DVR:
To set the time:
- Adjust the Time Switch to the mid position, this will enable time set.
- Press the hour button to increase the time, in hours, by one.
- Press the minute button to increase the time, in minutes, by one.
- When you have finished setting the time, adjust the Time Switch to the down position to prevent any adjustments.
To set the alarm:
- Adjust the Time Switch to the up position, this will enable alarm set.
- Press the hour button to increase the alarm time, in hours, by one.
- Press the minute button to increase the alarm time, in minutes, by one.
- When you have finished setting the alarm time, adjust the Time Switch to the down position to prevent any accidental adjustments.
To enable the alarm:
- Adjust the Alarm Switch to the up position to enable alarm.
- Adjust the Alarm Switch to the down position to disable alarm.
To turn off the alarm/use the snooze button:
When the alarm is set and enabled, an audible buzzer will sound at the set time.
- To turn off activated alarm, move the Alarm Switch down to disable alarm.
- While alarm is activated, press the snooze button to disable the alarm for 9 minutes. After 9 minutes, the alarm will sound again and you will again be prompted to either press the snooze button or turn off the alarm.
NOTE: The time displayed on the LCD Alarm Clock must set independently from the time setting on the covert DVR.
MAIN MENU
To access the main menu, press the joystick button. Navigation throughout the main menu is made easy with the directional joystick: move it up or down to navigate the menu, left or right to adjust settings and use the "STOP" button to go back a screen.
The following options are available in the main menu:
Search and Play: This option prompts the file list, view all of your recorded footage here
Set Date / Time: Configure the date, date format and time for your PI300
Set Motion Detect: Set a customized area for motion detection and adjust the camera's sensitivity to picking up movement
Manual Record: Configure the resolution, frame rate and quality of manual recordings
Schedule Record: Set up a 24 hour recording schedule and adjust the resolution, frame rate and quality for each of your scheduled recording types
SD Card Options: This option displays the size of your SD Card as well as how much space is available. Additionally, you can specify the size of recorded files and set automatic overwriting
System Status: Dispalys all of the current settings of your PI300
Power On Setup: Set your OSD language and video format
Factory Default: Return the settings of your PI300 to its original factory defaults
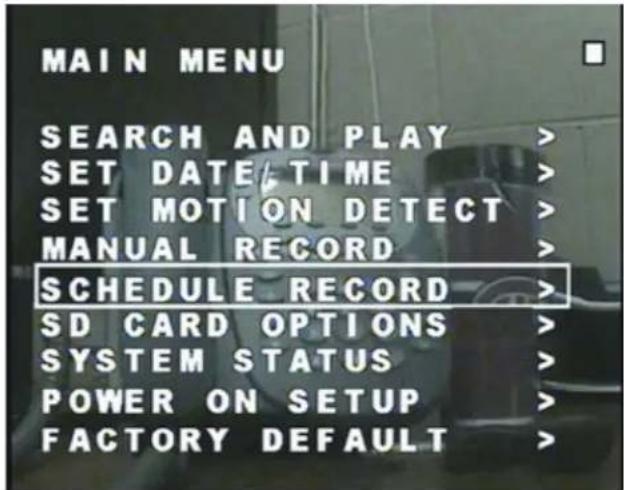
Main Menu Screen
PI300-SD
DVR SETTINGS
Search and Play
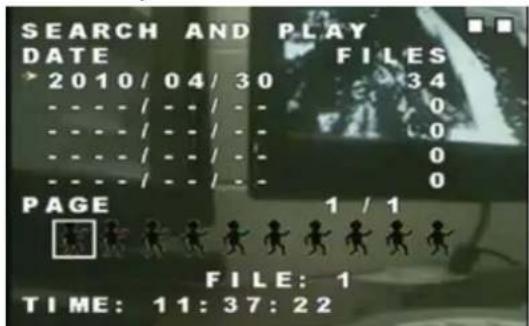
The Search and Play menu lets you view all of your previously recorded footage. Navigate this menu by moving the joystick up and down to scroll through the dates that footage was recorded on. Once the date has been selected, use the joystick left and right to toggle through the recorded files. The recorded files are located towards the bottom of the screen, a white cursor will highlight your selection. Press the joystick button to playback the desired footage.
Date: Details the date in which the video files were recorded on
Files: The number of files that were recorded that day
Page: Identifies the event type that triggered the recording. A icon indicates a scheduled recording, a icon indicates motion recording and a icon indicates manual recording
Time: Displays the start time of recorded video
Set Date / Time
Date Format: Toggle the date to be displayed in either year/month/day, month/day/year or day/month/year
Set Year: Set the year of your covert DVR
Set Month: Set the month of your P1300
Set Day: Set the day
Set Time: Adjust the time
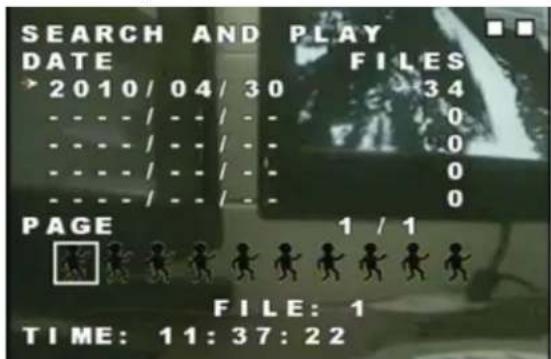
Search and Play Menu
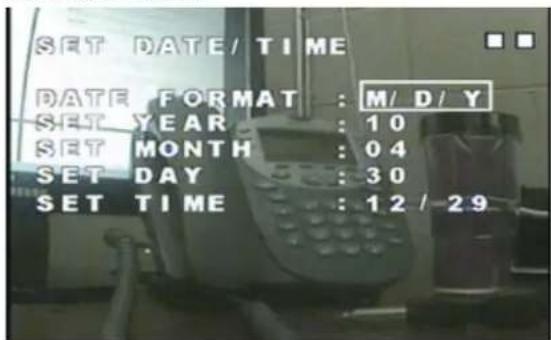
Set Date / Time Menu
PI300-SD
DVR SETTINGS
Set Motion Detection
Adjusting the motion detection area is a convenient feature for you to customize your cover recording experience. This option allows you to eliminate unwanted items that would trigger motion recording, for example, a fan or television screen, allowing you to record only what is important to you.
To adjust motion detection area:
Change the edit mode by pressing the "PLAY" button on the PI300. Navigate the screen moving up, down, left and right then select by pressing the joystick. A red square indicates motion will be detected while a white square indicates no motion will be detected.
Cell Edit: Choose a single area to turn on or off motion activated recording
Add Block: Select the areas of the camera that you want motion recording
Add All: This selects motion recording for the whole screen
Delete Block: Toggle to an area where you do not want motion detection recording
Delete All: This turns off motion recording for the whole screen
Motion Detection Sensitivity
MD Energy
Gauge how much motion is detected on screen so you can set your desired sensitivity level with the Motion Detection Threshold.
Motion Detection Threshold
Alter the degree of motion required to trigger motion activated recording. By decreasing the rehold, the motion detection becomes more sensitive. Likewise, increasing the threshold desensitizes motion detection.
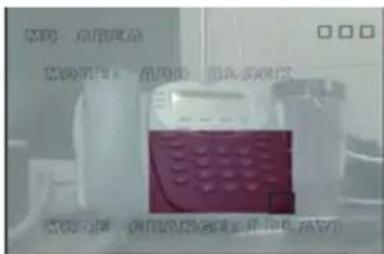
Set Motion Detection Area
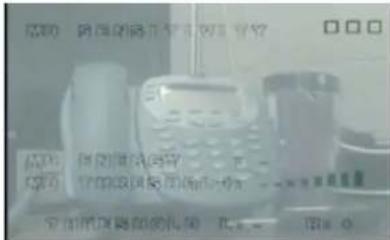
Motion Detection Sensitivity Menu
DVR SETTINGS
Manual Record
Video Size: Select the resolution you wish to record while using Manual Record Mode.
Choose between either 320x240 or 640x480
Frame Rate: Select how many frames per second (FPS) you wish to record. When using the resolution 320x240 you can select 1/2/10/15/20/30 FPS. When using the resolution 640x480 choose between 1/2/10/12 FPS.
Quality: Select the desired quality level of footage recorded in Manual Record Mode.
Choose from low, medium or high quality.
Schedule Record
The Schedule Record Menu allows you to setup a 24 hour recording schedule permitting you to set each hour of the day: choose to record continually, record when motion is detected or not to record at all. As well, it allows you to customize the recording quality for both motion recording and continuous recording that occurs in the scheduling period.
To set the schedule:
- Navigate to the "SCHEDULE SETUP" icon.
- Set the schedule recording mode on or off.
- Each hour of the 24 hour clock is displayed next to an icon indicating a recording type. Scroll through the schedule by moving the joystick up or down to navigate to desired hour.
- Move joystick left or right to adjust the recording type. A indicates motion detection, a indicates constant recording and an indicates no recording.
- When you have finished setting your recording schedule, press "STOP" to exit.
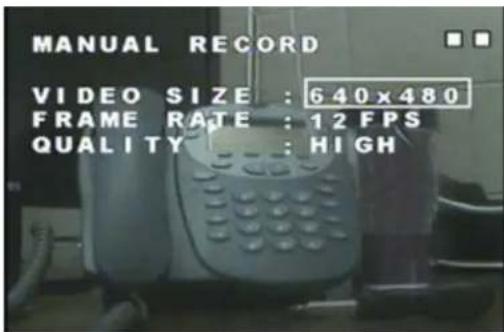
Manual Record Menu
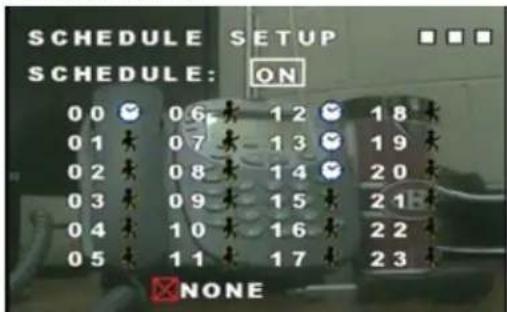
Schedule Record Menu
DVR SETTINGS
Motion Record
From this menu, configure the settings for motion detection recording that occurs in your 24 hour recording schedule.
Video Size: Select the resolution you wish to record while using Motion Record Mode. Choose between either 320x240 or 640x480
Frame Rate: Select how many frames per second (FPS) you wish to record. When using the resolution 320x240 you can select 1/2/10/15/20/30 FPS. When using the resolution 640x480 choose between 1/2/10/12 FPS.
Quality: Select the desired quality level of footage recorded in Motion Record Mode. You can select from low, medium and high quality.
Duration: Select how long you want recording to last once motion is detected. Choose between 5 seconds up to 1 minutes and 30 seconds.
Continuous Record
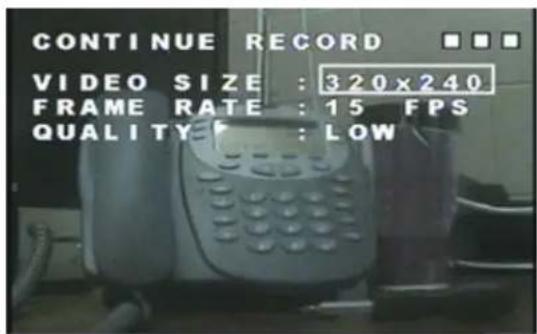
Configure the settings for the continuous recording that occurs in your 24 hour recording schedule.
Video Size: Select the resolution to record while using Continuous Record Mode. Select between 320x240 or 640x480
Frame Rate: Select how many frames per second (FPS) you wish to record. When using the resolution 320x240 you can select 1/2/10/15/20/30 FPS. When using the resolution 640x480 choose between 1/2/10/12 FPS.
Quality: Select the desired quality level of footage recorded in Continuous Record Mode. You can select from low, medium and high quality.
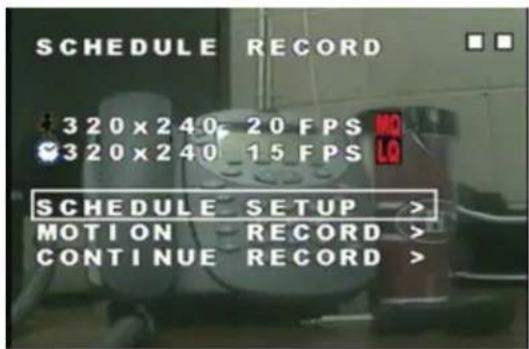
Schedule Record Menu
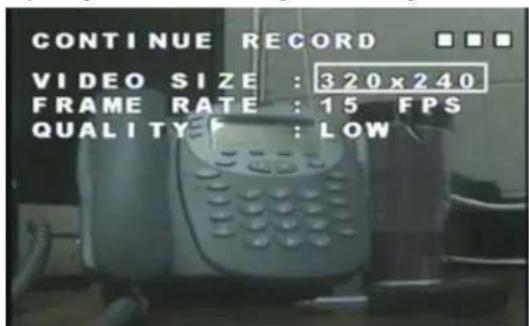
Adjusting Scheduled Recording Video Settings
PI300-SD
DVR SETTINGS
SD Card Options
This menu displays the size of your SD card and how much space is available. As well, you can set the size of files to be recorded, set automatic overwriting and format your SD card from this menu.
Disk Total: Informs you of the max storage size of your SD Card.
Disk Remain: This is the amount of storage space you have left on your SD Card.
Max File Size: Configure the size of your recorded files. Choose anywhere from 3MB up to 100MB per file.
Card Full: Adjust this setting to define what action happens when the SD Card is full. Select "OVERWRITE" to enable automatic overwriting which means that, when your SD Card is full, the PI300 will automatically begin recording over the oldest footage. You can also select "STOP" to have your covert DVR stop recording when the SD Card is full.
Format: If you wish to erase all of the contents on your SD Card, select this option. You will be prompted: "WARNING! DATA ON SD CARD WILL BE CLEANED!"
Press the joystick button to format your SD Card. If you choose not to format your SD Card, simply press the "STOP" button to cancel.
NOTE: Once you have formatted your SD Card, you cannot cancel this process. All of your saved information, whether it be recorded footage or other files, will be erased.
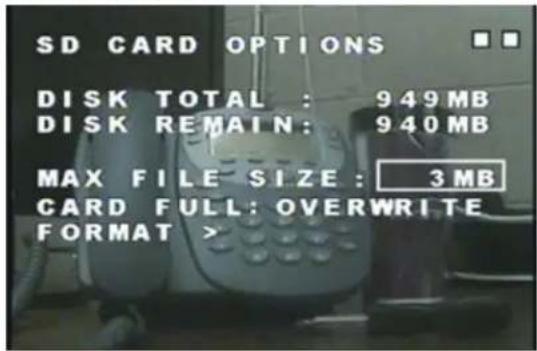
SD Card Options Menu
SD Card Format Screen
DVR SETTINGS
System Status
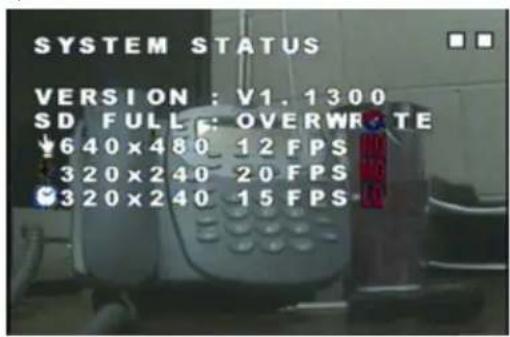
The System Status Menu displays all of your PI300's current settings but features no adjustable values. Use this screen to quickly review all of your covert DVR's current settings.
Version: The current firmware version of your PI300
SD Full: Indicates what action is taken when the SD Card is full
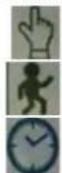
: Displays the resolution, frame rate and quality level of manual record mode
: Displays the resolution, frame rate and quality level of motion record mode
: Displays the resolution, frame rate and quality level of scheduled continue record mode
Power On Setup
From this menu, adjust the language of your PI300's On-Screen Display (OSD) and set your covert DVR for NTSC or PAL video standards.
Language: Select the language for your OSD. You can select from English, Chinese, Spanish, German, Danish, Dutch, Italian and French
Composite: Select the video format for your PI300. Choose from NTSC or PAL standards. If you are using this device in North America, you will want to leave this set to NTSC for it to be compatible with your TV or monitor. Use PAL if you are using this in Europe or Asia
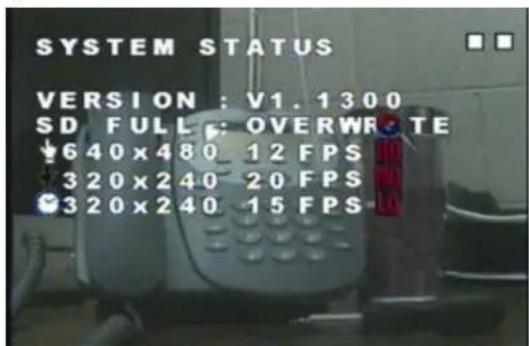
System Status Menu
Power On Setup Menu
PI300-SD
DVR SETTINGS
Factory Default
This option allows you to set your PI300 back to its factory default settings, precisely the way the unit came out of the box.
To set factory default:
- Select the factory default option from the main menu. You will be prompted: "RECALL DEFAULT NOW?"
- To restore your PI300 to factory default press the joystick button to signal yes.
- To cancel resetting your PI300 to factory defaults, press the "STOP" button to cancel.
Reinstall the rear panel
- To disguise and limit access to the control panel, reinstall the rear panel.
- Using the included Allen Key, tighten the Release Screw to secure the rear panel.
System Status Menu
CAMERA SPECIFICATIONS
| Image Sensor 1/6" Color CMOS Sensor | |
| Resolution 640 x 480 | |
| Outdoor Use No | |
| Focal Length Board Lens f3.62mm / F2.8 | |
| Focus Type Fixed | |
| Min. Illumination 2 lux |
| Motion Detection Yes | |
| Viewing Angle 66 Degrees | |
| BLC Auto | |
| AGC Auto | |
| White Balance Auto | |
| Signal Noise 46 dB |
DVR SPECIFICATIONS
| Functionality Simplex | |
| Video Compression MPEG-4 | |
| Resolution 640 x 480, 320 x 240 | |
| Recording Frame Rate 320x240: 1~30FPS, 640 x 480: 1~15FPS | |
| Recording Resolution VGA (640x480)/QVGA (320x240) | |
| Recording Qualities High, Medium, Low | |
| Recording Modes Manual/ Schedule/ Motion Detection | |
| Recording Media SD1.1/1.0 SD/SDHC Card, Max 32GB | |
| Video Format NTSC/PAL | |
| Video Display Output 1 CH RCA Composite | |
| Live Viewing Single Screen | |
| Live Resolution 640 x 480 | |
| Live Frame Rate 30 FPS | |
| Play Search Mode By Date, Time, Record Type | |
| Play Speed | Forward/Rewind: x1/x2/x4/x8/x16/x32 |
| Play Mode | Single Screen |
| OSD and System Menu Display | English |
| OSD Language Display Selectable | |
| Time and Date Stamp Display | Yes |
| Automatic Overwrite Option | Yes |
| LED Indicators | Power, Record |
| Housing Material ABS Plastic | |
| Housing Color | Midnight Black |
| Battery Backup (for DVR settings only) | Yes. Internal |
| Contents Backed Up | DVR settings only |
| Power Adapter Input | AC 110-240V (switching mode) |
| Operating Temperature | 41°F ~ 113°F |
| Operating Humidity | 80% |
| Dimensions | 8" x 4" x 2" |
| Weight | 1.2 lbs. |
| Disk Full Warning | Full Stop / Overwrite (Selectable) |
NOTES
PI300-SD

Specification Sheets
User Manuals
Software Updates
Quick Start Guides
Firmware Upgrades
www.svat.com
Disclaimer
SVAT does not endorse any of SVAT products for any illegal activities. SVAT is not responsible or liable in any way shape or form for any damage, vandalism, theft or any other action that may occur while a SVAT product is in use by the purchaser.

VISITEZ-NOUS SUR LE WEB!
INFORMATIONS DE LA GARANTIE DU PRODUIT
60 Industrial Parkway #Z64
Cheektowaga, NY
USA 14227
SVAT CANADA
4080 Montrose Road
Niagara Falls, ON
Canada L2H 1J9