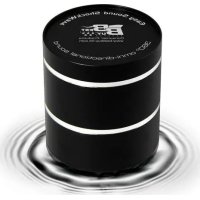
Easy Sound Shockwave - Docking station Best Buy - Free user manual and instructions
Find the device manual for free Easy Sound Shockwave Best Buy in PDF.



| Brand | Best Buy |
| Model | Easy Sound Shockwave |
| Product type | Docking station / Vibration speaker |
| Dimensions | 51 mm × 59 mm |
| Weight | 285 grams |
| Power supply | Rechargeable lithium battery via USB |
| Output power | 5 W |
| Frequency response | 80 Hz - 18 kHz |
| Impedance | 2 Ohms |
| Connectivity | Mini USB (charging) + 3.5mm audio input |
| LED indicator | Red (charging) / Green (full battery) |
| Main functions | Vibration speaker, amplification via surfaces, wall mountable |
| Included accessories | Main unit, audio+USB cable, mounting accessory, carrying pouch, manual, warranty card |
| Maintenance and cleaning | Clean the silicone base with a damp cotton cloth |
| Safety | Do not expose to moisture, do not disassemble, use only specified voltage |
| Spare parts and repairability | No user-serviceable parts; contact qualified technical service |
| General information | Use on a flat surface or mount with the provided accessory |
Frequently Asked Questions - Easy Sound Shockwave Best Buy
User questions about Easy Sound Shockwave Best Buy
0 question about this device. Answer the ones you know or ask your own.
Ask a new question about this device
Download the instructions for your Docking station in PDF format for free! Find your manual Easy Sound Shockwave - Best Buy and take your electronic device back in hand. On this page are published all the documents necessary for the use of your device. Easy Sound Shockwave by Best Buy.
USER MANUAL Easy Sound Shockwave Best Buy
Introduction. 16
Box contents. 16
Safety instructions. 17
Warnings. 18
Introduction to functions. 20
Connection diagram. 21
Precautions. 22
Attachment accessory. 23
Troubleshooting 24
Technical specifications. 26
Introduction
Thank you for buying the new Best Buy vibrospeaker. Please read the manual carefully to familiarize yourself with the system before configuring it and starting to use it. Please also check you have all the necessary elements to use the unit and that it is not damaged. But, above all, enjoy your music thanks to your new acquisition.
Box contents
Sound unit
Audio cable + USB
- Attachment accessory
Travel bag
- Instruction manual
- Guarantee card
Safety instructions
CAUTION

To reduce the risk of electric shock, do not dismantle the unit and avoid exposing it to rain or damp. There are no user-adjustable parts on the inside. Consult qualified staff.
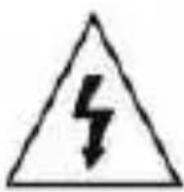
Explanation of graphic symbols
The lightning bolt in the triangle indicates the presence of dangerous non-insulated voltage inside the product, enough to cause an electric shock to a person.

The exclamation mark in a triangle informs of the presence of important use and maintenance instructions in the manuals provided with the product.
Warnings
- Read the instructions - All safety and use instructions must be read before starting to use the unit.
- Keep the instructions - Manuals must be kept for future reference.
- Heed the warnings - You must heed all the warnings shown both on the unit and in the manuals.
- Follow the instructions - All instructions for operation and use must be followed.
- Installation - Install the unit following the manufacturer's instructions.
- Power - This product must only be used with the voltage indicated on the label located near the power cable connection of the unit. If you are not sure of the voltage in your home, you're your supplier or your electricity company.
- Repair – Do not try to repair the product yourself, since opening and removing the casing may expose you to high voltage and other dangers. Always use a qualified technical service.
Be careful not to place the unit in the following locations:
- Close to heat sources or in the direct sunlight.
In damp or wet places.
In excessively dusty places.
In poorly ventilated areas. - On surfaces prone to excessive vibration.
Never use a defective or damaged cable to power the unit.
CAUTION
To reduce the risk of electric shock, do not try to dismantle or open the casing of the unit. There are no user-adjustable parts on the inside. For repair purposes, consult qualified technical staff only.
Introduction to functions
- Connect the Mini USB cable to the unit, then connect the 3.5mm audio cable to the sound source: PC, laptop, MP3 player, mobile phone, etc. Turn the switch to the "ON" position to listen to the music from the sound source used. If you do not wish to continue using the unit, please turn the switch to the "OFF" position.
- When the LED blinks red and the sound begins to weaken, this means that the battery needs recharging. Please turn the side switch to the "OFF" position and then connect the USB cable to the PC, laptop or DC adapter to recharge the unit until the red Light turns green. The battery will then be fully charged.
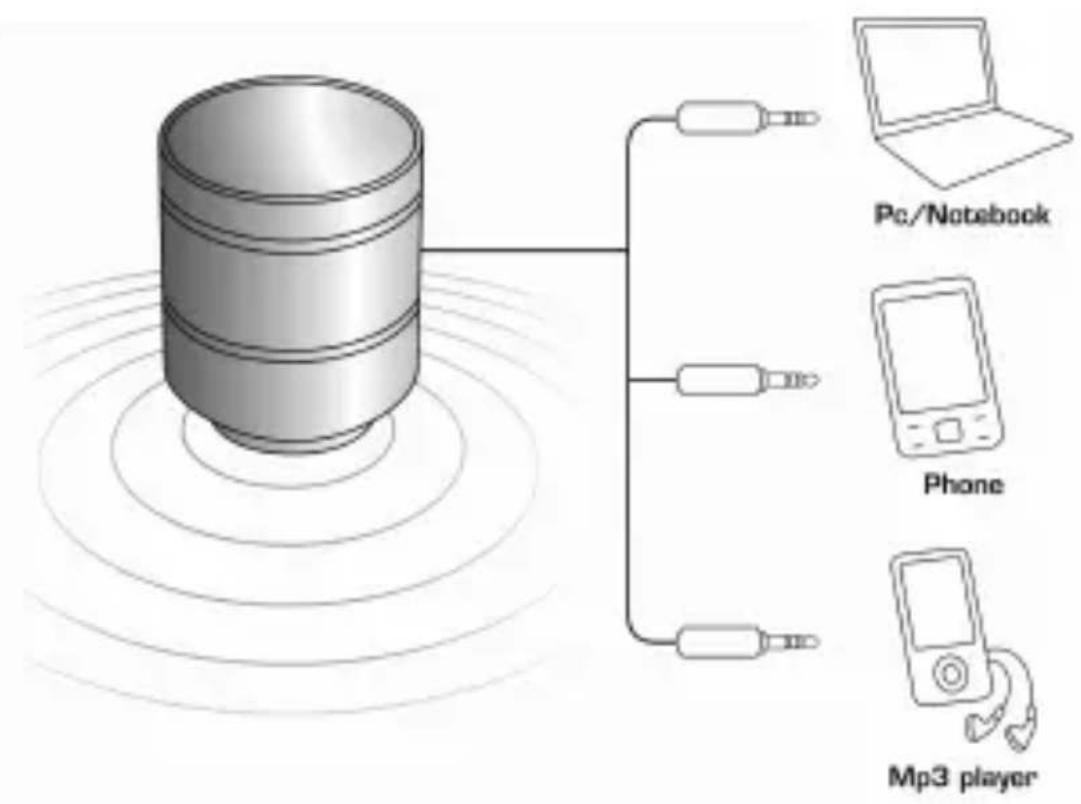
Connection diagram
Precautions
- Remove the protective sticker from the bottom of the unit, but do not remove the grey coloured rubber.
- Place the vibro-speaker on a suitable surface (table, shelf, etc.).
- Press down lightly on the top of the unit to achieve a better connection between the silicone gel and the surface used to amplify the sound.
- Make the cable connection following the diagram shown above in the manual.
- Do not open or try to dismantle this product.
- It is normal for your speaker to heat up slightly if used for a long period or at high volume.
- Please use damp cotton wool to clean the silicone gel when dirty.
WARNING: Do not throw away the film which protects the silicone gel. You should place it again in the unit if you use the mounting socket.
Attachment accessory
If you wish to fix the device firmly to horizontal or vertical surfaces, use the circular accessory with three holes included with the device. Screw the accessory firmly to the surface of the furniture with three screws. Then screw the unit to the attachment accessory and play your music as normal.
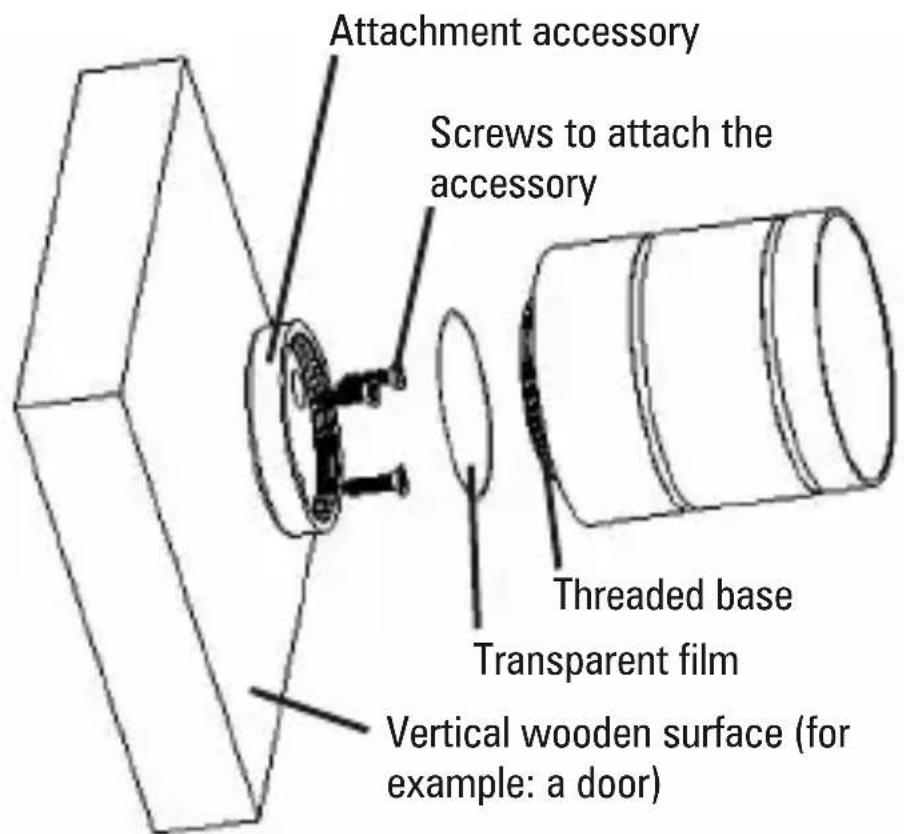
The attachment accessory is not necessary when the device is used on a horizontal surface (for example: a table).
Troubleshooting
No sound
POSSIBLE CAUSES
The USB cable is not properly connected.
SOLUTION
Connect the USB cable again.
The sound is weak
POSSIBLE CAUSES
- The signal from the audio source is weak (or at a low volume).
- The surface on which the unit has been placed is not flat or rigid enough.
SOLUTION
- Adjust the signal from the audio source or turn up the volume.
- Place the unit on a more suitable surface.
Audio distorsion
POSSIBLE CAUSES
- The audio source is not properly adjusted.
- Volume too high.
- The unit is not properly placed on the surface.
- Bad sound and the unit "shakes".
SOLUTION
- Readjust the audio source.
- Turn down the volume.
- Place the unit properly on the surface being used.
- Clean silica gel and make sure the speaker sticks to the surface.
Technical specifications
Output power 5W
Frequency 80Hz -- 18Khz
Power supply Lithium battery, USB connection
Impedance 2 Ohms
Size 51mm x 59mm
Weight 285 grams
Specifications subject to change without prior notice.
WARNING: The battery has a specific number of charging and discharging cycles. When these cycles have been exceeded, the battery may need to be changed. A battery that has completed its life cycle is not covered by the guarantee.
Index
Introduction. 28
Specifications techniques. 38
Introduction
Specifications techniques
Your appliance contains valuable materials which can be recovered or recycled. Leave it at a local civic waste collection point.
Participonsalaprotectiondel'environnement!
- INTRODUCTION
- BOX CONTENTS
- SAFETY INSTRUCTIONS
- CAUTION
- EXPLANATION OF GRAPHIC SYMBOLS
- WARNINGS
- INTRODUCTION TO FUNCTIONS
- PRECAUTIONS
- ATTACHMENT ACCESSORY
- TROUBLESHOOTING
- NO SOUND
- THE SOUND IS WEAK
- POSSIBLE CAUSES
- AUDIO DISTORSION
- SOLUTION
- TECHNICAL SPECIFICATIONS
- INDEX
- SPECIFICATIONS TECHNIQUES
- PARTICIPONSALAPROTECTIONDEL'ENVIRONNEMENT
Brand : Best Buy
Model : Easy Sound Shockwave
Category : Docking station