Series 5000 QC5370 - Beard trimmer PHILIPS - Free user manual and instructions
Find the device manual for free Series 5000 QC5370 PHILIPS in PDF.
Download the instructions for your Beard trimmer in PDF format for free! Find your manual Series 5000 QC5370 - PHILIPS and take your electronic device back in hand. On this page are published all the documents necessary for the use of your device. Series 5000 QC5370 by PHILIPS.
USER MANUAL Series 5000 QC5370 PHILIPS
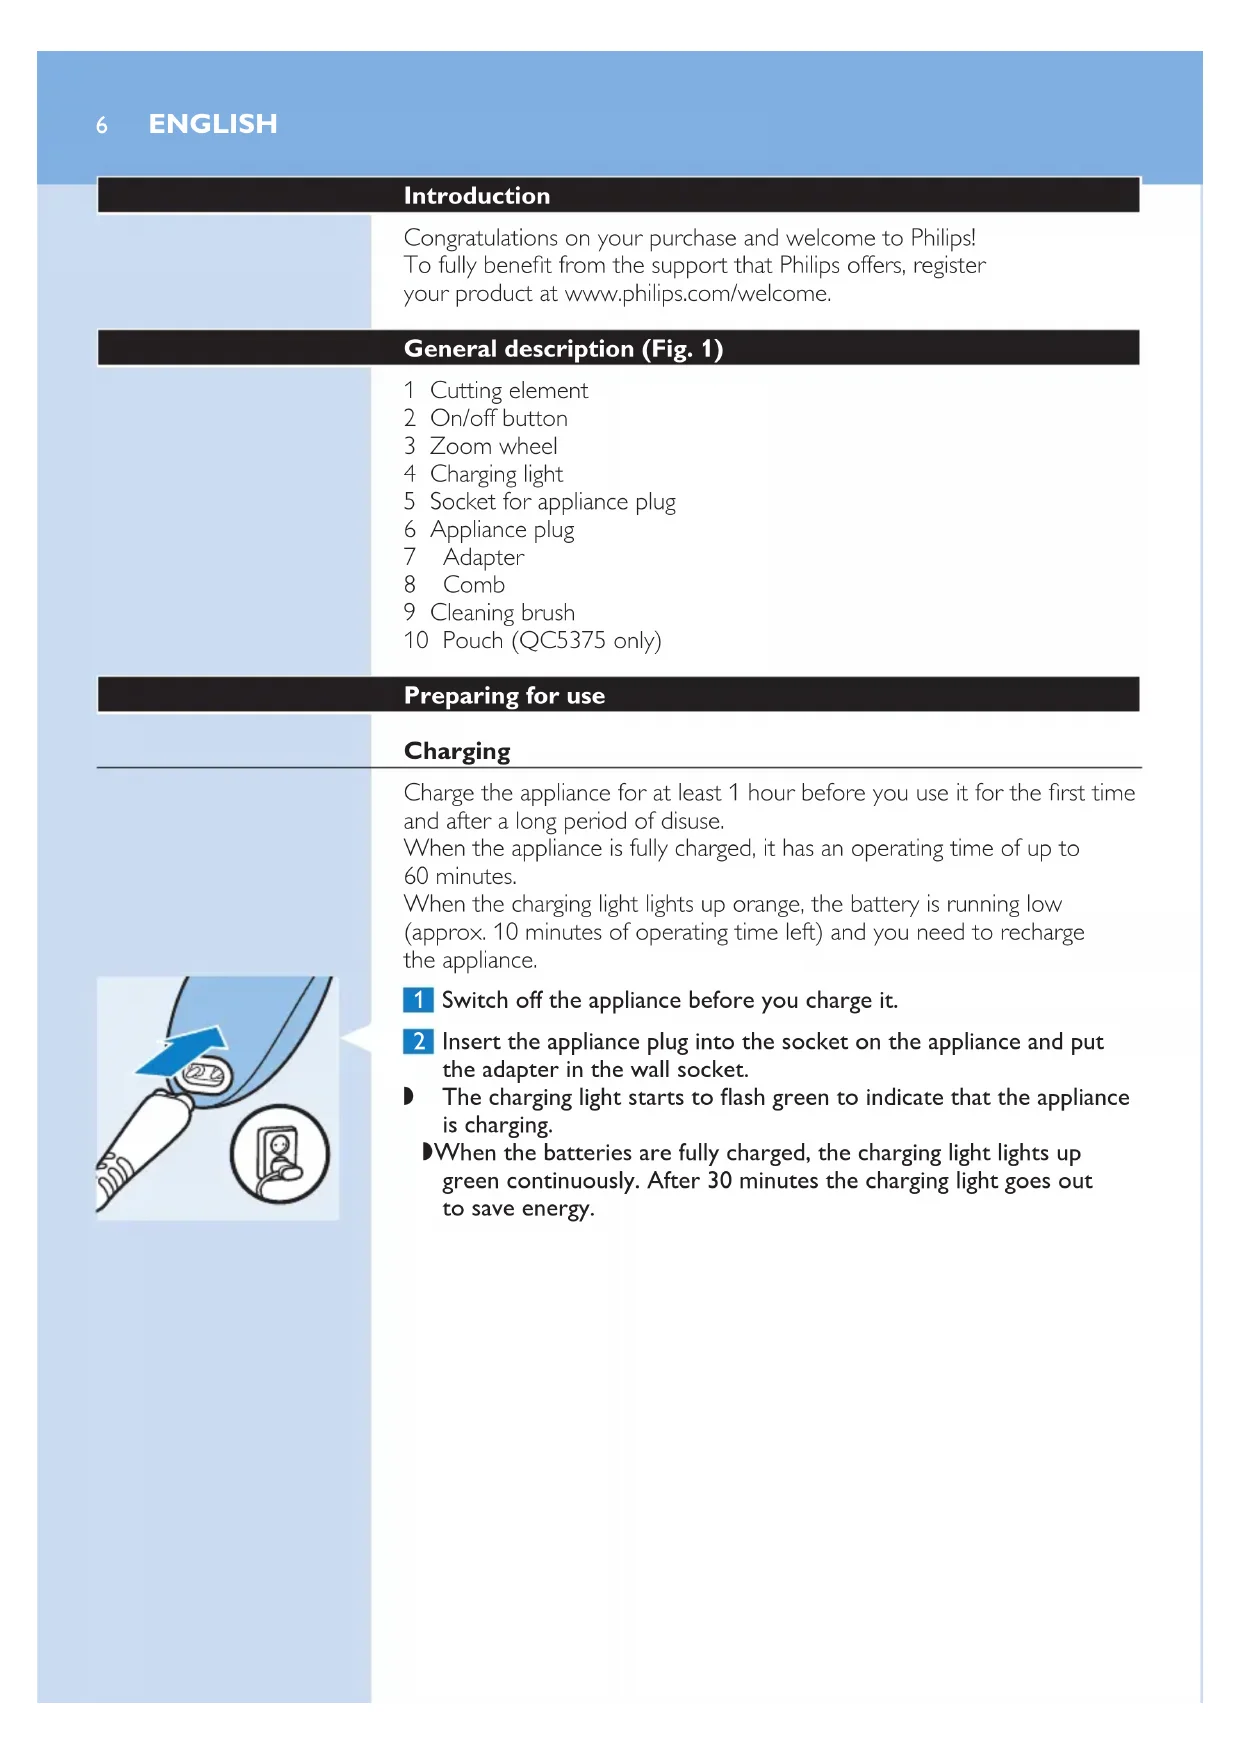
QC5375 QC5370 User manual1QC5375, QC5370 English 6 Dansk 10 DEutsCh 14 Ελληνικα 18 Español 22 suomi 26 Français 30 italiano 34 nEDErlanDs 38 norsk 42 português 45 svEnska 49 türkçE 536 Introduction Congratulations on your purchase and welcome to Philips! To fully benet from the support that Philips offers, register your product at www.philips.com/welcome. General description (Fig. 1) 1 Cutting element 2 On/off button 3 Zoom wheel 4 Charging light 5 Socket for appliance plug 6 Appliance plug 7 Adapter 8 Comb 9 Cleaning brush 10 Pouch (QC5375 only) Preparing for use Charging Charge the appliance for at least 1 hour before you use it for the rst time and after a long period of disuse. When the appliance is fully charged, it has an operating time of up to 60 minutes. When the charging light lights up orange, the battery is running low (approx. 10 minutes of operating time left) and you need to recharge the appliance. 1 Switch off the appliance before you charge it. 2 Insert the appliance plug into the socket on the appliance and put the adapter in the wall socket. , The charging light starts to ash green to indicate that the appliance is charging. , When the batteries are fully charged, the charging light lights up green continuously. After 30 minutes the charging light goes out to save energy. ENGLISHUsing the appliance Note: You can also use the appliance directly from the mains when the battery is empty. Clipping with comb The appliance comes with 1 comb for different hair lengths. The hair length settings are indicated in millimetres on the comb. The settings correspond to the remaining hair length after clipping. 1 Slide the comb straight into the guiding grooves on both sides of the handle (‘click’). 2 Turn the zoom wheel to set the comb to the desired setting. , The settings in the window show the selected hair length in millimetres after cutting. Tip: Write down the hair length settings you selected to create a certain hairstyle as a reminder for future clipping sessions. 3 Press the on/off button to switch on the appliance. 4 Move the appliance through the hair slowly. Tips - To clip most effectively, move the appliance against the hair growth direction. - Since all hair does not grow in the same direction, you need to move the appliance in different directions (upwards, downwards and across). - Make sure that the at part of the comb is always fully in contact with the scalp to obtain an even result. - Make overlapping passes over the head to ensure that you cut all the hair that needs to be cut. 5 Regularly remove cut hair from the comb. If a lot of hair has accumulated in the comb, remove the comb from the appliance and blow and/or shake the hair out of it. ENGLISH 7Contouring without comb You can use the appliance without comb to clip hair very close to the skin (0.5mm) or to contour the neckline and the area around the ears. Be careful when you clip without comb because the cutting element removes every hair it touches. 1 Pull the comb off the appliance. 2 Before you start to contour the hairline around the ears, comb the hair ends over the ears. 3 Press the on/off button to switch on the appliance. 4 Tilt the appliance in such a way that only one edge of the cutting element touches the hair ends when you shape the contours around the ears. Only cut the hair ends. The hairline should be close to the ear. 5 To contour the neckline and sideburns, turn the appliance and make downward strokes. Move the appliance slowly and smoothly. Follow the natural hairline. ENGLISH8Cleaning Clean the appliance every time you have used it with the cleaning brush and with warm water (max. 40°C). Never use compressed air, scouring pads, abrasive cleaning agents or aggressive liquids such as petrol, acetone or ethereal oils to clean the appliance. Note: The appliance does not need any lubrication. 1 Switch off the appliance and disconnected it from the mains. 2 Remove the comb from the appliance and rinse it under the tap. 3 Brush the outside of the shaving unit with the brush supplied. 4 Push the centre top end of the cutting element upwards with your thumb until it opens. 5 Use the cleaning brush to remove the cut hair. 6 Clean the appliance under a warm running tap to ush out the cut hair. ENGLISH 910 Introduktion Tillykke med dit køb og velkommen til Philips! For at få fuldt udbytte af den support, Philips tilbyder, skal du registrere dit produkt på www.philips.com/welcome. Generel beskrivelse (g. 1) 1 Skærenhed 2 On/off-knap 3 Zoomring 4 Opladeindikator med lys 5 Tilslutningsstik 6 Apparatstik 7 Adapter 8 Kam 9 Rensebørste 10 Etui (kun QC5375) Klargøring Opladning Oplad apparatet i mindst 1 time før første anvendelse eller efter en lang periode, hvor det ikke er blevet brugt. Når apparatet er fuldt opladet, har det en brugstid på op til 60 minutter. Når opladeindikatoren lyser orange, er batteriet ved at være tomt (ca. 10 minutters brugstid tilbage), og du skal genoplade apparatet. 1 Sluk for apparatet, før du oplader det. 2 Sæt apparatstikket i apparatet og adapteren i stikkontakten. , Opladeindikatoren begynder at blinke grønt for at indikere, at apparatet er under opladning. , Når batterierne er fuldt opladede, lyser opladeindikatoren konstant grønt. Efter 30 minutter slukker opladeindikatoren for at spare på energien. DANSKSådan bruges apparatet Bemærk: Du kan også bruge apparatet direkte fra stikkontakten, når batterierne er tomme. Klipning med kam Apparatet leveres med 1 kam til forskellige hårlængder. Hårlængdeindstillingerne er angivet i millimeter på kammen. Indstillingerne svarer til hårets længde efter klipningen.