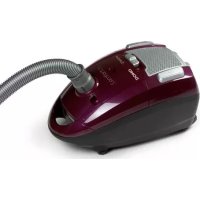
DO7236S - Aspirateur DOMO - Free user manual and instructions
Find the device manual for free DO7236S DOMO in PDF.
Download the instructions for your Aspirateur in PDF format for free! Find your manual DO7236S - DOMO and take your electronic device back in hand. On this page are published all the documents necessary for the use of your device. DO7236S by DOMO.
USER MANUAL DO7236S DOMO
nicht in der Garantie eingeschlossen.
WARRANTY This appliance has a two year warranty period. During this period the manufacturer is
responsible for any failures which are the direct result of construction failure. When these
failures occur the appliance will be repaired or replaced if necessary. The warranty will
not be valid when the damage to the appliance is caused by wrong use, not following the
instructions or repairs executed by a third party. The warranty will only be valid if the
warranty application has been completed by the dealer at the time of purchase. All parts,
such as brushes, which are subject to wear, are excluded from the warranty
Geschäft, in dem Sie das Produkt gekauft haben.
RECYCLING INFORMATION The symbol on the product or on its packaging indicates that this product may not
be treated as household waste. Instead it shall be brought to the applicable collection
point for recycling of electrical and electronic equipment. By ensuring this product is
disposed of correctly, you will help prevent potential negative consequences for the
environment and human health, which could otherwise be caused by inappropriate
waste handling of this product. For more detailed information about recycling of this
product, please contact your local city ofce, your household waste disposal service or
the shop where you purchased the product.DO7236S VEILIGHEIDSVOORSCHRIFTEN Om het risico op brand, elektrocutie en verwondingen te verminderen :
13DO7236S To prevent the risk of re, electrocution and injury :
1. Never leave the vacuum cleaner unattended when the appliance is plugged in.
Remove the plug from the socket when not in use or when you are going to clean the
2. To prevent the risk of electrocution never use the vacuum cleaner outdoors or on a
3. This vacuum cleaner is not a toy. Strict supervision is necessary when the vacuum
cleaner is used near or by children.
4. Only use the vacuum cleaner as described in the booklet. Only use accessories
recommended by the manufacturer.
5. Don’t use the appliance when the plug or the cord has been damaged. When the
vacuum cleaner malfunctions, when it has been dropped, has been damaged, has been
put outside or has fallen into water, you must take it to a service centre for a check up.
6. Don’t pull the cord. Don’t use the cord as a handle. Don’t jam the cord between a
door or pull it around corners or sharp edges. Don’t pull the vacuum cleaner over the
cord. Keep the cord away from hot surfaces.
7. Don’t remove the plug from the socket by pulling the cord. Grasp the plug to
remove it from the socket.
8. Don’t touch the plug or the vacuum cleaner when you’ve wet hands.
9. Don’t insert any object in the openings of the vacuum cleaner. Don’t use the
vacuum cleaner when one of the openings is blocked.
10. Keep hair, loose clothing, ngers and other body parts away from openings in the
vacuum cleaner or any moving parts.
11. Be very careful when you vacuum the stairs.
12. Always remove the plug from the socket when cleaning the unit or when removing
or placing accessories.
13. Don’t clean up water.
14. Never immerse in water to clean the unit.
15. Check the exible hose regularly. Don’t use the hose when damaged.
16. The appliance is not intended for use by persons (including children) with reduced
physical, sensory or mental capabilities, or lack of experience and knowledge, unless
they have been given supervision or instructions concerning the use of the appliance
by a person responsible for their safety.
17. Never allow children to play with the appliance.
18. Keep the appliance out of children’s reach.
DESCRIPTION OF THE PARTS
3. Suction power regulation
4. Lid of the accessories
5. Indication for bag change
6. Clip opening dust bag compartment
ASSEMBLY Attach the hose to the hose connection of the vacuum cleaner.
Attach the metal tube to the hose.
Connect the oor brush to the metal tube.
INSTRUCTIONS FOR USE
1. Button to rewind the cable :
Pull the cord out of the appliance as far as necessary. Make sure you don’t exceed the
red marking on the wire. Keep hold of the plug during the rewinding of the cord. You
can press the button with your foot to rewind the cable.
2. Suction power regulation :
Use the sliding knob to adjust the suction power of your vacuum cleaner.
3. When the red marking that indicates the change of the dust bag becomes visible,
you should check the following :
- Is the dust bag full ? If so change it.
- Is the dust bag blocked ? If so remove the blockage immediately.
CHANGING THE DUST BAG The vacuum cleaner cannot be used without the dust bag. When the dust bag is full or
damaged you need to replace it immediately.
1. Pull the knob of the lid of the dust bag to open it.
2. Remove the dust bag and place a new one in the correct position.
The motor lter is situated in the dust bag compartment. You need to change or clean
the motor lter when it is visible dirty. This can improve the efciency of your
vacuum cleaner and prolong the life. It is recommended to at least clean the motor
2. Clean it thoroughly
3. Let it dry by exposior to air
4. Replace it into the vacuum cleaner
when the micro lter, which is situated at the back, becomes dirty you need to clean
it or replace it. When the lter becomes dirty the airow will be obstructed, with the
possibility of over heating your vacuum cleaner. This can lead to a malfunction of
your vacuum cleaner.
1. remove the lid of the micro lter.
2. Clean the lter thoroughly by beating it out or replace it. Don’t wash !
3. Replace the lter.
4. Place the lid back on the vacuum cleaner.