
SN5147 - Cordless phone VTECH - Free user manual and instructions
Find the device manual for free SN5147 VTECH in PDF.
| Brand | VTech |
| Model | SN5147 |
| Product type | Digital cordless telephone |
| Base power supply | AC adapter included |
| Handset power supply | Rechargeable NiMH battery (model BT205662) |
| Number of handsets | 1 (expandable) |
| Range | Up to 50 meters indoors (estimated) |
| Directory | Yes, capacity not specified |
| Speakerphone | Yes (hands-free) |
| Caller ID | Yes |
| DECT compatibility | Yes |
| Cleaning | Disconnect before cleaning, use a soft damp cloth |
| Safety | Do not expose to water or extreme temperatures |
| Recommended spare part | Replacement battery BT205662 |
| Repairability | Take to a qualified service center |
| User manual | 62 pages, available in PDF |
| Warranty | Not specified in the manual |
Frequently Asked Questions - SN5147 VTECH
User questions about SN5147 VTECH
0 question about this device. Answer the ones you know or ask your own.
Ask a new question about this device
Download the instructions for your Cordless phone in PDF format for free! Find your manual SN5147 - VTECH and take your electronic device back in hand. On this page are published all the documents necessary for the use of your device. SN5147 by VTECH.
USER MANUAL SN5147 VTECH
Go to www.vtechphones.com (US) to register your product for enhanced warranty support and latest VTech product news.
Go to phones.vtechcanada.com (Canada) for the latest VTech product news.
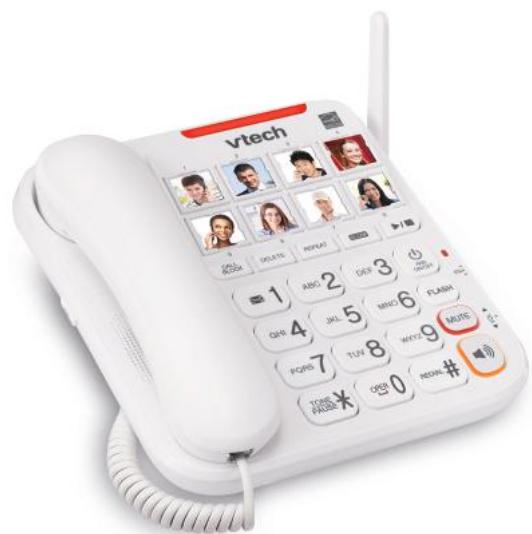
Amplified Corded/Cordless Answering System with Big Buttons and Display
Scan the QR code for support information

(US)

(CA)
Congratulations
on purchasing your new VTech product. Before using this telephone, please read Important safety instructions.
This quick start guide provides you with basic installation and use instructions. A limited set of features are described in abbreviated form. Please refer to the online user's manual for a full set of installation and operation instructions at www.vtechphones.com. In Canada, please visit phones.vtechcanada.com.

Telephones identified with this logo have reduced noise and interference when used with most T-coil equipped hearing aids and cochlear implants. The TIA-1083 Compliant Logo is a trademark of the Telecommunications Industry Association. Used under license.

The ENERGY STAR® program (www.energystar.gov) recognizes and encourages the use of products that save energy and help protect our environment. We are proud to mark this product with the ENERGY STAR® label indicating it meets the latest energy efficiency guidelines.
Important safety instructions
When using your telephone equipment, basic safety precautions should always be followed to reduce the risk of fire, electric shock and injury, including the following:
- Read and understand all instructions.
- Follow all warnings and instructions marked on the product.
- Use only with UL listed Bluetooth devices.
-
Unplug this product from the wall outlet before cleaning. Do not use liquid or aerosol cleaners. Use a damp cloth for cleaning.
-
CAUTION: Do not install the telephone base at a height above 2 meters.
- Do not use this product near water such as near a bath tub, wash bowl, kitchen sink, laundry tub or a swimming pool, nor in a wet basement or shower.
- Do not place this product on an unstable table, shelf, stand or other unstable surfaces.
- Avoid placing the telephone system in places with extreme temperature, direct sunlight, or other electrical devices. Protect your phone from moisture, dust, corrosive liquids and fumes.
- Slots and openings in the back or bottom of the telephone base and handset are provided for ventilation. To protect them from overheating, these openings must not be blocked by placing the product on a soft surface such as a bed, sofa or rug. This product should never be placed near or over a radiator or heat register. This product should not be placed in any area where proper ventilation is not provided.
- This product should be operated only from the type of power source indicated on the marking label. If you are not sure of the type of power supply in your home or office, consult your dealer or local power company.
- Do not allow anything to rest on the power cord. Do not install this product where the cord may be walked on.
- Never push objects of any kind into this product through the slots in the telephone base or handset because they may touch dangerous voltage points or create a short circuit. Never spill liquid of any kind on the product.
- To reduce the risk of electric shock, do not disassemble this product, but take it to an authorized service facility. Opening or removing parts of the telephone base or handset other than specified access doors may expose you to dangerous voltages or other risks. Incorrect
reassembling can cause electric shock when the product is subsequently used.
-
Do not overload wall outlets and extension cords.
-
Unplug this product from the wall outlet and refer servicing to an authorized service facility under the following conditions:
-
When the power supply cord or plug is damaged or frayed.
If liquid has been spilled onto the product.
If the product has been exposed to rain or water. - If the product does not operate normally by following the operating instructions. Adjust only those controls that are covered by the operation instructions. Improper adjustment of other controls may result in damage and often requires extensive work by an authorized technician to restore the product to normal operation.
- If the product has been dropped and the telephone base and/or handset has been damaged.
-
If the product exhibits a distinct change in performance.
-
Avoid using a telephone (other than cordless) during an electrical storm. There is a remote risk of electric shock from lightning.
- Do not use the telephone to report a gas leak in the vicinity of the leak. Under certain circumstances, a spark may be created when the adapter is plugged into the power outlet, or when the handset is replaced in its cradle. This is a common event associated with the closing of any electrical circuit. The user should not plug the phone into a power outlet, and should not put a charged handset into the cradle, if the phone is located in an environment containing concentrations of flammable or flame-supporting gases, unless there is adequate ventilation. A spark in such an environment could create a fire or explosion. Such environments might include: medical use of oxygen without adequate ventilation; industrial gases (cleaning solvents; gasoline vapors; etc.); a leak of natural gas; etc.
- Only put the handset of your telephone next to your ear when it is in normal talk mode.
- The power adapter is intended to be correctly oriented in a vertical or floor mount position. The prongs are not designed to hold the plug in place if it is plugged into a ceiling, under-the-table or cabinet outlet.
-
For pluggable equipment, the socket-outlet shall be installed near the equipment and shall be easily accessible.
-
CAUTION: Use only the batteries indicated in this manual. There may be a risk of explosion if a wrong type of battery is used for the handset. Use only the supplied rechargeable batteries or replacement batteries (BT205662) for the handset. Do not dispose of batteries in a fire. They may explode. Disposed of used batteries according to the instruction.
-
Do not use the battery in following conditions:
High or low extreme temperature during use, storage or transportation.
Replacement of a battery with an incorrect type that can defeat a safeguard.
Disposal of a battery into fire or a hot oven, or mechanically crushing or cutting of a battery, that can result in an explosion.
Leaving a battery in an extremely high temperature surrounding environment that can result in an explosion or the leakage of flammable liquid or gas.
A battery subjected to extremely low air pressure that can result in an explosion or the leakage of flammable liquid or gas. -
Use only the adapter included with this product. Incorrect adapter polarity or voltage can seriously damage the product.
-
The applied nameplate is located at the bottom or near of the product.
SAVE THESE INSTRUCTIONS
Battery
Use only the battery provided or equivalent. To order a replacement, visit our website at www.vtechphones.com or call 1 (800) 595-9511. In Canada, go to phones.vtechcanada.com or call 1 (800) 267-7377.
- Do not dispose of the battery in a fire. Check with local waste management codes for special disposal instructions.
- Do not open or mutilate the battery. Released electrolyte is corrosive and may cause burns or injury to the eyes or skin. The electrolyte may be toxic if swallowed.
Exercise care in handling batteries in order not to create a short circuit with conductive materials.
- Charge the battery provided with this product only in accordance with the instructions and limitations specified in this manual.
Precautions for users of implanted cardiac pacemakers
Cardiac pacemakers (applies only to digital cordless
telephones):
Wireless Technology Research, LLC (WTR), an independent research entity, led a multidisciplinary evaluation of the interference between portable wireless telephones and implanted cardiac pacemakers. Supported by the U.S. Food and Drug Administration, WTR recommends to physicians that:
Pacemaker patients
- Should keep wireless telephones at least six inches from the pacemaker.
- Should NOT place wireless telephones directly over the pacemaker, such as in a breast pocket, when it is turned ON.
- Should use the wireless telephone at the ear opposite the pacemaker.
WTR's evaluation did not identify any risk to bystanders with pacemakers from other persons using wireless telephones.
About cordless telephones
- Privacy: The same features that make a cordless telephone convenient create some limitations. Telephone calls are transmitted between the telephone base and the cordless handset by radio waves, so there is a possibility that the cordless telephone conversations could be intercepted by radio receiving equipment within range of the cordless handset. For this reason, you should not think of cordless telephone conversations as being a private as those on corded telephones.
- Electrical power: The telephone base of this cordless telephone must be connected to a working electrical outlet. The electrical outlet should not be controlled by a wall switch. Calls cannot be made from the cordless handset if the telephone base is unplugged, switched off or if the electrical power is interrupted.
- Potential TV interference: Some cordless telephones operate at frequencies that may cause interference to televisions and VCRs. To minimize or prevent such interference, do not place the telephone base of the cordless telephone near or on top of a TV or VCR. If interference is experienced, moving the cordless telephone farther away from the TV or VCR often reduces or eliminates the interference.
- Rechargeable batteries: Exercise care in handling batteries in order not to create a short circuit with conducting material such as rings, bracelets and keys.
The battery or conductor may overheat and cause harm. Observe proper polarity between the battery and the battery charger.
- Nickel-metal hydride rechargeable batteries: Dispose of these batteries in a safe manner. Do not burn or puncture the battery. Like other batteries of this type, if burned or punctured, they could release caustic material which could cause injury.
For C-UL compliance only
The RBRC seal on the nickel-metal hydride battery indicates that VTech Communications, Inc. is voluntarily participating in an industry program to collect and recycle these batteries at the end of their useful lives, when taken out of service within the United States and
Canada.
The program provides a convenient alternative to placing used nickel-metal hydride batteries into the trash or municipal waste, which may be illegal in your area. VTech's participation makes it easy for you to drop off the spent battery at local retailers participating in the program or at authorized VTech product service centers. Please call 1 (800) 8 BATTERY® for information on Ni-MH battery recycling and disposal bans/restrictions in your area. VTech's involvement in this program is part of its commitment to protecting our environment and conserving natural resources. The RBRC seal and 1 (800) 8 BATTERY® are registered trademarks of Call2recycle, Inc.
FCC, ACTA and IC regulations
FCC Part 15
NOTE: This equipment has been tested and found to comply with the requirements for a Class B digital device under Part 15 of the Federal Communications Commission (FCC) rules. These requirements are intended to provide reasonable protection against harmful interference in a residential installation. This equipment generates, uses and can radiate radio frequency energy and, if not installed and used in accordance with the instructions, may cause harmful interference to radio communications. However, there is no guarantee that interference will not occur in a particular installation. If this equipment does cause harmful interference to radio or television reception, which can be determined by turning the equipment off and on, the user is encouraged to try to correct the interference by one or more of the following measures:
Reorient or relocate the receiving antenna.
- Increase the separation between the equipment and receiver.
- Connect the equipment into an outlet on a circuit different from that to which the receiver is connected.
- Consult the dealer or an experienced radio/TV technician for help.
WARNING: Changes or modifications to this equipment not expressly approved by the party responsible for compliance could void the user's authority to operate the equipment.
This device complies with Part 15 of the FCC rules.
Operation is subject to the following two conditions: (1) this device may not cause harmful interference, and (2) this device must accept any interference received, including interference that may cause undesired operation. Privacy of communications may not be ensured when using this
telephone.
To ensure safety of users, the FCC/ISEDC has established criteria for the amount of radio frequency energy that can be safely absorbed by a user or bystander according to the intended usage of the product. This product has been tested and found to comply with the FCC/ISEDC criteria. The handset may be safely held against the ear of the user. The telephone base shall be installed and used such that parts of the user's body other than the hands are maintained at a distance of approximately 20~cm (8 inches) or more.
This Class B digital apparatus complies with Canadian requirement:
CANICES-3 (B)/NMB-3(B).
FCC Part 68 and ACTA
This equipment complies with Part 68 of the FCC rules and with technical requirements adopted by the Administrative Council for Terminal Attachments (ACTA). The label on the back or bottom of this equipment contains, among other things, a product identifier in the format US:AAAEQ##TXXXX. This identifier must be provided to your telephone service provider upon request.
The plug and jack used to connect this equipment to premises wiring and the telephone network must comply with applicable Part 68 rules and technical requirements adopted by ACTA. A compliant telephone cord and modular plug is provided with this product. It is designed to be connected to a compatible modular jack that is also compliant. An RJ11 jack should normally be used for connecting to a single line and an RJ14 jack for two lines. See the installation instructions in the user's manual.
The Ringer Equivalence Number (REN) is used to determine how many devices you may connect to your telephone line and still have them ring when you are called. The REN for this product is encoded as the 6th and 7th characters following the US: in the product identifier (e.g., if ## is 03, the REN is 0.3). In most, but no all areas, the sum of all RENs should be five (5.0) or less. For more information, please contact your telephone service provider.
This equipment must not be used with Party Lines. If you have specially wired alarm dialing equipment connected to your telephone line, ensure the connection of this equipment does not disable your alarm equipment. If you have questions about what will disable alarm equipment, consult your telephone service provider or a qualified installer.
If this equipment is malfunctioning, it must be unplugged from the modular jack until the problem has been corrected. Replacement to this telephone equipment can only be made by the manufacturer or its
authorized agents. For replacement procedures, follow the instructions outlined under the Limited warranty. If this equipment is causing harm to the telephone network, the telephone service provider may temporarily discontinue your telephone service. The telephone service provider is required to notify you before interrupting service. If advance notice is not practical, you will be notified as soon as possible. You will be given the opportunity to correct the problem and the telephone service provider is required to inform you of your right to file a complaint with the FCC. Your telephone service provider may make changes in its facilities, equipment, operation, or procedures that could affect the proper functioning of this product. The telephone service provider is required to notify you if such changes are planned.
If this product is equipped with a corded or cordless handset, it is hearing aid compatible.
If this product has memory dialing locations, you may choose to store emergency telephone numbers (e.g., police, fire, medical) in these locations. If you do store or test emergency numbers, please:
Remain on the line and briefly explain the reason for the call before hanging up.
Perform such activities in off-peak hours, such as early morning or late evening.
Industry Canada
This device contains licence-exempt transmitter(s)/ receiver(s) that comply with Innovation, Science and Economic Development Canada's licence-exempt RSS(s). Operation is subject to the following two conditions: (1) This device may not cause harmful interference. (2) This device must accept any interference, including interference that may cause undesired operation of the device.
Privacy of communications may not be ensured when using this telephone.
The term "IC:" before the certification/registration number only signifies that the Industry Canada technical specifications were met.
The Ringer Equivalence Number (REN) for this terminal equipment is 0.1. The REN indicates the maximum number of devices allowed to be connected to a telephone interface. The termination of an interface may consist of any combination of devices subject only to the requirement that the sum of the RENs of all the devices not exceed five.
This product meets the applicable Innovation, Science and Economic Development Canada technical specifications.
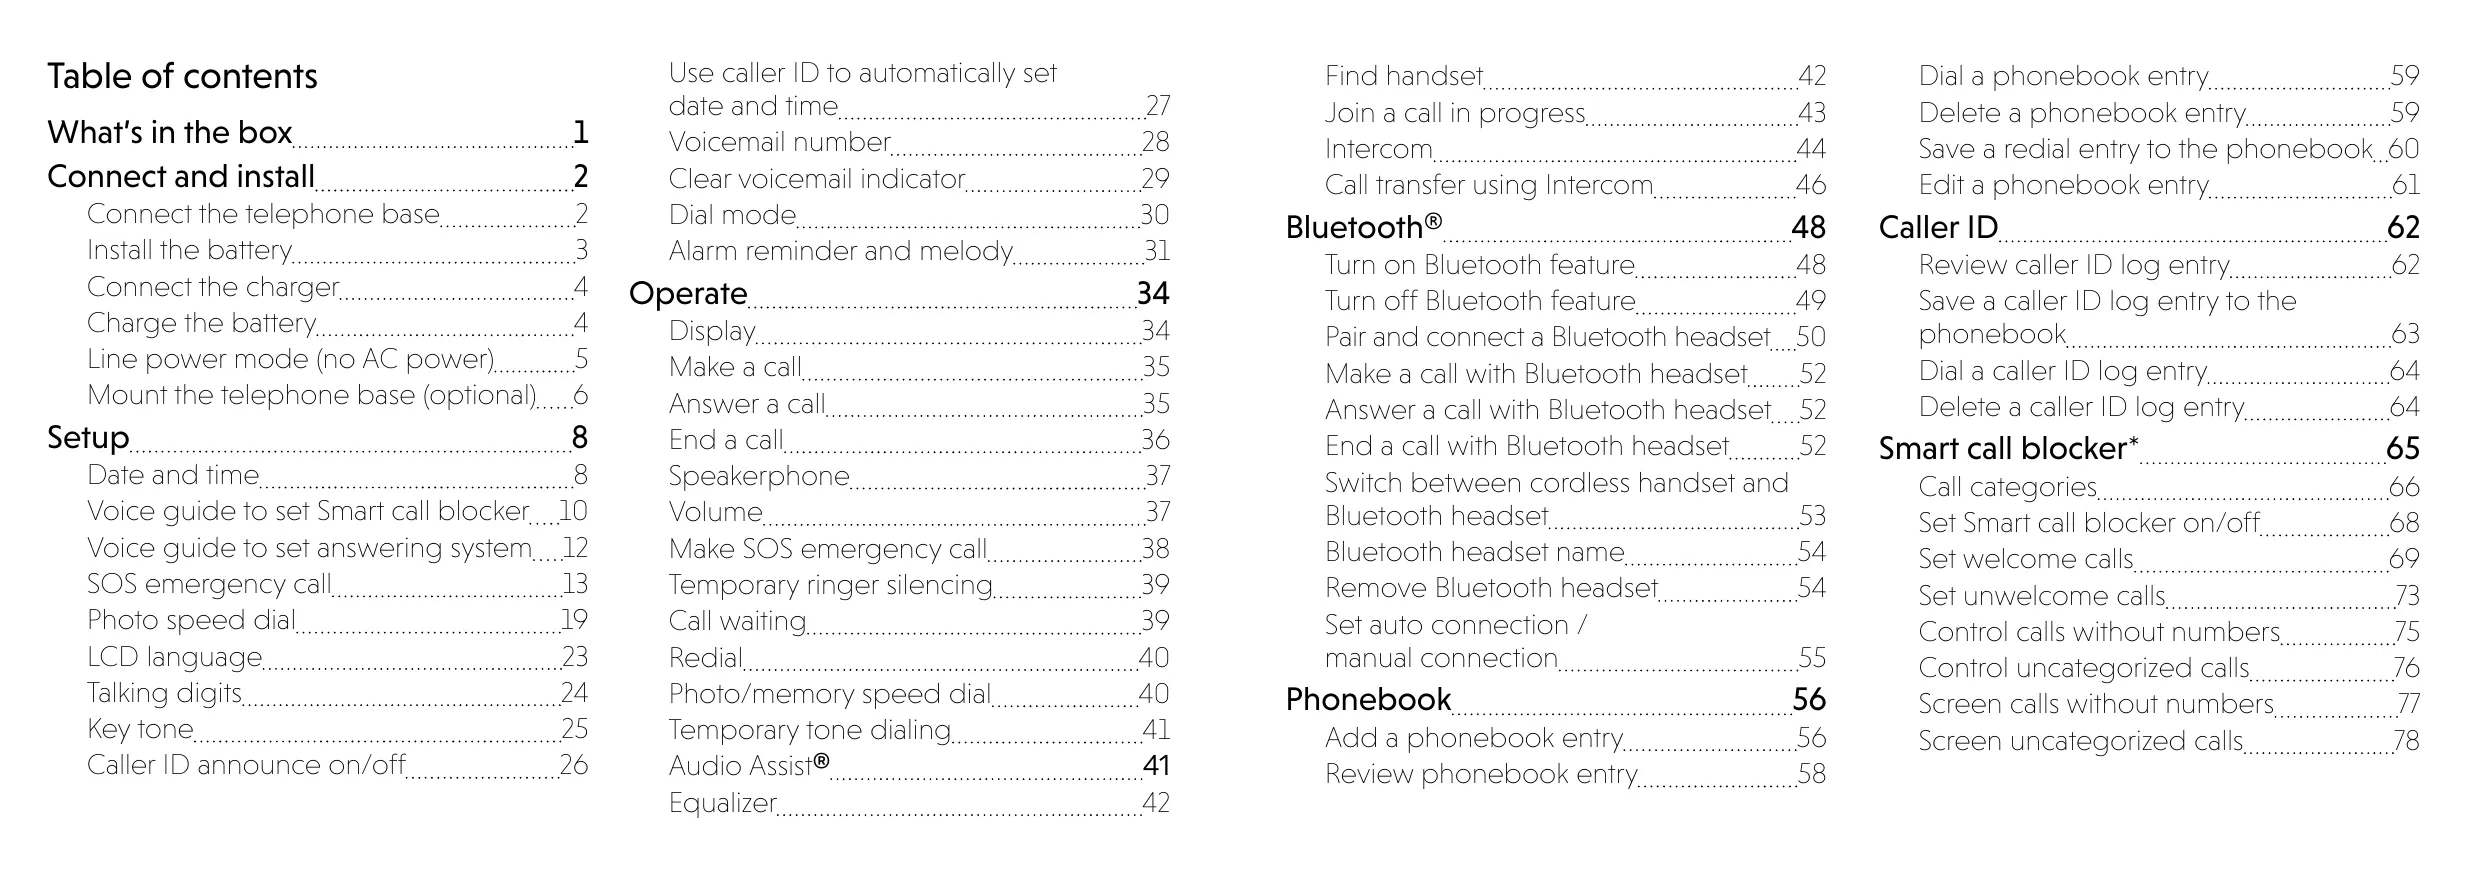
Table of contents
What's in the box 1
Connect and install 2
Connect the telephone base. 2
Install the battery. 3
Connect the charger 4
Charge the battery. 4
Line power mode (no AC power)............5
Mount the telephone base (optional).....6
Setup 8
Date and time. 8
Voice guide to set Smart call blocker....10
Voice guide to set answering system....12
SOS emergency call.13
Photo speed dial. 19
LCD language 23
Talking digits 24
Key tone. 25
Caller ID announce on/off 26
Use caller ID to automatically set
date and time 27
Voicemail number. 28
Clear voicemail indicator. 29
Dial mode 30
Alarm reminder and melody.31
Operate 34
Display. 34
Make a call. 35
Answer a call 35
End a call 36
Speakerphone 37
Volume 37
Make SOS emergency call 38
Temporary ringer silencing. 39
Call waiting. 39
Redial 40
Photo/memory speed dial 40
Temporary tone dialing. 41
Audio Assist® 41
Equalizer. 42
Find handset 42
Join a call in progress. 43
Intercom. 44
Call transfer using Intercom 46
Bluetooth® 48
Turn on Bluetooth feature 48
Turn off Bluetooth feature 49
Pair and connect a Bluetooth headset....50
Make a call with Bluetooth headset......52
Answer a call with Bluetooth headset....52
End a call with Bluetooth headset............52
Switch between cordless handset and
Bluetooth headset 53
Bluetooth headset name. 54
Remove Bluetooth headset. 54
Set auto connection /
manual connection. 55
Phonebook 56
Add a phonebook entry. 56
Review phonebook entry 58
Dial a phonebook entry. 59
Delete a phonebook entry. 59
Save a radial entry to the phonebook...60
Edit a phonebook entry. 61
Caller ID 62
Review caller ID log entry 62
Save a caller ID log entry to the
phonebook. 63
Dial a caller ID log entry 64
Delete a caller ID log entry............64
Smart call blocker* 65
Call categories. 66
SetSmart call blocker on/off. 68
Set welcome calls. 69
Set unwelcome calls. 73
Control calls without numbers. 75
Control un categorized calls.76
Screen calls without numbers. 77
Screen un categorized calls.78
Add a screened number to the
allow list or block list 79
Option while on a call 79
Answering system 80
About the built-in answering system
and voicemail service. 80
Built-in answering system VS Voicemail
service 80
Turn the built-in answering system
on or off 82
Set number of rings 82
Message playback. 84
Skip a message 85
Repeat the playing message............85
Play the previous message 86
Delete a message 86
Delete all messages 87
Remote access. 88
Set remote access code. 89
Additional devices 90
Add and register expansion handset....90
Add and register photo speed dial
handset 91
Device setup 92
Audio doorbell 94
Test device signal strength............106
Device monitoring.108
Neep help? 109
Limited warranty 110

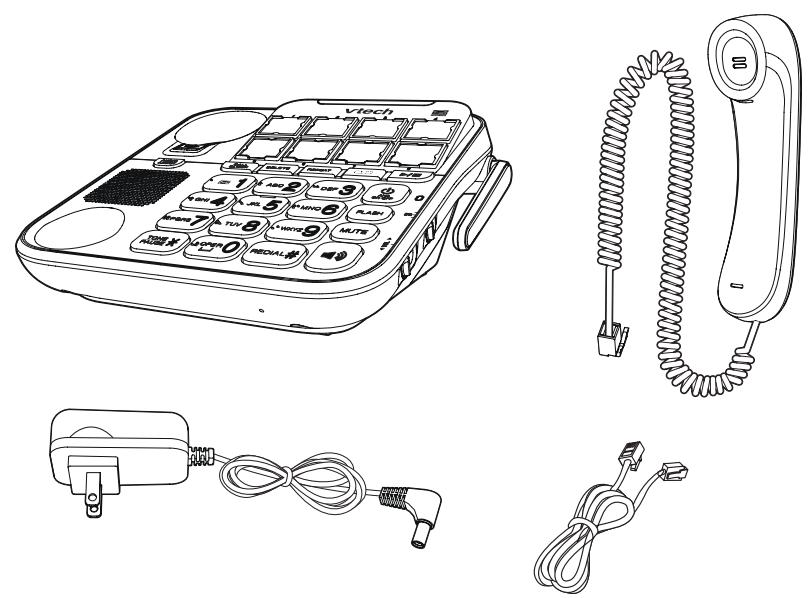
What's in the box

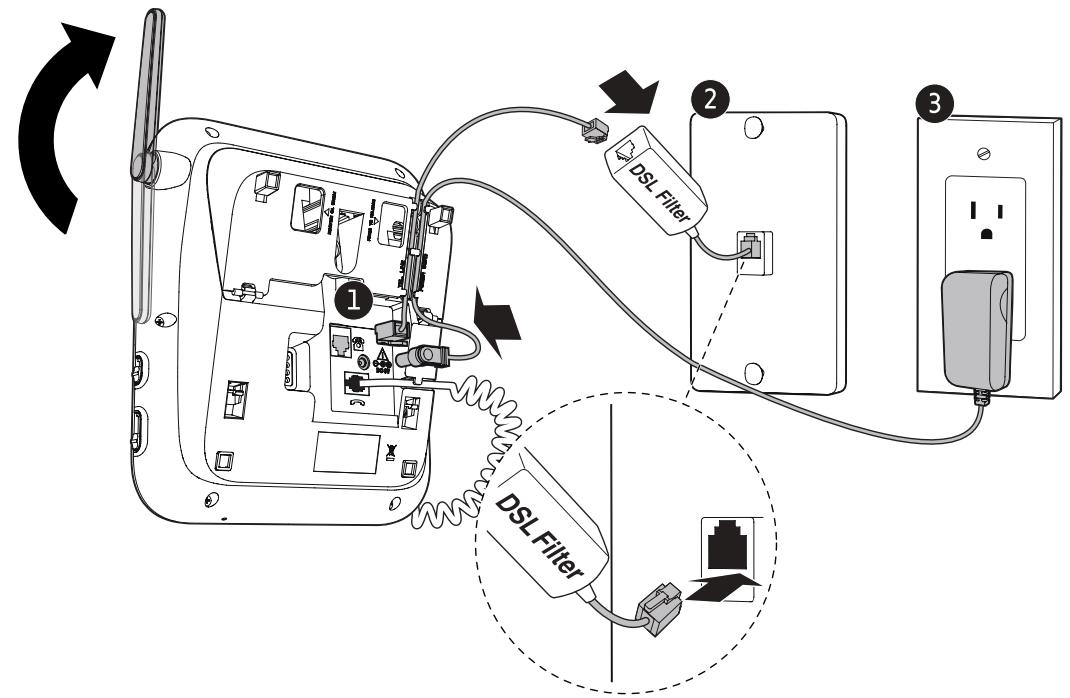
Connect the telephone base
If you subscribe to digital subscriber line (DSL) high-speed Internet service through your telephone line, make sure you connect a DSL filter (not included) to the telephone wall jack.
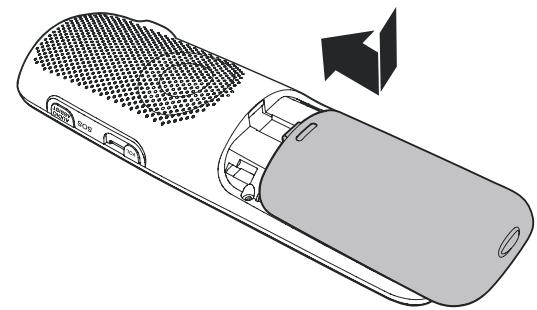
Install the battery

1
2
CAUTIONS
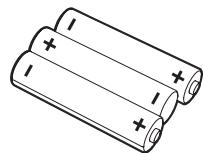
- Use only the rechargeable batteries provided or replacement batteries (model BT205662).
- Do not use other alkaline, manganese or Ni-Cd batteries, nor other non-rechargeable batteries for operating the cordless handset. They may cause failure or malfunction of the handset or the telephone system.
NOTES
- Charge the batteries provided with this product only in accordance with the instructions and limitations specified in this quick start guide.
- If the handset will not be used for a long time, disconnect and remove the batteries to prevent possible leakage.
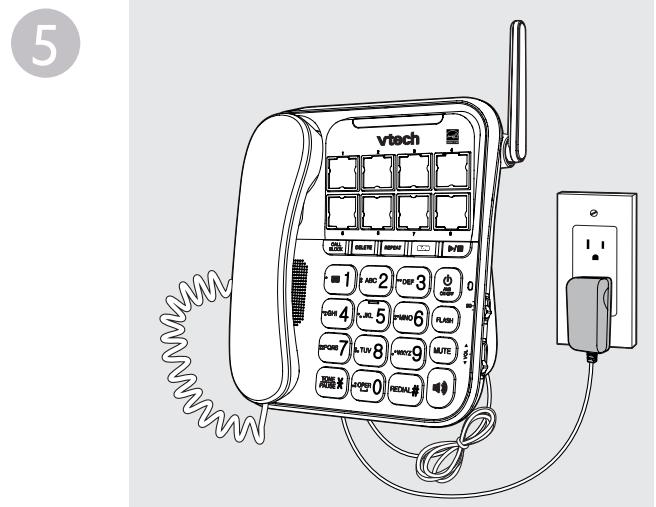
Connect the charger
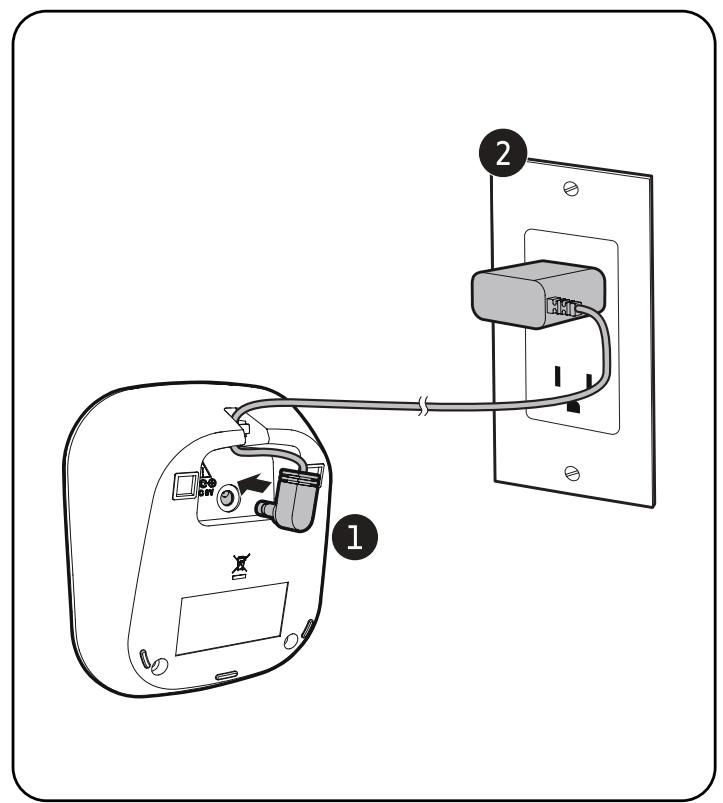
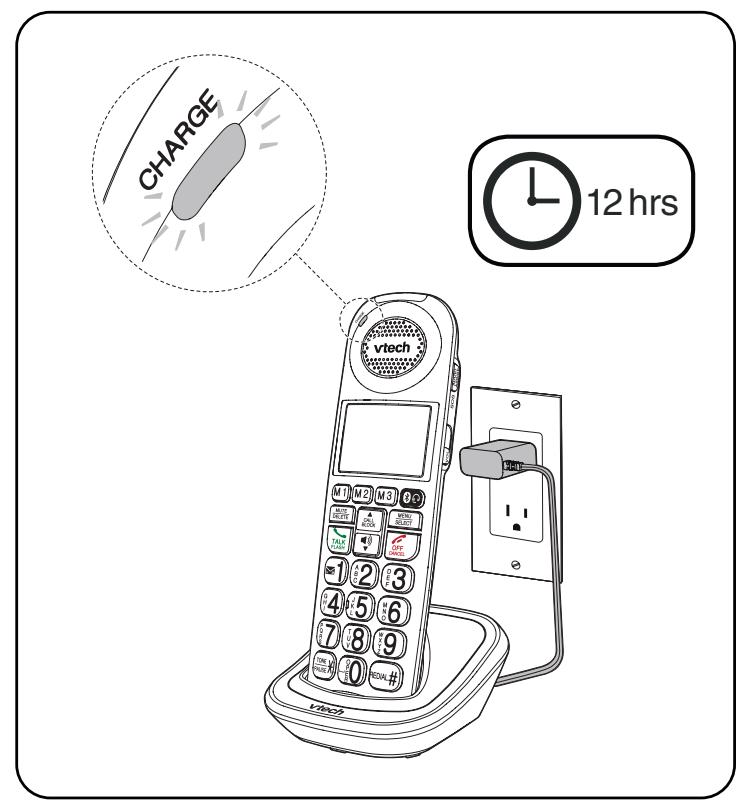
Charge the battery
Line power mode (no AC power)
When there is a power failure, the telephone base uses power from the telephone line to let you make and answer calls using the corded handset and dialing keys.
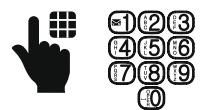
To make a call during power failure:

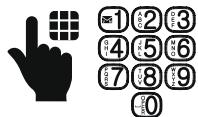
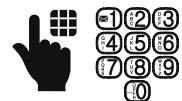
Lift the corded handset and wait for a dial tone.
Dial a telephone number using the dialing keys. Wait to hear each key tone upon inputting a digit before pressing the next dialing key.
To answer a call during power failure:

Lift the corded handset.
Connect and install
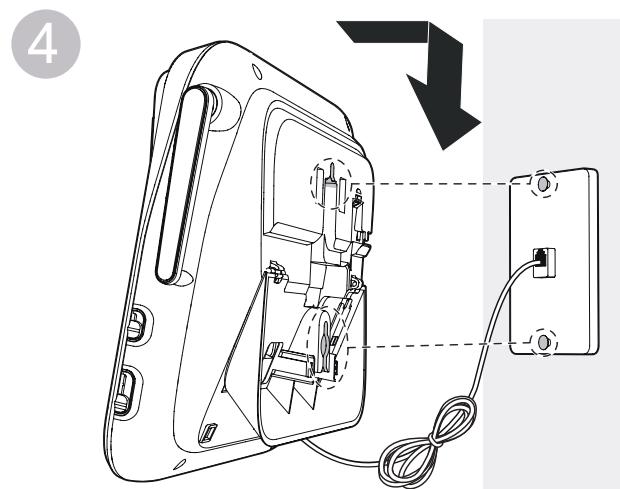
Mount the telephone base (optional)
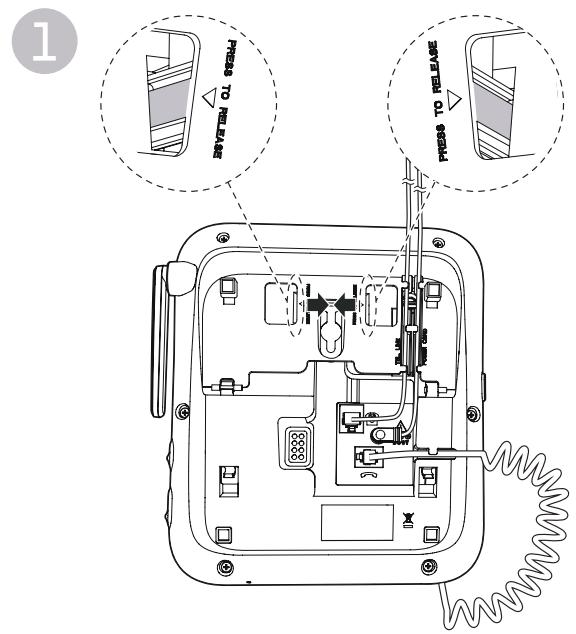
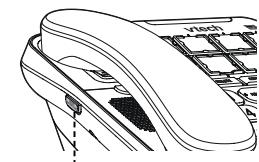
Press the tabs of the wall-mount bracket to release it from the tabletop orientation.
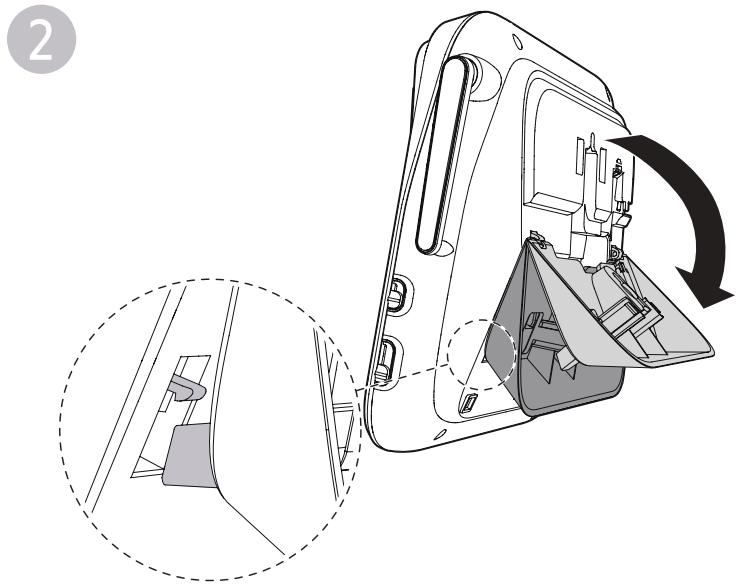
Rotate the wall-mount bracket down and push it into the telephone base until it clicks into place.
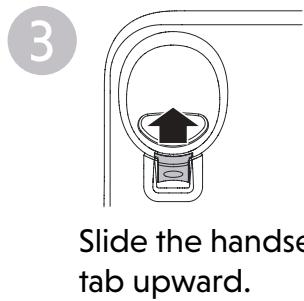
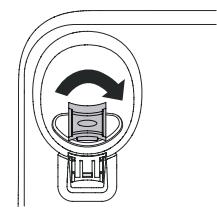
Rotate it upside down.
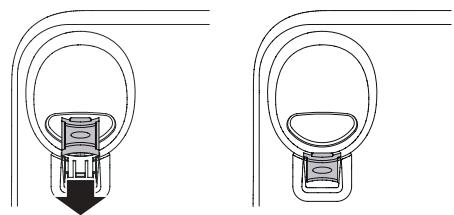
Slide the handset tab back into the slot.
The protruding edge of the handset tab holds the corded handset in place when the telephone is mounted on the wall.
Date and time
After you install your telephone or power returns following a power outage and battery depletion, the handset will prompt you to set the date and time, and to configure the Smart call blocker and answering system through the voice guides.
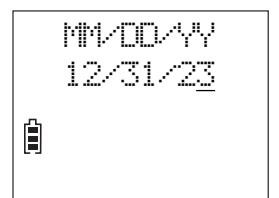
Follow the steps below to set the date and time. For example, if the date is 31 December, 2023, and the time is 10:59 PM:
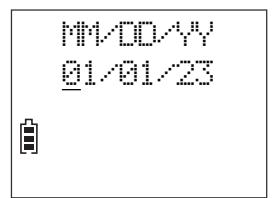
When the handset prompts you to set the date and time...

Press SELECT.
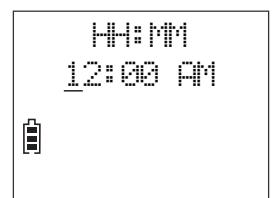

Enter the hour (HH) and minute (MM).
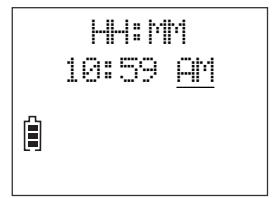

Press any number key to toggle between AM and PM.
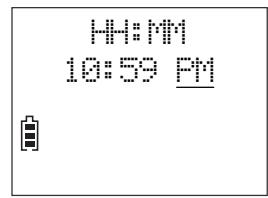

Press SELECT to save.
NOTE
Make sure you set the date and time including the year correctly; otherwise the answering system does not announce the correct day of the week for your recorded messages time stamp.

If you subscribe to caller ID service, the day, month and time are set automatically with each incoming call.
- OR -
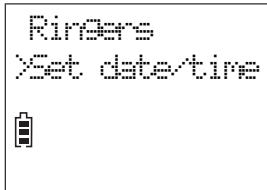
When the handset is not in use:
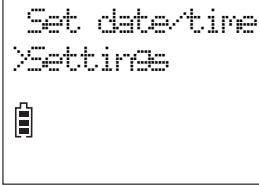
- Press MENU.
- Press or to scroll to Set date/time.
- Press SELECT, and then follow the Date and time steps to set the date and time.
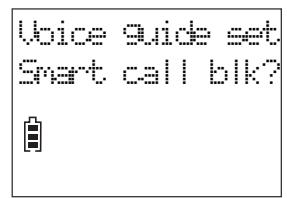
Voice guide to set Smart call blocker
After the date and time setting is done or skipped, the cordless handset then prompts if you want to set Smart call blocker. For more details on Smart call blocker, see page 65.
You can follow the voice guide to set your telephone system to allow or to screen all incoming calls, or to screen calls that do not display a phone number.
When the handset prompts you to set Smart call blocker via voice guide...


MENUSELECT

"Hello! This voice guide will assist you with the basic setup of Smart call blocker..."


Press SELECT.
Listen to the instructions and then choose one of the options.
On the cordless handset:

Press 1 if you want to screen calls with telephone numbers that are not saved in your Phonebook, Allow list or Star name list;

Press 2 if you only want to screen calls that do not display a phone number; or

Press 3 if you do not want to screen calls, and want to allow all incoming calls to get through.

NOTE
- If you select option 1 to screen calls, we recommend that you add the phone numbers of your family members and friends, and desired businesses to your Phonebook (see page 56) or Allow list (see page 69), or add their names to the Star name list (see page 70). This will avoid Smart call blocker to screen their calls.

- Read the Introducing Smart call blocker leaflet provided in your package to learn how to set up your Smart call blocker.
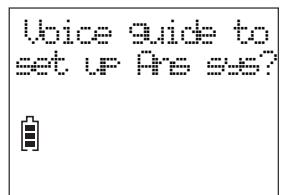
Voice guide to set answering system
After the Smart call blocker setting is done or skipped, the handset will then prompt if you want to set up the answering system.
This feature assists you to do the basic setup of the answering system. You can follow the voice guide to record your own announcement, set the number of rings and the message alert tone.
When the handset prompts you to set up the answering system via voice guide...

Press SELECT.

"This voice guide will assist you with the basic setup of your answering system."

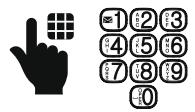
Set up your answering system by inputting the designated numbers as instructed in the voice guide.
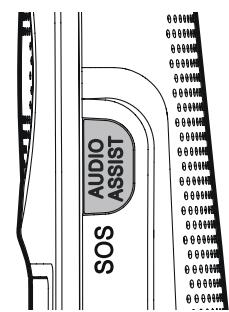
SOS emergency call
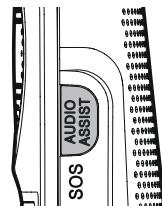
The AUDIO ASSIST/SOS button on the cordless handset can function as SOS emergency button. It lets you quickly page other system devices and call the preset external numbers for help in an emergency.
You can preset up to five SOS numbers.
If you have purchased and registered a Wearable home SOS pendant (SN7022) to your telephone system, the SOS pendant will function as same as the SOS emergency button of the cordless handset.
CAUTIONS
- To ensure proper operation, the telephone system must be installed according to the installation instructions on page 2 to page 4. To verify that the telephone system is operating properly and can successfully make emergency calls to the preset numbers, the telephone system must be tested immediately after installation, and periodically thereafter, according to the setup instructions on page 15 to page 18, and the operations on page 38.
- The telephone system cannot make an emergency call when other equipment (telephone, answering system, computer modem, etc.) connected to the same phone line is in use.
- Do not solely rely on the SOS button on the cordless handset, or the Wearable home SOS pendant (SN7022, purchased separately), for getting help in case of emergency. The functionality of the SOS emergency call is dependent on the phone settings and network availability.
NOTE
- We recommend you set all five SOS numbers to maximize the possibility of receiving response from others when you make an emergency call.
How does SOS emergency call work?
- To make an emergency call, press and hold AUDIO ASSIST/SOS on the right side of the cordless handset for three seconds. The telephone base announces "Emergency mode is activated". The handset then pages all system devices. All devices ring an alert tone and the handset screen shows SOS mode for 20 seconds. After that, the telephone then calls the preset SOS numbers in sequence until the call is answered.
- The telephone enables internal SOS alert by default. When this feature is enabled, the telephone pages all system devices before calling the preset SOS numbers.
-
If you disable internal SOS alert (see page 16), the telephone calls the preset SOS numbers directly when you press and hold AUDIO ASSIST/SOS on the cordless handset.
-
When the SOS call to the preset external number is answered, the call receiver hears an SOS message. You can record your own message or use the default message (see page 17).
- The SOS message played by the telephone asks the SOS call receiver to respond by pressing a number key. After the call receiver presses a number key, you can then talk to the call receiver with your cordless handset.
- When the SOS emergency call is answered by answering machine or voicemail, the call will be terminated after 60 seconds. The telephone then dials the next SOS number in sequence.
- When none of the preset SOS numbers answer, the telephone re-calls the preset SOS numbers in sequence until the call is answered. The telephone will call all the preset SOS numbers for 3 times before aborting the operation when none of the calls are answered.
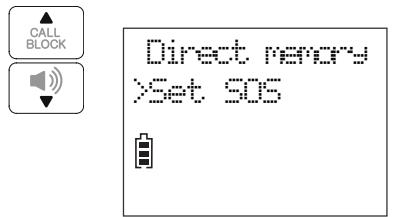
Set SOS emergency numbers


Press select again to add an emergency number.
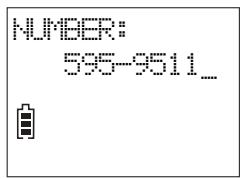

Enter the number. Then, press SELECT.
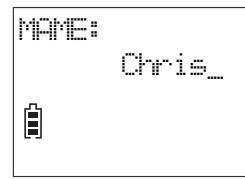

Enter the name. Then, press SELECT.
Enable or disable internal SOS alert
Internal SOS alert is enabled by default.
When you press and hold AUDIO ASSIST/SOS to make an emergency call, the telephone pages all registered system devices for 20 seconds. After that, the telephone then calls the five preset SOS numbers in sequence, until the call is answered.
You can disable this setting to allow you to make emergency calls directly to the preset SOS numbers.


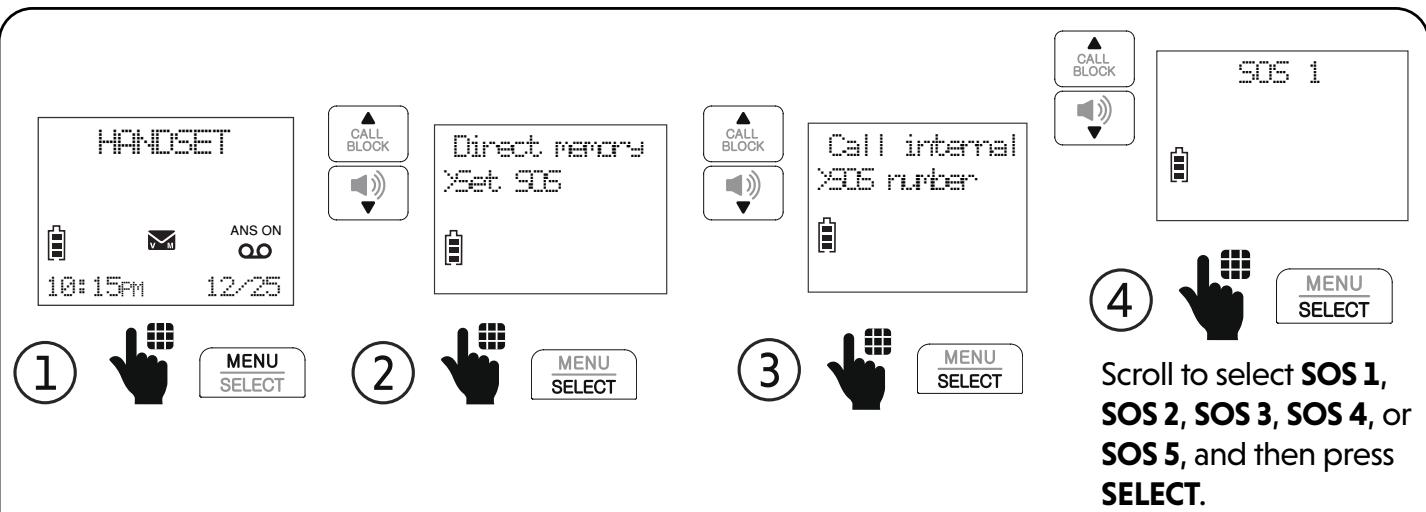
MENUSEL
Press MENU on the handset when it is not in use.
Direct report Set 96


MENU SELECT
Scroll to Set SOS, and then press SELECT.
Call internal
SIS number


Press to select Call internal.
CALL INTERNAL Enable


MENUSELECT
Scroll to select Enable or Disable, and then press SELECT.
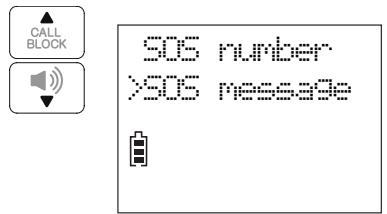
Record SOS message
When you make an emergency call with the AUDIO ASSIST/SOS button on the cordless handset, the SOS message is played to the call receiver after he/she picks up. The default SOS message is "This is an emergency call. Please press any number key to start the conversation." You can record your own message using the cordless handset.

SELECT
Press MENU on the handset when it is not in use.
Direct nerey XSet 50S
96 number
965 m#


SELECT

MENUSE SELECT
Scroll to Set SOS, and then press SELECT.
Scroll to SOS message, and then press SELECT.
Record arc Pla arc


"Record after the tone. Press STOP
when you are done."


MENUSELECT

Speak toward the cordless handset to record your message. Press 5 when done.
Note Make sure your recorded SOS message includes your name, your SOS message, and a request to the far-end caller on pressing any number key to start a conversation.
Play or reset SOS message

Press MENU on the handset when it is not in use.

SELECT
Scroll to Set SOS, and then press SELECT.

Scroll to SOS message, and then press SELECT.
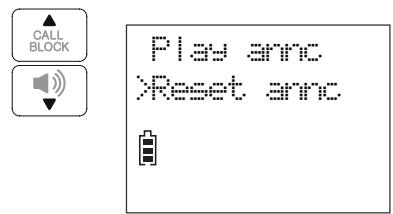

MENUE SELECT
Scroll to select Play annc or Reset annc, and then press SELECT. If you select Reset annc, press SELECT twice.
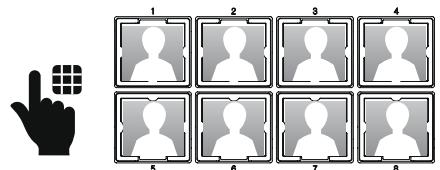
Photo speed dial
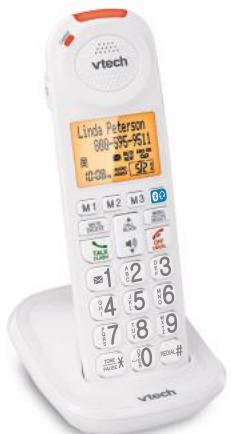
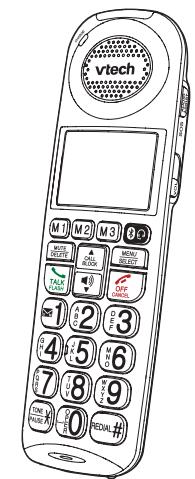
There are eight photo speed dial memory keys 1 to 8 on the telephone base, and three direct memory keys M1 to M3 on the cordless handset.
You can store the telephone numbers you wish to quick dial to the photo speed dial keys. When you set the first three photo speed dial keys 1, 2 and 3 on the telephone base, the same numbers will also automatically set in the M1, M2 and M3 keys on the cordless handset.

- We recommend you store at least two contacts that you may need to call them more often or immediately to photo speed dial keys 1 and 2 on the telephone base.
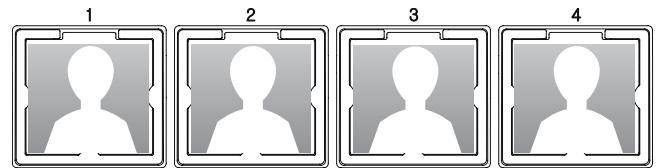
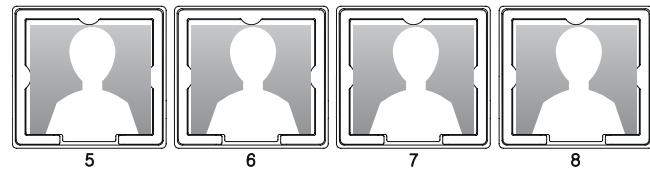

Photo speed dial
Store a photo speed dial entry:


MENUSELECT
Press MENU when the handset is not in use.
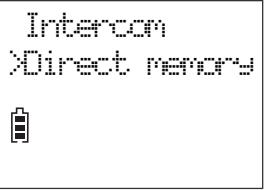


SELECT
Scroll to Direct memory, and then press SELECT.

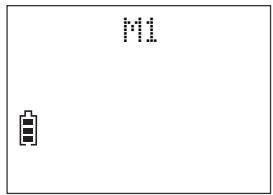


Scroll to select M1, M2, M3, M4, M5, M6, M7 or M8, and then press SELECT.
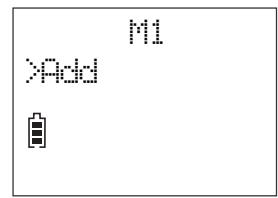


MENUSELECT
Press SELECT again to add the speed dial number.


SELECT
Enter the phone number, and then press SELECT.


SELECT
Enter the name, and then press SELECT to save.

NOTE
- To store another photo speed dial entry, repeat the steps.
Photo speed dial
Insert photos for speed dial keys:
You can insert photos into the photo speed dial compartments, or write the contact names on cards and insert them into the compartments.

NOTE
The telephone base is shipped with protective stickers covering the photo speed dial compartments. Remove the protective sticker before use.
- Remove the photo speed dial compartment cover.
- Crop your desired photo into the size specified on the right, and then insert it into the photo speed dial compartment. Then, insert the photo speed dial compartment cover back to the compartment.

LCD language
You can select your handset's display language (English, French or Spanish).


MENU
SELECT
Press MENU when the handset is not in use.

Set date/time settings
LUCO IaIuae Uoicai
LLOUANG


Set English LCD


MENUSELECT
1


MENUSELECT
1


MENUSELECT


MENUSECT
Scroll to Settings, and then press SELECT.
Press SELECT to select LCD language.
Scroll to highlight English, Français o Espanol, and then press SELECT.
Press SELECT to confirm.
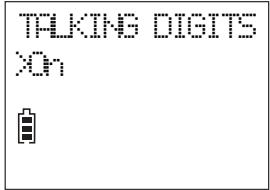
Talking digits
You can choose whether the digits are to be announced whenever you press the number keys.


MENUSELECT
Press MENU when the handset is not in use.


MENUSELECT
Scroll to Talking digits, and then press SELECT.


SELECT
Scroll to select On or Off, and then press SELECT.
Key tone
The cordless handset is set to beep with each key press. You can adjust the key tone volume or turn it off. If you turn off the key tone, there are no beeps when you press keys.


MENUSELECT
Press MENU when the handset is not in use.

Set date/time
?Settings
Cir voicanail

由


Scroll to Settings, and then press SELECT.
Scroll to Key tone, and then press SELECT.


MENUSELECT
Scroll to select the desired volume or select Off.
Press SELECT to confirm.
Caller ID announce on/off
The caller ID announce feature lets you know who's calling without having to look at the display. When you have an incoming call, the handset and/or base speaks "Call from..." and the name of the caller based on the phonebook or caller ID information. The default setting is On.

NOTE
To use the caller ID announce feature, you must subscribe to caller ID service from your telephone service provider.


MENUSELECT
Press MENU when the handset is not in use.

Talking digits XCaller ID amc


Scroll to Caller ID annc, and then press SELECT.
CALLER ID PNC Xn


Scroll to select On or Off, and then press SELECT.
Use caller ID to automatically set date and time
If you subscribe to caller ID service, you can choose to set the date and time for each incoming call by the caller ID information automatically. The default setting is On.


MENUSELECT
Press MENU when the handset is not in use.
Set date-time
Xsettins
keytore XID time snc
CID TINE SNC
Xn


MENUSE SELECT


MENUSELECT

SELECT
Scroll to Settings, and then press SELECT.
Scroll to CID time sync, and then press SELECT.
Scroll to On or Off, and then press SELECT.
Voicemail number
If you subscribe to a voicemail service offered by your telephone service provider, you can save your voicemail number to 1 for quick access.


Press and hold 1 when the handset is not in use.


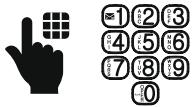
Enter the voicemail access number provided by your telephone service provider (up to 30 digits).
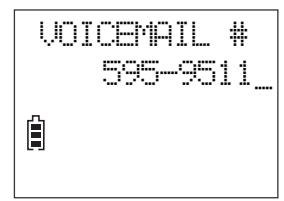


Press SELECT.
To retrieve voicemails from your telephone service provider:


Press and hold 1.
Clear voicemail indicator
Use this feature when the telephone indicates that there is new voicemail but there are none. This feature only turns off the indicators, New voicemail and V M. It does not delete your voicemail messages. As long as you have new voicemail messages, your telephone service provider continues to send the signal to turn on the indicators.


Press MENU when the handset is not in use.
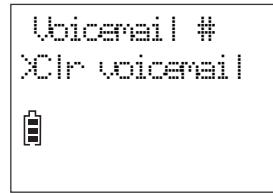
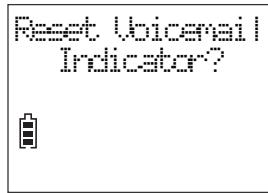


Scroll to Settings, and then press SELECT.


Scroll to Clr voicemail, and then press SELECT.
Press SELECT to confirm.
Dial mode
The dial mode is preset to touch-tone dialing. If you have pulse (rotary) service, you need to change the dial mode to pulse dialing before using the telephone.


MENU
SELECT
Press MENU when the handset is not in use.
Set date/time Settings
Here area code Xial note
自

SELECT


MENUSELECT
Scroll to Settings, and then press SELECT.
Scroll to Dial mode, and then press SELECT.
Scroll to select Touch-tone or Pulse, and then press SELECT.
Alarm reminder and melody
You can set alarm reminders that remind you at specific times, once, daily, or at weekdays or weekends.


MENU
SELECT
Press MENU when the handset is not in use.
Set 965 Xerminder
REmInDER emrder 1
REmInDER 1 On/Off

MENUE SELECT


SELECT
Scroll to Reminder, and then press SELECT.


SELECT
Scroll to select a reminder from Reminder 1 to Reminder 10, and then press SELECT.
Press SELECT to select On/Off.
Alarm reminder and melody


CH-FFF
Xn
自

M SE
Scroll to On and
then press SELECT.
HHH11 12:00
自
the hour (HH) and minute
(MM). Then, press any number key
to change between AM and PM.
FREQUENCY
Xhnce


SELECT
Scroll to select one of the frequency options, and then press SELECT.
NOTES
- When the set reminder alarm time is due, the alarm will not ring if the telephone is in use.
- The cordless handset rings for 30 seconds when the alarm time is due.
- Press any key on the handset to stop the alarm when ringing.
HH:MM 10:59PM
自

Press SELECT.
H:MM 0:59 PM
Alarm reminder and melody
You can also select the alarm reminder melody.


MENUSELECT
Press MENU when the handset is not in use.
Set S06
Xerminister
自
FIMINER
自
MELLOO
自

MELOC Tore 1
由


SELECT


MENUSELECT


MENUSELECT


MENUSELECT
Scroll to Reminder, and then press SELECT.
Scroll to select the desired reminder, and then press SELECT.
Scroll to Melody, and then press SELECT.
Scroll to the desired melody, and then press SELECT.

NOTE
- A reminder you have previously set up is added with an asterisk () after the name, for example, Reminder 1.
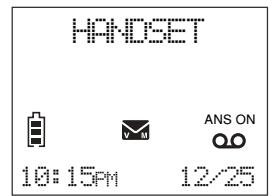
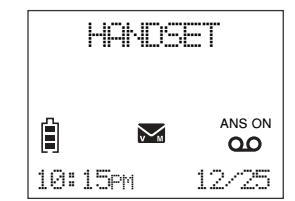
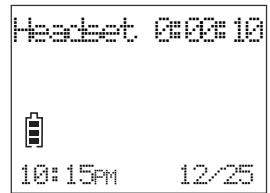
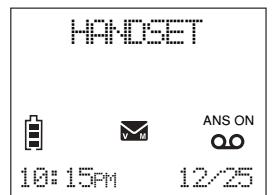
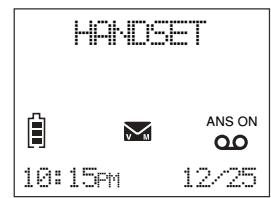
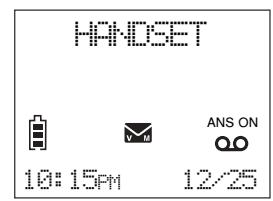
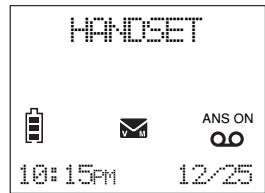
Display
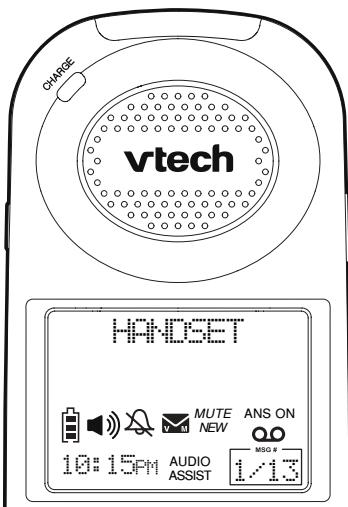
Audio Assist® is a registered trademark of Advanced American Telephones.
| The battery is low and needs charging. | |
| →→→ | The battery is charging. |
| The battery is fully charged. | |
| The handset speakerphone is in use. | |
| Handset ringer is off. | |
| V M | New voicemail received from your telephone service provider. |
| MUTE | The handset microphone is muted. |
| NEW | There are new caller ID log entries. |
| ANS ON | Answering system is on. |
| QO | There are new messages in the answering system. |
| MSG # 1/13 | Number of new/old messages recorded. |
| AUDIO ASSIST | The handset Audio Assist® feature is on. |
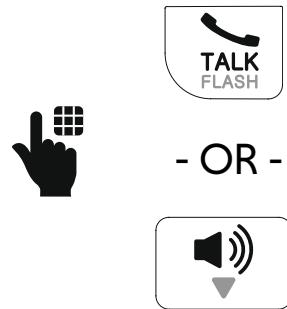
Make a call


On the cordless handset, press TALK or


On the telephone base, press or lift the corded handset.


Dial the phone number.
Answer a call
On the cordless handset:


-OR
- OR
Press TALK, or any dialing keys on the handset.

OR
On the telephone base:


- OR -
Press on the telephone base or lift the corded handset.
End a call
On the cordless handset:


- OR -
Press OFF on the handset.
-OR-
Place the handset in the handset charger.
On the telephone base:
If you are using the telephone base speakerphone or the corded handset:


- OR -

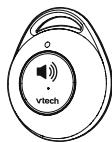
Speakerphone
On the cordless handset:

-
-
-
- OR - - - -
-
-
On the telephone base:


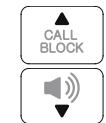
Volume
Handset
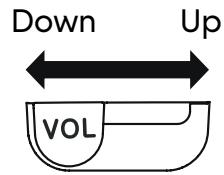
Telephone base
Down Up

Slide the VOL control on the cordless handset or on the telephone base:
to adjust the speaker volume level when on a call; or
to adjust the ringer volume when the telephone is ringing.

CAUTION
- For hearing protection, do not put the cordless handset near your ear when the telephone is ringing. Loud ringer sound may damage your hearing. Adjust the volume to lower the ringer sound if you find it too loud.
Make SOS emergency call
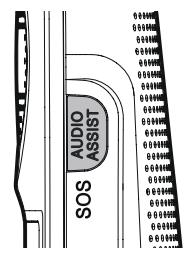
Press and hold AUDIO ASSIST/SOS on the cordless handset for 3 seconds. The telephone base announces, "Emergency mode is activated" and pages all registered devices. All devices ring an alert tone, and after 20 seconds, the telephone starts calling the preset SOS numbers.
- If you disable internal SOS alert (page 16), the telephone calls the preset SOS numbers in sequence directly when you press and hold AUDIO ASSIST/SOS. See page 13 for details.

SOS
AUDIO ASSIST
OR

If you have purchased and registered a Wearable home SOS pendant (SN7022), press the dial key on the SOS pendant to make SOS calls.
You can cancel SOS emergency call at any time:
- Press TALK or CANCEL on the handset; or
- Press and hold AUDIO ASSIST/SOS on the handset; or
- Press on the telephone base; or
- Press the CANCEL key on the back of the SOS pendant.

"This is an emergency call. Please press any number key to start the conversation."
NOTES
- When the emergency call is answered, the telephone plays the SOS message (see page 17) to the call receiver, asking the receiver to respond by pressing a number key on his/her phone.
After the call receiver presses a number key, you can then start a conversation with the call receiver.
The sos AUDIO ASSIST button on the cordless handset functions as Audio Assist button when on a call or listening to a message or announcement.
Temporary ringer silencing
When the telephone is ringing, you can temporarily silence the ringer without disconnecting the call. The next call rings normally at the preset volume.
When the telephone is ringing:
On the cordless handset:

MUTE DELETE


OR
On the telephone base:

MUTE
Call waiting
When you subscribe to call waiting service from your telephone service provider, you hear an alert tone if there is an incoming call while you are already on a call.

When on a call using the cordless handset.

- OR
FLASH
When on a call using the corded handset on the telephone base.
- Press FLASH on the handset or telephone base to put the current call on hold and take the new call.
- Press FLASH at any time to switch back and forth between calls.
Redial
The last 10 numbers dialed (up to 30 digits) are stored in the cordless handset. The telephone base stores the last number dialed.


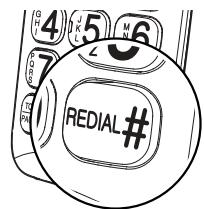
Press and hold REDIAL, and then press or to browse the radial entries when the handset is not in use.


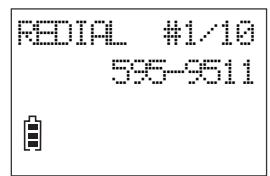
To redial, press TALK on the handset.
To redial the last number using the telephone base, lift the corded handset on the telephone base and then press and hold REDIAL.
Photo/memory speed dial
If you have set any of the eight direct memory speed dial numbers, you can press a photo speed dial key on the telephone base, or a directory memory key on the handset to quickly dial the preset number.
The telephone base and the cordless handset share the first three direct memory speed dial numbers.
For details on setting photo/memory speed dial, see page 19.
Press photo
speed dial key on the telephone base to call.


Press M1, M2 or M3 on the handset to call.
Temporary tone dialing
If you have pulse (rotary) service only, you can switch from pulse to touch-tone dialing temporarily during a call. This is useful if you need to send touch-tone signals to access your telephone banking or long distance services.


TONE PAUSE

When on a call, press TONE* on the handset or on the telephone base.
Enter the number you wish to dial. The telephone sends touch-tone signals. It automatically returns to pulse dialing mode after you end the call.
Audio Assist®
The Audio Assist feature enhances the clarity and loudness of your caller's voice on the cordless/cored handset earpiece when you are on a call, or listening to a message or an announcement.
Turn on/off Audio Assist:

AUDIO ASSIST
When on a call or listening to a message or an announcement:
- Press AUDIO ASSIST on the telephone base or on the cordless handset to turn on.
Press again to turn off.
Equalizer
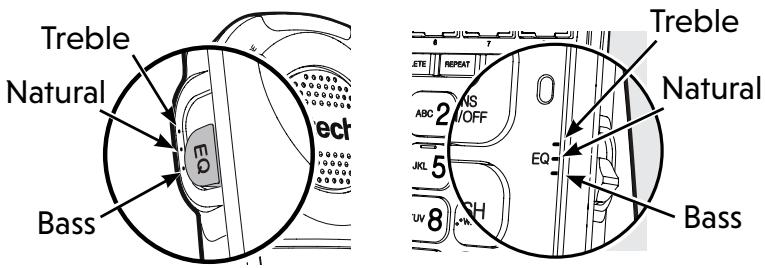
The equalizer on the cordless handset and telephone base enable you to change the quality of the audio for both handset earpiece and speakerphone to best suit your hearing. The default setting is Natural.
Change the equalizer setting:
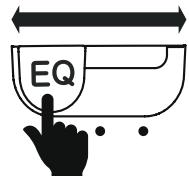
When on a call:
- Slide the EQ button to toggle among Treble, Natural and Bass.
Find handset
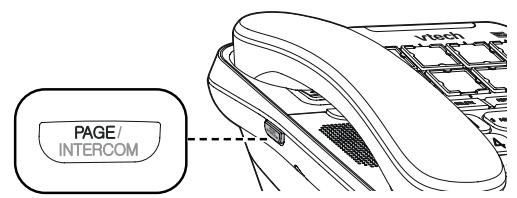
To find your misplaced cordless handset, press PAGE/INTERCOM on the telephone base to make intercom paging to the handset.
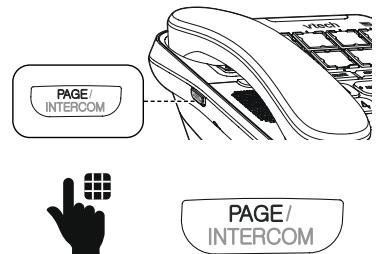
If you have two or more handsets, the telephone makes intercom paging to all handsets.
To stop the paging tone:
- Press TALK or to answer the intercom call with the cordless handset; or
- Press PAGE/INTERCOM on the telephone base.
Join a call in progress
When you are already on an outside call with the cordless handset or the telephone base, the other handset or the telephone base can join the call.
To join a call with the cordless handset:
Press TALK or on the handset.
To join a call with the telephone base:

Lift the corded handset or press on the telephone base.
To exit the call:
- Press OFF or place the handset in the handset charger; or
- Return the corded handset to the telephone base or press on the telephone base.
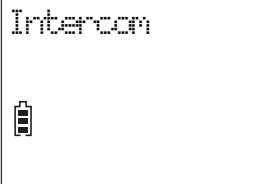
Intercom
You can use the intercom feature for conversations between the telephone base and the cordless handset. If you have two or more cordless handsets, you can make intercom calls from the telephone base to all cordless handsets, or from one handset to another or to the telephone base.
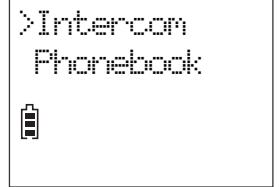
Make intercom call using the cordless handset:


MENU
SELECT
Press MENU when the handset is not in use.


MENU
SELECT
Scroll to Intercom, and then press SELECT.
NOTE
INTERCOMTO: HANIDSET2

Callir
If you have other registered devices or have two or more handsets, choose the device to call.
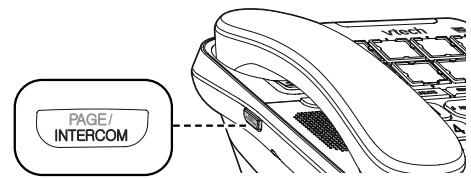
Make intercom call using the telephone base:


Lift the corded handset when the telephone is not in use.


PAGE/
INTERCOM
Press INTERCOM.
OR

PAGE/
INTERCOM


Press INTERCOM when the telephone is not in use.
Lift the corded handset.
NOTES
-
To answer the intercom call on the destination devices:
-
On a cordless handset, press TALK or
-
On the telephone base, lift the corded handset or press.
-
To cancel an intercom call:
-
When using the cordless handset, press OFF.
- When using the telephone base, press INTERCOM.
Call transfer using Intercom
Use the intercom feature to transfer an outside call from the cordless handset to the telephone base. You can also share an outside call with the telephone base.


MENUE SELECT
When on a call with your cordless handset, press MENU.


MENUSELECT
Press SELECT to select Intercom.
When the destination device picks up, the outside call is put on hold. Then, you have the following options:
- Transfer the call;
- Share the call; or
End the call.
Transfer call:


MENUSELECT
Press MENU.


MENUSELECT
Press SELECT to select Transfer. The call is transferred to the destination device.
Share call:

SELECT
Press MENU.
Transfer
XShare call

MENUSELEC
Scroll to Share call, and then press SELECT to let the destination device join you on the outside call in a three-way conversation.
End call:


Press TALK.
OR
Press TALK to end the intercom call and continue the outside call with your handset.
Your telephone system is enhanced with Bluetooth feature. You can pair one Bluetooth headset to each of your SN5147 cordless handsets. You can make or answer calls using a cordless handset or its paired Bluetooth headset.
Turn on Bluetooth feature
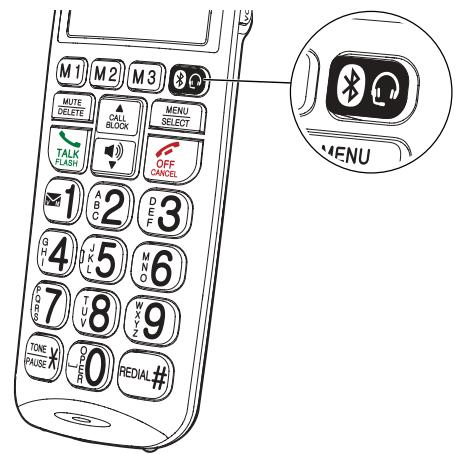


The Bluetooth feature is Off by default. To turn it On, press the Bluetooth key on the cordless handset.


MENUSELECT
Turn on Bluetooth?
Press SELECT to turn on Bluetooth feature.
Turn off Bluetooth feature


Press the Bluetooth key on the cordless handset.
SET DvOff
Pair headset
BLUETOOTH
30ff


SELECT


MENUSELECT
Press SELECT to choose BT On/Off.
Scroll to Off and then press SELECT again.
The Bluetooth® word mark and logos are owned by Bluetooth SIG, Inc. and any use of such marks by Advanced American Telephones and its parent, VTech Holdings Limited, is under license. VTech Holdings Limited is a member of Bluetooth SIG, Inc. Other trademarks and trade names are those of their respective owners.
Pair and connect a Bluetooth headset
NOTES
- Before you begin, make sure that your Bluetooth enabled headset is turned on and is not connected to any other Bluetooth device. If you have trouble pairing your Bluetooth headset to your SN5147 telephone system, try turning off the Bluetooth feature of the nearby devices that your Bluetooth headset has previously paired.
- Bluetooth wireless technology operates within a short range (a maximum of approximately 15 feet) from the cordless handset. Keep connected headset within this range.
- For more details about the Bluetooth feature, read the online Complete user's manual.

Set your Bluetooth headset to pairing mode. Refer to your Bluetooth headset user's manual to learn how. Place the Bluetooth headset next to the cordless handset.


Press the Bluetooth key on the cordless handset.
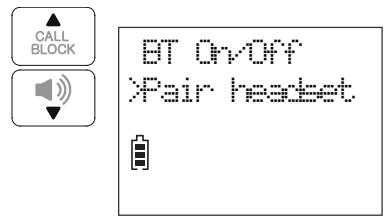

Scroll to Pair headset and then press SELECT.
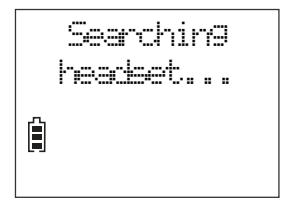
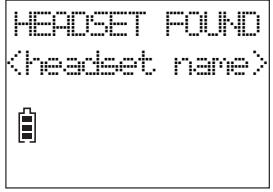


MENU SELECT
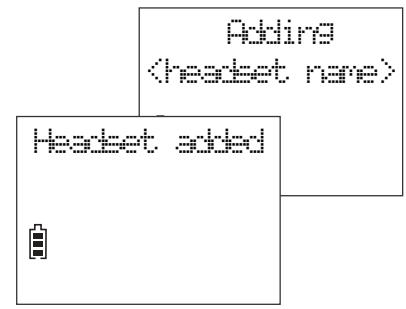
When your Bluetooth headset is found and its name is displayed on the screen, press SELECT.

NOTES
- If the cordless handset cannot find any Bluetooth headset available while pairing, its screen shows No headset found. Move the Bluetooth headset closer to the cordless handset and re-try the pairing steps.
- If the cordless handset already has a Bluetooth headset paired to it when pairing, it prompts if you want to remove the currently paired one. Press SELECT to remove when prompted. The handset shows BT headset removed. You can then continue pairing the new Bluetooth headset.
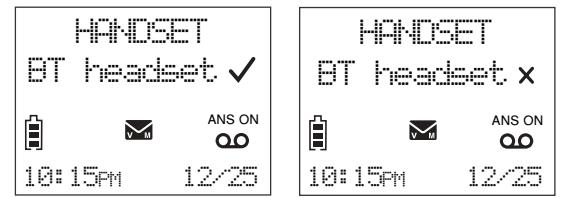
- If the Bluetooth feature is on and the paired Bluetooth headset is connected to the cordless handset, the screen shows BT headset . If the Bluetooth feature is on but the paired Bluetooth headset is disconnected, the screen shows BT headset x.
Make a call with Bluetooth headset Answer a call with Bluetooth headset


Enter the phone number.
-OR
Search a number in the phonebook (See Review phonebook entry).
-OR
Search a number in the caller ID log (See Review caller ID log entry).
-OR
Search a number in the radial list (See Redial).


Press Bluetooth headset key.


When there is an incoming call, press the Bluetooth headset key to answer the call.
-OR
If the Bluetooth headset is connected, press the key on
your Bluetooth headset to answer the call (refer to your Bluetooth headset's operation instructions).
End a call with Bluetooth headset

-OR
Press OFF on the cordless handset.
Press the key on your Bluetooth headset to end the call (refer to your Bluetooth headset's operation instructions).
Switch between cordless handset and Bluetooth headset
When you are on an outside call or intercom call using a cordless handset or its paired Bluetooth headset, you can switch between the two.
While on an outside call or intercom call with a cordless handset:


Press the Bluetooth headset key to switch to its paired Bluetooth headset.
While on an outside call or intercom call with a connected Bluetooth headset:


Press the Bluetooth headset key to switch to the cordless handset.
Mute the microphone during a call:
When you are on an outside call or intercom call using a Bluetooth headset, you can mute or unmute the microphone.

MUTE DELETE
Press MUTE on the cordless handset to mute the microphone. Press again to unmute.

NOTE
- When you use your Bluetooth headset to make or answer calls, we recommend that you keep the connected cordless handset close to the Bluetooth headset, or bring along the cordless handset when you move around while using the Bluetooth headset.
Bluetooth headset name
Check the name of the paired Bluetooth headset.


Press the Bluetooth key on the cordless handset.
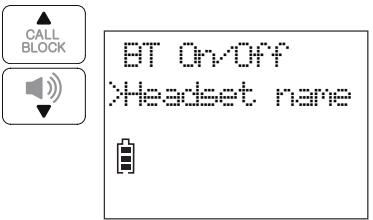
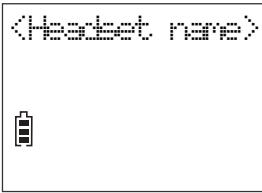


MENUSELECT
Scroll to Headset name and then press SELECT.
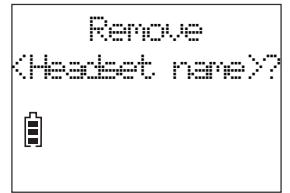
Remove Bluetooth headset


Press the Bluetooth key on the cordless handset.

Headset name Remove headset


MENUSELECT


MENUSELECT
Scroll to Remove headset and then press SELECT.
Press SELECT to confirm.
Set auto connection / manual connection
Auto connection
- After you have paired a Bluetooth headset, you can set the cordless handset to automatically connect to the paired Bluetooth headset when it is within range of the cordless handset (default setting).
Manual connection
- If you choose to connect the paired Bluetooth headset manually, the cordless handset will connect to the paired Bluetooth headset when you press the Bluetooth key (®) to make a call, or answer an outside call or intercom call. The Bluetooth headset will be disconnected after each call.
Remove headset
Correct, node
CONNECTIONMODE


Press the Bluetooth key on the cordless handset.


SELECT


MENUSELECT
Scroll to Connect. mode and then press SELECT.
Scroll to Auto or Manual and then press SELECT to set.
Phonebook
The phonebook can store up to 50 entries. Each entry may consist of a telephone number with up to 30 digits, and a name with up to 15 characters.
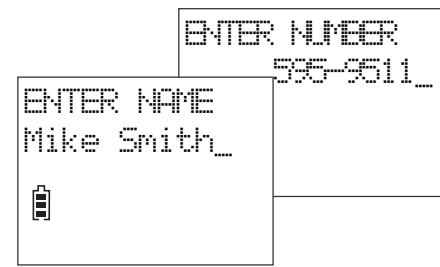
Add a phonebook entry

Enter the phone number when the handset is not in use.

Press SELECT.

Press SELECT again.

Enter the name

Press SELECT.
-
OR -
-
Press MENU on the cordless handset when the telephone is not in use.
- Scroll to Phonebook, and then press SELECT.
- Scroll to Add contact, and then press SELECT.
- Enter the phone number, and then press SELECT.
- Enter the name, and then press SELECT.
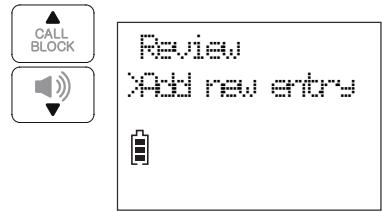
Review phonebook entry

Press MENU when the handset is not in use.

Press SELECT to select Phonebook.


Press SELECT to select Review.
Scroll to browse through the entries.
Dial a phonebook entry
Review the phonebook entries, and when your desired entry shows on the handset screen:

Press TALK on the handset.
Delete a phonebook entry
Review the phonebook entries, and when your desired entry shows on the handset screen:

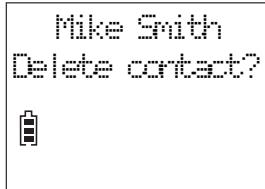


Press DELETE.
Press SELECT to delete.
Phonebook
Save a radial entry to the phonebook


Scroll to browse through the radial list. When your desired entry displays, press SELECT.
Edit the phone number if needed, and then press SELECT.
Enter the name.
Press SELECT to save.
Edit a phonebook entry
Review the phonebook entries, and when your desired entry shows on the handset screen:

Press SELECT.

Edit the number.

Press SELECT.

Edit the name.

Press SELECT to save.
Caller ID
If you subscribe to caller ID service, information about each caller appears after the first or second ring.
The caller ID log stores up to 50 entries. Each entry has up to 24 digits for the phone number and 15 characters for the name.
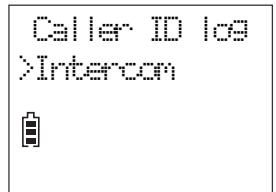
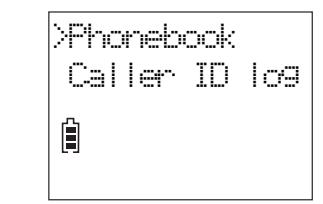
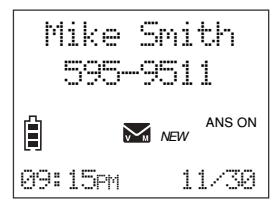
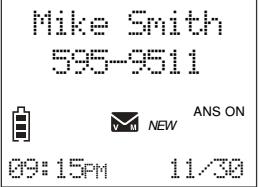
Review caller ID log entry


MENU
SELECT
Press MENU when the cordless handset is not in use.
F
XCaller ID log


MENU
SELECT
Scroll to Caller ID log,
and then press SELECT.
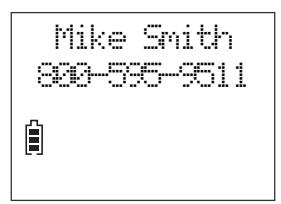
F
All calls


MENU
SELECT
Press SELECT to
select Review.
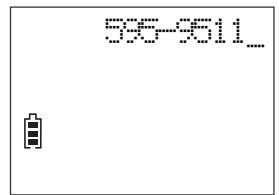
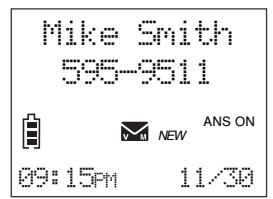
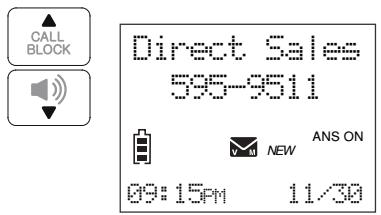
Mike Smith
595-9511

V M N
09:15PM
11/39

CALL BLOC

Scroll to browse
through the entries.
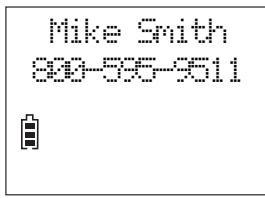
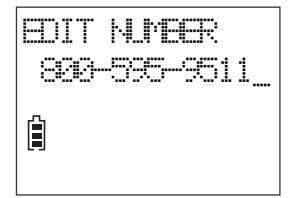
Save a caller ID log entry to the phonebook
When your desired caller ID log entry shows on the handset screen:
Mike Smith
595-9511

ANS ON

:15F 11/39

13/14
MENU
SELECT
Press SELECT.
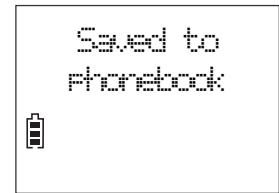
S4.E TO


1
SELECT
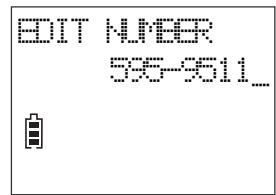
EDIT NUMBER
595-3511


( x - 2x) t - xy^2 = ( x - 2x) f^ t


123
456
789
0
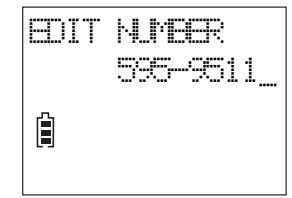
Edit the number if needed.
EDIT NUMBER
555511


MENU
SELECT
Press SELECT.
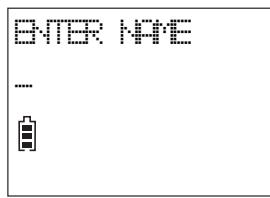
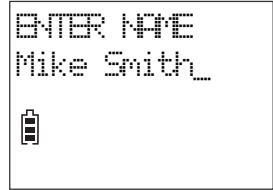
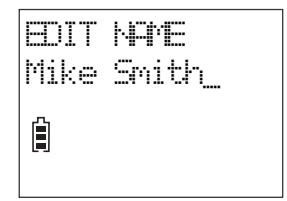
EDIT NAME
Mike Smith


128 456
1789 10
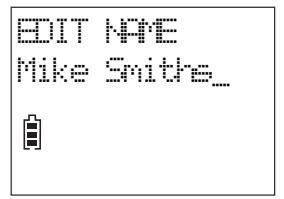
Edit the name if needed.
EDIT NAME
Mike Smiths


MENU
SELECT
Press SELECT to save.
Caller ID
Dial a caller ID log entry
Review the caller ID log entries, and when your desired entry shows on the handset screen:


Press TALK on the handset.
Delete a caller ID log entry
Review the caller ID log entries, and when your desired entry shows on the handset screen:

MUTE DELETE
Press DELETE on the handset.

Smart call blocker*
If you have subscribed to caller ID service, then you can use the Smart call blocker feature to screen incoming calls.
Smart call blocker is on, once you install your telephone. It allows all incoming calls to get through and ring by default. You can change the Smart call blocker settings to screen incoming calls.
With call screening active, Smart call blocker screens and filters all incoming calls from numbers or names that are not yet saved in your directory, allow list, block list, or star name list. You can easily add incoming phone numbers to your allow list and block list. This allows you to build up your lists of allowed and blocked numbers, and Smart call blocker will know how to deal with these calls when they come in again.
Read the Introducing Smart call blocker leaflet provided in your package to learn how to set up your Smart call blocker.
- Includes licenced QalteI™ technology.
Qaltel™ is a trademark of Truecall Group Limited.
Call categories
Calls are classified into four categories. Smart call blocker handles the calls in the following ways:
| CALL CATEGORY | CALL CONTROL |
| Welcome calls • Numbers saved in allow list. • Numbers saved in phonebook. • Numbers not found in block list. • Names saved in star name list. | Allow The telephone rings when there is an incoming call with number saved in your allow list or phonebook, but not in your block list. Robocalls with caller names saved in your star name list will also ring. |
| Unwelcome calls • Numbers saved in block list. | Block The telephone does not ring when there is an incoming call with number saved in your block list, and the call will be rejected. |
| CALL CATEGORY | CALL CONTROL |
| Calls without numbers • Numbers that are “out of area” or set to “Private”. Uncategorized calls • With absent caller ID number. • Numbers not found in phonebook. • Numbers not found in allow list. • Numbers not found in block list. • Caller ID names not found in star name list. | Option 1: Screening with caller name If you have selected this option, the telephone plays the screening announcement, and then asks the caller to say his/her name before the call rings on your telephone. You will then hear the caller's name announced if you have turned on the caller ID announce feature. Then, you can decide whether to accept or reject the call, or to forward the call to the answering system. Option 2: Screening without caller name If you have selected this option, the telephone plays the screening announcement, and then asks the caller to press the pound key (#) before the call rings on your telephone. You can then answer the call. Option 3: Allow (default settings) The telephone allows the calls to get through and ring. The caller's number will not be saved to the allow list. Option 4: Answering system If you have selected this option, the telephone forwards the calls to the answering system without ringing. Option 5: Block If you have selected this option, the telephone rejects the calls with block announcement without ringing. The caller's number will not be saved to the block list. |
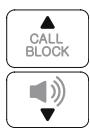
Set Smart call blocker on/off


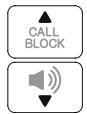
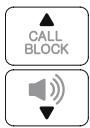
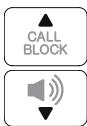
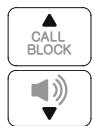
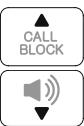
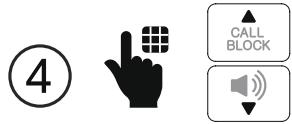
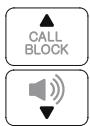
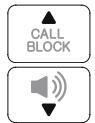
Press CALL BLOCK when the handset is not in use.
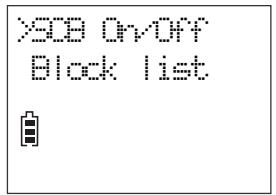

Press SELECT to select SCB On/Off.
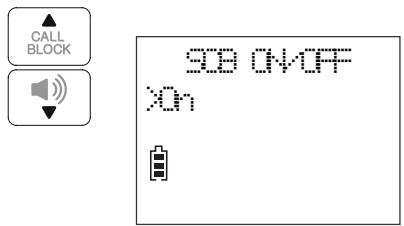

Scroll to On or Off, and then press SELECT.
Set welcome calls
Add allow list entry
Add numbers to the allow list that you want to allow their calls to get through to you. The allow list stores up to 200 numbers.


Press CALL BLOCK when the handset is not in use.
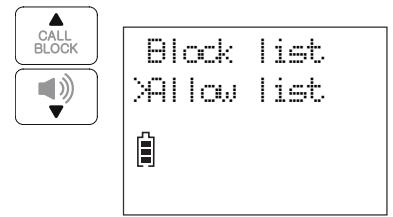


Scroll to Allow list, and then press SELECT.


Scroll to Add new entry, and then press SELECT.


Enter the phone number and name, and then press SELECT to save.
Smart call blocker
Set welcome calls
Add star name list entry
Add names (up to 15 characters) of organizations like schools, medical offices, and pharmacies that use robocalls to communicate important information to you. Their calls will get through to you. The star name list stores up to 10 names.


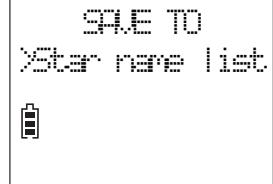
Press CALL BLOCK when the handset is not in use.
Allow list
Star rare list
Review

newent


MENU
SELECT
Scroll to Star name list, and then press SELECT.


SELECT
Scroll to Add new entry, and then press SELECT.
BNER MIE
Baser Elen


MENUSELECT
Enter the name, and then press SELECT to save.
Set welcome calls
Save a caller ID log to the allow list
Review the caller ID log entries:
- Press MENU when the handset is not in use.
- Scroll to Caller ID log, and then press SELECT.
- Press SELECT to select Review.

Mike Smith 595-9511

NEW
09:15PM
11/30
SPE TO

EDIT NUMBER
555-5511
EDIT NAME
Mike Smith


MENU
SELECT


MENU
SELECT
Browse through the entries.
When the desired entry
displays, press SELECT.


MENU
SELECT
Scroll to Allow list, and then press SELECT.
Edit the phone number and name if needed, and then press SELECT to save.
Set welcome calls
Save a caller ID log to the star name list
Review the caller ID log entries:
- Press MENU when the handset is not in use.
- Scroll to Caller ID log, and then press SELECT.
- Press SELECT to select Review.


MENU
SELECT
Browse through the entries. When the desired entry displays, press SELECT.


MENU
SELECT
Scroll to Star name list, and then press SELECT.


MENU
SELECT
Press SELECT to save.
Set unwelcome calls
Add block list entry
Add numbers to the block list that you want to block them from calling. The block list stores up to 1,000 entries.


CALL BLOCK
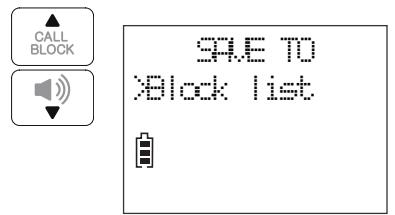
Press CALL BLOCK when the handset is not in use.
DB On-Off
Block list

Review
Add new entries

自


MENU
SELECT
Scroll to Block list, and then press SELECT.

MENU
SELECT
Scroll to Add new entry, and then press SELECT.
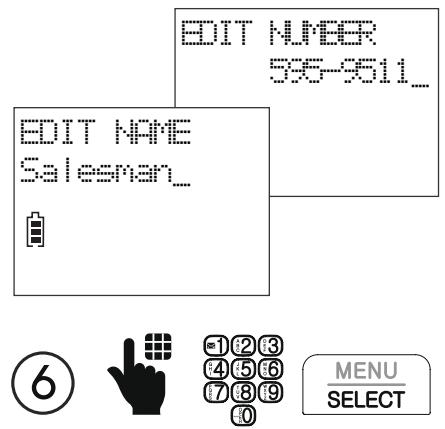
BITER NUMBER
595-9511
日
Salesman


MENU
SELECT
Enter the phone number and name, and then press SELECT to save.
Smart call blocker
Set unwelcome calls
Save a caller ID log to the block list
Review the caller ID log entries:
- Press MENU when the handset is not in use.
- Scroll to Caller ID log, and then press SELECT.
- Press SELECT to select Review.


MENUSELECT
Browse through the entries. When the desired entry displays, press SELECT.


SELECT
Scroll to Block list, and then press SELECT.
Edit the phone number and name if needed, and then press SELECT to save.
Control calls without numbers
Use this setting to control "out of area" calls or calls with numbers that are set to "Private". You can choose to allow or reject these calls directly. You can also choose to screen them with or without learning the callers' names before you decide whether to answer or reject these calls. Moreover, you can forward these calls to the answering system.


CALL BLOCK
Press CALL BLOCK when the handset is not in use.
Star rare list

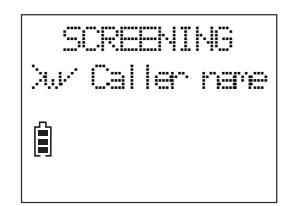
CALLWOONM Screener

SCREENING w'Caller rare


MENUSELECT


SELECT

MENUSELECT
Scroll to Calls w/o num, and then press SELECT.
Scroll to select Screening, Allow, Answering sys or Block, and then press SEL
If you select Screening, scroll to select w/Caller name or w/o Caller name, and then press SELECT.
Smart call blocker
Control uncategorized calls
Use this setting to control calls with numbers that are not in your phonebook, allow list or block list, or have no caller ID number display. You can choose to allow or reject these calls directly. You can also choose to screen them with or without learning the callers' names before you decide whether to answer or reject these calls. Moreover, you can forward these calls to the answering system.


Press CALL BLOCK when the handset is not in use.

Calls wor run Xrteatrizd


MENUSELECT


MENUSELECT
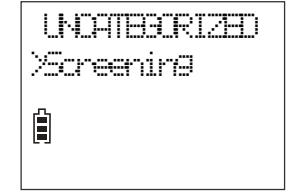
Scroll to Uncategorized, and then press SELECT.
Scroll to select Screening, Allow, Answering sys or Block, and then press SELECT.


MENUSE SELECT
If you select Screening, scroll to select w/Caller name or w/o Caller name, and then press SELECT when done.
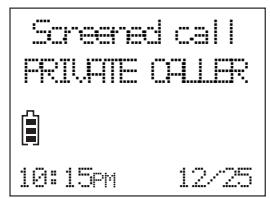
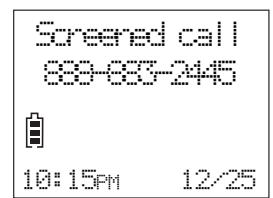
Screen calls without numbers
If Smart call blocker is on, and you have set to screen calls without numbers, the telephone will not ring when receiving calls without numbers. It plays the screening announcement to the caller and asks the caller to respond before putting the call through to you.

The telephone is playing the screening announcement to the caller.


- OR -
After screening, the telephone rings. Press TALK or to pick up the call.
If you have selected w/Caller name to ask callers to say their names:
After you pick up the call, the telephone announces:
To answer the call, press 1. To send this call to the answering system, press 4. To repeat these options, press *".


OR -
- Press 1 to answer the call;
- Press 4 to send it to the answering system; or
- Press OFF to hang up.
Screen un categorized calls
If Smart call blocker is on, and you have set to screen un categorized calls, the telephone will not ring when receiving these calls. It plays the screening announcement to the caller and asks the caller to respond before putting the call through to you.

The telephone is playing the screening announcement to the caller.


OR
1
1

After screening, the telephone rings. Press TALK or to pick up the call.
If you have selected w/Caller name to ask callers to say their names:
After you pick up the call, the telephone announces:
To answer the call, press 1. To answer and always allow this number, press 2. To block this number, press 3. To send this call to the answering system, press 4. To repeat these options, press *".


-OR
-OR

Press 1 to answer the call;
- Press 2 to answer and always allow this number;
- Press 3 or CALL BLOCK to block the call; or
- Press 4 to send it to the answering system; or
- Press OFF to hang up.
Add a screened number to the allow list or block list
When the telephone announces the screening options after you pick up a screened call:

"To answer the call, press 1. To answer and always allow this number, press 2. To block this number, press 3. To send this call to the answering system, press 4. To repeat these options, press *".
Add a screened number to the allow list


Press 2 to answer the call. The telephone will add the current number to the allow list.
Add a screened number to the block list


- OR -

Press 3 or CALL BLOCK to block the call. The telephone will add the current number to the block list.
Option while on a call
When you are on a call and speaking to the caller, and you do not want to continue the call, you can end the call with block announcement and add the number to the block list.
- During a call, press CALL BLOCK.
- Press SELECT to end the call.
- OR
CALL BLOCK
Answering system
About the built-in answering system and voicemail service
For message recording, your telephone has a built-in answering system, and it also supports voicemail service offered by your telephone service provider (subscription is required, and fee may apply).
Built-in answering system VS Voicemail service
BUILT-IN ANSWERING SYSTEM
VOICEMAIL SERVICE
| SUPPORTED BY | Telephone system | Telephone service provider |
| SUBSCRIPTION | No | Yes |
| FEES | No | May apply |
| ANSWER INCOMING CALLS | • After 4 rings by default. • It can be changed via handset menu. | • Usually after 2 rings. • It can be changed by contacting your telephone service provider. |
BUILT-IN ANSWERING SYSTEM
VoICEMAIL SERVICE
| STORAGE | Telephone base | Server or System |
| DISPLAY NEW MESSAGES | • Handset - XX New messages | • Handset - V M and New voicemail |
| RETRIEVE-messages | • Press▶■ on the telephone base; OR • Press MENU, and then select Play messages on the handset; OR • Access remotely with an access code. | • Press and hold 1 on the dialpad, and enter an access number and/or passcode from your telephone service provider. |
Answering system
Turn the built-in answering system on or off
On the telephone base:


ANS ON/OFF
Press ANS ON/OFF.
Set number of rings
You can set your answering system to answer calls at least two rings earlier than your voicemail service. For example, if your voicemail service answers after six rings, set your answering system to answer after four rings. Thus, if you are on a call, or if the answering system is busy recording a message and you receive another call, the second caller can leave a voicemail message.


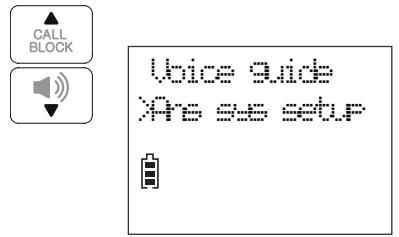
Press MENU when the handset is not in use.


Scroll to Answering sys, and then press SELECT.
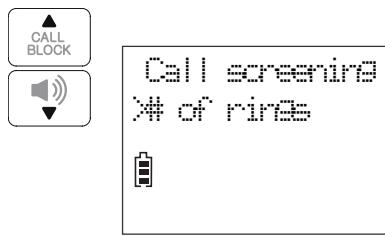
Set number of rings


MENU
SELECT
Scroll to Ans sys setup, and then press SELECT.


MENU
SELECT
Scroll to # of rings, and then press SELECT.
Select 6, 5, 4, 3, 2 or Toll saver, and then press SELECT.
NOTE
- If you select Toll saver, the answering system answers a call after two rings when you have new messages, and after four rings when there are no new messages. This feature allows you to check for new messages and avoid paying long distance charges when calling from out of your local area.
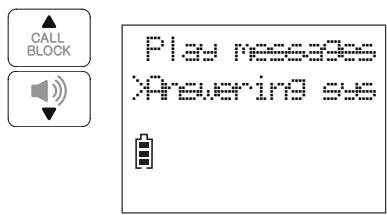
Message playback
On the telephone base:


- OR -
On the cordless handset:
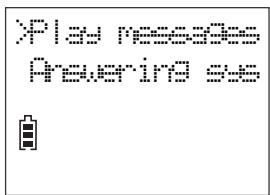


Press MENU when the handset is not in use.


MENUSELECT
Press SELECT to select Play messages.
兴TIP
- While playing back a message on the telephone base, you can press SLOW to reduce the playback speed.
Skip a message
If you are using the cordless handset to play messages, you can skip a message.
On the cordless handset:


Repeat the playing message
On the telephone base:

REPEAT
- OR -
On the cordless handset:


Answering system
Play the previous message
On the telephone base:


REPEAT


REPEAT
Press REPEAT twice.

On the cordless handset:


Press 4 twice.
Delete a message
When message is playing:
On the telephone base:

DELETE
- OR -
On the cordless handset:

MUTE DELETE
Delete all messages
On the telephone base:


DELETE


DELETE
Press DELETE twice.
On the cordless handset:


SELECT
Press MENU when the handset is not in use.
Prrnne

Arooert.
Delete all old

Delete all old reassas


SELECT
Scroll to Answering sys, then press SELECT.


MENUSELECT
Scroll to Delete all old, then press SELECT.


MENUSELECT
Press SELECT again to confirm.
Remote access
You can reach your answering system remotely by dialing your home telephone number from any touch-tone telephone. A two-digit security code is required. The preset code is 19. You can set the code from 00 to 99.

To access your answering system remotely, dial your telephone number from any touch-tone telephone.

When the system plays your answering system announcement, "Hello. Please leave a message after the tone.", enter the two-digit security code.

Enter one of the remote commands.
| COMMAND | DESCRIPTION |
| 1 | Play all messages. |
| 2 | Play only new messages. |
| 3 | Delete the current message (during playback). |
| 33 | Delete all old messages. |
| 4 | Repeat the current message (during playback). |
| 5 | Stop. |
| *5 | Hear a list of remote commands. |
| 6 | Skip to the next message (during playback). |
| *7 | Record a new announcement. |
| 8 | End the call. |
| 0 | Turn the answering system on or off. |
Set remote access code
You can set your own remote access code from 00 to 99.


MENUSELECT
Press MENU when the handset is not in use.
Plnne


Voice GuideHere is a great set up


of rings
XRemote code


SELECT
Scroll to Answering sys, and then press SELECT.


MENUSELECT
Scroll to Ans sys setup, and then press SELECT.


MENUSELECT
Scroll to Remote code, and then press SELECT.
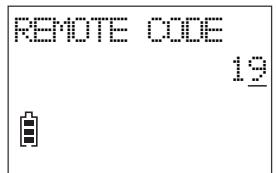
Enter a two-digit number.
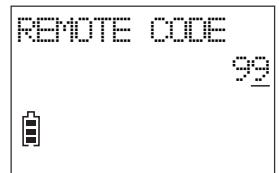
Press SELECT to save.


MENUSELECT
Add and register expansion handset
You can add new cordless handsets (SN5107, purchased separately) to expand your telephone system. Your telephone base supports a maximum of four cordless handsets. Additional handsets are assigned with numbers in sequential order.
Charge the new handset without interruption for at least 30 minutes before registering it to the telephone base. After charged, each expansion handset displays To register HS, see manual.

PAGE/ INTERCOM
When the telephone is not in use, press and hold PAGE on the telephone base for about five seconds until the visual ringer indicator light turns on. Release PAGE.


Press the pound (#) key on the handset to register.
Registerir#.. Please wait
自
HANDSET2 Registered
自
When the registration is successful, the handset displays HANDSET X Registered.
Add and register photo speed dial handset
You can add a new photo speed dial handset (SN5307, purchased separately) to your telephone system. The SN5307 cordless photo speed dial handset lets you quickly dial one of the four preset numbers by just pressing the photo speed dial key.
If you have already set the direct memory speed dial keys 1, 2, 3 and 4 on the telephone base, the same numbers will be automatically set for the dial keys of your newly registered photo speed dial handset.
You can register a maximum of four cordless handsets.
You need to register your new photo speed dial handset to the telephone base before use.
PAGE/ NTERCOM

PAGE/ INTERCOM
When the telephone is not in use, press and hold PAGE on the telephone base for about five seconds until the visual ringer indicator light turns on. Release PAGE.

Put the handset on its charger to begin registration. The handset CHARGE light alternates red and green quickly to indicate the registrat is in progress.
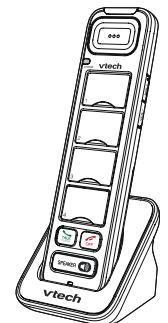
For registration and detailed operations, read the user's manual of your new photo speed dial handset provided in your package.
Device setup
You can add VTech compatible Cordless audio doorbell and ULE Wearable home SOS pendant (SN7021 and SN7022, both purchased separately) to your telephone system.
The Cordless audio doorbell (SN7021) helps you get notified at your telephone system upon visitors' arrival. When a visitor presses the Audio doorbell, both the base and the handset will play the chime tone, and you can then answer the doorbell call and talk to the visitor at your door with the handset or base. For operation instructions, refer to page 94 to page 105.
The ULE Wearable home SOS pendant (SN7022) function as same as the SOS button of your cordless handset. It acts as a handy pendant to let you quickly call the preset SOS numbers for help in an emergency, even when your telephone is beyond your reach. For detailed setups and operations, refer to Set SOS emergency call section on page 13 to page 18, and Make SOS emergency call section on page 38.

NOTE
- You can add a maximum of two Cordless audio doorbells and 30 compatible ULE devices to your telephone base.
NOTES
- You need to register your newly purchased devices to the telephone base before use.
- Make sure the new devices are powered on with batteries or with AC power before registering them to the telephone base.
Add and register a new device
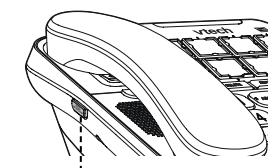
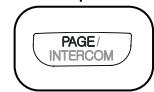

PAGE/ INTERCOM
When the telephone is not in use, press and hold PAGE on the telephone base for about five seconds until the visual ringer indicator light turns on. Release PAGE.

Audio doorbell
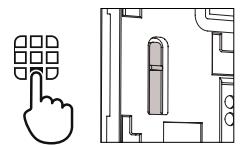
Press and hold the pair button on the back of the audio doorbell until the chime button LED light flashes, then release the pair button. When registration is successful, the chime button LED light becomes steady on, and then the base beeps once.
SOS pendant

Press and hold CANCEL on the back of the SOS pendant until the LED light on the front flashes, then release the button. When registration is successful, the LED light turns off, and then the base beeps once.
Audio doorbell
(Model SN7021, purchased separately)
If you have purchased and registered an Cordless audio doorbell (SN7021) to the telephone base, the Doorbell sub-menu option appears in the Set device menu of the cordless handset. You can set up your Cordless audio doorbell, for example, set the chime volume and tone, and divert doorbell calls to a preset number. You can also record doorbell calls.
Set chime volume

Press
MENUS SELECT
the handset when
it is not in use.
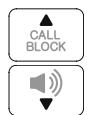
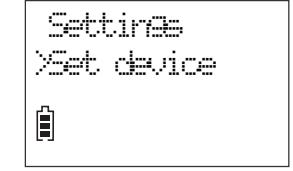

Scroll to Set device, and then press SELECT.
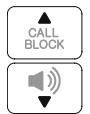
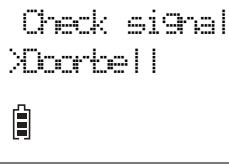


Scroll to Doorbell, and then press SELECT.
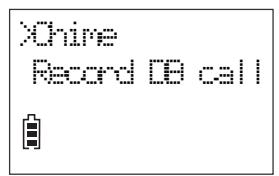


MENUSECT
Press SELECT to select Chime.


Press SELECT again to select Chime volume.
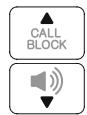


MENUSELECT
Scroll to select from Volume 1 to Volume 5, or select Off, and then press SELECT.
Audio doorbell
(Model SN7021, purchased separately)
Set chime tone


MENUSECT
Press MENU when the handset is not in use.
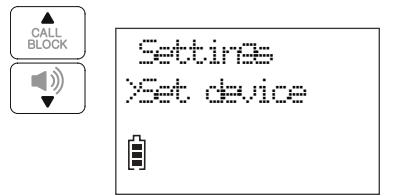


MENUSECT
Scroll to Set device, and then press SELECT.


MENUSELECT
Scroll to Doorbell, and then press SELECT.
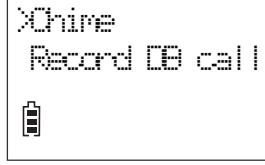
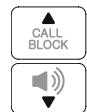


MENUSEL


MENUSELECT
Press SELECT to select Chime.
Scroll to Chime tone, and then press SELECT.
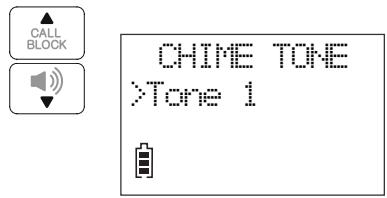


MENUSELECT
Scroll to select from Tone 1 to Tone 5, or select Off, and then press SELECT.
Additional devices
Audio doorbell (Model SN7021, purchased separately)
When a visitor presses your audio doorbell, all your devices chime and the handset screen shows Doorbell X is ringing.

Answer a doorbell call
Using a cordless handset:


Press TALK on a cordless handset to answer.
Using the telephone base:
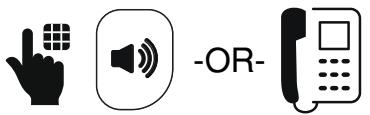
Press on the telephone base or lift the corded handset to answer.
Decline a doorbell call
Using a cordless handset:


When the chime tone is ringing, press OFF on the handset.
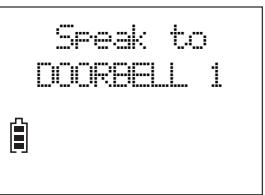
NOTE
- After you press TALK on the cordless handset to answer the doorbell, the handset screen displays Speak to DOORBELL X. You can then talk with the visitor at your door.
Record doorbell call
You can record conversations between you at the telephone and the visitor at your door. Your telephone is set to record all doorbell calls by default. You can disable the setting.


MENUSELECT
Press MENU on the handset when it is not in use.
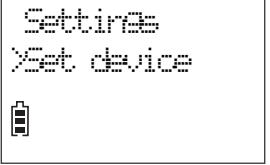


SELECT
Scroll to Set device, and then press SELECT.


MENUSELECT
Scroll to Doorbell, and then press SELECT.


MENUS SELECT
Scroll to Record DB call and press SELECT. Then, scroll to On or Off, and press SELECT.
NOTE
- Recorded doorbell calls are stored as voice messages. See Message playback section on page 84 to retrieve your doorbell call conversations.
Additional devices
Audio doorbell (Model SN7021, purchased separately)
You can divert all doorbell calls to a preset external number, or decline a doorbell call and forward the doorbell call to the preset external number.
Set call divert number

Press MENU on the handset when it is not in use.

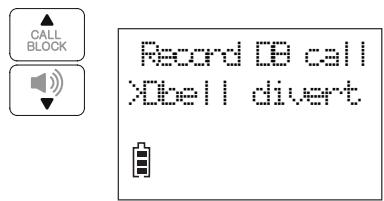


Scroll to Set device, and then press SELECT.
Scroll to Doorbell, and then press SELECT.
Scroll to Dbell divert, and then press SELECT.

NOTE
When a visitor presses the doorbell and the doorbell call is diverted to the preset number, the call receiver of the preset number hears the message "This is a diverted call from doorbell. Please press any number key to start the conversation." Your telephone is set to record all doorbell call conversations by default. You can disable the setting. See Record doorbell call on page 99.
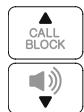
Divert node
XFreest nurner
MENU
SELECT


MENU
SELECT
Scroll to Preset number, and then press SELECT.


Enter the destination number.
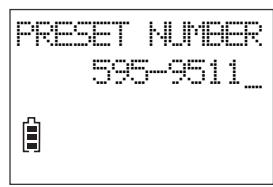


MENU
SELECT
Press SELECT to save.
Additional devices
Audio doorbell (Model SN7021, purchased separately)
You can set your audio doorbell to divert all doorbell calls to the preset external number when visitors press the doorbell.
Set auto call divert to preset number


MENUSELECT
Press MENU on the handset when it is not in use.

Settine Set device


Scroll to Set device, and then press SELECT.
Check signal
[ortell]
自


MENUSELECT
Scroll to Doorbell, and then press SELECT.

NOTE
To cancel all call diverts to the preset number:
- Repeat from step 1 to step 5.
- Then, at step 6, scroll to Off and then press SELECT.
Record ID call Xbell divert
自
Divert mode Preset number
DIVERT MODE Auto divert
自


MENU
SELECT


MENU
SELECT


MENUSELECT
Scroll to Dbell divert, and then press SELECT.
Press SELECT to select Divert mode.
Scroll to Auto divert, and then press SELECT.
Additional devices
Audio doorbell (Model SN7021, purchased separately)
You can also set up call divert to the preset number, only when you press OFF on your handset to decline the doorbell call.
Set declined call divert to preset number


MENUSELECT
Press MENU on the handset when it is not in use.
Settings Xset device


Scroll to Set device, and then press SELECT.
Check signal
[ortell]


SELECT
Scroll to Doorbell, and then press SELECT.

NOTE
To cancel all call diverts to the preset number:
- Repeat from step 1 to step 5.
- Then, at step 6, scroll to Off and then press SELECT.
Record DB call Ytbell divert
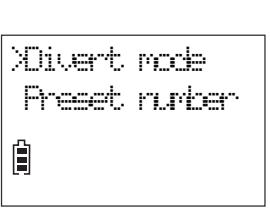


SELECT

SELECT
Press SELECT to select Divert mode.
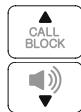
DIVERT MODE Declire divert


MENUSELECT
Scroll to Decline divert, and then press SELECT.
Additional devices
Test device signal strength
You can check the signal strength of your devices (SN7021/SN7022, both purchased separately), for example, before mounting it. Follow the instructions below to check the signal strength between the device and the telephone base. For Audio doorbell (SN7021), make sure you mount them in a location where the signal strength is good.


MENU
SELECT
Press MENU on the handset when it is not in use.

Setting
Set device


MENU
SELECT
Scroll to Set device, and then press SELECT.
Check signal Dortbell


MENUE SELECT
Press SELECT to select
Check signal.
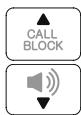
DEVICES XOOOPBELL 1


MENUSELECT
Scroll to select the desired device, and then press SELECT.

When the handset displays Awaiting signal:
Audio doorbell
DEVICES 1000REELI
Awaiting signal


Press the chime button on the audio doorbell.
SOS pendant
DEVICESXFENDANT3
Awaiting signal

CANCEL
-OR
Press the CANCEL button on the audio doorbell.
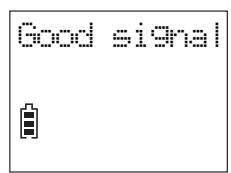
TIP
When the handset displays Good signal, press SELECT to confirm.
- If the handset displays No signal or Weak signal, check your device and make sure it is powered on, or select another location nearer to the telephone base.
Device monitoring
If there are additional devices registered to the telephone base, the names of the registered devices appear in the Devices menu of the cordless handset.
You can view the current status of each of the registered devices and check whether they are active, inactive, or with low battery.
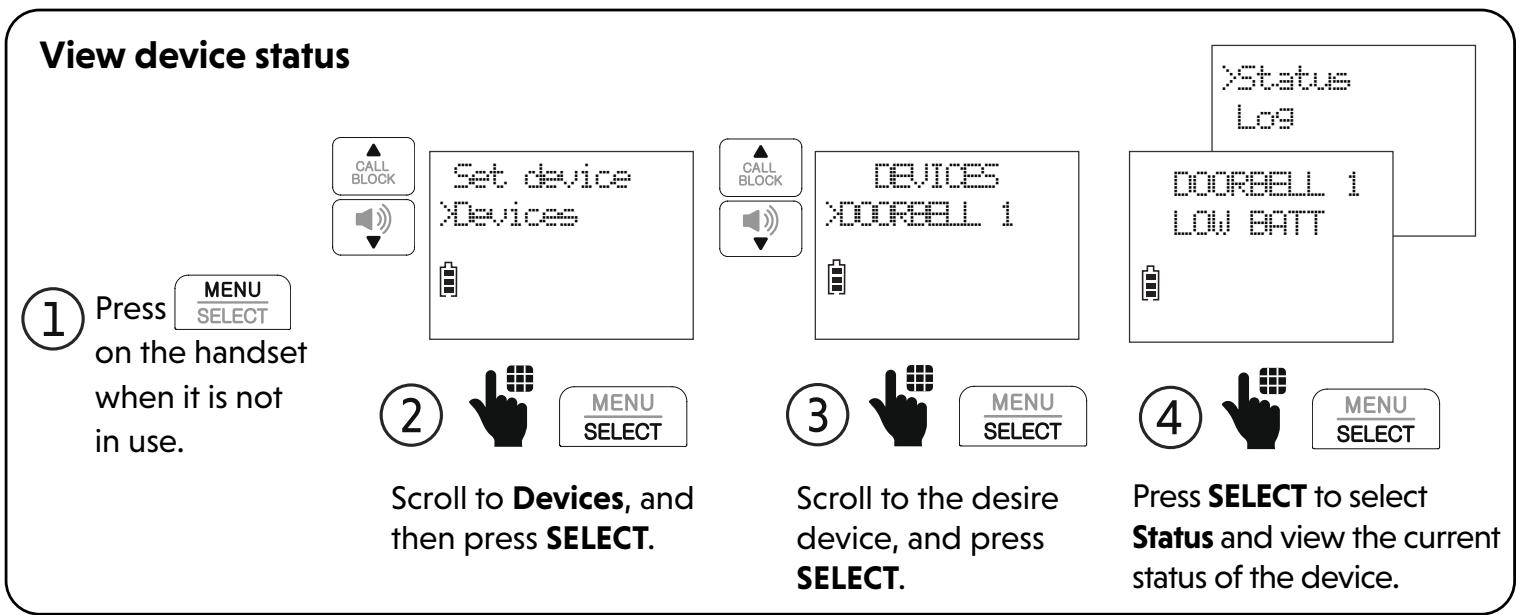
Neep help?
For operations and guides to help you using your telephone, and for the latest information and supports, go and check the online help topics and online FAQs.
Use your smartphone or mobile device to access our online help.
-
Go to https://help.vtechphones.com/SN5147 (US); OR https://phones.vtechcanada.com/en/support/general/manuals?model=SN5147 (Canada)
-
Scan the QR code on the right. Launch the camera app or QR code scanner app on your smartphone or tablet. Hold the device's camera up to the QR code and frame it. Tap the notification to trigger the redirection of the online help.
-
If the QR code is not clearly displayed, adjust your camera's focus by moving your device closer or further away until it is clear.
You can also call our Customer Support at 1 (800) 595-9511 [in US] or 1 (800) 267-7377 [in Canada] for help.

SN5147 (US)

SN5147 (CA)
Limited warranty
What does this limited warranty cover?
The manufacturer of this VTech Product warrants to the holder of a valid proof of purchase ("Consumer" or "you") that the Product and all accessories provided in the sales package ("Product") are free from defects in material and workmanship, pursuant to the following terms and conditions, when installed and used normally and in accordance with the Product operating instructions. This limited warranty extends only to the Consumer for Products purchased and used in the United States of America and Canada.
What will VTech do if the Product is not free from defects in materials and workmanship during the limited warranty period ("Materially Defective Product")?
During the limited warranty period, VTech's authorized service representative will replace at VTech's option, without charge, a materially Defective Product. If we replace the Product, we may use new or refurbished replacement parts. If we choose to replace the Product, we may replace it with a new or refurbished Product of the same or similar design. We will retain defective parts, modules, or equipment. Replacement of the Product, at VTech's option, is your exclusive remedy. VTech will return the replacement Products to you in working condition. You should expect the replacement to take approximately 30 days.
How long is the limited warranty period?
The limited warranty period for the Product extends for ONE (1) YEAR from the date of purchase. If VTech replaces a materially Defective Product under the terms of this limited warranty, this limited warranty also applies to the replacement Product for a period of either (a) 90 days from the date the replacement Product is shipped to you or (b) the time remaining on the original one-year warranty; whichever is longer.
What is not covered by this limited warranty?
This limited warranty does not cover:
- Product that has been subjected to misuse, accident, shipping or other physical damage, improper installation, abnormal operation or handling, neglect, inundation, fire, water or other liquid intrusion.
- Product that has been subjected to contact with liquid, water, rain, extreme humidity or heavy perspiration, sand, dirt or the like; but then only to the extent the damage was not caused by incorrectly securing the waterproof handset's protective elements, for example, failing to properly close a seal), or such protective elements are damaged or missing (e.g. a cracked battery door), or subjecting a Product to conditions beyond its stated specifications or limits (e.g. 30 minutes in 1 meter of fresh water).
- Product that has been damaged due to repair, alteration or modification by anyone other than an authorized service representative of VTech;
- Product to the extent that the problem experienced is caused by signal conditions, network reliability, or cable or antenna systems;
- Product to the extent that the problem is caused by use with non-VTech accessories;
- Product whose warranty/quality stickers, product serial number plates or electronic serial numbers have been removed, altered or rendered illegible;
- Product purchased, used, serviced, or shipped for repair from outside the United States of America or Canada, or used for commercial or institutional purposes (including but not limited to Products used for rental purposes);
- Product returned without a valid proof of purchase (see item 2 below); or
- Charges for installation or set up, adjustment of customer controls, and installation or repair of systems outside the unit.
How do you get warranty service?
To obtain warranty service in the United States of America, please visit our website at www.vtechphones.com or call 1 (800) 595-9511. In Canada, go to phones.vtechcanada.com or dial 1 (800) 267-7377.
NOTE: Before calling for service, please review the user's manual - a check of the Product's controls and features may save you a service call.
Except as provided by applicable law, you assume the risk of loss or damage during transit and transportation and are responsible for delivery or handling charges incurred in the transport of the Product(s) to the service location. VTech will return replaced Product under this limited warranty. Transportation, delivery or handling charges are prepaid.
VTech assumes no risk for damage or loss of the Product in transit. If the Product failure is not covered by this limited warranty, or proof of purchase does not meet the terms of this limited warranty, VTech will notify you and will request that you authorize the cost of replacement prior to any further replacement activity. You must pay for the cost of replacement and return shipping costs for the replacement of Products that are not covered by this limited warranty.
What must you return with the Product to get warranty service?
- Return the entire original package and contents including the Product to the VTech service location along with a description of the malfunction or difficulty; and
- Include a "valid proof of purchase" (sales receipt) identifying the Product purchased (Product model) and the date of purchase or receipt; and
- Provide your name, complete and correct mailing address, and telephone number.
Other limitations
This warranty is the complete and exclusive agreement between you and VTech. It supersedes all other written or oral communications
related to this Product. VTech provides no other warranties for this Product. The warranty exclusively describes all of VTech's responsibilities regarding the Product. There are no other express warranties. No one is authorized to make modifications to this limited warranty and you should not rely on any such modification.
State/Provincial Law Rights: This warranty gives you specific legal rights, and you may also have other rights, which vary from state to state or province to province.
Limitations: Implied warranties, including those of fitness for a particular purpose and merchantability (an unwritten warranty that the Product is fit for ordinary use) are limited to one year from the date of purchase. Some states/provinces do not allow limitations on how long an implied warranty lasts, so the above limitation may not apply to you. In no event shall VTech be liable for any indirect, special, incidental, consequential, or similar damages (including, but not limited to lost profits or revenue, inability to use the Product or other associated equipment, the cost of substitute equipment, and claims by third parties) resulting from the use of this Product. Some states/provinces do not allow the exclusion or limitation of incidental or consequential damages, so the above limitation or exclusion may not apply to you.
Please retain your original sales receipt as proof of purchase
Disclaimer and Limitation of Liability
VTech Communications, Inc. and its suppliers assume no responsibility for any damage or loss resulting from the use of this user's manual. VTech Communications, Inc. and its suppliers assume no responsibility for any loss or claims by third parties that may arise through the use of this product.
Company: VTech Communications, Inc.
Address: 9020 SW Washington Square Road - Ste 555 Tigard, OR 97223, United States
Phone: 1 (800) 595-9511 in the U.S. or 1 (800) 267-7377 in Canada
Technical specifications
| Frequency control | Crystal controlled PLL synthesizer |
| Transmit frequency | Handset: 1921.536-1928.448 MHz Telephone base: 1921.536-1928.448 MHz |
| Channels | 5 |
| Nominal effective range | Maximum power allowed by FCC and IC. Actual operating range may vary according to environmental conditions at the time of use. |
| Power requirement | Handset: 1.2V 500mAh, 3 x AAA Ni-MH battery Telephone base: 6V DC @ 800mA Charger: 6V DC @ 400mA |
| Memory | Phonebook: 50 memory locations; up to 30 digits and 15 characters Caller ID log: 50 memory locations; up to 24 digits and 15 characters Call block: 1000 entries |
The Bluetooth® word mark and logos are owned by Bluetooth SIG, Inc. and any use of such marks by Advanced American Telephones and its parent, VTech Holdings Limited, is under license. VTech Holdings Limited is a member of Bluetooth SIG, Inc. Other trademarks and trade names are those of their respective owners.
Audio Assist® is a registered trademark of Advanced Americian Telephones.
Qaltel™ is a trademark of Truecall Group Limited.

Recycle this product when you are done with it
Scan the QR code on the right or visit www.vtechphones.com/recycle.
(For the US only)


Specifications are subject to change without notice. © 2024 VTech Communications, Inc. | © 2024 VTech Technologies Canada Ltd. All rights reserved. 01/24. SN5147_UG_V1_BT_Y


- Congratulations
- Important safety instructions
- SAVE THESE INSTRUCTIONS
- Battery
- Precautions for users of implanted cardiac pacemakers
- Pacemaker patients
- About cordless telephones
- For C-UL compliance only
- Canada.
- FCC, ACTA and IC regulations
- FCC Part 15
- telephone.
- FCC Part 68 and ACTA
- Industry Canada
- Table of contents
- What's in the box 1
- Connect and install 2
- Setup 8
- Operate 34
- Bluetooth® 48
- Phonebook 56
- Caller ID 62
- Smart call blocker* 65
- Answering system 80
- Additional devices 90
- Neep help? 109
- What's in the box
- Connect the telephone base
- Install the battery
- CAUTIONS
- NOTES
- Connect the charger
- Charge the battery
- Line power mode (no AC power)
- To make a call during power failure:
- To answer a call during power failure:
- Connect and install
- Mount the telephone base (optional)
- Date and time
- NOTE
- - OR -
- Voice guide to set Smart call blocker
- Voice guide to set answering system
- SOS emergency call
- How does SOS emergency call work?
- Set SOS emergency numbers
- Enable or disable internal SOS alert
- Record SOS message
- Play or reset SOS message
- Photo speed dial
- Store a photo speed dial entry:
- Insert photos for speed dial keys:
- LCD language
- Talking digits
- Key tone
- Caller ID announce on/off
- Use caller ID to automatically set date and time
- Voicemail number
- Clear voicemail indicator
- Dial mode
- Alarm reminder and melody
- Display
- Make a call
- Answer a call
- On the cordless handset:
- On the telephone base:
- End a call
- Speakerphone
- Volume
- Handset
- Telephone base
- CAUTION
- Make SOS emergency call
- You can cancel SOS emergency call at any time:
- Temporary ringer silencing
- Call waiting
- Redial
- Photo/memory speed dial
- Temporary tone dialing
- Audio Assist®
- Turn on/off Audio Assist:
- Equalizer
- Find handset
- Join a call in progress
- Intercom
- Make intercom call using the cordless handset:
- Make intercom call using the telephone base:
- OR
- Call transfer using Intercom
- Transfer call:
- Share call:
- End call:
- Turn on Bluetooth feature
- Turn off Bluetooth feature
- Pair and connect a Bluetooth headset
- Make a call with Bluetooth headset Answer a call with Bluetooth headset
- End a call with Bluetooth headset
- Switch between cordless handset and Bluetooth headset
- While on an outside call or intercom call with a cordless handset:
- While on an outside call or intercom call with a connected Bluetooth headset:
- Mute the microphone during a call:
- Bluetooth headset name
- Remove Bluetooth headset
- Set auto connection / manual connection
- Auto connection
- Manual connection
- Phonebook
- Add a phonebook entry
- Review phonebook entry
- Dial a phonebook entry
- Delete a phonebook entry
- Save a radial entry to the phonebook
- Edit a phonebook entry
- Caller ID
- Review caller ID log entry
- Save a caller ID log entry to the phonebook
- Dial a caller ID log entry
- Delete a caller ID log entry
- Smart call blocker*
- Call categories
- Set Smart call blocker on/off
- Set welcome calls
- Add allow list entry
- Smart call blocker
- Add star name list entry
- Save a caller ID log to the allow list
- Set unwelcome calls
- Add block list entry
- Control calls without numbers
- Control uncategorized calls
- Screen calls without numbers
- Screen un categorized calls
- Add a screened number to the allow list or block list
- Add a screened number to the allow list
- Add a screened number to the block list
- Option while on a call
- Answering system
- About the built-in answering system and voicemail service
- Built-in answering system VS Voicemail service
- BUILT-IN ANSWERING SYSTEM
- VOICEMAIL SERVICE
- Turn the built-in answering system on or off
- Set number of rings
- Message playback
- Skip a message
- Repeat the playing message
- Play the previous message
- Delete a message
- When message is playing:
- Delete all messages
- Remote access
- Set remote access code
- Add and register expansion handset
- Add and register photo speed dial handset
- Device setup
- Add and register a new device
- Audio doorbell
- SOS pendant
- Set chime volume
- Set chime tone
- Additional devices
- Audio doorbell (Model SN7021, purchased separately)
- Answer a doorbell call
- Decline a doorbell call
- Record doorbell call
- Set call divert number
- Set auto call divert to preset number
- Set declined call divert to preset number
- Test device signal strength
- Device monitoring
- Neep help?
- Limited warranty
- What does this limited warranty cover?
- What will VTech do if the Product is not free from defects in materials and workmanship during the limited warranty period ("Materially Defective Product")?
- How long is the limited warranty period?
- What is not covered by this limited warranty?
- How do you get warranty service?
- What must you return with the Product to get warranty service?
- Other limitations
- Please retain your original sales receipt as proof of purchase
- Disclaimer and Limitation of Liability
- Technical specifications
Brand : VTECH
Model : SN5147
Category : Cordless phone