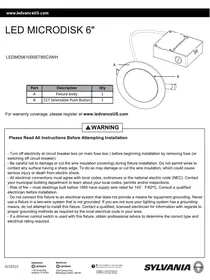
LEDMD561000TS93CWH - Lighting SYLVANIA - Free user manual and instructions
Find the device manual for free LEDMD561000TS93CWH SYLVANIA in PDF.


| Product Type | LED Recessed Light Fixture |
| Brand | SYLVANIA |
| Model | LEDMD561000TS93CWH |
| Color Temperature | Selectable: 2700K, 3000K, 3500K, 4000K, 5000K |
| Cutout Diameter | 6.3 inches (160 mm) |
| Power Supply | 120 V, 60 Hz |
| Beam Angle | 111.9° |
| Luminous Flux | Approximately 900 lm (estimate) |
| Power | Approximately 15 W (estimate) |
| Protection Rating | IP20 (indoor use) |
| Functions | Wireless pairing, color temperature selection, dimming not compatible |
| Installation | Recessed in ceiling, requires at least 3 inches of space above |
| Maintenance | Clean with a damp non-abrasive cloth |
| Safety | Cut power before installation; grounding required; do not use with unspecified dimmer |
| Replacement Parts | Luminaire housing, TCP push button, cutout template, wire connectors, power supply box, screws |
| Warranty | 5-year limited (excluding labor) |
| Repairability | Contact LEDVANCE at 1-800-544-4828 |
| Compliance | FCC Part 15, Class B; NMB-005 (B) |
Frequently Asked Questions - LEDMD561000TS93CWH SYLVANIA
User questions about LEDMD561000TS93CWH SYLVANIA
0 question about this device. Answer the ones you know or ask your own.
Ask a new question about this device
Download the instructions for your Lighting in PDF format for free! Find your manual LEDMD561000TS93CWH - SYLVANIA and take your electronic device back in hand. On this page are published all the documents necessary for the use of your device. LEDMD561000TS93CWH by SYLVANIA.
USER MANUAL LEDMD561000TS93CWH SYLVANIA
For warranty coverage, please register at www.ledvanceUS.com
WARNING
Please Read All Instructions Before Attempting Installation
- Turn off electricity at circuit breaker box (or main fuse box) before beginning installation by removing fuse (or switching off circuit breaker).
- Be careful not to damage or cut the wire insulation (covering) during fixture installation. Do not permit wires to contact any surface having a sharp edge. To do so may damage or cut the wire insulation, which could cause serious injury or death from electric shock.
- All electrical connections must agree with local codes, ordinances or the national electric code (NEC). Contact your municipal building department to learn about your local codes, permits and/or inspections.
- Risk of fire – most dwellings built before 1985 have supply wire rated for 140^ F/60°C. Consult a qualified electrician before installation.
- Do not connect this fixture to an electrical system that does not provide a means for equipment grounding. Never use a fixture in a two-wire system that is not grounded. If you are not sure your lighting system has a grounding means, do not attempt to install this fixture. Contact a qualified, licensed electrician for information with regards to proper grounding methods as required by the local electrical code in your area.
- If a dimmer control switch is used with this fixture, obtain professional advice to determine the correct type and electrical rating required.
Preparation:
Before beginning assembly, installation or operation of product, make sure all parts are present. Compare parts with package contents list and diagram on previous page. If any part is missing or damaged, do not attempt to assemble, install or operate the product. Contact customer service for replacement parts..
TOOLS REQUIRED (not supplied)
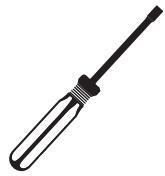
Slotted Screwdriver
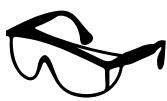
Safety Goggles

Electrical Tape

Ladder
CONTENT
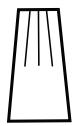
AA
BB
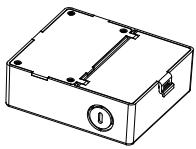
CC
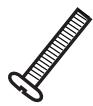
DD
| Part | Description | Qty |
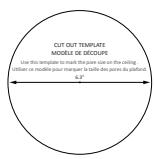
| AA | Cut-out template | 1 |
| BB | Wire connectors | 2 |
| CC | Power Supply Box | 1 |
| DD | Screws | 2 |
FCC STATEMENT
This device complies with Part 15 of the FCC Rules. Operation is subject to the following two conditions: (1) This device may not cause harmful interference, and (2) This device must accept any interference received, including interference that may cause undesired operation. This equipment has been tested and found to comply with the limits for a Class B digital device, pursuant to part 15 of the FCC Rules. These limits are designed to provide reasonable protection against harmful interference in a residential installation. This equipment generates, uses and can radiate radio frequency energy and, if not installed and used in accordance with the instructions, may cause harmful interference to radio communications. However, there is no guarantee that interference will not occur in a particular installation. If this equipment does cause harmful interference to radio or television reception, which can be determined by turning the equipment off and on, the user is encouraged to try to correct the interference by one or more of the following measures:
—Reorient or relocate the receiving antenna.
—Increase the separation between the equipment and receiver.
—Connect the equipment into an outlet on a circuit different from that to which the receiver is connected.
—Consult the dealer or an experienced radio/ TV technician for help.
FCC Radiation Exposure Statement:
This equipment complies with FCC radiation exposure limits set forth for an uncontrolled environment. In order to avoid the possibility of exceeding the FCC radio frequency exposure limits, Human proximity to the antenna shall not be less than 20cm(8 inches) during normal operation.
That changes or modifications not expressly approved by the party responsible for compliance could void the user's authority to operate the equipment.
CAN ICES-005 (B)
FCC Supplier's Declaration of Conformity: 47 CFR § 2.1077 Compliance Information
Responsible Party: LEDVANCE LLC
1100 Tyrone Pike Versailles, KY 40383,
USA 1-800-544-4828
Before beginning the installation, make sure all power is off at the breaker box. Remove the disuse existing bulb if necessary and remove the existing trim.
2. Cut a hole in the ceiling
Cut a 6.3 in. hole in the ceiling as round as possible using the template (AA) provided and a recessed lighting hole saw (not included).
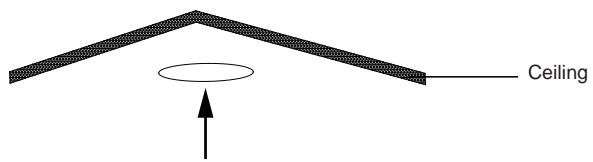
NOTE: Before cutting, ensure that the space above the installed fixture is at least 3 in and the hole does not impinge on joists, pipe work, cable or other building services.
3. Making the electrical connections
Open the power supply box (CC) cover. Feed the supply wire into the knockout hole using a 3/8 in. clamp connector (not included) and make all the connections inside the power supply box (CC) using the wire connectors (BB) provided. Connect the 120V line (black) wire to the black wire. Connect the neutral (white) wire to the white wire.
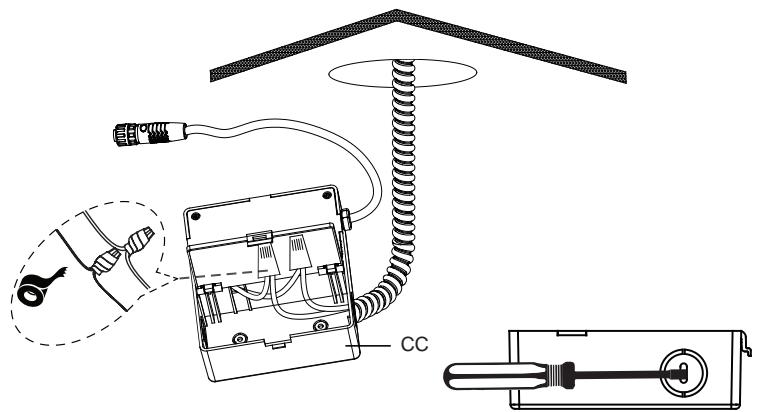
NOTE: Carefully remove the knock-out with a slotted screwdriver or punch.
NOTE: For easier installation, separate the power supply box (CC) and downlight by disconnecting the tethered connectors.
4. Connect the tethered connector
Reconnect the tethered connector before restoring the power at the breaker panel. To ensure proper connection, the arrows on the cable adapters must be facing each other. Screw on the fastener to secure connection.

natural_image
Diagram showing two types of electrical connectors with internal wiring, no text or symbols present5. Installing the fixture
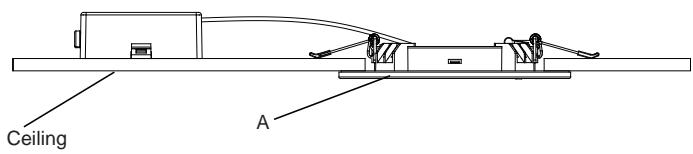
Hold the spring clips against the fixture body (A) and gently guide into the ceiling until the clips snap into place. The fixture body (A) should be flush with the ceiling.
6. Turning Power on
Turn power on at circuit breaker or replace the fuse.
Operating Instructions:
Connecting Lamps together
• After installation is done, turn the power ON.
- The product will start blinking slowly for about 30 seconds and pair together automatically.
Note: If the product doesn't enter pairing mode, simply turn ON/OFF the wall switch of the group of products you want to pair together three times.
Changing Color Temperature:
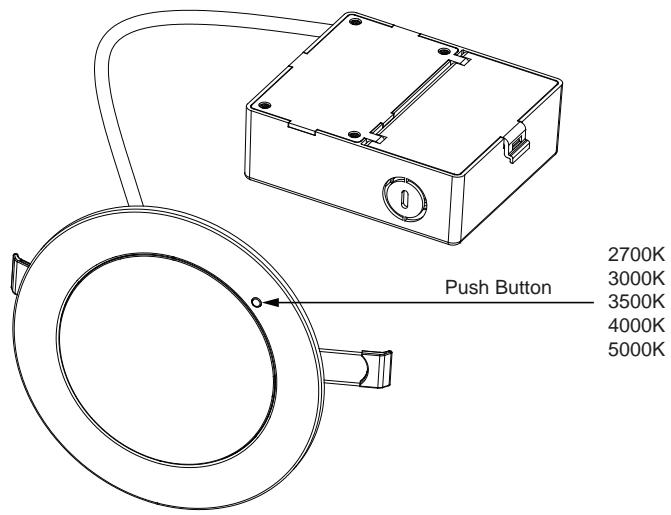
- Select the desired color temperature by pressing the push button on one of the units.
- All units will automatically follow and adjust to the same color temperature.
Adding Products to a Group:
- To add a unit to a group, press and hold the CCT button for 3 seconds on the unit you want to add to the group, and then press the CCT button on one unit from the group.
Unpairing Fixtures from Remote or Groups:
Using the Wall Switch:
• Turn the wall switch ON/OFF three times at a normal speed.
• All units connected to the wall switch will pulse three times to indicate they are unpaired.
For Individual Fixtures:
• Press and hold the fixture switch for 6 seconds.
• The fixtures will pulse three times to indicate they are ready for the next command.
Lighting Distribution
| DISTANCE | CENTER BEAM (FOOT CANDLES) | BEAM DIAMETER |
| 3 FT. | 41 | 8.9 FT. |
| 5 FT. | 15 | 15 FT. |
| 8 FT. | 5.7 | 24 FT. |
| 15 FT. | 1.6 | 44 FT. |
| BEAM ANGLE=111.9° | ||
BEAM ANGLE=111.9°
CARE AND MAINTENANCE
To clean, turn off and wipe with a damp, non-abrasive cloth.
TROUBLESHOOTING
- The light does not come on at all:
a) Make sure the wall switch and circuit breaker are on.
b) Make sure the wiring is correct.
- Fuse blows or circuit trips when light is turned on.
a) Check for crossed wires, ensure wiring is correct.
If unable to fix any of the above issues, please consult a certified electrician.
LIMITED WARRANTY
5 YEAR LIMITED WARRANTY: LEDVANCE warrants the Product to be free from defects in material and workmanship from date of purchase for the specified warranty period when used as directed. Failure to comply with Product warnings and instructions shall void the warranty. This warranty does not cover Product subject to accident, neglect, abuse, misuse, or acts of God, If Product fails to operate according to the warranty, return Product to place of purchase with proof of purchase date and LEDVANCE will replace with the same or similar Product free. LABOR IS NOT INCLUDED. LEDVANCE reserves the sole right to examine and determine whether the Product is defective. For additional information, contact 1-800 LIGHT-BULB(1-800-544-4828);Email: lightbulb@ledvance.com.THIS IS THE EXCLUSIVE REMEDY AVAILABLE. LIABILITY FOR INCIDENTAL OR CONSEQUENTIAL DAMAGES IS EXPRESSLY EXCLUDED. SOME STATES AND JURISDICTIONS DO NOT ALLOW THE EXCLUSION OR LIMITATION OF INCIDENTAL OR CONSEQUENTIAL DAMAGES, SO THE ABOVE LIMITATION OR EXCLUSION MAY NOT APPLY TO YOU. THIS WARRANTY GIVES YOU SPECIFIC LEGAL RIGHTS, AND YOU MAY ALSO HAVE OTHER RIGHTS WHICH VARY FROM STATE TO STATE OR PROVINCE. THIS WARRANTY IS IN LIEU OF ALL OTHER WARRANTIES, EXPRESS OR IMPLIED, INCLUDING THE WARRANTY OF MERCHANTABILITY OR FITNESS OF USE, WHICH ARE HEREBY EXCLUDED. IF UNDER APPLICABLE STATE LAW IMPLIED WARRANTIES MAY NOT VALIDLY BE DISCLAIMED OR EXCLUDED, THE DURATION IS LIMITED TO THE SPECIFIED WARRANTY PERIOD.
MICRODISQUE DEL DE 6 PO
LEDMD561000ST9SC3WH
natural_image
Diagram showing two types of electrical connectors with arrows indicating direction (no text or symbols)
- WARNING
- Please Read All Instructions Before Attempting Installation
- Preparation:
- TOOLS REQUIRED (not supplied)
- CONTENT
- FCC STATEMENT
- Cut a hole in the ceiling
- Making the electrical connections
- Connect the tethered connector
- Installing the fixture
- Turning Power on
- Operating Instructions:
- Connecting Lamps together
- Changing Color Temperature:
- Adding Products to a Group:
- Unpairing Fixtures from Remote or Groups:
- Lighting Distribution
- CARE AND MAINTENANCE
- TROUBLESHOOTING
- LIMITED WARRANTY
- MICRODISQUE DEL DE 6 PO
Brand : SYLVANIA
Model : LEDMD561000TS93CWH
Category : Lighting