
steamboost 03.2 - Steam plant HIGH ONE - Free user manual and instructions
Find the device manual for free steamboost 03.2 HIGH ONE in PDF.
| Type de produit | Centrale vapeur |
| Marque | HIGH ONE |
| Modèle | steamboost 03.2 (987437) |
| Tension de fonctionnement | 220-240 V ~, 50-60 Hz |
| Puissance nominale | 2000-2400 W |
| Capacité du réservoir d'eau | 1,25 L |
| Pression de vapeur | 4 bars |
| Classe de protection | I |
| Semelle | Aluminium |
| Réglages de température | 4 niveaux : 70-120 °C, 100-160 °C, 140-210 °C, 170-225 °C |
| Fonctions | Repassage à sec et à vapeur |
| Entretien et nettoyage | Semelle : chiffon humide ; détartrage : vinaigre blanc dilué |
| Sécurité | Ne pas toucher la semelle chaude ; ne pas diriger la vapeur vers des personnes |
| Pièces détachées | Réservoir d'eau amovible, socle à isolation thermique |
| Réparabilité | Garantie 2 ans ; pièces disponibles via service après-vente |
| Informations générales | Usage domestique uniquement ; consulter la notice complète |
Frequently Asked Questions - steamboost 03.2 HIGH ONE
User questions about steamboost 03.2 HIGH ONE
0 question about this device. Answer the ones you know or ask your own.
Ask a new question about this device
Download the instructions for your Steam plant in PDF format for free! Find your manual steamboost 03.2 - HIGH ONE and take your electronic device back in hand. On this page are published all the documents necessary for the use of your device. steamboost 03.2 by HIGH ONE.
USER MANUAL steamboost 03.2 HIGH ONE
Thank you for choosing this HIGHONE product. HIGHONE products are chosen, tested, and recommended by ELECTRO DEPOT, so you can be sure you are getting a top-quality, easy-to-use product that won't let you down.
We're confident your new device will be a pleasure to use every day!
Welcome to ELECTRO DEPOT.
Table of Contents

Parts
Product overview
Intended use
Specifications

Before first use
Using your steam station

Cleaning and maintenance
Storage
Parts
A Aluminum soleplate
B Temperature indicator
C Steam trigger
D Temperature dial
(1) The first setting [70^ C < T < 120^ C]
The second setting (100^ < T < 160^)
The third setting (140^ < T < 210^)
Maximum setting (170^ < T < 225^)
E Iron
F Thermal insulation stand
Unit base
H Cord clip
Water tank
Filling aperture
Water tank handle
Product overview
- Unpack and remove all labels from the unit except the nameplate. Please check that all parts are included and intact. If the unit is damaged or faulty, do not use it and take it to your retailer or after-sales service centre.
- Keep all packaging out of the reach of children. There is a risk of accidents if children play with packaging materials.
Intended use
This product is for domestic use only. It has not been designed for industrial or professional use.
Any other use may damage the product or cause injury.
Specifications
| Model: | 987437 - STEAMBOOST-03.2 |
| Operating voltage: | 220-240 V ~, 50-60 Hz |
| Nominal power: | 2000-2400W |
| Tank capacity: | 1.25L |
| Steam pressure: | 4 Bar |
| Protection class: | I |
Before first use
- Remove any sticker or protective foil from the soleplate.
- Fill the water tank with water and heat up the iron at the maximum temperature, and then iron over a piece of damp cloth for several minutes for the purpose of removing any residue on the soleplate according to the section of "Steam ironing".

NOTE:
It is normal that strange odor comes out from the unit for the first use. This will cease after a short while.
- Some particles may come out of the soleplate when you use the iron for the first time. This is normal, the particles are harmless and stop coming out of the iron after a short while.
Filling aperture
Fill the water tank with water through the filling aperture. Make sure the water shall not exceed the maximum level of water tank.
Temperature dial
Turn the temperature dial to set the ironing temperature basing on the garment needs to be ironed.
Temperature indicator
When the iron is heating up, the temperature indicator will light up. Once the iron has reached the selected temperature, it will extinguish. The temperature indicator will illuminate solidly during heating.
Steam trigger
When the appliance is heated to the selected temperature and the temperature indicator will extinguish, press the steam trigger with a little force, the steam will be sprayed from the soleplate. When loosen the steam trigger, the appliance can only be used for dry ironing without steam.
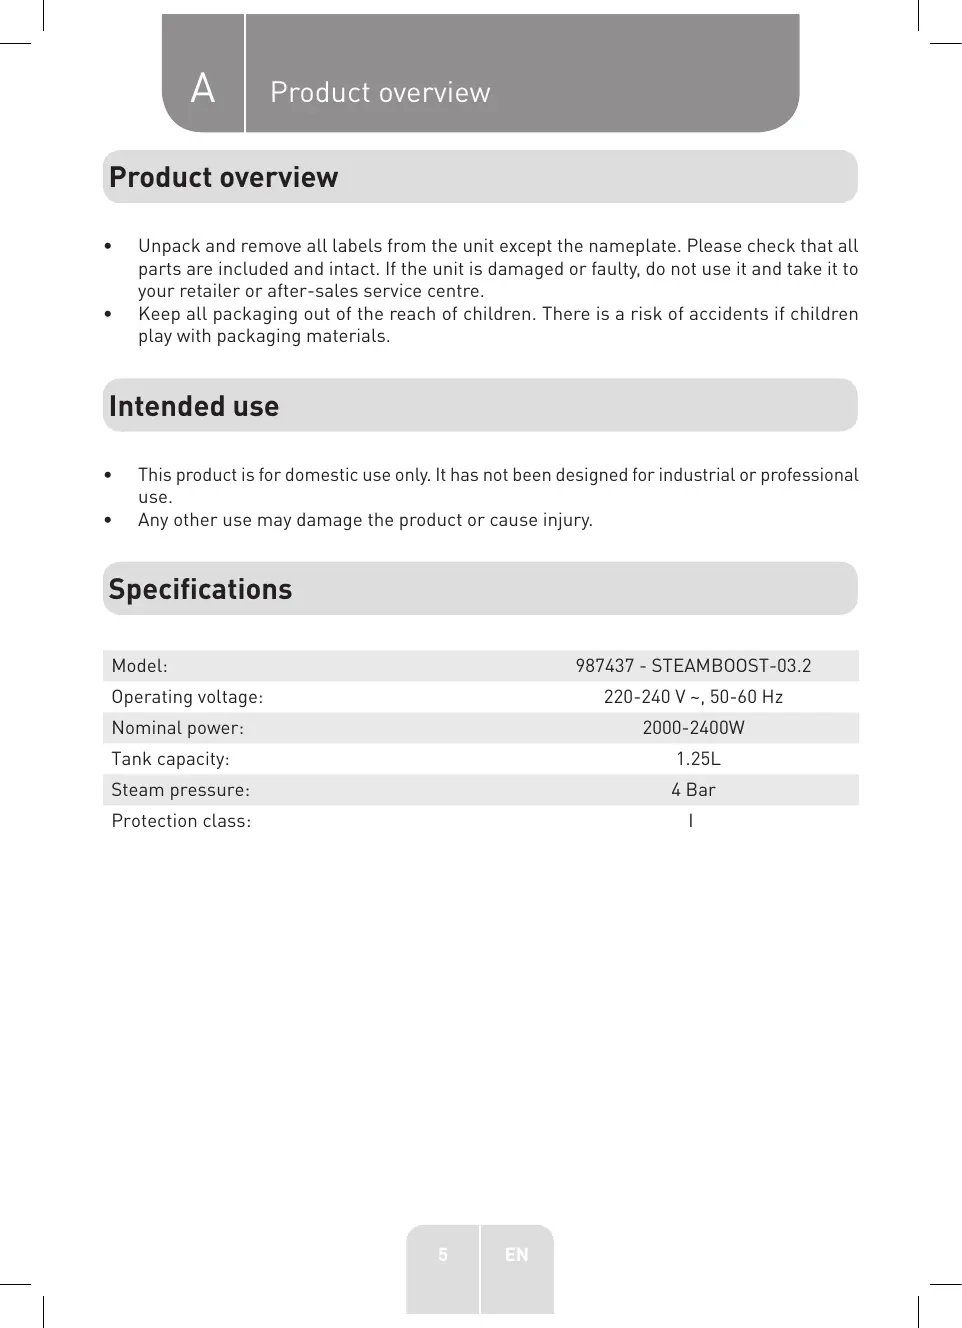
Cord clip
When not in use, the power cord can be tied with a cable tie and the steam supply hose can be stored at the cord clips (see Fig.1 & Fig.2).
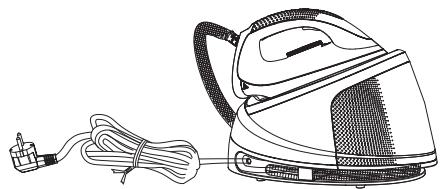
Fig.1
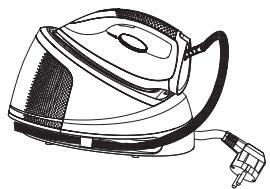
Fig.2
B Product usage
Correct placement of iron on the thermal insulation stand
When the iron is put on the thermal insulation stand, it must be placed on it correctly (see Fig.3).
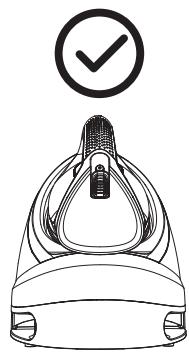
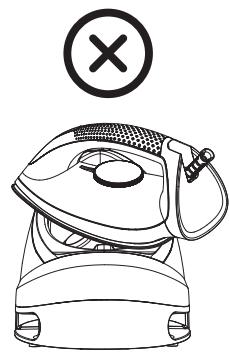
Fig.3
Using your steam station
The appliance has two ironing ways. You can use dry ironing or steam ironing, the details refer to the following.
Dry ironing
- Put the unit base on a stable and level surface.
- Put the iron on the thermal insulation stand of unit base correctly (see Fig.3).
- Connect the plug to wall outlet, and then turn the temperature dial to select your desired temperature setting, which is depended on the fabric of garment. Refer to "Ironing tips" and "Additional table" as below when select temperature.
- And then the temperature indicator illuminates and the iron starts heating.
- When the temperature of soleplate reaches the selected temperature, the temperature indicator turns off, and you can start ironing now.

WARNING: Never touch hot soleplate at any time before cooling down!
Steam ironing
- Put the unit base on a stable and level surface.
- Grasp the water tank handle and then pull out the water tank horizontally, fill the water tank with water through the filling aperture and then replace the water tank well in position [see Fig.4]. Make sure the water tank shall be pulled out horizontally when removing the water tank. You had better use purified water with less calcium particles. The maximum capacity of water tank is 1.2L, the water level shall not be exceeded the maximum level.
Grasp the water tank handle
Remove the water tank horizontally
Fill the water tank with water
Replace the water tank
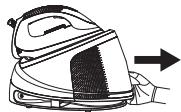
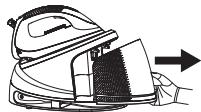
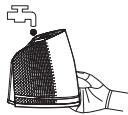
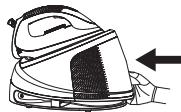
Fig.4
- Put the iron on the thermal insulation stand of unit base correctly (see Fig.3).
- Connect the plug to wall outlet, and then turn the temperature dial to select your desired temperature setting, which is depended on the fabric of garment. Refer to "Ironing tips" and "Additional table" as below when select temperature.
- And then the temperature indicator illuminates and the iron starts heating.
- After one minute, the temperature indicator extinguishes, which indicates the soleplate temperature has achieved the selected temperature. And you can start ironing with steam now.
- Press the steam trigger with a little force, the steam will be sprayed from the soleplate continuously, and then you can iron the garment with steam.

NOTE: There may be dripping water during spraying steam when the temperature is lower than that of the second setting. This is normal.

CAUTIONS:
Do not touch hot soleplate at any time before cooling down!
- Never direct the steam at people!
- Do not activate the steam function when the iron is placed on the unit base to avoid being scalded by steam.
- After ironing, remove the plug from the wall socket and the appliance will be turned off. But the soleplate is still hot, never touch it with hand, place it on the thermal insulation stand correctly until it cools down completely.
Ironing tips
- Always check first whether a label with ironing instructions is attached to the article. Follow these ironing instructions in any case.
- The iron heats up quicker than cooling it down, therefore, you should start ironing the articles requiring the lower temperature such as those made of synthetic fiber.
- If the fabric consists of various kinds of fibers, you must always select the lowest ironing temperature to iron the composition of those fibers.
Synthetic fibre and silk fabrics should be ironed on their inner side to avoid being shone. - Velvet and other textures that rapidly become shiny should be ironed in one direction with light pressure applied. Always keeps the iron moving at any moment.
- Pure wool fabrics (100% wool) may be ironed with the steam iron. Use a dry cloth as a mat and then select the corresponding fabric setting for ironing.
B Product usage
- Never iron over zip, rivet in the cloth. This will damage the soleplate. Iron around any such object.

NOTE: When ironing woolen fabrics, shining of the fabric may occur. So it is suggested that you should turn the article inside out and iron the reverse side.
Additional table
| Setting | Temperature (℃) | Fabric |
| The first setting | 70<T<120 | Acetate, elastane, polyamide, polypropylene |
| The second setting | 100<T<160 | Cupro, polyester, silk |
| The third setting | 140<T<210 | Triacetate, viscose, wool |
| Maximum | 170<T<225 | Cotton, flax |
Cleaning and maintenance
- Before cleaning, firstly disconnect the power outlet and let the appliance cools down.
- Wipe the residues and any other deposits on the soleplate with a damp cloth or a non-abrasive (liquid) cleaner.

NOTE: Do not use chemical, steel, wooden or abrasive cleaners to scrape the soleplate.
- Clean the upper part of iron with a soft damp cloth. Wipe the water drop on the unit base and the thermal insulation stand with dry cloth.
- When do not use the appliance for a long time, empty the water in the water tank, turn the temperature dial to the minimum setting and store the steam supply hose and power cord at the cord clips, then put the appliance at a place out of the reach of children.
- To descale, use white vinegar diluted in water (like 1/3 vinegar 2/3 water) then rinse.
Storage
- Before storing the steam iron, ensure that it has cooled and dried thoroughly.
- Ensure that the water tank is empty before storing it.
- Bundle the water supply hose and fold it in two. Then, wind it along the water supply hose storage groove. In addition, tie the power cord with a cable tie.
- Store in a cool, dry place.

Merci!
This product is guaranteed against faults caused by defects in manufacturing or the materials used for a period of two years, starting from the date of purchase.* This warranty does not cover defects or damage caused by failure to install the device correctly, incorrect use of the product, or excessive wear and tear.
*proof of purchase required.