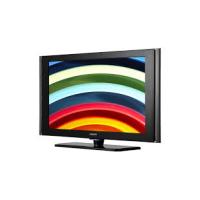
LN-T4081F - Television SAMSUNG - Free user manual and instructions
Find the device manual for free LN-T4081F SAMSUNG in PDF.


| Product type | LCD TV |
| Brand | SAMSUNG |
| Model | LN-T4081F |
| Screen size | 40 inches (diagonal) |
| Resolution | 1920 x 1080 pixels (Full HD) |
| Sound | 10 W x 2 (stereo) |
| Dimensions (with stand) | 1100 x 289.9 x 675.4 mm |
| Dimensions (without stand) | 1100 x 102.8 x 607.3 mm |
| Weight (with stand) | 26.2 kg |
| Weight (without stand) | 22.3 kg |
| Power supply | 100-240 V ~ 50/60 Hz |
| Connectivity | HDMI (x3), DVI, Component (x2), AV (x2), S-Video, PC, USB (WISELINK), Optical audio |
| Tuner | Built-in digital HD (ATSC) |
| Main features | DNle, SRS TruSurround XT, Picture-in-Picture (PIP), Anynet+ (HDMI-CEC), Timer, Sleep, Image freeze |
| Maintenance | Use a soft, dry cloth. Avoid solvents. |
| Safety | Built-in Kensington lock. Do not display a still image for more than 2 hours. |
| Included accessories | Remote control (AAA batteries x2), power cord, cleaning cloth, ferrite core, stand base |
| Repairability | Samsung technical support. Spare parts available through authorized service. |
Frequently Asked Questions - LN-T4081F SAMSUNG
User questions about LN-T4081F SAMSUNG
0 question about this device. Answer the ones you know or ask your own.
Ask a new question about this device
Download the instructions for your Television in PDF format for free! Find your manual LN-T4081F - SAMSUNG and take your electronic device back in hand. On this page are published all the documents necessary for the use of your device. LN-T4081F by SAMSUNG.
USER MANUAL LN-T4081F SAMSUNG
If you have any questions or comments relating to Samsung products, please contact the SAMSUNG customer care center.
→ Owner's Instructions
Register your product at www.samsung.com/global/register
Record your Model and Serial number here for future reference.
· Model ____ · Serial No. ____
Important Warranty Information Regarding Television Format Viewing
Wide screen format LCD Displays (16:9, the aspect ratio of the screen width to height) are primarily designed to view wide screen format full-motion video. The images displayed on them should primarily be in the wide screen 16:9 ratio format, or expanded to fill the screen if your model offers this feature and the images are constantly moving. Displaying stationary graphics and images on screen, such as the dark side-bars on nonexpanded standard format television video and programming, should be limited to no more than 5% of the total television viewing per week.
Additionally, viewing other stationary images and text such as stock market reports, video game displays, station logos, web sites or computer graphics and patterns, should be limited as described above for all televisions. Displaying stationary images that exceed the above guidelines can cause uneven aging of LCD Displays that leave subtle, but permanent burned-in ghost images in the LCD picture. To avoid this, vary the programming and images, and primarily display full screen moving images, not stationary patterns or dark bars.
On LCD models that offer picture sizing features, use these controls to view different formats as a full screen picture.
Be careful in the selection and duration of television formats used for viewing. Uneven LCD aging as a result of format selection and use, as well as burned-in images, are not covered by your Samsung limited warranty.
U.S.A Only
The product unit accompanying this user manual is licensed under certain intellectual property rights of certain third parties. In particular, this product is licensed under the following US patents: 5,991,715, 5,740,317, 4,972,484, 5,214,678, 5,323,396, 5,539,829, 5,606,618, 5,530,655, 5,777,992, 6,289,308, 5,610,985, 5,481,643, 5,544,247, 5,960,037, 6,023,490, 5,878,080, and under US Published Patent Application No. 2001-44713-A1.
This license is limited to private non-commercial use by end-user consumers for licensed contents. No rights are granted for commercial use. The license does not cover any product unit other than this product unit and the license does not extend to any unlicensed product unit or process conforming to ISO/IEC 11172-3 or ISO/IEC 13818-3 used or sold in combination with this product unit. The license only covers the use of this product unit to encode and/or decode audio files conforming to the ISO/IEC 11172-3 or ISO/IEC 13818-3. No rights are granted under this license for product features or functions that do not conform to the ISO/IEC 11172-3 or ISO/IEC 13818-3.
Other countries
The product unit accompanying this user manual is licensed under certain intellectual property rights of certain third parties. This license is limited to private non-commercial use by end-user consumers for licensed contents. No rights are granted for commercial use. The license does not cover any product unit other than this product unit and the license does not extend to any unlicensed product unit or process conforming to ISO/IEC 11172-3 or ISO/IEC 13818-3 used or sold in combination with this product unit. The license only covers the use of this product unit to encode and/or decode audio files conforming to the ISO/IEC 11172-3 or ISO/IEC 13818-3. No rights are granted under this license for product features or functions that do not conform to the ISO/IEC 11172-3 or ISO/IEC 13818-3.
SAMSUNG ELECTRONICS NORTH AMERICAN LIMITED WARRANTY STATEMENT
Subject to the requirements, conditions, exclusions and limitations of the original Limited Warranty supplied with Samsung Electronics (SAMSUNG) products, and the requirements, conditions, exclusions and limitations contained herein, SAMSUNG will additionally provide Warranty Repair Service in the United States on SAMSUNG products purchased in Canada, and in Canada on SAMSUNG products purchased in the United States, for the warranty period originally specified, and to the Original Purchaser only.
The above described warranty repairs must be performed by a SAMSUNG Authorized Service Center. Along with this Statement, the Original Limited Warranty Statement and a dated Bill of Sale as Proof of Purchase must be presented to the Service Center. Transportation to and from the Service Center is the responsibility of the purchaser.
Conditions covered are limited only to manufacturing defects in material or workmanship, and only those encountered in normal use of the product.
Excluded, but not limited to, are any originally specified provisions for, in-home or on-site services, minimum or maximum repair times, exchanges or replacements, accessories, options, upgrades, or consumables.
For the location of a SAMSUNG Authorized Service Center, please call toll-free:
In the United States : 1-800-SAMSUNG (1-800-726-7864)
In Canada : 1-800-SAMSUNG
Precautions When Displaying a Still Image
A still image may cause permanent damage to the TV screen
- Do not display a still image on the LCD panel for more than 2 hours as it can cause screen image retention. This image retention is also known as "screen burn". To avoid such image retention, reduce the degree of brightness and contrast of the screen when displaying a still image.

Watching the LCD TV in 4:3 format for a long period of time may leave traces of borders displayed on the left, right and center of the screen caused by the difference of light emission on the screen.
Playing a DVD or a game console may cause a similar effect to the screen.
Damages caused by the above effect are not covered by the Warranty.
- Displaying still images from Video games and PC for longer than a certain period of time may produce partial after-images. To prevent this effect, reduce the ‘brightness’ and ‘contrast’ when displaying still images.
Contents
General Information
■ List of Features....2
■ Accessories....2
■ Viewing the Control Panel ....3
■ Viewing the Connection Panel 4
■ Remote Control ....5
■ Installing Batteries in the Remote Control ....6
Connections
■ Connecting VHF and UHF Antennas....6
■ Connecting Cable TV 7
■ Connecting a DVD Player or Cable Box/Satellite receiver (Set-Top Box) via HDMI....8
■ Connecting a DVD Player or Cable Box/Satellite receiver (Set-Top Box) via DVI 8
■ Connecting a DVD Player or Cable Box/Satellite receiver (Set-Top Box) via Component cables ....9
■ Connecting a Camcorder 9
■ Connecting a VCR....10
■ Connecting a Digital Audio System 11
■ Connecting an Amplifier/DVD Home Theater .... 11
■ Connecting a PC 11
Operation
■ Turning the TV On and Off ....12
■ Plug & Play Feature....12
■ Changing Channels....13
■ Adjusting the Volume......14
■ Viewing the Display ....14
■ Viewing the Menus 15
■ Memorizing the Channels....15
■ Setting Up Your Remote Control 17
■ Remote Control Codes....19
■ To Select the Source 22
■ To Edit the Input Source Name....22
Picture Control
■ Using Automatic Picture Settings .....23
■ Adjusting the Color Tone 24
■ Resetting the Picture Settings to the Factory Defaults ...24
■ Adjusting the Detailed Settings....25
■ Changing the Screen Size....28
■ Setting the Active Color 29
■ DNle (Digital Natural Image engine)......29
■ Setting the LED SmartLighting ....30
■ Setting the LED Feature Demo 30
■ Setting the HDMI Black Level....31
■ Setting the Film Mode....31
■ Viewing Picture-in-Picture 32
■ Freezing the Picture ....33
Sound Control
■ Customizing the Sound ....34
■ Using Automatic Sound Settings ....34
■ Setting the TruSurround XT 35
■ Choosing a Multi-Channel Sound (MTS) track - Digital ..35
■ Choosing a Multi-Channel Sound (MTS) track - Analog .36
■ Automatic Volume Control 36
■ Selecting the Internal Mute....37
■ Adjusting the TV On/Off Melody Sound......37
■ Listening to the Sound of the Sub (PIP) Picture......38
■ Resetting the Sound Settings to the Factory Defaults.....38
■ Connecting Headphones 38

Symbol
Press

Important

Note

One-Touch Button
Channel Control
■ Selecting the Antenna....39
■ Clearing Scrambled Channels - Digital....39
■ Adding and Erasing Channels 40
■ To Set-Up Your Favorite Channels 41
■ Using the Channel Lists......42
■ Viewing the Channel Lists 42
■ Labeling Channels....43
■ LNA (Low Noise Amplifier)......43
■ Fine Tuning Analog Channels....44
■ Checking the Digital-Signal Strength....44
PC Display
■ Using Your TV as a Computer (PC) Display 45
■ Display Modes....45
■ Setting up the TV with your PC 46
■ Setting the Home Theater PC 47
Time Setting
■ Setting the Clock ....48
Function Description
■ Selecting a Menu Language....51
■ Setting the Blue Screen Mode....52
■ Using the Game Mode....52
■ Viewing Closed Captions (On-Screen Text Messages) - Analog ....53
■ Viewing Closed Captions (On-Screen Text Messages) - Digital 54
■ Menu Transparency Level 55
■ Using the Energy Saving Feature....55
■ Setting the Function Help 56
■ Digital Noise Reduction 56
■ Using the V-Chip....57
■ Setting the Light Effect 64
■ Upgrading the Software....64
WISELINK
■ Using the WISELINK Function 65
■ Using the WISELINK Menu 66
■ Using the PHOTO (JPEG) List 67
■ Using the MP3 List....74
■ Using the Setup Menu....76
About Anynet+
■ What is Anynet+? 78
■ Connecting Anynet+ Devices....78
■ Setting Up Anynet+....79
■ Scanning and Switching between Anynet+ Devices......79
■ Recording 80
■ Listening through a Receiver (Home theater)......81
■ Troubleshooting for Anynet+......81
Appendix
■ Troubleshooting....82
■ Installing the Stand....84
■ Disconnecting the Stand....84
■ Auto Wall-Mount Adjustment (Sold separately)
(LN-T4081F, LN-T4681F, LN-T5281F) 85
■ Wall Mount Kit Specifications (VESA) 86
■ Using the Anti-Theft Kensington Lock 87
■ Specifications ....88
■ Dimensions (LN-T4081F) 89
■ Dimensions (LN-T4681F) 90
■ Dimensions (LN-T5281F) 91
■ Dimensions (LN-T5781F) 92
List of Features
- Adjustable picture settings that can be stored in the TV’s memory.
♦ Automatic timer to turn the TV on and off.
♦ A special sleep timer.
♦ Excellent Digital Interface & Networking : With a built-in HD digital tuner, non-subscription HD broadcasts can be viewed with no Cable Box/Satellite receiver (Set-Top Box) needed.
♦ HDMI/DVI connection of your PC to this TV.
♦ Remote Control
The supplied remote can be used to operate the TV as well as most DVD players, Cable Box/Satellite receiver (Set-Top Box) and VCRs.
♦ Excellent Picture Quality - DN1e technology provides life-like clear images.
♦ SRS TruSurround XT - SRS TruSurround XT provides a virtual Dolby surround system.
Accessories
Please make sure the following items are included with your LCD TV. If any items are missing, contact your dealer.

Remote Control & Batteries
(AAA x 2)
(BN59-00599A)

Power Cord
(3903-000144)

Cleaning Cloth
(BN63-01798A)

Ferrite Core
LN-T4681F, LN-T5281F,
LN-T5781F:3301-001305
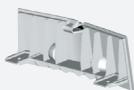
Cover-Bottom
LN-T4081F : BN63-03665A
LN-T4681F : BN63-03675A
LN-T5281F : BN63-03799A
LN-T5781F : BN63-03801A

Owner's Instructions

Warranty Card / Registration
Card / Safety Guide Manual
(Not available in all locations)
The items color and shape may vary depending on the model.
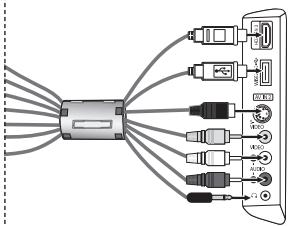
➢ Ferrite Core (Side Panel Jacks)
The ferrite cores are used to shield the cables from interference.
When connecting a cable, open the ferrite core and clip it around the cable near the plug.
[Side Panel Jacks]
Buttons on the Lower-Right Part of the Panel
The buttons on the lower-right panel control your TV's basic features, including the on-screen menu. To use the more advanced features, you must use the remote control.

Front Panel buttons
The product color and shape may vary depending on the model.
Touch the each button to operate.
① SOURCE
Toggles between all the available input sources (TV, AV1, AV2, S-Video1, S-Video2, Component1, Component2, PC, HDMI1, HDMI2, HDMI3). In the on-screen menu, use this button as you would use the ENTER button on the remote control.
② MENU
Press to see an on-screen menu of your TV's features.
③ + VOL -
Press to increase or decrease the volume. In the on-screen menu, use the + VOL - buttons as you would use the ◀ and ▶ buttons on the remote control.
4 ^ CH ∨
Press to change channels. In the on-screen menu, use the ^CH ∨ buttons as you would use the ▲ and ▼ buttons on the remote control.
⑤ POWER INDICATOR
Blinks and turns off when the power is on and lights up in stand-by mode.
⑥ REMOTE CONTROL SENSOR
Aim the remote control towards this spot on the TV.
⑦ SPEAKERS
8 ⏻ (POWER)
Touch the silver sensor below the ⏻ mark to turn the TV on and off.

Rear Panel Jacks
Use the rear panel jacks to connect A/V components that will be connected continuously, such as VCR or DVD players. For more information on connecting equipment, see pages 6-11.

[Side Panel Jacks]

The product color and shape may vary depending on the model.
1 AUDIO OUT
Connects to the audio input jacks on your Amplifier/Home theater.
② DIGITAL AUDIO OUT (OPTICAL)
Connects to a Digital Audio component.
③ PC IN
Connects to the video and audio output jacks on your PC.
④ HDMI IN 1,2,3 / DVI IN(HDMI1) (AUDIO R/L)
Connects to the HDMI jack of a device with an HDMI output. Use the HDMI IN 1 jack for DVI connection to an external device.
Use a DVI to HDMI cable or DVI-HDMI adapter (DVI to HDMI) for video connection and the DVI IN (HDMI1) 'R-AUDIO-L' jacks for audio.
- No sound connection is needed for an HDMI to HDMI connection
- When using an HDMI/DVI cable connection, you must use the HDMI IN 1 jack.
⑤ ANT 1 IN/ANT 2 IN
Connects to an antenna or cable TV system.
⑥ EX-LINK
Connect this to the jack on the optional wall mount bracket. This will allow you to adjust the TV viewing angle using your remote control.
The model LN-T5781F cannot be wall mounted. The EX-LINK jack on this model functions as a service jack.
⑦ COMPONENT IN 1,2
Connects Component video/audio.
⑧ AV IN 1 / AV IN 2
Video and audio inputs for external devices, such as a camcorder or VCR.
S-VIDEO
Connects an S-Video signal from a camcorder or VCR.
⑨ POWER INPUT
Connects the supplied power cord
10 KENSINGTON LOCK
The Kensington lock (optional) is a device used to physically fix the system when used in a public place. If you want to use a locking device, contact the dealer where you purchased the TV.
The location of the Kensington Lock may be different depending on your TV.
11 HEADPHONE
Connects a set of external headphones for private listening.
⑫ WISELINK
Connect a USB mass storage device to view photo files (JPEG) and play audio files (MP3).
You can use the remote control up to a distance of about 23 feet from the TV. When using the remote, always point it directly at the TV. You can also use your remote control to operate your VCR, Cable box, DVD player or Cable Box/Satellite receiver (Set-Top Box)
1 POWER
Turns the TV on and off.
② NUMERIC BUTTONS
Press to change the channel.
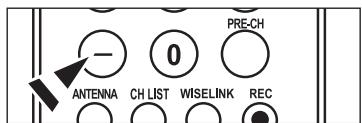
3 -
Press to select additional channels(digital and analog) being broadcast by the same station. For example, to select channel "54-3", press "54", then press "-" and "3".
4 CH LIST
Used to display Channel Lists on the screen.
5 ANTENNA
Press to select "AIR" or "CABLE".
6 VCR/DVD Functions
- Rewind
- Stop
- Play/Pause
- Fast/Forward
⑦ VOL⊕/VOL⊖
Press to increase or decrease the volume.
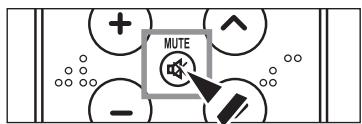
8 (MUTE)
Press to temporarily cut off the sound.
⑨ MENU
Displays the main on-screen menu.
10 S.MODE
Press to select the sound mode.
11 RETURN
Returns to the previous menu.
12 P.MODE
Press to select the picture mode.
13 CAPTION
Controls the caption decoder.
14 FAV.CH
Press to switch to your favorite channels.
15 SLEEP
Press to select a preset time interval for automatic Shut off.
16 SRS
Selects SRS TruSurround XT mode.
17 SET
Sets the remote to control your TV, VCR, Cable, DVD or Set-Top Box
18 TV, DVD, STB, CABLE, VCR
Press to operate your TV, DVD, STB, CABLE (box) or VCR (See pages 17-21)
19 When pressing this button, a number of buttons on the remote control (e.g. TV, DVD, STB, CABLE, VCR, VOL and CH buttons) light up for a few seconds and then turn off to save power. This function is convenient for using the remote at night or when dark.
20 SOURCE
Press to display all of the available video sources.
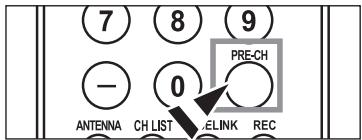
21 PRE-CH
Tunes to the previous channel.
22 WISELINK
This function enables you to view and play photo (JPEG) and audio files (MP3) from an external device. (Refer to pages 67 (JPEG) and 74 (MP3))
23 REC
This remote can be used to control recording on Samsung DVD recorders with the Anynet feature. (Refer to page 80)
24 CH ⬤ / CH √
Press to change channels.
25 EXIT
Press to exit the menu.
Use to select on-screen menu items and change menu values.
27 INFO
Press to display information on the TV screen.
28 Anynet+
Runs the Anynet+ functions and sets up Anynet devices.
29 STILL
Press to stop the action during a particular scene. Press again to resume normal video.
30 P.SIZE
Picture size selection.
31 PIP
Picture-in Picture ON/OFF.
③2 CH ∧ / ∨
Displays the available channels in sequence. (These buttons change channels in the PIP window only.)
33 MTS
Press to choose stereo, mono or Separate Audio Program (SAP broadcast).
34 RESET
When your remote does not work, change the batteries and press the RESET button for 2-3 seconds before use.

This is a special remote control for the visually impaired and has Braille points on the POWER, CH, VOL, STOP and PLAY/PAUSE buttons.
The performance of the remote control may be affected by bright light.
Installing Batteries in the Remote Control
- Lift the cover at the back of the remote control upward as shown in the figure.
- Install two AAA size batteries.
Make sure to match the "+" and "-" ends of the batteries with the diagram inside the compartment.
- Replace the cover.
Remove the batteries and store them in a cool, dry place if you won't be using the remote control for a long time.
The remote control can be used up to about 23 feet from the TV.
(Assuming typical TV usage, the batteries should last for about one year.)

If the remote control doesn't work, check the following:
- Is the TV power on?
- Are the plus and minus ends of the batteries reversed?
- Are the batteries drained?
- Is there a power outage or is the power cord unplugged?
- Is there a special fluorescent light or neon sign nearby?
Connections
Connecting VHF and UHF Antennas
If your antenna has a set of leads that look like the diagram to the right, see "Antennas with 300 Ω Flat Twin Leads" below.

If your antenna has one lead that looks like the diagram to the right, see "Antennas with 75 Ω Round Leads".
If you have two antennas, see "Separate VHF and UHF Antennas".
Antennas with 300 Ω Flat Twin Leads
If you are using an off-air antenna (such as a roof antenna or "rabbit ears") that has 300 Ω twin flat leads, follow the directions below.
-
Place the wires from the twin leads under the screws on a 300-75 Ω adapter (not supplied).
Use a screwdriver to tighten the screws. -
Plug the adaptor into the ANT 1 IN (AIR) terminal on the back of the TV.

Antennas with 75 Ω Round Leads
- Plug the antenna lead into the ANT 1 IN (AIR) terminal on the back of the TV.

Separate VHF and UHF Antennas
If you have two separate antennas for your TV (one VHF and one UHF), you must combine the two antenna signals before connecting the antennas to the TV. This procedure requires an optional combiner-adaptor (available at most electronics shops).
- Connect both antenna leads to the combiner.

- Plug the combiner into the ANT 1 IN (AIR) terminal on the bottom of the rear panel.

Connecting Cable TV
To connect to a cable TV system, follow the instructions below.
Cable without a Cable Box
- Plug the incoming cable into the ANT 2 IN (CABLE) terminal on the back of the TV. ➢ Because this TV is cable-ready, you do not need a cable box to view unscrambled cable channels.
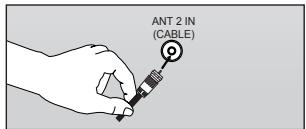
Connecting to a Cable Box that Descrambles All Channels
- Find the cable that is connected to the ANT OUT terminal on your cable box.
This terminal might be labeled "ANT OUT", "VHF OUT" or simply, "OUT".

- Connect the other end of this cable to the ANT 2 IN (CABLE) terminal on the back of the TV.

Connecting to a Cable Box that Descrambles Some Channels
If your cable box descrambles only some channels (such as premium channels), follow the instructions below. You will need a two-way splitter, an RF (A/B) switch and four lengths of RF cable. (These items are available at most electronics stores.)
- Find and disconnect the cable that is connected to the ANT IN terminal on your cable box.
This terminal might be labeled "ANT IN", "VHF IN" or simply, "IN". - Connect this cable to a two-way splitter.
- Connect an RF cable between the OUTPUT terminal on the splitter and the IN terminal on the cable box.
- Connect an RF cable between the ANT OUT terminal on the cable box and the B-IN terminal on the RF(A/B) switch.
- Connect another cable between the other OUT terminal on the splitter and the A–IN terminal on the RF (A/B) switch.
- Connect the last RF cable between the OUT terminal on the RF (A/B) switch and the ANT 2 IN (CABLE) terminal on the rear of the TV.

![graph LR A["Incoming cable"] --> B["Splitter"]](/content/2020/05/25399/images/2a95e2f3d69606491b2e5e0593e55bb85caeac9dc12631e21473350216462685.jpg)

![graph LR A["Incoming cable"] --> B["Splitter"] B --> C["Cable Box"] C --> D["RF (A/B) Switch"] style A fill:#f9f,stroke:#333 style B fill:#ccf,stroke:#333 style C fill:#cfc,stroke:#333 style D fill:#fcc,stroke:#333](/content/2020/05/25399/images/620473217487feb5036440f1a25bb3a974f91b0272834da4c32396e821fce3d8.jpg)
![graph LR A["Incoming cable"] --> B["Splitter"] B --> C["Cable Box"] C --> D["RF (A/B) Switch"] D --> E["A"] D --> F["B"] D --> G["Cable"] style A fill:#f9f,stroke:#333 style B fill:#ccf,stroke:#333 style C fill:#cfc,stroke:#333 style D fill:#fcc,stroke:#333 style E fill:#ffc,stroke:#333 style F fill…](/content/2020/05/25399/images/b69fa29e23192d6cbe79438ffedcb84a98043f5f1efc6e98740c73a65fe89553.jpg)
![graph LR A["Incoming cable"] --> B["Splitter"] B --> C["Cable Box"] C --> D["RF (A/B) Switch"] D --> E["ANT 2 IN (CABLE)"] E --> F["TV Rear"] style A fill:#f9f,stroke:#333 style F fill:#ccf,stroke:#333](/content/2020/05/25399/images/cc7e8441c75c3fe36ea77f8a099eb287f2a40285cbae1e2a57053da0c441f70f.jpg)
After you have made this connection, set the A/B switch to the "A" position for normal viewing. Set the A/B switch to the "B" position to view scrambled channels. (When you set the A/B switch to "B", you will need to tune your TV to the cable box's output channel, which is usually channel 3 or 4.)
Connecting a DVD Player or Cable Box/Satellite receiver (Set-Top Box) via HDMI
This connection can only be made if there is an HDMI Output connector on the external device.
- Connect an HDMI Cable between the HDMI IN (1,2 or 3) jack on the TV and the HDMI jack on the DVD Player or Cable Box/Satellite receiver (Set-Top Box)

What is HDMI?
- HDMI(High-Definition Multimedia Interface), is an interface that enables the transmission of digital audio and video signals using a single cable.
- The difference between HDMI and DVI is that the HDMI device is smaller in size and has the HDCP (High Bandwidth Digital Copy Protection) coding feature installed
▶ Each DVD Player or Cable Box/Satellite receiver (Set-Top Box) has a different back panel configuration.
The TV may not output sound and pictures may be displayed with abnormal color when DVD players/Cable Boxes/Satellite receivers supporting HDMI versions older than 1.3 are connected. When connecting an older HDMI cable and there is no sound, connect the HDMI cable to the HDMI IN 1 jack and the audio cables to the DVI IN (HDMI1) [R-AUDIO-L] jacks on the back of the TV. If this happens, contact the company that provided the DVD player/Cable Box/Satellite receiver to confirm the HDMI version, then request an upgrade.
➢ HDMI cables that are not 1.3 may cause annoying flicker or no screen display.
Connecting a DVD Player or Cable Box/Satellite receiver (Set-Top Box) via DVI
This connection can only be made if there is a DVI Output connector on the external device.
- Connect a DVI to HDMI Cable or DVI-HDMI Adapter between the HDMI IN 1 jack on the TV and the DVI jack on the DVD Player or Cable Box/Satellite receiver (Set-Top Box)
- Connect Audio Cables between the DVI IN (HDMI 1) [R-AUDIO-L] jack on the TV and the DVD Player or Cable Box/Satellite receiver (Set-Top Box)
![graph TD A["DVd Player or Cable Box/ Satellite receiver (Set-Top Box)"] --> B["OUTPUT"] B --> C["DVI"] B --> D["VIDEO"] B --> E["AUDIO"] C --> F["1"] D --> G["2"] E --> H["3"] F --> I["4"] G --> J["5"] H --> K["6"] I --> L["7"] J --> M["8"] K --> N["9"] L --> O["10"] M --> P["11"] N --> Q["12"] O --…](/content/2020/05/25399/images/d861315e11f50b6c6956393d12d7e3ad575322c7f270e4513800b23d6cd0beb4.jpg)
➢ Each DVD Player or Cable Box/Satellite receiver (Set-Top Box) has a different back panel configuration.
When connecting a DVD Player or Cable Box/Satellite receiver (Set-Top Box), match the color of the connection terminal to the cable.
When using an HDMI/DVI cable connection, you must use the HDMI IN1 jack.
Connecting a DVD Player or Cable Box/Satellite receiver (Set-Top Box) via Component cables
The rear panel jacks on your TV make it easy to connect a DVD Player or Cable Box/Satellite receiver (Set-Top Box) to your TV.
-
Connect a Component Cable between the COMPONENT IN(1 or 2) [Y, PB, PR] jacks on the TV and the COMPONENT [Y, PB, PR] jacks on the DVD Player or Cable Box/Satellite receiver (Set-Top Box).
-
Connect Audio Cables between the COMPONENT IN(1 or 2) [R-AUDIO-L] jacks on the TV and the AUDIO OUT jacks on the DVD Player or Cable Box/Satellite receiver (Set-Top Box).

Component video separates the video into Y (Luminance (brightness)), Pb (Blue) and Pr (Red) for enhanced video quality.
Be sure to match the component video and audio connections.
For example, if connecting the video cable to COMPONENT IN, connect the audio cable to COMPONENT IN also.
➢ Each DVD Player or Cable Box/Satellite receiver (Set-Top Box) has a different back panel configuration.
When connecting a DVD Player or Cable Box/Satellite receiver (Set-Top Box), match the color of the connection terminal to the cable.
Connecting a Camcorder
The side panel jacks on your TV make it easy to connect a camcorder to your TV. They allow you to view the camcorder tapes without using a VCR
-
Connect a Video Cable (or S-Video Cable) between the AV IN2 [VIDEO] (or S-VIDEO) jack on the TV and the VIDEO OUT jack on the camcorder.
-
Connect Audio Cables between the AV IN2 [R-AUDIO-L] jacks on the TV and the AUDIO OUT jacks on the camcorder.
![graph LR A["Camcorder"] --> B["TV Side Panel"] B --> C["S-Video Cable (Not supplied)"] B --> D["Video Cable (Not supplied)"] B --> E["Audio Cable (Not supplied)"] C --> F["1"] D --> G["2"] E --> H["3"] F --> I["4"] G --> J["5"] H --> K["6"]](/content/2020/05/25399/images/d49ffe488b88883421b19b4662fa0a49613b54fa5fe7665c40e789958b4f7bd7.jpg)
➢ Each Camcorder has a different back panel configuration.
When connecting a Camcorder, match the color of the connection terminal to the cable.
Video Connection
These instructions assume that you have already connected your TV to an antenna or a cable TV system (according to the instructions on pages 6-7). Skip step 1 if you have not yet connected to an antenna or a cable system.
- Unplug the cable or antenna from the back of the TV.
- Connect the cable or antenna to the ANT IN terminal on the back of the VCR.
- Connect an RF Cable between the ANT OUT terminal on the VCR and the ANT 1 IN (AIR) or ANT 2 IN (CABLE) terminal on the TV.
- Connect a Video Cable between the VIDEO OUT jack on the VCR and the AV IN 1 (or AV IN 2) [VIDEO] jack on the TV.
- Connect Audio Cables between the AUDIO OUT jacks on the VCR and the AV IN 1 (or AV IN 2) [R-AUDIO-L] jacks on the TV.
If you have a “mono” (non-stereo) VCR, use a Y-connector (not supplied) to hook up to the right and left audio input jacks of the TV. If your VCR is stereo, you must connect two cables.


Follow the instructions in "Viewing a VCR or Camcorder Tape" to view your VCR tape.
➢ Each VCR has a different back panel configuration.
When connecting a VCR, match the color of the connection terminal to the cable.
S-Video Connection
Your Samsung TV can be connected to an S-Video signal from an VCR. (This connection delivers a better picture as compared to a standard VCR.)
- To begin, follow steps 1–3 in the previous section to connect the antenna or cable to your VCR and your TV.
- Connect an S-Video Cable between the S-VIDEO OUT jack on the VCR and the AV IN1 [S-VIDEO] jack on the TV.
- Connect Audio Cables between the AUDIO OUT jacks on the VCR and the AV IN1 [R-AUDIO-L] jacks on the TV.

An S-Video cable may be included with a VCR. (If not, check your local electronics store.)
➢ Each VCR has a different back panel configuration.
When connecting a VCR, match the color of the connection terminal to the cable.
Connecting a Digital Audio System
The rear panel jacks on your TV make it easy to connect a Digital Audio System to your TV.
- Connect an Optical Cable between the "DIGITAL AUDIO OUT (OPTICAL)" jacks on the TV and the Digital Audio Input jacks on the Digital Audio System.
When a Digital Audio System is connected to the "DIGITAL AUDIO OUT (OPTICAL)" jack: Decrease the volume of the TV and adjust the volume level with the system's volume control.
Digital Audio System

➢ 5.1CH audio is possible when the TV is connected to an antenna.
➢ Each Digital Audio System has a different back panel configuration.
If you have an external device (DVD, Cable/Set top box) connected via HDMI to the TV, audio is not output from the Optical jack.
When the COMPONENT IN or HDMI IN jacks are connected, the Optical jack on the TV outputs 2 channel audio only. If you want to hear 5.1 channel audio, connect the DIGITAL AUDIO OUT (OPTICAL) jack on the DVD player or Cable/Satellite Box directly to an Amplifier or Home Theater, not the TV.
Connecting an Amplifier/DVD Home Theater
- Connect Audio Cables between the AUDIO OUT [R-AUDIO-L] jacks on the TV and AUDIO IN [R-AUDIO-L] jacks on the Amplifier/DVD Home Theater.
When an audio amplifier is connected to the "AUDIO OUT [R-AUDIO-L]" jack: Decrease the volume of the TV and adjust the volume level with the Amplifier's volume control.

➢ Each Amplifier/DVD Home Theater has a different back panel configuration.
When connecting an Amplifier/DVD Home Theater, match the color of the connection terminal to the cable.
Connecting a PC
Using the D-Sub Cable
- Connect a D-Sub Cable between PC IN [PC] connector on the TV and the PC output connector on your computer.
- Connect a PC Audio Cable between the PC IN [AUDIO] jack on the TV and the Audio Out jack of the sound card on your computer.
Using the HDMI/DVI Cable
- Connect a HDMI/DVI cable between the HDMI IN 1 jack on the TV and the PC output jack on your computer.
- Connect a 3.5 mm Stereo mini-plug/2RCA Cable between the DVI IN(HDMI1) [R-AUDIO-L] jack on the TV and the Audio Out jack of the sound card on your computer.
Using the D-Sub Cable

Using the HDMI/DVI Cable
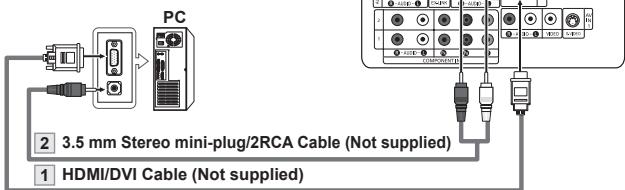
➢ Each PC has a different back panel configuration.
When connecting a PC, match the color of the connection terminal to the cable.
When using an HDMI/DVI cable connection, you must use the HDMI IN1 terminal.
Turning the TV On and Off
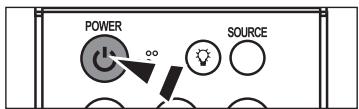
Press the POWER ⏻ button on the remote control.
You can also use the POWER ⏻ button on the TV.
Plug & Play Feature
When the TV is initially powered on, basic settings proceed automatically and subsequently:
- Press the POWER button on the remote control.
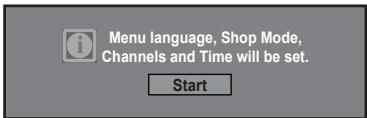
The message “Menu language, Shop Mode, Channels and Time will be set.” is displayed.
Press the ENTER button, then "Select the language of the OSD" menu is automatically displayed.
- Press the ▲ or ▼ button to select language, then press the ENTER button. The message "Select Home Mode when installing this TV at home." is displayed.
- Press the ◀ or ▶ button to select "Shop" or "Home", then press the ENTER button.
The message “Select the antennas to memorize.” is displayed.
We recommend setting the TV to Home mode for the best picture in your home environment.
➢ Shop mode is only intended for use in retail environments.
If the unit is accidentally set to Shop mode and you want to return to Dynamic (Home) mode, press any Volume button and then hold down the MENU button for five seconds on the side panel of the TV.
- Press the ▲ or ▼ button to memorize the channels of the selected connection. Press the ENTER button to select "Start".
If the antenna is connected to ANT 1(AIR), select "Air" and if it is connected to ANT 2 (CABLE), select "Cable".
➢ If both ANT 1 (AIR) and ANT 2 (CABLE) are connected, select the “Air + Cable”.
In Cable mode, you can select the correct signal source among STD, HRC, and IRC by pressing the ▲ or ▼ button, then press the ENTER button. Contact your local cable company to identify the type of cable system that exists in your particular area.
- The TV will begin memorizing all of the available channels.
After all the available channels are stored, the Auto program menu reappears.
Press the ENTER button when channel memorization is complete.
The message "Select the clock mode." is displayed.
To stop the search before it has finished, press the ENTER button with stop selected.
- Press the ENTER button.
Press the ▲ or ▼ button to select "Auto", then Press the ENTER button.
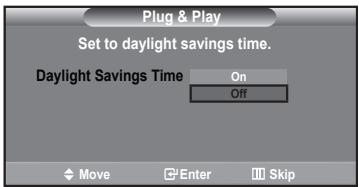
The message “Set to daylight savings time.” is displayed.
If you select "Manual", "Set current date and time." is displayed. (See page 48)

- Press the ▲ or ▼ button to select "On" or "Off", then press the ENTER button. The message "Select the time zone in which you live." is displayed.
- Press the ▲ or ▼ button to highlight the time zone for your local area Press the ENTER button. If you have received a digital signal, the time will be set automatically. If not, see page 49 to set the clock.
- The message "Enjoy your watching." is displayed. When you have finished, press the ENTER button.
If you want to reset this feature...
- Press the MENU button to display the menu. Press the ▲ or ▼ button to select "Setup", then press the ENTER button.
- Press the ENTER button again, to select "Plug & Play".
- The message "Menu language, Shop Mode, Channels and Time will be set." is displayed.


Changing Channels
Using the Channel Buttons
- Press the CH⊗ or CH⊗ button to change channels.
When you press the CH⊗ or CH⊗ button, the TV changes channels in sequence. You will see all the channels that the TV has memorized. (The TV must have memorized at least three channels). You will not see channels that were either erased or not memorized. See page 16 to memorize channels.
Using the Number Buttons
- Press the number buttons to go directly to a channel. For example, to select channel 27, press 2, then 7. The TV will change channels when you press the second number.
Using the “-” Button
The “-” button is used to select stations that broadcast a digital signal.
- For example, for Channel 7-1, press 7, then -, then 1.
HD indicates the TV is receiving a Digital High Definition signal. SD indicates the TV is receiving a Standard Definition signal.
For quick channel change, press the number buttons, then press the ENTER button.


Using the PRE-CH Button to select the Previous Channel
1. Press the PRE-CH button.
The TV will switch to the last channel viewed.
To quickly switch between two channels that are far apart, tune to one channel, then use the number button to select the second channel. Then use the PRE-CH button to quickly alternate between them.
Adjusting the Volume
Using the Volume Button
- Press the VOL ⊖ or VOL ⊕ button to decrease or increase the volume.

Using the MUTE button
At any time, you can cut off the sound using the MUTE button.
- Press MUTE button and the sound cuts off.
The word "Mute" will appear in the lower-left corner of the screen.
- To turn mute off, press the MUTE button again or simply press the VOL ⊙ or VOL ⊕ button.
Viewing the Display
The display identifies the current channel and the status of certain audio-video settings.
- Press the INFO button on the remote control.
The TV will display the channel, the type of sound, and the status of certain picture and sound settings.

Press the INFO button once more or wait approximately 10 seconds and the display disappears automatically.

Viewing the Menus
- With the power on, press the MENU button. The main menu appears on the screen. The menu's left side has five icons: Picture, Sound, Channel, Setup, Input.
- Use the ▲ or ▼ button to select one of the five icons. Then press the ENTER button to access the icon's sub-menu.
- Press the EXIT button to exit.
The on-screen menus disappear from the screen after about one minute.


Memorizing the Channels
Your TV can memorize and store all of the available channels for both "off-air" (Air) and "Cable" channels. After the available channels are memorized, use the CH⊗ or CH⊗ button to scan through the channels. This eliminates the need to change channels by entering the channels digits. There are three steps for memorizing channels: selecting a broadcast source, memorizing the channels (automatic) and adding or deleting channels (Channel Lists).
Selecting the Video Signal-source
Before your television can begin memorizing the available channels, you must specify the type of signal source that is connected to the TV (i.e. an Air or a Cable system).
-
Press the MENU button to display the menu. Press the ▲ or ▼ button to select "Channel", then press the ENTER button.
-
Press the ENTER button select "Antenna". Press the ▲ or ▼ button to select "Air" or "Cable", then press the ENTER button. Press the EXIT button to exit.


Storing Channels in Memory (Automatic Method)
- Press the MENU button to display the menu.
Press the ▲ or ▼ button to select "Channel", then press the ENTER button. -
Press the ▲ or ▼ button to select "Auto Program", then press the ENTER button.
-
Press the ▲ or ▼ button to select the antenna connection, then press the ENTER button.
Air: "Air" antenna signal.
Cable: "Cable" antenna signal.
Air+Cable: "Air" and "Cable" antenna signals.
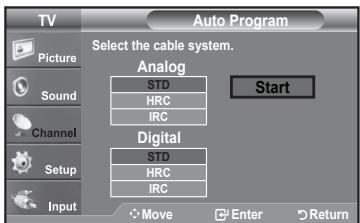
- When selecting the Cable TV system: Press the ENTER button to start the auto program. By default, the cable TV system is set to "STD". If you want to select another type of cable system, press the ▲ or ▼ button to select "STD", "HRC" or "IRC".
STD, HRC and IRC identify various types of cable TV systems. Contact your local cable company to identify the type of cable system that exists in your particular area. At this point the signal source has been selected.
Press the ENTER button to start the auto program.
To stop the search before it has finished, press the ENTER button with "Stop" selected.
- After all the available channels are stored, the "Auto Program" menu reappears. Press the EXIT button to exit.




After the television has been set up properly, your remote control can operate in five different modes: TV, DVD, Cable, Set-Top Box, VCR. Pressing the corresponding button on the remote control allows you to switch between these modes and control whichever piece of equipment you choose.
The remote control might not be compatible with all DVD Players, VCRs, Cable boxes and Set-Top Boxes.
Setting Up the Remote to Operate Your VCR
- Turn off your VCR.
- Press the VCR button on your TV's remote control.
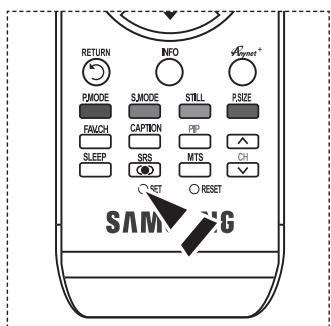
- Press the SET button on your TV's remote control.
- Using the number buttons on your remote control, enter three digits of the VCR code listed on page 19 of this manual for your brand of VCR. Make sure you enter three digits of the code, even if the first digit is a "0". (If more than one code is listed, try the first one.)
- Press the POWER button on the remote control. Your VCR should turn on if your remote is set up correctly.
If your VCR does not turn on after set up, repeat steps 2, 3 and 4, but try one of the other codes listed for your brand of VCR. If no other codes are listed, try each VCR code, 000 through 080.
Note on Using Remote Control Modes: VCR When your remote control is in "VCR" mode, the volume buttons still control your TV's volume.


Setting Up the Remote to Operate Your Cable Box
- Turn off your cable box.
- Press the CABLE button on your TV's remote control.
- Press the SET button on your TV's remote control.
- Using the number buttons on your remote control, enter three digits of the cable box code listed on page 20 of this manual for your brand of cable box. Make sure you enter three digits of the code, even if the first digit is a "0". (If there is more than one code listed, try the first one.)
- Press the POWER button on the remote control. Your cable box should turn on if your remote is set up correctly.
If your cable box does not turn on after set up, repeat steps 2, 3 and 4, but try one of the other codes listed for your brand of cable box. If no other codes are listed, try each code, 000 through 046.
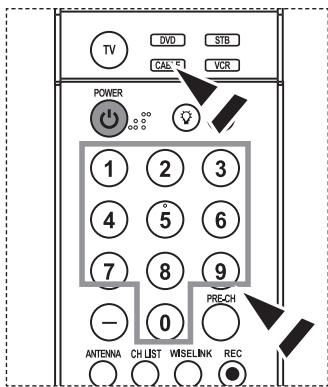
Note on Using Remote Control Modes: Cable Box When your remote control is in "CABLE" mode, the volume buttons still control your TV's volume.

Setting Up the Remote to Operate Your DVD
- Turn off your DVD.
- Press the DVD button on your TV's remote control.
- Press the SET button on your TV's remote control.
- Using the number buttons on your remote control, enter three digits of the DVD code listed on page 20\~21 of this manual for your brand of DVD. Make sure you enter three digits of the code, even if the first digit is a "0". (If there is more than one code listed, try the first one.)
- Press the POWER button on the remote control. Your DVD should turn on if your remote is set up correctly.
If your DVD does not turn on after set up, repeat steps 2, 3 and 4, but try one of the other codes listed for your brand of DVD. If no other codes are listed, try each code, 000 through 141.
Note on Using Remote Control Modes: DVD When your remote control is in "DVD" mode, the volume buttons still control your TV's volume.

Setting Up the Remote to Operate Your STB
- Turn off your STB.
- Press the STB button on your TV's remote control.
- Press the SET button on your TV's remote control.
- Using the number buttons on your remote control, enter three digits of the STB code listed on page 21 of this manual for your brand of STB. Make sure you enter three digits of the code, even if the first digit is a "0". (If there is more than one code listed, try the first one.)
- Press the POWER button on the remote control.
Your STB should turn on if your remote is set up correctly.
If your STB does not turn on after set-up, repeat steps 2, 3 and 4, but try one of the other codes listed for your brand of STB. (If no other codes are listed, try each code, 000 through 074.)Note on Using Remote Control Modes: STB When your remote control is in "STB" mode, the volume buttons still control your TV's volume.


VCR
| Brand | Code |
| SAMSUNG | 000 001 002 003 004 005 077 078 079 |
| ADMIRAL | 020 |
| AIWA | 025 |
| AKAI | 004 027 032 |
| AUDIO DYNAMICS | 007 026 |
| BELL&HOWELL | 018 |
| BROKSONIC | 022 |
| CANDLE | 002 003 006 008 015 055 |
| CANON | 021 056 |
| CITIZEN | 002 003 006 008 015 055 |
| COLORTYME | 007 |
| CRAIG | 002 024 |
| CURTIS MATHES | 002 007 008 017 021 025 056 064 066 |
| DAEWOO | 003 010 011 012 013 014 015 016 |
| DB | 007 026 |
| DIMENSIA | 017 |
| DYNATECH | 025 |
| ELECTROHOME | 034 |
| EMERSON | 001 003 006 021 022 025 030 032 034 040 047 050 052 060 063 065 066 067 069 073 |
| FISHER | 018 024 028 029 048 051 061 |
| FUNAI | 025 |
| GENERAL ELECTRIC | 002 005 017 021 056 |
| GO VIDEO | 002 |
| HARMAN KARDON | 007 |
| HITACHI | 019 025 041 042 074 |
| INSTANT REPLAY | 021 |
| JC PENNEY | 002 007 018 019 021 026 037 041 054 056 |
| JCL | 007 008 018 021 026 037 |
| JVC | 081 082 083 |
| KENWOOD | 007 008 018 021 026 037 |
| KLH | 070 |
| KONIA | 036 |
| LG(Goldstar) | 006 007 008 009 010 |
| LIOYD | 025 |
| LOGIK | 038 |
| LXI | 025 |
| MAGNAVOX | 021 056 059 |
| MARANTZ | 007 008 018 021 026 037 062 |
| MARTA | 006 |
| MEI | 021 |
| MEMOREX | 006 021 024 025 |
| MGA | 034 |
| MIDLAND | 005 |
| MINOLTA | 019 041 075 |
| MITSUBISHI | 019 034 041 046 |
| Brand | Code |
| MONTGOMERY WARD | 020 |
| MTC | 002 025 |
| MULTITECH | 002 005 025 038 |
| NEC | 007 008 018 026 037 062 064 |
| OPTIMUS | 020 |
| ORION | 073 074 075 076 |
| PANASONIC | 021 056 071 072 |
| PENTAX | 019 041 075 |
| PENTEX RESEARCH+ | 008 |
| PHILCO | 021 056 059 |
| PHILIPS | 021 080 |
| PIONEER | 019 026 039 053 |
| PORTLAND | 015 049 055 |
| PROSCAN | 017 |
| QUARTZ | 018 |
| QUASAR | 021 056 |
| RADIO SHACK/ REALISTIC | 006 018 020 021 024 025 029 034 048 056 |
| RCA | 002 017 019 021 035 041 043 057 068 076 |
| SANSUI | 026 |
| SANYO | 018 024 |
| SCOTT | 003 047 052 067 |
| SEARS | 006 018 019 024 028 029 041 048 051 |
| SHARP | 020 034 045 015 |
| SHIMTOM | 027 033 038 058 |
| SIGNATURE | 025 |
| SONY | 027 033 044 |
| SYLVANIA | 021 025 056 059 |
| SYMPHONIC | 025 |
| TANDY | 018 025 |
| TASHIKA | 006 |
| TATUNG | 037 |
| TEAC | 025 037 068 |
| TECHNICS | 021 |
| TEKNIKA | 006 021 025 031 |
| TMK | 066 |
| TOSHIBA | 003 019 029 051 052 |
| TOTEVISION | 002 006 |
| UNITECH | 002 |
| VECTOR RESEARCH | 007 026 |
| VICTOR | 026 |
| VIDEO CONCEPTS | 007 026 |
| VIDEOSONIC | 002 |
| WARDS | 002 003 006 019 020 021 024 025 034 038 041 |
| YAMAHA | 007 008 018 026 037 |
| ZENITH | 023 027 033 |
CABLE BOX
| Brand | Code |
| SAMSUNG | 000 001 002 003 004 005 006 007 |
| GI | 041 |
| HAMLIN | 003 024 031 |
| HITACHI | 025 030 |
| JERROLD | 038 039 |
| MACOM | 025 030 |
| MAGNAVOX | 019 023 028 |
| OAK | 026 |
| PANASONIC | 003 022 027 037 044 |
| PHILIPS | 019 021 023 028 |
| PIONEER | 004 018 020 044 |
| RCA | 014 022 040 |
| REGAL | 003 |
SAMSUNG DVD
| Product | Code |
| DVD | 000 001 002 |
| DVDR | 003 004 |
| BD Record | 005 006 |
| VCR COMBO | 007 008 009 010 011 |
| VCR Record | 012 |
| DHR COMBO | 013 |
DVD
| Brand | Code |
| ANAM | 030 |
| AUDIOVOX | 075 |
| AUDIOLOGIC | 085 |
| ANABA | 072 |
| APEX DIGITAL | 070 071 074 086 083 084 088 111 112 |
| AIWA | 114 |
| BROKSONIC | 062 |
| BLAUPUNKT | 074 |
| B&K | 122 123 |
| CURTIS MATHES | 027 |
| CYBER HOME | 077 078 079 082 |
| CLARION | 080 125 |
| CIRRUS | 081 |
| CYBER HOME | 065 |
| CINEVISION | 095 |
| DAEWOO | 066 |
| DENON | 146 |
| FARENHEIT | 067 068 |
| FISHER | 090 |
| GPX | 060 |
| GO VIDEO | 061 089 133 135 |
| GE | 069 074 |
| GREENHILL | 074 |
| HITACHI | 064 113 |
| HITEKER | 071 |
| HOYO | 073 |
| HARMAN / KARDON | 091 110 |
| IRT | 089 |
| Brand | Code |
| REGENCY | 015 023 |
| SA | 042 043 |
| SCIENTIFIC ATLAN | 042 043 |
| SPRUCER | 022 |
| STARGATE 2000 | 036 |
| SYLVANIA | 016 |
| TEXSCAN | 016 |
| TOCOM | 032 |
| UNIVERSAL | 033 034 |
| VIEWSTAR | 019 021 023 028 |
| WARNER AMEX | 046 |
| ZENITH | 017 029 035 037 045 |
| Product | Code |
| Home Theater VCR COMBO | 014 015 016 |
| HDD Recorder COMBO | 017 |
| TWIN TRAY COMBO | 018 |
| STB DVD COMBO | 019 |
| DVD Receiver | 020 |
| AV Receiver | 021 |
| Brand | Code |
| INTEGRA | 092 |
| JBL | 091 |
| JVC | 022 033 115 116 |
| JATON | 073 |
| KENWOOD | 051 108 109 |
| KISS | 073 |
| KONKA | 059 100 106 107 |
| KLH | 074 075 |
| LG(Goldstar) | 025 031 |
| LOEWE | 057 |
| LASONIC | 058 |
| MOBILE AUTHORITY | 054 |
| MEMOREX | 055 |
| MALATA | 056 |
| MAGNAVOX | 076 093 |
| MINTEK | 074 094 |
| MONYKA | 073 |
| NORCENT | 048 049 050 |
| NEXT BASE | 052 |
| NEC | 053 |
| NANTAUS | 144 |
| NESA | 074 |
| OPTOMEDIA ELECTRONICS | 105 |
| OPTIVIEW | 072 |
| ONKYO | 076 092 119 |
| PHILCO | 044 045 |
| PRINCETON | 046 047 |
| PROSCAN | 023 |
DVD
| Brand | Code |
| PANASONIC | 024 034 124 134 136 137 138 |
| PHILIPS | 036 076 |
| ROTEL | 117 118 |
| RIO | 120 |
| RCA | 023 035 074 075 131 132 |
| RAITE | 073 |
| ROWA | 038 |
| SAMPO | 104 |
| SONY | 026 029 126 127 128 129 130 141 |
| SHERWOOD | 039 041 |
| SVA | 042 |
| SYLVANIA | 043 093 |
| SHARP | 140 |
| SANSUI | 062 |
| SANYO | 062 090 |
| SHINSONIC | 094 |
SAMSUNG SET-TOP BOX
| Product | Code |
| Ground wave STB | 000 001 002 008 013 |
| CABLE STB | 000 004 008 013 |
| Satellite STB | 000 003 008 013 |
SET-TOP BOX
| Brand | Code |
| ALPHASTAR | 023 |
| ANAM | 043 |
| CHANNEL MASTER | 018 034 |
| CROSSDIGITAL | 019 |
| CHAPARRAL | 035 |
| DIRECT TV | 015 016 017 019 022 045 060 061 062 065 066 067 068 |
| DAEWOO | 074 |
| DISH NETWORK SYSTEM | 069 070 |
| DISHPRO | 069 |
| DRAKE | 018 024 032 |
| DX ANTENNA | 027 |
| ECHOSTAR | 025 069 070 071 |
| EXPRESSVU | 069 |
| GOI | 069 |
| GE | 065 |
| GENERAL INSTRUMENT | 046 047 048 063 064 |
| HTS | 069 |
| HOME CABLE | 056 |
| HITACHI | 022 |
| HUGHES NETWORK | 015 017 |
| IQ | 020 |
| IQ PRISM | 020 |
| JANEIL | 059 |
| JERROID | 063 |
| JVC | 069 070 |
| LG(Goldstar) | 044 073 |
| Brand | Code |
| THOMSON | 145 |
| TOSHIBA | 028 062 076 |
| TECHNICS | 139 |
| TVIEW | 072 |
| TOKAI | 073 |
| TEAC | 096 |
| TECHWOOD | 097 |
| TREDEX | 098 099 101 |
| URBAN CONCEPTS | 076 |
| VENTURER | 075 |
| VOCOPRO | 102 |
| YAMAHA | 032 063 |
| YAMAKAWA | 040 073 |
| XWAVE | 103 |
| ZENITH | 076 121 |
| Brand | Code |
| MAGNAVOX | 016 021 036 038 039 040 041 042 |
| MEMOREX | 016 |
| MOTOROLA | 064 |
| MACOM | 018 |
| MITSUBISHI | 015 |
| NEXT LEVEL | 047 048 064 |
| PHILIPS | 015 016 017 021 033 036 038 039 040 041 042 067 |
| PRIMESTAR | 046 049 050 063 |
| PANASONIC | 058 059 061 062 |
| PAYSAT | 016 |
| PROSCAN | 065 066 |
| RCA | 051 052 053 065 066 |
| RADIOSHACK | 064 |
| REALISTIC | 057 |
| STAR TRAK | 026 |
| STS | 020 027 |
| SKY | 031 |
| SKY LIFE | 005 006 007 |
| SHACK | 064 |
| STAR CHOICE | 064 |
| SONY | 054 060 |
| TOSHIBA | 015 017 028 029 030 072 |
| ULTIMATE TV | 060 066 |
| UNIDEN | 016 021 037 055 056 057 |
| ZENITH | 024 031 068 |
To Select the Source
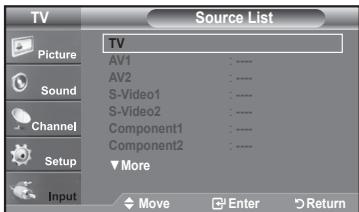
Use to select TV or other external input sources such as DVD players or Cable Box/Satellite receivers (Set-Top Box) connected to the TV. Use to select the input source of your choice.
- Press the MENU button to display the menu.
Press the ▲ or ▼ button to select "Input", then press the ENTER button.
- Press the ENTER button to select "Source List".
Press the ▲ or ▼ button to select signal source, then press the ENTER button.
You can choose between the following sets of jacks: AV1, S-Video1, Component1, Component2, PC, HDMI1, or HDMI2 on the TV's rear panel and AV2, S-Video2, or HDMI3 on the TV's side panel.
HDMI1, HDMI2, HDMI3 input can only be selected when the external device is turned on and connected via HDMI.
➢ You can choose only those external devices that are connected to the TV.
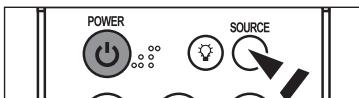
Press the SOURCE button on the remote control to view an external signal source.

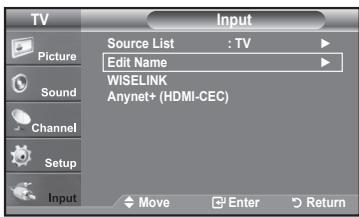
To Edit the Input Source Name
Name the device connected to the input jacks to make your input source selection easier.
- Press the MENU button to display the menu.
Press the ▲ or ▼ button to select "Input", then press the ENTER button. Press the ▲ or ▼ button to select "Edit Name", then press the ENTER button.
-
Press the ▲ or ▼ button to select "AV1", "AV2", "S-Video1", "S-Video2", "Component1", "Component2", "PC", "HDMI1", "HDMI2", "HDMI3" input jack, then press the ENTER button.
-
Press the ▲ or ▼ button to select "VCR", "DVD", "D-VHS", "Cable STB", "HD STB", "Satellite STB", "PVR STB", "AV Receiver", "DVD Receiver", "Game", "Camcorder", "DVD Combo", "PC", "VOD STB", "TV" input source, then press the ENTER button.
Press the EXIT button to exit.
When a PC with a resolution of 1920 x 1080@60Hz is connected to the HDMI IN 1 port, you should set the" HDMI1" mode to "PC" in the "Edit Name" of the "Input" mode. If the "HDMI1" mode is not PC, it works depending on the TV setting.


Using Automatic Picture Settings
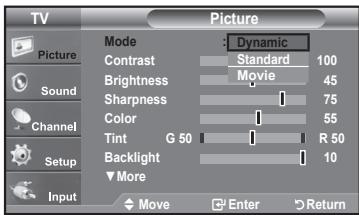
Your TV has Three automatic picture settings ("Dynamic", "Standard" and "Movie") that are preset at the factory. You can activate either Dynamic, Standard, Movie by making a selection from the menu.
- Press the MENU button to display the menu. Press the ENTER button, to select "Picture".

-
Press the ENTER button to select "Mode". Press the ▲ or ▼ button to select the "Dynamic", "Standard", "Movie" picture setting. Press the ENTER button.
-
Choose Dynamic to increase the clarity and sharpness of the picture.
- Choose Standard for the standard factory settings.
♦ Choose Movie for a natural Image without picture enhancements.
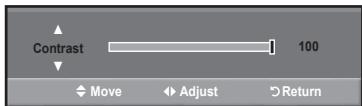
- Press the ▲ or ▼ button to select "Contrast", "Brightness", "Sharpness", "Color", "Tint(G/R)" or "Backlight", then press the ENTER button.
- Press the ◀ or ▶ button to decrease or increase the value of a particular item. For example, if you select "Contrast", pressing the ▶ button increases it. Press the ENTER button.
Press the EXIT button to exit.
When you make changes to "Contrast", "Brightness", "Sharpness", "Color", "Tint(G/R)" or "Backlight", the OSD will be adjusted accordingly.
When in PC mode, Tint, Sharpness and Color are not available.
➢ Each adjusted setting will be stored separately according to its input mode.

Press the P.MODE button on the remote control repeatedly to select the desired picture mode.

Adjusting the Color Tone
You can change the color of the entire screen according to your preference.
- Press the MENU button to display the menu.
Press the ENTER button to select "Picture".
-
Press the ▲ or ▼ button to select "Color Tone", then press the ENTER button.
-
Press the ▲ or ▼ button to select "Cool2", "Cool1", "Normal", "Warm1" or "Warm2".
Press the ENTER button.
When the picture mode is set to "Dynamic" or "Standard", "Warm1" and "Warm2" cannot be selected. "Movie" mode is only available.
➢ Each adjusted setting will be stored separately according to its input mode.


Resetting the Picture Settings to the Factory Defaults
- Press the MENU button to display the menu. Press the ENTER button to select "Picture".
- Press the ▲ or ▼ button to select "Reset", then press the ENTER button. Press the ▲ or ▼ button to select "Cancel" or "OK" then press the ENTER button.
Press the EXIT button to exit.
▶ Each mode can be reset.


Adjusting the Detailed Settings
Samsung's new TVs allow you to make even more precise picture settings than previous models. See below to adjust detailed picture settings.
Activating Detailed Settings
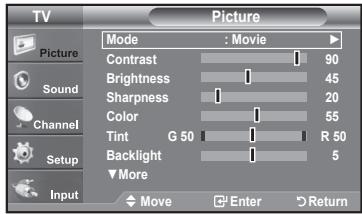
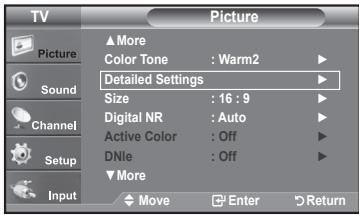
- Press the MENU button to display the menu. Press the ENTER button to select "Picture".
- Press the ENTER button to select "Mode" Press the ▲ or ▼ button to select "Standard" or "Movie", then press the ENTER button.
- Press the ▲ or ▼ button to select "Detailed Settings", then press the ENTER button.
➢ "Detailed Settings" is available in "Standard" or "Movie" mode.
If "DNIe" is Off, the "Detailed Settings" cannot be selected when the Picture mode is in "Standard" mode.
Activating Black adjust
You can select the black level on the screen to adjust the screen depth.
- Press the ▲ or ▼ button to select "Black adjust", then press the ENTER button.
-
Press the ▲ or ▼ button to select "Off", "Low", "Medium" or "High". Press the ENTER button.
-
Off: Turns off the black adjustment function.
- Low: Sets the black color depth to low.
♦ Medium: Sets the black color depth to medium.
♦ High: Sets the black color depth to high.


Activating Dynamic Contrast
You can adjust the screen contrast so that the optimal contrast is provided.
- Press the ▲ or ▼ button to select "Dynamic Contrast", then press the ENTER button.
-
Press the ▲ or ▼ button to select "Off", "Low", "Medium" or "High". Press the ENTER button.
-
Off: Turns off the dynamic contrast adjustment function.
- Low: Sets the dynamic contrast to low.
- Medium: Sets the dynamic contrast to medium.
- High: Sets the dynamic contrast to high.


Activating Gamma
You can adjust the Primary Color (Red, Green Blue) Intensity. (-3 \~ +3)
- Press the ▲ or ▼ button to select "Gamma", then press the ENTER button.
- Press the ◀ or ▶ button to decrease or increase the value of a particular item. Press the ENTER button.
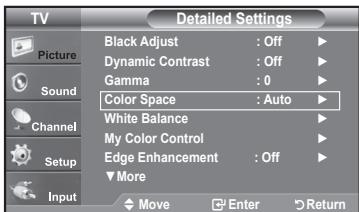
Changing the Color Space
Color space is a color matrix composed of red, green and blue colors.
Select your favorite color space to experience the most natural color.
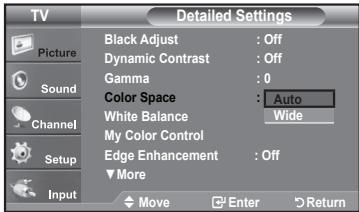
- Press the ▲ or ▼ button to select "Color Space", then press the ENTER button.
-
Press the ▲ or ▼ button to select "Auto" or "Wide". Press the ENTER button.
-
Auto: Auto Color Space automatically adjusts to the most natural color tone based on program sources.
- Wide : Wide Color Space offers deep and rich color tone.
Activating White Balance
You can adjust the color temperature for more natural picture colors.
- Press the ▲ or ▼ button to select "White Balance", then press the ENTER button.
- Select the required option by pressing the ▲ or ▼ button, then press the ENTER button.
- Press the ◀ or ▶ button to decrease or increase the value of a particular item. Press the ENTER button.
♦ R-Offset: Adjusts the red color darkness.
♦ G-Offset: Adjusts the green color darkness.
♦ B-Offset: Adjusts the blue color darkness.
♦ R-Gain: Adjusts the red color brightness.
♦ G-Gain: Adjusts the green color brightness.
♦ B-Gain: Adjusts the blue color brightness.
- Reset: The previously adjusted white balance will be reset to the factory defaults.
➢ Changing the adjustment value will refresh the adjusted screen.




Activating My Color Control
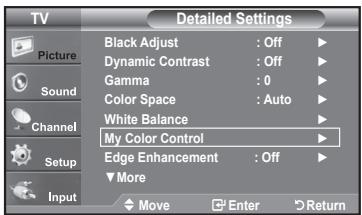
This setting can be adjusted to suit your personal preferences. When using the My Color Control Feature, the current picture remains in movement.
- Press the ENTER button to select "My Color Control".
- Press the ▲ or ▼ button to select "Pink", "Green", "Blue", "White" or "Reset". Press the ENTER button.
- Press the ◀ or ▶ button to decrease or increase the value of a particular item. Press the ENTER button.
♦ Pink: Darkens or lightens the pink color
♦ Green: Darkens or lightens the green color
- Blue: Darkens or lightens the blue color
- White: Darkens or lightens the white color
- Reset: The previously adjusted colors will be reset to the factory defaults.
➢ Changing the adjustment value will refresh the adjusted screen.


Activating Edge Enhancement
You can emphasize object boundaries in the picture.
- Press the ▲ or ▼ button to select "Edge Enhancement", then press the ENTER button.
- Press the ▲ or ▼ button to select "Off" or "On". Press the ENTER button.


Activating xvYCC
Setting the xvYCC mode to On increases detail and color space when watching movies from an external device (ie. DVD player) connected to the HDMI or Component IN jacks. You must set the Picture Mode to Movie to enjoy this feature.
- Press the ▲ or ▼ button to select "xvYCC", then press the ENTER button.
- Press the ▲ or ▼ button to select "Off" or "On". Press the ENTER button.
▶ Only available in HDMI and Component on Movie option.
➢ If xvYCC function is active, PIP cannot be selected.
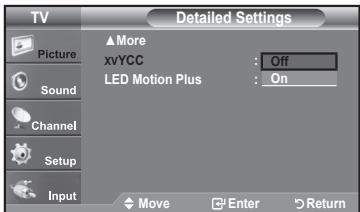
Activating LED Motion Plus
Removes drag from fast scenes with a lot of movement to provide aclearer picture.
- Press the ▲ or ▼ button to select "LED Motion Plus", then press the ENTER button.
- Press the ▲ or ▼ button to select "Off" or "On". Press the ENTER button.
Press the EXIT button to exit.

Changing the Screen Size
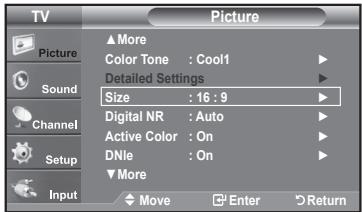
Occasionally, you may want to change the size of the image on your screen. Your TV comes with six screen size options, each designed to work best with specific types of video input. Your cable box or satellite receiver may have its own set of screen sizes as well. In general, though, you should view the TV in 16:9 mode as much as possible.
- Press the MENU button to display the menu.
Press the ENTER button, to select "Picture".
-
Press the ▲ or ▼ button to select "Size", then press the ENTER button.
-
Press the ▲ or ▼ button to select the screen format you want.
Press the ENTER button.
Press the EXIT button to exit.
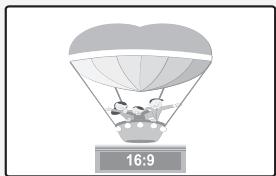
• 16:9 : Sets the picture to 16:9 wide mode.
- Zoom1 : Magnifies the size of the picture on the screen.
- Zoom2 : Magnifies the size of the picture more than "Zoom1".
- Wide Fit : Enlarges the aspect ratio of the picture to fit the entire screen.
• 4:3 : Sets the picture to 4:3 normal mode.
- Just Scan : Use the function to see the full image without any cutoff when HDMI (720p/1080i/1080p), Component (720p/1080i/1080p) or DTV (1080i) signals are input.
Alternate, you can press the P.SIZE button on the remote control repeatedly to change the picture size.
If you watch a still image or the 4:3 mode for a long time (over 2 hours), an image may be burned onto the screen. View the TV in 16:9 mode as much as possible.
HD (High Definition)
16:9 - 1080i/1080p (1920x1080), 720p (1280x720)


16:9
Sets the picture to 16:9 wide mode.

Zoom1
The screen size when Wide screen is vertically enlarged.

Zoom2
The screen size when the Zoom1 screen is vertically enlarged.

Wide Fit
Enlarges the aspect ratio of the picture to fit the entire screen.

4:3
Sets the picture to 4:3 normal mode.

Just Scan
Use the function to see the full image without any cutoff when HDMI(720p/1080i/1080p), Component (720p/1080i/1080p) or DTV (1080i) signals are input.
- In TV, VIDEO, S-VIDEO and all COMPONENT (480i, 480p) modes, all screen modes can be selected. (16:9, Zoom1, Zoom2, 4:3).
- You can select only the 16:9, 4:3 and Wide Fit screen sizes in the DTV(1080i), Component (720p, 1080i, 1080p) or HDMI (720p, 1080i, 1080P) mode.
- In PC modes, only 16:9 & 4:3 modes can be selected.
- You must select Zoom with P.SIZE button on the remote if you want to move the Zoom 1 or 2 picture up or down.
- When watching a DTV's HD signal, you can use Wide Fit. Horizontal zoom (Wide Fit) sets the optical picture format by expanding it both horizontally and vertically. For example, you can reset the picture in 4:3 format to 16:9. Wide Fit does not support all external devices (DVD, VCR etc.).
- When Double (□□, □□) mode has been set in PIP, the Picture Size cannot be set.
Setting the Active Color
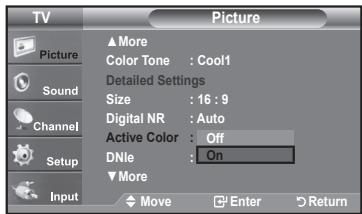
If you turn on this option, the blue and green colors will be more vivid.
- Press the MENU button to display the menu. Press the ENTER button, to select "Picture".
- Press the ▲ or ▼ button to select "Active Color", then press the ENTER button.
- Press the ▲ or ▼ button to select "Off" or "On" Press the ENTER button.
Press the EXIT button to exit.
➢ "Active Color" is available only in "Dynamic" mode.
- This function doesn't work when the Input Source is PC.

DNle (Digital Natural Image engine)
This TV includes the DNle function to provide high visual quality. If you set DNle to on, you can view the screen with the DNle feature activated. Using this function, you can view the difference in the visual quality.
- Press the MENU button to display the menu.
Press the ENTER button, to select "Picture". - Press the ▲ or ▼ button to select "DNle", then press the ENTER button.
-
Press the ▲ or ▼ button to select "Off", "Demo" or "On", then press the ENTER button.
-
Off: Switches off the DNle mode.
- On: Switches on the DNle mode.
Press the EXIT button to exit.
DNle™ (Digital Natural Image engine) DNle™
This feature brings you a more detailed image with 3D noise reduction and detailed, contrast and white enhancement.
This function doesn't work when the Input Source is PC.
The DNle function is not supported in the Movie mode.


Setting the LED SmartLighting
Controls LED backlight to maximize picture clarity.
-
Press the MENU button to display the menu. Press the ENTER button to select "Picture".
-
Press the ▲ or ▼ button to select "LED SmartLighting", then press the ENTER button.
-
Press the ▲ or ▼ button to select "Off" or "On" then press the ENTER button. Press the ENTER button.
➢ If “LED Feature Demo” is On, this function is not available.


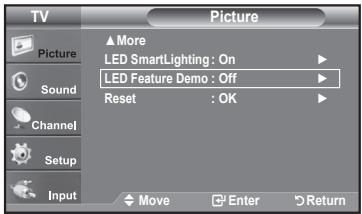
Setting the LED Feature Demo
LED Feature Demo allows you to compare the enhanced screen quality of the “LED SmartLighting” feature with the original picture.
-
Press the MENU button to display the menu. Press the ENTER button to select "Picture".
-
Press the ▲ or ▼ button to select "LED Feature Demo", then press the ENTER button.
-
Press the ▲ or ▼ button to select "Off" or "On" then press the ENTER button. Press the ENTER button.
The Demo screen for the "LED SmartLighting" is displayed. The right figure shows the screen before the LED Feature is applied. The left figure shows the screen after the LED Feature is applied.

Setting the HDMI Black Level
You can select the black level on the screen to adjust the screen depth.
- Press the MENU button to display the menu.
Press the ▲ or ▼ button to select "Setup", then press the ENTER button. - Press the ▲ or ▼ button to select "HDMI Black Level", then press the ENTER button.
- Press the ▲ or ▼ button to select "Normal" or "Low", then press the ENTER button.
• Normal: The screen gets brighter.
- Low: The screen gets darker.
This function is active only when the external input connects to HDMI (RGB signals). "HDMI Black Level" function may not be compatible with or external devices.
Press the EXIT button to exit.


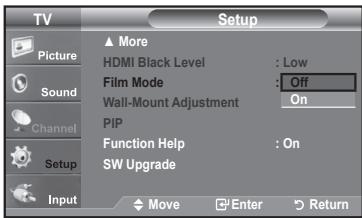
Setting the Film Mode
The TV can be set to automatically sense and process film signals from all sources and adjust the picture for optimum quality.
- Press the MENU button to display the menu.
Press the ▲ or ▼ button to select "Setup", then press the ENTER button. - Press the ▲ or ▼ button to select "Film Mode", then press the ENTER button.
- Press the ▲ or ▼ button to select "On" or "Off", then press the ENTER button.
Press the EXIT button to exit.
➢ "Film mode" is supported in TV, VIDEO, S-VIDEO, COMPONENT(480i / 1080i) and HDMI(480i / 1080i).

Viewing Picture-in-Picture
This product has one built-in tuner, which does not allow PIP to function in the same mode. For example, you cannot watch one TV channel in the main screen and a different one in the PIP screen. Please see 'PIP Settings' below for details. You can use the PIP feature to simultaneously watch two video sources. (See page 38 to select the PIP picture sound.)
➢ While V-Chip (See page 57) is in operation, the PIP function cannot be used.
➢ While xvYCC (See page 27) is in operation, the PIP function cannot be used.
Activating Picture-in-Picture
- Press the MENU button to display the menu.
Press the ▲ or ▼ button to select "Setup", then press the ENTER button. Press the ▲ or ▼ button to select "PIP", then press the ENTER button.
- Press the ENTER button again.
Press the ▲ or ▼ button to select "On", then press the ENTER button.
If you turn the TV off while watching in PIP mode and turn it on again, the PIP window will disappear.
You can view Analog TV broadcasts on the PIP screen (sub-picture) when the main picture is from an external device connected to HDMI1, 2, 3, Component1,2 or PC
| Main picture | Sub picture |
| Component 1,2HDMI 1,2,3PC | Analog TV broadcasts only |


Alternately, you can press the PIP button on the remote control repeatedly to activate or deactivate the PIP.

Changing the PIP Channel
- Press the ▲ or ▼ button to select "Channel", then press the ENTER button.
Press the ▲ or ▼ button to select the desired channel in the PIP window.
Press the ENTER button.
MAIN: PC / HDMI 1,2,3 / Component 1,2 PIP: TV(Analog)
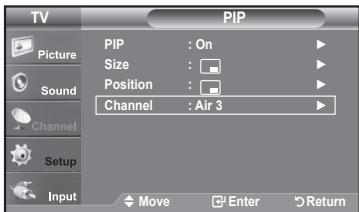

Alternatively, you can press the PIP Channel buttons on the remote control.

Changing the Position of the PIP Window
- Press the ▲ or ▼ button to select "Position", then press the ENTER button.
Press the ▲ or ▼ button to select the desired channel in the PIP window.
Press the ENTER button.
In Double Window (☐☐), and Double Wide (☐☐) modes, "Position" cannot be selected.


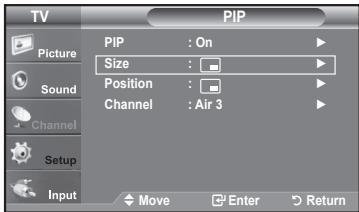
Changing the Size of the PIP Window
- Press the ▲ or ▼ button to select "Size", then press the ENTER button.
Press the ▲ or ▼ button to select the desired channel in the PIP window.
Press the ENTER button.
Press the EXIT button to exit.
➢ If the main picture is in PC and HDMI 1 mode, "Size" is not available.
➢ You may notice that the picture in the PIP window becomes slightly unnatural when you use the main screen to view a game or karaoke.
➢ You can adjust picture position only by using the □ size menu.

Freezing the Picture
- Press the STILL button to freeze a moving picture.
➢ Normal sound will still be heard. Press again to cancel.
➢ While V-Chip is in operation, the Still function cannot be used.

Customizing the Sound
The sound settings can be adjusted to suit your personal preference. (Alternatively, you can use one of the "automatic" settings.)
- Press the MENU button to display the menu.
Press the ▲ or ▼ button to select "Sound", then press the ENTER button. -
Press the ▲ or ▼ button to select "Equalizer", then press the ENTER button.
-
Press the ◀ or ▶ button to select a particular frequency to adjust.
Press the ▲ or ▼ button to increase or decrease the level of the particular frequency.
Press the ENTER button.
Press the EXIT button to exit.
- L/R Sound Balance Adjustment: To adjust the sound balance of the L/R speakers.
- Bandwidth Adjustment (100Hz, 300Hz, 1KHz, 3KHz, 10KHz): To adjust the level of different bandwidth frequencies.
If you make any changes to the equalizer settings, the sound mode is automatically switched to the "Custom" mode.


Using Automatic Sound Settings
Your TV has automatic sound settings ("Standard", "Music", "Movie", "Speech" and "Custom") that are preset at the factory. Or, you can select "Custom", which automatically recalls your personalized sound settings.
-
Press the MENU button to display the menu.
Press the ▲ or ▼ button to select "Sound", then press the ENTER button. -
Press the ENTER button to select "Mode".
Press the ▲ or ▼ button to select "Standard", "Music", "Movie", "Speech", or "Custom" sound setting, then press the ENTER button.
Press the EXIT button to exit.
- Choose Standard for the standard factory settings.
- Choose Music when watching music videos or concerts.
- Choose Movie when watching movies.
- Choose Speech when watching a show that is mostly dialog (i.e., news).
- Choose Custom to recall your personalized settings (see "Customizing the Sound").


Press the S.MODE button on the remote control repeatedly to select one of the sound settings.

Setting the TruSurround XT
TruSurround XT is a patented SRS technology that solves the problem of playing 5.1 multichannel content over two speakers. TruSurround delivers a compelling, virtual surround sound experience through any two-speaker playback system, including internal television speakers. It is fully compatible with all multichannel formats.
-
Press the MENU button to display the menu. Press the ▲ or ▼ button to select "Sound", then press the ENTER button.
-
Press the ▲ or ▼ button to select "SRS TruSurround XT", then press the ENTER button.
-
Press the ▲ or ▼ button to select "On" or "Off", then press the ENTER button. Press the EXIT button to exit.
Press the SRS button on the remote control to select On or Off.
TRADEMARK & LABEL LICENSE NOTICE

TruSurround XT, SRS and (●) Symbol are trademarks of SRS Labs, Inc.
TruSurround XT technology is incorporated under license from SRS Labs, Inc.


Choosing a Multi-Channel Sound (MTS) track - Digital
The digital-TV transmission system is capable of simultaneous transmission of many audio tracks (for example, simultaneous translations of the program into foreign languages). The availability of these additional “multitracks” depends upon the program.
Preferred Language
- Press the MENU button to display the menu.
Press the ▲ or ▼ button to select "Sound", then press the ENTER button.Quick way to access the MTS menu: Just press the "MTS" button on the remote control. You can listen in a language other than your chosen language by pressing the MTS button.
- Press the ▲ or ▼ button to select "Multi-Track Options", then press the ENTER button.
- Press the ENTER button to select "Preferred Language".
Press the ▲ or ▼ button to choose the language (English, Spanish or French) you want, then press the ENTER button.
Press the EXIT button to exit.
➢ "Multi-Track Options" is available only in TV mode.
➢ You can only select the language from among the actual languages being broadcast.


You can listen in a language other than the favorite language by pressing the MTS button on the remote control.

Multi-Track Sound
-
Press the MENU button to display the menu. Press the ▲ or ▼ button to select "Sound", then press the ENTER button.
-
Press the ▲ or ▼ button to select ""Multi-Track Options", then press the ENTER button.
-
Press the ▲ or ▼ button to select "Multi-Track Sound", then press the ENTER button. Press the ▲ or ▼ button to select a setting you want, then press the ENTER button. Press the EXIT button to exit.
-
Choose Mono for channels that are broadcasting in mono or if you are having difficulty receiving a stereo signal.
- Choose Stereo for channels that are broadcasting in stereo.
- Choose SAP to listen to the Separate Audio Program, which is usually a foreign-language translation.
➢ "Multi-Track Options" is available only in TV mode.
Press the MTS button on the remote control repeatedly to select "Mono", "Stereo" or "SAP".


Automatic Volume Control
Reduces the differences in volume level among broadcasters.
- Press the MENU button to display the menu.
Press the ▲ or ▼ button to select "Sound", then press the ENTER button. -
Press the ▲ or ▼ button to select "Auto Volume", then press the ENTER button.
-
Press the ▲ or ▼ button to set Auto Volume "On" or "Off" then press the ENTER button.
Press the EXIT button to exit.
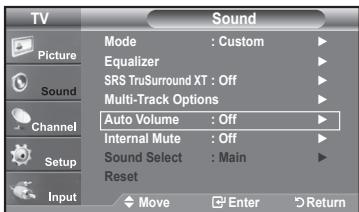

Selecting the Internal Mute
Sound output from the TV speakers is muted.
- Press the MENU button to display the menu.
Press the ▲ or ▼ button to select "Sound", then press the ENTER button. -
Press the ▲ or ▼ button to select "Internal Mute", then press the ENTER button.
-
Press the ▲ or ▼ button to select "On", then press the ENTER button.
Press the EXIT button to exit.
When "Internal mute" is set to "On", Sound menus except "Multi-Track Options" and "Sound Select" (in PIP mode) cannot be adjusted.
The VOL⊕, VOL⊖ and MUTE buttons do not operate when the Internal Mute is set to On.
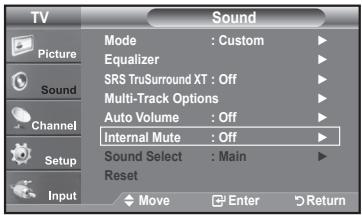

| TV'S Internal Speakers | Audio Out (Optical, L/R Out) to Sound System | |||||
| RF | AV, S-Video | Component, PC, HDMI | RF | AV, S-Video | Component, PC, HDMI | |
| Internal Mute Off | Speaker Output | Speaker Output | Speaker Output | Sound Output | Sound Output | Sound Output |
| Internal Mute On | Mute | Mute | Mute | Sound Output | Sound Output | Sound Output |
| Video No Signal | Mute | Mute | Mute | Mute | Mute | Mute |
Adjusting the TV On/Off Melody Sound
A melody sound can be set to come on when the TV is powered On or Off.
- Press the MENU button to display the menu. Press the ▲ or ▼ button to select "Setup", then press the ENTER button.
- Press the ▲ or ▼ button to select "Melody", then press the ENTER button.

-
Press the ▲ or ▼ button to select "Off", "Low", "Medium" or "High", then press the ENTER button.
-
Off : Turns off the melody function.
- Low : Sets the melody volume to low.
• Medium : Sets the melody volume to medium.
• High : Sets the melody volume to high.
Press the EXIT button to exit.

TRADEMARK & LABEL LICENSE NOTICE

DIGITAL
Manufactured under license from Dolby Laboratories.
"Dolby" and the double-D symbol are trademarks of Dolby Laboratories.
Listening to the Sound of the Sub (PIP) Picture
When the PIP feature is activated, you can listen to the sound of the sub (PIP) picture.
- Press the MENU button to display the menu.
Press the ▲ or ▼ button to select "Sound", then press the ENTER button. -
Press the ▲ or ▼ button to select "Sound Select", then press the ENTER button.
-
Press the ▲ or ▼ button to select "Main" or "Sub", then press the ENTER button. Press the EXIT button to exit.
-
Main: Used to listen to the sound of the main picture.
- Sub: Used to listen to the sound of the sub picture.
You can select this option when "PIP" is set to "On".


Resetting the Sound Settings to the Factory Defaults
If Game Mode is On, the Reset Sound function is activated(Refer to page 52). Selecting the Reset function resets the equalizer setting to the factory defaults.
- Press the MENU button to display the menu.
Press the ▲ or ▼ button to select "Sound", then press the ENTER button. - Press the ▲ or ▼ button to select "Reset", then press the ENTER button. Press the EXIT button to exit.
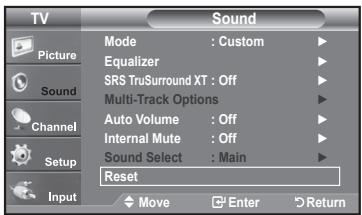
Connecting Headphones
You can connect a set of headphones to your set if you wish to watch a TV program without disturbing the other people in the room.
When you insert the headphone's plug into the headphone jack, only "Auto Volume" in the Sound menu can be operated.
➢ Prolonged use of headphones at a high volume may damage your hearing.
➢ You will not receive sound from the speakers when you connect headphones to the system.
The headphone volume and TV volume are adjusted separately.

TV Side Panel

Selecting the Antenna
- Press the MENU button to display the menu.
Press the ▲ or ▼ button to select "Channel", then press the ENTER button.
- Press the ENTER button to select "Antenna".
Press the ▲ or ▼ button to select "Air" or "Cable", then press the ENTER button.
Press the EXIT button to exit.
If the antenna is connected to ANT 1 IN (AIR), select "Air" and if it is connected to ANT 2 IN (CABLE), select "Cable".

or

If both ANT 1 IN (AIR) and ANT 2 IN (CABLE) are connected, select the antenna input you want. If the antenna input is not selected properly, noise may appear on the screen.


Press the ANTENNA button on the remote control.
Clearing Scrambled Channels - Digital
The Clear Scrambled Channel function is used to filter out scrambled channels after Auto Program is completed.
It removes the scrambled channels from the list by tuning the digital cable channels. This process may take up to 20\~30 minutes.
- Press the MENU button to display the menu.
Press the ▲ or ▼ button to select "Channel", then press the ENTER button.
- Press the ▲ or ▼ button to select "Clear Scrambled Channel", then press the ENTER button.
It searches scrambled channels, which are to be removed from the list.
To stop searching scrambled channels;
Press the ENTER button to select "Stop".
Press the ◀ button to select Yes, then press the ENTER button.
- When the scrambled channel searching is completed, press the ENTER button.
Press the EXIT button to exit.
▶ Only cable mode is available.


Adding and Erasing Channels
You can add or delete a channel to display the channels you want. To use the Channel List function, first run Auto Program.
- Press the MENU button to display the menu. Press the ▲ or ▼ button to select "Channel", then press the ENTER button.
- Press the ▲ or ▼ button to select "Channel List", then press the ENTER button.
- Press the ENTER button to select "All".
- Press the ◀, ▶, ▲ or ▼ button to select a channel to delete, then press the ENTER button.
Press the ▲ or ▼ button to select "Delete", then press the ENTER button to delete the channel.
The √ mark will disappear.
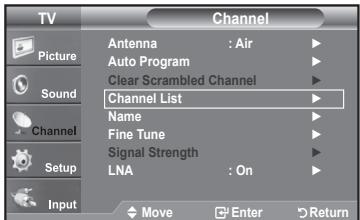
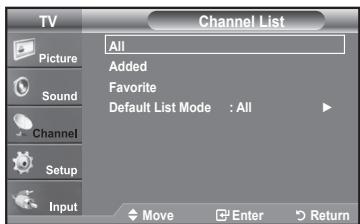


- Press the ◀, ▶, ▲ or ▼ button to select a channel to add, then press the ENTER button.
Press the ▲ or ▼ button to select "Add", then press the ENTER button to add the channel.
The √ mark will appear and the channel will be added.
Press the EXIT button to exit.
All selected channels will be shown on "Added" menu.
- P.MODE (Red) button: Press repeatedly to select "All", "Added" or "Favorite".
- S.MODE (Green) button: Press to add all channels deleted.
- STILL (Yellow) button: Press to delete all channels memorized.


To Set-Up Your Favorite Channels
You can set channels you watch frequently as favorites.
- Press the MENU button to display the menu. Press the ▲ or ▼ button to select "Channel", then press the ENTER button.
- Press the ▲ or ▼ button to select "Channel List", then press the ENTER button
- Press the ▲ or ▼ button to select "All" or "Added", then press the ENTER button.
- Press the ◀, ▶, ▲ or ▼ button to select your favorite channels to watch among the labeled channels. Then press the ENTER button.
Press the ▲ or ▼ button to select "Favorite", then press the ENTER button.
The "♥" symbol will be highlighted and the channel will be set as a Favorite. To cancel your Favorite channel selection, press the ENTER button until the "♥" symbol is no longer highlighted.
Press the EXIT button to exit.
➢ Only memorized channels can be set as favorite channels.
All favorite channels will be shown in the "Favorite" menu.
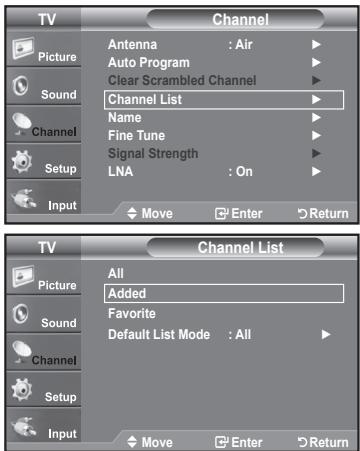

To select the favorite channels you have set up, press the FAV.CH button on the remote control.

Using the Channel Lists
Displays your desired channel list automatically when you press CH LIST button on the remote. (Choose All, Added or Favorite)
-
Press the MENU button to display the menu. Press the ▲ or ▼ button to select "Channel", then press the ENTER button.
-
Press the ▲ or ▼ button to select "Channel List", then press the ENTER button.
-
Press the ▲ or ▼ button to select "Default List Mode" (the channel list you want to appear when you press CH LIST), then press the ENTER button. Press the ▲ or ▼ button to select "All", "Added" or "Favorite" then press the ENTER button.
The Channel list you have chosen will now be set.
Press the EXIT button to exit.
Alternate, press the CH LIST button on the remote control to bring up the Channel Lists.
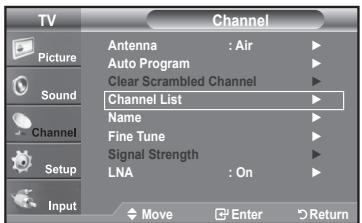

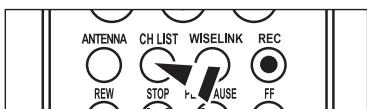
Viewing the Channel Lists
You can display a list of all channels, added channels or your favorite channels.
-
Press the MENU button to display the menu. Press the ▲ or ▼ button to select "Channel", then press the ENTER button.
-
Press the ▲ or ▼ button to select "Channel List", then press the ENTER button.
-
Press the ▲ or ▼ button to select "All", "Added" or "Favorite", then press the ENTER button.
-
Press the ▲ or ▼ button to select "Channel", then press the ENTER button. To toggle between your all channels, add channels or favorite channels, use the P.MODE (red) button on the remote control.
- P.MODE (Red) button: Press repeatedly to select "All", "Added" or "Favorite"


Labeling Channels
Channels can be labeled so that their call letters appear whenever the channel is selected.
- Press the MENU button to display the menu.
Press the ▲ or ▼ button to select "Channel", then press the ENTER button.
Press the ▲ or ▼ button to select "Name", then press the ENTER button.

- Press the ▲ or ▼ button to select the channel to be assigned a new name, then press the ENTER button.
Press the ▲ or ▼ button to select a letter, a number or a blank (Results in this sequence: A...Z, 0...9, +, -, *, /, blank).
Press the ▶ button to switch to the next field, which will be selected.
Select a second letter or digit by pressing the ▲ or ▼ button, as above.
Repeat the process to select the last three digits. When you have finished, press the ENTER button to assign the new name.
To erase the assigned new name, select "Clear" by pressing the ◀ or ▶ button, then press the ENTER button.
Press the EXIT button to exit.
The names of digital broadcasting channels are automatically assigned and thus cannot be assigned by users.


If the TV is operating in a weak-signal area, sometimes the LNA function can improve the reception (a low-noise preamplifier boosts the incoming signal).
- Press the MENU button to display the menu.
Press the ▲ or ▼ button to select "Channel", then press the ENTER button. - Press the ▲ or ▼ button to select "LNA", then press the ENTER button.
- Press the ▲ or ▼ button to select "On", then press the ENTER button.
Press the EXIT button to exit.
➢ LNA functions only when antenna is set to Air or Cable.
The LNA setting must be made separately for each channel.
➢ If the picture is noisy with the LNA set to On, select Off.


Fine Tuning Analog Channels
Use fine tuning to manually adjust a particular channel for optimal reception.
- Press the MENU button to display the menu.
Press the ▲ or ▼ button to select "Channel", then press the ENTER button. -
Press the ▲ or ▼ button to select "Fine Tune", then press the ENTER button.
-
Press the ◀ or ▶ button to adjust the fine tuning.
To store the fine tuning setting in the TV's memory, press the ENTER button.
If you do not store the fine-tuned channel in memory, adjustments are not saved.
- To reset the fine tuning setting, press the ▼ button to select "Reset", then press the ENTER button.
Press the EXIT button to exit.
"*" will appear next to the name of fine-tuned channels.
▶ Only analog TV channels can be fine tuned.
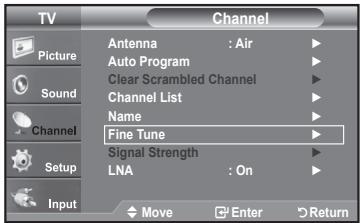
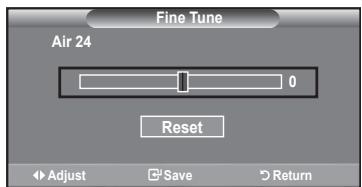


Checking the Digital-Signal Strength
Unlike analog channels, which can vary in reception quality from “snowy” to clear, digital (HDTV) channels have either perfect reception quality or you will not receive them at all. So, unlike analog channels, you cannot fine tune a digital channel. You can, however, adjust your antenna to improve the reception of available digital channels.
- Press the MENU button to display the menu.
Press the ▲ or ▼ button to select "Channel", then press the ENTER button.
- Press the ▲ or ▼ button to select "Signal Strength", then press the ENTER button.
If the signal strength meter indicates that the signal is weak, physically adjust your antenna to increase the signal strength.
Continue to adjust the antenna until you find the best position with the strongest signal.
Press the EXIT button to exit

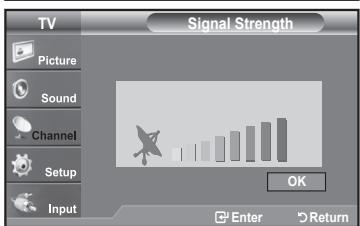
Using Your TV as a Computer (PC) Display
Setting Up Your PC Software (Based on Windows XP)
The Windows display-settings for a typical computer are shown below. The actual screens on your PC will probably be different, depending upon your particular version of Windows and your particular video card. However, even if your actual screens look different, the same basic set-up information will apply in almost all cases. (If not, contact your computer manufacturer or Samsung Dealer.)
- First, click on "Control Panel" on the Windows start menu.
- When the control panel window appears, click on "Appearance and Themes" and a display dialog-box will appear.
- When the control panel window appears, click on "Display" and a display dialog-box will appear.
- Navigate to the "Settings" tab on the display dialog-box.
The correct size setting (resolution)
Optimum: 1920 X 1080 pixels
If a vertical-frequency option exists on your display settings dialog box, the correct value is "60" or "60 Hz". Otherwise, just click "OK" and exit the dialog box.
![Display Properties Themes Desktop Screen Save Appearance Settings Display: Plug and Play Monitor on NVIDIA GeForce FX: 5600 Screen resolution More Less 1360 by 708 pixels Color quality Highest [32 bit] Troubleshoot Advanced OK Cancel Apply](/content/2020/05/25399/images/ee391eb143175a8ed9719f8ded2a6e5d1f9dd25efd3a893e53002aa92804b1f9.jpg)
Display Modes
If the signal from the system equals the standard signal mode, the screen is adjusted automatically. If the signal from the system doesn't equal the standard signal mode, adjust the mode by referring to your videocard user guide; otherwise there may be no video. For the display modes listed below, the screen image has been optimized during manufacturing.
D-Sub Input
| Mode | Resolution | Horizontal Frequency (kHz) | Vertical Frequency (Hz) | Pixel Clock Frequency (MHz) | Sync Polarity (H/V) |
| IBM | 720 X 400 | 31.469 | 70.087 | 28.322 | - / + |
| 640 X 480 | 31.469 | 59.940 | 25.175 | - / - | |
| VESA | 640 x 480 | 37.861 | 72.809 | 31.500 | - / - |
| 640 x 480 | 37.500 | 75.000 | 31.500 | - / - | |
| 800 x 600 | 35.156 | 56.250 | 36.000 | + / + | |
| 800 x 600 | 37.879 | 60.317 | 40.000 | + / + | |
| 800 x 600 | 48.077 | 72.188 | 50.000 | + / + | |
| 800 x 600 | 46.875 | 75.000 | 49.500 | + / + | |
| 1024 x 768 | 48.363 | 60.004 | 65.000 | - / - | |
| 1024 x 768 | 56.476 | 70.069 | 75.000 | - / - | |
| 1024 x 768 | 60.023 | 75.029 | 78.750 | + / + | |
| 1280 x 1024 | 79.976 | 75.025 | 123.000 | + / + | |
| 1920 x 1080 | 66.500 | 60.000 | 138.500 | - / + |
HDMI/DVI Input
| Mode | Resolution | Horizontal Frequency (kHz) | Vertical Frequency (Hz) | Pixel Clock Frequency (MHz) | Sync Polarity (H/V) |
| IBM | 640 X 350 | 31.469 | 70.086 | 25.175 | +/- |
| 720 X 400 | 31.469 | 70.087 | 28.322 | -/+ | |
| 640 X 480 | 31.469 | 59.940 | 25.175 | -/- | |
| VESA | 800 x 600 | 37.879 | 60.317 | 40.000 | +/+ |
| 1024 x 768 | 48.364 | 60.000 | 65.000 | -/- | |
| 1280 x 1024 | 63.981 | 60.020 | 108.000 | +/+ | |
| 1920 x 1080 | 66.587 | 59.934 | 138.500 | +/- |
How to Auto Adjust
Use the Auto Adjust function to have the TV set automatically adjust the video signals it receives. The function also automatically fine-tunes the settings and adjusts the frequency values and positions.
This function does not work in DVI-Digital mode.
- Press the MENU button to display the menu.
Press the ▲ or ▼ button to select "Setup", then press the ENTER button. Press the ▲ or ▼ button to select "PC", then press the ENTER button.
➢ Change to the PC mode first.
- Press the ▲ or ▼ button to select "Auto Adjustment", then press the ENTER button. Press the EXIT button to exit.
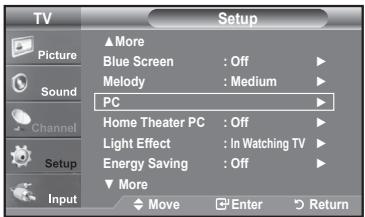
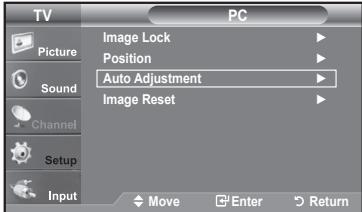

Adjusting the Screen Quality
The purpose of the picture quality adjustment is to remove or reduce picture noise. If the noise is not removed by fine tuning alone, then make the vertical frequency adjustments on your PC and fine tune again. After the noise has been reduced, re-adjust the picture so that it is aligned on the center of the screen.
- Press the MENU button to display the menu.
Press the ▲ or ▼ button to select "Setup", then press the ENTER button. Press the ▲ or ▼ button to select "PC", then press the ENTER button.
➢ Change to the PC mode first.
-
Press the ENTER button to select "Image Lock".
-
Press the ▲ or ▼ button to select "Coarse" or "Fine", then press the ENTER button. Press the ◀ or ▶ button to adjust the screen quality.
➢ Vertical stripes may appear or the picture may be blurry.
Press the ENTER button.
Press the EXIT button to exit.


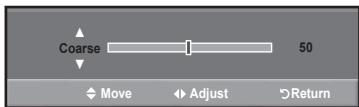
Changing the Screen Position
- Press the MENU button to display the menu.
Press the ▲ or ▼ button to select "Setup", then press the ENTER button.
Press the ▲ or ▼ button to select "PC", then press the ENTER button.
Change to the PC mode first.
-
Press the ▲ or ▼ button to select "Position", then press the ENTER button.
-
Press the ▲ or ▼ button to adjust the V-Position.
Press the ◀ or ▶ button to adjust the H-Position.
Press the ENTER button.
Press the EXIT button to exit.


Initializing the Screen Position or Color Settings
You can replace all image settings with the factory default values.
- Press the MENU button to display the menu.
Press the ▲ or ▼ button to select "Setup", then press the ENTER button.
Press the ▲ or ▼ button to select "PC", then press the ENTER button.
➢ Change to the PC mode first.
- Press the ▲ or ▼ button to select "Image Reset", then press the ENTER button.
Press the EXIT button to exit.


Setting the Home Theater PC
This function enables you to view higher quality pictures while in PC Mode.
After setting the Home Theater PC function to On, you can go into the Detailed Settings menu and make adjustments without affecting settings in the regular TV mode.
- Press the MENU button to display the menu.
Press the ▲ or ▼ button to select "Setup", then press the ENTER button.
-
Press the ▲ or ▼ button to select "Home Theater PC", then press the ENTER button.
-
Press the ▲ or ▼ button to select "On" or "Off", then press the ENTER button.
-
Off: Turns off the settings for screen-related functions in PC input mode.
- On: Turns on the settings for screen-related functions in PC input mode to provide more dynamic scenes.
Press the EXIT button to exit.
This function is available only in PC mode.


Setting the Clock
Setting the clock is necessary in order to use the various timer features of the TV. Also, you can check the time while watching the TV. (Just press the INFO button.)
Option 1: Setting the Clock Manually
- Press the MENU button to display the menu.
Press the ▲ or ▼ button to select "Setup", then press the ENTER button. Press the ▲ or ▼ button to select "Time", then press the ENTER button.
-
Press the ENTER button to select "Clock".
-
Press the ENTER button to select "Clock Mode".
Press the ▲ or ▼ button to select "Manual", then press the ENTER button.
-
Press the ▲ or ▼ button to select "Clock Set", then press the ENTER button.
-
Press the ◀ or ▶ button to move to "Month", "Day", "Year", "Hour", "Minute", or "am/pm". Set the date and time you want by pressing the ▲ or ▼ button, then press the ENTER button.
Press the EXIT button to exit.
The current time will appear every time you press the INFO button.
➢ You can set the month, day, year, hour and minute directly by pressing the number buttons on the remote control.
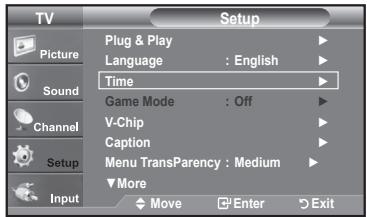
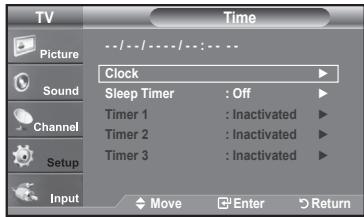
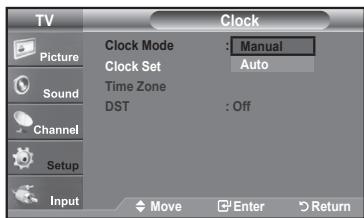


Option 2: Setting the Clock Automatically
The Clock can be set automatically if you are receiving a digital signal.
-
Press the MENU button to display the menu.
Press the ▲ or ▼ button to select "Setup", then press the ENTER button.
Press the ▲ or ▼ button to select "Time", then press the ENTER button. -
Press the ENTER button to select "Clock".
-
Press the ENTER button to select "Clock Mode".
Press the ▲ or ▼ button to select "Auto", then press the ENTER button.
-
Press the ▲ or ▼ button to select "Time Zone", then press the ENTER button.
-
Press the ▲ or ▼ button to highlight the time zone for your local area, then press the ENTER button.
-
Press the ▲ or ▼ button to select "DST" (Daylight Saving Time), then press the ENTER button.
Press the ▲ or ▼ button to select "On" or "Off", then press the ENTER button.
Press the EXIT button to exit.
➢ Depending on the broadcast station and signal, the auto time may not be set correctly. If this occurs, set the time manually.
The Antenna or cable must be connected in order to set the time automatically.


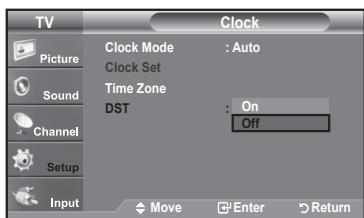
Setting the Sleep Timer
The sleep timer automatically shuts off the TV after a preset time (30, 60, 90, 120, 150 and 180 minutes).
- Press the MENU button to display the menu.
Press the ▲ or ▼ button to select "Setup", then press the ENTER button. Press the ▲ or ▼ button to select "Time", then press the ENTER button.
-
Press the ▲ or ▼ button to select "Sleep Timer", then press the ENTER button.
-
Press the ▲ or ▼ button to adjust "Minute".
-
Press the ▶ button to select "Activation".
Press the ▲ or ▼ button to select "On", then press the ENTER button. Press the EXIT button to exit.
Simply press the SLEEP button on the remote control for a Quick way to access the sleep timer setting.
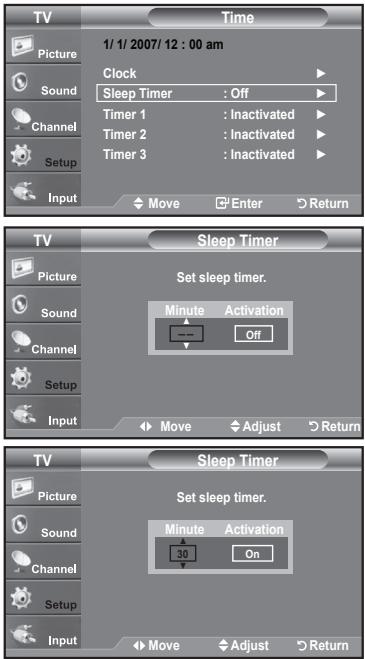

Setting the On/Off Timer
- Press the MENU button to display the menu.
Press the ▲ or ▼ button to select "Setup", then press the ENTER button. Press the ▲ or ▼ button to select "Time", then press the ENTER button.
-
Press the ▲ or ▼ button to select "Timer 1, Timer 2 or Timer 3", then press the ENTER-button.
-
Press the ▲ or ▼ button to adjust "Hour", then press the ▶ button to move to the next step.
Set other items using the same method as above.
| Activate or Inactivate | Press the ▲or▼ button | |
| Repeat | Select Once, Everyday, Mon-Fri, Mon-Sat, Sat-Sun Sets the desired day(s) of the week you want the TV to turn on. | Press the ▲or▼ button |
| Volume | Select the desired turn on volume level. | Press the ▲or▼ button |
| Contents | When the On Timer is active, you can turn on a specific channel or play back contents such as photo or audio files. (Make sure that an USB device is connected to your TV.) | Press the ▲or▼ button |
➢ You can set the hour, minute and channel by pressing the number buttons on the remote control.
Auto Power Off
When you set the timer On, the television will eventually turn off, if no controls are operated for 3 hours after the TV was turned on by timer. This function is only available in timer On mode and prevents overheating, which may occur if a TV is on for too long time.
Press the EXIT button to exit.
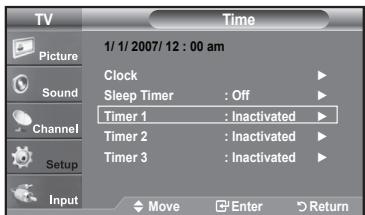
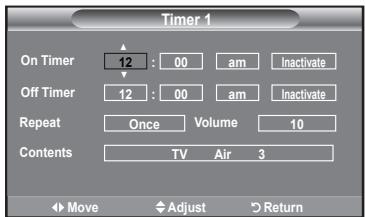

Function Description
Selecting a Menu Language
- Press the MENU button to display the menu.
Press the ▲ or ▼ button to select "Setup", then press the ENTER button. Press the ▲ or ▼ button to select "Language", then press the ENTER button.
- Press the ▲ or ▼ button to select "English", "Español" or "Français". Press the ENTER button.
Press the EXIT button to exit.

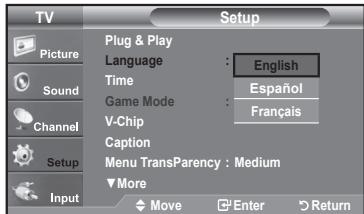
Setting the Blue Screen Mode
If no signal is being received or the signal is very weak, a blue screen automatically replaces the noisy picture background. If you wish to continue viewing the poor picture, you must set the "Blue Screen" mode to "Off"
- Press the MENU button to display the menu.
Press the ▲ or ▼ button to select "Setup", then press the ENTER button. -
Press the ▲ or ▼ button to select "Blue Screen", then press the ENTER button.
-
Press the ▲ or ▼ button to select "On" or "Off" then press the ENTER button.
Press the EXIT button to exit.
➢ Blue Screen is displayed when there is no signal from an external device, regardless of the Blue Screen Setting.

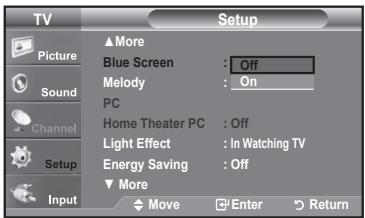
Using the Game Mode
When connecting to a game console such as PlayStation ™ or Xbox ™ , you can enjoy a more realistic gaming experience by selecting the game menu.
- Press the MENU button to display the menu.
Press the ▲ or ▼ button to select "Setup", then press the ENTER button. -
Press the ▲ or ▼ button to select "Game Mode", then press the ENTER button.
-
Select "On" or "Off" by pressing the ▲ or ▼ button, then press the ENTER button.
-
Press the EXIT button to exit.
Restrictions on "Game mode" (Caution)
- To disconnect the game console and connect another external device, set "Game" to Off in the setup menu.
- If you display the TV menu in "Game mode", the screen shakes slightly.
- The mark (💡) appears on the screen which means that "Game Mode" is on with the selected source.
If "Game Mode" is On
- Picture Mode is automatically changed to "Standard" and users cannot change the mode.
- Sound Mode is automatically changed to" Custom" and users cannot change the mode. Adjust the sound using the equalizer.
- The "Reset" in the Sound menu is activated. "Reset" function initializes the "Equalizer" settings to the factory default setting.
➢ "Game Mode" is not available in regular TV/Antenna mode.
If the picture is poor when external device is connected to TV, check if "Game Mode" is On. Set "Game Mode" to Off and connect external devices.


Viewing Closed Captions (On-Screen Text Messages) - Analog
The Analog Caption function operates in either analog TV channel mode or external signal mode. (Depending on the broadcasting signal, the Analog Caption function may operate on digital channels.)
- Press the MENU button to display the menu.
Press the ▲ or ▼ button to select "Setup", then press the ENTER button. -
Press the ▲ or ▼ button to select "Caption", then press the ENTER button.
-
Press the ENTER button to select "Caption".
Press the ▲ or ▼ button to select "On", then press the ENTER button.
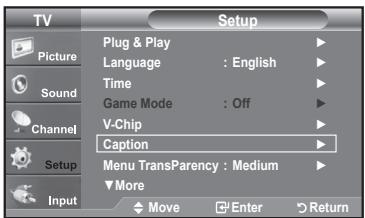

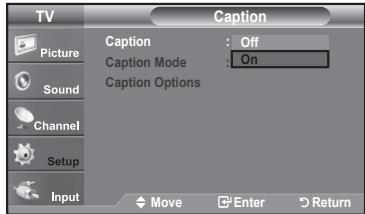

- Press the ▲ or ▼ button to select "Caption Mode", then press the ENTER button. Press the ▲ or ▼ button to select submenu (Default, CC1\~CC4 or Text1\~Text4) you want, the press the ENTER button.
Press the EXIT button to exit.
- The default is "CC1".
- CC1: The Primary Synchronous Caption Service. These are captions in the primary language that must be in sync with the sound, preferably matched to a specific frame.
- CC2: The Special Non-Synchronous Use Captions. This channel carries data that is intended to augment information carried in the program.
- CC3: Secondary Synchronous Caption Service. Alternate program-related caption data, typically second language captions.
- CC4: Special Non-Synchronous Use Captions. Similar to CC2.
- Text1: First Text Service. This may be various non-program related data.
- Text2: Second Text Service. Additional data, usually not program related.
- Text3/Text4: Third and Fourth Text Services.
These data channels should be used only if Text1 and Text2 are not sufficient.
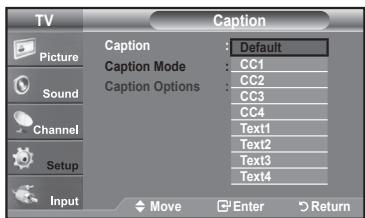
The Caption feature doesn't work in Component, HDMI or PC modes.
The availability of captions depends on the program being broadcast.
The Caption feature doesn't work in Component, HDMI or PC modes. The availability of captions depends on the program being broadcast.
Press the CAPTION button on the remote control to select "On" or "Off".

The Digital Captions function operates on digital channels.
- Press the MENU button to display the menu.
Press the ▲ or ▼ button to select "Setup", then press the ENTER button. - Press the ▲ or ▼ button to select "Caption", then press the ENTER button.
-
Press the ENTER button to select "Caption".
Press the ▲ or ▼ button to select "On", then press the ENTER button. -
Press the ▲ or ▼ button to select "Caption Mode", then press the ENTER button. Press the ▲ or ▼ button to select submenu (Default, Service1\~Service6, CC1\~CC4 or Text1\~Text4) you want, then press the ENTER button.
-
Press the ▲ or ▼ button to select "Caption Options", then press the ENTER button.
“Caption Options” are available only when “Service1\~Service6” can be selected in “Caption Mode”.
➢ Service1\~6 in digital caption mode may not be available depending on the broadcast.
- Press the ▲ or ▼ button to select "Size", then press the ENTER button.
Press the ▲ or ▼ button to select the desired Caption option, then press the ENTER button.
Press the ▲ or ▼ button to select the desired sub-menu options (see options below), then press ENTER.
Press the EXIT button to exit.
The availability of captions depends on the program being broadcast.
"Default" means to follow the standard set by the broadcaster.
➢Foreground and Background cannot be set to have the same color.
➢Foreground Opacity and Background Opacity cannot be both set to Transparent.
- Size: This option consists of "Default", "Small", "Standard" and "Large". The default is "Standard".
- Font Style: This option consists of "Default", "Style0 \~ Style 7". You can change the font you want. The default is "Style 0".
- Foreground Color: This option consists of "Default", "White", "Black", "Red", "Green", "Blue", "Yellow", "Magenta" and "Cyan". You can change the color of the letter. The default is "White".
- Background Color: This option consists of "Default", "White", "Black", "Red", "Green", "Blue", "Yellow", "Magenta" and "Cyan". You can change the background color of the caption. The default is "Black".
- Foreground Opacity: This option consists of “Default”, “Transparent”, “Translucent”, “Solid” and “Flashing”. You can change the opacity of the letter.
- Background Opacity: This option consists of “Default”, “Transparent”, “Translucent”, “Solid”, and “Flashing”. You can change the background opacity of the caption.
- Return to Default: This option sets each of "Size", "Font Style", "Foreground Color", "Background color", "Foreground Opacity" and "Background Opacity" to its default.


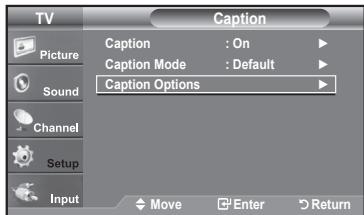

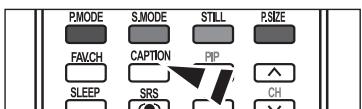
Menu Transparency Level
Adjusts the transparency of the menu screen.
- Press the MENU button to display the menu.
Press the ▲ or ▼ button to select "Setup", then press the ENTER button. -
Press the ▲ or ▼ button to select "Menu Transparency", then press the ENTER button.
-
Press the ▲ or ▼ button to select level, then press the ENTER button. Press the EXIT button to exit.

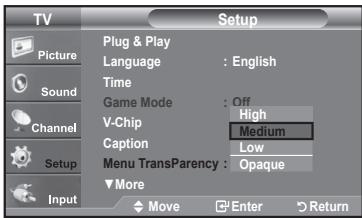
Using the Energy Saving Feature
This feature adjusts the brightness of the TV in order to reduce power consumption. When watching TV at night, set the "Energy Saving" mode option to "High" to reduce eye fatigue as well as power consumption.
- Press the MENU button to display the menu.
Press the ▲ or ▼ button to select "Setup", then press the ENTER button. -
Press the ▲ or ▼ button to select "Energy Saving", then press the ENTER button.
Select the required option (Off, Low, Medium, High, Auto) by pressing the ▲ or ▼ button. Press the ENTER button. -
Off: Turns off the energy saving function.
- Low: Sets the TV to low energy saving mode.
• Medium: Sets the TV to medium energy saving mode.
• High: Sets the TV to high energy saving mode. - Auto: Automatically adjusts the brightness of the TV screen in accordance with the scenes.
Press the EXIT button to exit.

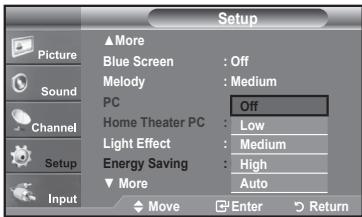
Setting the Function Help
Displays help on the menu functions.
- Press the MENU button to display the menu.
Press the ▲ or ▼ button to select "Setup", then press the ENTER button.
- Press the ▲ or ▼ button to select "Function Help", then press the ENTER button.
- Press the ▲ or ▼ button to select "On", then press the ENTER button.
Press the EXIT button to exit.
The predetermined value of the Function Help is On.
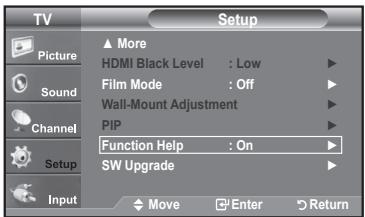

Digital Noise Reduction
If the broadcast signal received by your TV is weak, you can activate the Digital Noise Reduction feature to help reduce any static and ghosting that may appear on the screen.
- Press the MENU button to display the menu. Press the ENTER button to select "Picture".
- Press the ▲ or ▼ button to select "Digital NR", then press the ENTER button.
-
Press the ▲ or ▼ button to select "Off", "Low", "Medium", "High", "Auto". Press the ENTER button.
-
Off: Turns the screen noise reduction function off.
- Low: Reduces screen noise at a low level.
- Medium: Reduces screen noise at a medium level.
♦ High: Reduces screen noise at a high level. - Auto: Automatically recognizes and reduces screen noise.
Press the EXIT button to exit.


The V-Chip feature automatically locks out programs that are deemed inappropriate for children. The user must enter a PIN (personal ID number) before any of the V-Chip restrictions are set up or changed.
When the V-chip feature is activated, the PIP features do not function.
U.S.A Only
This product is covered by the following U.S.patents :US4,930,158,US4,930,160
Setting Up Your Personal ID Number (PIN)
- Press the MENU button to display the menu.
Press the ▲ or ▼ button to select "Setup", then press the ENTER button.
- Press the ▲ or ▼ button to select "V-Chip", then press the ENTER button. The message "Enter PIN" will appear. Enter your 4 digit PIN number.
The default PIN number of a new TV set is "0-0-0-0".
- The "V-Chip" screen will appear.
Press the ▲ or ▼ button to select “Change PIN”, then press the ENTER button. The Change PIN screen will appear. Choose any 4 digits for your PIN and enter them. As soon as the 4 digits are entered, the “Confirm new PIN” screen appears. Re-enter the same 4 digits. When the Confirm screen disappears, your PIN has been memorized.
Press the EXIT button to exit.
If you forget the PIN, press the remote-control buttons in the following sequence, which resets the pin to 0-0-0-0 : Power Off. → Mute → 8 → 2 → 4 → Power On.


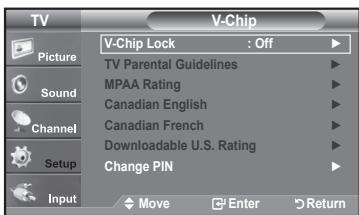
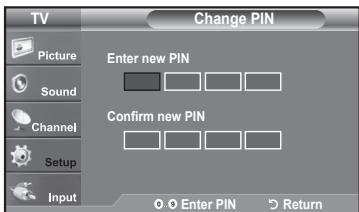
How to Enable/Disable the V-Chip
- Press the MENU button to display the menu.
Press the ▲ or ▼ button to select "Setup", then press the ENTER button. -
Press the ▲ or ▼ button to select "V-Chip", then press the ENTER button. The message "Enter PIN" will appear. Enter your 4 digit PIN number.
-
The "V-Chip" screen will appear.
To enable the V-Chip feature, press the ENTER button so that the "V-Chip Lock" field is "On". (Pressing the ▲ or ▼ button will alternate between "On" and "Off".)
Press the ENTER button.
Press the EXIT button to exit.

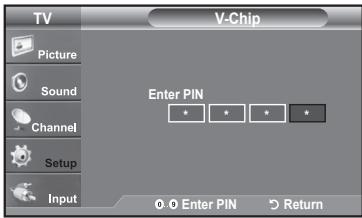
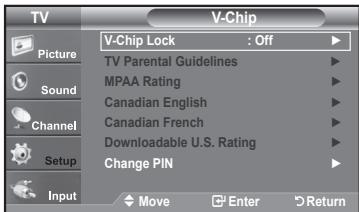
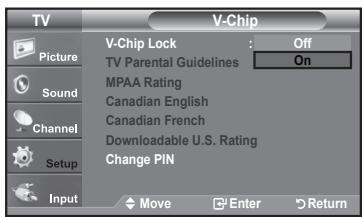
How to Set up Restrictions Using the "TV Parental Guidelines"
First, set up a personal identification number (PIN) and enable the V-Chip. (See previous section.)
Parental restrictions can be set up using either of two methods: The TV guidelines or the MPAA rating.
- Press the MENU button to display the menu.
Press the ▲ or ▼ button to select "Setup", then press the ENTER button. - Press the ▲ or ▼ button to select "V-Chip", then press the ENTER button.
The message “Enter PIN” will appear. Enter your 4 digit PIN number.


-
The "V-Chip" screen will appear. Press the ▲ or ▼ button to select "TV Parental Guidelines", then press the ENTER button.
-
The "TV Parental Guidelines" screen will appear.
Press the ▲ or ▼ button to select one of the six aged based categories:
• TV-Y: Young children
• TV-Y7: Children 7 and over
• TV-G: General audience
• TV-PG: Parental guidance
• TV-14: Viewers 14 and over
• TV-MA: Mature audience
- At this point, one of the TV-Ratings is selected.
Press the ENTER button. Depending on your existing setup, the “💡” symbol will be selected. (Blank = Unblocked, = Blocked)
While “💡” is selected, press the ENTER button to block or unblock the category. To select a different TV-Rating, press the ▲ or ▼ button and then repeat the process.
➢ Allow all: Press to unlock all TV ratings. / Block all: Press to lock all TV ratings.
The TV-Y, TV-Y7, TV-G, TV-PG, TV-14 and TV-MA have additional options. See the next step to change any of the following sub-ratings:
FV: Fantasy violence / D: Sexually Suggestive Dialog / L: Adult Language / S: Sexual situation / V: Violence
The V-Chip will automatically block certain categories that are “more restrictive”. For example, if you block “TV-Y” category, then TV-Y7 will automatically be blocked. Similarly, if you block the TV-G category, then all the categories in the “young adult” group will be blocked (TV-G, TV-PG, TV-14 and TV-MA). The sub-ratings (D, L, S, V) work together similarly. (See next section.)
- How to set the FV, D, L, S and V sub-ratings.
First, select one of these TV-Ratings: TV-Y, TV-Y7, TV-G, TV-PG, TV-14 or TV-MA (See Step 4) and press the ▶ button. The “💡” symbol will be displayed for each sub-rating.
While “💡” is selected, press the ENTER button to go to a sub rating.
Press ENTER to block the sub rating. To select a different TV-Rating, press the ▲ or ▼ button and then repeat the process.
The V-chip will automatically block certain categories that are "More restrictive". For example, if you block "L" sub-rating in TV-PG, then the "L" sub-ratings in TV-14 and TV-MA will automatically be blocked.
- Press the EXIT button to clear all the screens. (Or proceed to the next section, and set up additional restrictions based on the MPAA codes.)
These categories consist of two separate groups: TV-Y and TV-Y7 (young children through age 7) and TV-G through TV-MA (everybody else). The restrictions for these two groups work independently: If a household includes very young children as well as young adults, the TV guidelines must be set up separately for each age group. (See next step.)


How to Set up Restrictions Using the MPAA Ratings: G, PG, PG-13, R, NC-17, X, NR
The MPAA rating system uses the Motion Picture Association of America (MPAA) system and its main application is for movies. When the V-Chip lock is on, the TV will automatically block any programs that are coded with objectionable ratings (either MPAA or TV-Ratings).
-
Press the MENU button to display the menu. Press the ▲ or ▼ button to select "Setup", then press the ENTER button.
-
Press the ▲ or ▼ button to select "V-Chip", then press the ENTER button. The message "Enter PIN" will appear. Enter your 4 digit PIN number.
-
The "V-Chip" screen will appear. Press the ▲ or ▼ button to select "MPAA Rating", then press the ENTER button.
-
The "MPAA Rating" screen will appear. Repeatedly press the ▲ or ▼ button to select a particular MPAA category. Pressing the ▲ or ▼ button will cycle through the MPAA categories:
• G: General audience (no restrictions).
• PG: Parental guidance suggested.
• PG-13: Parents strongly cautioned.
- R: Restricted. Children under 17 should be accompanied by an adult.
• NC-17: No children under age 17.
• X: Adults only.
- NR: Not rated.
▶ Allow all: Press to unlock all TV ratings. / Block all: Press to lock all TV ratings.
While a particular category is selected, press the ENTER button to activate it. The “ 🔊” symbol will be displayed. Press the ENTER button to block or unblock the category.
The V-Chip will automatically block any category that is “more restrictive”. For example, if you block the “PG-13” category, then “R”, “NC-17” and “X” will automatically be blocked also.
Press the EXIT button to exit.
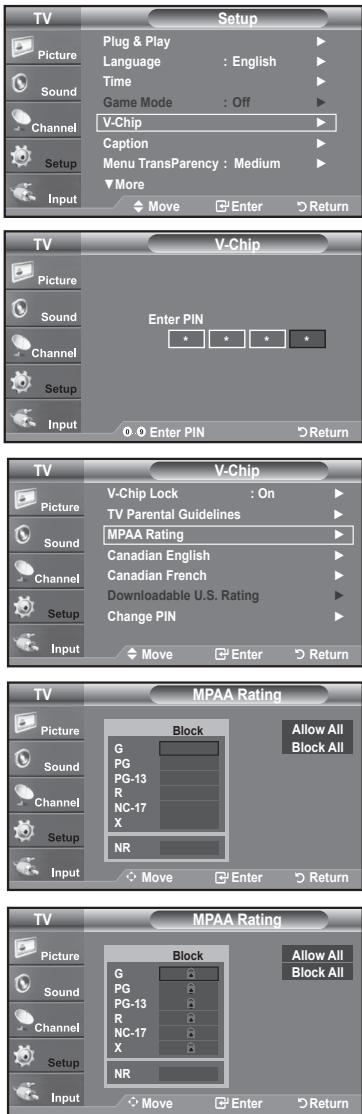
How to Set up Restrictions Using the ‘Canadian English’
- Press the MENU button to display the menu.
Press the ▲ or ▼ button to select "Setup", then press the ENTER button. -
Press the ▲ or ▼ button to select "V-Chip", then press the ENTER button. The message "Enter PIN" will appear. Enter your 4 digit PIN number.
-
The "V-Chip" screen will appear. Press the ▲ or ▼ button to select "Canadian English", then press the ENTER button.
-
Press the ▲ or ▼ button to select a appropriate restriction. Press the ENTER button to activate the restriction selected. The “💡” symbol is indicated.
Press the EXIT button to exit.
➢ Allow all: Press to unlock all TV ratings. / Block all: Press to lock all TV ratings.
• C: Programming intended for children under age 8.
- C8+: Programming generally considered acceptable for children 8 years and over to watch on their own.
• G: General programming, suitable for all audiences.
• PG: Parental Guidance.
- 14+: Programming contains themes or content which may not be suitable for viewers under the age of 14.
• 18+: Adult programming.
The V-Chip will automatically block any category that is “more restrictive”. For example, if you block G category, then PG, 14+ and 18+ will automatically be blocked also.

How to Set up Restrictions Using the ‘Canadian French’
- Press the MENU button to display the menu.
Press the ▲ or ▼ button to select "Setup", then press the ENTER button. -
Press the ▲ or ▼ button to select "V-Chip", then press the ENTER button. The message "Enter PIN" will appear. Enter your 4 digit PIN number.
-
The "V-Chip" screen will appear. Press the ▲ or ▼ button to select "Canadian French", then press the ENTER button.
-
Press the ▲ or ▼ button to select an appropriate restriction. Press the ENTER button to activate the restriction selected. The “💡” symbol is indicated.
Press the EXIT button to exit.
▶ Allow all: Press to unlock all TV ratings. / Block all: Press to lock all TV ratings.
• G: General
- 8 ans+: Programming generally considered acceptable for children 8 years and over to watch on their own.
- 13 ans+: Programming may not be suitable for children under the age of 13.
- 16 ans+: Programming is not suitable for children under the age of 16.
• 18 ans+: Programming restricted to adults.
The V-Chip will automatically block any category that is “more restrictive”. For example, if you block 8 ans+ category, then 13 ans+, 16 ans+ and 18 ans+ will automatically be blocked also.
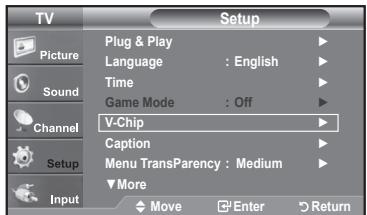

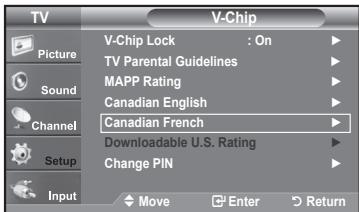


Using the V-Chip for Digital channels
Parental restriction information can be used while watching DTV channels.
- Press the MENU button to display the menu.
Press the ▲ or ▼ button to select "Setup", then press the ENTER button. -
Press the ▲ or ▼ button to select "V-Chip", then press the ENTER button. The message "Enter PIN" will appear. Enter your 4 digit PIN number.
-
The "V-Chip" screen will appear. Press the ▲ or ▼ button to select "Downloadable U.S. Rating", then press the ENTER button.
If information is not downloaded from the broadcasting station, the Downloadable U.S. rating menu is deactivated.
➢ Parental restriction information is automatically downloaded while watching DTV channels. It may take several seconds.
The Downloadable U.S. rating menu is available for use after information is downloaded from the broadcasting station. However, depending on the information from the broadcasting station, it may not be available for use.
- Press the ▲ or ▼ button to select a appropriate restriction.
Press the ENTER button to activate the restriction selected. The “💡” symbol is indicated.
Press the EXIT button to exit.
Allow all: Press to unlock all TV ratings. / Block all: Press to lock all TV ratings.
➢ Parental restriction levels differ depending on the broadcasting station.
The default menu name and Downloadable US rating changes depending on the downloaded information.
Even if you set the On-screen display to your desired language, the "Downloadable U.S. Rating" menu will appear in English only.
The rating will automatically block certain categories that are more restrictive.
The rating titles(For example: Humor Level..etc) and TV ratings(For example: DH,MH,H..etc) may differ depending on the broadcasting station.


The number of all rating title
How to Reset the TV after the V-Chip Blocks a Channel ("Emergency Escape")
If the TV is tuned to a restricted channel, the V-Chip will block it. The screen will go blank and the following message will appear:
- Enter your PIN.
To resume normal viewing, tune to a different channel using CH⊗ or CH⊗ button. Under certain conditions (depending on the rating of the local TV programs) the V-Chip might lock out all the channels. In this case, use the V-Chip function for an “emergency escape”:
-
Press the MENU button. Press the ▲ or ▼ button to select "Setup", then press the ENTER button.
-
Press the ▲ or ▼ button to select "V-Chip", then press the ENTER button.
-
Enter your PIN, then press the ENTER button and press the ▲ or ▼ button to temporarily disable the V-Chip Lock.
If you forget the PIN, press the remote-control buttons in the following sequence, which resets the pin to 0-0-0-0 : Power Off. → MUTE → 8 → 2 → 4 → Power On.
Channel Is Locked by
TV-PG [S]

Use the NUMBER buttons to enter your
pin number to unlock all channels.
Press EXIT to clear PIN.
Press MENU for main menu.
Channel Is Locked by
TV-PG [L]

Use the NUMBER buttons to enter your
pin number to unlock all channels.
Press EXIT to clear PIN.
Press MENU for main menu.
Setting the Light Effect
You can turn the LED on the front of TV on/off.
- Press the MENU button to display the menu.
Press the ▲ or ▼ button to select "Setup", then press the ENTER button. - Press the ▲ or ▼ button to select "Light Effect", then press the ENTER button.
-
Press the ▲ or ▼ button to select t "Off", "In Standby", "In Watching TV" or "Always", then press the ENTER button.
-
Off: LED will not come on.
- In Standby: Turns the LED on in standby mode.
- In Watching TV: Turns the LED on while watching TV.
• Always: LED will come on after you turn the TV off.
Press the EXIT button to exit.
➢ Set the Light Effect to Off to reduce power consumption.


Upgrading the Software
Samsung may offer upgrades for TV's firmware in the future. Please contact the Samsung call center at 1-800-SAMSUNG (726-7864) to receive information about downloading upgrades and using a USB drive. Upgrades will be possible by connecting a USB drive to the USB port located on located on the side of your TV.
- Insert a USB drive containing the firmware upgrade into the WISELINK port on the side of the TV.
- Press the MENU button to display the menu. Press the ▲ or ▼ button to select Setup, then press the ENTER button.
- Press the ▲ or ▼ button to select Software upgrade, then press the ENTER button.
- Press the ENTER button. The message Scanning for USB... It may take up to 30 seconds. is displayed. Please be careful to not disconnect the power or remove the USB drive while upgrades are being applied. The TV will shut off and turn on automatically after completing the firmware upgrade. Please check the firmware version after the upgrades are complete. When software is upgraded, video and audio settings you have made will return to their default (factory) settings. We recommend you write down your settings so that you can easily reset them after the upgrade.


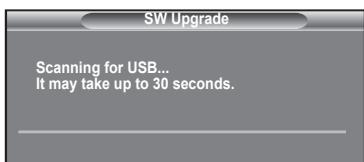
Using the WISELINK Function
This function enables you to view and listen to photo (JPEG) and audio files (MP3) saved on a USB Mass Storage Class (MSC) device.
Press the POWER button on the remote control or front panel.
Connect a USB device containing JPEG and/or MP3 files to the WISELINK jack (USB jack) on the side of the TV.

If you enter the WISELINK mode with no USB device connected the message "There is no device connected" will appear. In this case, insert the USB device, exit the screen by pressing the WISE LINK button on the remote control and enter the WISELINK screen again.
➢ Photo and audio files must be named in English, French or Spanish. If not, the files can not be played. Change the file names to English, French, or Spanish if necessary.
The file system only supports FAT16/32 (The NTFS file system is not supported)
➢ Certain types of USB devices may not be compatible with this TV.
Wiselink only supports the USB Mass Storage Class device (MSC). MSC is a Mass Storage Class Bulk-Only Transport device. Examples of MSC are Thumb drives and Flash Card Readers (Both USB HDD and HUB are not supported.)
Before connecting your device to the TV, please back up your files to prevent them from damage or loss of data. SAMSUNG is not responsible for any data file damage or data loss.
➢ Recommended image resolution for Wiselink is 600 mega pixels.
Please connect directly to the USB port of your TV. If you are using a separate cable connection, there may be a USB Compatibility problem.
➢ Only MP3 and JPEG file formats are supported.
We recommend the sequential jpeg format. Progressive jpeg uses a lot of memory and decoding may fail.
Do not disconnect the USB device while it is "loading."
➢ Neither PTP (Picture Transfer Protocol) nor MTP (Media Transfer Pprotocol) is supported.
The playing duration of an mp3 file may be displayed as '00:00:00' if its playing time information is not found at the start of the file.
The higher the resolution of the image, the longer it takes to display on the screen.
If the horizontal resolution of an image is higher than 5000, it cannot be decoded.
If the vertical resolution of an image is higher than 4000, it cannot be decoded.
Using the Remote Control Button in WISELINK Menu
| Button | Operations |
 | Move the cursor and select an item |
 | Select the currently selected item. |
 | Play or pause the Slide Show or MP3 file. |
 | Return to the previous menu |
 | Run various functions from the Photo and Music menus. |
 | Stop the current slide show or MP3 file. |
 | Page Up or Down (file list item) |
 | Stop the current function and return to the previous high-level menu. |
- Press the MENU button. Press the ▲ or ▼ button to select "Input", then press the ENTER button.
-
Press the ▲ or ▼ button to select "WISELINK", then press the ENTER button.
-
Press the ▲ or ▼ button to select the corresponding USB Memory Device, then press the ENTER button.
The WISELINK menu differs depending on the USB Memory Device connected to TV.
- Press the ◀ or ▶ button to move to an icon, then press the ENTER button. ▶ To exit WISELINK mode, press the WISELINK button on the remote control.
Press the WISELINK button on the remote control to display a WISELINK menu.

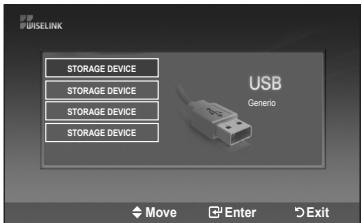
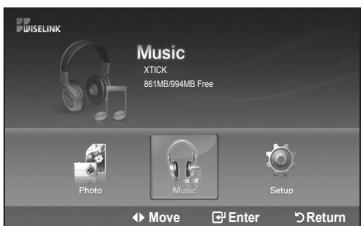

Using the PHOTO (JPEG) List
This menu shows JPEG files and folders saved on an USB memory device.
- Complete Steps 1 to 3 of "Using the WISELINK Menu". (Refer to page 66)
-
Press the ◀ or ▶ button to move to "Photo", then press the ENTER button. The saved file information is displayed as a folder or file.
-
Press the ▲, ▼, ◀ and ▶ button to select a file, then press the ENTER button.
-
Pressing the ENTER button over a photo icon shows the currently selected photo in full screen.
- Pressing the ENTER button over a folder icon shows the JPEG files included in the folder.
To exit WISELINK mode, press the WISELINK button on the remote control.
➢ Moving to a photo may take a few seconds to load the file.
At this point, the Loading icon will appear at the top left of the screen.
This menu only shows files whose file extension is jpg. Files of other formats such as bmp or tiff will not be displayed.
The files are displayed on a page. 15 thumbnail photos are displayed per page.
The thumbnails are numbered from left to right and from top to bottom, from 1 to 15.
➢ Certain types of USB Digital camera and audio devices may not be compatible with this TV.
➢ Folders are displayed first and they are followed by all JPEG files in the current folder. The folders and JPEG files are sorted in alphabetical order.
If the photo is displayed in full screen, you can zoom in and out or rotate the photo on the screen.
It takes time to show JPEG files as Thumbnail images.
➢ Photos without EXIF information may not be displayed as thumbnail images in the PHOTO LIST depending on the picture quality and resolution.

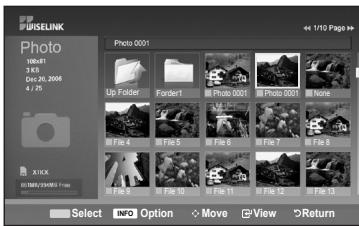

: Folder icon

: Photo icon

: Move to the previous folder stage icon
Selecting a Photo and Slide Show
- Complete Steps 1 to 3 of "Using the WISELINK Menu". (Refer to page 66)
-
Press the ◀ or ▶ button to move to "Photo", then press the ENTER button. The saved file information is displayed as a folder or file.
-
Press the INFO button to display "Start Slide Show" or "Deselect All".


- Press the ▲ or ▼ button to select "Start Slide Show", then press the ENTER button.
During the slide show, files are displayed in order from the currently shown file.
MP3 files can be automatically played during the Slide Show if the Default Background Music is set to On. To enable this function, MP3 files and other photo files must be located in the same folder on the USB Memory Device.
- Press the INFO button during the slide show to set the following options (Slide show Speed, Background Music, Background Music Setting, List).
Press the ▲ or ▼ button to select the option, then press the ENTER button.
- After setting the option press the ENTER button to make a change.

Using the Menu during a Slide Show
Slide Show Speed:
Select to control the slide show speed.
You can select Slow, Normal or Fast.
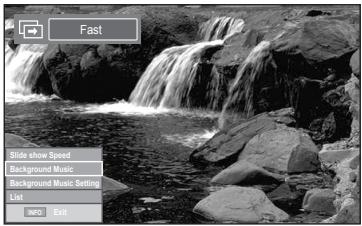
Background Music:
Select to choose whether you want to play an MP3 file during a slide show.
You can select Music "ON" or "OFF".

Background Music Setting:
While the slide show is in progress, MP3 files and folders under the same directory are displayed.
Select a folder using the ▲ or ▼ button and press the ENTER button.
The selected folder will be highlighted.
Press the RETURN button again to return to the slide show screen.
The selected background music is played.
If you turn Off the Background Music, even if the Background Music Settings have been set up, the background music will not be played.

List:
The file information is displayed as a folder or JPEG file.
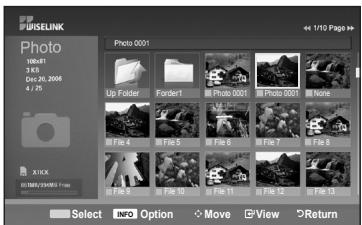
To exit WISELINK mode, press the WISELINK button on the remote control.
Slideshow function information icon (Displayed at the top left of the screen).
| Icon | Current OSD | Function |
 | (Photo) SlideShow | Photo SlideShow is in progress. |
 | Photo Pause | You are able to pause a SlideShow and Music by pressing the PLAY/PAUSE ▶■ button on the remote control during a SlideShow.To resume the SlideShow, press the PLAY/PAUSE ▶■ button on the remote control again. |
 | Move to Next Photo | Pressing the (right) direction button on the remote control allows you to move to the next photo. |
 | Move to Previous Photo | Pressing the (left) direction button on the remote control allows you to move to the previous photo |
When selecting a photo file, the photo file information is displayed on the left side of the TV screen, such as the resolution, the date modified and the order of the file in the current directory (e.g. 10th out of 15).

Rotating
- Complete Steps 1 to 3 of "Using the WISELINK Menu". (Refer to page 66)
-
Press the ◀ or ▶ button to move to "Photo", then press the ENTER button. The saved file information is displayed as a folder or file.
-
Press the ▲, ▼, ◀ and ▶ button to select a file, then press the ENTER button. Pressing the button over a photo thumbnail displays the photo in full screen.
-
Press the INFO button to display the option(Start Slide Show, Rotate, Zoom, List).
Press the ▲ or ▼ button to select "Rotate", then press the ENTER button.
Press the ▲ or ▼ button to select the required option(0°, 90°, 180°, 270°), then press the ENTER button.
To exit WISELINK mode, press the WISELINK button on the remote control.
The rotated file is not saved.
The Zoom/Slide Show option is disabled when the Rotate option is selected.
The Rotating function information icon (Displayed at the top left of the screen).
| Icon | Current OSD | Function |
| Rotating (0°) | This rotates a photo to its original position | |
| Rotating (90°) | This rotates a photo by 90 degrees | |
| Rotating (180°) | This rotates a photo by 180 degrees | |
| Rotating (270°) | This rotates a photo by 270 degrees |
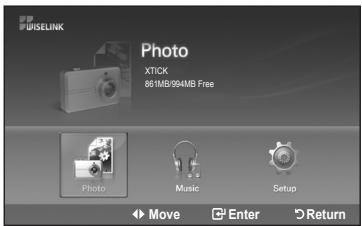

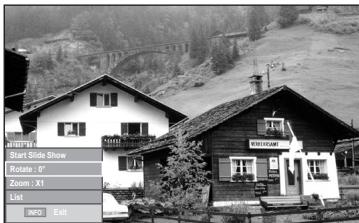
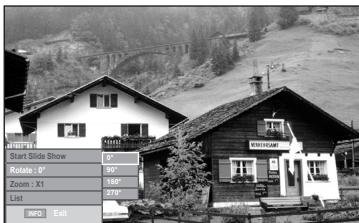
Zooming-in
- Complete Steps 1 to 3 of "Using the WISELINK Menu". (Refer to page 66)
-
Press the ◀ or ▶ button to move to "Photo", then press the ENTER button. The saved file information is displayed as a folder or file.
-
Press the ▲, ▼, ◀ and ▶ buttons to select a file, then press the ENTER button. Pressing the button over a photo thumbnail displays the photo in full screen.
-
Press the INFO button to display the option(Start Slide Show, Rotate, Zoom, List).
Press the ▲ or ▼ button to select "Zoom", then press the ENTER button.
- Zoom(x 1): Restore the photo to its original size.
- Zoom(x 2): Zoom-in to the photo x2.
- Zoom(x 4): Zoom-in to the photo x4.
To pan up/down/left/right, press the ▲, ▼, ◀ and ▶ buttons.
Images with a resolution larger than 1280 X 720 are not supported.
The Rotate/Slide show option is disabled when the Zoom option is selected.
To exit WISELINK mode, press the WISELINK button on the remote control.
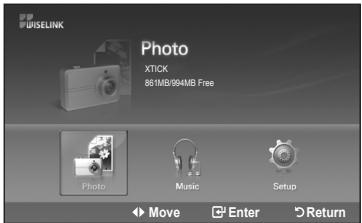

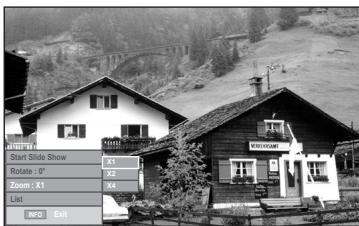

| Icon | Current OSD | Function |
 | Zoom (x 2) | Zoom-in to a photo x2. |
 | Zoom (x 4) | Zoom-in to a photo x4. |
 | Zoom (x 1) | Restore a photo to its original size. |
 | Pan Down | Pan down to view the lower part of a zoomed-in photo. |
 | Pan Up | Pan up to view the upper part of a zoomed-in photo. |
 | Pan Right | Pan right to view the right side of a zoomed-in photo. |
 | Pan Left | Pan left to view the left side of a zoomed-in photo. |
The Rotate/Slide show option is disabled when the Zoom option is selected.
This menu shows MP3 files from among the files saved on a USB memory device.
- Complete Steps 1 to 3 of "Using the WISELINK Menu". (Refer to page 66)
- Press the ◀ or ▶ button to move to "Music", then press the ENTER button. The saved file information is displayed as a folder or file.

- Press the ▲ or ▼ button to select a file, then press the ENTER button.
To select all files or a file, press the INFO button to display the Music menus. Press the ENTER button to select "Play", "Repeat Music" or "Deselect All".
- Pressing the ENTER button over a musical note icon immediately plays the music file.
- Pressing the ENTER button over a folder icon shows the music files included in the folder.
To select a file on the next page, press the REW ◀◀ or FF ▶▶ button to move to the next page.
- Press the PLAY/PAUSE ▶ button while playing an MP3 file to pause the file. Press the STOP ■ button to exit Play mode.
To exit WISELINK mode, press the WISELINK button on the remote control.


: Folder icon

: Music icon

: Move to the previous folder stage icon
This menu only shows files with the MP3 file extension. Files with other file extensions are not displayed, even if they are saved on the same USB device.
The selected file is displayed on the top with its playing time.
To adjust the music volume, press the VOL+ or VOL- button on the remote control. To mute the sound, press the MUTE button on the remote control.
➢ FF ▶▶ or REW ◀◀ buttons do not function during the play.
Music function information icon (Displayed at the top left of the screen).
| Icon | Current OSD | Function |
| [ABWK] | (Music) All | When all music files are being played. |
| [YYAE] | (Music) One | When a music file is being played. |
 | (Music) Play/Pause | When pressing the PLAY/PAUSE▶■ button on the remote control while music is playing. The music stops and the ‘Play’ text appears at the top of the screen. |
 | ||
 | (Music) Stop | When pressing the STOP ■ button on the remote control when music is stopped. The music resumes and the ‘Stop’ text appears at the top of the screen. |
Music Repeat
- Complete Steps 1 to 3 of "Using the WISELINK Menu". (Refer to page 66)
-
Press the ◀ or ▶ button to move to "Music", then press the ENTER button. The saved file information is displayed as a folder or file.
-
Press the ▲ or ▼ button to select a file, then press the ENTER button. To select all files or a file, press the INFO button to display the Music menus. Press the ENTER button to select "Play", "Repeat Music" or "Deselect All".
-
Press the ENTER button to select "Repeat Music".
Select to repeatedly play MP3 files in the current folder. You can select On or Off
- On: Plays back a music file or all music files repeatedly
- Off: Doesn't play back the music files repeatedly.
To exit WISELINK mode, press the WISELINK button on the remote control.
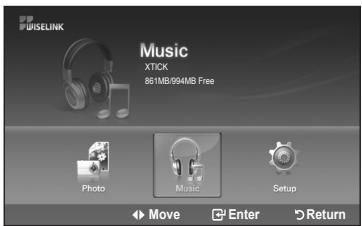


Using the Setup Menu
Setup displays the user settings of the WISELINK menu.
- Complete Steps 1 to 3 of "Using the WISELINK Menu". (Refer to page 66)
-
Press the ◀ or ▶ button to move to "Setup", then press the ENTER button.
-
Press the ▲ or ▼ button to select an item you want, then press the ENTER button.
-
Press the ▲ or ▼ button to select the option, then press the ENTER button.
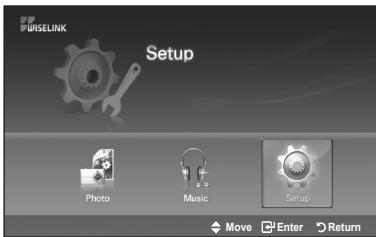
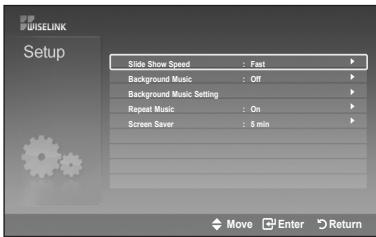

continued...
Slide Show Speed:
Select to control the slide show speed. You can select "Fast", "Normal" or "Slow".

Background Music :
Select to determine whether to play an MP3 file during a slide show.
You can select Music "On" or Music "Off".
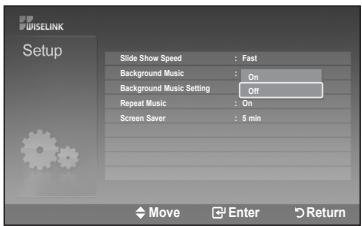
Background Music Setting:
You can select the background music to play during a slide show. You can also select the background music while a slide show is playing by pressing the INFO button and selecting the "Background Music Setting" menu.

Repeat Music:
Select to repeatedly play MP3 files in the current folder.
You can select "On" or "Off".
- On: Plays back a music file or all music files repeatedly.
- Off: Doesn't play back repeatedly.
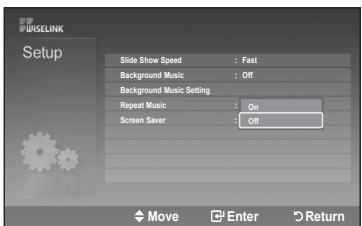
Screen Saver:
Select to set the waiting time before the screen saver appears.
The screensaver will appear when no button is pressed for 1, 3 or 5 minutes.

To exit WISELINK mode, press the WISELINK button on the remote control.
What is Anynet+?
Anynet + is a function that enables you to control all connected Samsung devices that support Anynet + with your Samsung TV's remote.
Connecting Anynet+ Devices
The Anynet + system can be used only with Samsung devices that have the Anynet + feature. To be sure your Samsung device has this feature, check if there is an Anynet + logo on it.
To connect to a TV
![graph TD TV["TV"] -->|HDMI IN 2| HDMI1["Anynet+ Device 1"] TV -->|HDMI IN 2| HDMI2["Anynet+ Device 2"] TV -->|HDMI IN 2| HDMI3["Anynet+ Device 3"] TV -->|HDMI IN 2| HDMI4["Anynet+ Device 3"] TV -->|HDMI IN 2| HDMI5["Anynet+ Device 1"] TV -->|HDMI IN 2| HDMI6["Anynet+ Device 2"] TV -->|HDMI IN 2| HDM…](/content/2020/05/25399/images/7188ec2bc7310cdea3f943cd30560a65f0521977718f72d3fbab8a7f64e4c603.jpg)
Connect the [HDMI 1], [HDMI 2] or [HDMI 3] jack on the TV and the HDMI OUT jack of the corresponding Anynet + device using an HDMI cable.
To connect to Home Theater
![graph TD TV["TV"] -->|HDMI 1.3 Cable| Home_Theater["Home Theater"] TV -->|HDMI 1.3 Cable| Anynet+Device1["Anynet+ Device 1"] TV -->|HDMI 1.3 Cable| Anynet+Device2["Anynet+ Device 2"] TV -->|HDMI 1.3 Cable| Anynet+Device3["Anynet+ Device 3"] TV -->|HDMI 1.3 Cable| OpticalCable["Optical Cable"] TV -->…](/content/2020/05/25399/images/bca416f93218e6fe5ad7061fbbfd0e2d9876a845d1bdd45e432dc718f8af2216.jpg)
- Connect the [HDMI 1], [HDMI 2] or [HDMI 3] jack on the TV and the HDMI OUT jack of the corresponding Anynet + device using an HDMI cable.
- Connect the HDMI IN jack of the home theater and the HDMI OUT jack of the corresponding Anynet + device using an HDMI cable.
Connect the Optical cable between the Digital Audio Out (Optical) jack on your TV and the Digital Audio Input on the Home Theater.
Connect only one Home Theater.
When following the connection above, the Optical jack only outputs 2 channel audio. You will only hear sound from the Home Theater's Front Left and Right speakers and the subwoofer. If you want to hear 5.1 channel audio, connect the DIGITAL AUDIO OUT (OPTICAL) jack on the DVD player or Cable/Satellite Box (ie Anynet Device 1 or 2) directly to the Amplifier or Home Theater, not the TV.
Please see the home theater's user manual for more information.
Some HDMI cables may not support Anynet+ functions.
Anynet + works when the AV device supporting Anynet + is in the Standby or On status.
Anynet + supports up to 12 AV devices in total. Note that you can connect up to 3 devices of the same type.
The following settings help set the Anynet + functions.
To use the Anynet + Function, Anynet + (HDMI-CEC) must be set to On
- Press the Anynet + button.
Press the ▲ or ▼ button to select "Setup", then press the ENTER button. - Press the ENTER button to select "Anynet + (HDMI-CEC)", then press the ENTER button.
3, Press the ▲ or ▼ button to select "On", then press the ENTER button.
The Anynet + (HDMI-CEC) function is enabled.
➢ If you select Off, Anynet + (HDMI-CEC) is disabled.When the Anynet + (HDMI-CEC) function is disabled, all the Anynet + related operations are deactivated.


Setting an Anynet + Device to turn Off Automatically when the TV is Turned Off
- Press the ▲ or ▼ button to select Auto Turn Off, then press the ENTER button.
- Press the ▲ or ▼ button to select "On", then press the ENTER button.
The "Auto Turn Off" function is enabled.
➢ If you select "Off", the "Auto Turn Off" function is canceled.
Press the EXIT button to exit.
The active source on the TV remote must be set to TV to use the Anynet + function.
If you set Auto Turn Off to On, connected external devices are also turned off when the TV is turned off. If an external device is still recording, it may or may not turn off.
Scanning and Switching between Anynet+ Devices
- Press the Anynet + button.
▶ Anynet + devices connected to the TV are listed. - Press the ▲ or ▼ button to select to a particular device and press the ENTER button. It is switched to the selected device.
- If you cannot find a device you want, press the ▲ or ▼ button to select "Searching Connections", then press the ENTER button.
The meassage "Configuring Anynet + connection..." is displayed. When searching devices completes, the connected devices are listed in the Anynet + menu.

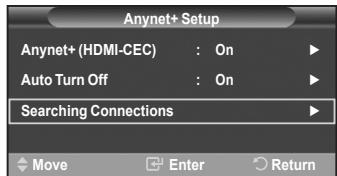
Switching to the selected devices may take up to 2 minutes. You cannot cancel the operation during the switching operation.
The time required to scan for devices is determined by the number of connected devices.
When the device scan is complete, the number of devices found are not displayed.
Although the TV automatically scans devices when it is turned on using the POWER button, devices connected when the TV is already on are not displayed in the device list. In this case, select the Searching Connections menu to search devices.
If you have selected external input mode by pressing the SOURCE button, you cannot use the Anynet + function. Make sure to switch to an Anynet + device by using the Anynet + button.
Anynet + Menu
The Anynet + menu changes depending on the type and status of the Anynet + devices connected to the TV.
| Anynet+ Menu | Description |
| View TV | Switches from Anynet+ to TV broadcast mode. |
| Record | Starts a recording. (This menu works only for a device supporting recording.) |
| (Device_Name) Menu | Shows the menu of the connected device.Example: When a DVD Recorder is connected, the DVD Recorder's title menu appears. |
| (Device_Name) Operation | Shows the play control menu of the connected device.Example: When a DVD Recorder is connected, the play control menu of the DVD Recorder appears. |
| Connect (Device_Name) | Your TV connects to the corresponding device. |
| Receiver | Sound is output through the receiver (home theater). |
| Setup | You can set the Anynet+ (HDMI-CEC), auto turn off, and searching connections for using Anynet+. |
TV Remote Control Buttons Available in Anynet + Mode
| Device Type | Operating Status | Available Buttons |
| Anynet+ Device | After switching to the device, when the menu of the corresponding device is displayed on the screen. | Numeric buttons▲/▼/◄/►/ENTER buttonsColor buttonsEXIT button |
| After switching to the device, while playing a file | ◄◄ (Backward search)►►(Forward search)■(Stop)►II (Play/Pause) | |
| Device with built-in Tuner | After switching to the device, when you are watching a TV program | CH ▲/▼ button |
| Audio Device | When Receiver is activated | VOL +/- buttonMUTE button |
The Anynet + function only works when the active source on the TV remote control is set to TV.
The REC button works only while in the recordable state.
You cannot control Anynet + devices using the buttons on the side of the TV. You can control Anynet + devices only using the TV remote control.
The TV remote control may not work under certain conditions. In this case, reselect the Anynet + device.
The Anynet + functions do not operate with other manufacturers' products.
The ◀◀, ▶▶ operations may differ depending on the device.
Recording
You can make a recording of a TV program using a recorder.
Press the REC button.
Recording begins. (Only when the Anynet + enabled recording device is connected.)
You can record the source streams by selecting "Record" after pressing the Anynet + button.
➢ Pressing the REC button will record whatever you are currently watching. If you are watching video from another device, the video from the device is recorded.
Before recording, check whether the antenna jack is properly connected to the recording device. To properly connect an antenna to a recording device, refer to the recording devices users manual.
Listening through a Receiver (Home theater)
You can listen to sound through a receiver instead of the TV speaker.
- Press the Anynet+ button.
Press the ▲ or ▼ button to select "Receiver", then press the ENTER button.
-
Press the ◀ or ▶ button to select to "On", then press the ENTER button. Now you can listen to sound through the receiver.
-
Press the EXIT button to exit.
When the receiver (home theater) is set to On, you can hear sound output from the TV's Optical jack. When the TV is displaying a DTV(air) signal, the TV will send out 5.1 channel sound to the Home theater receiver. When the source is a digital component such as a DVD and is connected to the TV via HDMI, only 2 channel sound will be heard from the Home Theater receiver.
If your receiver supports audio only, it may not appear in the device list.
The receiver will work when you have properly connected the Optical IN jack of the receiver to the Optical Out jack of the TV.
When using the WISELINK feature, sound may not output properly through the receiver.
When listening through the receiver, there are restrictions for using the PIP and audio-related(MTS, Preferred language) menus.

Troubleshooting for Anynet +
| Symptom | Solution |
| Anynet+ does not work. | Check if the device is an Anynet+ device. The Anynet+ system supports Anynet+ devices only.Connect only one receiver (home theater).Check if the Anynet+ device power cord is properly connected.Check the Anynet+ device's Video/Audio/HDMI 1.3 cable connections.Check whether Anynet+ (HDMI-CEC) is set to On in the Anynet+ setup menu.Check whether the TV remote control is in TV mode.Check whether it is Anynet+ exclusive remote control. Anynet+ doesn't work at a certain condition. (Searching channels, Operating WISELINK)When connecting or removing the HDMI 1.3 cable, please make sure to search devices again or restart your TV.Check if the Anynet+ Function of Anynet+ device is set on. |
| I want to start Anynet+ . | Check if the Anynet+ device is properly connected to the TV and check if the Anynet+ (HDMI-CEC) is set to On in the Anynet+ Setup menu.Press theTVbutton on the TV remote control to switch to TV. Then press the Anynet+ button to show the Anynet+ menu and select a menu you want. |
| I want to exit Anynet+ . | SelectView TVin Anynet+ menu.Press theSOURCEbutton on the TV remote control and select a device other than Anynet+ devices.Press any ofCH, CH LIST, PRE-CH, andFAV.CHto change the TV mode.(Note that the channel button operates only when a tuner-embedded Anynet+ device is not connected.) |
| The message Connecting to Anynet+ device... appears on the screen. | You cannot use the remote control when you are configuring Anynet+ or switching to a view mode.Use the remote control when the Anynet+ setting or switching to view mode is complete. |
| The Anynet+ device does not play. | You cannot use the play function when Plug & Play is in progress. |
| The connected device is not displayed. | Check whether or not the device supports Anynet+ functions.Check whether or not the HDMI 1.3 cable is properly connected.Check whether Anynet+ (HDMI-CEC) is set to On in the Anynet+ setup menu.Search Anynet+ devices again.You can connect an Anynet+ device using the HDMI 1.3 cable only. Some HDMI cables may not support Anynet+ functions. |
| The TV program cannot be recorded. | Check whether the antenna jack on the recording device is properly connected. |
| The TV sound is not output through the receiver. | Connect the optical cable between TV and the receiver. |
Appendix
Troubleshooting
The TFT LCD panel uses a panel consisting of sub pixels (6 220 800) which require sophisticated technology to produce. However, there may be few bright or dark pixels on the screen. These pixels will have no impact on the performance of the product.
If the TV seems to have a problem, first try this list of possible problems and solutions. If none of these troubleshooting tips apply, call your nearest Samsung service center.
| Problem | Possible Solution | |
| Poor picture | Try another channel.Adjust the antenna.Check all wire connections. | |
| Poor sound quality. | Try another channel.Adjust the antenna. | |
| No picture or sound. | Try another channel.Press the SOURCE button.Make sure the TV is plugged in.Check the antenna connections. | |
| No sound or sound is too low at maximum volume. | First, check the volume of units connected to your TV (digital broadcasting receiver, DVD, cable broadcasting receiver, VCR, etc.). Then, adjust the TV volume accordingly. | |
| Picture rolls vertically. | Check all wire connections. | |
| The TV operates erratically. | Unplug the TV for 30 seconds, then try operating it again. | |
| The TV won't turn on. | Make sure the wall outlet is working. | |
| Remote control malfunctions | Replace the remote control batteries.Clean the upper edge of the remote control (transmission window).Check the battery terminals. | |
| “Check signal cable” message. | Ensure that the signal cable is firmly connected to the PC source. | |
| “Not Supported Mode” message. | Check the maximum resolution and the frequency of the Video Adapter.Compare these values with the data in the Display Modes. | |
| Digital broadcasting screen problem. | Please check the digital signal strength and input antenna. | |
| The image is too light or too dark. | Adjust the Brightness and Contrast.Adjust the Fine tuning. | |
| Black bars on the screen. | Make sure the broadcast you're receiving is High Definition (HD).HD channels sometimes broadcast Standard Definition (SD) programming, which can cause black bars.Set your cable/satellite box to stretch or widescreen mode to eliminate the bars. | |
| Picture has a Red/Green or Pink tint. | Make sure the Component cables are connected to the correct jacks. | |
| Closed Captioning not working. | If you are using a Cable/Satellite box, you must set Closed Captioning on the box, not your TV. | |
| Snowy picture | Your cable box may need a firmware upgrade. Please contact your Cable company. | |
| Ghosting on picture | This is sometimes caused by compatibility issues with your cable box.Try connecting Component cables instead. | |
| Problem | Possible Solution | |
| Horizontal bars appear to flicker, jitter or shimmer on the image. | Adjust the Coarse tuning and then adjust the Fine tuning. | |
| Vertical bars appear to flicker, jitter or shimmer on the image. | Adjust the Coarse tuning and then adjust the Fine tuning. | |
| Screen is black and power indicator light blinks steadily. | On your computer check: Power, Signal Cable.The TV is using its power management system.Move the computer's mouse or press any key on the keyboard. | |
| Image is not stable and may appear to vibrate when you have a computer connected to the PC input. | If the setting is not correct, use your computer utility program to change the display settings.➢Your TV supports multiscan display functions within the following frequency domain: | |
| Horizontal frequency (kHz) | 30~60 | |
| Vertical frequency (Hz) | 60~75 | |
| PC Maximum refresh rate (at 60 Hz) | 1920 X 1080 | |
| Image is not centered on the screen. | Adjust the horizontal and vertical position.The screen position must be adjusted on the output source (i.e. STB) with a digital signal. | |
| The picture appears distorted in the corner of the screen. | If Just Scan is selected with some external devices, the picture may appear distorted in the corner of the screen. This symptom is caused by the external devices, not TV. | |

<2>

< 3 >
- Place the TV face down on a soft cloth or cushion on a table.
- Put the stand into the hole at the bottom of the TV.
- Insert screw into the hole indicated and tighten.
Disconnecting the Stand

<2>
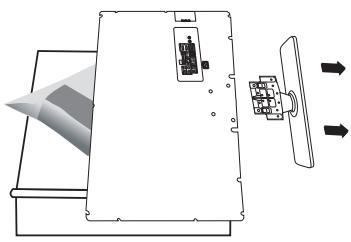
< 3 >

< 4 >
- Place the TV face down on a soft cloth or cushion on a table.
- Remove four screws from the back of the TV.
- Separate the stand from the TV.
- Cover the bottom hole with a cap.
Once the auto wall mount is installed, your TV's position can be easily adjusted.

Entering the menu
- Press the ▲, ▼, ◀ or ▶ button on your remote control.
The Wall Mount Adjustment screen is displayed.
If the Wall Mount Adjustment screen is not displayed when clicking on a direction button while watching your TV, use the menu to display that screen.
- Press the MENU butt on to display the menu. Press the ▲ or ▼ button to select "Setup", then press the ENTER button.
- Press the ▲ or ▼ button to select “Wall-Mount Adjustment”, then press the ENTER button.

Remembering the Position
- Adjust to the desired position using the ▲,▼,◀,► buttons.
If you press an arrow button when no OSD is displayed on the TV screen, the Adjustment screen appears.
➢ Press the INFO button to reset. Press the ◀ or ▶ button to select "Yes", then press the ENTER button.
The position is initialized to the default setting.
- Press the blue button.
Press the ▲ and ▼ buttons to select a save mode from either Position 1, Position 2 or Position 3 in order to save the current position.
➢ To not save the current position, press the RETURN button.
When selecting a save mode, you cannot use the Color buttons.
- Press the ENTER button to save.
When Position1 is selected, the message "Current position saved as Position1" is displayed.
- Press the ENTER button.
➢ The saved position appears on the left side of the OSD.
Moving to the remembered position
- Complete Step 1 of "Entering the menu".
- Pressing a Color (Red, Green, Yellow) button moves the auto wall mount to the saved position.
➢ You can move the wall mount to one of the 3 pre-set positions by pressing the Red (Position 1), Green (Position 2) or Yellow (Position 3) buttons.
If you adjust the positon after moving to a pre-set position, the position display will disappear.
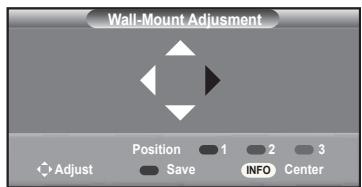


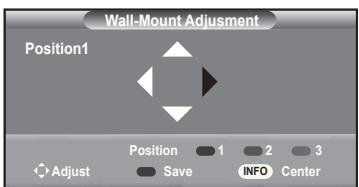
For installation, refer to the Installation Manual provided with the wall mount.
For product installation and the installation and moving of the wall mount, make sure to consult a specialized installation company.
This installation manual is to be used when attaching the wall mount to a wall. When attaching to other building materials, please contact your nearest dealer.
The auto wall mount will not work when Anynet + is operating.
Wall Mount Kit Specifications (VESA)
Install your wall mount on a solid wall perpendicular to the floor.
When attaching to other building materials, please contact your nearest dealer.
If installed on a ceiling or slanted wall, it may fall and result in severe personal injury.

| Product Family | inches | VESA Spec. (A * B) | Standard Screw | Quantity |
| LCD-TV | 23~ 26 | 200 * 100 | M4 | 4 |
| 32 ~ 40 | 200 * 200 | M6 | ||
| 46 ~ 52 | 600 * 400 | M8 | ||
| 57 | 700 * 400(No VESA) | |||
| 57 ~ 70 | 800 * 400 | |||
| 80 ~ | 1400 * 800 | |||
| PDP-TV | 42 ~ 50 | 600 * 400 | M8 | 4 |
| 55 ~ 70 | 800 * 400 | |||
| 63 | No VESA | 6 | ||
| 80 ~ | 1400 * 800 | 4 |
➢ Standard dimensions for wall mount kits are shown in the table above.
When purchasing our wall mount kit, a detailed installation manual and all parts necessary for assembly are provided.
➢ Do not use screws longer than the standard dimension, as they may cause damage to the inside of the TV set.
For wall mounts that do not comply with the VESA standard screw specifications, the length of the screws may differ depending on their specifications.
➢ Do not use screws that do not comply with the VESA standard screw specifications.
Do not use fasten the screws too strongly, this may damage the product or cause the product to fall, leading to personal injury. Samsung is not liable for these kinds of accidents.
Samsung is not liable for product damage or personal injury when a non-VESA or non-specified wall mount is used or the consumer fails to follow the product installation instructions.
Our 57" and 63" models do not comply with VESA Specifications. Therefore, you should use our dedicated wall mount kit for this model.
➢ Do not exceed 15 degrees tilt when mounting this TV.

Do not install your Wall Mount Kit while your TV is turned on. It may result in personal injury due to electric shock
Using the Anti-Theft Kensington Lock
The Kensington lock is a device used to physically fix the system when using it in a public place. The locking device has to be purchased separately. The appearance and locking method may differ from the illustration depending on the manufacturer. Please refer to the manual provided with the Kensington lock for proper use.

The location of the Kensington Lock may be different depending on its model.
- Insert the locking device into the Kensington slot on the LCD TV (Figure 1) and turn it in the locking direction (Figure 2).
- Connect the Kensington lock cable.
- Fix the Kensington lock to a desk or a heavy stationary object.
Specifications
| Model Name | LN-T4081F | LN-T4681F |
| Screen Size (Diagonal) | 40 inches | 46 inches |
| PC Resolution | 1920 x 1080 @ 60 Hz | 1920 x 1080 @ 60 Hz |
| Sound Output | 10W X 2 | 10W X 2 |
| Dimensions (WxDxH) | ||
| Body | 43.3 X 4 X 23.9 inches(1100 x 102.8 x 607.3 mm) | 48.3 X 4.4 X 27 inches(1228 x 111 x 686.8 mm) |
| With stand | 43.3 X 11.4 X 26.6 inches(1100 x 289.9 x 675.4 mm) | 48.3 X 12.6 X 29.6 inches(1228 x 319.9 x 752.4 mm) |
| Weight | ||
| With Stand | 57.76 lbs (26.2 kg) | 76.94 lbs (34.9 kg) |
| Without stand | 49.16 lbs (22.3 kg) | 65.70 lbs (29.8 kg) |
| Environmental Considerations | ||
| Operating Temperature | 50 °F to 104 °F (10 °C to 40 °C) | 50 °F to 104 °F (10 °C to 40 °C) |
| Operating Humidity | 10% to 80%, non-condensing | 10% to 80%, non-condensing |
| Storage Temperature | -4 °F to 113 °F (-20 °C to 45 °C) | -4 °F to 113 °F (-20 °C to 45 °C) |
| Storage Humidity | 5% to 95%, non-condensing | 5% to 95%, non-condensing |
| Model Name | LN-T5281F | LN-T5781F |
| Screen Size (Diagonal) | 52 inches | 57 inches |
| PC Resolution | 1920 x 1080 @ 60 Hz | 1920 x 1080 @ 60 Hz |
| Sound Output | 15W X 2 | 15W X 2 |
| Dimensions (WxDxH) | ||
| Body | 54 X 4.7 X 30.7 inches(1372 x 120 x 779.8 mm) | 58 X 4.8 X 32.7 inches(1474 x 121 x 830.7 mm) |
| With stand | 54 X 12.6 X 33.3 inches(1372 x 319.9 x 845.4 mm) | 58 X 13.6 X 35.3 inches(1474 x 344.7 x 895.4 mm) |
| Weight | ||
| With Stand | 92.59 lbs (42 kg) | 111.55 lbs (50.6 kg) |
| Without stand | 81.13 lbs (36.8 kg) | 100.97 lbs (45.8 kg) |
| Environmental Considerations | ||
| Operating Temperature | 50 °F to 104 °F (10 °C to 40 °C) | 50 °F to 104 °F (10 °C to 40 °C) |
| Operating Humidity | 10% to 80%, non-condensing | 10% to 80%, non-condensing |
| Storage temperature | -4 °F to 113 °F (-20 °C to 45 °C) | -4 °F to 113 °F (-20 °C to 45 °C) |
| Storage Humidity | 5% to 95%, non-condensing | 5% to 95%, non-condensing |
Stand Swivel (Left / Right)
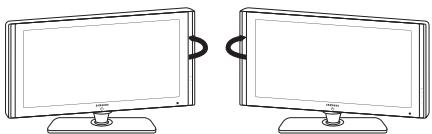
-20° 20°
➢ Design and specifications are subject to change without prior notice.
This device is a Class B digital apparatus.
For the power supply and Power Consumption, refer to the label attached to the product.
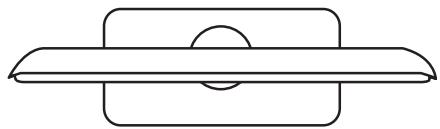
TOP VIEW

JACK PANEL DETAIL 3.5"H X 9"W

FRONT VIEW / SIDE VIEW


REAR VIEW
NOTE: All drawings are not necessarily to scale.
Some dimensions are subject to change without prior notice.
Refer to the dimensions prior to performing installation of your TV.
Not responsible for typographical or printed errors.
© 2007 Samsung Electronics America, Inc.
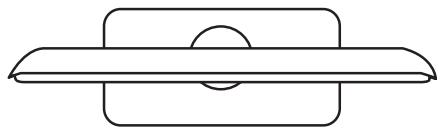
TOP VIEW
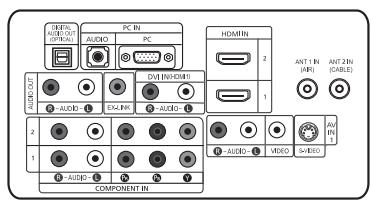
JACK PANEL DETAIL 3.5"H X 9"W

FRONT VIEW / SIDE VIEW
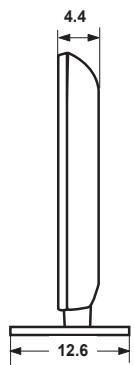

REAR VIEW
NOTE: All drawings are not necessarily to scale.
Some dimensions are subject to change without prior notice.
Refer to the dimensions prior to performing installation of your TV.
Not responsible for typographical or printed errors.
© 2007 Samsung Electronics America, Inc.

TOP VIEW

JACK PANEL DETAIL 3.5"H X 9"W

FRONT VIEW / SIDE VIEW


REAR VIEW
NOTE: All drawings are not necessarily to scale.
Some dimensions are subject to change without prior notice.
Refer to the dimensions prior to performing installation of your TV.
Not responsible for typographical or printed errors.
© 2007 Samsung Electronics America, Inc.

TOP VIEW

JACK PANEL DETAIL 3.5"H X 9"W

FRONT VIEW / SIDE VIEW

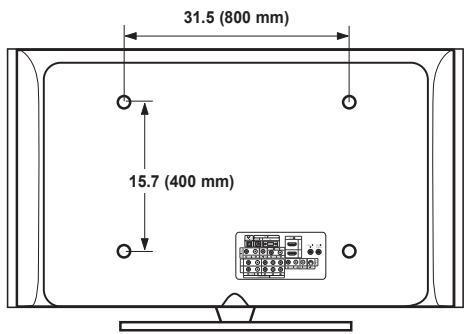
REAR VIEW
NOTE: All drawings are not necessarily to scale.
Some dimensions are subject to change without prior notice.
Refer to the dimensions prior to performing installation of your TV.
Not responsible for typographical or printed errors.
© 2007 Samsung Electronics America, Inc.
This page is intentionally left blank.
② DIGITAL AUDIO OUT (OPTICAL)
18 TV, DVD, STB, CABLE, VCR


Mode audio multipistes
♦ Off: Désactive la function Mélodie.
Modes d'affichage
<2>

< 3 >
< 2 >

< 3 >

< 4 >
-20° 20°
VUE DU HAUT
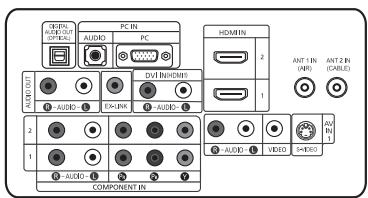
DETAILS DU PANNEAU DES PRISES 3.5"H X 9"W

VUE AVANT/VUE LATERALE
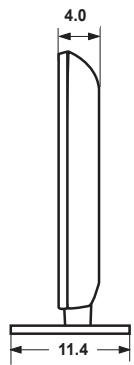

VUE ARRIERE
VUE DU HAUT

DETAILS DU PANNEAU DES PRISES 3.5"H X 9"W
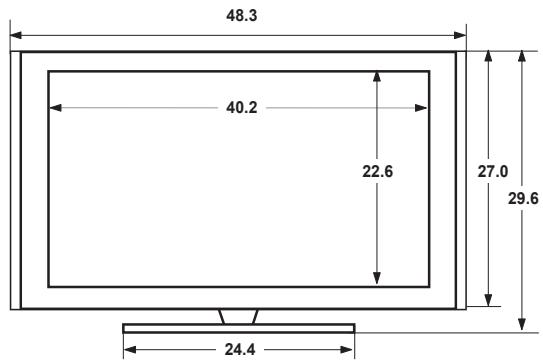
VUE AVANT/VUE LATERALE


VUE ARRIERE
VUE DU HAUT

DETAILS DU PANNEAU DES PRISES 3.5"H X 9"W

VUE AVANT/VUE LATERALE


VUE ARRIERE
VUE DU HAUT

DETAILS DU PANNEAU DES PRISES 3.5"H X 9"W

VUE AVANT/VUE LATERALE
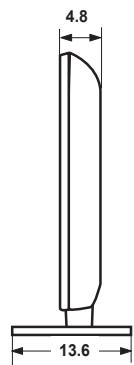

VUE ARRIERE
LN-T4681F, LN-T5281F,
LN-T5781F:3301-001305

Cubierta inferior
LN-T4081F : BN63-03665A
LN-T4681F : BN63-03675A
LN-T5281F : BN63-03799A
LN-T5781F : BN63-03801A

② DIGITAL AUDIO OUT (OPTICAL)
18 TV, DVD, STB, CABLE, VCR
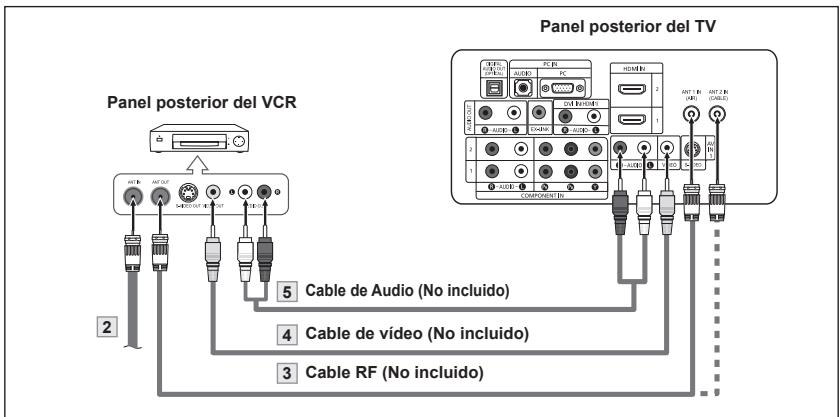

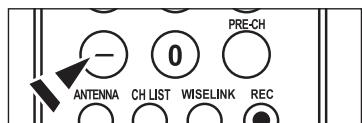
Uso del botón Mute
16:9
Zoom1
Zoom2
4:3
Config. música fondo:
<2>

< 3 >
< 2 >
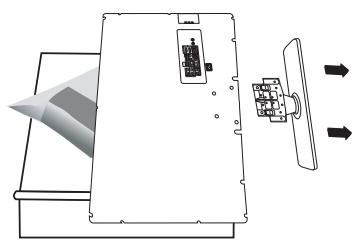
< 3 >

< 4 >
-20° 20°
VISTA SUPERIOR

VISTA POSTERIOR
© 2007 Samsung Electronics America, Inc.

VISTA SUPERIOR

DETALLE DEL PANEL DE TOMAS 3.5"H X 9"W
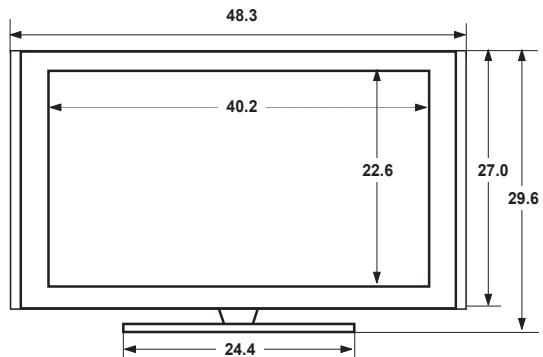
VISTA FRONTAL/VISTA LATERAL

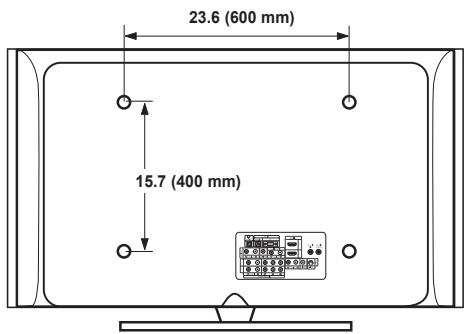
VISTA POSTERIOR
© 2007 Samsung Electronics America, Inc.

VISTA SUPERIOR
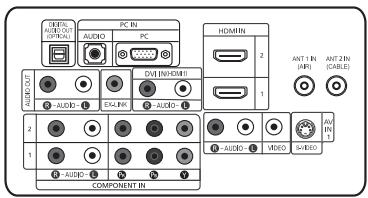
DETALLE DEL PANEL DE TOMAS 3.5"H X 9"W

VISTA FRONTAL/VISTA LATERAL

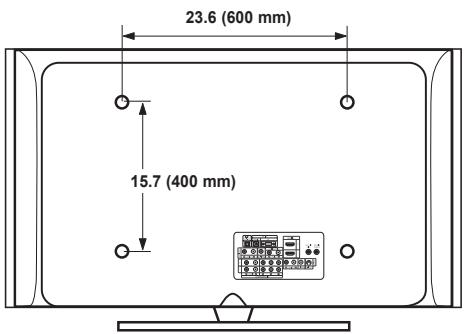
VISTA POSTERIOR
© 2007 Samsung Electronics America, Inc.

VISTA SUPERIOR

DETALLE DEL PANEL DE TOMAS 3.5"H X 9"W

VISTA FRONTAL/VISTA LATERAL


VISTA POSTERIOR
© 2007 Samsung Electronics America, Inc.
- → OWNER'S INSTRUCTIONS
- IMPORTANT WARRANTY INFORMATION REGARDING TELEVISION FORMAT VIEWING
- U.S.A ONLY
- OTHER COUNTRIES
- SAMSUNG ELECTRONICS NORTH AMERICAN LIMITED WARRANTY STATEMENT
- PRECAUTIONS WHEN DISPLAYING A STILL IMAGE
- CONTENTS
- GENERAL INFORMATION
- CONNECTIONS
- OPERATION
- PICTURE CONTROL
- SOUND CONTROL
- CHANNEL CONTROL
- PC DISPLAY
- TIME SETTING
- FUNCTION DESCRIPTION
- WISELINK
- ABOUT ANYNET
- APPENDIX
- LIST OF FEATURES
- ACCESSORIES
- BUTTONS ON THE LOWER-RIGHT PART OF THE PANEL
- ① SOURCE
- ② MENU
- ③ + VOL
- 4 ^ CH ∨
- ⑤ POWER INDICATOR
- ⑥ REMOTE CONTROL SENSOR
- ⑦ SPEAKERS
- 8 ⏻ (POWER)
- REAR PANEL JACKS
- 1 AUDIO OUT
- ② DIGITAL AUDIO OUT (OPTICAL)
- ③ PC IN
- ④ HDMI IN 1,2,3 / DVI IN(HDMI1) (AUDIO R/L)
- ⑤ ANT 1 IN/ANT 2 IN
- ⑥ EX-LINK
- ⑦ COMPONENT IN 1,2
- ⑧ AV IN 1 / AV IN 2
- S-VIDEO
- ⑨ POWER INPUT
- 10 KENSINGTON LOCK
- 11 HEADPHONE
- ⑫ WISELINK
- 1 POWER
- ② NUMERIC BUTTONS
- 3
- 4 CH LIST
- 5 ANTENNA
- 6 VCR/DVD FUNCTIONS
- ⑦ VOL⊕/VOL⊖
- 8 (MUTE)
- ⑨ MENU
- 10 S.MODE
- 11 RETURN
- 12 P.MODE
- 13 CAPTION
- 14 FAV.CH
- 15 SLEEP
- 16 SRS
- 17 SET
- 18 TV, DVD, STB, CABLE, VCR
- 20 SOURCE
- 21 PRE-CH
- 22 WISELINK
- 23 REC
- 24 CH ⬤ / CH √
- 25 EXIT
- 27 INFO
- 28 ANYNET
- 29 STILL
- 30 P.SIZE
- 31 PIP
- ③2 CH ∧ / ∨
- 33 MTS
- 34 RESET
- INSTALLING BATTERIES IN THE REMOTE CONTROL
- CONNECTING VHF AND UHF ANTENNAS
- ANTENNAS WITH 300 Ω FLAT TWIN LEADS
- ANTENNAS WITH 75 Ω ROUND LEADS
- SEPARATE VHF AND UHF ANTENNAS
- CONNECTING CABLE TV
- CABLE WITHOUT A CABLE BOX
- CONNECTING TO A CABLE BOX THAT DESCRAMBLES ALL CHANNELS
- CONNECTING TO A CABLE BOX THAT DESCRAMBLES SOME CHANNELS
- CONNECTING A DVD PLAYER OR CABLE BOX/SATELLITE RECEIVER (SET-TOP BOX) VIA HDMI
- CONNECTING A DVD PLAYER OR CABLE BOX/SATELLITE RECEIVER (SET-TOP BOX) VIA DVI
- CONNECTING A DVD PLAYER OR CABLE BOX/SATELLITE RECEIVER (SET-TOP BOX) VIA COMPONENT CABLES
- CONNECTING A CAMCORDER
- VIDEO CONNECTION
- S-VIDEO CONNECTION
- CONNECTING A DIGITAL AUDIO SYSTEM
- CONNECTING AN AMPLIFIER/DVD HOME THEATER
- CONNECTING A PC
- USING THE D-SUB CABLE
- USING THE HDMI/DVI CABLE
- TURNING THE TV ON AND OFF
- PLUG & PLAY FEATURE
- IF YOU WANT TO RESET THIS FEATURE
- CHANGING CHANNELS
- USING THE CHANNEL BUTTONS
- USING THE NUMBER BUTTONS
- USING THE “-” BUTTON
- USING THE PRE-CH BUTTON TO SELECT THE PREVIOUS CHANNEL
- PRESS THE PRE-CH BUTTON
- ADJUSTING THE VOLUME
- USING THE VOLUME BUTTON
- USING THE MUTE BUTTON
- VIEWING THE DISPLAY
- VIEWING THE MENUS
- MEMORIZING THE CHANNELS
- SELECTING THE VIDEO SIGNAL-SOURCE
- STORING CHANNELS IN MEMORY (AUTOMATIC METHOD)
- SETTING UP THE REMOTE TO OPERATE YOUR VCR
- SETTING UP THE REMOTE TO OPERATE YOUR CABLE BOX
- SETTING UP THE REMOTE TO OPERATE YOUR DVD
- SETTING UP THE REMOTE TO OPERATE YOUR STB
- TO SELECT THE SOURCE
- TO EDIT THE INPUT SOURCE NAME
- USING AUTOMATIC PICTURE SETTINGS
- ADJUSTING THE COLOR TONE
- RESETTING THE PICTURE SETTINGS TO THE FACTORY DEFAULTS
- ADJUSTING THE DETAILED SETTINGS
- ACTIVATING DETAILED SETTINGS
- ACTIVATING BLACK ADJUST
- ACTIVATING DYNAMIC CONTRAST
- ACTIVATING GAMMA
- CHANGING THE COLOR SPACE
- ACTIVATING WHITE BALANCE
- ACTIVATING MY COLOR CONTROL
- ACTIVATING EDGE ENHANCEMENT
- ACTIVATING XVYCC
- ACTIVATING LED MOTION PLUS
- CHANGING THE SCREEN SIZE
- SETTING THE ACTIVE COLOR
- DNLE (DIGITAL NATURAL IMAGE ENGINE)
- SETTING THE LED SMARTLIGHTING
- SETTING THE LED FEATURE DEMO
- SETTING THE HDMI BLACK LEVEL
- SETTING THE FILM MODE
- VIEWING PICTURE-IN-PICTURE
- ACTIVATING PICTURE-IN-PICTURE
- CHANGING THE PIP CHANNEL
- CHANGING THE POSITION OF THE PIP WINDOW
- CHANGING THE SIZE OF THE PIP WINDOW
- FREEZING THE PICTURE
- CUSTOMIZING THE SOUND
- USING AUTOMATIC SOUND SETTINGS
- SETTING THE TRUSURROUND XT
- TRADEMARK & LABEL LICENSE NOTICE
- CHOOSING A MULTI-CHANNEL SOUND (MTS) TRACK - DIGITAL
- PREFERRED LANGUAGE
- MULTI-TRACK SOUND
- AUTOMATIC VOLUME CONTROL
- SELECTING THE INTERNAL MUTE
- ADJUSTING THE TV ON/OFF MELODY SOUND
- LISTENING TO THE SOUND OF THE SUB (PIP) PICTURE
- RESETTING THE SOUND SETTINGS TO THE FACTORY DEFAULTS
- CONNECTING HEADPHONES
- SELECTING THE ANTENNA
- CLEARING SCRAMBLED CHANNELS - DIGITAL
- ADDING AND ERASING CHANNELS
- TO SET-UP YOUR FAVORITE CHANNELS
- USING THE CHANNEL LISTS
- VIEWING THE CHANNEL LISTS
- LABELING CHANNELS
- FINE TUNING ANALOG CHANNELS
- CHECKING THE DIGITAL-SIGNAL STRENGTH
- USING YOUR TV AS A COMPUTER (PC) DISPLAY
- SETTING UP YOUR PC SOFTWARE (BASED ON WINDOWS XP)
- DISPLAY MODES
- HOW TO AUTO ADJUST
- ADJUSTING THE SCREEN QUALITY
- CHANGING THE SCREEN POSITION
- INITIALIZING THE SCREEN POSITION OR COLOR SETTINGS
- SETTING THE HOME THEATER PC
- SETTING THE CLOCK
- OPTION 1: SETTING THE CLOCK MANUALLY
- OPTION 2: SETTING THE CLOCK AUTOMATICALLY
- SETTING THE SLEEP TIMER
- SETTING THE ON/OFF TIMER
- SELECTING A MENU LANGUAGE
- SETTING THE BLUE SCREEN MODE
- USING THE GAME MODE
- VIEWING CLOSED CAPTIONS (ON-SCREEN TEXT MESSAGES) - ANALOG
- MENU TRANSPARENCY LEVEL
- USING THE ENERGY SAVING FEATURE
- SETTING THE FUNCTION HELP
- DIGITAL NOISE REDUCTION
- SETTING UP YOUR PERSONAL ID NUMBER (PIN)
- HOW TO ENABLE/DISABLE THE V-CHIP
- HOW TO SET UP RESTRICTIONS USING THE "TV PARENTAL GUIDELINES
- HOW TO SET UP RESTRICTIONS USING THE MPAA RATINGS: G, PG, PG-13, R, NC-17, X, NR
- HOW TO SET UP RESTRICTIONS USING THE ‘CANADIAN ENGLISH
- HOW TO SET UP RESTRICTIONS USING THE ‘CANADIAN FRENCH
- USING THE V-CHIP FOR DIGITAL CHANNELS
- HOW TO RESET THE TV AFTER THE V-CHIP BLOCKS A CHANNEL ("EMERGENCY ESCAPE")
- SETTING THE LIGHT EFFECT
- UPGRADING THE SOFTWARE
- USING THE WISELINK FUNCTION
- USING THE PHOTO (JPEG) LIST
- SELECTING A PHOTO AND SLIDE SHOW
- USING THE MENU DURING A SLIDE SHOW
- SLIDE SHOW SPEED
- BACKGROUND MUSIC
- BACKGROUND MUSIC SETTING
- LIST
- SLIDESHOW FUNCTION INFORMATION ICON (DISPLAYED AT THE TOP LEFT OF THE SCREEN)
- ROTATING
- ZOOMING-IN
- MUSIC REPEAT
- USING THE SETUP MENU
- REPEAT MUSIC
- SCREEN SAVER
- WHAT IS ANYNET
- CONNECTING ANYNET+ DEVICES
- TO USE THE ANYNET + FUNCTION, ANYNET + (HDMI-CEC) MUST BE SET TO ON
- SETTING AN ANYNET + DEVICE TO TURN OFF AUTOMATICALLY WHEN THE TV IS TURNED OFF
- SCANNING AND SWITCHING BETWEEN ANYNET+ DEVICES
- ANYNET + MENU
- RECORDING
- LISTENING THROUGH A RECEIVER (HOME THEATER)
- DISCONNECTING THE STAND
- ENTERING THE MENU
- REMEMBERING THE POSITION
- MOVING TO THE REMEMBERED POSITION
- WALL MOUNT KIT SPECIFICATIONS (VESA)
- USING THE ANTI-THEFT KENSINGTON LOCK
- THIS PAGE IS INTENTIONALLY LEFT BLANK
- MODE AUDIO MULTIPISTES
- MODES D'AFFICHAGE
- USO DEL BOTÓN MUTE
- CONFIG. MÚSICA FONDO
Brand : SAMSUNG
Model : LN-T4081F
Category : Television