
HWS116GAE - Air-conditioner HAIER - Free user manual and instructions
Find the device manual for free HWS116GAE HAIER in PDF.
| Product type | Wine cellar |
| Brand | Haier |
| Model | HWS116GAE |
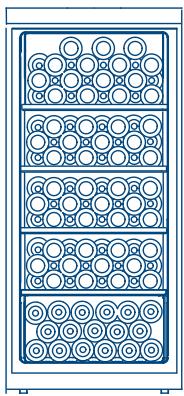
| Capacity | 116 bottles |
| Net volume | 220 L |
| Dimensions (W × D × H) | 595 × 639 × 1265 mm |
| Net weight | 71 kg |
| Power supply | 220-240 V ~ 50 Hz, 100 W |
| Temperature range | 5 °C to 20 °C |
| Refrigerant | R600a (45 g) |
| Climate class | SN-ST (10 °C to 38 °C) |
| Noise level | 38 dB(A) |
| Interior lighting | Yes, manual and automatic control when door opens |
| Door open alarm | Yes, after 1 minute |
| Temperature memory | Yes, in case of power failure |
| °C / °F conversion | Yes |
| Automatic defrost | Yes |
| Activated carbon filter | Yes, annual replacement recommended |
| Provided accessories | 4 wooden shelves, 2 keys, user manual, information kit |
| Maintenance and cleaning | Cleaning with baking soda solution; door seals to be cleaned every 3 months |
| Safety | Grounding mandatory, do not use extension cord, remove doors before disposal |
Frequently Asked Questions - HWS116GAE HAIER
User questions about HWS116GAE HAIER
0 question about this device. Answer the ones you know or ask your own.
Ask a new question about this device
Download the instructions for your Air-conditioner in PDF format for free! Find your manual HWS116GAE - HAIER and take your electronic device back in hand. On this page are published all the documents necessary for the use of your device. HWS116GAE by HAIER.
USER MANUAL HWS116GAE HAIER
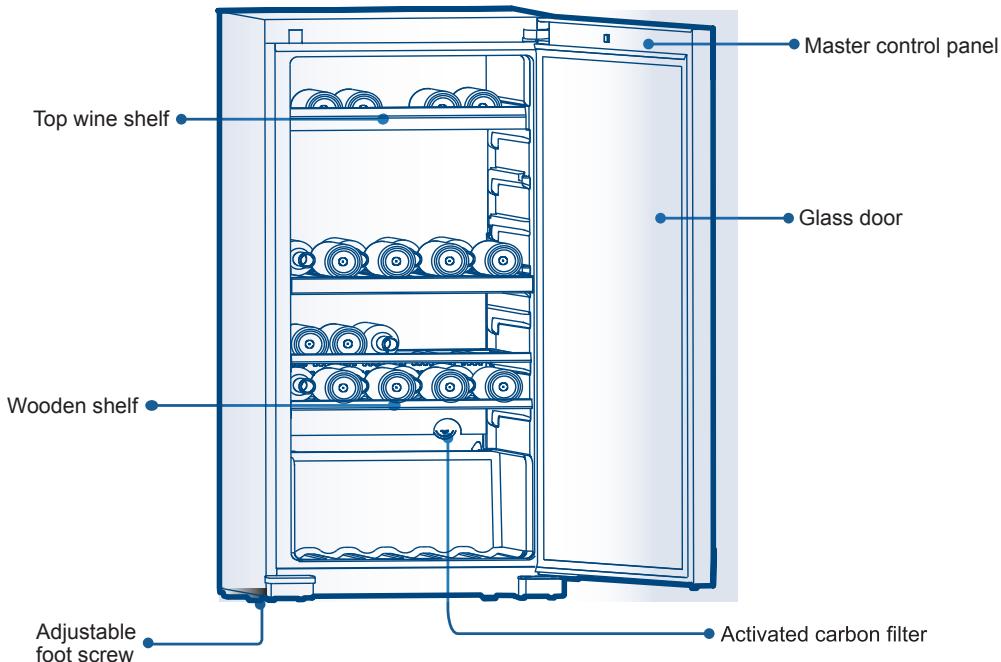
Names of Wine Cellar Components

WS105GA
(105 bottle capacity)
HWS116GAE
(116 bottle capacity)

WS171GA
(171 bottle capacity)
HWS188GAE
(188 bottle capacity)
Page
IMPORTANT SAFEGUARDS 4
Installing Your Wine Cellar 5
Unpacking Your Wine Cellar 5
Leveling Your Wine Cellar 5
Proper Air Circulation 5
Electrical Requirement 6
Install Limitations 6
Use of Extension Cord 6
Initial Setup 6
Introduction to Primary Functions of the Appliance 7
1.Temperature Adjustment 7
2. Interior Light 7
3. " ^ 口 F / ^ 口 C " Conversion 7
4.Door opening alarm 8
5.Temperature Power-Off Memory 8
6.Power 8
Precautions for Use of Wine Cellar 9
Automatic Defrosting 9
Shelving 10
Normal Operating Sounds You May Hear 10
Proper Wine Cellar Care and Cleaning 11
Troubleshooting 12
Technical Data 13
Packing List 13
This appliance is intended to be used exclusively for the storage of wine. When using this appliance, always exercise basic safety precautions, including the following:
- Read all of the instructions before using this appliance.
- Use this appliance only for its intended purpose as described in this use and care guide.
- This wine cellar must be properly installed in accordance with the installation instructions before it is used. See grounding instructions in the installation section.
-
It is intended strictly for household uses such as
-
staff kitchen areas in shops, offices and other working environments;
-
farm houses and by clients in hotels, motels and other residential type environments;
-
bed and breakfast type environments;
-
catering and similar non-retail applications.
-
This appliance can be used by children aged from 8 years and above and persons with reduced physical, sensory or mental capabilities or lack of experience and knowledge if they have been given supervision or instruction concerning use of the appliance in a safe way and understand the hazards involved. Children shall not play with the appliance.
- The appliance must be positioned so that the plug is accessible.
- If the supply cord is damaged, it must be replaced by the manufacturer, its service agent or similarly qualified persons in order to avoid a hazard.
- Keep ventilation openings, in the appliance enclosure or in the built-in structure, clear of obstruction.
- Do not use mechanical devices or other means to accelerate the defrosting process, other than those recommended by the manufacturer.
- Do not damage the refrigerant circuit.
- Do not use electrical appliances inside the food storage compartments of the appliance, unless they are of the type recommended by the manufacturer.
- If the light is damaged, it must be replaced by the manufacturer, its service agent or similarly qualified persons in order to avoid a hazard.
- This appliance is intended to be used exclusively for the storage of wine.
- Do not store explosive substances such as aerosol cans with a flammable propellant in this appliance.
- Risk of child entrapment. Before you throw away your old wine cellar, take off the doors. Leave the shelves in place so that children may not easily climb inside.
- Please contact the service agent to dispose the appliance because the flammable refrigerant and flammable blowing gas was used.
- Refrigerants are flammable, should be careful when you do the installation, handling, servicing.
Unpacking Your Wine Cellar
- Remove all packaging material. This includes the foam base and all adhesive tape holding the wine cellar accessories inside and outside.
- Inspect and remove any remains of packing, tape or printed materials before powering on the wine cellar.
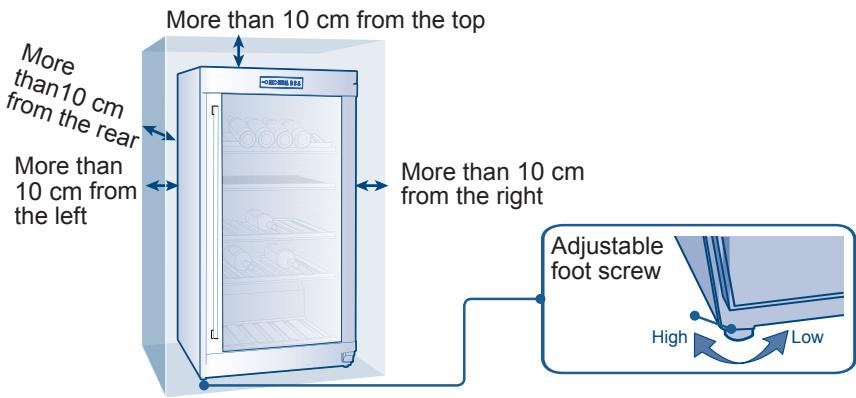
Leveling Your Wine Cellar
- Your wine cellar has four leveling legs which are located in the front and rear corners of your wine cellar. After properly placing your wine cellar in its final position, you can level your wine cellar.
- Leveling legs can be adjusted by turning them clockwise to raise your wine cellar or by turning them counterclockwise to lower your wine cellar. The wine cellar door will close easier when the leveling legs are extended.
Proper Air Circulation
- To assure your wine cellar works at the maximum efficiency it was designed for, you should install it in a location where there is proper air circulation, plumbing and electrical connections.
- The following are recommended clearances around the wine cellar:
Sides. 4" (100mm)
Top. 4" (100mm)
Back. 4" (100mm)
- Do not over fill your wine cellar for proper wine cooling.
Note: If your wine cellar has been tilted for any reason, wait 24 hours before plugging it in.
Electrical Requirement
- Make sure there is a suitable power Outlet (220-240V, 15 amps outlet) with proper grounding to power the wine cellar.
- An independent and exclusive standard outlet with reliable grounding shall be used for the wine cellar by matching its 3-pin plug including the grounding pin, which shall never be removed or disconnected with the grounding wire in any circumstances.
Install Limitations
- Do not install your wine cellar in any location not properly insulated or heated e.g. garage etc. Your wine cellar was not laid to operate if the ambient temperature is below 10^ .
- Select a suitable location for the wine cellar on a hard even surface away from direct sunlight or heat source e.g. radiators, baseboard heaters, cooking appliances etc. Any floor unevenness should be corrected with the leveling legs located on the front and rear bottom corners of the wine cellar.
- Your wine cellar is designed for free-standing installation only. It is not designed for built-in application.
Use of Extension Cord
- Avoid the use of an extension cord because of potential safety hazards under certain conditions. If it is necessary to use an extension cord, use only a 3-wire extension cord that has a plug with 2 round pins and 1 slot and an outlet with 2 slots and 1 round pin that will accept the plug. The marked rating of the extension cord must be equal to or greater than the electrical rating of the appliance.
Initial Setup
Once you have plugged the unit into an electrical outlet, let the unit run for at least 30 minutes to acclimate itself before making any adjustments. During this time, depending on the internal temperature, the red or white wine light will stay on for the upper compartment and red or white wine light will stay on for the lower compartment. The LED display will show the current internal temperature.
Control Panel
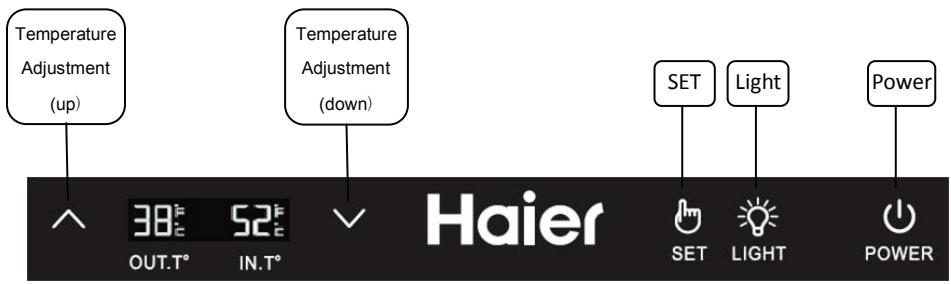
The temperature range of display panel is 5 20^ (41 68^)
The default setting temperature is 12^ (54°F).
You can set the temperature according to your wine storage requirements.
1. Temperature Adjustments
To set the temperature hold the button for about 3 seconds. Then the temperature display of IN.T° flashes. Press the or button to increase or decrease the temperature setting. Once the desired temperature is attained, press the button.
2. Interior Light
Compliment the look of your collection, a soft light has been built into the wine cellar. Simply push the button and the light comes on, push again for off. When door is open the light will go on. Upon closing the door, light will go off.
3. “°F/°C” Conversion
Press and hold for 3 seconds, the displayed temperature in Fahrenheit degree and ^ F character will convert to temperature in Celsius degree and "°C" character. Press and hold for 3 seconds again, the temperature in Celsius degree and "°C" character will convert to temperature in Fahrenheit degree and "°F" character.
4. Door opening alarm
In case the door is kept open for over 1 min, buzzer will be beeping to give an alarm till the door is closed or any key on display panel can be operated and then the buzzer will stop beeping.
5. Temperature Power-Off Memory
In case of a power outage, the cellar will automatically save the set temperature.
After power recovery, it will run based on the temperature set before the power outage while other functions will return to the default status.
6. Power
Holding the key for 3 seconds, the main power will turn off (power for all electrical devices inside will be cut off and the whole appliance will be in standby).
If the device is off, the power can be turned on by holding the key for 3 seconds, and then all icons on the display screen will turn on.
Precautions for Use of Wine Cellars
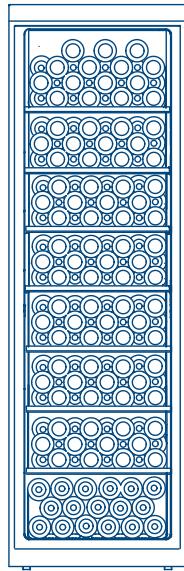
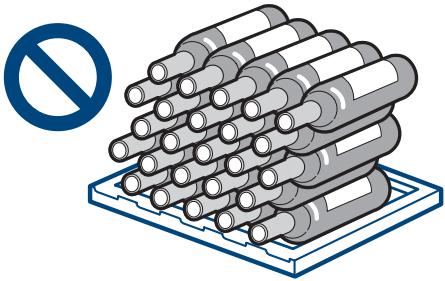
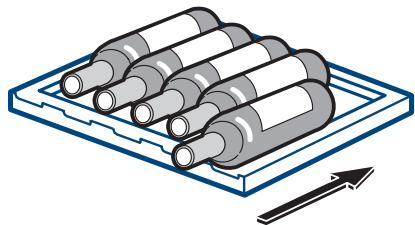
Do not place too much wine in the cellar so as not to exceed the bearing capacity of the wine shelves. Do not place more than three layers of wine on each shelf. The number of wine bottles should not exceed three layers on each shelf, and the bearing capacity of the wine shelves should not exceed 35kg.
Before placing the bottles inside the wine cellar, confirm whether or not the wine shelves are completely stable.
In addition, confirm whether or not any bottle protrudes from the shelves in order to prevent bottles hitting the glass door upon closing.
Automatic Defrosting
This appliance has an automatic defrosting function.
During use, ensure that the drainage hole is unblocked so
as to force defrosting water to flow smoothly through
the drainage hole into the water receiver inside the cellar cabin.
Regularly clean water tank at the bottom of the compartments; use a dry cloth to absorb water inside the water tank and wipe down them (clean them every three months as suggested).
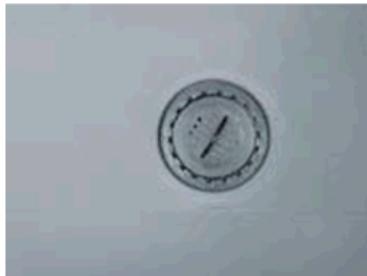
Air exchange with activated carbon filter
The way in which wines continue to mature depends on the ambient conditions. The quality of the air is therefore decisive for preserving the wine. An activated carbon filter has been fitted in the lower area of the rear wall of the appliance to ensure that the air through put remains at an optimum quality.

We recommend that you replace the filter once a year. Filters can be obtained from your dealer.
Changing the filter:
Take the filter by the handle. Turn it to the left and remove.
Inserting the filter:
Insert with the handle in a vertical position. Turn it to the right and insert.
Shelving
- The shelves are designed for appearance and easy cleaning. Larger bottles or Magnums can be more easily accommodated at the cross shelves at the bottom of the cellar.
- There are some shelves for easy storage and removal of your wine.
Normal Operating Sounds You May Hear
- Water flowing sound or slight vibrations that are the result of the refrigerant circulating through the cooling coils.
- The compressor will click when it cycles on and off.
Cleaning and Maintenance
Warning: To avoid electric shock always unplug your wine cellar before cleaning. Ignoring this warning may result in death or injury.
Caution: Before using cleaning products, always read and follow manufacturer's instructions and warnings to avoid personal injury or product damage.
General:
- Prepare a cleaning solution of 3-4 tablespoons of baking soda mixed with warm water. Use sponge or soft cloth, dampened with the cleaning solution, to wipe down your wine cellar.
- Rinse with clean warm water and dry with a soft cloth.
- Do not use harsh chemicals, abrasives, ammonia, chlorine bleach, concentrated detergents, solvents or metal scouring pads. SOME of these chemicals may dissolve, damage and/or discolor your wine cellar.
Door Gaskets: Clean door gaskets every three months. Gaskets must be kept clean and pliable to assure a proper seal. Petroleum jelly applied lightly on the hinge side of gaskets will keep the gasket pliable and assure a good seal.
Wine Shelf: If the wine shelf was accidentally sprinkled with wine or water droplets, please use 300-400 sandpaper to polish, then use soft cloth to wipe down the sawdust. Do not use towel or soft cloth with water.
Power Interruptions
- Occasionally there may be power interruptions due to thunderstorms or other causes. Remove the power cord from AC outlet when a power outage occurs. When power has been restored, replug power cord to AC outlet.
Vacation and Moving Care
- For long vacations or absences, unplug the wine cellar and clean the wine cellar and door gaskets. Leave doors open, so air can circulate inside.
- When moving always move the wine cellar vertically. Do not move with the unit lying down, as possible damage to the sealed system could occur.
Note: After moving, wait for 24 hours before plugging in the wine cellar.
Wine Cellar Does Not Operate:
- Check if wine cellar is plugged in.
- Check if there is power in the AC outlet, by checking the circuit breaker.
Wine appears too warm:
- Frequent door openings.
- Allow time for recently added wine to reach desired temperature.
- Check gaskets for proper seal.
- Please contact the service agent to clean condenser coils.
- Adjust temperature control to colder setting.
Wine temperature is too cold:
- If temperature control setting is too cold, adjust to a warmer setting.
Wine cellar runs too frequently:
- This may be normal to maintain constant temperature during high temperature and humid days.
- Doors may have been opened frequently or for an extended period of time.
- Please contact the service agent to clean condenser coils.
- Check gasket for proper seal.
- Check to see if doors are completely closed.
Moisture build up on interior or exterior of the wine cellar:
- This is normal during high humidity periods.
- Prolonged or frequent door openings.
- Check door gaskets for proper seal.
Wine cellar door does not shut properly:
- Level the wine cellar.
- Check for blockages e.g. wine bottles, shelves.
Do not dispose of electrical appliances as unsorted municipal waste, use separate collection facilities. Contact you local government for information regarding the collection systems available. If electrical appliances are disposed of in landfills or dumps, hazardous substances can leak into the groundwater and get into the food chain, damaging your health and well-being. When replacing old appliances with new ones, the retailer is legally obligated to take back your old appliance for disposals at least free of charge.
Technical Data
| Model | Climate Type | Electric Shock Resistance Type | Available Capacity (I) | Rated Voltage (V) | Rated Frequency (Hz) | Input Power (W) |
| WS105GA | SN-ST | I | 210 | 220-240 | 50 | 100 |
| WS171GA | SN-ST | I | 360 | 220-240 | 50 | 100 |
| HWS116GAE | SN-ST | I | 220 | 220-240 | 50 | 100 |
| HWS188GAE | SN-ST | I | 385 | 220-240 | 50 | 100 |
| Temperature Range (℃) | Refrigerant (R600a) (g) | Supply Cord Connection Mode | Weight (kg) | Noise (Acoustic Power Level) dB (A) | Overall Dimension (Depth × Width × Height) (mm) | |
| 5-20 | 45 | Y | 71 | 38 | 639×595×1,265 | |
| 5-20 | 75 | Y | 92 | 38 | 639×595×1,850 | |
| 5-20 | 45 | Y | 71 | 38 | 639×595×1,265 | |
| 5-20 | 75 | Y | 92 | 38 | 639×595×1,850 | |
Remarks:
1. According to international standards, if the climate is an SN-ST type, the ambient temperature for use of the wine cellar ranges between 10^ and 38^ .
2. "Noise (acoustic power level)" marked in the technical data refers to a situation in which the semi-anechoic room is set up as thick as specified according to national standards, in the case of an empty wine cellar, a resilient rubber cushion as thick as 5 mm to 6 mm is placed inside. It can run for at least 30 minutes after the door is closed. A test will be conducted after stable running (excluding startup and shutdown). Ground noise will be tested at 1 m from the front, rear, left and right surfaces of the wine cellar respectively.
During use, it is normal that the actual noise is different from the marked noise due to the effects of the type of wine stored in the wine cellar, ambient noise, door opening and closing, compressor startup and shutdown, etc.
Packing List
This appliance is being developed continuously. We reserve the right to change the components of the wine cellar without notice.
| Quantity Name Product Model | User Guide | Information Kit | Small Wooden Shelf | Wooden Shelf | Key |
| WS105GA | 1 | 1 | 1 | 3 | 2 |
| WS171GA | 1 | 1 | 1 | 5 | 2 |
| HWS116GAE | 1 | 1 | 0 | 4 | 2 |
| HWS188GAE | 1 | 1 | 0 | 7 | 2 |