USER MANUAL LBP223DW CANON
LBP228x / LBP226dw / LBP223dw
User Guide
Table of Contents
Important Safety Instructions 2
Installation 3
Power Supply 5
Handling 6
Maintenance and Checks 9
Consumables 10
Configuration 14
Main Functions 15
Preparations Before Using the Device 17
Preventing Unauthorized Access 18
Configuration Using the Setup Guide 20
Setting the Date and Time 22
Network environment configuration 24
Selecting a wired or wireless LAN 26
Connecting to a wired LAN 27
Connecting to a wireless LAN 28
Configuring the connection using WPS push button mode 30
Configuring the connection using WPS PIN code mode 32
Configuring the connection by selecting a wireless router 34
Configuring the connection by setting detailed settings 37
Checking the SSID and network key 40
Setting IP addresses 41
Setting IPv4 address 42
Setting IPv6 addresses 45
Displaying network settings 48
Configuring settings to communicate with a computer 51
Configuring print protocols and WSD functions 52
Printer Port Configuration 55
Print Server Configuration 58
Configuring the Device for Your Network Environment 61
Ethernet Settings Configuration 62
Changing the Maximum Transmission Unit 64
Setting a Waiting Time for Network Connection 65
DNS Configuration 66
SMB Protocol Configuration 70
WINS Server Configuration 72
Monitoring and Controlling the Device via SNMP 74
Other Network Settings 78
Installing the Drivers 82
Basic Operation 85
Parts and Their Functions 88
Front 89 Back 91 Inside 92 Bypass Tray 93 Paper Cassette 94 Control Panel 95
Turn the device on 99
Turn the device off 100
Turn the device off remotely 101 Scheduled shutdown 102
Restarting the device 104
Using the control panel 106
Basic screens 107
Home screen 108 Screen 111 Displaying messages 115
Basic operations 116 Entering text 121
Connecting to the device 125
Loading paper 126
Loading paper into the paper cassette 128 Loading paper into the multi-purpose tray 134 Loading envelopes 137 Loading letterhead paper 139
Specifying the paper size and type 144
Specifying the paper size and type in the paper cassette 145 Setting the paper size and type in the multi-purpose tray 147 Saving default paper settings for the multi-purpose tray 149 Saving a custom paper size 152 Limiting the displayed paper sizes 154 Automatically selecting the appropriate paper feed for each function 155
Customizing the display 157
Customizing the Home screen 158
Changing the default settings for functions 160
Setting the audible signals 161
Activating the sleep mode 162
Using a USB memory device 164
Printing 167
Printing from a computer 168
Canceling print jobs 170 Checking the print status and log 173
The different printing methods 175
Printing a document secured by a PIN code (Secure Print) 176 Printing via the secure print function 177
Printing from a USB memory device (memory media print) 181
Receiving I-Fax for printing 189
Connecting to mobile devices 193
Connecting to mobile devices 194
Connecting via a wireless LAN router (network connection) 195 Direct connection (access point mode) 197
Using the machine from applications 201
Using the AirPrint service 203
Printing with AirPrint 208 If you cannot use AirPrint 211
Using Google Cloud Print 212
Managing the device by remote command 215
Managing the device 217
Configuring access rights 219
Specifying the PIN code and system administrator ID 220 Configuring the service number management mode 222 Configuring a PIN code for the remote user interface 228
Configuring network security settings 230
Restricting communications using firewalls 232 Specifying IP addresses for firewall settings 233 Specifying MAC addresses for firewall settings 236
Changing port numbers 239
Setting a proxy 241 Configuring the key with certificate used for TLS 243
Generating the key with certificate used for network communications 246 Generating a key and a certificate signing request (CSR) 249 Registering the key with certificate used for network communications 253
Configuring IPSec settings 255
Configuring IEEE 802.1X authentication 262
Restricting device functions 266
Restricting printing from a computer 268 Restricting USB functions 269 Disabling HTTP communication 271 Disabling the remote user interface 272 Restricting the use of the control panel 273
Managing the device from a computer (remote user interface) 274
Starting the remote user interface 275 Checking the status and log 278 Configuring the menu options of the remote user interface 284 Security policy 287 Importing/Exporting setting data 293
Updating the firmware 296
Resetting the settings 299
302
303
304 310 311 317 338 339 342
344
345 353
354
355 359 388 390 394
395
396 398 / 402 404 406
Maintenance 410
Regular cleaning 412
Cleaning the exterior 413 Cleaning the mounting assembly 414
Replacing the toner cartridge 415
Checking the remaining amount of consumables 421 Moving the device 422
Adjusting the image quality 424
Adjusting the print density 425 Adjusting the print position 426
Displaying the counter value 428
Printing reports and lists 429
Consumables 434
Troubleshooting (FAQ) 437
Appendix 439
Software part 441
Description of functions 442
Environmental footprint and cost control 443 Productivity gains 444 New perspectives 446
Characteristics 448
Main Unit 449 Paper Available 451 Cassette-AH Module 454 Printer Commands 455 Management Functions 458 System Environment 460 Network Environment 461
Optional Equipment 462
Optional Equipment 463 System Options 464
Manuals and Their Contents 466
With User's Guide 467
Structure of User's Guide Screens 468 Displaying the User's Guide 471
Basic Operation under Windows 473
Notices 480
Important Safety Instructions
Important Safety Instructions 2
Installation 3 Power Supply 5 Handling 6 Maintenance and Inspections 9 Consumables 10
Important Safety Instructions
5YHU-000
The content described in this chapter is intended to prevent damage to property and bodily injury to users of the device or other persons. Before using this device, read this chapter carefully and follow the operating instructions for the device. Do not perform any operation not described in this manual. Canon shall not be held responsible for any damage resulting from use not described in this manual, incorrect use, or any repair/modification not performed by Canon or by a third party authorized by Canon.
Installation (P. 3) Power Supply (P. 5) Handling (P. 6) Maintenance and Inspections (P. 9) Consumables (P. 10)
For optimal performance and safe use, carefully read the following precautions and install the device in an appropriate location.

WARNING
Do not install the device in a location that could cause fire or electric shock.
- Avoid locations with restricted ventilation (near walls, beds, carpets, or similar objects), humid or dusty places.
- Locations exposed to direct sunlight or outdoors.
- Locations exposed to high temperatures.
- Locations exposed to open flames.
- Locations near sources of alcohol, solvents, or other flammable substances.
Other warnings
- Do not connect unapproved cables to this device, as this may cause fire or electric shock.
- Do not place collars, other metal objects, or containers with liquid on the device. If foreign substances come into contact with the internal electrical components, it could cause a risk of fire or electric shock.
- Do not use this product near medical equipment. The radio waves it emits may interfere with such equipment, which can cause malfunctions and accidents. When installing or removing optional accessories, be sure to turn off the device, unplug the power cord, and disconnect all interface cables and the power cord from the device. Otherwise, this may damage the interface cables or power cord and cause fire or electric shock. If foreign objects fall into this device, unplug the power cord from the outlet and contact your Canon dealer or authorized service representative.

CAUTION
The following locations are prohibited for installation:
The device may slip or fall and cause injury.
- Unstable location
- Location exposed to vibrations

WARNING
Other precautions
When transporting this device, follow the instructions in this document. Incorrect handling may cause it to fall and result in injury. When installing this device, be careful not to pinch your hands between the device and the floor or walls. You could injure yourself.
Poorly ventilated location
- This device emits a small amount of ozone and other gases during normal operation. These emissions are not hazardous to health. You may occasionally notice the presence of ozone or other gases during prolonged use or long production cycles, especially in a poorly ventilated room. It is recommended to provide adequate ventilation for the room where the device is located in order to maintain a comfortable working environment. Also avoid locations where people would be exposed to the device's emissions.
IMPORTANT
Do not install the device in the following locations, as this may cause property damage
- Location exposed to significant temperature or humidity variations
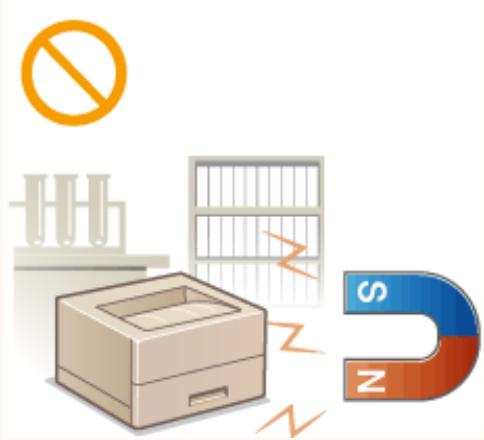
- Location near devices that generate magnetic or electromagnetic waves, laboratory or place where chemical reactions occur, location exposed to corrosive or toxic gases
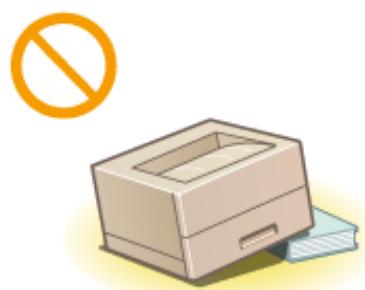
- Surface that may bend under the weight of the device, or surface into which the device may sink (carpet, etc.).
Do not install the device in a location subject to heavy condensation
Water droplets (condensation) may form inside the device when the temperature of the room where it is located rises rapidly, and when it is moved from a cool or dry room to a warm or humid room. Using the device under such conditions may cause paper jams or poor print quality, or even damage to the device. Allow the device to adapt to the ambient temperature and humidity level for at least 2 hours before using it.
At altitudes of 3,000 m above sea level or higher
- It is possible that devices equipped with a hard disk may not function properly when used at high altitudes, i.e., approximately 3000 meters above sea level.

WARNING
- Use only a power supply whose voltage matches that indicated. Otherwise, you risk causing a fire or electric shock. The device must be connected to a grounded power outlet using the supplied power cord. Use only the supplied power cord to avoid any risk of fire or electric shock. The supplied power cord is intended for use with this machine. Do not connect it to another device.
- Do not modify, pull, bend excessively, or alter the power cord in any way. Also, be careful not to place heavy objects on the power cord. This could cause electrical damage and result in a fire or electric shock.
- Do not plug/unplug the power cord with wet hands as you risk electric shock.
- Do not use extension cords or power strips with the device. This could cause a fire or electric shock.
- Do not coil the power cord or tie it in a knot, as this may cause fires or electric shocks.
- Insert the power plug fully into the wall outlet. If you do not, it may cause a risk of fire or electric shock.
- Unplug the power cord from the wall outlet during thunderstorms. Lightning can cause a fire, electric shock, or malfunction of the device.

CAUTION
- Install this machine near a wall outlet and leave sufficient clearance around the outlet so that the machine can be easily unplugged in case of emergency.
IMPORTANT
When connecting the power
- Do not connect the device to an uninterruptible power supply (UPS). You risk causing a malfunction or damaging the device in the event of a power failure.
- If you connect the device to a power strip with multiple outlets, do not connect any other equipment to the other outlets. Do not plug the power cord into the auxiliary outlet of a computer.
Other precautions
- Electrical interference may cause the device to malfunction or result in data loss.

WARNING
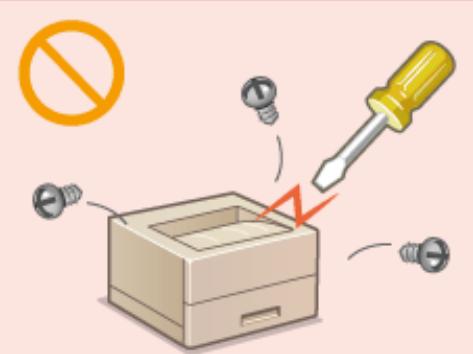
- Unplug the power cord from the wall outlet and contact an authorized Canon dealer if the device emits abnormal noise, smoke, heat, or an unusual odor. Continuing to use the device may result in fire or electric shock. Never disassemble or modify the device. It contains high-voltage and high-temperature components that may cause fire or electric shock.
- Place the device where children cannot come into contact with the power cord, other cables, or internal and electrical parts. Failure to do so may lead to unexpected accidents.
- Do not spray flammable substances near the device. If such substances come into contact with the internal electrical components, it may cause fire or electric shock. When moving the device, be sure to turn off the device and the computer, and unplug the power cord and interface cables. Failure to do so may damage the power cord and cables, which could result in fire or electric shock. When connecting or disconnecting a USB cable while the power cord is plugged into a wall outlet, do not touch the metal part of the connector, as you may receive an electric shock.
If you have a pacemaker
This device emits a weak magnetic field and ultrasonic waves. If you have a pacemaker and notice any abnormality, move away from the device and consult your doctor immediately.

CAUTION
- Do not place heavy objects on the device, as they may fall and cause injury. For safety, unplug the power cord if you do not plan to use the device for an extended period.
- Be careful when opening and closing the covers to avoid injuring your hands.
- Keep your hands or clothing away from the roller in the output area. A sudden rotation of the roller may catch your hands or clothing and cause personal injury. The inside of the device and the output slot may become very hot during and immediately after use. Avoid contact with these areas to prevent burns. Printed paper may also be very hot when it comes out of the printer. Be careful when handling it. Otherwise, you may burn yourself.

CAUTION
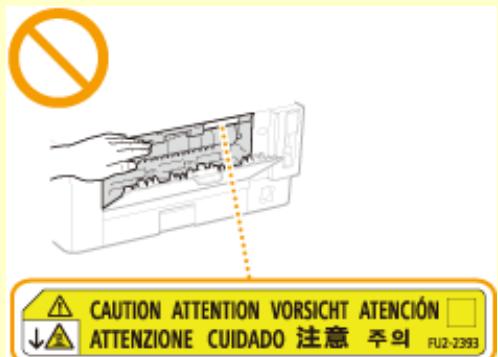
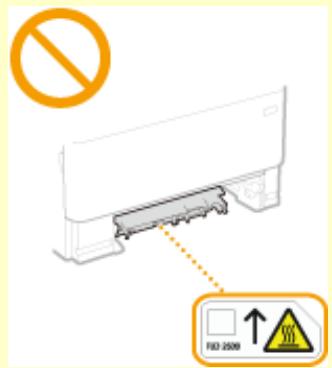
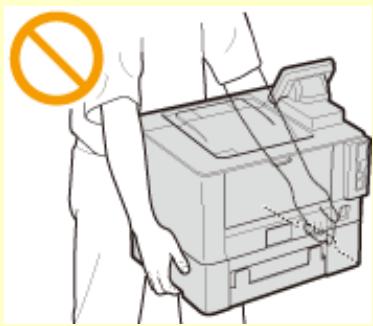
- Do not carry the device with the paper cassette or the optional one-cassette module installed, as these modules may fall and cause injury.
Laser radiation
If the laser beam escapes from the device and your eyes are exposed to it, the radiation can cause eye damage.
IMPORTANT
When transporting the device
To avoid damaging the device during transport, proceed as follows.
- Remove the toner cartridge.
- Carefully pack the device in its original box with all packaging materials.
If the noise generated during operation bothers you
- Depending on the conditions of use and the operating mode, it is recommended to install the device in another room if the noise bothers you.
Other precautions
Follow the usage precautions indicated on the labels attached to the device. Avoid shaking the device or subjecting it to shock. - Do not force open or close the doors, covers, or other parts, as this may damage the device. - Do not touch the contacts (a) located inside the device. You risk damaging the device.
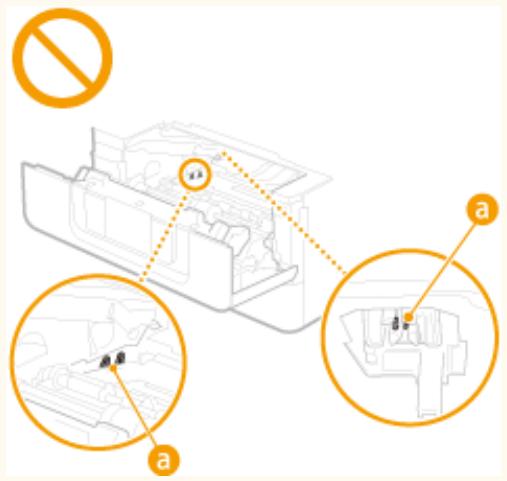
To avoid paper jams, avoid turning off the device, opening or closing the covers, and loading or unloading paper during printing.
Clean the device regularly. If dust accumulates, the device will not function properly. Follow the cleaning instructions below. If problems occur, refer to the Troubleshooting section.

WARNING
- Before any cleaning operation, turn off the power and unplug the power cord from the outlet. Failure to do so may result in a risk of fire or electric shock.
- Regularly unplug the power cord and remove dust and dirt with a dry cloth. Accumulated dust deposits can absorb moisture and eventually cause a fire if they come into contact with electricity.
- Use a damp, well-wrung cloth to clean the device. Moisten the cloth with water only. Do not use any flammable substances such as alcohol, benzene, or paint thinner. Do not use paper towels or tissue paper. If such substances come into contact with the internal electrical components of the device, it may cause fire or electric shock.
- Check the condition of the power cord and plug from time to time. Look for any signs of rust, snags, cracks, or excessive heat generation. If you continue to use the device when it is poorly maintained, it may lead to a risk of fire or electric shock.

CAUTION
The inside of the device contains high-voltage and high-temperature components. Any contact with these components may cause burns. Do not touch any part of the device unless indicated in the manual. When loading paper or clearing a paper jam, be careful not to cut your hands on the edges of the paper.
IMPORTANT
When removing jammed paper or replacing toner cartridges, for example, be careful not to stain your hands or clothing with ink. If you get ink on your hands or clothing, wash them immediately with cold water.

WARNING
- Do not throw used toner cartridges or any materials containing toner into fire. Do not store toner cartridges or paper in a place exposed directly to an open flame. The ink may ignite and cause burns or a fire.
- In case of accidental toner spillage, carefully gather the toner particles or remove them with a soft damp cloth to avoid inhalation. Never use a vacuum cleaner not equipped with a dust explosion protection device to clean up spilled toner. This may cause the vacuum cleaner to malfunction or a dust explosion due to electrostatic discharge.
If you wear a pacemaker
The toner cartridge emits a weak magnetic field. If you wear a pacemaker and notice any abnormality, move away from the toner cartridge and consult your doctor immediately.

CAUTION
Be careful not to inhale toner. If inhaled, consult a doctor immediately. - Be careful not to get toner splashes in your eyes or mouth. If contact occurs with eyes or mouth, rinse immediately with cold water and consult a doctor. - Be careful not to get toner splashes on your skin. If this happens, rinse immediately with cold water and soap. If skin irritation occurs, consult a doctor immediately. - Keep toner cartridges and other consumables out of the reach of young children. If toner is ingested, consult a doctor immediately or contact the poison control center. - Do not disassemble or modify the toner cartridge or any other important toner parts, as this may cause toner splashes. To remove the adhesive tape from the toner cartridge, pull it to remove it completely without applying excessive force. You may cause toner splashes.
IMPORTANT
Handling the toner cartridge
- Be sure to hold the toner cartridge by the handle.
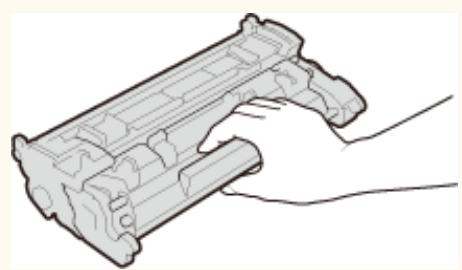
- Do not touch the toner cartridge memory (a) or the electrical contacts (b). To avoid scratching the drum surface or exposing it to light, avoid opening the drum protective cover (c).
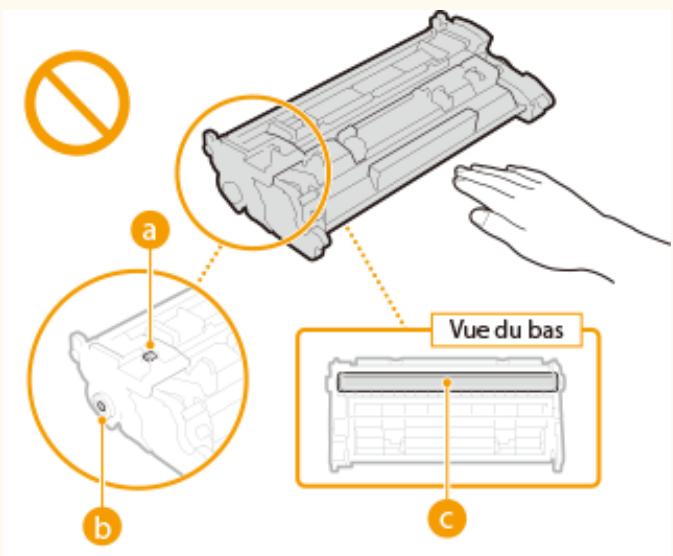
Do not remove the toner cartridge from this device or its protective packaging without reason. The toner cartridge is a magnetic product. Do not place it near products susceptible to magnetism, including floppy disks or disk drives. This could damage data.
Storing the toner cartridge
- Store the cartridge under the following ambient conditions to ensure safe and satisfactory use.
Storage temperature range: 0 °C to 35 °C
Storage humidity range: 35 to 85% relative humidity (without condensation)*
- Keep the cartridge in its packaging until you are ready to use it. When you remove the toner cartridge from the device for storage, place it in its original packaging. When storing the toner cartridge, do not place it vertically or upside down. The toner will solidify and will not return to its original state even if shaken.
- Even when you respect the storage humidity range, water droplets (condensation) can form inside the toner cartridges if there are significant temperature variations between the inside and outside of the cartridge. Condensation impairs the print quality of toner cartridges.
The following locations are prohibited for storing toner cartridges:
- Places exposed to open flames
- Places exposed to direct sunlight or intense light for more than five minutes or more. Places exposed to excessively dirty air.
- Places subject to emissions of corrosive gases (aerosols and ammonia). Places that are particularly hot and humid.
- Places subject to strong temperature and humidity variations that may generate condensation. Very dusty places. Places within reach of children.
Toner cartridges: beware of counterfeits
- There are counterfeit Canon toner cartridges on the market. Their use may affect print quality and machine performance. Canon cannot be held responsible for any malfunction, accident, or damage caused by the use of counterfeits. For more information, visit global.canon/ctc.
Availability period for spare parts and ink cartridges
- Spare parts and ink cartridges compatible with this device will remain available for at least seven (7) years after the end of marketing of this model.
Packaging materials for toner cartridges
- Keep the toner cartridge packaging materials; you will need them if you have to transport the device.
- Packaging materials may change in shape or location (or we may add or remove them) without prior notice.
- After removing the sealing tape from the toner cartridge, dispose of it in accordance with local regulations.
Disposal of used toner cartridges
To dispose of a toner cartridge, place it in its original packaging to prevent toner leakage, and dispose of it in accordance with local regulations.
Configuration
Configuration 14
Main functions 15
Preparations before using the device 17
Preventing unauthorized access 18
Configuration using the setup guide 20
Setting the date and time 22
Configuring the network environment 24
Selecting a wireless or wired LAN 26
Connecting to a wired LAN 27
Connecting to a wireless LAN 28
Configuring the connection using WPS push button mode 30
Configuring the connection using WPS PIN code mode 32
Configuring the connection by selecting a wireless router 34
Configuring the connection by defining detailed settings 37
Checking the SSD and network key 40
Setting IP addresses 41
Setting IPv4 address 42
Setting IPv6 addresses 45
Displaying network settings 48
Configuring settings to communicate with a computer 51
Configuring print protocols and WSD functions 52
Configuring printer ports 55
Configuring the print server 58
Configuring the device according to your network environment 61
Configuring Ethernet settings 62
Changing the maximum transmission unit 64
Setting a wait time for connecting to a network 65
DNS Configuration 66
SMB Protocol Configuration 70
WINS Server Configuration 72
Monitoring and Controlling the Device via SNMP 74
Other Network Settings 78
Driver Installation 82
Before you can use the functions of the device, you must define the conditions under which the device will be used. To begin, familiarize yourself with the various steps necessary for system configuration, then make the necessary settings. Preparations to make before using the device (P. 17)
NOTE
- The functions available on the device vary from model to model. Before using the device, consult Main Functions (P. 15) to see which functions are available on the model you purchased.
Configuring the Initial Settings of the Device (Configuration Guide)
- You can easily configure the necessary initial settings for using the device, such as the date, time, and network settings, by following the instructions on the screen. Configuration using the configuration guide (P. 20)
Main Functions
5YHU-007
This manual covers all functions of all models in the series. Before starting, check which functions are available on the model you purchased.

:With function :Without function
| Fonction | LBP228x | LBP226dw | LBP223dw |
| Impression | ✓ | ✓ | ✓ |
| Impression recto versuso | ✓ | ✓ | ✓ |
| Impression sécurisée | ✓ | ✓ | — |
| Impression support mémoire | ✓ | — | — |
| Connexion au réseau filaire | ✓ | ✓ | ✓ |
| Connexion au réseau sans fil | ✓ | ✓ | ✓ |
| Connexion USB | ✓ | ✓ | ✓ |
| Interface utilisateur distante | ✓ | ✓ | ✓ |
| Clés et certificates | ✓ | ✓ | ✓ |
| Connexion à des terminaux mobiles | ✓ | ✓ | ✓ |
| Affichage | Écran tactile | LCD noir et blanc | LCD noir et blanc |
| ID d'administrateur système par défaut | 7654321 | Non précisé | Non précisé |
| Code PIN d'administrateur système par défaut | 7654321 | Non précisé | Non précisé |
| Gestion des numéroes de service | ✓ | ✓ | ✓ |
| Application Library (Bibliothèque d'applications) | ✓ | — | — |
| Module Une Cassette-AH | En option | En option | En option |
| Kit d'impression de code à barre | En option | — | — |
NOTE
- For available driver types, refer to the CD-ROM/DVD-ROM User Software provided with the device or the Canon website (https://global.canon/).
- Because the instructions may not always be displayed in the same way on the two displays that equip the models, the display corresponding to the instructions described in the User's Guide is indicated by the mention "touch screen model" or "black and white LCD model".
- In most cases, when the instructions are the same for both models, the screens used to illustrate the instructions in the guide are those displayed on the touch screen. The screens displayed on the black and white LCD model are different from those of the touch screen model. In both cases, follow the instructions displayed on your model to perform the operations.
LINKS
Displaying the User's Guide (P. 471)
Preparations to make before using the machine
Follow steps 1 to 3 in order to set up the device. For more information on a given step, click the link to access the corresponding section. To use the device safely, also refer to the section Preventing Unauthorized Access (P. 18).
Step 1
Configuration using the Setup Guide (P. 20)

Step 2
Configuring the network environment (P. 24)
- Configure the network settings not covered in the configuration guide. If you do not need to use the configuration guide, make the network settings from here.

Step 3
Installing the Drivers (P. 82)
TIPS
Configuring from the Remote User Interface
- Once the network settings are complete, you can configure the device from a computer using the Remote User Interface. Starting the Remote User Interface (P. 275)
Importing Data from Another Device to Save Time
- If the devices are the same model, you can save the setting data recorded on another Canon multifunction device/printer to a computer (export) and load it onto this device (import). Importing/Exporting Setting Data (P. 293)
Preventing Unauthorized Access
5YHU-009
This section describes security measures to prevent unauthorized access from an external network. All users and administrators should read this before using the device, other printers, and multifunction devices connected to the network. In recent years, a printer/multifunction device connected to the network can offer a wide range of useful functions, such as printing from a computer, controlling the printer from a computer using the remote function, and sending scanned documents over the Internet. On the other hand, it is essential to take security measures to reduce the risk of information leakage, as a printer/multifunction device has become more exposed to threats such as unauthorized access and theft when connected to the network. This section describes the necessary settings that you must perform to prevent unauthorized access before using the printer/multifunction device connected to the network.
Security Measures to Prevent Unauthorized Access from the External Network
1. Assigning a Private IP Address (P. 18) 2. Using a Firewall to Restrict Transmissions (P. 19) 3. Specifying TLS Encrypted Communications (P. 19) 4. Configuring a PIN Code to Manage Information Stored on the Multifunction Device (P. 19)
Assigning a Private IP Address
An IP address is a numerical label assigned to each device that is part of a computer network. A "global IP address" is used for communication by connecting to the Internet, and a "private IP address" is used for communication within a local network, such as a LAN, in a company. If a global IP address is assigned to your printer/multifunction device, it is open to the public and can be accessed via the Internet. Therefore, the risk of information leakage due to unauthorized access from an external network increases. On the other hand, if a private IP address is assigned, your printer/multifunction device is confined to the local network and can only be accessed by users on their local network, such as a company LAN.
Global IP address: Can be accessed from an external network.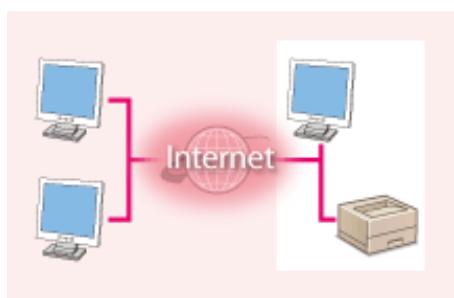
Private IP address: Can be accessed by users on a local network.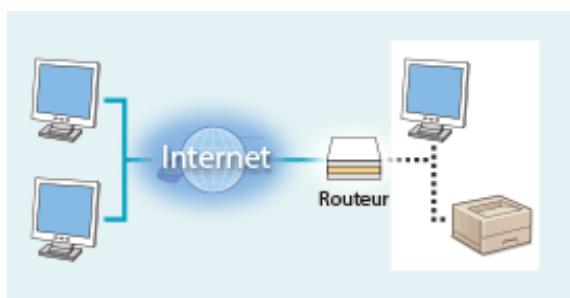
In general, assign a private IP address to your printer/multifunction device. Make sure to check whether the IP address assigned to the printer/multifunction device you are using is a private IP address or not. A private IP address falls within one of the following ranges.
■ Private IP address ranges
From 10.0.0.0 to 10.255.255.255, from 172.16.0.0 to 172.31.255.255, from 192.168.0.0 to 192.168.255.255
For more information on how to check the IP address, refer to "IPv4 Address Settings" (P. 42).
NOTE
If a global IP address is assigned to a printer/multifunction device, you can create a network environment aimed at reducing the risk of unauthorized access by installing security software, such as
a firewall, which prevents access from external networks. If you wish to assign a global IP address to a printer/multifunction device and use it, contact your network administrator.
Using a firewall to restrict transmissions
A firewall is a system that prevents unauthorized access from external networks and protects against attacks/intrusions on a local network. You can use a firewall in your network environment to block access from an external network that is considered dangerous by restricting communications from the specific IP address of an external network. The function installed on a Canon printer/multifunction device allows you to define IP address filtering. For more information on how to configure IP address filtering, refer to "Specifying IP Addresses for Firewall Settings" (P. 233).
Specifying encrypted TLS communications
For more information on encrypted TLS communications, refer to the section Configuring Network Security Settings (P. 230), and for specific procedures, refer to the section Configuring the Key with Certificate Used for TLS (P. 243).
If a malicious third party attempts to access a printer/multifunction device, configuring a PIN for the information stored in the device can help reduce the risk of information leakage. Canon printers/multifunction devices allow you to protect various types of information by configuring a PIN.
■Configuring a PIN for Each Function
- Configuring a PIN for Using the Remote UI
For more information, refer to the section Configuring a PIN for the Remote UI (P. 228).
- Configuring a PIN for System Administrator Settings
For more information, refer to the section Specifying the PIN and System Administrator ID (P. 220).
The above are some examples of security measures to prevent unauthorized access. For more information on other security measures, refer to the section Managing the Device (P. 217) and take the necessary security measures to prevent unauthorized access to your environment.
Configuration Using the Setup Guide
5YHU-00A
When the device is turned on (Turning the Device On (P. 99)) for the first time, the setup guide appears to help you configure the initial settings of the device through on-screen instructions. In the setup guide, the configuration screens appear in the following order.
Step 1 Selecting the Display Language and Country or Region
Select the language to use on the control panel and in reports, as well as the country or region where the device will be used.
1 Select a language. 2 For the touch screen model, select . 3 Select a country or region.
Step 2 Setting the Date and Time
Set the date and time of the device.
1 Select a time zone.
NOTE:
What is UTC?
Coordinated Universal Time (UTC) is the primary time standard by which the world regulates clocks and time. It is important to set your time zone correctly for proper transfer of your Internet communications.
2 Enter the date and time, then press (OK).
Touch screen model
- Tap the input field and enter the date and time.
Black and white LCD model
Use or to move the cursor, and enter the date and time using the numeric keys.
Step 3 Configuring Access Security Measures
Set a PIN code to access the remote user interface. Since the remote user interface can be used to modify device settings from a computer, it is recommended to set a PIN code.
1 Select .
- If you select , no PIN code is set, and the setup guide proceeds to step 4.
- You can also configure the security measure for accessing the remote user interface later. ©Setting a PIN for the Remote User Interface (P. 228)
2 Enter a PIN, then press (OK).
3 Enter the same PIN again, then press (OK).
Step 4 Wireless LAN Settings
Make the necessary settings to connect the machine to the wireless LAN.
1 Select . - If you select , the wireless LAN is not configured, and the setup guide proceeds to step 5. 2 Select . 3 Select the configuration mode. For more information on wireless LAN settings, see the section ©Connecting to a Wireless LAN (P. 28).
Step 5 Displaying Application Library
The Application Library button is located on the Home screen. You can view the description of each button's function.
1 To finish the setup guide, select .
Once the setup guide is finished, the Home screen is displayed.
Setting the Date and Time
Set the date and time of the machine. The date and time serve as the reference for functions that indicate the time, so it is very important to set them accurately.
Selecting the time zone (P. 22) Setting the current date and time (P. 22) Setting the daylight saving time (P. 23)
Selecting the time zone
If you change the time zone, the values defined for are also modified accordingly.
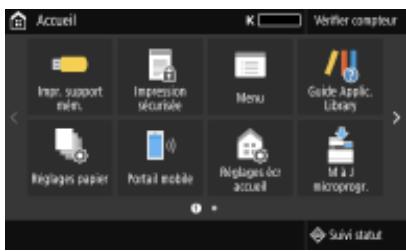
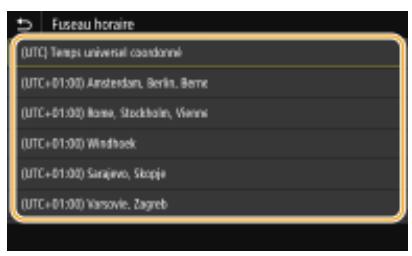
1 Select in the Home screen. Home Screen (P. 108) 2 Select . 3 Select the time zone.
NOTE
What is UTC?
Coordinated Universal Time (UTC) is the primary time standard used worldwide to set clocks and time. Time offsets exist depending on the country or region where the device is used. You should set your time zone correctly for proper transfer of your Internet communications.
Setting the current date and time
1 Select in the Home screen. Home Screen (P. 108) 2 Select > > .
3 Enter the date and time.
Touch screen model
- Touch the input field and enter the date and time.
Black and white LCD model
Use or to move the cursor, and enter the date and time with the numeric keys.
4 Press (OK).
IMPORTANT
- Select this before setting the current date and time. If you change it later, the date and time will also be adjusted accordingly.
NOTE
- You can change the display format of the date and time.
(P. 312) (P. 313)
Setting Daylight Saving Time
If you enable the daylight saving time function, specify the start and end dates for daylight saving time.
1 Select on the Home screen. Home Screen (P. 108) 2 Select . 3 Select or in .
If you select , select and , and specify the month and day for each option. To set the day, specify "which day of which week". 4 Select .
Configuring the Network Environment
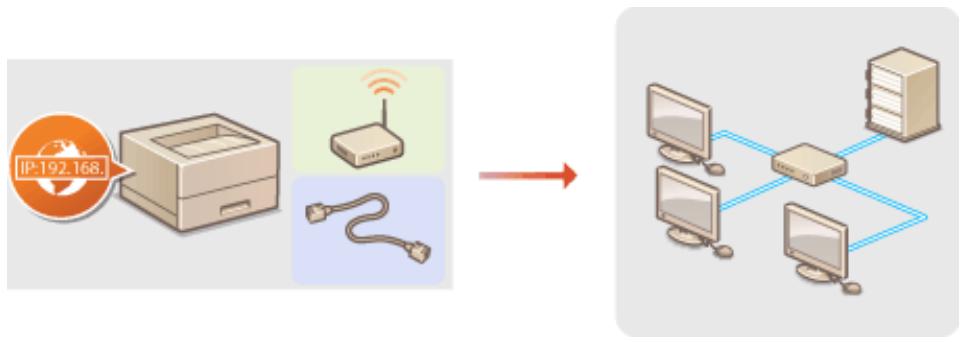
When you connect the machine to a wired or wireless local area network, you must assign a unique IP address to the selected network. Select "wired" or "wireless" according to your communication environment and network peripherals. For IP address settings, contact your Internet service provider or network administrator.
IMPORTANT
If the machine is connected to an unsecured network, there is a risk of your personal information being leaked to third parties.
NOTE
The device cannot connect to both wired and wireless local networks simultaneously. The device is shipped without a network cable or router. Obtain these items if necessary. For more information on network peripherals, refer to the manuals provided with the peripherals or contact the manufacturer concerned.
Before You Start
Follow these steps to connect the device to a network.
Check the computer settings.
Make sure the computer is properly connected to the network. For more information, refer to the manuals for the peripherals you are using or contact the manufacturers concerned. Make sure the network settings are configured on the computer. If the network has not been configured correctly, you will not be able to use the device on the network, even if you have completed the rest of the procedure below.
NOTE:
- Depending on the network used, you may need to change the communication mode and Ethernet type settings (see "Configuring Ethernet Settings" (P. 62)). For more information, contact your Internet service provider or network administrator. To check the device's MAC address, see "Displaying the MAC Address for Wired LAN" (P. 48).
See "Displaying the MAC Address and Information for Wireless LAN" (P. 49). To connect to an IEEE 802.1X network, refer to "Configuring IEEE 802.1X Authentication" (P. 262).
Select a wireless or wired local network.
See "Selecting a Wireless or Wired Local Network" (P. 26).
Connect the device to a wireless or wired local network.
- Go to the section that corresponds to the setting you need in step 2.
See "Connecting to a Wired Local Network" (P. 27) or "Connecting to a Wireless Local Network" (P. 28).
Set the IP address as appropriate.
At the time of purchase, the device is configured to automatically obtain an IP address. Change this setting if you want to use a specific IP address. See "Setting IP Addresses" (P. 41).
LINKS
● Configuration of settings for communicating with a computer (p. 51) ● Configuration of the device according to your network environment (p. 61)
Selecting a wireless or wired LAN
5YHU-00F
To connect the device to a computer via a wireless or wired connection, select the wireless or wired connection using the control panel. Note that if you switch from one to the other, you must uninstall the drivers from your computer and then reinstall them. For more information, refer to the driver manuals available on the Online Manuals website.
1 Select on the Home screen. Home Screen (p. 108) 2 Select > .
If the login screen appears, enter the correct ID and PIN. ▸ Logging in to the Device (p. 125)
3 Select . 4 Select or .
LINKS
● Configuring the network environment (p. 24) ● Connecting to a wired LAN (p. 27) ● Connecting to a wireless LAN (p. 28)
Connecting to a wired LAN
5YHU-00H
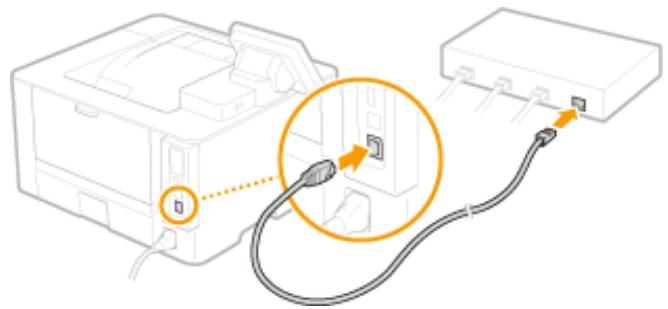
Connect the device to a computer via a router. Use a network cable to connect the device and the router.
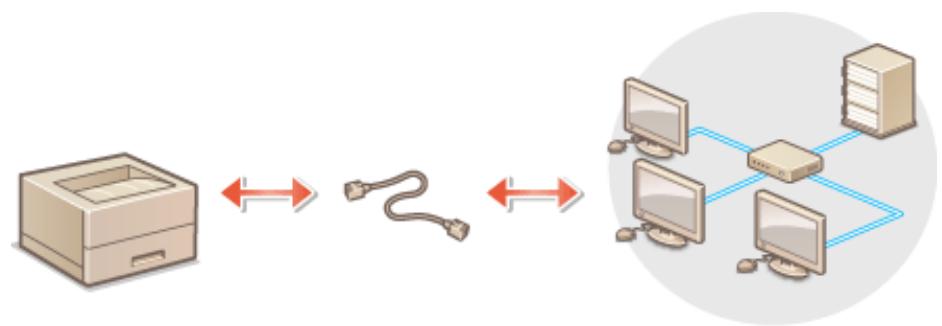
1 Connect a network cable.
Connect the device to a router using a network cable. Push the connector in firmly until it clicks.
Wait a few minutes.
The IP address is set automatically.
NOTE:
- You can set the IP address yourself. © Setting IP addresses (P. 41)
LINKS
○ Configuring the network environment (P. 24)
Connecting to a wireless LAN
5YHU-00J
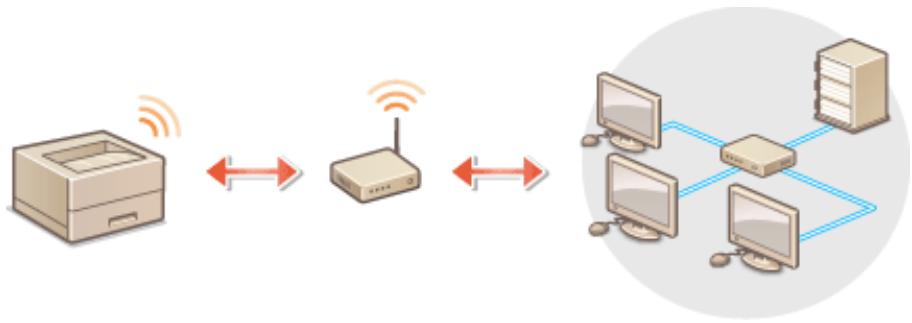
Wireless routers (or access points) connect the device and the computer using radio waves. If your wireless router is equipped with the WPS (Wi-Fi Protected Setup) function, configuring your network is simple and automatic. If your network devices do not support automatic configuration, or if you want to specify authentication and encryption settings in detail, you must configure the connection manually. Make sure the computer is properly connected to the network.
○ Configuring the WPS connection (P. 28) ○ Configuring the connection manually (P. 29)
IMPORTANT
- You use the wireless connection at your own discretion and risk. If the device is connected to an unsecured network, leakage of your personal information to a third party cannot be ruled out. Indeed, the radio waves used by wireless communications propagate nearby and through walls.
Wireless LAN security
The wireless LAN function of this device supports WEP, WPA-PSK, and WPA2-PSK standards. To check compatibility with the wireless security standards of your router, refer to the manuals provided with your network devices or contact the manufacturer.
NOTE
Requirements for local wireless connection
The device is not supplied with a local wireless network router. Obtain one if necessary.
Setting up the WPS connection
When using WPS, you have two modes to choose from: push-button mode and PIN code mode.
Push-button mode
Check if the WPS mark shown below is on the casing of your wireless router. Also make sure there is a WPS button on your network device. ▸ Setting up the connection using WPS push-button mode (P. 30)
PIN code mode
Some WPS routers do not support push-button mode. If a WPS PIN code is shown on the casing or mentioned in the manual of your network device, set up the connection by entering the PIN code. © Setting up the connection using WPS PIN code mode (P. 32)
NOTE
- If the wireless router is set to WEP authentication, you may not be able to set up the connection using WPS.
Manual connection setup
When setting up a wireless connection, you can either select a wireless router or manually enter the required information. Whichever method you use, make sure you have the required information, including the SSID and network key. © Checking the SSID and network key (P. 40)
■ Selecting a wireless router
Select this configuration option if you need to set up the connection manually but want to do it as easily as possible. © Setting up the connection by selecting a wireless router (P. 34)
If you want to configure detailed security settings such as authentication and encryption settings, manually enter the SSID and network key to configure the connection. ▸ Configuring the connection by specifying detailed settings (P. 37)
LINKS
Ⓥ Configuring the network environment (P. 24)
Ⓥ Selecting a wireless LAN or wired network (P. 26)
Configuring the connection using the WPS push button mode
If your wireless router supports WPS push button mode, you can easily configure a connection with the WPS button.
IMPORTANT
The operation of the wireless router depends on the peripheral device used. For assistance, refer to the instruction manual provided with your network peripheral.
1 Select on the Home screen. Home screen (P. 108) 2 Select ▸.
If the connection screen appears, enter the correct ID and PIN code. ▸ Connecting to the device (P. 125).
3 Select . If the message is displayed, select .
4 Read the message that is displayed and select . 5 Select . 6 Select . 7 Press and hold the WPS button on the wireless router.
The button must be pressed within 2 minutes of selecting at step 6. - Depending on the network device used, you may need to press and hold the button for 2 seconds or more. For assistance, refer to the instruction manual provided with your network device.
NOTE: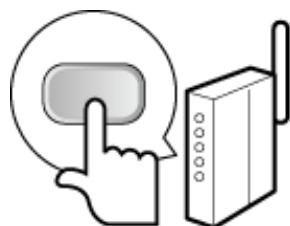
If an error message appears during setup
- Select and repeat the procedure from step 5.
8 Wait for the message to appear.
9 Select .
=> Wait a few minutes for the IP address and other settings to be configured automatically.
IMPORTANT:
Signal strength
When multiple wireless routers are available for connection, the device connects to the one with the strongest radio signal. Signal strength is measured in RSSI (Received Signal Strength Indication).
NOTE:
- You can set the IP address yourself. Setting IP Addresses (P. 41) When the device is connected to the wireless network, the Wi-Fi icon is displayed on the Home screen or the basic procedure screens of each function. Basic Screens (P. 107)
NOTE
Reducing power consumption
- You can configure the device to enter sleep mode based on signals from the wireless router. (P. 318)
If the IP address of the device has changed
- In a DHCP environment, the device's IP address can change automatically. If this happens, the connection is maintained as long as the device and the computer are on the same subnet.
LINKS
Connecting to a wireless LAN (P. 28)
Configuring the connection using WPS PIN code mode
5YHU-00L
If the wireless router supports WPS PIN code mode, generate a PIN code with the device and register the code on the network device.
IMPORTANT
The operation of the wireless router depends on the device used. For assistance, refer to the manual provided with your network device.

From the computer
1 Access your wireless router from a computer and display the screen for entering the WPS PIN code. For more information, refer to the manuals provided with the network device.

From the control panel
2 Select on the Home screen. Home Screen (P. 108) 3 Select > .
If the connection screen appears, enter the correct ID and PIN code. Connecting to the Device (P. 125)
4 Select . If the message appears, select . 5 Read the message that appears and select . 6 Select . 7 Select .
The PIN code is generated and appears on the screen.

From the computer
8 Save the PIN code generated on the wireless router.
- Enter the PIN code in the configuration screen that appears in step 1. The PIN code must be entered within 10 minutes of selecting it in step 7.
NOTE:
If an error message appears during setup
- Select and restart the procedure from step 6.

From the control panel
9 Wait for the message to appear.
10 Select .
Wait a few minutes while the IP address and other settings are configured automatically.
IMPORTANT:
Signal strength
When multiple wireless routers are available for connection, the device connects to the one with the strongest radio signal. Signal strength is measured in RSSI (Received Signal Strength Indication).
NOTE:
- You can set the IP address yourself. © Setting IP addresses (P. 41)
When the device is connected to the wireless network, the Wi-Fi icon is displayed on the Home screen or the Basic Procedures screen of each function. Basic Screens (P. 107)
NOTE
Reducing Power Consumption
- You can configure the device so that it enters power saving mode based on signals emitted by the wireless router. (P. 318)
If the IP Address of the Device Has Changed
- In a DHCP environment, the IP address of the device may change automatically. If this happens, the connection is maintained as long as the device and the computer are in the same subnet.
LINKS
Connecting to a Wireless LAN (P. 28)
Configuring the Connection by Selecting a Wireless Router
5YHU-00R
You can search for available wireless network routers (or access points) and select the appropriate one on the device screen. For the network key, enter a WEP key or PSK. Before selecting a wireless router, check and note the required configuration information, especially the SSID and network key (Checking the SSID and Network Key (P. 40)).
NOTE
Security Settings
- If the wireless connection is configured by selecting a wireless router, the WEP authentication method is set to Open System or Shared Key, and the WPA/WPA2 encryption method is set to AES-CCMP or TKIP. If you want to select WEP for authentication or WPA/WPA2 for encryption, you must use the detailed settings to configure the connection. Configuring the Connection by Setting Detailed Rules (P. 37)
1 Select <Menu> on the Home screen. Home Screen (P. 108) 2 Select <Network Settings>.
If the login screen appears, enter the correct ID and PIN. [O] Connecting the Device (P. 125).
3 Select . If the message appears, select . 4 Read the message that appears and select . 5 Select . 6 Select .
The device starts searching for available wireless routers.
NOTE:
If a message appears indicating that no access point can be found, check the network settings. For more information, see the "Troubleshooting (FAQ)" section on the online manuals website.
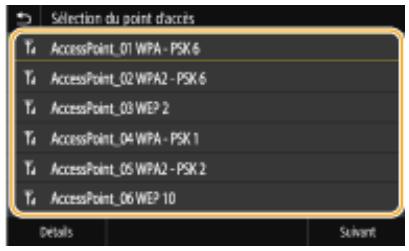
7 Select a wireless LAN router.
Touchscreen model
Select the router with the same SSID that you noted, and select OK.
Black-and-white LCD model
Select the router with the same SSID that you noted, and press OK.
NOTE:
Displaying security settings details on the Touchscreen model
- Select the wireless network router and select . To return to the previous screen, select .
If your wireless router cannot be found
- Check that the device is properly installed and ready for network connection. For more information, see the Troubleshooting (FAQ) section on the online manuals website.
8 Enter the network key you noted down.
Enter the network key, then select . For more information on entering text, see Entering Text (P. 121).
9 Select .
NOTE:
If an error message is displayed during setup
- Select , check if the network key is correct, and return to step 5.
10 Wait until the message is displayed.
11 Select .
Wait a few minutes while the IP address and other settings are configured automatically.
IMPORTANT:
Signal Strength
When multiple wireless routers are available for connection, the machine connects to the device with the strongest radio signal. Signal strength is measured in RSSI (Received Signal Strength Indication).
NOTE:
- You can set the IP address yourself. Setting IP Addresses (P. 41). When the machine is connected to the wireless network, the Wi-Fi icon is displayed on the Home screen or the Basic Procedures screen of each function. Basic Screens (P. 107).
NOTE
Reducing Power Consumption
- You can configure the device so that it switches to power saving mode based on signals from the wireless router. (P. 318)
If the IP Address of the Device Has Changed
- In a DHCP environment, the IP address of the device may change automatically. If this happens, the connection is maintained as long as the device and the computer are on the same subnet.
LINKS
Connecting to a Wireless LAN (P. 28)
Configuring the Connection by Specifying Detailed Settings
5YHU-00S
If you want to configure detailed security settings or cannot establish a wireless connection using other methods, manually enter all the required information for the wireless LAN connection. Before specifying detailed settings, check and note down the required configuration information, especially the SSID, network key, and wireless security protocols. Checking the SSID and Network Key (P. 40)
1 Select on the Home screen. Home Screen (P. 108) 2 Select .
If the connection screen appears, enter the correct ID and PIN. Connecting to the Device (P. 125)
3 Select . If the message appears, select . 4 Read the message that appears and select . 5 Select . 6 Enter the SSID you noted down.
Enter the SSID, then select . For more information about entering text, see Entering Text (P. 121).
7 Set the security settings according to the information you wrote down.
If you do not need to specify security settings, press .
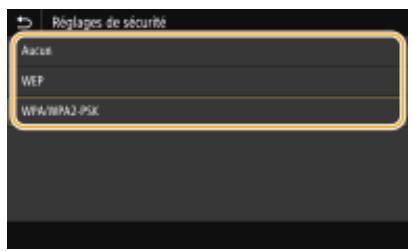
Using WEP mode
1 Select . 2 Select an authentication method.
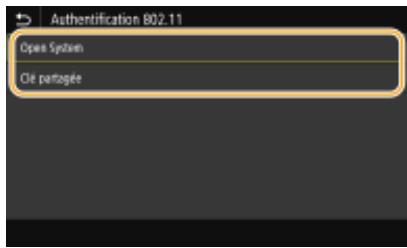
Sets an open system authentication, also called "open authentication".
Uses a WEP key as a password.
NOTE:
If is selected
When connecting to a wireless LAN, the device may encounter an authentication error if the shared key authentication type is set on the wireless router. If this happens, the device automatically changes the setting, selects , and retries the connection.
3 Select the WEP key to change.
Touchscreen models
Enter the WEP key (1 to 4), then select .
Black and white LCD models
- Select > WEP key (1 to 4). You can register up to four WEP keys.
4 Enter the network key you noted.
Enter the network key, then select .
5 Select the desired WEP key.
Touchscreen model
- Select the WEP key you modified and selected.
Black and white LCD model
- Select the WEP key you modified.
■Using WPA-PSK or WPA2-PSK
1 Select . 2 Select an encryption method.
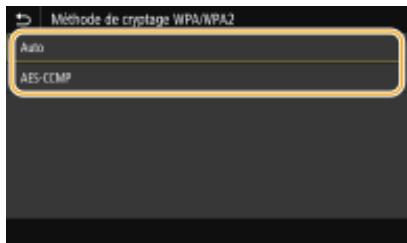
Configure the device so that it automatically selects AES-CCMP or TKIP according to the wireless router setting.
Set AES-CCMP as the encryption method.
3 Enter the network key you noted down.
Enter the network key, then select .
8 Select .
NOTE:
If an error message appears during configuration
- Select , check if the settings made are correct and return to step 5.
9 Wait for the message to appear.
10 Select .
Wait a few minutes for the IP address and other settings to be configured automatically.
IMPORTANT:
Signal strength
When multiple wireless routers are available for connection, the device connects to the device with the strongest radio signal. Signal strength is measured in RSSI (Received Signal Strength Indication).
NOTE:
- You can set the IP address yourself. © Setting IP Addresses (P. 41)
When the device is connected to the wireless network, the Wi-Fi icon is displayed on the Home screen or the Basic Procedures screen of each function. Basic Screens (P. 107)
NOTE
Reducing power consumption
- You can configure the device to switch to [Power Save Mode] based on signals emitted by the wireless router. © (P. 318)
If the IP address of the device has changed
- In a DHCP environment, the IP address of the device may change automatically. If this happens, the connection is maintained as long as the device and the computer are on the same subnet.
LINKS
Checking the SSID and network key
When you manually configure a wireless connection, you must specify the SSID and network key of your wireless router. The SSID and network key may be indicated on these network devices. Check your network devices and note the necessary information before configuring the connection. For more information, refer to the manuals provided with your network devices or contact the relevant manufacturers.
| SSID | Nom permettant l'identification d'un réseau local sans fil donné. D'autres appellations comme "nom du point d'accès" et "nom du réseau" sont également employées pour désigner leSSID. |
| Clé réseau | Mot-clé ou mot de passer utilisé pour le cryptage des données ou l'authentication d'un réseau. La clé réseau est également désignée par d'autres termes tels que "clé de cryptage", "clé WEP", "expression mot de passer WPA/WPA2" ou "clé prépartagée (PSK)". |
| Protocôtes de sécurité sans fil (authentication/cryptage) | Lorsque vous configurez manuellement une connexion sans fil en précisant ses paramètres de façon détaillée, vousdezuez indiquer les paramètres de sécurité. Vérifiez les points suivants:
• Type de sécurité (WEP/WPA-PSK/WPA2-PSK)
• Méthode d'authentication (Open System/Clé partagée)
• Méthode de cryptage (TKIP/AES-CCMP) |
■ Checking the SSID and network key on a computer
The SSID or network key may have been changed. If you do not know the SSID or network key, you can obtain them using "Canon MF/LBP Wireless Setup Assistant". Download "Canon MF/LBP Wireless Setup Assistant" from the Canon website (https://global.canon/), and run it from a computer connected to a wireless LAN.
NOTE
- If no access point appears on the screen after starting "Canon MF/LBP Wireless Setup Assistant", check whether the configuration is complete on the computer and the wireless router.
LINKS
○ Connecting to a wireless LAN (p. 28) ○ Configuring the connection by selecting a wireless router (p. 34) ○ Configuring the connection by specifying detailed settings (p. 37)
Setting IP Addresses
The machine must be connected to a network that requires a unique IP address. There are two versions of IP addresses: IPv4 and IPv6. Configure these settings according to your network environment. To use IPv6 addresses, you must configure the IPv4 address settings properly.
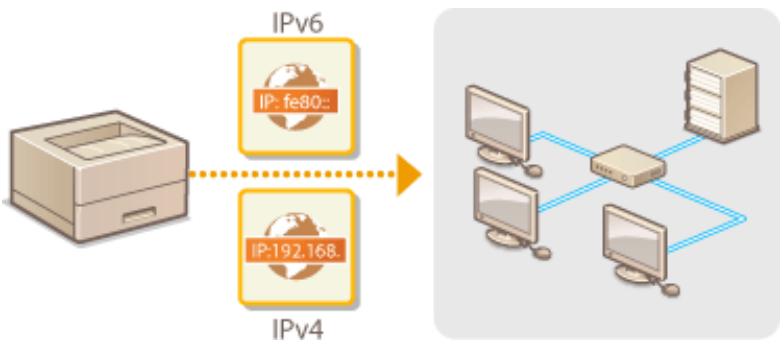
IPv4 Address Settings (p. 42) IPv6 Address Settings (p. 45)

The IPv4 address of the machine can be assigned automatically by a dynamic IP addressing protocol such as DHCP, or entered manually. When you connect the machine to a wired LAN, make sure that the connectors of the network cable are firmly inserted into the ports (○ Connecting to a wired LAN (p. 27)). Test the network connection if necessary.
○ IPv4 Address Settings (p. 42) ○ Testing the Network Connection (p. 44)
IPv4 Address Settings
1 Select from the Home screen. Home Screen (P. 108) 2 Select .
If the login screen appears, enter the correct ID and PIN. 0 Logging in to the Device (P. 125)
3 Select ▷ ▷ . 4 Configure the IP address settings.
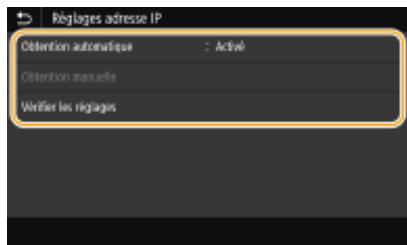
Select this option to automatically assign an IP address via the DHCP protocol. When is displayed, automatic addressing is enabled.
Deselect this option to assign the IP address by manually entering an IP address. To use this option, you must set automatic to off.
Select this option when you want to review the current IP address settings.
■ Automatically assigning an IP address
1 Select . 2 Select the protocol.
Touch panel model
- Select in , then select ▶ .
Black and white LCD model
NOTE:
If you do not want to use DHCP, BOOTP, or RARP for IP address assignment
- Select . If you select while these services are not available, the device will waste time and communication resources searching for these services on the network.
3 Check if is set to . If is selected, select instead. 4 Select .
NOTE:
IP addresses assigned by DHCP protocols take precedence over the address obtained by the auto IP setting.
Manual entry of an IP address
1 Configure a setting to disable automatic acquisition.
Touch screen model
- Select , then select in
- .
Black and white LCD model
- Select , and set and to .
2 Select . 3 Set the IP address, subnet mask, and gateway address (or default gateway).
Touch screen model
Enter , and , then select .
Black and white LCD model
Enter these values on each screen using the numeric keys, then press ox.
For the touch screen model, select .
6 Restart the device. Restarting the Device (P. 104)
NOTE
Check if the settings are correct
Make sure that the remote user interface screen can be displayed on the computer (Starting Remote User Interface (P. 275)). If the computer is not available, check the connection using the control panel (Testing the Network Connection (P. 44)).
If you changed the IP address after installing the printer driver
- You need to add a new port. > Configuring Printer Ports (P. 55)
Testing the Network Connection
1 Select on the Home screen. Home Screen (P. 108) 2 Select .
If the login screen appears, enter the correct ID and PIN. > Logging in to the Device (P. 125)
3 Select . 4 Enter the IPv4 address of another device on the network, and then press (OK).
If a connection has been established, the message is displayed.
LINKS
Setting IPv6 Addresses (P. 45) O Displaying Network Settings (P. 48) O Configuring the WINS Server (P. 72)
Setting IPv6 Addresses

The device's IPv6 addresses can be configured from the remote user interface. Before configuring IPv6 addresses, check the IPv4 address rules (Viewing IPv4 Rules (P. 48)). You must configure the IPv4 addresses properly in order to use IPv6 addresses. The device can use several of the following IPv6 addresses:
| Type | Description |
| Adresse Link-Local | Adresse uniquement valable au sein du sous-réseau ou de la liaison et qui ne permet pas d'établit des communications avec des pérophériques situés au-delà du routeur. Une adresse Link-Local est automatiquement définie si la fonction IPv6 de l'appareil est activée. |
| Adresse manuelle | Adresse saisie manuelle. Lorsque vous utilisez cette adresse, indiquez la longueur du préfixe et l'adresse du routeur par défaut. |
| Adresse sans état | Adresse générae automatiquement à l'aide de l'adresse MAC de l'appareil et du préfixe réseau publié par le routeur. Les adresses sans état sont supprimées lorsque l'appareil est redémarré (ou mis sous tension). |
| Adresse avec état | Adresse obtenue par un serveur DHCP à l'aide du protocole DHCPv6. |
NOTE
- For more information on the basic procedures to perform to configure the device from the remote user interface, see Configuring Menu Options from the Remote User Interface (P. 284).
1 Start the remote user interface and log in as System Administrator. Starting the Remote User Interface (P. 275) 2 Click [Settings/Registration] on the portal page. Remote User Interface Screen (P. 276) 3 Select [Network Settings] [IPv6 Settings]. 4 Click [Edit]. 5 Select the [Use IPv6] check box and configure the appropriate settings.
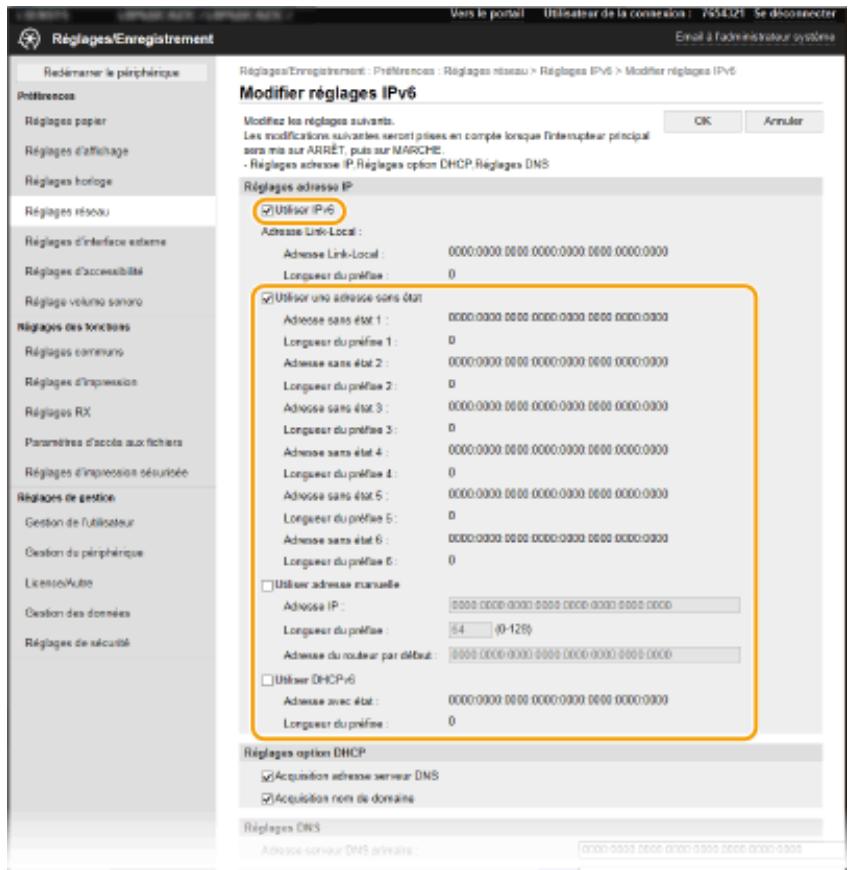
[Use IPv6]
Select the check box to enable IPv6 on the device. If you do not use IPv6, clear this check box.
[Stateless Address 1]
Select the check box to use a stateless address. If not, clear this check box.
[Use Manual Address]
When you manually enter an IPv6 address, select the check box and enter the IP address, prefix length, and default router address in the corresponding text boxes.
[IP Address]
Enter an IPv6 address. You cannot enter addresses beginning with "ff" (or multicast addresses).
[Prefix Length]
Enter a number indicating the number of bits available for the network address.
[Default router address]
Specify the IPv6 address of the default router as appropriate. You cannot enter addresses starting with "ff" (or multicast addresses).
[Use DHCPv6]
Check the box to use a stateful address. If you do not use DHCPv6, uncheck this box.
6 Click [OK].
7 Restart the device. Restarting the device (P. 104)
NOTE
Check if the settings are correct
Make sure that the remote user interface screen is displayed on your computer before using the IPv6 address of the device. Starting the Remote User Interface (P. 275)
Selecting settings from the control panel
- IPv6 settings are also accessible from , on the Home screen. / / (Touch panel model) (P. 321) / (Black and white LCD model) (P. 325)
If you changed the IP address after installing the printer driver
- You need to add a new port. Configuring printer ports (P. 55)
LINKS
Setting IPv4 address (P. 42) Displaying network settings (P. 48)
Displaying Network Settings
Display IPv4 settings (p. 48) Display IPv6 settings (p. 48) Display the MAC address for the wired LAN (p. 48) Display the MAC address and information for the wireless LAN (p. 49)
NOTE
The IP address is not correctly configured if "0.0.0." is displayed. - Connecting the device to a switching hub may cause the connection to fail even if the IP address is correctly configured. This problem can be resolved by delaying the start of communications of the device. Setting a wait time for network connection (p. 65) - You can print the list of network settings used. Data list/System administrator data list (p. 430)
Displaying IPv4 Settings

Select the setting to display Verify the settings
Displaying IPv6 Settings

Select the setting to display
Verify the settings
Displaying the MAC Address for the Wired LAN
1 Select on the Home screen. Home screen (p. 108) 2 Select .
If the login screen appears, enter the correct ID and PIN. Logging in to the device (p. 125).
3 Select .
The MAC address is displayed.
1 Select on the Home screen. Home Screen (P. 108) 2 Select .
If the login screen appears, enter the correct ID and PIN. Logging in to the Device (P. 125)
3 Select . 4 Read the message that appears and select . 5 Select / . 6 Select the setting to display.
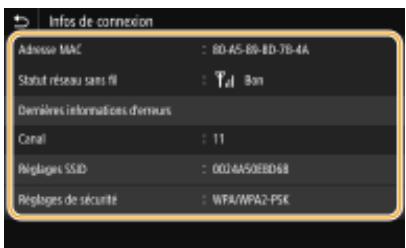
NOTE:
Displaying security information
To display WEP and WPA/WPA2-PSK information, proceed as follows.
Touch panel model
Select .
Black and white LCD model
Select the displayed security protocol. Select the setting to display.
Display on the screen
- You can display and on the screen ().
Touch panel model
Select the setting to display
Black-and-white LCD model
Select the setting to display
Connecting to a wireless LAN (P. 28) IPv4 address settings (P. 42) IPv6 address settings (P. 45) DNS configuration (P. 66)
Configuring settings for communicating with a computer
5YHU-011
Specify the protocol and port to use to control the device from a computer via the network. Before configuring the device for printing from a computer, perform the standard configuration procedures. For more information, see the manuals for the drivers used on the online manuals website.
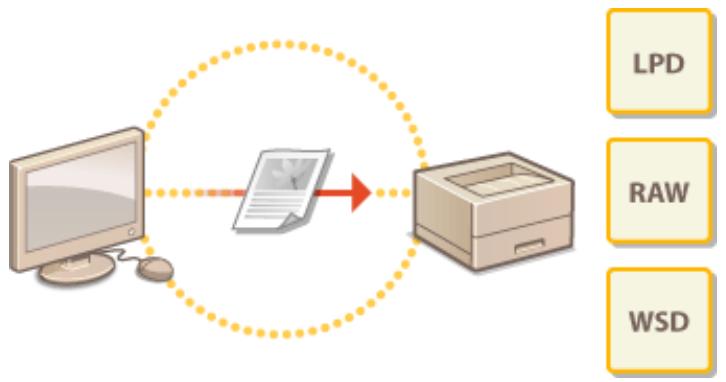
Configuring print protocols and WSD functions (P. 52) Configuring printer ports (P. 55) Configuring the print server (P. 58)
NOTE
- The protocols described here refer to rules for delivering document data created on a computer to the device, and are selected according to the intended use of the device or the network environment.
- Ports are access gates used for data transmission between devices on the network. Incorrect port configuration is often the cause of communication failures within the network.
Configuring print protocols and WSD functions
5YHU-012
Configure the protocols used to print documents from a computer connected to the network.
NOTE
- For more information on the basic procedures for configuring the device from the remote user interface, see Configuring menu options from the remote user interface (P. 284).
1 Launch the remote user interface and log in in System Administrator mode. Starting the Remote User Interface (P. 275) 2 Click [Settings/Registration] on the portal page. Remote User Interface Screen (P. 276) 3 Click [Network Settings]. 4 Configure the print protocols.
■Configuring LPD or RAW
1 Select [LPD Settings] or [RAW Settings] [Edit]. 2 Configure the settings as needed.
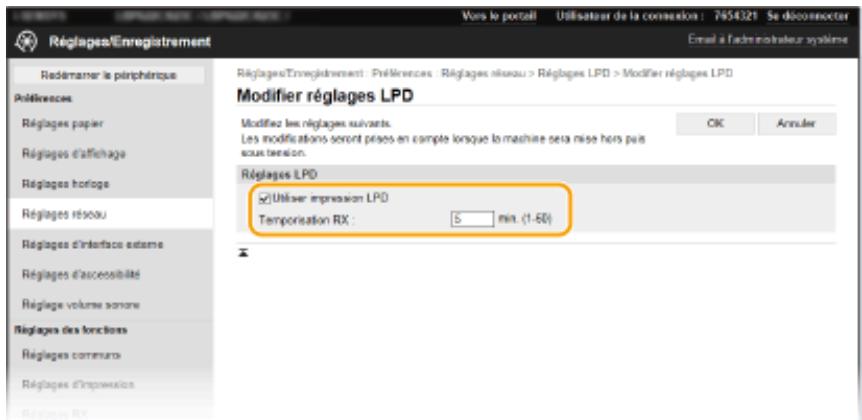
[Use LPD Printing]
Select the check box to print via LPD. If not, clear the check box.
[Use RAW Printing]
Select the check box to print via RAW. If not, clear the check box.
[RX Timeout]
Specify a value for the wait time for data reception to resume. If data reception does not resume within the specified period, printing is canceled.
3 Click [OK].
■Configuring the WSD Protocol
1 Select [WSD Settings] [Edit]. 2 Configure the settings as needed.
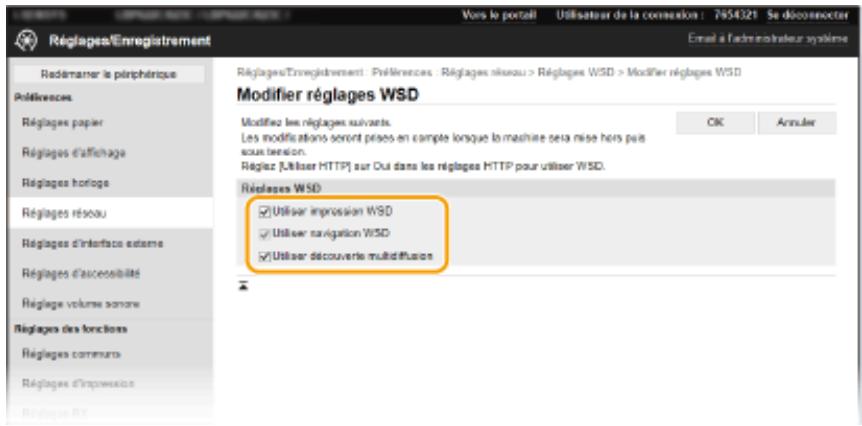
[Use WSD Printing]
Select the check box to print via WSD. If not, clear the check box.
[Use WSD Browsing]
Check the checkbox to obtain information about the device from a computer via WSD. This checkbox is automatically checked when the [Use WSD Printing] checkbox is checked.
[Use Multicast Discovery]
Check the checkbox to configure the device to respond to multicast discovery messages. If the checkbox is unchecked, the device remains in standby mode even if multicast discovery messages are circulating on the network.
3 Click [OK].
5 Restart the device. Restarting the Device (P. 104)
NOTE
Selecting Settings from the Control Panel
- The LPD, RAW, and WSD settings are also accessible from , on the Home screen.
(P. 328) (P. 328) (P. 328)
Configuring WSD Network Devices
- WSD network devices can be added from the printers folder. Open the printers folder (Viewing the Printers Folder (P. 473)), click [Add a device] or [Add a printer], and then follow the on-screen instructions. For more information about installing the driver for a WSD network, refer to the driver manual on the online manuals website.
To Change the Port Number
- The port number used for the printing protocol must be the same as that used for the device and a computer.
Configuring Printer Ports (P. 55) Changing Port Numbers (P. 239)
LINKS
Configuration des ports d'imprimante (P. 55)
Configuration des ports d'imprimante
5YHU-013
Printing errors occur if the device's IP address is changed or if a printer is added to the Windows printer folder. These errors are usually due to incorrect printer port settings. For example, this is the case when a wrong port number or type is set. In such a situation, the print attempt fails because the document data cannot reach the device. To resolve this issue, configure the printer port settings on the computer.
IMPORTANT
To perform the following operation, log in to the computer using an administrator account.
1 Open the printer folder. (See "Displaying the Printer Folder" on P. 473) 2 Right-click the icon for this device's driver, and then click [Printer Properties] or [Properties]. 3 Click the [Ports] tab and configure the appropriate settings.
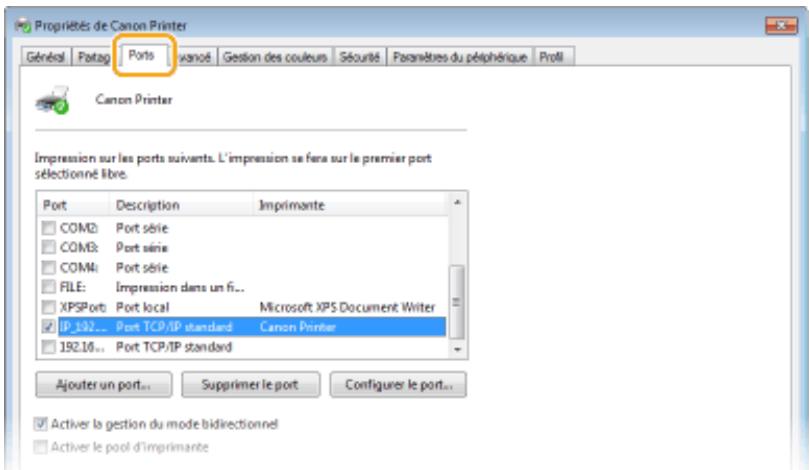
Adding a Port
If you have changed the device's IP address or if you selected a wrong port during driver installation, add a new port.
1 Click [Add Port]. 2 Select [Standard TCP/IP Port] in [Available port types], and then click [New Port]. 3 Click [Next]. 4 Enter the IP address or DNS name of the device, and then click [Next].
The [Port Name] field is filled in automatically. If necessary, you can change it.
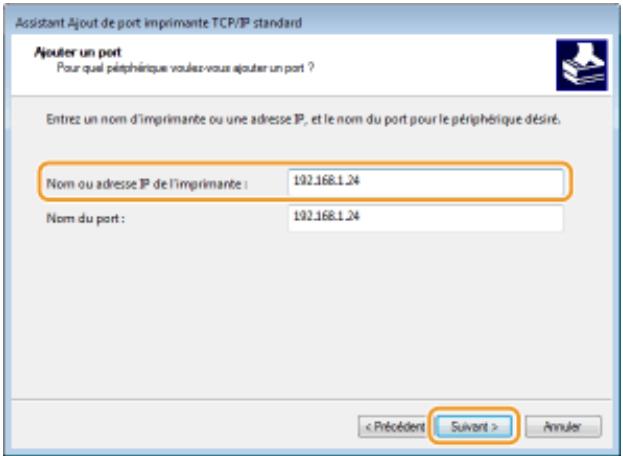
NOTE:
When the following screen appears, follow the instructions.
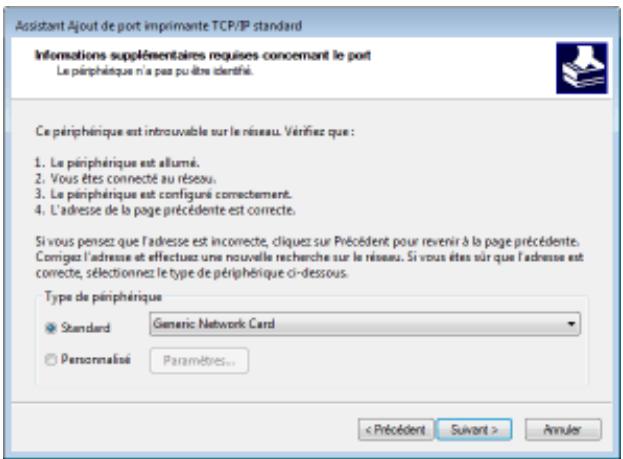
- When you select the [Device Type], select [Canon Network Printing Device with P9100] under [Standard].
5 Click [Finish]. 6 Click [Close].
Changing the port type or number
If the printing protocol (LPD or RAW) has been changed (Configuring Printing Protocols and WSD Functions (p. 52)) or if the port number has been changed on the device (Changing Port Numbers (p. 239)), the corresponding settings must also be changed on the computer. This operation is unnecessary for WSD ports.
1 Click [Configure Port]. 2 Under [Protocol], select [Raw] or [LPR].
If you selected [Raw], change the [Port Number]. If you selected [LPR], enter "Ip" in [Queue Name].
3 Click [OK].
Deleting ports
1 Select the port number to delete and click [Delete Port].
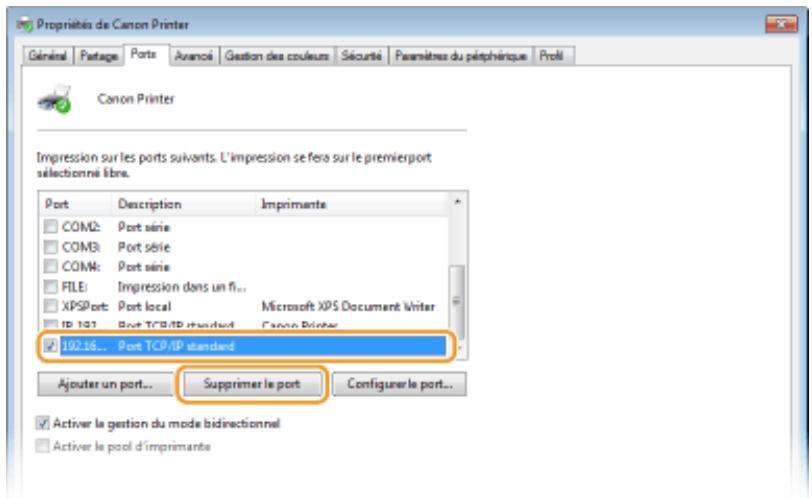
NOTE:
- You cannot delete a port configured as the printer port. To delete this port, select another port and click [Apply] to configure it as the new printer port, then delete the original port.
2 Click [OK].
4 Click [Close].
LINKS
Configuring the Print Server (p. 58)
Configuring the Print Server
With a print server, you can reduce the workload on the computer from which you print. The print server also allows you to install drivers on each computer over the network, saving you from having to install drivers on each computer using the supplied CD-ROM/DVD-ROM. To configure a computer on the network as a print server, configure the necessary settings to share the printer.
IMPORTANT
To perform the following operation, log in to the computer using an administrator account. - It may be impossible to install drivers over the network depending on the operating system and architecture (32-bit or 64-bit) of the print server and client computers. When implementing a print server in a domain environment, consult your network administrator.
NOTE
To perform service number management using a print server
- You must add "Canon Driver Information Assist Service" during the printer driver installation. For more information, refer to the manuals for the drivers used on the Online Manuals website.
1 Open the printers folder. © Displaying the Printers Folder (p. 473) 2 Right-click the printer driver icon for this device, and then click [Printer Properties] or [Properties]. 3 Click the [Sharing] tab, select [Share this printer], and enter the shared name of the device.
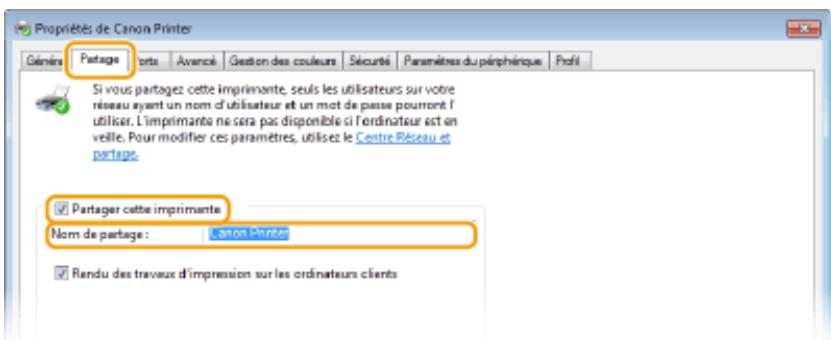
NOTE:
- Click the [Change Sharing Options] button if it is displayed.
4 Install any additional drivers that are necessary.
- This operation is essential for installing drivers on other computers with a different architecture via the print server.
1 Click [Additional Drivers]. 2 Check the box for the bit architecture used by the other computers, and click [OK].
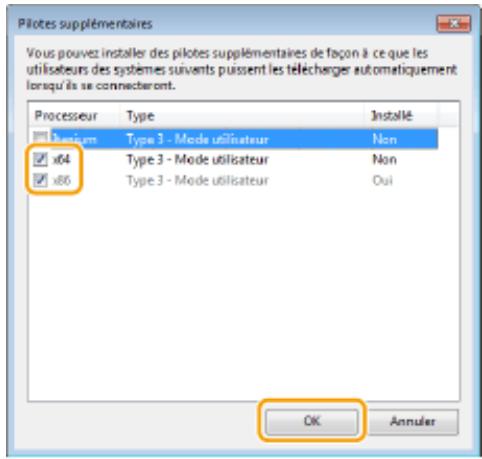
- Select additional drivers from the following drivers according to the print server's operating system.
| Serveur d'impression | Cochez la case |
| Systèmes d'exploitation 32 bits | [x64] |
| Systèmes d'exploitation 64 bits | [x86] sous [Proessesur] |
NOTE:
If you are unsure whether your Windows operating system is 32-bit or 64-bit, see Checking the Bit Architecture (p. 476).
3 Insert the provided CD-ROM/DVD-ROM into the computer's drive, click [Browse] to select the folder containing the drivers, then click [OK].
If the print server is running on a 32-bit operating system, select the [UFRII] [English] [x64] [Driver] folders from the provided CD-ROM/DVD-ROM. If the print server is running on a 64-bit operating system, select the [UFRII] [English] [32BIT] [Driver] folders from the provided CD-ROM/DVD-ROM.
4 Follow the on-screen instructions to install other drivers.
5 Click [OK].
■ Installing drivers on a computer via the print server
1 Search for the printer shared on the print server. © Displaying shared printers in the print server (P. 474)
2 Double-click the shared printer. 3 Follow the on-screen procedure to install the drivers.
LINKS
© Printing from a computer (P. 168)
Configuring the device according to your network environment
5YHU-015
Network configuration varies depending on the purpose of the network. The device has been designed to be compatible with a wide range of network configurations and is equipped with a broad array of technologies. Contact your network administrator and define a configuration suitable for your network.
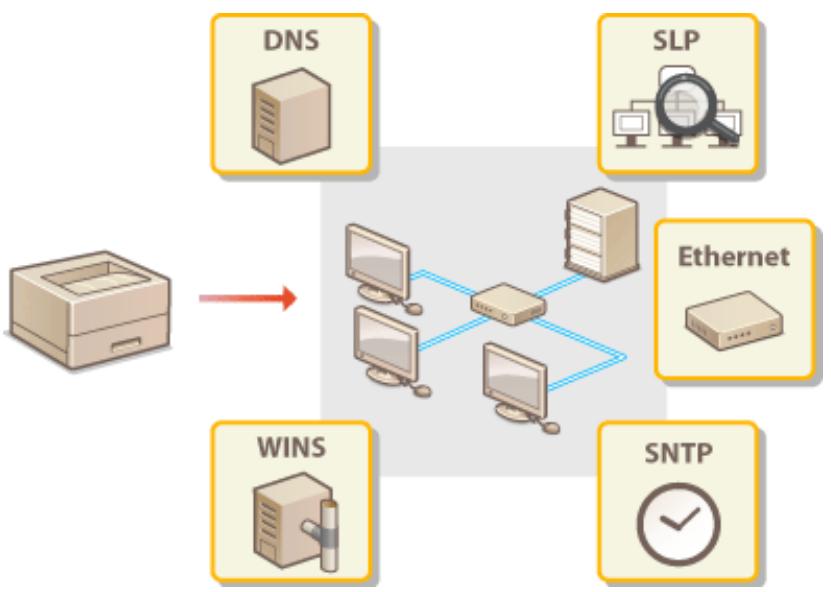
© Configuring Ethernet settings (P. 62) © Changing the maximum transmission unit (P. 64) © Setting a waiting time for network connection (P. 65) © Configuring DNS (P. 66) © Configuring the SMB protocol (P. 70) © Configuring the WINS server (P. 72) © Monitoring and controlling the device via SNMP (P. 74) © Other network settings (P. 78)
Configuring Ethernet settings
5YHU-016
Ethernet is a standard for transmitting data in a local network. You can define the communication mode and the type of Ethernet. In general, it is possible to operate the device without modifying the default settings (Ethernet driver settings (P. 333)). However, you can modify them to take into account the needs of your network environment.
1 Select on the Home screen. Home screen (P. 108) 2 Select > .
If the connection screen appears, enter the correct ID and PIN. Logging in to the device (P. 125)
3 Select . 4 Specify whether you want to configure the Ethernet settings automatically or manually. - If automatic detection is enabled, the device automatically detects and sets the Ethernet communication mode that you can use.
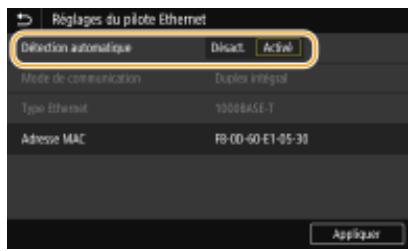
■ Automatic configuration of Ethernet settings
Touch screen model
Select in .
Black and white LCD model
Select ▷ .
■ Manual configuration of Ethernet settings
1 Configure a setting to disable automatic detection. Touch screen model
Black and white LCD model
2 Select the communication mode.
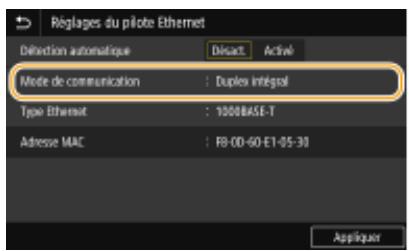
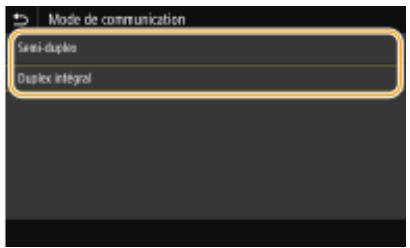
Receives and sends communication data alternately. Select this option if the device is connected to a network device in half-duplex mode.
Receives and sends communication data simultaneously. This setting is suitable for most environments.
3 Select the Ethernet type. 4 Select .
For the touch screen model, select . 6 Restart the device. Restarting the device (P. 104)
LINKS
● Changing the maximum transmission unit (P. 64) ● Setting a waiting time for connecting to a network (P. 65)
Changing the maximum transmission unit
In most Ethernet networks, the maximum size of a packet that can be sent is 1500 bytes. A packet represents the portion of data into which the original data is divided before being sent. The maximum transmission unit (MTU) varies from network to network. Modify the device settings as needed. For more information, contact your network administrator.
1 Select on the Home screen. Home Screen (P. 108) 2 Select > .
If the login screen appears, enter the correct ID and PIN. Logging in to the Device (P. 125).
3 Select ▷ . 4 Select the MTU.
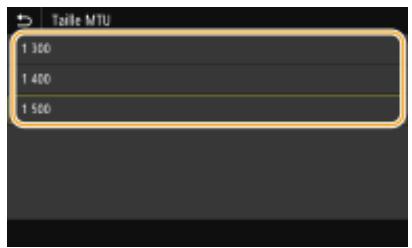
For the touch screen model, select . 6 Restart the device. Restarting the device (P. 104)
LINKS
● Configuring Ethernet settings (P. 62) ● Setting a waiting time for connecting to a network (P. 65)
Definition of a connection wait time for network connection
5YHU-018
When a network is designed to take advantage of redundant connectivity through multiple bridges or switching hubs, it must have a mechanism to prevent packets from looping. An effective solution is to define the role of each switch port. However, communications may still be interrupted for several tens of seconds immediately after changing the connection mode of network peripherals. If this type of problem occurs, define a wait time to establish the network connection.
1 Select from the Home screen. Home Screen (P. 108) 2 Select ▷ .
If the connection screen appears, enter the correct ID and PIN. □ Connecting to the Device (P. 125)
3 Select / . 4 Specify the wait time required to start communication with the network, and then press (OK).
LINKS
○ Configuring Ethernet Settings (P. 62) ○ Changing the Maximum Transmission Unit (P. 64)
Configuring DNS
5YHU-019
The DNS (Domain Name System) service provides a name resolution service that associates a host (or domain) with an IP address. Configure DNS, mDNS, or DHCP settings as appropriate. Note that the procedures for configuring DNS differ for IPv4 and IPv6 addresses.
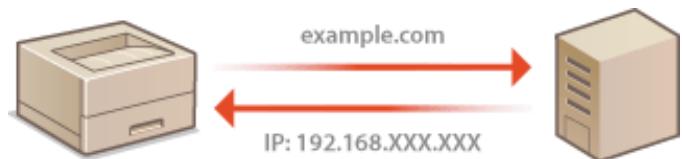
NOTE
- For more information on the basic procedures to configure the device from the Remote User Interface, see Configuring Menu Options from the Remote User Interface (P. 284).
1 Start the Remote User Interface and log in as System Administrator. Starting the Remote User Interface (P. 275) 2 Click [Settings/Registration] on the portal page. Remote User Interface Screen (P. 276) 3 Click [Network Settings]. 4 Configure DNS settings.
■Configuring IPv4 DNS Settings
1 Select [IPv4 Settings] [Edit]. 2 Configure the IPv4 DNS settings.
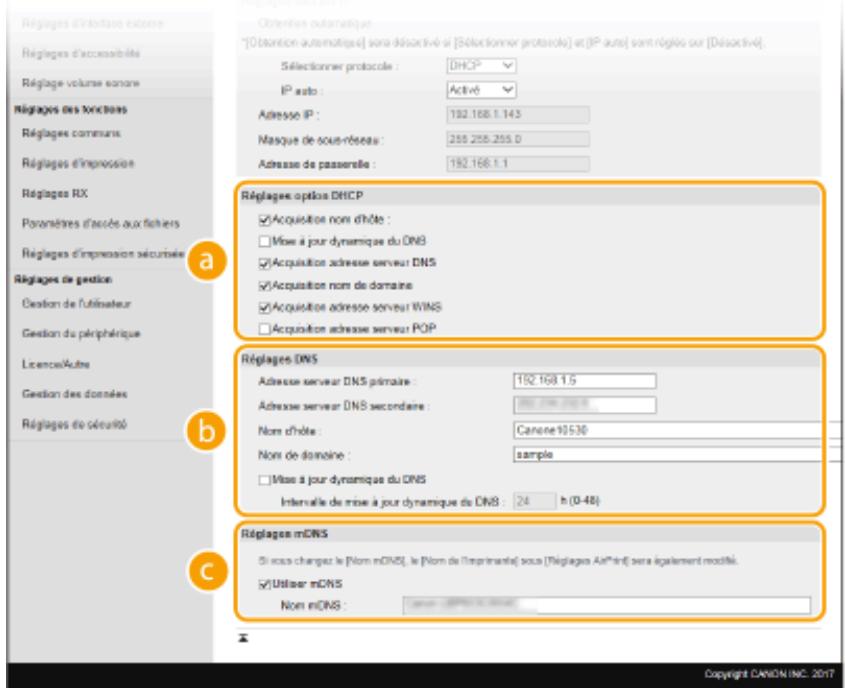
[DHCP Option Settings]
[Host Name Acquisition]
Check the box to enable Option 12 to obtain the host name from the DHCP server.
[Dynamic DNS Update]
Check the box to enable Option 81 to dynamically update DNS records via the DHCP server.
[DNS Server Address Acquisition]
Check the box to enable Option 6 to obtain a DNS server address from the DHCP server.
[Domain Name Acquisition]
Check the box to enable Option 15 to obtain a domain name from the DHCP server.
[WINS Server Address Acquisition]
Check the box to enable Option 44 to obtain a WINS server address from the DHCP server.
[POP Server Address Acquisition]
Check the box to enable Option 70 to obtain a POP3 server address from the DHCP server.
[DNS Settings]
[Primary DNS server address]
Specify the IP address of a DNS server.
[Secondary DNS server address]
Specify the IP address of a secondary DNS server, if applicable.
[Host name]
Enter the host name of the device (in alphanumeric characters) that is registered on the DNS server.
[Domain name]
Enter the domain name (in alphanumeric characters) to which the device belongs, such as "example.com."
[Dynamic DNS update]
Check the box to dynamically update DNS records whenever the device's IP address changes. To specify the time interval between updates, enter it in the [Dynamic DNS update interval] text box.
![CANON LBP223DW - [Dynamic DNS update] - 1](/content/2024/11/223822/images/e02e44183988dbe6252e4a9f18c723cb8c99bf6f420d3ca2f487e737348788d4.jpg)
[mDNS settings]
[Use mDNS]
Adopted by Bonjour, the mDNS (multicast DNS) protocol associates a host name with an IP address without involving DNS. Check the box to enable mDNS and enter the mDNS name in the [mDNS name] text box.
3 Click [OK].
■Configuring IPv6 DNS settings
1 Select [IPv6 Settings] [Edit]. 2 Configure the IPv6 DNS settings.
The [Use IPv6] checkbox must be checked to configure the settings. IPv6 Address Settings (P. 45)
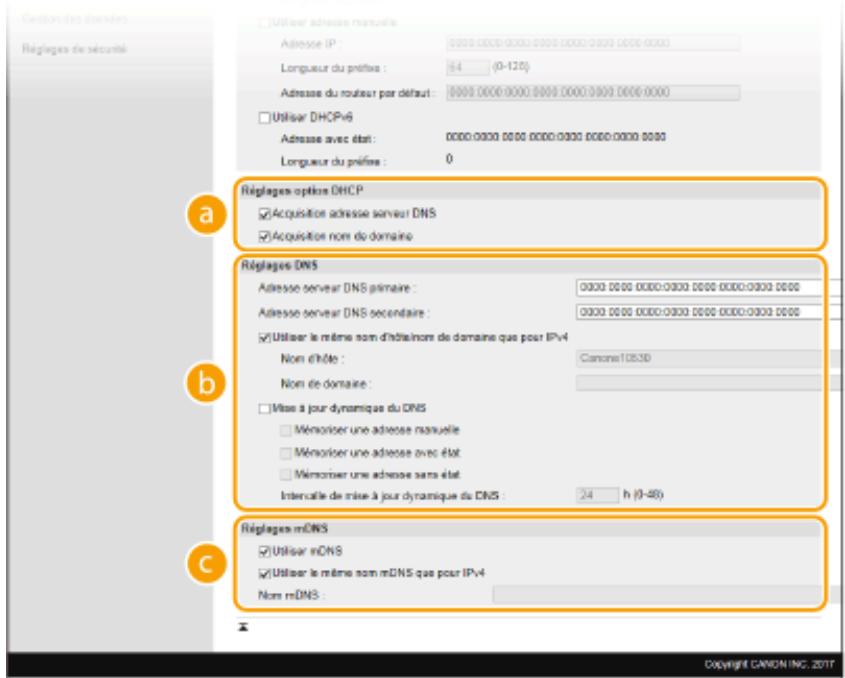

[DHCP Option Settings]
[DNS Server Address Acquisition]
Check the checkbox to enable Option 23 to obtain a DNS server address from the DHCP server.
[Domain Name Acquisition]
Check the checkbox to enable Option 24 to obtain a Domain Name from the DHCP server.
![CANON LBP223DW - [Domain Name Acquisition] - 1](/content/2024/11/223822/images/9874dfe7f63dcb678afdea2888ebb3b6b5374c3ec7e2a0e16dbecda72519fbaf.jpg)
[DNS Settings]
[Primary DNS Server Address]
Enter the IP address of a DNS server. You cannot enter addresses starting with "ff" (or multicast addresses).
[Secondary DNS Server Address]
If applicable, enter the IP address of a secondary DNS server. You cannot enter addresses starting with "ff" (or multicast addresses).
[Use the same host name/Domain Name as for IPv4]
Check the checkbox to use the same host and Domain names as for IPv4.
[Host Name]
Enter the device host name (alphanumeric characters) that is registered on the DNS server.
[Domain Name]
Enter the domain name (alphanumeric characters) to which the device belongs, such as "example.com."
[Dynamic DNS Update]
Check the box to dynamically update DNS records whenever the device's IP address changes. To indicate the type(s) of addresses to register on the DNS server, check the [Remember manual address], [Remember stateful address], or [Remember stateless address] checkboxes. To specify the time interval between updates, enter it in the [Dynamic DNS update interval] text box.
![CANON LBP223DW - [Dynamic DNS Update] - 1](/content/2024/11/223822/images/35d778e1bc138599950207fbdb19febfd6a40785d17da051b46250a024df4548.jpg)
[mDNS Settings]
[Use mDNS]
Adopted by Bonjour, the mDNS (multicast DNS) protocol associates a host name with an IP address without involving DNS. To enable mDNS, check the box.
[Use the same mDNS name as for IPv4]
Check the box to use the same mDNS name as for IPv4. To set a different name, uncheck the box and type the mDNS name in the [mDNS Name] text box.
3 Click [OK].
5 Restart the device. Restarting the device (P. 104)
NOTE
Selecting settings from the control panel
- DNS settings are also accessible from , on the Home screen.
(Touch Screen Model)(P. 321) / (Black and White LCD Model)(P. 325)
LINKS
IPv4 Address Settings (P. 42) IPv6 Address Settings (P. 45) Displaying Network Settings (P. 48)
Configuring the SMB Protocol
5YHU-01A
The SMB (Server Message Block) protocol is a protocol for sharing resources such as files and printers with multiple devices on a network. You must use it to configure the device as a shared printer on an SMB network. Depending on the network used, you may need to set the NetBIOS name and the workgroup name.
NetBIOS Name
In a Windows network that uses NetBIOS, NetBIOS names are used to identify computers connected to the network and to share files and other network peripherals. On most computers, the computer name serves as the NetBIOS name.
Workgroup Name
The workgroup name is a name that groups several computers so that basic network functions, such as file sharing, are available on a Windows network. Specify the workgroup name to identify the group to which the device belongs.
NOTE
- For more information on the basic procedures for configuring the device from the Remote User Interface, see Configuring Menu Options from the Remote User Interface (P. 284).
1 Start the Remote User Interface and log on in System Administrator mode. Starting the Remote User Interface (P. 275) 2 Click [Settings/Registration] on the portal page. Remote User Interface Screen (P. 276) 3 Select [Network Settings] [SMB Settings]. 4 Click [Edit]. 5 Specify the required settings.
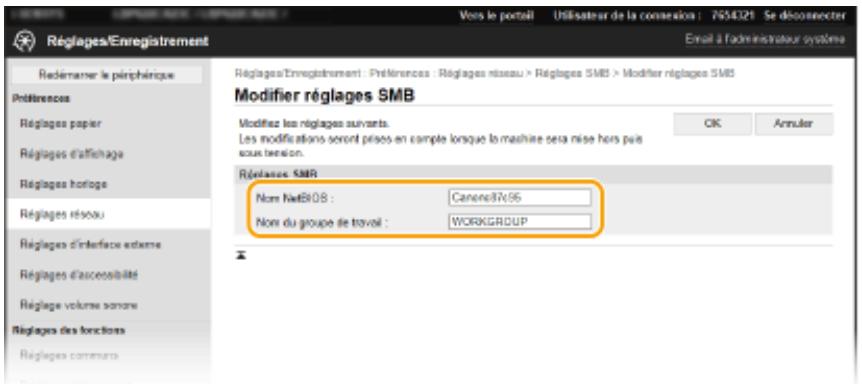
[NetBIOS Name]
Enter the NetBIOS name of the device using alphanumeric characters.
[Workgroup name]
Enter the name of the workgroup to which the device belongs, using alphanumeric characters.
IMPORTANT:
- It is not possible to register a NetBIOS name or a workgroup name that begins with an asterisk (*) on a WINS server.
6 Click [OK].
7 Restart the device. Restarting the Device(P. 104)
LINKS
Configuring the WINS Server(P. 72)
Configuring the WINS Server
5YHU-01C
The WINS (Windows Internet Name Service) service is a name resolution service that associates a NetBIOS name (the name of a computer or printer on an SMB network) with an IP address. To enable the WINS service, it is necessary to specify the WINS server.
IMPORTANT
To specify the WINS server settings, it is mandatory to define the NetBIOS name and the workgroup name. Configuring the SMB Protocol(P. 70) This function is not available on an IPv6 network.
NOTE
- For more information on the basic procedures for configuring the device from the Remote User Interface, see Configuring Menu Options from the Remote User Interface(P. 284).
1 Launch the remote user interface and log in as System Administrator. Starting the Remote User Interface (P. 275) 2 Click [Settings/Registration] on the portal page. Remote User Interface Screen (P. 276) 3 Select [Network Settings] [WINS Settings]. 4 Click [Edit]. 5 Select the [WINS Resolution] check box and configure the required settings.
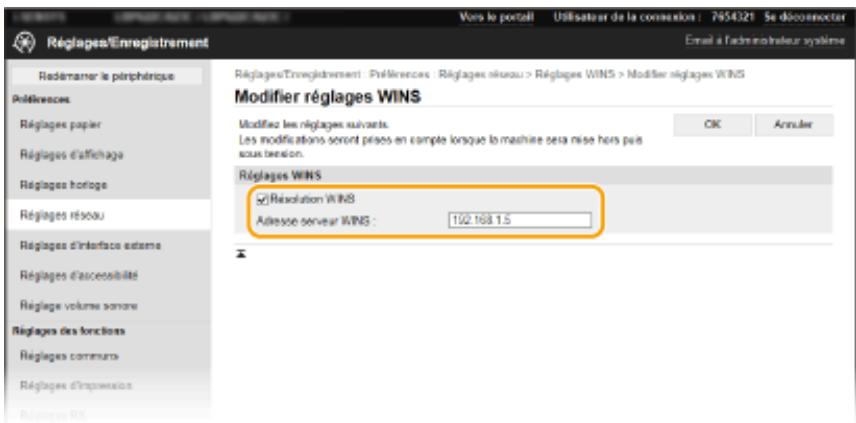
[WINS Resolution]
Select the check box to use WINS name resolution. If not, clear this check box.
[WINS Server Address]
Specify the IP address of a WINS server.
IMPORTANT:
- If you obtain the IP address of the WINS server from a DHCP server, this IP address replaces the IP address entered in the [WINS Server Address] text box.
6 Click [OK].
7 Restart the device. ▸ Restarting the Device (P. 104)
NOTE
Selecting Settings from the Control Panel
- WINS settings can also be accessed from , on the Home screen. © (P. 328)
LINKS
IPv4 Address Settings (P. 42)
Monitoring and Controlling the Computer via SNMP
SNMP (Simple Network Management Protocol) is a protocol dedicated to monitoring and controlling communication peripherals on a network and involves a Management Information Base (MIB). The device supports SNMPv1 as well as SNMPv3, which has advanced security features. You can check the device status from a computer when printing documents or using the remote user interface. You are free to enable SNMPv1, SNMPv3, or both protocols at the same time. Specify the settings for each version to adapt them to your network environment and network usage.
SNMP Manager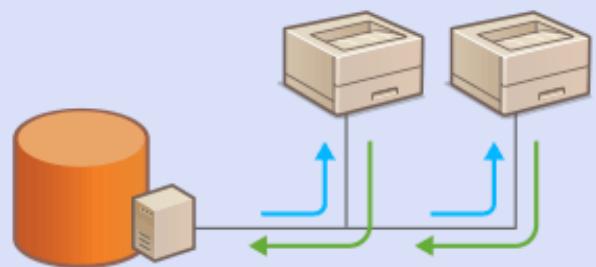
SNMPv1
SNMPv1 uses information called "community" to define the scope of SNMP communications. Since this information is exposed on the network in plain text, your network is vulnerable. If you want to strengthen network security, disable SNMPv1 and prefer SNMPv3.
SNMPv3
With SNMPv3, you can implement network device management protected by powerful security features. Note that you must first enable TLS mode for the remote user interface before you can configure SNMPv3 (Configuring the Key with Certificate Used for TLS (P. 243)).
NOTE
The device does not support the SNMP trap notification function. - To change the SNMP port number, refer to the section "Modifying Port Numbers (P. 239)". - The SNMP management software installed on a network computer allows you to configure, monitor, and control the device remotely from the computer. For more information, refer to the manual for the management software. - For more information on the basic procedures for configuring the device from the remote user interface, see "Configuring Menu Options from the Remote User Interface (P. 284)".
1 Start the remote user interface and log in as System Administrator. Starting the Remote User Interface (P. 275) 2 Click [Settings/Registration] on the portal page. Remote User Interface Screen (P. 276)
3 Select [Network Settings] [SNMP Settings].
4 Click [Edit].
5 Configure the SNMPv1 settings.
If it is not necessary to change the SNMPv1 settings, proceed to the next step.
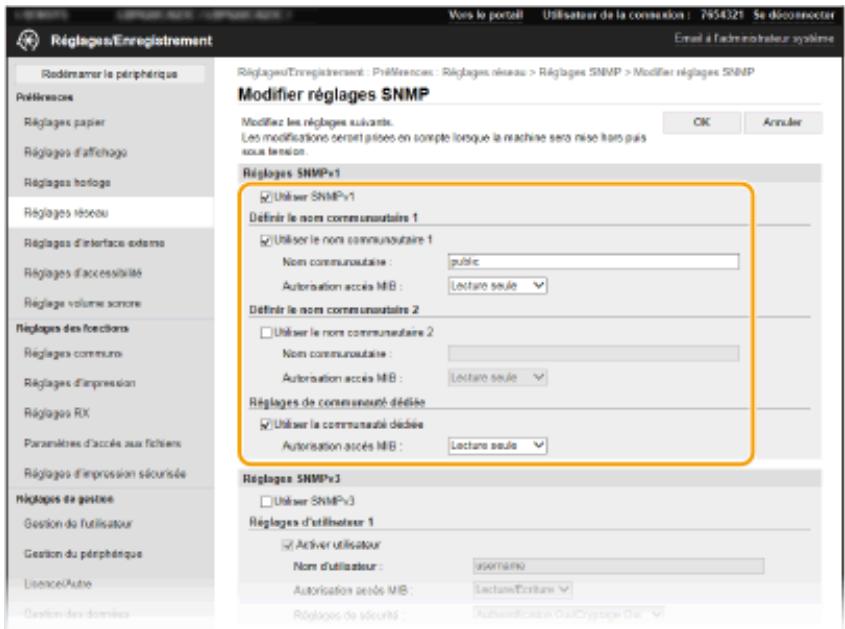
[Use SNMPv1]
Check the check box to enable SNMPv1. You can specify the other SNMPv1 settings only if you check this check box.
[Use Community Name 1]/[Use Community Name 2]
Check the check box if you want to specify a community name. Otherwise, clear the check box.
[Community Name]
Enter a community name using alphanumeric characters.
[MIB Access Permission]
For each community, select [Read/Write] or [Read Only] to obtain the corresponding access rights for MIB objects.
| [Lecture/Écriture] | Autorise l'affichage et la modification des valeurs des objets MIB. |
| [Lecture seule] | Autorise uniquement l'affichage des valeurs des objets MIB. |
[Use Dedicated Community]
The dedicated community is a predefined community exclusively intended for administrators using Canon software, such as iW Management Console. Check the check box to use the dedicated community and specify [MIB Access Permission]. If you do not need it, clear the check box.
6 Set the SNMPv3 settings.
If there is no need to change the SNMPv3 settings, proceed to the next step.
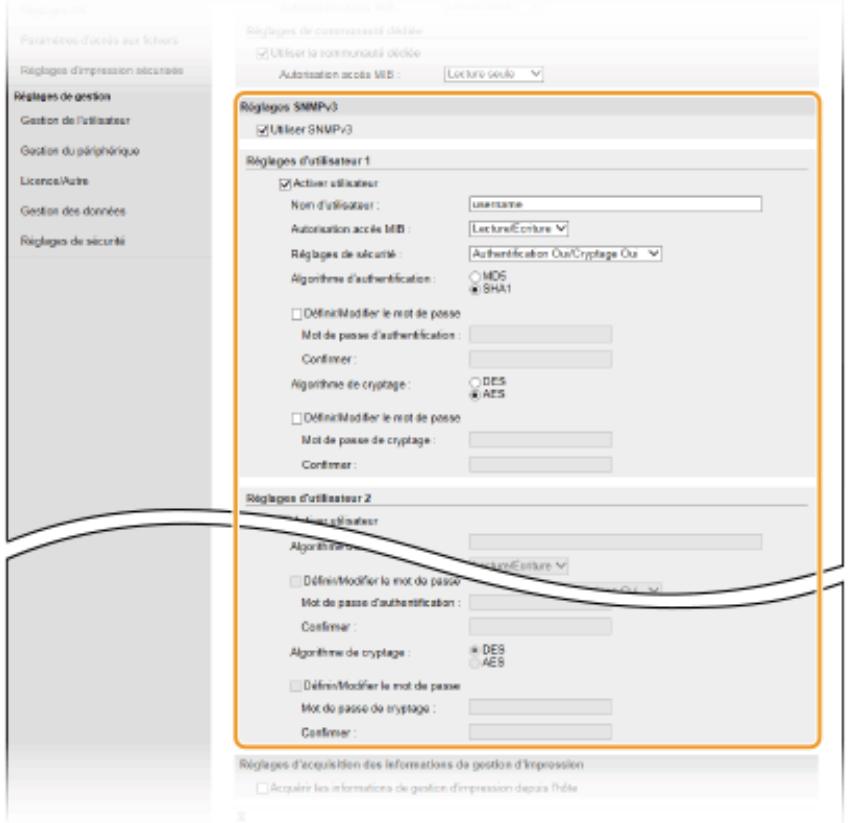
[Use SNMPv3]
Check the check box to enable SNMPv3. You can specify the other SNMPv3 settings only if you check this check box.
[Enable User]
Check the check box to enable [User Settings 1]/[User Settings 2]/[User Settings 3]. To disable the desired user settings, clear the corresponding check box.
[User Name]
Enter the user name using alphanumeric characters.
[MIB Access Rights]
Select [Read/Write] or [Read Only] to obtain the corresponding access rights for MIB objects.
| [Lecture/Écriture] | Autorise l'affichage et la modification des valeurs des objets MIB. |
| [Lecture seule] | Autorise uniquement l'affichage des valeurs des objets MIB. |
[Security Settings]
Select [Authentication Yes/Encryption Yes], [Authentication Yes/Encryption No], or [Authentication No/Encryption No] according to the desired combination of authentication and encryption settings.
[Authentication Algorithm]
If you selected [Authentication Yes/Encryption Yes] or [Authentication Yes/Encryption No] in [Security Settings], select the appropriate authentication algorithm for your network environment.
[Encryption Algorithm]
If you selected [Authentication Yes/Encryption Yes] in [Security Settings], select the appropriate encryption algorithm for your network environment.
[Set/Change Password]
To set or change the password, check the box, then enter the password using alphanumeric characters in the [Authentication Password] or [Encryption Password] text box. Confirm the password in the [Confirm] text box. You are free to set different passwords for the authentication and encryption algorithms.
Through SNMP, a computer connected to the network can monitor and regularly obtain printer management information, such as print protocols and printer ports.
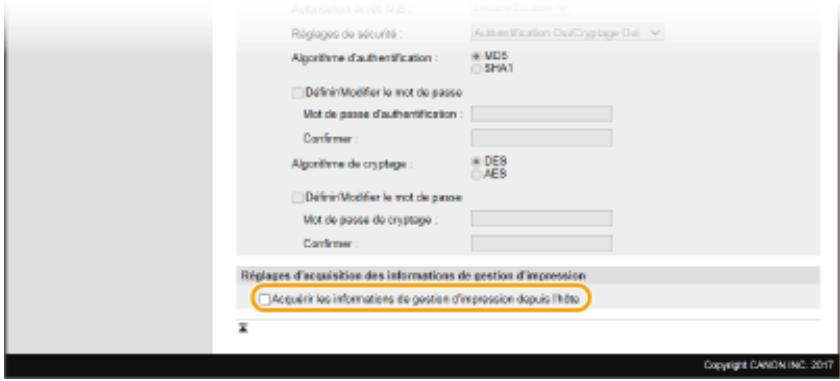
[Acquire Printer Management Information from Host]
Check the checkbox to enable monitoring of the device's printer management information via SNMP. To disable monitoring, uncheck the checkbox.
8 Click [OK].
9 Restart the device. Restarting the Device (P. 104)
NOTE
Disabling SNMPv1
- If SNMPv1 is disabled, some functions of the device will not be available. Thus, you will not be able to obtain information about the device through the printer driver.
Using the Control Panel
- You can enable or disable SNMP settings from . © (P. 330)
Enabling SNMPv1 and SNMPv3
- If both versions of the SNMP protocol are enabled at the same time, it is recommended to set the MIB access rights for SNMPv1 to [Read Only]. It is possible to set different MIB access rights for SNMPv1 and SNMPv3 (as well as for each user in SNMPv3). Selecting [Read/Write] (all access rights) in SNMPv1 cancels the powerful security functions that characterize SNMPv3, because most of the device settings are then controlled by SNMPv1.
LINKS
© Configuration of the key with certificate used for TLS (P. 243)
Configure the following options according to the network environment.
© Configuration of SNTP (P. 78) Monitoring the device from device management systems (P. 79)
Configuration of SNTP
The SNTP (Simple Network Time Protocol) protocol allows you to set the system clock using the network time server. If SNTP is used, the time server is checked periodically, so that the exact time is always maintained. The time is set to Coordinated Universal Time (UTC); therefore, select the time zone before configuring SNTP (Setting Date and Time (P. 22)). You can make SNTP settings using the Remote User Interface.
NOTE
The device's SNTP supports NTP servers (version 3) and SNTP servers (versions 3 and 4). - For more information on the basic procedures to configure the device from the Remote User Interface, see Configuring Remote User Interface Menu Options (P. 284).
1 Start the Remote User Interface and log in as Administrator. Starting the Remote User Interface (P. 275) 2 Click [Settings/Registration] on the portal page. Remote User Interface Screen (P. 276) 3 Select [Network Settings] [SNTP Settings]. 4 Click [Edit]. 5 Select the [Use SNTP] checkbox and configure the required settings.
[Use SNTP]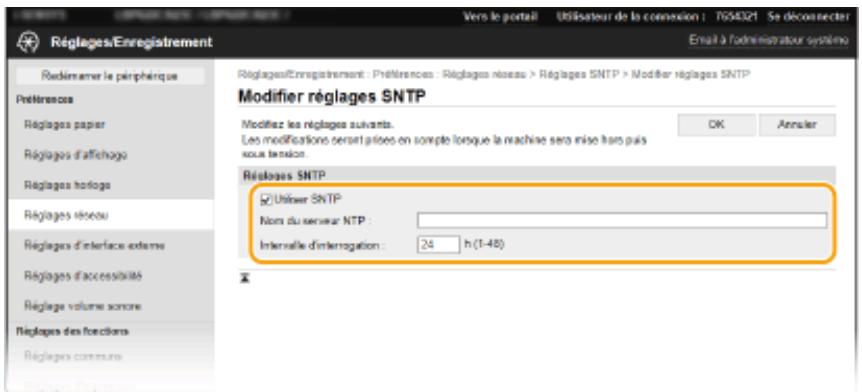
Select the checkbox to use SNTP for synchronization. Otherwise, clear the checkbox.
[NTP Server Name]
Enter the IP address of the NTP or SNTP server. If DNS is available on the network, you can enter a host name (or FQDN) in alphanumeric characters instead (e.g., ntp.example.com).
[Polling Interval]
Set the interval between synchronizations.
6 Click [OK].
7 Restart the device. Restarting the Device (P. 104)
NOTE
Testing Communications with the NTP/SNTP Server
- You can check the communication status with the registered server by clicking [Settings/Registration] [Network Settings] [Check NTP Server] in [SNMP Settings]. If a correct connection has been established, the result is displayed as shown below. Please note that this operation does not set the system clock.
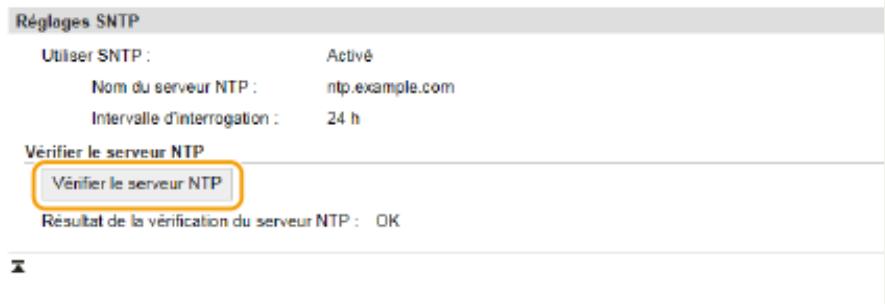
Monitoring the device from device management systems
You can facilitate the collection and management of information about network devices by deploying device management software on the network, such as iW Management Console*. Information such as device settings and error logs is extracted and distributed by the server. If the device is connected to such a network, iW Management Console searches for the device on the network using protocols such as SLP (Service Location Protocol) to collect device information, including its power supply status. You can configure SLP settings from the remote user interface. This section also describes the configuration of settings required for communication between the device and plug-ins for iW Management Console.
- For more information about iW Management Console, contact your local authorized Canon dealer.
NOTE
To use iW Management Console plug-ins
- You must enable the dedicated port settings and SNMP settings. For SNMP settings, set [MIB access permission] to [Read/Write] (SNMPv1 and SNMPv3).
/ (P. 332) Monitoring and controlling the device via SNMP (P. 74)
Operations from the remote user interface
- For more information on the basic procedures for configuring the device from the remote user interface, see Configuring Remote User Interface Menu Options (P. 284).
■ Configuring SLP communication with device management software
1 Start the remote user interface and log in as System Administrator. Starting the Remote User Interface (P. 275) 2 Click [Settings/Registration] on the portal page. Remote User Interface Screen (P. 276) 3 Click [Network Settings]. 4 Configure the SLP settings.
■ Specifying multicast device discovery
1 Select [Multicast Discovery Settings] > [Edit]. 2 Check the [Respond to discovery] checkbox and configure the required settings.
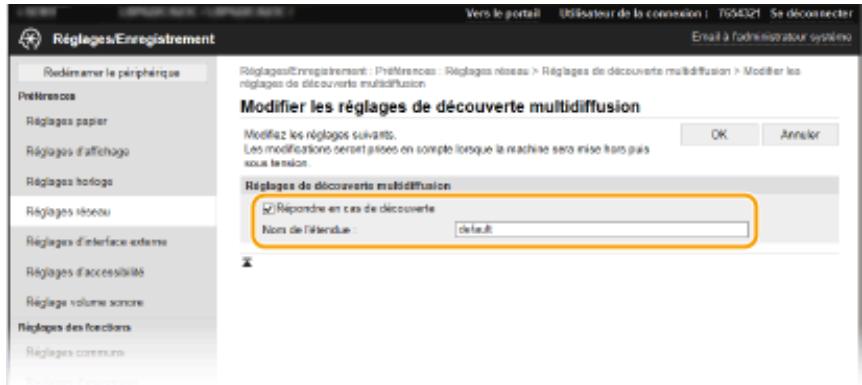
[Respond to discovery]
Check the checkbox to configure the device to respond to multicast discovery packets and allow monitoring by device management software.
NOTE:
To change the multicast discovery port number, refer to Changing Port Numbers (P. 239).
[Scope Name]
To include the device in a given scope, enter a scope name using alphanumeric characters.
3 Click [OK].
■ Notifying a Device Management Software of the Device's Power Status
1 Select [Power Saving Mode Notification Settings] > [Edit]. 2 Select the [Notify] check box and configure the required settings.
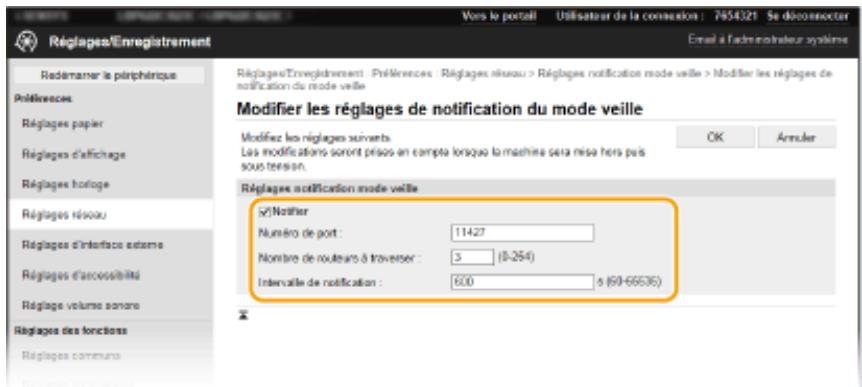
[Notify]
Select the check box to notify the device management software of the device's power status. If [Notify] is selected, you will find that the device does not establish unnecessary communications in power saving mode and reduces its overall power consumption.
[Port Number]
Change the port number for this function according to the network environment.
[Number of Routers to Traverse]
Specify the number of routers that notification packets can traverse.
[Notification Interval]
Specifies how often the device reports its power on/off status to the device management software.
3 Click [OK].
5 Restart the device. Restarting the device (P. 104)
■ Setting communication parameters between the device and plug-ins
You can set the activation parameters for communication between the device and iW Management Console plug-ins. Using plug-ins allows you to manage device settings from iW Management Console.