
VR-20 - Audio recorder TEAC - Free user manual and instructions
Find the device manual for free VR-20 TEAC in PDF.

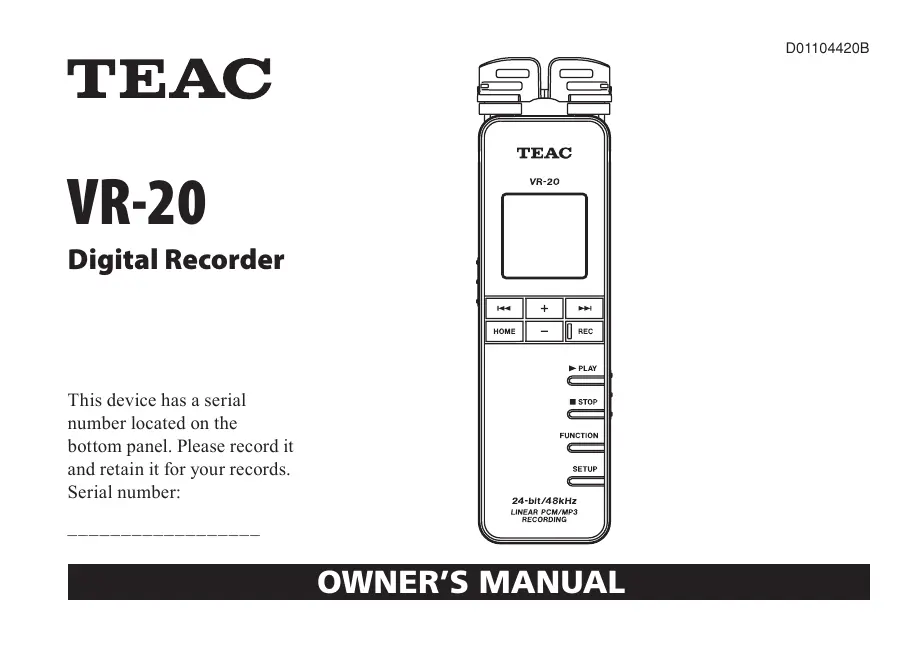

| Product Type | Digital Audio Recorder |
| Brand | TEAC |
| Model | VR-20 |
| Dimensions (W × H × D) | 37 × 139.5 × 15 mm |
| Weight | 56 g (without batteries) |
| Power Supply | 2 AAA batteries (alkaline or NiMH) or USB bus power |
| Power Consumption | 1 W max |
| Battery Life (alkaline) | Approx. 6 hours (MP3 recording or playback) |
| Recording Media | microSD/microSDHC card (64 MB - 32 GB) |
| Recording Formats | PCM 16/24 bit, 44.1/48 kHz stereo/mono; MP3 32-320 kbps, 44.1 kHz |
| Built-in Microphone | Stereo electret condenser swivel |
| Built-in Speaker | Mono 100 mW |
| Connectors | MIC/EXT. IN input (3.5 mm mini-jack), earphone/LINE OUT output (3.5 mm mini-jack), Micro USB, microSD slot |
| Main Recording Functions | AGC (Low/High) or manual, pre-record (2 s), scheduled recording, low-cut filter, REC EQ (Voice/Boost/Low/Mid/High) |
| Playback Functions | Variable speed 50-200% without pitch change, A-B repeat, playlist, PLAY EQ (Noise Cancelling, Boost, Low/High Cut) |
| Display | 96×96 pixel LCD with backlight |
| Operating Temperature | 0°C to 40°C |
| Included Accessories | microSD card installed, 2 AAA alkaline batteries, Micro USB cable (80 cm), in-ear earphones, warranty card, user manual |
| Maintenance | Clean with a dry cloth; do not use solvents |
| Safety | Follow safety instructions: do not expose to water, do not open, use batteries correctly |
| Spare Parts and Repairability | Contact TEAC customer service or an authorized center |
| General Information | Manufactured by TEAC Corporation, Japan. Serial number on the bottom face. |
Frequently Asked Questions - VR-20 TEAC
User questions about VR-20 TEAC
0 question about this device. Answer the ones you know or ask your own.
Ask a new question about this device
Download the instructions for your Audio recorder in PDF format for free! Find your manual VR-20 - TEAC and take your electronic device back in hand. On this page are published all the documents necessary for the use of your device. VR-20 by TEAC.
USER MANUAL VR-20 TEAC
This device has a serial number located on the bottom panel. Please record it and retain it for your records. Serial number:
IMPORTANT SAFETY INSTRUCTIONS
1 Read these instructions.
2 Keep these instructions.
3 Heed all warnings.
4 Follow all instructions.
5 Do not use this apparatus near water.
6 Clean only with dry cloth.
7 Do not block any ventilation openings. Install in accordance with the manufacturer's instructions.
8 Do not install near any heat sources such as radiators, heat registers, stoves, or other apparatus (including amplifiers) that produce heat.
9 Do not defeat the safety purpose of the polarized or grounding-type plug. A polarized plug has two blades with one wider than the other. A grounding type plug has two blades and a third grounding prong. The wide blade or the third prong are provided for your safety. If the provided plug does not fit into your outlet, consult an electrician for replacement of the obsolete outlet.
10 Protect the power cord from being walked on or pinched particularly at plugs, convenience receptacles, and the point where they exit from the apparatus.
11 Only use attachments/accessories specified by the manufacturer.
12 Use only with the cart, stand, tripod, bracket, or table specified by the manufacturer, or sold with the
apparatus. When a cart is used, use caution when moving the cart/apparatus combination to avoid injury from tip-over.

13 Unplug this apparatus during lightning storms or when unused for long periods of time.
14 Refer all servicing to qualified service personnel. Servicing is required when the apparatus has been damaged in any way, such as power-supply cord or plug is damaged, liquid has been spilled or objects have fallen into the apparatus, the apparatus has been exposed to rain or moisture, does not operate normally, or has been dropped.
- Do not expose this apparatus to drips or splashes.
- Do not place any objects filled with liquids, such as vases, on the apparatus.
- If the product uses batteries (including a battery pack or installed batteries), they should not be exposed to sunshine, fire or excessive heat.
IMPORTANT SAFETY INSTRUCTIONS
- CAUTION for products that use replaceable lithium batteries: there is danger of explosion if a battery is replaced with an incorrect type of battery. Replace only with the same or equivalent type.
- Caution should be taken when using earphones or headphones with the product because excessive sound pressure (volume) from earphones or headphones can cause hearing loss.
Cautions about Batteries
This product uses batteries. Misuse of batteries could cause a leak, rupture or other trouble. Always abide by the following precautions when using batteries.
- Never recharge non-rechargeable batteries. The batteries could rupture or leak, causing fire or injury.
- When installing batteries, pay attention to the polarity indications (plus/minus (+/-) orientation), and install them correctly in the battery compartment as indicated. Putting them in backward could make the batteries rupture or leak, causing fire, injury or stains around them.
- When you store or dispose of batteries, isolate their terminals with insulation tape or something like that to prevent them from contacting other batteries or metallic objects.
-
When throwing used batteries away, follow the disposal instructions indicated on the batteries and the local disposal laws.
-
Do not use batteries other than those specified. Do not mix and use new and old batteries or different types of batteries together. The batteries could rupture or leak, causing fire, injury or stains around them.
- Do not carry or store batteries together with small metal objects. The batteries could short, causing leak, rupture or other trouble.
- Do not heat or disassemble batteries. Do not put them in fire or water. Batteries could rupture or leak, causing fire, injury or stains around them.
- If the battery fluid leaks, wipe away any fluid on the battery case before inserting new batteries. If the battery fluid gets in an eye, it could cause loss of eyesight. If fluid does enter an eye, wash it out thoroughly with clean water without rubbing the eye and then consult a doctor immediately. If the fluid gets on a person's body or clothing, it could cause skin injuries or burns. If this should happen, wash it off with clean water and then consult a doctor immediately.
- The unit power should be off when you install and replace batteries.
- Remove the batteries if you do not plan to use the unit for a long time. Batteries could rupture or leak, causing fire, injury or stains around them. If the battery fluid leaks, wipe away any fluid on the battery compartment before inserting new batteries.
IMPORTANT SAFETY INSTRUCTIONS
THIS CLASS B DIGITAL APPARATUS COMPLIES WITH CANADIAN ICES-003.
CET APPAREIL NUMÉRIQUE DE LA CLASSE B EST CONFORME À LA NORME NMB-003 DU CANADA.
FOR U.S.A.
TO THE USER
This equipment has been tested and found to comply with the limits for a Class B digital device, pursuant to Part 15 of the FCC Rules. These limits are designed to provide reasonable protection against harmful interference in a residential installation. This equipment generates, uses, and can radiate radio frequency energy and, if not installed and used in accordance with the instruction manual, may cause harmful interference to radio communications. However, there is no guarantee that interference will not occur in a particular installation. If this equipment does cause harmful interference to radio or television reception, which can be determined by turning the equipment off and on, the user is encouraged to try to correct the interference by one or more of the following measures.
a) Reorient or relocate the receiving antenna.
b) Increase the separation between the equipment and receiver.
c) Connect the equipment into an outlet on a circuit different from that to which the receiver is connected.
d) Consult the dealer or an experienced radio/TV technician for help.
CAUTION
Changes or modifications to this equipment not expressly approved by TEAC CORPORATION for compliance could void the user's authority to operate this equipment.
IMPORTANT SAFETY INSTRUCTIONS
产品有毒有害物质或元素的名称及含量
Product components 12
Conventions used in this manual 13
Intellectual property rights. 13
About microSD cards. 15
Precautions for placement. 16
Beware of condensation. 16
Cleaning the unit. 16
2 - Names and functions of parts. 17
Top panel 17
Left side panel 20
Right side panel 21
Bottom panel 22
Home Screen 23
Recording Screen 26
Menu structure. 27
FUNCTION menu 27
SETUP menu 28
Menu operation basics 29
3-Preparations 31
Preparing the power 31
About the power supply 31
Using AAA batteries 31
Using USB bus power 31
Turning the power on and off 32
Turning the power on 33
Turning the power off 33
Inserting and removing microSD cards. 34
Inserting a card 34
Ejecting a card. 34
Preparing a microSD card for use 35
Setting the date and time. 35
Using the built-in speaker to monitor playback. 37
Connecting monitoring equipment 38
Preventing accidental operation with the hold function 39
Using the built-in microphone 39
Setting the mics to capture localized sound. 39
Setting the mics to record a wide stereo sound...40
Setting the microphone to record nearby sounds 40
Swapping the left-right channels of the built-in microphone pair 40
Microphone position detection 42
Using the stand 43
Table of Contents
4-Recording. 44
Making recording settings 44
Setting the recording quality. 44
Setting the built-in stereo microphone for input .46
Setting external input. 46
Reducing low-frequency noise when recording...48
Setting the recording quality when recording
(REC EQ) 49
Automatically starting and pausing recording....51
Set the folder where recorded files are saved ....53
Creating new folders 54
Placement and connections 55
Recording with the built-in microphone. 55
Recording with an external microphone. 56
Recording with an external device (MIC/EXT. IN) 56
Adjusting the input level 56
Using the auto gain control function. 56
Setting the recording level manually. 57
Recording 58
Starting a new file while continuing to record .... 59
Manually starting a new file during recording .... 59
Using timer recording. 60
Recording the moment before pushing REC
(PREREC) 62
Recording formats and times 63
5 - File and folder operations
(FILE/FOLDER screen) 64
Navigating the FILE/FOLDER screen 64
Icons shown on the FILE/FOLDER screen 65
File operations 65
Folder operations 67
Selecting a folder for recording and playback.....67
Creating a new folder 67
Splitting files 68
Erasing files 69
6-Playback 71
Playing a file 71
Stopping playback. 71
Searching backward and forward. 71
Jumping back a few seconds during playback....71
Adjusting the playback volume 72
Set the playback and repeat areas 73
Using the FILE/FOLDER screen to set a folder as the
playback area 74
75
Adding files to the Playlist. 76
Editing the Playlist 77
Table of Contents
Selecting a file for playback (skipping) 79
Repeating playback of an interval 80
Enhancing sound quality during playback 82
Changing the playback speed 83
7 - Connecting with a Computer 86
Connecting to a computer by USB 86
Copying files to a computer 87
Copying files from a computer 88
Ending the connection with a computer 88
8 - Various Settings and Information
Display 89
Other settings 89
Using the auto power off function 89
Setting the backlight. 90
Setting the battery type. 91
Using the stealth mode 93
Setting the contrast 94
Reformatting the microSD card 95
Initializing unit settings. 98
Viewing unit, card and file information 99
9 - Messages 101
10 - Troubleshooting 105
8 TEAC VR-20
11-Specifications. 107
Recording media and formats 107
Input and output. 107
Audio input and output. 107
Audio performance 108
Requirements for connected computers 108
Other specifications. 109
Dimensional drawings. 110
In this guide, we will show you how to record and playback using this unit.
When the unit is shipped from the factory, a microSD card has already been installed and the recording format has been set to 16-bit, 44.1 kHz PCM. You can change the recording format to increase the quality of recording further or to make longer recording possible. For details, see "Setting the recording quality" on page 44.
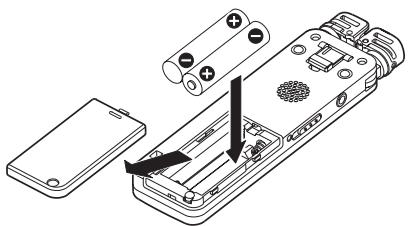
1 Insert batteries into the battery compartment on the back of the unit. Align them with the + / - indications in the compartment.
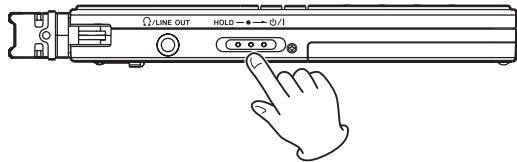
2 Turn the power ON. Slide the / 1 / HOLD switch on the left side of the unit toward / 1
until the unit starts up. Release the switch when the unit starts.
3 Set the REC LEVEL switch on the right side of the unit to LOW.
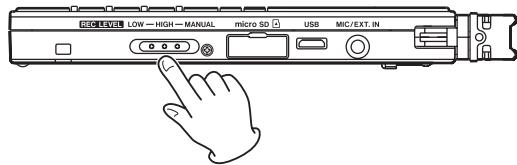
If the volume of the sound source is low, setting this switch to HIGH might improve the recording. Moreover, when recording music, setting the recording level manually could improve the recording quality even
Quick Start Guide
more. For details, see "Adjusting the input level" on page 56.
4 Press the REC key to start recording. The REC indicator lights during recording.
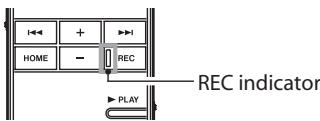
5 Press the STOP key to stop recording.
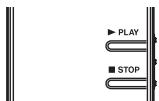
6 Press the PLAY key to play back the recording that you just made.
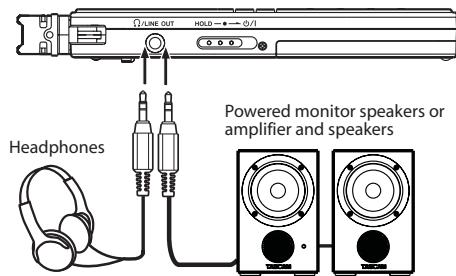
To listen using headphones or an amplification system with speakers, connect the equipment to the / LINE OUT jack on the left side of the unit.
To listen using the unit's built-in speaker, turn the speaker ON. For details, see "Using the built-in speaker to monitor playback" on page 37.
7 Use the + and - keys to adjust the playback volume.
8 Press the STOP key to stop playback.
NOTE
If you have multiple recordings, use the and keys to select the file that you want to playback.
Thank you very much for purchasing the TEAC VR-20 Digital Recorder. We hope that you will enjoy using this recorder for many years to come. Please read this Owner's Manual carefully in order to maximize your use of all the unit's features. Please keep a copy of this manual in a safe place for future reference. You can also download a digital copy of this manual from our website (www.teac.com).
Features
24-bit, 48-kHz linear PCM and MP3 recording
Built-in high-performance stereo microphone
- Microphone angle can be changed
- Closed for recording interviews and other situations where the orientation is important
-
Open for recording music and other situations where width and stereo image is important
-
Open and rotated for recording meetings and other situations where sound comes from multiple directions.
Built-in speaker
- Playback speed can be adjusted in a range from half to double without changing pitch
Automatic starting and stopping possible in response to input signals
- File splitting manually possible (PCM files only)
- Auto gain control and sound enhancement during recording (REC EQ function)
- Manual recording level adjustment possible in addition to two levels of automatic gain control
- Noise cancellation and sound quality enhancement during playback (PLAY EQ function)
- Stand for tabletop recording
- Pre-record function allows recording the 2 seconds before the record button was pressed
- Interval repeat playback (A-B repeat)
1 - Introduction
- Stereo mini-jack for external input (supports mics that require plug-in power)
- Can be powered by 2 AAA batteries or USB bus power
Timer recording - Jump back playback function can be set to 1-10, 20 or 30 seconds
USB 2.0 jack (Micro USB) - microSD/microSDHC cards used as recording media
96 x 96 pixel LCD with backlight - Playlist function allows files to be added to a list for playback
Product components
This product includes the following.
Main unit 1
- microSD card installed in unit 1
AAA alkaline batteries. 2
Micro USB cable (80 cm) 1
In-ear stereo headphones 1
Warranty card. 1
Owner's Manual (this document) 1
Please open the packaging carefully to avoid damaging the unit. Save the box and packaging materials for shipping at a future date.
Please contact the store where you purchased this unit or TEAC if any of these accessories are missing or have been damaged during transportation.
Conventions used in this manual
The following conventions are used in this manual.
- Keys, jacks and other parts of this unit and other equipment are indicated in a bold font like this: HOME key.
- Characters that appear on the display are shown like this: ON
- "microSD memory card" is sometimes abbreviated as "microSD card."
Additional information is provided as necessary as tips, notes and cautions.
TIP
These are hints about how the unit can be used.
NOTE
These provide additional explanations and special situations, for example.
CAUTION
These instructions should be followed to avoid injury, damage to equipment or loss of data.
Intellectual property rights
- TEAC is a trademark of TEAC Corporation, registered in the U.S. and other countries.
- microSDHC Logo is a trademark of SD-3C, LLC.

- Microsoft, Windows, Windows XP, Windows Vista, and Windows 7 are either registered trademarks or trademarks of Microsoft Corporation in the United States and/or other countries.
- Apple, Macintosh, iMac, Mac OS and Mac OS X are trademarks of Apple Inc.
1 - Introduction
- MPEG Layer-3 audio coding technology licensed from Fraunhofer IIS and Thomson. Supply of this product does not convey a license nor imply any right to distribute MPEG Layer-3 compliant content created with this product in revenue-generating broadcast systems (terrestrial, satellite, cable and/or other distribution channels), streaming applications (via Internet, intranets and/or other networks), other content distribution systems (pay-audio or audio-on-demand applications and the like) or on physical media (compact discs, digital versatile discs, semiconductor chips, hard drives, memory cards and the like). An independent license for such use is required. For details, please visit http://mp3licensing.com.
- Other company names, product names and logos in this document are the trademarks or registered trademarks of their respective owners.
Any data, including, but not limited to information, described herein are intended only as illustrations of such data and/or information and not as the specifications for such data and/ or information. TEAC Corporation disclaims any warranty that any use of such data and/or information shall be free from infringement of any third party's intellectual property rights or other proprietary rights, and further, assumes no liability of whatsoever nature in the event of any such infringement, or arising from or connected with or related to the use of such data and/or information.
This product is designed to help you record and reproduce sound works to which you own the copyright, or where you have obtained permission from the copyright holder or the rightful licensor. Unless you own the copyright, or have obtained the appropriate permission from the copyright holder or the rightful licensor, your unauthorized recording, reproduction or distribution thereof may result in severe criminal penalties under copyright laws and international copyright treaties. If you are uncertain about your rights, contact your legal advisor. Under no circumstances will TEAC Corporation be responsible for the consequences of any illegal copying performed using the recorder.
About microSD cards
This unit uses microSD cards for recording and playback. microSD cards that are 64 MB - 2 GB and microSDHC cards that are 4 GB - 32 GB in size can be used. A list of microSD cards that have been tested with this unit can be found on the TEAC web site (www.teac.com).
Precautions for use
microSD cards are delicate media. In order to avoid damaging a card or the card slot, please take the following precautions when handling them.
- Do not leave them in extremely hot or cold places.
- Do not leave them in extremely humid places.
- Do not let them get wet.
- Do not put things on top of them or twist them.
- Do not hit them.
1 - Introduction
Precautions for placement
The environmental temperature operation range of this unit is 0 - 40^ (32 - 104^)
- Do not install in the following types of places. Doing so could degrade the sound quality and/ or cause malfunctions.
- Places with significant vibrations or that are otherwise unstable
Near windows or other places exposed to direct sunlight
Near heaters or other extremely hot places - Extremely cold places
- Places with bad ventilation or high humidity
Beware of condensation
If the unit is moved from a cold to a warm place, or used after a sudden temperature change, there is a danger of condensation; vapor in the air could condense on the internal mechanism, making correct operation impossible. To prevent this, or if this occurs, let the unit sit for one or two hours at the new room temperature before using.
Cleaning the unit
Use a dry soft cloth to wipe the unit clean. Do not clean the unit with a chemically treated cloth or substances such as benzene, thinner and alcohol because they might cause damage to the surface of the unit.
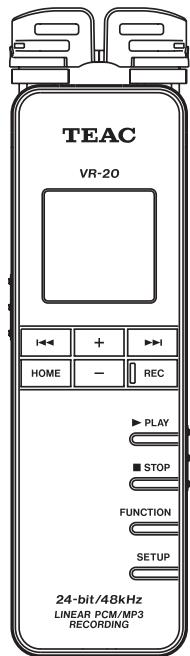
Top panel
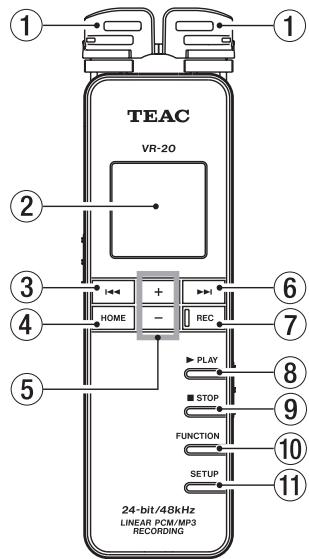
① Built-in stereo microphone
This is a stereo electret condenser microphone. When a separate microphone or other external device is connected to the MIC/EXT. IN jack on the right panel, the input from that external microphone/device input is given priority, and the built-in stereo microphone is disabled.
② Display
This shows various types of information.
③ key
Press this key during playback or when paused during playback to return to the beginning of the recording.
Press this key when stopped at the beginning of a recording to skip to the previous recording.
Press and hold to search backward.
Press when a menu screen is open to return to the previous screen.
On the FILE/FOLDER screen, press to move up a level.
2 - Names and functions of parts
This operates as a function key on some menus. (The function is shown at the bottom of the screen.)
When in record standby, this key adjusts the recording level.
④ HOME keys
Press to open the Home Screen.
When the Home Screen is open, press to return to the previous screen.
⑤ +/- keys
Use these to adjust the output level during playback.
When a setting screen is open, use these keys to select files, folders and other items, to turn functions ON and OFF, and to set split points in files.
These operate as function keys on some menus. (The functions are shown at the bottom of the screen.)
⑥ key
During playback and when stopped, press this key to skip to the next file. Press and hold to search forward. When a menu screen is open, press this key to open menus and folders, as well as to move between setting items and confirm setting values.
This operates as a function key on some menus. (The function is shown at the bottom of the screen.)
When in record standby, this key adjusts the recording level.
⑦ REC key and indicator
Press when stopped to start recording if the recording level setting switch is set to HIGH or LOW (see item 17 below). The REC indicator lights.
Press when stopped to start recording standby if the recording level setting switch is set to MANUAL. The REC indicator blinks when in recording standby. Press when in recording standby to start recording. Press and hold
when stopped to start pre-record standby.
Press during recording to create a new track and continue recording without interruption (track increment).
⑧ PLAY key
Press when stopped to start playback. Press during playback to jump back a few seconds and continue playback.
9 STOP key
Press to end recording standby or stop playback or recording at the current position.
10 FUNCTION key
Press when the Home Screen is open to open the Function menu. Press when the Function menu is open to open the Home Screen.
⑪ SETUP key
Press when the Home Screen is open to open the Setup menu. Press when the Setup menu is open to open the Home Screen.
2 - Names and functions of parts
Left side panel
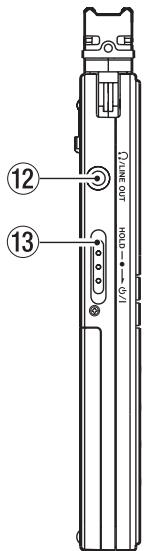
12 Y/LINE OUT jack
Connect headphones or the line input jack of an external device using a stereo mini-jack cable.
13 / /HOLD switch
Turn the power ON/OFF. Set the switch to the HOLD position to activate the hold function, which prevents accidental operation. When set to HOLD, none of the keys can be used.
Right side panel
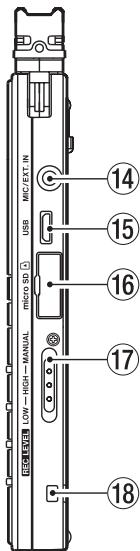
MIC/EXT. IN jack
This stereo mini-jack is an external microphone/device input jack that can provide plug-in power to mics that need it.
Micro USB port
Use the included Micro USB cable to connect this USB port to a computer.
microSD card slot
Insert a microSD card here.
17 REC LEVEL switch
Use to set the recording level. When set to LOW or HIGH, the auto gain control function is activated, and the unit's recording level is adjusted automatically. When set to MANUAL, use the and keys on the top panel to set the recording level manually.
18 Strap holder
Attach a strap here.
2 - Names and functions of parts
Bottom panel
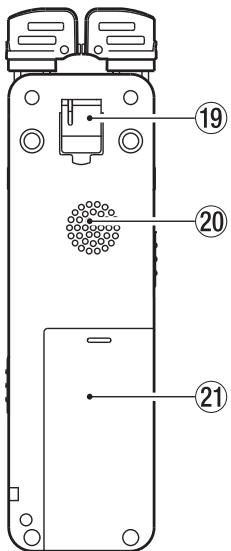
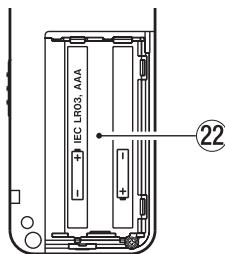
19 Stand
Use this stand to raise the unit slightly when recording on a tabletop.
20 Mono speaker
Use this speaker for monitoring.
Sound is not output by this speaker when recording or in recording standby, when headphones or a monitoring system is connected to the unit, or when the speaker has been turned OFF in the unit settings.
21 Battery compartment cover
22 Battery compartment
Put 2 AAA batteries into this compartment to power the unit.
Home Screen
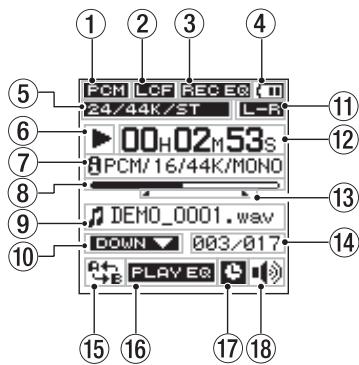
① File format
This shows the recording file format.
PCM: PCM format
MP3 format
② Low-cut filter status
Shows the low cut filter status is shown here.
LCF indicator shown: Low-cut filter ON
indicator not shown: Low-cut filter OFF
③ Status of sound quality enhancement during recording
This shows the status of the sound quality enhancement function that can be used when recording.
RECEQ indicator shown: Sound quality enhancement during recording is ON
RECE0 indicator not shown: Sound quality enhancement during recording is OFF
④ Power supply status
A battery icon appears when the unit is operating on battery power. The amount of remaining battery charge is indicated by the number of bars (or). When there are no bars, and the icon blinks, the batteries are almost dead and the unit's power will automatically change to off soon.
2 - Names and functions of parts
When using USB bus power, is shown.
⑤ File mode display
This shows the recording file format.
PCM: Shows the quantization bit rate, sampling frequency and whether stereo or monaural.
MP3: Shows the bit-rate and whether stereo or monaural.
⑥ Recorder operation status
The recorder operation status is indicated by one of the following icons.
| Icon | Meaning |
| ■ | Stopped |
| II | Paused |
| ▲ | Playing back |
| ▲▲ | Searching forward |
| ▲▲ | Searching backward |
| ▲▲I | Skipping to the start of the next file |
| I▲▲ | Skipping to the start of the current or previous file |
⑦ Playback file format
This shows the format of the currently selected file. Information about the file format of the currently selected file is shown after the icon. When stopped, the possible recording time of the card is shown.
⑧Playback position bar
This bar shows the current playback position. As playback progresses, the bar extends from the left.
9 File information
The name of the file being played back or tag information is shown. If an MP3 file has ID3 tag information, it is shown.
⑩ Playback speed status
One of the following icons is shown depending on whether the playback speed function is ON or OFF and the playback speed setting.
2 - Names and functions of parts
| Display | Meaning |
| DOWN | 50–90% |
| No indicator | 100% |
| UP | 110–200% |
① Microphone left-right position setting
This shows the current microphone left-right position setting
- 3 : This is shown when the left microphone is input to the left channel and the right microphone is input to the right channel.
E-C: This is shown when the left microphone is input to the right channel and the right microphone is input to the left channel.
12 Elapsed time
This shows the elapsed time of the file being played (hours: minutes: seconds).
13 Repeat playback A (starting) and B (ending) point status
This shows this setting status of starting and ending points for A-B repeat playback.
When a starting point is set, is shown below the playback position bar at the corresponding position.
When an ending point is set, is shown below the playback position bar at the corresponding position.
⑭ Playback file number/total number of files
The total number of files in the playback area and the current file number are shown
15 Repeat playback and playback area setting status
One of the following icons is shown depending on the setting.
A-B repeat playback
:Playback area set to ALL file
:Playback area set to FOLDER
:Playbackarea set toPLAYLIST
2 - Names and functions of parts
Status of sound quality enhancement during playback
The status of the sound quality enhancement function during playback is shown.
PLAYEQindicator shown:ON
PLAYO indicator not shown: OFF
⑰ Timer setting status
This icon appears when the timer is set for recording.
Built-in speaker setting status
This shows whether the built-in speaker is ON or OFF.
The speaker is set to ON.
1: The speaker is set to OFF.
NOTE
Even if the SPEAKER setting is ON, no sound is output from the speaker when recording or in recording standby, or when headphones or a monitoring system is connected.
Recording Screen
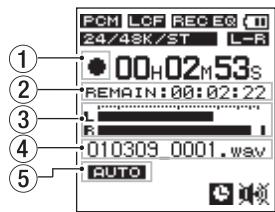
① Recorder operation status
This icon shows the recorder operation status.
| Icon | Meaning |
| ■ | Stopped or in standby |
| ● | Recording |
② Remaining recording time
This shows the remaining recording time, which depends on the remaining card capacity and the ENCODING setting.
③ Level meters
This shows the input sound levels.
④ File name
The name that is automatically given to the file being recorded is shown
⑤ Auto record function status
When the auto record function is ON, the AUTO icon appears.
Menu structure
Press the FUNCTION key to open the FUNCTION menu, and press the SETUP key to open the SETUP menu. Their menu items are as follows.
FUNCTION menu
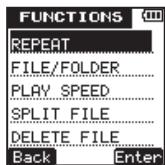
| REPEAT | Enable A-B repeat playback. |
| FILE/FOLDER | Work with files and folders on the card. |
| PLAY SPEED | Set the playback speed. |
| SPLIT FILE | Divide files. |
| DELETE FILE | Delete files. |
2 - Names and functions of parts
SETUP menu
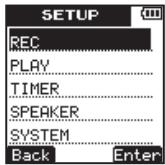
| REC | Make the following settings related to recording.ENCODING (recording quality)EXT. INPUT (switch to external input)LOW CUT (low-cut filter)REC EQ (recording quality adjustment settings)AUTO REC (automatic recording settings) |
| PLAY | Make the following settings related to playback. • MODE (playback area/repeat area) • PLAY EQ (playback sound quality enhancement) • JUMP BACK (jump back time) |
| TIMER | Make settings related to timer recording. |
| SPEAKER | Turn the built-in speaker ON/OFF. |
| SYSTEM | Make the following settings. • LR SWAP (left-right setting for built-in mic) • DATE/TIME • AUTO POWER OFF • BACKLIGHT • BATTERY TYPE • STEALTH MODE (backlight off) • CONTRAST (display contrast) • FORMAT • INFORMATION |
Menu operation basics
| FUNCTION key | Opens the FUNCTION menu. When the FUNCTION menu is open, press to return to the Home Screen. |
| SETUP key | Opens the SETUP menu. When the SETUP menu is open, press to return to the Home Screen. |
| ►I key | Depending on the screen, this key has the following functions. · Advances to the next menu. · Confirms a setting. · On the FILE/FOLDER screen, opens a folder. · On the TIMER START/END screen and the DATE/TIME screen, moves to the next digit. · On the repeat screen, sets the repeat end point. |
| key | Depending on the screen, this key has the following functions. • Returns to the previous screen. • On the repeat screen, sets the repeat start point. |
| +/- keys | Select items and change setting values. |
| HOME key | Opens the Home Screen. When, the Home Screen is open, press to return to the previous screen. |
The functions of the 1 1 , 1 + and - keys are shown at the bottom of the screen. The assignments of the keys differ according to the screen.
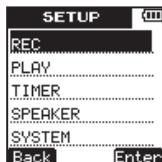
2 - Names and functions of parts
Back: Return to the previous screen.
Enter: Open the sub menu or confirm the setting.
Next: Move the cursor to the next position.
Respond " to a confirmation message.
No: Respond "No" to a confirmation message.
: Change the value by using the + / - keys.
Exec.: Execute the selected operation.
Point: Set the current position to A point.
B Point: Set the current position to B point.
ON/OFF: Turn the selected function on and off.
Preparing the power
About the power supply
This unit can be powered by 2 AAA batteries or USB bus power.
This unit can use AAA alkaline batteries or AAA nickel metal hydride batteries.
Using AAA batteries
Slide off the battery compartment cover on the bottom panel of this unit, and insert 2 AAA batteries into the battery compartment according to the + / - indications.
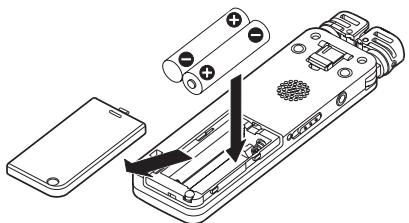
When using AAA batteries, set the battery type so that the unit can accurately display the remaining battery charge and determine the necessary minimum remaining charge for operation. (See "Setting the battery type" on page 91.)
CAUTION
- Manganese AAA batteries cannot be used.
- This unit cannot recharge AAA nickel metal hydride (NiMH) batteries. Use a commercially-available battery recharger to recharge NiMH batteries.
- The included alkaline batteries are provided to allow confirmation of the unit's operation, and are short-lived.
Using USB bus power
Connect this unit and a computer using the included USB cable as shown in the illustration.
3 - Preparations
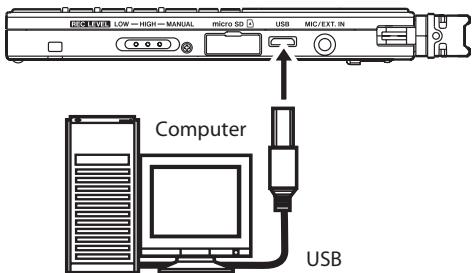
If you connect the unit by USB when its power is ON, or if you turn the unit's power ON when it is already connected by USB, a screen appears on this unit's display to let you choose whether you want to operate the unit using USB bus power or to connect the unit with the computer by USB.
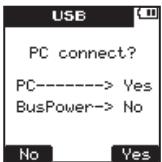
Press the (No) key.
Power is now supplied through the USB bus port. The Home Screen opens automatically.
NOTE
When power is available from both batteries and by USB, power is supplied by the USB connection (USB bus power prioritized).
Turning the power on and off
CAUTION
When switching the unit on and off, we suggest that you turn down the volume of any speakers or amplifiers connected to the unit. Also, do not wear headphones connected to the unit when switching power on or off. This will avoid damage to speakers and possible harm to your hearing.
Turning the power on
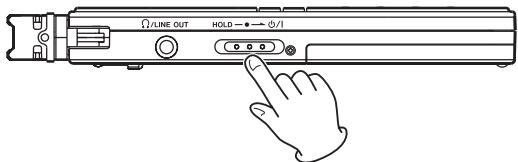
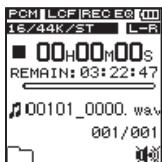
When the power is off, slide the / /HOLD switch toward / . When the startup screen with TEAC VR-20 appears, release the switch. The unit starts up and the Home Screen opens.
Turning the power off
When the power is ON, slide the G / I /HOLD switch toward G / I . When the following shutdown screen appears, release the switch.
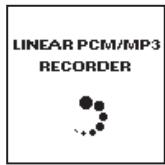
After the unit completes shutting down, the unit's power is set to off.
CAUTION
Always use the / HOLD switch to put the unit power off. All recording data and settings, for example, are lost and cannot be recovered if the power supply is suddenly interrupted. When the power is ON, do not remove the batteries, or disconnect the USB cable when using USB bus power.
Inserting and removing microSD cards
Inserting a card
1 Open the microSD card slot cover on the right side panel of the unit.
2 Insert the microSD card in the direction of the illustration until it clicks into place.
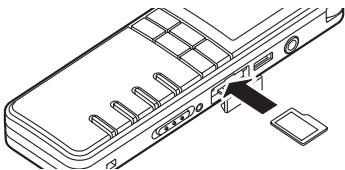
NOTE
When this unit is purchased new, a microSD card is already inserted in the microSD card slot. You can use this microSD card as it is for recording and playback. There is no need to reinsert it.
Ejecting a card
1 Open the microSD card slot cover.
2 Push the microSD card gently, and it will come out of the unit slightly and can be pulled out.
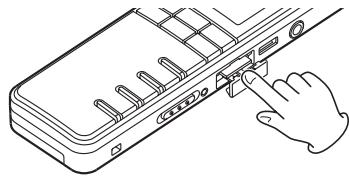
CAUTION
- When connected with a computer by USB, do not remove the microSD card from the unit.
- microSD cards that are compliant with microSD/ SDHC standards can be used.
- A list of microSD cards that have been verified for use with this unit can be found on the TEAC website (http://www.TEAC.com/).
Preparing a microSD card for use
A microSD card must be formatted by this unit to be used with the unit.
1 Confirm that the microSD card is inserted and turn the power ON.
2 If a new card or a card that has been formatted by a device other than this unit has been inserted, the following pop-up message appears.
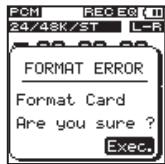
3 Press the (Exec.) key to start formatting the card.
CAUTION
Formatting erases all data on the card.
4 When formatting is complete, the Home Screen opens.
CAUTION
When formatting, confirm that the remaining battery charge is sufficient or use USB bus power.
You can also format the card at any time with this unit. (See "Reformatting the microSD card" on page 95.)
Setting the date and time
This unit adds date and time information to recorded files using its internal clock. Timer recording also uses the internal clock.
1 Press the SETUP key to open the SETUP menu screen.
2 Use the + / - keys to select the SYSTEM menu item.
3 - Preparations
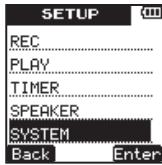
3 Press the Enter) key to open the SYSTEM menu screen.
4 Use the + / - keys to select the DATE/TIME item.
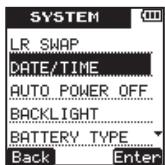
5 Press the Enter) key to open the DATE/TIME setting screen.

6 Press the (Next) key to cycle through the setting items in the following order: year, month, day, hour, minute, second.
Use the + / - keys to set each item.
7 Press the REC key to confirm the date and time setting that the unit stores and uses.
The following pop-up message appears.
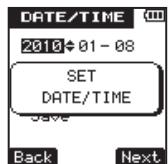
8 After the pop-up confirmation message disappears, press the HOME key to return to the Home Screen.
CAUTION
The date and time setting is only retained for a few minutes if there is no power supplied to the unit by batteries or USB bus power. When using batteries, we recommend that you replace them before they are completely dead.
Using the built-in speaker to monitor playback
To use this unit's built-in speaker to listen to a recording that is playing back, in the SETUP menu set the SPEAKER setting to ON.
1 Press the SETUP key to open the SETUP screen.
2 Use the + / - keys to select the SPEAKER menu item.
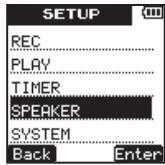
3 Press the (Enter) key to open the SPEAKER setting screen.
4 Use the + / - keys to set it to
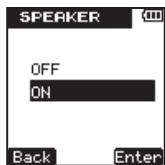
5 Press the (Enter) key to confirm the setting and the following pop-up message appears on the display briefly, and then the SPEAKER setting screen is shown again.
3 - Preparations

6 When you have finished making the setting, press the HOME key to return to the Home Screen.
NOTE
Even if the SPEAKER setting is ON, no sound is output from the speaker when recording or in recording standby, or when headphones or a monitoring system is connected.
Connecting monitoring equipment
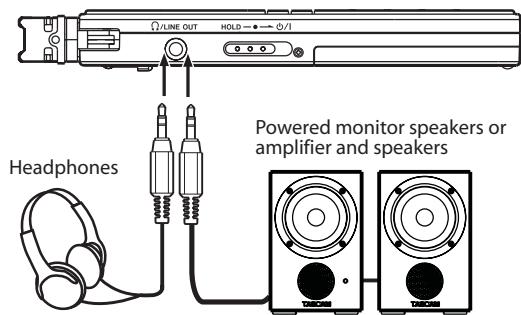
To monitor with headphones, connect them to the / LINE OUT jack.
To monitor with an external monitoring system (powered monitor speakers or an amplifier and speakers), connect it to the / LINE OUT jack.
Preventing accidental operation with the hold function
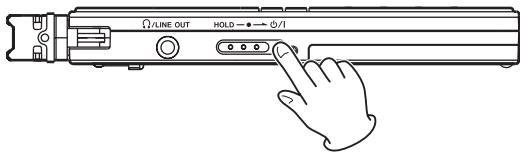
To prevent accidental operation, set the / / HOLD switch to HOLD to activate the hold function. When hold is activated, all keys are disabled.
Using the built-in microphone
This unit's built-in microphones can be adjusted, allowing the angles of the microphones to be changed. By changing the position of the built-in stereo microphone according to recording conditions, the unit can be set to record in wide
stereo for music or oriented with a more focused field for interviews, for example.
Setting the mics to capture localized sound
Close the stereo microphone.
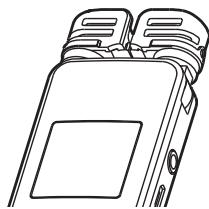
Set this way, recording is possible in a relatively narrow field and is useful for interviews and similar situations.
Setting the mics to record a wide stereo sound
Spread the stereo microphone to the left and right.
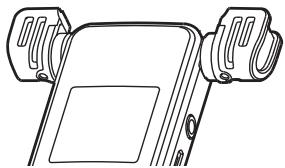
Set this way, the two microphones are spread widely left and right, and recording is possible with a strong stereo field that is good for music, for example.
Setting the microphone to record nearby sounds
Spread the two microphones to the left and to the right and then rotate them.
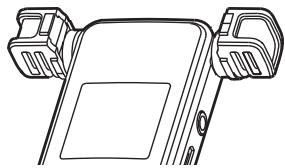
When placed on a table with the top panel up and viewed from above, the microphones are pointed up, making this setting useful for recording meetings and other situations where you want to record sounds from all around the unit.
Swapping the left-right channels of the built-in microphone pair
Depending on the angles at which the microphones are set, the recording channels of the left and right microphones can be swapped. When the microphone pair is open, the left microphone should be set to the left channel and the right microphone should be set to the right channel. When the microphone pair is closed, the
left microphone should be set to the right channel and the right microphone should be set to the left channel.
1 Press the SETUP key to open the SETUP menu
2 Use the + and - keys to select the SYSTEM menu item.
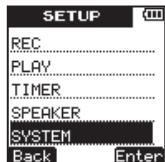
3 Press the (Enter) key to open the SYS-TEM menu screen.
4 Use the + and - keys to select the LR SWAP menu item.
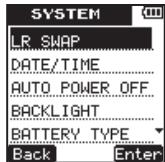
5 Press the Enter) key to open the LR SWAP setting screen.
6 Use the + and - keys to set the item to L-R or R-L according to the mic position.
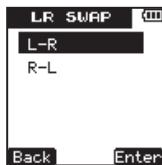
7 Press the Enter) key to confirm the setting and temporarily show the setting, and then return to the LR SWAP setting screen.
3 - Preparations
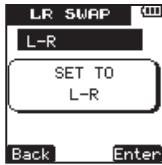
8 When you have finished making the setting, press the HOME to return to the Home Screen.
Microphone position detection
The following pop-up message appears automatically whenever the left microphone is opened or closed. If only the right microphone is opened or closed, it does not appear.
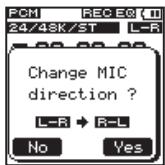
Press the (Y∈s) key to change the setting.
Press the (H) key to leave the setting as it is.
CAUTION
- When you change the microphone angle setting and the pop-up message appears, you must press the key to change the L - R setting, press the key to keep this setting as is, or restore the previous microphone angle to close the pop-up message before you can begin recording.
- The pop-up message does not appear if you change the microphone position when recording or in pre-record mode. If necessary, use the LR SWAP setting from the SYSTEM menu to switch the setting (see the previous page).
Using the stand
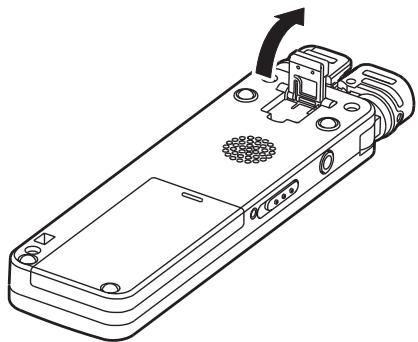
The folding stand included on the bottom panel of this unit can be used to raise the top of the unit slightly when placed on a flat surface.
By using this stand when the unit is placed on a table or similar surface, the amount of contact with that surface is reduced, decreasing vibration noise and allowing clearer recording.
4 - Recording
In addition to recording with the built-in microphone, this unit can also record the signal from an external microphone, the headphone jack of a portable CD player or other external audio device.
Making recording settings
Setting the recording quality
Before starting recording, set the audio file format. In addition to choosing stereo or monaural, set the audio file format to PCM or MP3 to suit your purposes, including whether you want to prioritize sound quality or recording time.
NOTE
- PCM formats allow recording at higher quality than MP3 formats.
-
MP3 formats allow recording for a longer time than PCM formats.
-
With MP3 formats, higher bit-rates allow better recording quality.
- For information about recording times, see "Recording formats and times" on page 63.
1 Press the SETUP key to open the SETUP menu screen.
2 Use the + / - keys to select the REO menu item.
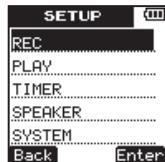
3 Press the (Enter) key to open the REO menu screen.
4 Use the + / - keys to select the ENCODING item.
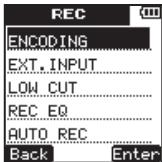
5 Press the Enter key to open the ENCODING setting screen.

6 Use the + / - keys to set the recording quality (encoding format) to one of the following. (The default value is PCM16/44/ST.)
| Display | Format (bit rate), sampling frequency, number of channels |
| PCM24/48/ST | PCM, 24-bit, 48 kHz, stereo |
| PCM16/48/ST | PCM, 16-bit, 48 kHz, stereo |
| PCM24/44/ST | PCM, 24-bit, 44.1 kHz, stereo |
| PCM16/44/ST | PCM, 16-bit, 44.1 kHz, stereo |
| PCM16/44/M0 | PCM, 16-bit, 44.1 kHz, monaural |
| MP3/320/ST | MP3, 320 kbps, stereo |
| MP3/192/ST | MP3, 192 kbps, stereo |
| MP3/128/ST | MP3, 128 kbps, stereo |
| MP3/64/ST | MP3, 64 kbps, stereo |
| MP3/160/M0 | MP3, 160 kbps, monaural |
| MP3/96/M0 | MP3, 96 kbps, monaural |
| MP3/64/M0 | MP3, 64 kbps, monaural |
| MP3/32/M0 | MP3, 32 kbps, monaural |
7 Press the (Enter) key to confirm the setting and show a pop-up with the setting briefly, and then return to the ENCODING menu screen.
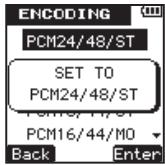
8 When you have finished making the setting, press the HOME key to return to the Home Screen.
Setting the built-in stereo microphone for input
The input source for this unit can be set to the built-in stereo microphone, external microphone input or external device input. When nothing is connected to the MIC/EXT. IN jack on the right side panel of the unit, the built-in microphone is set as the input.
Setting external input
When an external microphone, the headphone jack of a portable CD player or another external audio device is connected to the MIC/EXT. IN jack, the external input is set as the input source. Make the following setting according to the type of connected device.
1 Press the SETUP key to open the SETUP menu screen.
2 Use the + / - keys to select the RED menu item.
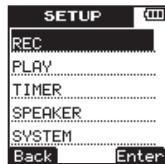
3 Press the (Enter) key to open the REO menu screen.
4 Use the + / - keys to select the EXT. INPUT item.
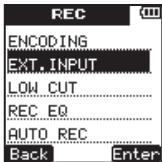
5 Press the Enter) key to open the EXT. INPUT setting screen.
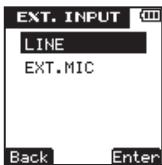
6 Use the + / - keys to select one of the following. (The default value is LINE.)
| Display | Input source |
| LINE | External audio device (the headphone jack of a portable CD player, etc.) |
| EXT. MIC | External microphone |
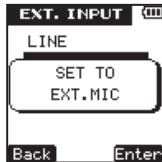
7 Press the (Enter) key to confirm the setting and show a pop-up with the setting briefly and then return to the EXT.INSPT screen.
8 When you have finished making the setting, press the HOME key to return to the Home Screen.
NOTE
In some cases, when connected to the LINE output of a device the volume cannot be adjusted and might be too loud. In such cases, use the headphone output jack or another output that can have its level adjusted.
Reducing low-frequency noise when recording
This unit has a low-cut filter that can be used to reduce low frequencies during recording for a clearer sound. Unnecessary noise from the sounds of air-conditioning and wind during outdoor recording, for example, can be reduced using the low-cut filter. Set the filter to one of three levels according to the recording conditions.
1 Press the SETUP key to open the SETUP menu screen.
2 Use the + / - keys to select the REC menu item.
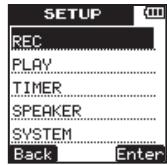
3 Press the (Enter) key to open the REO menu screen.
4 Use the + / - keys to select the LOW CUT item.
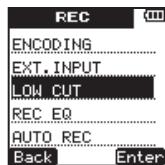
5 Press the Enter key to open the LOW CUT setting screen.
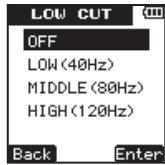
6 Use the + / - keys to select one of the following. (The default value is LOW(40Hz).)
| Display | Low-cut filter effect |
| OFF | Low-cut filter OFF |
| LOW(40Hz) | Low-cut filter below 40 Hz |
| MIDDLE(80Hz) | Low-cut filter below 80 Hz |
| HIGH(120Hz) | Low-cut filter below 120 Hz |
7 Press the Enter) key to confirm the setting and show a pop-up with the setting briefly, and then return to the LOW CUT menu screen.
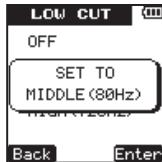
8 When you have finished making the setting, press the HOME key to return to the Home Screen.
Setting the recording quality when recording (REC EQ)
Recording quality can be enhanced according to recording conditions and purposes.
The record equalization (REC EQ) functions are designed to enhance voices, low frequencies, middle frequencies and high frequencies.
1 Press the SETUP key to open the SETUP menu screen.
2 Use the + / - keys to select the REC menu item.
4 - Recording
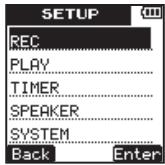
3 Press the▶▶(Enter) key to open the REO menu screen.
4 Use the + / - keys to select the RECO item.
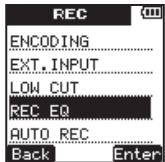
5 Press the Enter key to open the REO EQ setting screen.
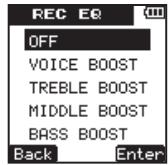
6 Use the + / - keys to select one of the following. (The default value is OFF.)
| Display | Sound quality enhancement |
| OFF | None |
| VOICE BOOST | Voice enhancement |
| TREBLE BOOST | Emphasizes high frequencies |
| MIDDLE BOOST | Middle frequency enhancement |
| BASS BOOST | Emphasizes low frequencies |
7 Press the (Enter) key to confirm the setting and show a pop-up with the setting briefly, and then return to the REC EQ menu screen.
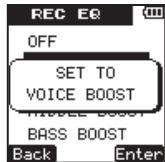
8 When you have finished making the setting, press the HOME key to return to the Home Screen.
Automatically starting and pausing recording
This unit can be set to automatically start and pause recording according to input sound levels.
1 Press the SETUP key to open the SETUP menu screen.
2 Use the + / - keys to select the REC menu item.
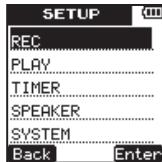
3 Press the (Enter) key to open the REO menu screen.
4 Use the + / - keys to select the AUTO REC item.
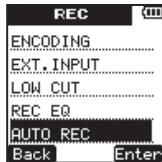
5 Press the Enter) key to open the AUTO REC menu screen.
6 Use the + / - keys to select the ON/OFF item.
4 - Recording
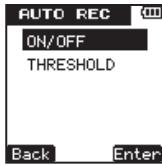
7 Press the Enter key to open the ON/OFF setting screen.
8 Use the + / - keys to select OH. (The default value is OFF.)
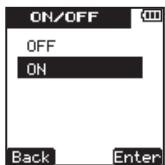
9 Press the Enter) key to confirm the setting and show a pop-up with the setting briefly, and then return to the AUTO REC ON/OFF screen
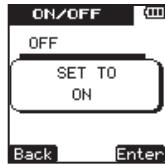
10 Press the 口 Back) key to return to the AUTO REC menu screen
11 Use the + / - keys to select the THRESHOLD item.
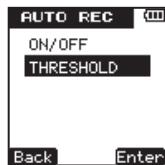
12 Press the Enter) key to open the THRESHOLD setting screen.
13 Set the level at which recording starts and pauses (THRESHOLD LEVEL). A icon
appears above the level meter on the screen. Use the + / - keys to set the value to-6dB, -12dB,-24dB or -36dB.
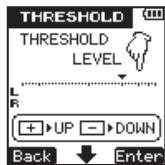
14 Press the Enter) key to confirm the setting and show a pop-up with the setting briefly, and then return to the THRESHOLD setting screen.
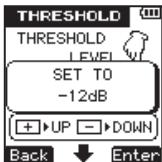
15 When you have finished making the settings, press the HOME key to return to the Home Screen.
Set the folder where recorded files are saved
Set the folder where the file being recorded is to be saved before beginning recording.
If no particular setting is made, the file will be saved in the SOUND folder.
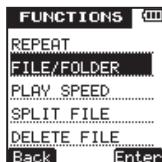
1 Press the FUNCTION key to open the FUNCTIONS menu screen.
2 Use the + / - keys to select the FILE/FOLDER menu item.
4 - Recording
3 Press the Enter) key to open the FILE/FOLDER screen.
4 Use the + / - keys to select the folder where you want to save recorded files.
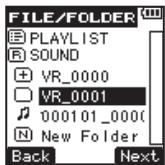
5 Press the (Next) key to open the selected folder.
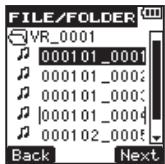
6 This sets the folder where recorded files are saved. Press the HOME key to return to the Home Screen.
NOTE
If you select PLAYLIST as the destination for saving new recorded files, they are saved in the folder that contains the currently selected file.
Creating new folders
Folders can be created to a maximum of two levels inside the sound folder, which is the root folder used by this unit. Use folders to organize recording sessions and categorize music tracks, for example.
1 Press the FUNCTION key to open the FUNCTIONS menu screen.
2 Use the + / - keys to select the FILE/FOLDER menu item.
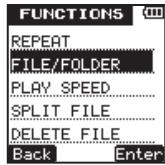
3 Press the Enter) key to open the FILE/FOLDER screen.
4 Use the + / - keys to select the New Folder menu item.
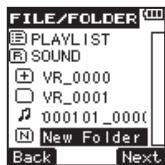
5 Press the (Next) key to open the following pop-up message.
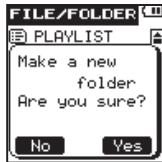
6 Press the (Y∈s) key to create and open a new folder. The newly created folder is set as the folder where recorded files are saved.
7 When you are finished creating new folders, press the HOME key to return to the Home Screen.
Placement and connections
Recording with the built-in microphone
Point the microphone toward the sound source and put it in a stable place where vibration is minimal.
Recording with an external microphone
Connect the external microphone to the unit's MIC/EXT. IN jack.
Point the microphone toward the sound source and put it in a stable place where there is little vibration.
On the EXT. INPUT setting screen, set EXT. INPUT to EXT.MIC. (See "Setting external input" on page 46.)
Recording with an external device (MIC/EXT.IN)
Connect the output of an external audio device to the unit's MIC/EXT. IN jack using a stereo miniplug cable.
On the EXT. INPUT setting screen, set EXT. INPUT to LINE. (See "Setting external input" on page 46.)
Adjusting the input level
Using the auto gain control function
Set the REC LEVEL switch on the right side panel to LOW or HIGH.
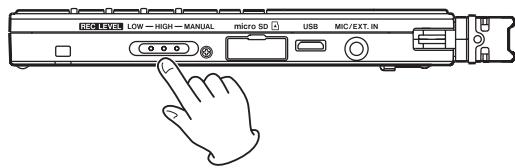
Set this way, the unit automatically adjusts the input gain according to the input level. This function is useful for recording meetings and other situations where people are talking.
When the volume of the sound you are recording is loud, set the switch to LOW. When the recording sounds distant or quiet
or the sound source itself has low volume, set the switch to HIGH.
When the REC LEVEL switch is set to LOW or HIGH, the unit automatically adjusts the recording level for optimal recording, so you cannot use the 1 1 / 1 keys to manually adjust the recording level.
Setting the recording level manually
1 Set the REC LEVEL switch on the right side panel to MANUAL.
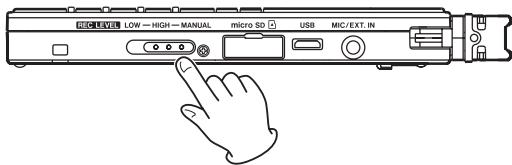
2 Press the REC key to put the unit into recording standby. The recording indicator blinks and the recording screen appears.
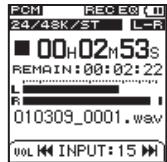
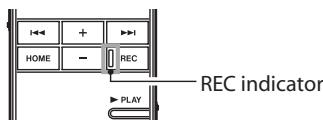
3 Use the and keys to adjust the input level. The input level is shown at the bottom of the display.
NOTE
- Press the STOP key to end recording standby.
- When in recording standby and during recording, even if the SPEAKER setting is set to ON, no sound is output from the built-in speaker. If you want to adjust the level or record while monitoring the sounds, connect headphones to the unit's
4 - Recording
LINE OUT jack. The monitoring sound volume can be adjusted using the +/- keys, but this has no effect on the recording.
TIP
In addition to using the 144 / 144 keys to adjust the recording level, try changing the orientation of the microphone and its distance from the source of the sound. The orientation of the microphone and the distance also change the sound quality.
Recording
Use the following procedures after selecting the input, adjusting the level and returning to the Home Screen.
NOTE
If the REC LEVEL switch is set to LOW or HIGH, pressing the REC key once starts recording immediately without putting the unit into recording standby. You can check the current recording setting at the top of the Home Screen.
1 Press the REC key to start recording standby. The REC indicator blinks when in recording standby.
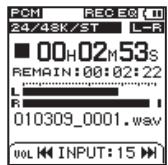
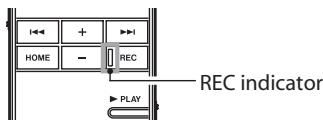
2 Press the REC key to start recording.
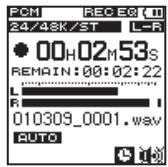
When recording starts, the REC indicator lights, and the elapsed recording time and the remaining recording time are shown on the display.
3 Press the STOP key to end recording.
Starting a new file while continuing to record
With this unit, the maximum recording file size is 2 GB. If the file size reaches 2 GB while recording, the unit automatically continues recording in a new file and stops recording the current file.
Manually starting a new file during recording
You can manually create a new file during recording at any time. Press the REC key during recording create a new file and continue recording.
CAUTION
- If the total number of folders and files would exceed 999, a new file cannot be created.
- A new file cannot be created if the recording time is less than 2 seconds.
- If the newly created file would have the same name as an existing file, the numerical suffix is increased by one as many times as necessary until a unique name is created.
NOTE
- When a new file is created, the number at the end of the file name is increased by one.
- Recording times are different for the same file size depending on the file format. In addition, if
4 - Recording
the recording time exceeds 24 hours, "23:59:59" is shown on the display.
Using timer recording
The unit can start and end recording at set times. In addition to setting start and end times, you can also set the unit to record only once or repeat recording daily.
1 Press the SETUP key to open the SETUP menu screen.
2 Use the + / - keys to select the TIMER menu item.
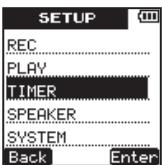
3 Press the Enter key to open the TIMER menu screen.
4 Use the + / - keys to select the ON/OFF item.
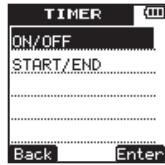
5 Press the (Enter) key to open the ON/OFF setting screen.
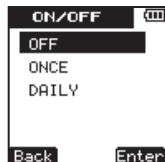
6 Use the + / - keys to set the timer operation to one of the following options.
| OFF | Timer OFF |
| ONCE | Record only once |
| DAILY | Record every day |
7 Press the Enter) key to confirm the setting and show a pop-up with the setting briefly, and then return to the ON/OFF setting screen.
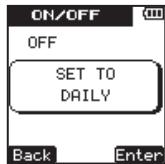
8 Press the (Back) key to return to the TIMER menu screen.
9 Use the + / - keys to select the START/END menu item.
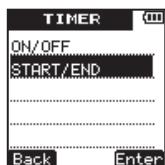
10 Press the (Enter) key to open the START/END setting screen where you can set the timer starting and ending times.
11 Use the (Next) key to select the time increment to set, and use the + / - keys to change the timer starting and ending times.
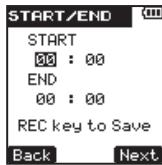
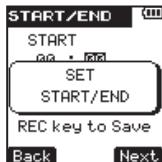
12 Press the REC key to confirm the setting and open a pop-up briefly and return to the START/END setting screen.
4 - Recording
13 When you have finished making the settings, press the HOME key to return to the Home Screen.
CAUTION
The starting and ending times for timer recording are based on the DATE/TIME item setting. Be sure to use the DATE/TIME setting screen to set this accurately in advance. (See "Setting the date and time" on page 35.)
NOTE
During timer recording, regardless of the position of the / /HOLD switch, the unit's keys are disabled to prevent recording from being stopped unintentionally. The following pop-up message appears if you try to use the keys on the unit.
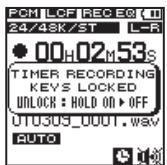
If you want to operate the unit during timer recording, slide the / /HOLD switch toward the HOLD position momentarily to disable the hold function.
Recording the moment before pushing REC (PRE REC)
By using prerecording, when the unit is in recording standby you can record up to two seconds of the signal input before the REC button is pushed to start recording.
Press and hold the REC button when stopped to staty pre-recording standby. Press REC button again to start recording for two seconds when the recording is activated
TIP
By using this in combination with the AUTO REC function, you can record events without losing the beginnings of sounds.
NOTE
If the amount of time in record standby is less than two seconds, the sound for that amount of time is recorded.
Recording formats and times
Recording times (hours: minutes) for different file formats and microSD/microSDHC card capacities are shown in the following table.
| 1GB | 2GB | 4GB | 8GB | |
| PCM24/48/ST | 1:02 | 2:04 | 4:08 | 8:16 |
| PCM16/48/ST | 1:33 | 3:06 | 6:12 | 12:24 |
| PCM24/44/ST | 1:07 | 2:15 | 4:30 | 9:00 |
| PCM16/44/ST | 1:41 | 3:22 | 6:44 | 13:28 |
| PCM16/44/MO | 3:22 | 6:44 | 13:28 | 26:56 |
| MP3/320/ST | 7:27 | 14:54 | 29:48 | 59:36 |
| MP3/192/ST | 12:25 | 24:50 | 49:40 | 99:20 |
| MP3/128/ST | 18:36 | 37:16 | 74:32 | 149:04 |
| MP3/64/ST | 37:16 | 72:32 | 149:04 | 298:08 |
| MP3/160/MO | 14:54 | 29:48 | 59:36 | 119:12 |
| MP3/96/MO | 24:50 | 49:40 | 99:20 | 198:40 |
| MP3/64/MO | 74:30 | 145:04 | 298:08 | 596:16 |
| MP3/32/MO | 149:04 | 290:08 | 596:16 | 1192:32 |
- The above recording times are estimates, and might differ according to the microSD/ microSDHC card.
- The above recording times are not continuous recording times. They are total recording times for microSD/microSDHC card capacities.
5 - File and folder operations (FILE/FOLDER screen)
On the FILE/FOLDER screen, you can view the contents of the SOUND folder (which is used to store audio files) on the microSD card. In addition, you can erase audio files selected on this screen, create folders and add tracks to the Playlist. (See " Playlist" on page 75.)
TIP
If you connect this unit to a computer by USB, or connect the microSD card directly to a computer using a card reader, you can also use the computer to change the structure of folders inside the SOUND folder and delete files. Moreover, you can also use the computer to edit file names.
To open the FILE/FOLDER screen, press the FUNCTION key to open the FUNCTION menu screen, use the +I- keys to select the FILE/FOLDER menu item, and press the key to open it.
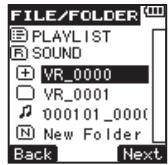
This screen shows the contents of the folder that contains the file selected on the Home Screen before the FILE/FOLDER screen was opened.
Navigating the FILE/FOLDER screen
The FILE/FOLDER screen shows folders and music files in a tree hierarchy format much like a file list shown on a computer. Two sub-levels of folders can be created.
- Use the + / - keys to select files and folders.
- When a folder is selected, press the key to show its contents.
- When a file or folder is selected, press the (Back) key to close the currently open folder, and show the contents of the higher level folder.
5 - File and folder operations (FILE/FOLDER screen)
- When a file is selected, press the (Next) key to open the pop-up menu.
- When New Folder is selected, press the (Next) key to open a pop-up message to confirm whether or not you want to create a new folder.
Icons shown on the FILE/FOLDER screen
The following types of icons are shown on the FILE/FOLDER screen.
[ \text{Playlist} ]
PLAYLIST appears next to an 三 icon. (See "ArrayList" on page 75.)
SOUND folder SOUND
On the root level screen, the SOUND folder is shown as the top level.
New folder New Folder
New Folder appears next to an icon. (See "Creating a new folder" on page 67.)
Audio file
A music file is shown with its file name after an icon.
Folder
This icon indicates a folder that contains files or other folders.
Folder
This icon indicates a folder that does not contain files or other folders.
Displayed folder
The contents of the current folder are shown on the screen.
File operations
You can add files to the Playlist and delete them from the card.
5 - File and folder operations (FILE/FOLDER screen)
1 After selecting a file on the FILE/FOLDER screen, press the (Next) key to open the following pop-up message.
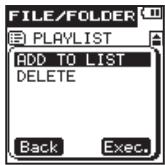
2 Use the + / - keys to select the desired item, and press the (Exec.) key to execute one of the following operations.
ADD TO LIST
Adds the selected file to the Playlist. (See " Playlist" on page 75.)
DELETE
Opens a pop-up message where you can confirm whether you want to delete the selected file.
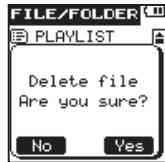
Press the (Y∈s) key to erase the selected file.
Press the (No) key to cancel erasing the file.
NOTE
You cannot erase write-protected files and files that this unit does not recognize.
Folder operations
You can select the folder for recording and playing files and create new folders.
Selecting a folder for recording and playback
Select the desired folder on the FILE/FOLDER screen, and press the (Next) key to open the selected folder and show a list of the files in the folder.
Opening a folder also sets it as the folder for recording and playback.
When you are done selecting the folder, press the HOME key to return to the Home Screen.
Creating a new folder
Select New Folder on the FILE/FOLDER screen, and press the (Next) key to open a pop-up message where you can confirm whether you want to create a new folder.

Press the (Yes) key to create a new folder and open it. Press the (No) key to cancel creation of a new folder and return to the FILE/FOLDER screen.
When a new folder is created, it is automatically set as the recording/playback folder.
After finishing the creation of a new folder, press the HOME key to return to the Home Screen.
NOTE
- A maximum of two sub-levels of folders can be created.
- If you select PLAYLIST as the destination for saving new recorded files, they are saved in the folder that contains the currently selected file.
Splitting files
You can split a file into two files at any point.
1 Use the and keys or the FILE/FOLDER screen to select the file that you want to split.
2 Play or search the file until you find the point where you want to split it.
3 Press the FUNCTION key to open the FUNCTIONS menu screen.
4 Use the + / - keys to select the SPLITFILE menu item.
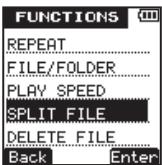
5 Press the Enter key to open the SPLITFILE screen.
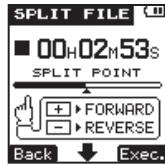
6 Use the + / - keys to adjust the point where the file is to be split.
7 After setting the split point, press the (Exec.) key to open the following pop-up message.
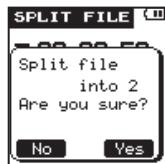
8 Press the ( ) key to split the file and return to the Home Screen.
5 - File and folder operations (FILE/FOLDER screen)
Press the (No) key to cancel splitting the file and return to the SPLITFILE screen.
NOTE
When the SPLIT FILE screen is open, you can press the PLAY key and find the point where you want to split the file during playback.
When a file is split, new files are created with "a" and "b" added to the end of the original file name.
For example, if the file name before being split was "091225_0000.wav", then the file names after splitting are "091225_0000_a.wav" (part before the split point) and "091225_0000_b.wav" (part after the split point).
After being split, the "a" file is selected.
CAUTION
- MP3 files cannot be split.
-
If the open capacity on the microSD card is low, splitting might not be possible.
-
If the resulting file names would have more than 200 characters, splitting is not possible.
- If a file already exists that has the same name as a name that would result from splitting a file, splitting is not possible.
Erasing files
Follow these procedures to erase unnecessary files.
1 Use the and keys or the FILE/FOLDER screen to select a file that you want to erase.
2 Press the FUNCTION key to open the FUNCTIONS menu screen.
3 Use the + / - keys to select the DELETE FILE menu item.
5 - File and folder operations (FILE/FOLDER screen)
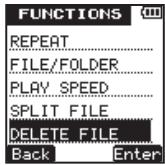
4 Press the (Enter) key to open the DE-LETE FILE screen.

5 Press the (Yes) key to erase the file and return to the Home Screen. Press the (No) key to cancel erasing the file and return to the FUNCTION menu screen.
NOTE
This unit cannot erase a file that is write-protected. To erase such a file, connect the unit to a computer and change this property from the computer.
Playing a file
On the Home Screen, press the PLAY key when stopped to start playback.
NOTE
- Files must be in the playback area to be played. (See "Set the playback and repeat area" on page 73.)
- You can also select a file on the FILE/FOLDER screen to play it.
Stopping playback
On the Home Screen, press the STOP key during playback to stop playback at the current position.
Searching backward and forward
On the Home Screen, when stopped or during playback, press and hold the and keys to search backward or forward.
Jumping back a few seconds during playback
During playback, press the PLAY key to jump back a few seconds and continue playback.
Set the jump back interval using the following procedures.
1 Press the SETUP key to open the SETUP menu screen.
2 Use the + / - keys to select the PLAY menu item.
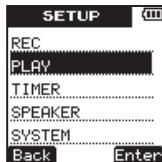
3 Press (Enter) key to open the PLAY menu screen.
4 Use the + / - keys to select the JUMP BACK menu item.
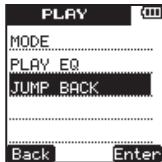
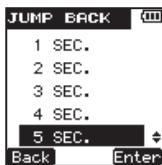
5 Press the Enter) key to open the JUMP BACK setting screen.
6 Use the + / - keys to set the jump back interval to one of the following values: OFF, 1-10 seconds (in 1-second increments), 20 seconds or 30 seconds. (The default value is 3 seconds.)
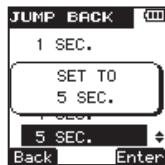
7 Press the Enter key to confirm the setting and show a pop-up with the setting
briefly, and then return to the JUMP BACK screen.
8 When you have finished making the setting, press the HOME key to return to the Home Screen.
Adjusting the playback volume
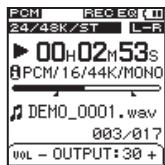
Press the + / - keys when stopped, when paused or during playback to adjust the volume output to headphones or an audio monitoring system connected to the unit. The output level is shown at the bottom of the display
Set the playback and repeat areas
Use the MODE setting in the PLAY menu to set the playback area.
When the last file in the playback area is played, the unit automatically continues playing from the beginning of the first file in the playback area.
1 Press the SETUP key to open the SETUP menu screen.
2 Use the + / - keys to select the PLAY menu item.
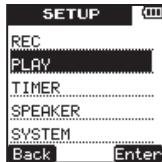
3 Press the Enter) key to open the PLAY menu screen.
4 Use the + / - keys to select the MODE item.
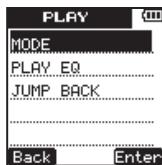
5 Press the (Enter) key to open the MODE setting screen.

6 Use the + / - keys to set the playback area to one of the following.
ALLFILES
Play all the files in the SOUND folder on the microSD card.
FOLDER (default value)
Play all the files in the folder that contains the currently selected file.
PLAYLIST
Play all the files that have been added to the Playlist. (See " Playlist" on page 75.)
7 Press the (Enter) key to confirm the setting and show a pop-up with the setting briefly, and then return to the MODE screen.
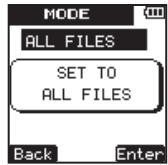
8 When you have finished making the setting, press the HOME key to return to the Home Screen.
NOTE
The current playback area setting is shown at the bottom left of the Home Screen. When A-B repeat playback is active, the A-B repeat setting is shown.
Using the FILE/FOLDER screen to set a folder as the playback area
Regardless of the current playback area setting, selecting a folder on the FILE/FOLDER screen sets the selected folder as the playback area.
1 Press the FUNCTION key to open the FUNCTIONS menu screen.
2 Use the + / - keys to select the FILE/FOLDER menu item.
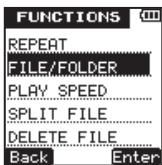
3 Press the (Enter) key to open the FILE/FOLDER screen.
4 Use the + / - keys to select the folder that you want to set as the playback area.
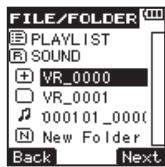
NOTE
For details about FILE/FOLDER screen operations, see "5 - File and folder operations (FILE/FOLDER screen)" on page 64.
5 Press the (Next) key to open the selected folder and show a list of files inside the folder. This action also sets the selected folder as the playback area.
6 Press the HOME key to return to the Home Screen.
Playlist
You can add files to the Playlist and set it as the playback area.
Use the PLAY item in the SETUP menu to set MODE to PLAYLIST. This sets the unit to play the files in the Playlist.
Adding files to the Playlist
1 Press the FUNCTION key to open the FUNCTIONS menu screen.
2 Use the + / - keys to select the FILE/FOLDER menu item.
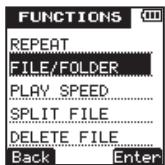
3 Press the Enter) key to open the FILE/FOLDER screen.
NOTE
For details about FILE/FOLDER screen operations, see "5 - File and folder operations (FILE/FOLDER screen)" on page 64.
4 Use the + / - keys to select a file to add to the Playlist.
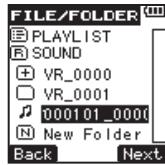
5 Press the (Next) key to open the following pop-up menu.
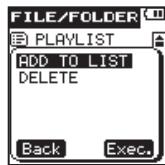
6 Use the + / - keys to select ADD TO LIST.
7 Press the (Exec.) key to add the selected file to the Playlist, and close the pop-up menu.
8 Repeat steps 4, 5, 6 and 7 as necessary. The files are numbered in the list in the order that they are added.
9 When you are finished adding tracks to the Playlist, press the HOME key to return to the Home Screen.
Editing the Playlist
The PLAYLIST screen shows the tracks in the Playlist. You can use this screen to edit the Playlist.
1 Press the FUNCTION key to open the FUNCTIONS menu screen.
2 Use the + / - keys to select the FILE/FOLDER menu item.
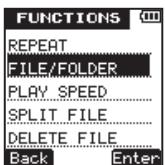
3 Press the Enter) key to open the FILE/FOLDER screen.
NOTE
For details about FILE/FOLDER screen operations, see "5 - File and folder operations (FILE/FOLDER screen)" on page 64.
4 Use the + / - keys to select PLAYLIST.
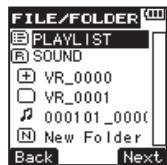
5 Press the (Next) key to open the PLAYLIST screen.
6 Use the + / - keys to select the file that you want to edit.
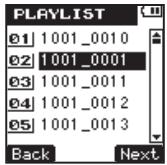
7 Press the key (Next) to open the pop-up menu.
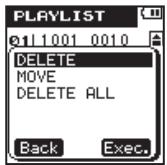
8 Use the + / - keys to select the desired operation from the following choices.
9 Press the (Exec.) key to execute it.
DELETE
Remove the file from the Playlist. A file that is removed from the Playlist is not erased from
the microSD card.
MOVE
Use this to change the order of the selected file. The file number is highlighted along with the file name.
- Use the + / - keys to change the file order in the Playlist.
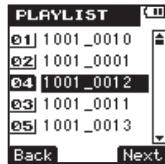
The illustration above shows a file being moved from the fourth to the third position.
- Press the (Next) key to confirm the movement and return to the PLAYLIST screen. To cancel the movement, press the (Back) key, and return to the previous screen.
DELETE ALL
Use this to remove all files from the Playlist. Files that are removed from the Playlist are not erased from the microSD card.
After pressing the key, open a pop-up message to confirm the deletion of all the files from the Play List.
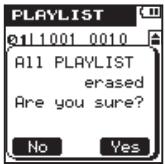
- Press the (Yes) key to delete all the files from the Play List and return to the PLAYLIST screen. Press the (No) key to cancel the deletion and return to the PLAYLIST screen.
10 When you are finished editing, press the HOME key to return to the Home Screen.
Selecting a file for playback (skipping)
On the Home Screen, press the and keys to select the file that you want to play.
When in the middle of a file, press the key to return to the beginning of the file. When at the beginning of a file, press the key to skip to the beginning of the previous file.
When at the beginning or in the middle of a file, press the key to skip to the beginning of the next file.
NOTE
- Files must be in the playback area to be played back.
Information (file name, etc.) about the file being played back and its file number is shown on the display. - When stopped at the beginning of a file, the icon is shown on the display. When a file is paused, the icon is shown.
Repeating playback of an interval
You can play a desired interval within a file repeatedly (A-B repeat playback).
1 Press the FUNCTION key to open the FUNCTIONS menu screen.
2 Use the + / - keys to select the REPEAT item.
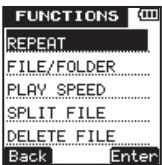
3 Press the Enter key to open the REPAT setting screen.
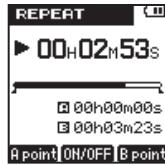
By default, the repeat starting point (A) is set at the beginning of the file and the ending point (B) is set at the end of the file. If you want to repeat the playback of an entire file, press the + key without changing the A and B points
4 During playback (or when paused), press the (A Point) key at the point where you want to start repeat playback. The A (starting) point is set at the position where the key is pressed.
5 Press the (B Point) key at the point where you want to end repeat playback. The B (ending) point is set at the position where the key is pressed.
- /- icons appear beneath the playback position bar on the Home Screen at the A and B point positions.
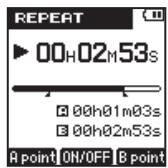
6 Press the + key to start repeat playback.
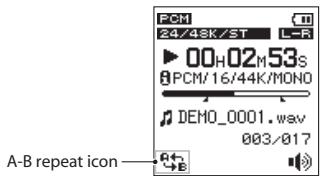
A-B repeat icon appears at the bottom left of the screen.
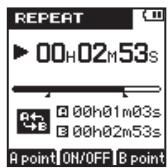
To disable the A-B repeat function, press + key again. A-B repeat icon disappears.
During repeat playback, the A-B repeat icon also appears at the bottom left of the Home Screen.
NOTE
- Press and hold the 1 and 2 keys to search.
- The A and B points must be in the same file. Repeating between two or more files is not possible.
- When a different file is selected, the A and B point settings are discarded.
- Setting the A and B points accurately might not be possible with an MP3 file that is VBR format.
TIP
You can repeat playback of a single file by setting the A point at its beginning and the B point at its end. If A and B points have not been set, by default, the A point is set as the start of the file and the B point is set as the end of the file. As a result, an entire file can be repeated by turning the repeat function ON without setting A and B points in advance.
Enhancing sound quality during playback
This unit has a filter that can enhance voice frequencies, reduce noise, and reduce high or low frequencies during playback. Use this feature according to the recorded material and playback environment.
1 Press the SETUP key to open the SETUP menu screen.
2 Use the + / - keys to select the PLAY item.
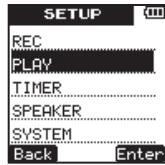
3 Press the (Enter) key to open the PLAY menu screen.
4 Use the + / - keys to select the PLAY EQ item.
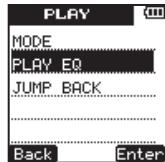
5 Press the Enter) key to open the PLAY EQ setting screen.
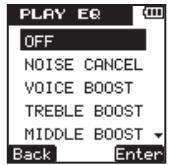
6 Use the + / - keys to select from the following filter functions according to the playback conditions. (The default value is OFF.)
| OFF | EQ function OFF (default value) |
| NOISE CANCEL | Reduces noise. |
| VOICE BOOST | Voice enhancement |
| TREBLE BOOST | Emphasizes high frequencies |
| MIDDLE BOOST | Emphasizes middle frequencies |
| BASS BOOST | Emphasizes low frequencies |
| LOW CUT | Reduces low frequencies. |
| HIGH CUT | Reduces high frequencies. |
7 Press the (Enter) key to confirm the setting and show a pop-up with the setting briefly, and then return to the PLAY EQ setting screen.
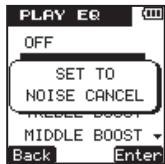
8 When you have finished making the setting, press the HOME key to return to the Home Screen.
Changing the playback speed
Using this unit's playback speed control function, you can adjust the playback speed without changing the pitch in a range from half speed to double speed.
6 - Playback
When the playback speed is set to any value other than 100% , the playback speed function can be turned ON or OFF. When set to 100% , the DOWN U F icons are not shown.
1 Press the FUNCTION key to open the FUNCTIONS menu screen.
2 Use the + / - keys to select the PLAY SPEED menu item.
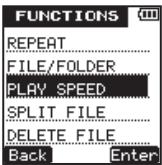
3 Press the (Enter) key to open the PLAY SPEED setting screen.
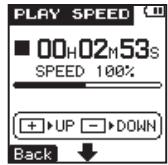
4 Press the + key to increase the playback speed and the -key to decrease the playback speed. The adjustment range is 50 - 200% (in 10% increments).
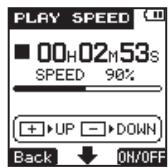
5 Press the ON/OFF) key to turn play speed function ON/OFF. When the playback speed function is ON, and the adjustment is set to a value other than 100% , an DOWN
orUP icon appears on the PLAY SPEED setting screen.
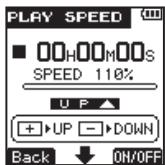
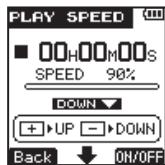
6 When you have finished making the setting, press the HOME key to return to the Home Screen.
7 Press the PLAY key to begin playback at the speed that was set. To restore playback to its original speed, set the value to 100% in step 4 above or turn the function OFF in step 5.
NOTE
When the playback speed function is ON, and the adjustment is set to a value other than 100% , an
DOWN or U P icon appears on the Home
Screen.
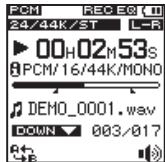
7 - Connecting with a Computer
Connecting to a computer by USB
By connecting this unit with a computer using the included Micro USB cable, you can copy audio files between the unit's microSD card and the computer.
This unit is compatible with the following audio file formats.
MP3: 32-320 kbps, 44.1 kHz
WAV: 44.1/48 kHz, 16/24-bit
NOTE
Instead of connecting this unit to a computer by USB, you can also remove the microSD card and connect it directly to a computer (by using a card reader, for example) to perform the same operations.
CAUTION
-
When connected to a computer by USB and data transmission is enabled, the unit cannot be used normally.
-
Connect the unit directly to a computer. Do not use a USB hub.
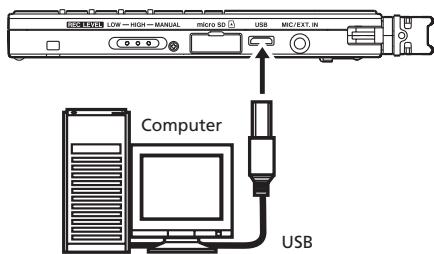
When connected to a computer, a pop-up window appears on this unit's display to let you choose whether you want to operate the unit using USB bus power or to connect the unit with the computer by USB.
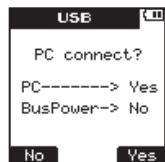
7 - Connecting with a Computer
Press the (Yes) key.
"USB connected" appears on the display.
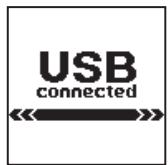
Confirm that the microSD card is inserted into the unit correctly.
If a USB connection is made when a microSD card is not inserted correctly, a "Can't Save Data" pop-up message appears.
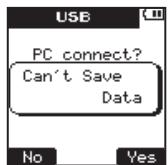
The unit appears on the computer as an external drive named "UR-20".
Copying files to a computer
1 Click the drive named "VR-20" on the computer display to show the "SOUND" and "UTILTY" folders inside it.
2 Open the "SOUND" folder and drag-and-drop the files that you want to copy to any location on the computer.
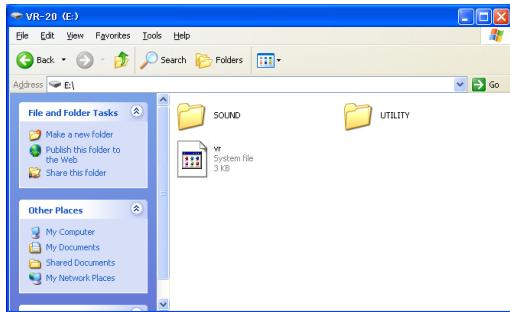
Copying files from a computer
1 Click the drive named "VR-20" on the computer display to show the "SOUND" and "UTILTY" folders inside it.
2 Drag-and-drop audio files from the computer to the "SOUND" folder.
TIP
- You can also use the computer to manage the contents of the "SOUND" folder.
- You can create sub folders inside the "SOUND" folder, but this unit can only recognize two levels of sub folders. The unit ignores deeper folder levels.
- Since this unit can be set to play the contents of a single folder, organizing folders by musical category or artist could be convenient.
- Names given to sub folders and files are shown on the unit's Home Screen and the FILE/FOLDER screen.
Ending the connection with a computer
Follow the correct computer procedures to disconnect the unit from the computer before disconnecting the USB cable. This unit automatically restarts.
Please refer to your computer manual for information about the correct procedures for disconnecting an external drive.
8 – Various Settings and Information Display
Other settings
Use the items in the SYSTEM menu to make various settings to suit the environment and conditions in which the unit is to be used, as well as to format microSD cards.
Using the auto power off function
Use the AUTO POWER OFF setting to set the amount of time since being last used until the unit's power automatically turns OFF when operating on batteries.
1 Press the SETUP key to open the SETUP menu screen.
2 Use the + / - keys to select the SYSTEM menu item.
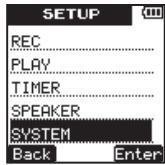
3 Press the Enter) key to open the SYSTEM menu screen.
4 Use the + / - keys to select AUTO POWER OFF.
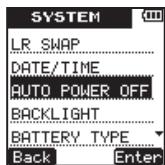
5 Press the Enter) key to open the AUTO OFF setting screen.
6 Use the + / - keys to set the time. Options: OFF (default value—auto power off disabled), 3min, 5min, 10min, 30min
8 - Various Settings and Information Display
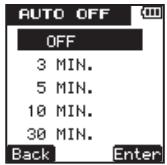
7 Press the Enter key to confirm the setting and show a pop-up with the setting briefly, and then return to the AUTO OFF setting screen.
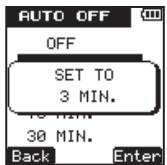
8 When you have finished making the setting, press the HOME key to return to the Home Screen.
Setting the backlight
Use the BACKLIGHT item to set the amount of time since being last used until the unit's backlight automatically turns OFF when operating on batteries.
1 Press the SETUP key to open the SETUP menu screen.
2 Use the + / - keys to select the SYSTEM menu item.
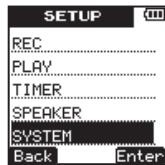
3 Press the (Enter) key to open the SYS-TEM menu screen.
4 Use the + / - keys to select the BACKLIGHT item.

5 Press the (Enter) key to open the BACKLIGHT setting screen.
6 Use the + / - keys to set the time.
Options: OFF (backlight does not turn OFF), 5sec (default value), 10sec, 15sec, 30sec
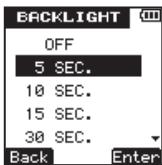
7 Press the (Enter) key to confirm the setting and show a pop-up with the setting
briefly, and then return to the BACKLIGHT setting screen.
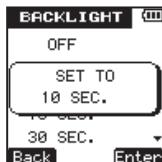
8 When you have finished making the setting, press the HOME key to return to the Home Screen.
Setting the battery type
Use the BATTERY TYPE item to set the type of battery used. This setting is necessary for the unit to display the remaining battery charge and determine the minimum necessary remaining charge for correct operation.
1 Press the SETUP key to open the SETUP menu screen.
8 - Various Settings and Information Display
2 Use the + / - keys to select the SYSTEM menu item.
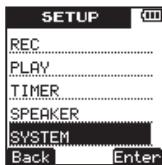
3 Press the Enter key to open the SYS-TEM menu screen.
4 Use the + / - keys to select BATTERY TYPE.
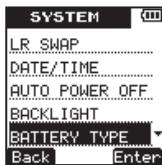
5 Press the Enter key to open the BAT- TERY setting screen.
6 Use the + / - keys to set the battery type.
Options: ALKALINE (alkaline batteries—default value), Ni-MH (nickel metal hydride batteries)
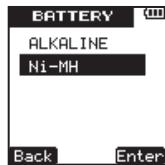
7 Press the Enter) key to confirm the setting and show a pop-up with the setting briefly, and then return to the BATTERY setting screen.
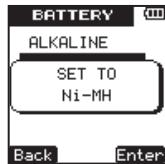
8 When you have finished making the setting, press the HOME key to return to the Home Screen.
Using the stealth mode
Use the STEALTH MODE item to set the backlight and REC indicator to stay unlit at all times.
1 Press the SETUP key to open the SETUP menu screen.
2 Use the + / - keys to select the SYSTEM menu item.
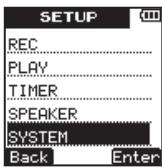
3 Press the (Enter) key to open the SYS-TEM menu screen.
4 Use the +/- keys to select STEALTH MODE.
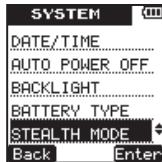
5 Press the (Enter) key to open the STEALTH setting screen.
6 Use the + / - keys to turn the stealth mode OFF (default value) or ON.
(REC indicator and backlight disabled).
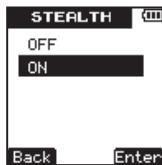
7 Press the (Enter) key to confirm the setting and show a pop-up with the setting
8 - Various Settings and Information Display
briefly, and then return to the STEALTH setting screen.
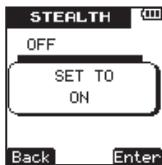
8 When you have finished making the setting, press the HOME key to return to the Home Screen.
Setting the contrast
Use the CONTRAST item to adjust the display contrast.
1 Press the SETUP key to open the SETUP menu screen.
2 Use the + / - keys to select the SYSTEM menu item.
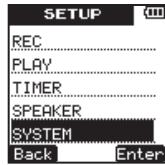
3 Press the Enter) key to open the SYS-TEM menu screen.
4 Use the + / - keys to select CONTRAST.
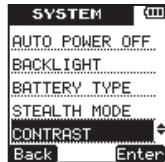
5 Press the Enter) key to open the CONTRAST setting screen.
6 Use the + / - keys to set the display contrast. Options: 日 1 - 1 0 default value:5
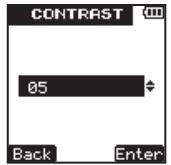
7 Press the (Enter) key to confirm the setting and show a pop-up with the setting briefly, and then return to the CONTRAST setting screen.
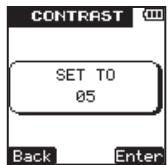
8 When you have finished making the setting, press the HOME key to return to the Home Screen.
Reformatting the microSD card
You can reformat the microSD card.
CAUTION
If you format the card, all files on it are erased.
- When formatting, use USB bus power or confirm that the remaining battery charge is sufficient. If the batteries run out of power during this operation, the formatting might not be completed correctly.
Quick formatting
Use this procedure to format the microSD card quickly.
1 Press the SETUP key to open the SETUP menu screen.
2 Use the + / - keys to select the SYSTEM menu item.
8 - Various Settings and Information Display
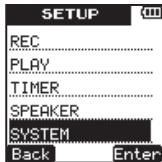
3 Press the Enter) key to open the SYSTEM menu screen.
4 Use the + / - keys to select FORMAT.
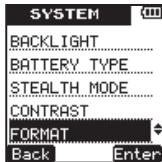
5 Press the (Enter) key to open the FOR-MAT screen..
6 Use the + / - keys to select QUICK.
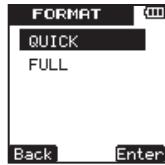
7 Press the (Enter) key to open a confirmation pop-up message.
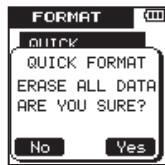
8 Press the 1 (Y∈s) key to start quick formatting.
9 When the quick formatting finishes, the FORMAT menu screen reopens.
10 Press the HOME key to return to the Home Screen.
Full formatting
Use this procedure to full-format the microSD card.
With full formatting, memory errors are checked as formatting is executed. This procedure takes a long time compared to quick formatting.
1 Conduct steps 1 to 5 of the Quick Formatting procedures above.
2 Use the + / - keys to select FULL.
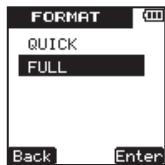
3 Press the (Enter) key to open a confirmation pop-up message.
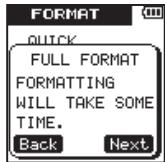
4 Press the (Next) key to open a second confirmation pop-up message.
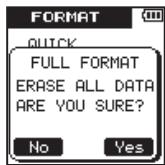
5 Press the key to start full formatting.
6 When full formatting finishes, the FORMAT menu screen reopens.
7 Press the HOME key to return to the Home Screen.
8 - Various Settings and Information Display
Initializing unit settings
Use the INITIALIZE item to restore the unit's various settings to their default values.
1 Press the SETUP key to open the SETUP menu.
2 Use the + / - keys to select the SYSTEM menu item.
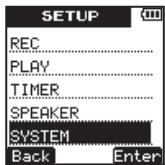
3 Press the Enter key to open the SYS-TEM menu screen.
4 Use the + / - keys to select INITIALIZE.
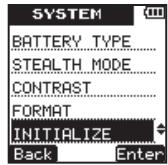
5 Press the (Enter) key to open a confirmation pop-up message.
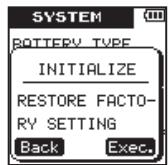
6 Press the (Exec.) key to start initialization. After initialization completes, the SYSTEM menu reappears.
7 Press the HOME key to return to the Home Screen.
Viewing unit, card and file information
Use the following procedures to open the INFORMATION screen where you can view various types of information.
1 Press the SETUP key to open the SETUP menu screen.
2 Use the + / - keys to select the SYSTEM menu item.

3 Press the Enter) key to open the SYS-TEM menu screen.
4 Use the + / - keys to select INFORMATION.

5 Press the Enter key.
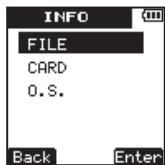
6 Use the + / - keys to select the desired item, and press the 1 (Enter) key.
- FILE information page
- This page shows information about the audio file being played.
8 - Various Settings and Information Display
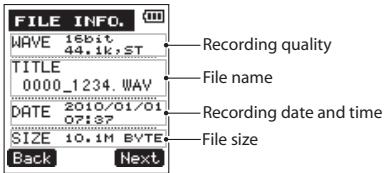
- CARD information page
- This page shows information about the use of the microSD card currently in the unit.
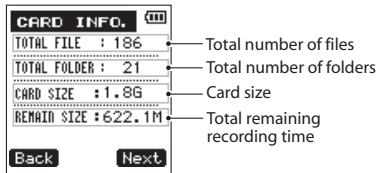
- Operating system information page
- This page shows information about the system firmware version.
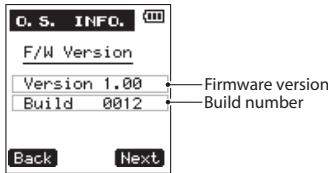
Press the (Next) key on any information page to open the next information page.
7 Press the HOME key to return to the Home Screen.
The following is a list of the pop-up messages that might appear on the VR-20 under certain conditions. Refer to this list if one of these pop-up messages appears and you want to check the meaning or determine a suitable response.
| Message | Meaning and response |
| FILE NAME ERR | The SPLIT FILE function would cause the file name to exceed 200 characters. The SPLIT FILE function adds “_a” or “_b” to the end of the file name. Before choosing the SPLIT FILE function, connect the unit to a computer and edit the file name to less than 198 characters. |
| DUP FILE NAME | The SPLIT FILE function would cause the file name to be the same as that of an existing file. The SPLIT FILE function adds “_a” or “_b” to the end of the file name. Before choosing the SPLIT FILE function, connect the unit to a computer and edit the file name. |
| FILE NOT FOUND | The file added to the playlist cannot be found or a file could be damaged. Please check the file in question. |
| NON-SUPPORTED | The audio file is not a supported format. Please see “7-Connecting with a Computer” for file formats that this unit can use. |
| BATTERY EMPTY | The battery is almost out of power. Replace the AAA batteries. |
| A-B TOO SHORT | The A and B points are too close together. Reset the A and B points with at least 1 second between them. |
| FILE NOT FOUND PLAYLIST | The file in the Playlist cannot be found. Please confirm that the file is still in the SOUND Folder. |
9 - Messages
| Message | Meaning and response |
| NO PLAYLIST | No files have been added to the Playlist. Add a file to the Playlist or change the play mode to something besides PLAYLIST. |
| PLAYLIST FULL | The playlist is full. You cannot add more than 99 tracks to the Playlist. |
| MBR ERROR INIT CARD | The card is not formatted properly or the formatting is broken. Change the card or press the ➔I key when this message appears to format the card in FAT format. CAUTION: Execution of FAT formatting erases all data currently on the card. |
| FORMAT ERROR FORMAT CARD | The FAT formatting of the card is abnormal or broken. This message also appears if you FAT formatted the card using a computer connected by USB and if a new card is inserted in the unit. Always use the VR-20 to conduct FAT formatting of cards to be used with it. Change the card or press the ➔I key when this message appears to format the card in FAT format. CAUTION: Execution of FAT formatting erases all data currently on the card. |
| FILE NOT FOUND MAKE SYSFILE | The system file is missing. This unit requires a system file for operation. When this message appears, press ➔I to automatically create a system file. |
| INVALID SYSFILE MAKE SYSFILE | The system file required to operate this unit is invalid. When this message appears, press ➔I to automatically create a system file. |
| INVALID CARD CHANGE CARD | Something might be wrong with the card. Change the card. |
| WRITE TIMEOUT | Writing to the card timed out. Backup files on the card to your computer, and format the card. |
| CARD FULL | The card has no remaining capacity. Erase unnecessary files or move them to your computer to make open space. |
| LAYER TOO DEEP | Folders can be created down to two layers. You cannot create a new folder inside the current folder. |
| CAN'T DIVIDE | The position selected for divide is not suitable (too close to the beginning or end of a track). |
| MAX FILE SIZE | The file is larger than the designated size or the recording time exceeded 24 hours. |
| FILE FULL | The total number of folders and files exceeds 999. Erase unnecessary files or move them to your computer. |
| CARD ERROR | The card could not be handled properly. Replace the card. |
| CURRENT FILE MP3 | MP3 files cannot be divided. |
| FILE PROTECTED | The file is read only and cannot be erased. |
| NO CARD | No card is in the unit, so recording is not possible. |
| NO PB FILE | There is no file that can be played back. The file might be damaged. |
| NO MUSIC FILE | There is no playback file, so SPLIT FILE cannot be executed. |
9 - Messages
| Message | Meaning and response |
| NOT CONTINUED | If any of these errors occur, turn the unit power OFF and restart it. If the power cannot be turned OFF, remove the batteries and disconnect the USB connection. If the error message continues to appear, please contact a TEAC Service Center. |
| FILE OPERATION FAILED | |
| CAN'T SAVE DATA | |
| PLAYER ERROR | |
| DEVICE ERROR | |
| WRITING FAILIED | |
| SYS ROM ERR | |
| SYSTEM ERR 50 | |
| SYSTEM ERROR 1 | |
| SYSTEM ERROR 2 | |
| SYSTEM ERROR 3 | |
| SYSTEM ERROR 4 | |
| SYSTEM ERROR 5 | |
| SYSTEM ERROR 6 | |
| SYSTEM ERROR 7 | |
| SYSTEM ERROR 8 | |
| SYSTEM ERROR 9 |
If you are having trouble with the operation of this unit, please try the following before seeking repair. If these measures do not solve the problem, please contact the store where you bought the unit or a TEAC Service Center.
Power will not turn ON.
- Confirm that the batteries are not dead.
- Confirm that the batteries are installed with the correct +/- orientations.
The unit is not responding to operations.
- Is the / I /HOLD switch set to HOLD?
The microSD card is not recognized.
- Confirm that the microSD card is securely inserted.
■ Playback is not possible.
- If it is a WAV file, confirm that it is of a compatible sampling frequency.
- If it is an MP3 file, confirm that it is of a compatible bit-rate.
No sound is output.
- Are headphones connected?
- Is the SPEAKER set to OFF?
- Confirm that the monitoring system is connected correctly.
- Is the volume level of the connected monitoring system minimized?
- Is the output level of this unit minimized?
Recording is not possible.
Reconfirm connections.
- Reconfirm the input setting.
- Check whether the recording level is too low.
- Confirm that the microSD card is not full.
- Confirm that the maximum number of files has not been reached.
The recording level is low.
- Is the input level setting too low?
Is the gain setting too low? - Is the output level of a connected external device too low?
10 - Troubleshooting
The sound I am trying to record is distorted.
- Is the input level higher than necessary?
The playback sound is unnatural. - Confirm that the playback speed has not been changed
I cannot erase a file. - Confirm that the file is not read-only (using a computer).
- Files on this device do not appear on a computer.
- Confirm that the USB port of the unit is connected with the computer.
- Is the unit recording or in recording standby?
Recording media and formats
Recording media
microSD card (64 MB - 2 GB)
microSDHC card (4 GB - 32 GB)
Recording and playback formats
WAV: 44.1 / 48kHz 16/24-bit (stereo or monaural)
MP3: 44.1 kHz, 32/64/96/160 kbps (monaural), 64/128/192/320 kbps (stereo)
Input and output
Audio input and output
MIC/EXT. IN jack
Connector: 1/8 (3.5-mm) stereo mini-jack
When set to MIC
Input impedance: 200k
Nominal input level:
LOW: -45 dBV
HIGH: -61 dBV
Maximum input level:
LOW: -29 dBV
HIGH: -45 dBV
When set to EXT.IN
Input impedance: 200k
Nominal input level:
LOW: -19 dBV
HIGH: -31 dBV
Maximum input level:
LOW: -3 dBV
HIGH: -3 dBV
Ω/LINE OUT jack
Connector: 1/8 (3.5-mm) stereo mini-jack
Output impedance: 200
Nominal output level: -18dBV
Maximum output level: -2dBV
11 - Specifications
Maximum output: 5mW + 5mW (into 16
Built-in speaker
100mW (monaural)
USB connection
USB port connector: Micro-B type
Format: USB2.0 mass storage class
Audio performance
Frequency response
20Hz - 20kHz (44.1 kHz, External input External output)
20Hz - 22kHz (48 kHz, External input External output)
Requirements for connected computers
Windows computer
Pentium 300 MHz or faster
128 MB or more memory
USB port (USB2.0 recommended)
Macintosh computer
266 MHz Power PC, iMac, G3, G4 or faster
64 MB or more memory
USB port (USB2.0 recommended)
Recommended USB host controller
Intel chipset
Supported Operating Systems
Windows XP, Windows Vista, Windows 7
Mac OS X 10.2 or newer
Other specifications
Power supply
2 AAA batteries (alkaline or NiMH)
USB bus power
Power consumption
1 W (at Max.)
Battery operation time (when used continuously)
Alkaline batteries
About 6 hours (MP3, recording, JEITA)
About 6 hours (MP3, playback, JEITA)
Dimensions (W× H× D)
37 × 139.5 × 15 ~mm/
1.457 × 5.492 × 0.591 in.
Weight
56g / 1.807oz (without batteries)
Operating temperature range
0-40°C/32-104°F
11 - Specifications
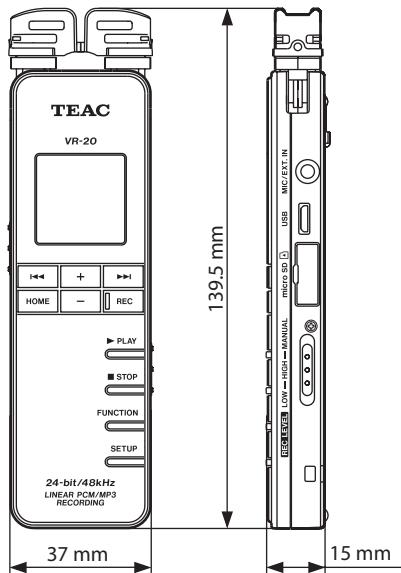
Dimensional drawings
- Illustrations in this manual might differ from the actual product.
- In order to improve the product, specifications and appearance could be changed without prior notice.
TEAC
VR-20
| TEAC CORPORATION | 1-47 Ochiai, Tama-shi, Tokyo 206-8530 Japan Phone: (042) 356-9156 |
| TEAC AMERICA, INC. | 7733 Telegraph Road, Montebello, California 90640 U.S.A. Phone: (323) 726-0303 |
| TEAC CANADA LTD. | 5939 Wallace Street, Mississauga, Ontario L4Z 1Z8, Canada Phone: (905) 890-8008 |
| TEAC MEXICO, S.A. DE C.V. | Río Churubusco 364, Colonia Del Carmen, Delegation Coyoacan, CP 04100, México DF, México Phone: (5255)5010-6000 |
| TEAC UK LTD. | Suites 19 & 20, Building 6, Croxley Green Business Park, Hatters Lane, Watford, Hertfordshire, WD18 8TE, U.K. Phone: (0845) 130-2511 |
| TEAC EUROPE GMBH | Bahnstraße 12, D-65205 Wiesbaden-Erbenheim, Deutschland Phone: 0611-71580 |
- IMPORTANT SAFETY INSTRUCTIONS
- Cautions about Batteries
- TO THE USER
- CAUTION
- - Names and functions of parts. 17
- 3-Preparations 31
- Table of Contents
- 4-Recording. 44
- - File and folder operations
- (FILE/FOLDER screen) 64
- 6-Playback 71
- - Connecting with a Computer 86
- - Various Settings and Information
- Display 89
- - Messages 101
- - Troubleshooting 105
- 11-Specifications. 107
- Quick Start Guide
- NOTE
- Features
- - Introduction
- Product components
- Conventions used in this manual
- TIP
- Intellectual property rights
- About microSD cards
- Precautions for use
- Precautions for placement
- Beware of condensation
- Cleaning the unit
- Top panel
- - Names and functions of parts
- Left side panel
- Right side panel
- Bottom panel
- Home Screen
- ① Microphone left-right position setting
- Elapsed time
- ⑭ Playback file number/total number of files
- Repeat playback and playback area setting status
- A-B repeat playback
- Recording Screen
- Menu structure
- FUNCTION menu
- SETUP menu
- Preparing the power
- About the power supply
- Using AAA batteries
- Using USB bus power
- - Preparations
- Turning the power on and off
- Turning the power on
- Turning the power off
- Inserting and removing microSD cards
- Inserting a card
- Ejecting a card
- Preparing a microSD card for use
- Setting the date and time
- Using the built-in speaker to monitor playback
- Connecting monitoring equipment
- Preventing accidental operation with the hold function
- Using the built-in microphone
- Setting the mics to capture localized sound
- Setting the mics to record a wide stereo sound
- Setting the microphone to record nearby sounds
- Swapping the left-right channels of the built-in microphone pair
- Microphone position detection
- Using the stand
- - Recording
- Making recording settings
- Setting the recording quality
- Setting the built-in stereo microphone for input
- Setting external input
- Reducing low-frequency noise when recording
- Setting the recording quality when recording (REC EQ)
- Automatically starting and pausing recording
- Set the folder where recorded files are saved
- Creating new folders
- Placement and connections
- Recording with the built-in microphone
- Recording with an external microphone
- Recording with an external device (MIC/EXT.IN)
- Adjusting the input level
- Using the auto gain control function
- Setting the recording level manually
- Recording
- Press the REC key to start recording.
- Press the STOP key to end recording.
- Starting a new file while continuing to record
- Manually starting a new file during recording
- Using timer recording
- Recording the moment before pushing REC (PRE REC)
- Recording formats and times
- - File and folder operations (FILE/FOLDER screen)
- Navigating the FILE/FOLDER screen
- Icons shown on the FILE/FOLDER screen
- Audio file
- Folder
- Displayed folder
- File operations
- Folder operations
- Selecting a folder for recording and playback
- Creating a new folder
- Splitting files
- Erasing files
- Playing a file
- Stopping playback
- Searching backward and forward
- Jumping back a few seconds during playback
- Adjusting the playback volume
- Set the playback and repeat areas
- Using the FILE/FOLDER screen to set a folder as the playback area
- Playlist
- Adding files to the Playlist
- Editing the Playlist
- DELETE ALL
- Selecting a file for playback (skipping)
- Repeating playback of an interval
- Press the + key to start repeat playback.
- Enhancing sound quality during playback
- Changing the playback speed
- - Playback
- - Connecting with a Computer
- Connecting to a computer by USB
- Copying files to a computer
- Copying files from a computer
- Ending the connection with a computer
- – Various Settings and Information Display
- Other settings
- Using the auto power off function
- - Various Settings and Information Display
- Setting the backlight
- Setting the battery type
- Using the stealth mode
- Setting the contrast
- Reformatting the microSD card
- Quick formatting
- Full formatting
- Initializing unit settings
- Viewing unit, card and file information
- - Messages
- Power will not turn ON.
- The unit is not responding to operations.
- The microSD card is not recognized.
- ■ Playback is not possible.
- No sound is output.
- Recording is not possible.
- The recording level is low.
- - Troubleshooting
- Recording media and formats
- Input and output
- Audio input and output
- MIC/EXT. IN jack
- Ω/LINE OUT jack
- - Specifications
- Audio performance
- Requirements for connected computers
- Other specifications
- Power supply
- Power consumption
- Battery operation time (when used continuously)
- Dimensions (W× H× D)
- Weight
- Operating temperature range
- TEAC
- VR-20
Brand : TEAC
Model : VR-20
Category : Audio recorder