USER MANUAL CYCLOMAX-01 - CYCLOMAX-01 VALBERG
Thank you for choosing this VALBERG product. VALBERG products are chosen, tested, and recommended by ELECTRO DEPOT, so you can be sure you are getting a top-quality, easy-to-use product that won't let you down. We're confident your new device will be a pleasure to use every day!
Welcome to ELECTRO DEPOT.
Table of Contents

Parts
Product overview
Intended use
Specifications

Assembly/Disassembly
Operation

Cleaning and maintenance
Troubleshooting
Storage
Parts
Dust cup release button
B Handle
C Power cable rewind button
+/- buttons to increase or decrease the suction.
E ON/OFF button
F Air vent
Floor brush storage slot
Dust cup
Hose-connecting inlet
J Flexible hose
Metal extension tube (telescopic)
Floor brush (smooth floors and carpets)
M Pedal (to extend and retract the brush)
Long crevice tool (for hard-to-reach places)
Mini turbo brush (to remove
0 stubborn dirt from furniture, smooth floors and carpets]
Product overview
- Unpack and remove all labels from the unit. Please check that all of the unit's parts are included and intact. If the unit is damaged or faulty, do not use it and take it to your retailer or after-sales service centre.
- Keep all packaging out of the reach of children. There is a risk of accidents if children play with packaging materials.
Intended use
This vacuum cleaner is for household use only. It has not been designed for industrial or professional use by cleaning companies.
Any other use may damage the unit or cause injury.
Specifications
| Model: | 970400 - CYCLOMAX |
| Vacuum cleaner |
| Power: | 700 W max. |
| Dust cup capacity: | 1.4 L |
| Noise level: | 79 dB |
| Suction power: | 130 W |
| Pressure: | 13 kPa |
| Operating voltage: | 220-240 V ~, 50/60 Hz |
| Protection class: | Class II |
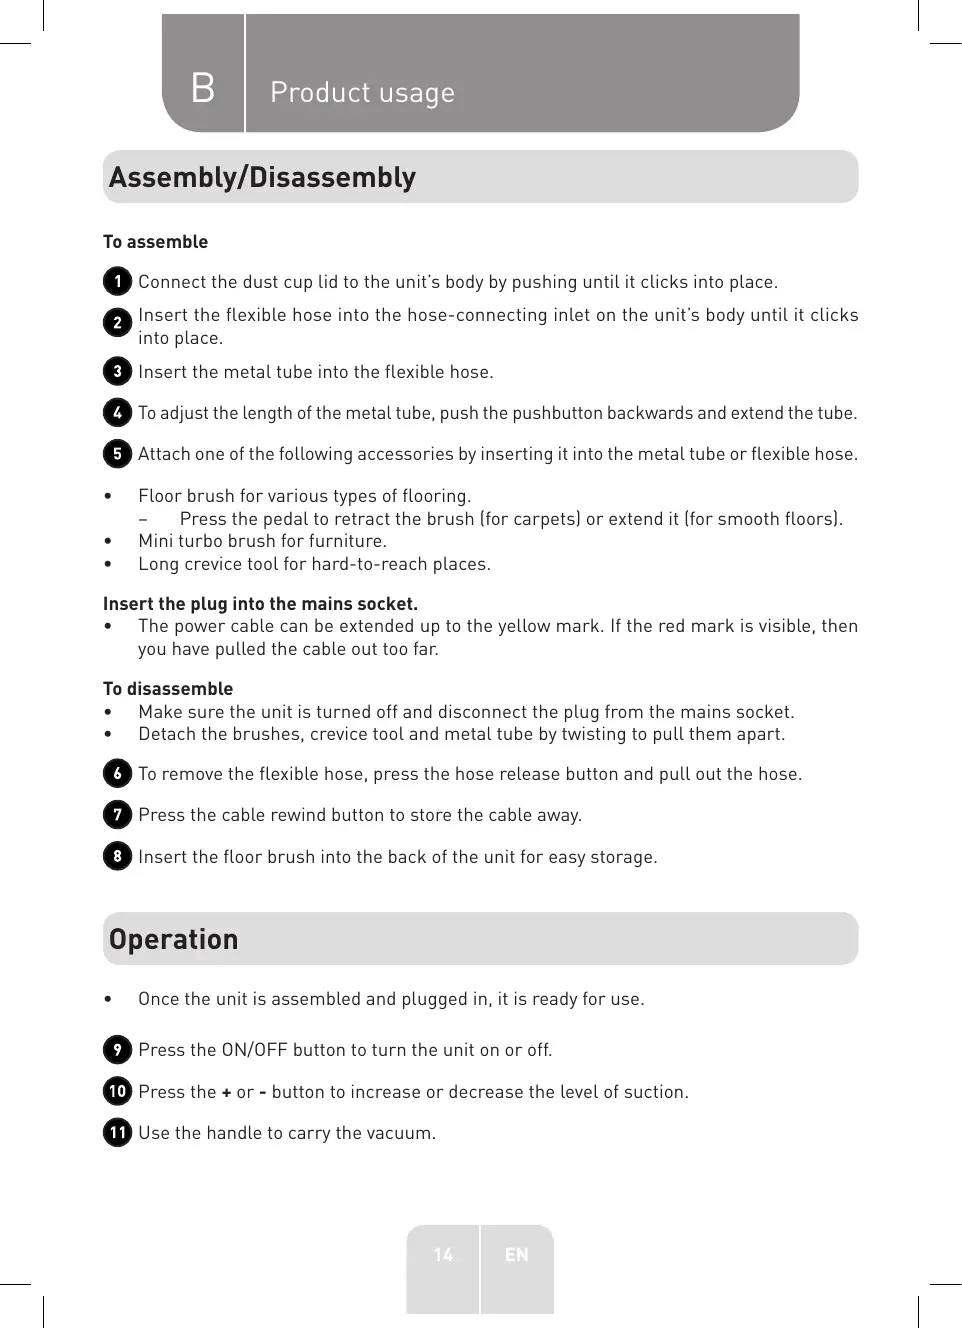
Assembly/Disassembly
To assemble
1 Connect the dust cup lid to the unit's body by pushing until it clicks into place.
Insert the flexible hose into the hose-connecting inlet on the unit's body until it clicks into place.
3 Insert the metal tube into the flexible hose.
To adjust the length of the metal tube, push the pushbutton backwards and extend the tube.
5 Attach one of the following accessories by inserting it into the metal tube or flexible hose.
- Floor brush for various types of flooring.
- Press the pedal to retract the brush (for carpets) or extend it (for smooth floors).
- Mini turbo brush for furniture.
- Long crevice tool for hard-to-reach places.
Insert the plug into the mains socket.
- The power cable can be extended up to the yellow mark. If the red mark is visible, then you have pulled the cable out too far.
To disassemble
- Make sure the unit is turned off and disconnect the plug from the mains socket.
- Detach the brushes, crevice tool and metal tube by twisting to pull them apart.
To remove the flexible hose, press the hose release button and pull out the hose.
Press the cable rewind button to store the cable away.
8 Insert the floor brush into the back of the unit for easy storage.
Operation
- Once the unit is assembled and plugged in, it is ready for use.
9 Press the ON/OFF button to turn the unit on or off.
10 Press the + or - button to increase or decrease the level of suction.
11 Use the handle to carry the vacuum.
Cleaning and maintenance

WARNING!
Cleaning the dust cup and filters
- Empty the dust cup whenever it is full or there is a loss of suction.
Press the two dust cup release buttons to attach or detach the cup.
13 ① Detach the dust cup lid.
(2) Remove the filter.
14 Remove the central part of the filter over a bin.
15 Detach the base of the dust cup to empty the contents.
- Wipe the dust cup and the central part of the filter with a dry cloth.
- The filter can be cleaned under running water.
Cleaning the air outlet filter
16 ① Press the air outlet pushbutton to open it.
(2) Press the pushbutton to remove the HEPA filter.
- The HEPA filter can be cleaned under running water.
- Let all the parts dry.

WARNING!
-
To avoid damaging the unit, only use and insert dry filters!
-
Reassemble all the parts in reverse order.
Disassembling and cleaning the brushes
Floor brush:
17 Detach the brush from the tube.
Mini turbo brush:
18 ① Detach the brush from the tube and remove the locking system.
(2) Lift up the transparent cover.
③ Remove the roller and gently pull the brush out.
- Clean the brush bristles. Let them dry completely.
- Reposition the brush and re-attach the locking system.
Troubleshooting
| Problem | Possible Cause | Solution |
| The unit does not work. | ·The unit is not connected to the mains socket. | ·Securely insert the plug into the mains socket. Press the Power button. If the unit is still not working, get it checked by a qualified technician. |
| ·The dust cup is full. | ·Empty the dust cup. |
| The suction power is weak, there is no suction or the motor vibrates. | ·The nozzle is blocked. | ·Remove the blockage. |
| ·The filter is blocked, dirty or broken. | ·Clean the filter.
·If necessary, replace the filter with a new one. |
Storage
- Always unplug the unit before storing it.
- Store the unit in a fresh, dry and dust-free place, out of the reach of children and pets.
- Please retain the packaging and use it to store your unit when it is not in use for an extended period of time.
Bedankt!