
DV 4200 - DVD player MARANTZ - Free user manual and instructions
Find the device manual for free DV 4200 MARANTZ in PDF.


User questions about DV 4200 MARANTZ
0 question about this device. Answer the ones you know or ask your own.
Ask a new question about this device
Download the instructions for your DVD player in PDF format for free! Find your manual DV 4200 - MARANTZ and take your electronic device back in hand. On this page are published all the documents necessary for the use of your device. DV 4200 by MARANTZ.
USER MANUAL DV 4200 MARANTZ
Your purchase receipt is your permanent record of a valuable purchase. It should be kept in a safe place to be referred to as necessary for insurance purposes or when corresponding with Marantz.
IMPORTANT
When seeking warranty service, it is the responsibility of the consumer to establish proof and date of purchase. Your purchase receipt or invoice is adequate for such proof.
FOR U.K. ONLY
This undertaking is in addition to a consumer's statutory rights and does not affect those rights in any way.
FRANÇAIS
GARANTIE
Entertainment for the new millennium 6
Introduction 7
Unpacking 7
Placement 7
Functional overview
Front panel 8
Rear panel 9
Display 10
Remote control 11
On-screen display information
Menu bar/Status window 12
Status window icons 12
Default screen 12
Temporary feedback field icons 13
Preparation
General notes 14
Connecting to a TV 14
Connecting to optional equipment 15-16
Connecting to the power cord 16
Remote Control battery installation 16
NTSC/PAL Settings 16
General explanation 17
Turning on the power 18
Initial Setup 18-19
Personal Preferences 19-20
Access Control: child lock 21
Access Control: parental control 22-23
Operation
Loading discs 24
Playing a DVD-Video disc 24
Playing a Video CD 25
General Features 25-28
Special DVD features 29
Special VCD features 30
Playing an Audio CD 30-31
FTS Program 32
Before requesting service
Before requesting service 33
Cleaning discs 34
Specifications
Specifications 35
Entertainment for the new millennium
Video was never like this before! Digital video discs provide perfect digital, studio-quality pictures; three dimensional digital, multi-channel audio; story sequences screened from your choice of camera angle; sound tracks in as many as eight languages; and up to 32 subtitles (if available on disc). Whether you watch DVD-Video on wide-screen or regular TV, you always see it the way it was meant to be.
Digital video
DVD-Video uses state-of-the-art MPEG2 data compression technology to register an entire movie on a single 5-inch disc. DVD's variable bitrate compression, running at up to 9.8 Mbits/second, captures even the most complex pictures in their original quality.
The crystal-clear digital pictures have a horizontal resolution of over 500 lines, with 720 pixels (picture elements) to each line. This resolution is more than double that of VHS, superior to Laser Disc, and entirely comparable with digital masters made in recording studios. DVD-Video discs conform to either the PAL or NTSC video standard. This player can play both PAL and NTSC discs, presenting them in the best possible way on your multi-standard TV screen.
As the universal video system of the future, DVD-Video offers optimal pictures on any TV screen.
Introduction
Your MARANTZ DVD-Video player will play digital video discs conforming to the universal DVD-Video standard. With it, you will be able to enjoy full-length movies with true cinema picture quality, as well as stereo or multi-channel sound (depending on the disc and your playback setup). The unique features of DVD-Video, such as selection of sound track, subtitle languages and different camera angles (again depending on the disc), are all included. What's more, MARANTZ Child Lock lets you decide which discs your children will be able to see. In addition to DVD-Video discs, you will be able to play all Video CDs and Audio CDs (including finalized CD Recordable and CD Rewritable).
You will find the On-Screen Display, player display, and remote control make the player easy to use. This manual provides all the information you will need, so read on!

DVD-Video
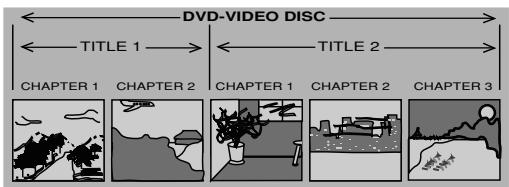
You will recognize DVD-Video discs by the logo shown on the left. Depending on the material on the disc (a movie, video clips, a drama series, etc.) the disc may have one or more Titles. Each Title may have one or more Chapters. To make playback easy and convenient, your player lets you select Titles and playback Chapters.

Video CD
You will recognize Video CDs by the logo shown at the left. Depending on the material on the disc (a movie, video clips, a drama series, etc.) the disc may have one or more tracks. Tracks may have one or more indexes, as indicated on the disc case. To make playback easy and convenient, your player lets you select tracks and indexes.
Super VCD
SVCD discs based on the Super VCD IO Standard based on the Standard of the Electronics Industry of the People's Republic of China.

Audio CD
Audio CDs contain music tracks only.
You will recognize Audio CDs by their logo which is shown at the left.
You can play them in conventional style through a stereo system, using the keys on the remote control and/or front panel, or via the TV using the On-Screen Display (OSD).
Unpacking
First check and identify the contents of your DVD-Video player package.
You should have the following items.
DVD-Video player
Remote Control with batteries
AC power cord
Audio/Video cable
SCART cable
- Instructions for use
Keep the packaging materials; you may need them to transport your player in the future.
Placement
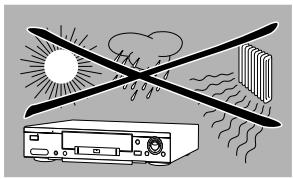
- Place the player on a firm, flat surface.
- Keep the player away from domestic heating equipment and direct sunlight.
- In a cabinet, allow about 2.5cm (1 inch) of free space all around the player for adequate ventilation.
- If the DVD-Video player cannot read CDs/DVDs correctly, use a commonly available cleaning CD/DVD to clean the lens before taking the DVD-Video player to be repaired. Other cleaning methods may destroy the lens. Always keep the tray closed to avoid dust on the lens.
- The lens may cloud over when the DVD-Video player is suddenly moved from cold to warm surroundings. Playing a CD/DVD is not possible then. Leave the DVD-Video player in a warm environment until the moisture evaporates.
Front panel
Rear panel
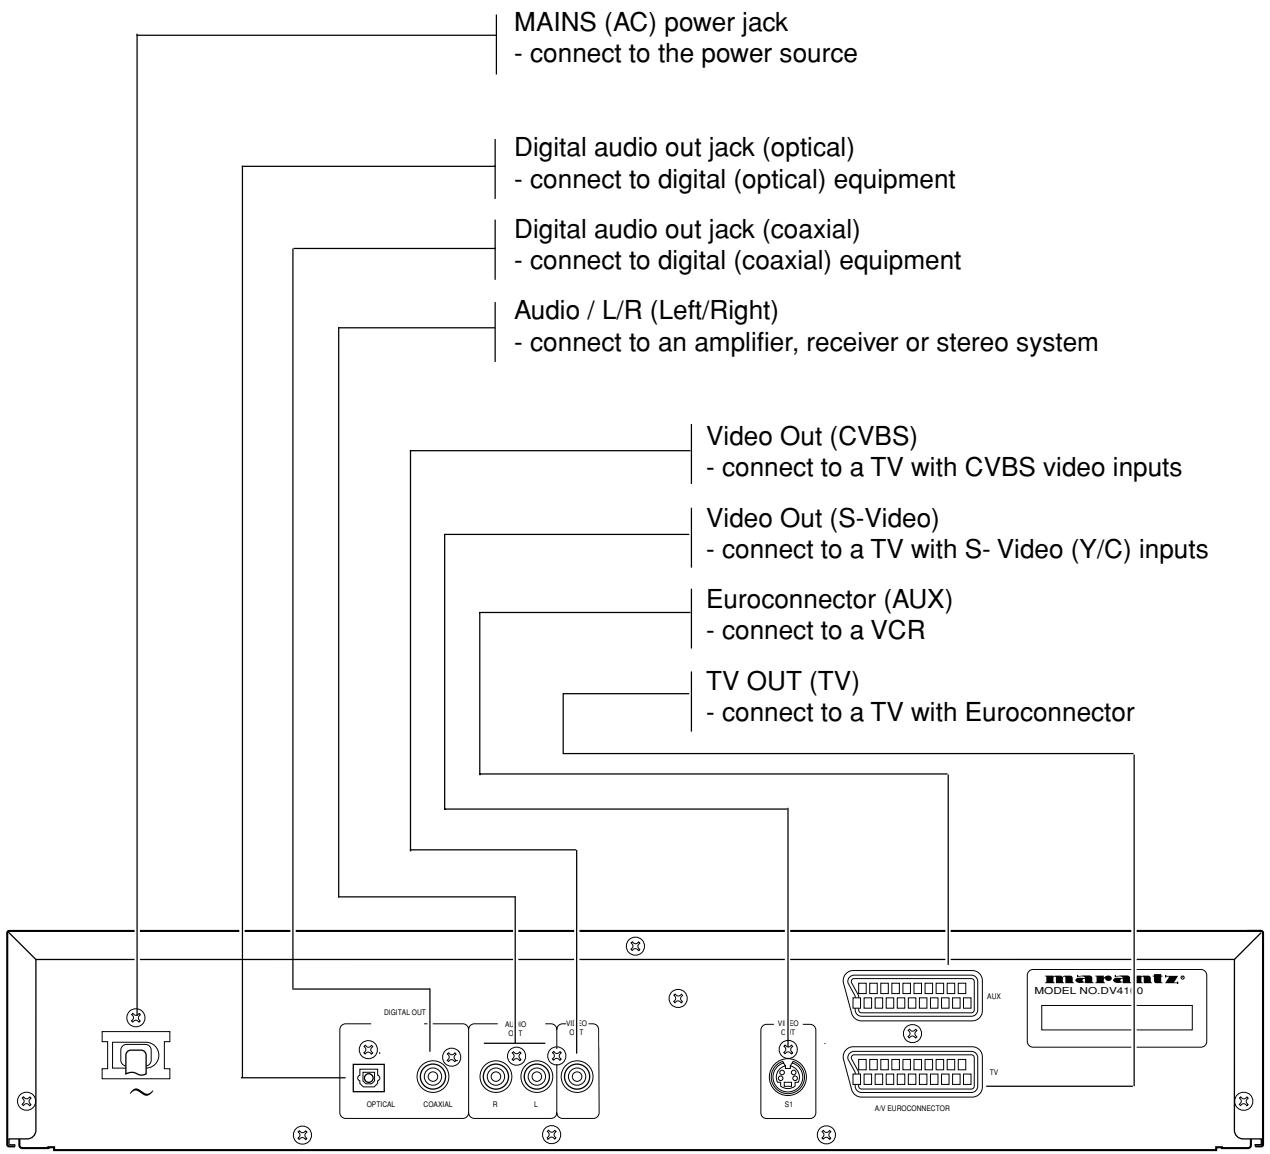
Caution: Do not touch the inner pins of the jacks on the rear panel connectors. Electrostatic discharge may cause permanent damage to the unit.
Display
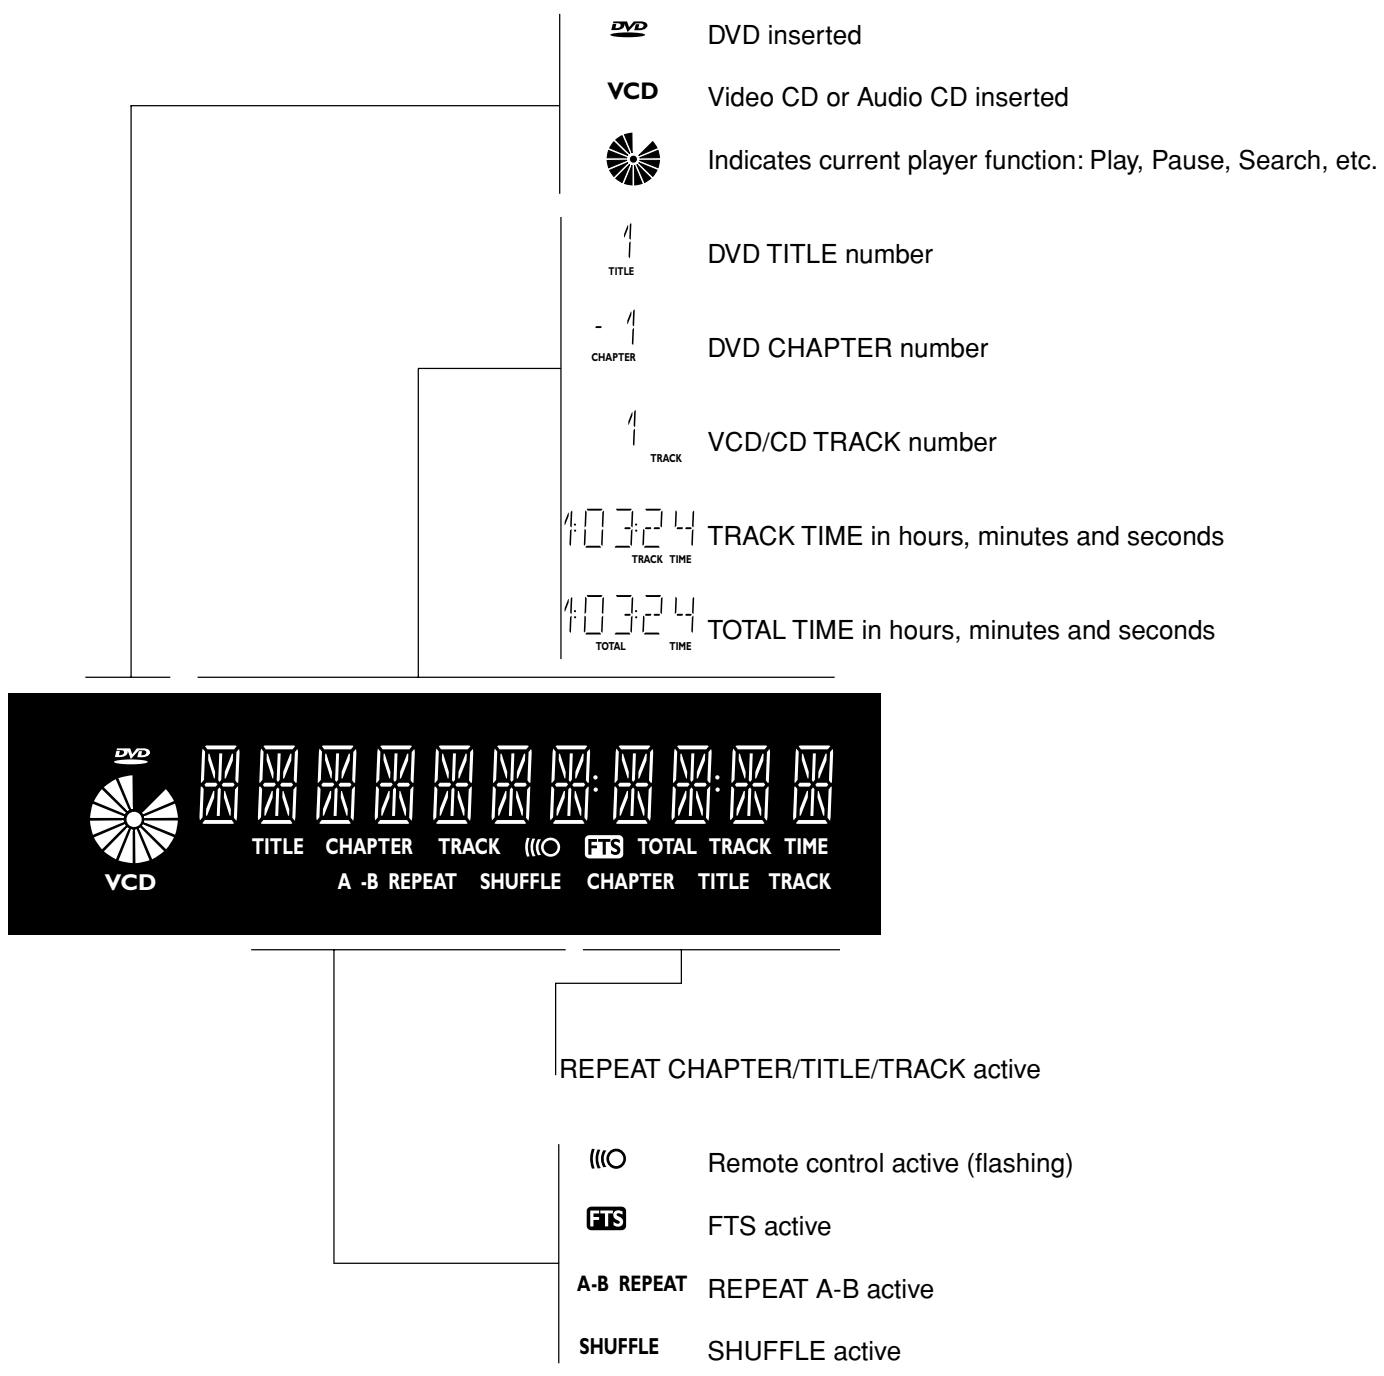
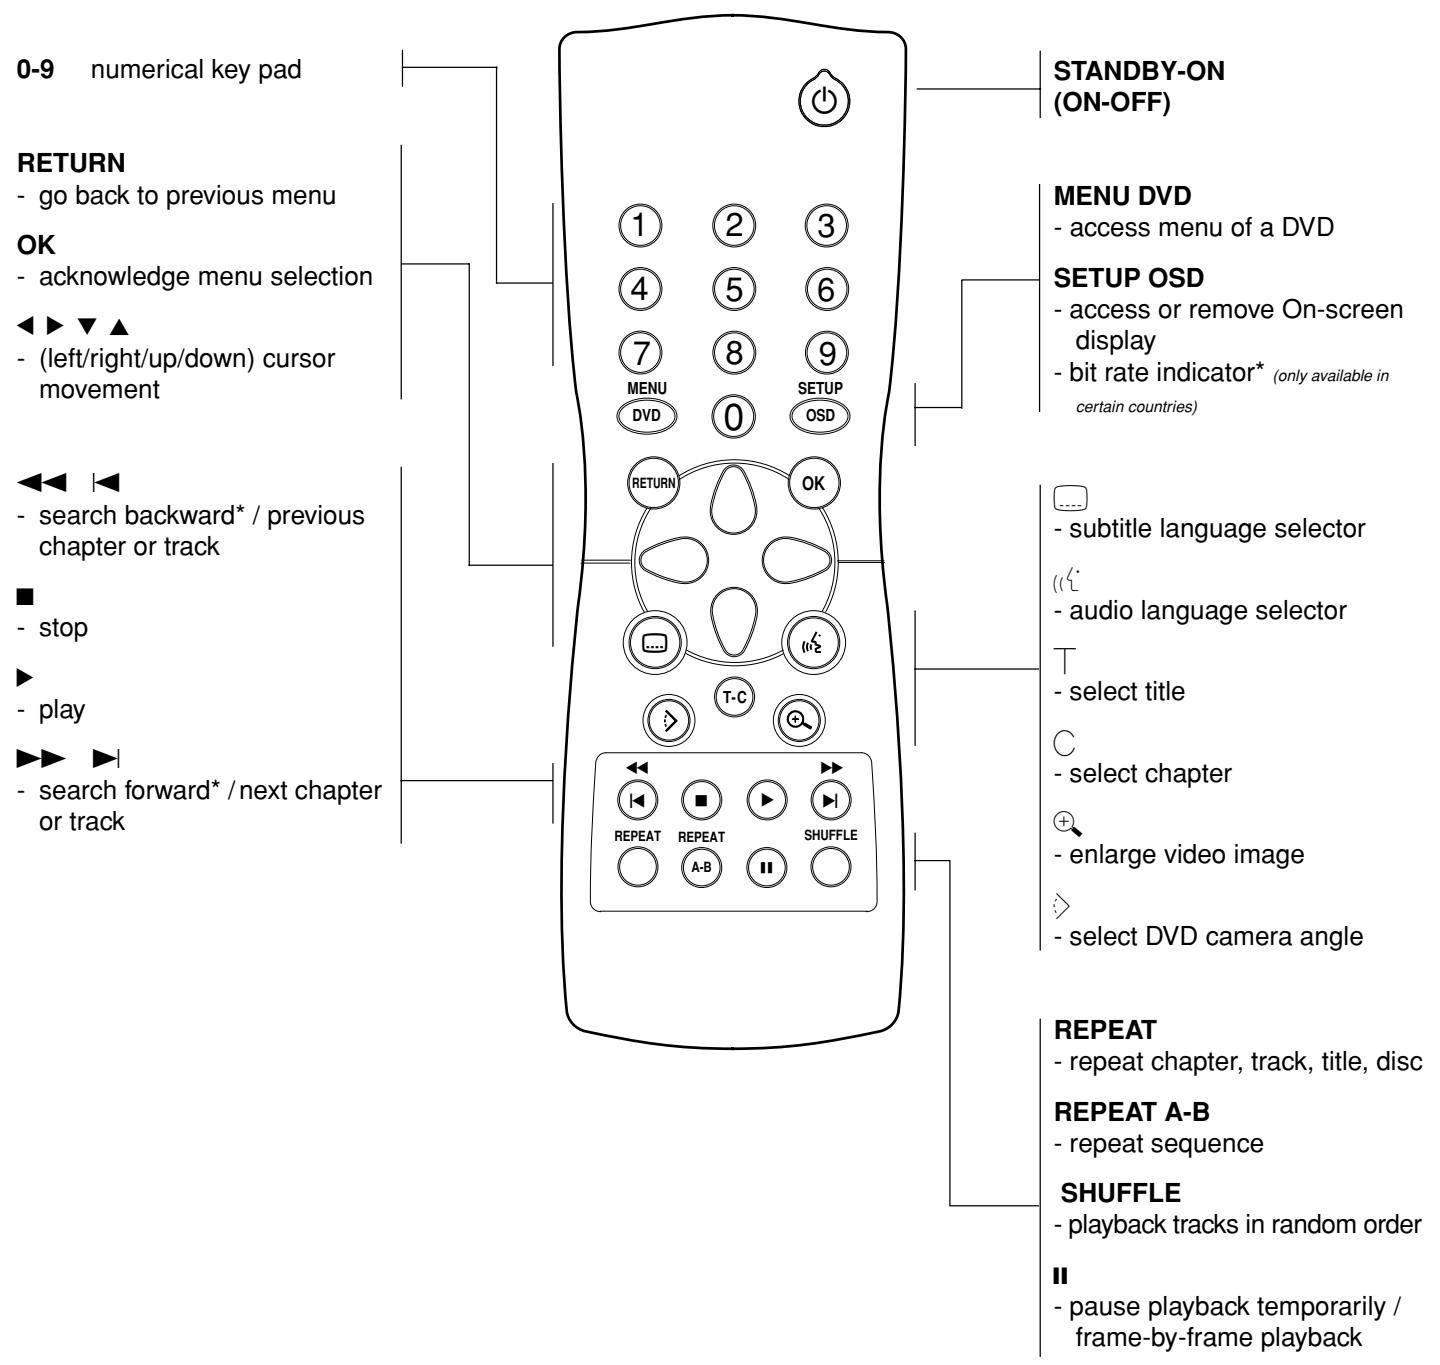
* Press key for about 1 second
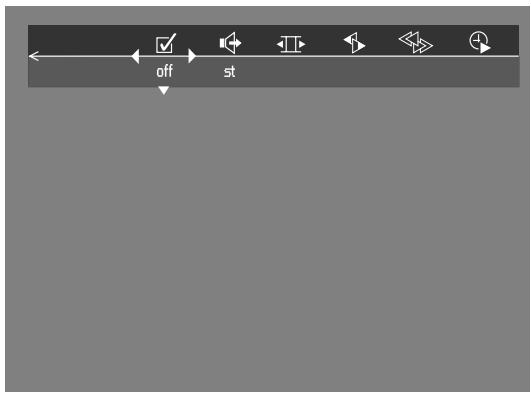
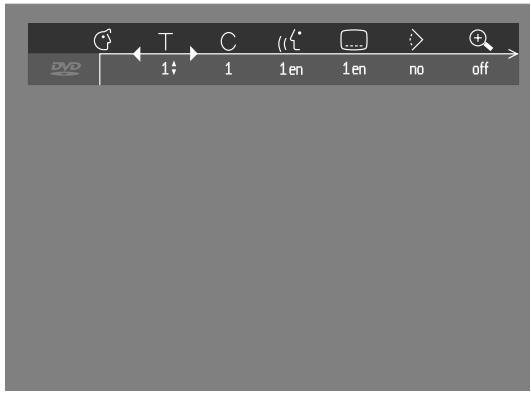
Menu bar/Status window
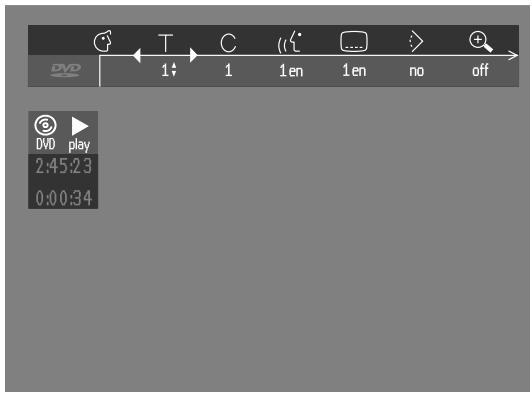
Status window icons
The status window displays the current status of the player and appears with the first part of the menu bar. (You must activate this in the Features Menu - see Personal Preferences for details).
General


Disc type
Tray status
Default screen
The default screen is displayed when the player is in STOP mode. It may contain a 'Status Window' and a 'Temporary Feedback Field'. This gives information concerning prohibited actions, playback modes, available angles, etc.
Temporary Feedback Field icons

Repeat All

Repeat Title

Repeat Track

Repeat Chapter

Shuffle

Shuffle Repeat

Repeat A to end

Repeat A-B

Angle

Child Lock On

Child Safe

Resume

Action prohibited
General notes
- Depending on your TV and other equipment you wish to connect, there are various ways you could connect the player. Possible connections are shown in the following drawings.
- Please refer to the manuals of your TV, VCR, Stereo System or other devices as necessary to make the best connections.
- Do not connect your DVD-player via your VCR. The video quality could be distorted by the copy protection system.
- For better sound reproduction, connect the player's audio out jacks to the audio in jacks of your amplifier, receiver, stereo or A/V equipment. See 'Connecting to optional equipment'.
Caution: Do not connect the player's audio out jack to the phono in jack of your audio system.
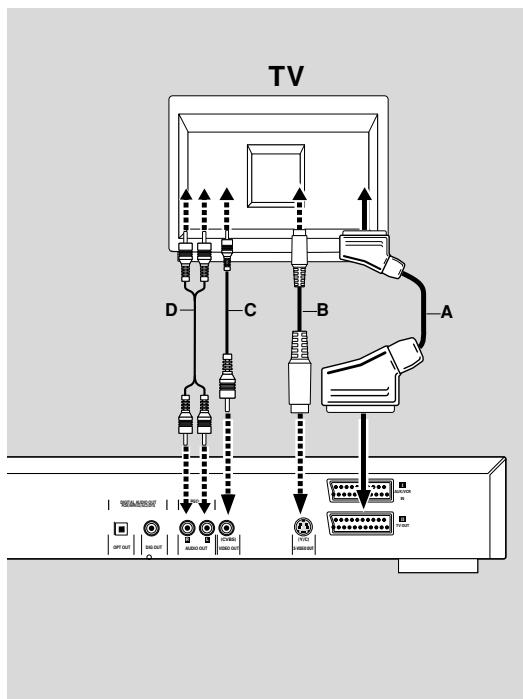
Connecting to a TV
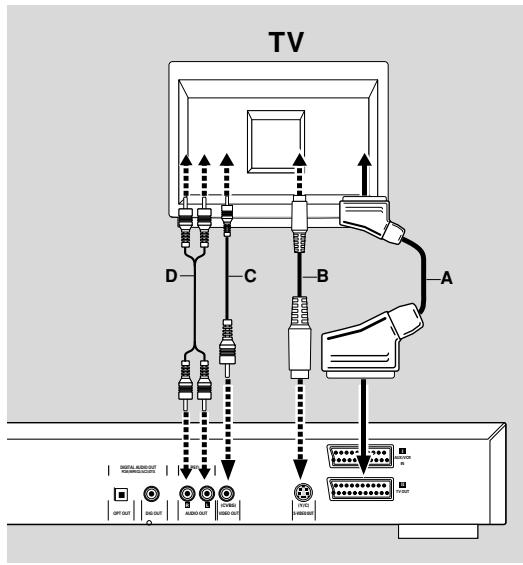
- Connect the Euroconnector to the corresponding connector on the TV using the Euroconnector cable supplied (A).
If your TV is not equipped with a Euroconnector you can select one of the following alternative connections:
S-Video (Y/C) connection
1 Connect the S-Video jack on the DVD-player to the S-Video in jack on the TV using an optional S-Video cable (B) .
2 Connect the audio Left and Right out jacks to the audio left/right in jacks on the TV (D) .
Video CVBS connection
1 Connect the Video out (CVBS) jack to the video in jack on the TV using the audio/video cable supplied (C) .
2 Connect the audio Left and Right out jacks to the audio left/right in jacks on the TV (D) .
Connecting to optional equipment
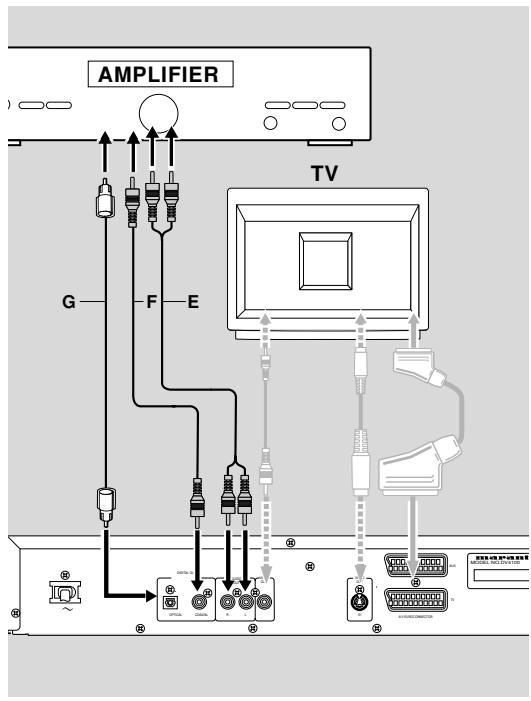
Connecting to an amplifier equipped with two channel analog stereo
- Connect the audio Left and Right out jacks of the DVD player to the audio left and right in jack on your amplifier, receiver or stereo system, using an audio cable (E) .
Connecting to an amplifier equipped with two channel digital stereo (PCM)
1 Connect the player's digital audio out jack (optical ±bG or coaxial ±bF ) to the corresponding in jack on your amplifier. Use an optional digital (optical ±bG or coaxial ±bF ) audio cable.
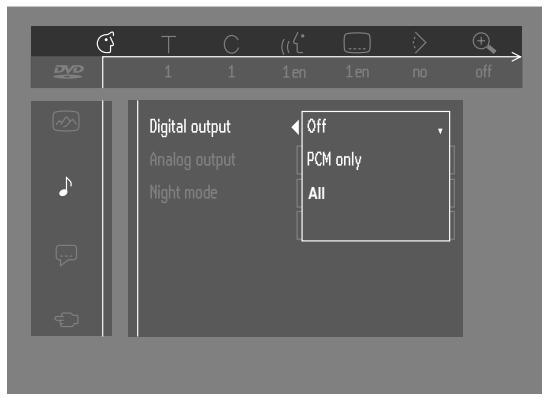
2 You will need to activate the player's digital output (see 'Personal Preferences').
Connecting to an A/V receiver equipped with a multi-channel decoder (Dolby Digital™(AC-3), MPEG 2 and DTS)
Digital Multi-channel sound
Digital multi-channel connection provides the best sound quality. For this you need a multi-channel A/V receiver that supports one or more of the audio formats supported by your DVD player (MPEG 2, Dolby Digital™(AC-3), AC3 and DTS). Check the receiver manual and the logos on the front of the receiver.
1 Connect the DVD player's digital audio output (optical ±bG or coaxial ±bF ) to the corresponding input on the receiver using an optional digital (optical ±bG or coaxial ±bF ) audio cable.
2 You will need to activate the player's digital output (see 'Personal Preferences').
Note:
If the audio format of the digital output does not match the capabilities of your receiver, the receiver will produce a strong, distorted sound or no sound at all. The selected audio format of the DVD is displayed in the Status Window when the SETUP OSD is activated or Audio button is activated.
Six Channel Digital Surround Sound via digital connection can only be obtained if your receiver is equipped with a Digital Multi-channel decoder.
To see the selected audio format of the current DVD in the Status Window, press the SETUP OSD or the Audio Language selector button.
Connecting to an amplifier equipped with Dolby Surround™
Dolby Surround sound
1 Connect the player to the TV, then connect the player's audio Left and Right out jacks to the corresponding in jacks on the Dolby Surround™ Audio/Video receiver, using the audio/video cable supplied (D).
If your amplifier is equipped with a Dolby Digital™ decoder,
- Connect the player as described in 'Connecting to an A/V receiver with multi-channel decoder'.
If your TV is equipped with a Dolby Surround™ decoder,
- Connect the player to the TV as described in 'Connecting to a TV'.
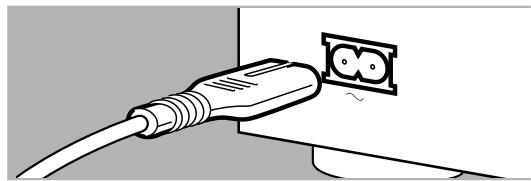
Connecting the power cord
1 Plug the female end of the supplied power cord into the Mains (AC) jack on the rear of the player.
2 Connect the other end of the cord to an AC outlet.
Note: When the player is in the "STANDBY" mode, it is still consuming some power. If you wish to disconnect your player completely from the power, unplug the power cord from the AC outlet.
Caution: Only qualified service personnel should remove the cover or attempt to service this device.
Remote control battery installation
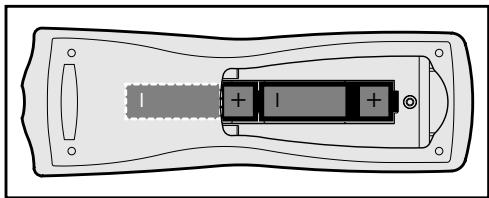
Loading the batteries
1 Open the battery compartment cover.
2 Insert batteries as indicated inside the battery compartment.
3 Close the cover.
Caution: Do not mix old and new batteries. Never mix different types of batteries (standard, alkaline, etc.).
NTSC/PAL Settings
You can switch the NTSC/PAL setting of the DVD player to match the video signal of your TV. This setting only affects the television's on-screen display that shows the stop and setup modes. You may select either NTSC or PAL. To change the DVD player setting to PAL or NTSC, follow the steps below.
1 Press the POWER ON/OFF button on the front panel of the DVD player to turn OFF the DVD player.
2 Press and hold and on the front of the DVD player. While holding and ,press POWER ON/OFF.
3 After PAL or NTSC appears on the display panel of the DVD player, release and at the same time. The PAL or NTSC that appears on the display panel indicates the current setting.
4 To change the setting, press within three seconds. The new setting (PAL or NTSC) will appear on the display panel.
General explanation
About this manual
This manual gives the basic instructions for operating this DVD player. Some DVDs require specific operation or allow only limited operation during playback. In these cases, the player may not respond to all operating commands. When this occurs, please refer to the instructions contained with the DVD. When the symbol × appears on the TV screen, the operation is not permitted by the player or the disc.
Remote control operation
- Unless otherwise stated, all operations can be carried out with the remote control. Always point the remote control directly at the player, making sure there are no obstructions in the path of the infrared beam. When there are corresponding keys on the front panel of the player, they can also be used.
Menu bar operation
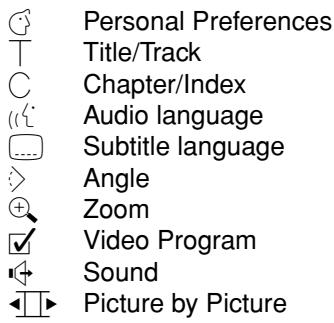
- A number of operations can be carried out via the menu bar on the screen. The menu bar can be accessed by pressing any of the following keys on the remote control: SETUP OSD, T-C, Angle, Audio Language, Subtitle Language and Zoom.
- The following functions are available via the menu bar:
| - | Personal Preferences |
| - | Title/Track |
| - | Chapter/Index |
| - | Audio language |
| - | Subtitle language |
| - | Angle |
| - | Zoom |
| - | Video Program |
| - | Sound |
| - | Picture by Picture |
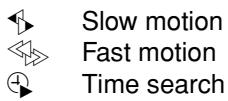
| - | Slow motion |
| - | Fast motion |
| - | Time search |
- The various items can be selected by pressing the SETUP OSD button, then the / keys or by pressing relevant keys on the remote control.
- Pressing SETUP OSD while the menu bar is displayed will clear the menu bar from the screen.
- When selecting an item in the menu bar, the selected item will be high lighted and the appropriate cursor keys to operate this item will be displayed below the icon.
- < or > indicates that more items are available at the left/right of the menu bar. Press or to select these items.
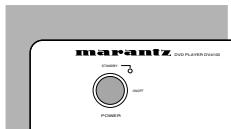
Turning On the power
1 Switch on the TV and select the video input channel for your DVD-Video player.
2 Press ON button.
Initial Setup
General
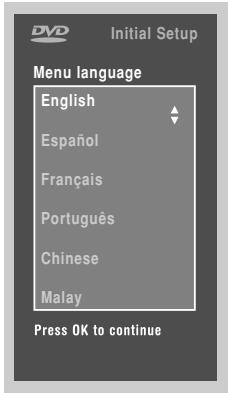
In 'Initial Setup' you may have to set your preferences for some of the player's features. (not applicable for all models)
Operation
After switching on the player for the very first time, the 'Initial Setup Screen' will appear.
The menu for the first item to be set is displayed and the first option is highlighted.
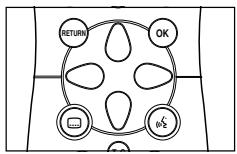
- Use the keys to go through the options of the menu.
The icon of the selected option will be high lighted. - Use OK to confirm your selection and to go to the next menu.
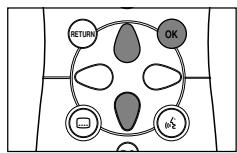
Note: Preferences have to be set in the order in which the item menus will appear on the screen.
The 'Initial Setup' screen will only disappear after the settings for the last item have been confirmed.
If any keys other than or OK are pressed × , will appear on the screen. If the player is switched off while setting personal preferences, all preferences have to be set again after switching the player on again.
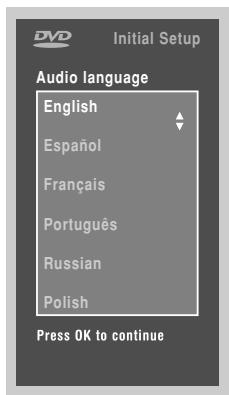
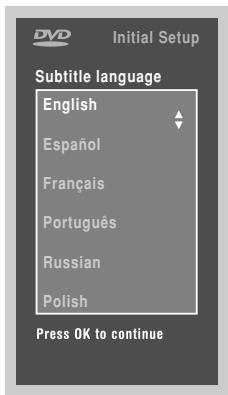
The following items may have to be set in Initial Setup: Menu language
The On Screen Menus will be displayed in the language you choose. You can choose from different languages.
Audio language
The sound will be in the language you choose if it is available on the disc. If the language you select is not available, speech will revert to the first spoken language on the disc. You can choose from different languages.
Subtitle language
The subtitles will be in the language you choose if it is available on the disc. If the language you select is not available, subtitles will revert to the first subtitle language on the disc. You can choose from different languages.
TV Shape
If you have a wide screen (16:9) TV, select 16:9.
If you have a regular (4:3) TV, select 4:3.
If you have a 4:3 TV, you can also select between:
Letterbox for a 'wide-screen' picture with black bars top and bottom, or Pan Scan, for a full-height picture with the sides trimmed. If a disc has Pan Scan, the picture then moves (scans) horizontally to keep the main action on the screen.
Country
Select your country. This also is used as input for the 'Parental Control' feature (see 'Access Control').
Note: All these items may have to be set during 'Initial Setup'. After that, they can always be changed in the Personal Preferences Menu.
Personal Preferences
You can set your personal preferences for some of the player features.
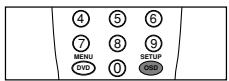

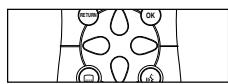
General operation:
- Press SETUP OSD on the remote control.
- Select in the menu bar.
The Personal Preferences menu appears.
- Use the keys to toggle through the menus, submenus and submenu options.
When a menu item is selected, the cursor keys (on the remote control) to operate the item are displayed next to the item. - Press OK to confirm and return to the main menu.
The following items can be adapted:
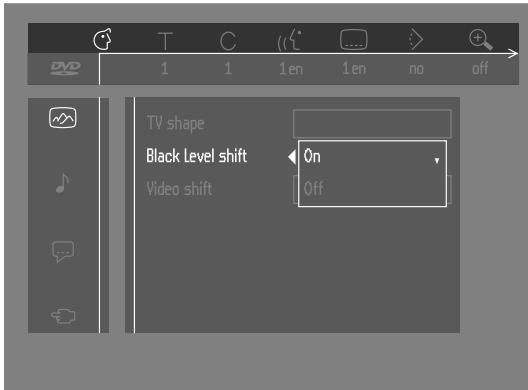
Picture
-TV Shape
See 'Initial Setup'
- Black level shift (NTSC only)
Select ON for adapting the color dynamics to obtain richer contrasts.
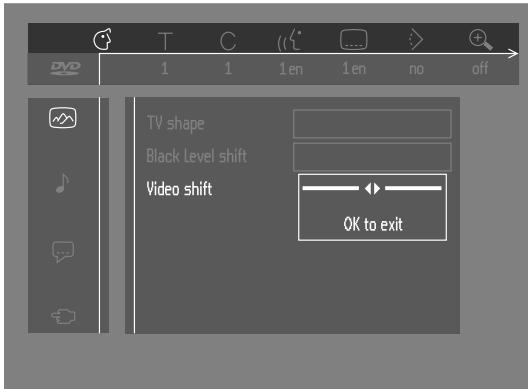
- Video shift
The factory centers the video on your screen. Use this setting to personalize the position of the picture on your TV by scrolling it to the left or right.
Sound
- Digital output
Factory setting: ALL. This means that both coaxial and optical outputs are switched on. If you are not connecting equipment with a digital input, change the setting to OFF.
If your equipment doesn't include a digital multi-channel decoder, set the digital output to PCM (Pulse Code Modulation). Both coaxial and optical outputs are switched on.
- Analog output
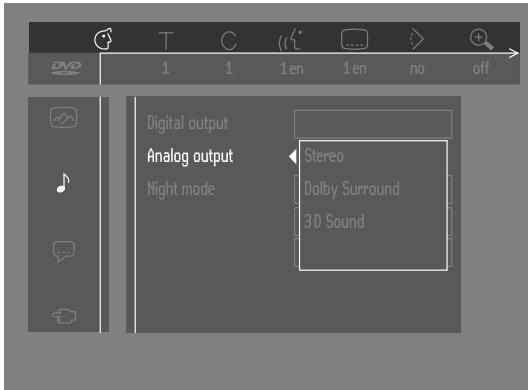
Select Stereo, Dolby Surround or 3D sound.
- Night Mode
Optimizes the dynamics of the sound with low volume playback.
- Karaoke vocal
Put this setting to ON only when a multi-channel karaoke DVD is being played. The karaoke channels on the disc will then be mixed to a normal stereo sound.
Language
Select the required Menu, Audio and Subtitle language. See 'Initial Setup'. Audio language and Subtitle language can also be adapted via the Menu bar on the screen.
Features
- Access Control
Access Control contains the following features:
Child Lock - When Child Lock is set to ON, a 4-digit code needs to be entered in order to play discs.
Parental control - Allows the conditional presentation of DVDs containing Parental Control information (see 'Access Control').
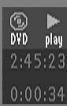
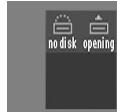
- Status Window
Displays the current status of the player and is displayed with the menu bar. When disc playback is stopped, it is displayed with the 'Temporary Feedback Field' in the default screen. See 'On-Screen Display information'; Factory setting is ON. Select OFF to suppress display of the Status Window.
Access control; child lock (DVD and VCD)
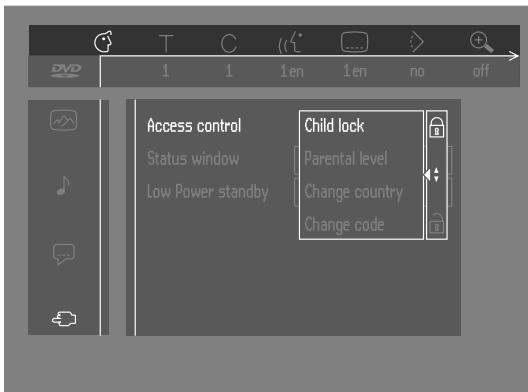
Activating/deactivating the child lock
1 When disc playback is stopped, select Access Control in the features menu using the / keys.
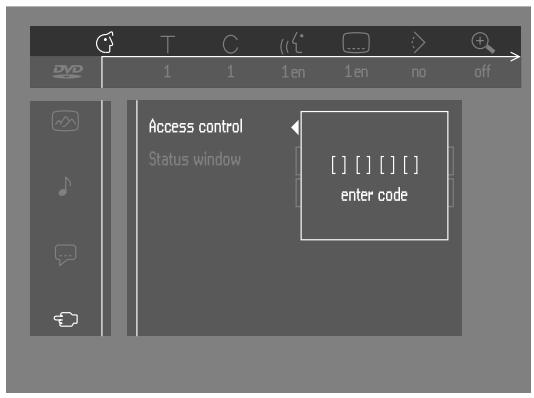
2 Enter a 4-digit code of your own choice.
3 Enter the code a second time.
4 Move to "Child Lock" using the / keys.
5 Move to LOCK/UNLOCK using the key.
6 Select LOCK using the / keys.
7 Press OK or to confirm, then press again to exit the menu. Now unauthorized discs will not be played unless the 4-digit code is entered.
8 Select UNLOCK to deactivate the Child Lock.
Note: Confirmation of the 4-digit code is necessary when:
- The code is entered for the very first time (see above),
- The code is changed (see 'Changing the 4-digit code'),
- The code is cancelled (see 'Changing the 4-digit code').
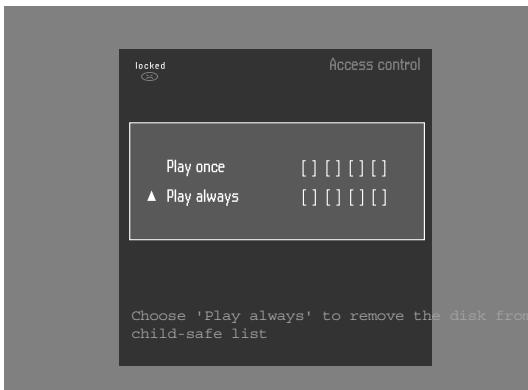
Authorizing discs
- Insert the disc. See 'Loading disc'.
The 'child protect' dialog will appear.
You will be asked to enter your secret code for 'Play Once' or 'Play Always.' If you select 'Play Once', the disc can be played as long as it is in the player and the player is ON. If you select 'Play Always', the disc will become child safe (authorized) and can always be played, even if the Child Lock is set to ON.
Notes: The player memory maintains a list of 50 authorized ('Child safe') disc titles. A disc will be placed in the list when 'Play Always' is selected in the 'child protect' dialog. Each time a 'child safe' disc is played, it will be placed on top of the list. When the list is full and a new disc is added, the last disc in the list will be removed from the list. Double sided DVDs may have a different ID for each side. In order to make the disc 'child safe', each side has to be authorized. Multi-volume VCDs may have a different ID for each volume. In order to make the complete set 'child safe', each volume has to be authorized.
Deauthorized discs
- Insert the disc. See 'Loading disc'.
Playback starts automatically.
- Press while is visible.
The will appear and the disc is now deauthorized.
Access control; Parental control (DVD-Video only)
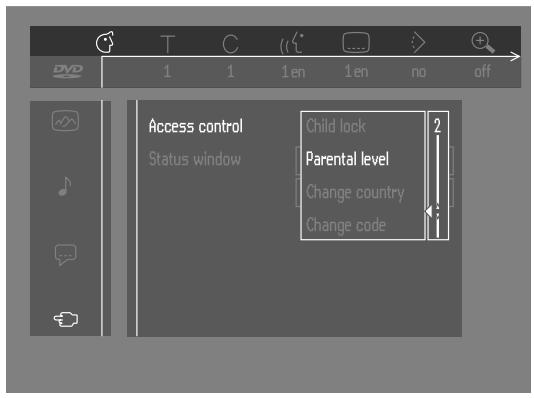
Movies on DVDs may contain scenes not suitable for children. Therefore, disc may contain 'Parental Control' information which applies to the complete disc or to certain scenes on the disc. These scenes are rated from 1 to 8, and alternative, more suitable scenes are available on the disc. Ratings are country dependent. The 'Parental Control' feature allows you to prevent discs from being played by your children or to have certain discs played with alternative scenes.
Activating/Deactivating Parental Control
1 When disc playback is stopped, select Access Control in the features menu using the / keys.
2 Enter your 4-digit code. If necessary, enter the code a second time.
3 Move to Parental Control using the / keys.
4 Move to Value Adjustment (1-8) using the key.
5 Then use the / keys or the numerical keys on the remote control to select a rating from 1 to 8 for the disc inserted.
Rating 0 (displayed as - - ) Parental Control is not activated. The Disc will be played in full.
Ratings 1 to 8:
The disc contains scenes not suitable for children. If you set a rating for the player, all scenes with the same rating or lower will be played. Higher rated scenes will not be played unless an alternative is available on the disc. The alternative must have the same rating or a lower one. If no suitable alternative is found, play will stop and the 4-digit code has to be entered.
6 Press OK or to confirm, then press again to exit the menu.
Country
1 When disc playback is stopped, select ACCESS CONTROL in the features menu using the / keys.
2 Enter the 4-digit code.
3 Move to CHANGE COUNTRY using the key.
4 Press the key.
5 Select a country using / .
6 Press OK or to confirm, then press again to exit the menu.
Changing the 4-digit code
1 When disc playback is stopped, select ACCESS CONTROL in the features menu using the / keys.
2 Enter the old code.
3 Move to CHANGE CODE using the key.
4 Press the key.
5 Enter the new 4-digit code.
6 Enter the code a second time and reconfirm by pressing OK.
7 Press to exit the menu.
Note: If you forget your 4 digit code, it can be cancelled by pressing four times in the 'Access Control' dialog. You can then enter a new code (twice!) as described above.
Parental Control Disclaimer
This DVD player features the PARENTAL CONTROL system which is intended to activate when playing DVD discs furnished with certain software coding. This is according to technical standards adopted by the set maker and disc content industries.
Please note that the PARENTAL CONTROL system will not operate a DVD disc which is not furnished with the appropriate software coding. Also note that at the time of release of this DVD player, certain aspects of the technical standards had not been settled between set makers and the disc industries.
On this basis MARANTZ cannot guarantee functioning of the PARENTAL CONTROL system and denies any liability associated with unintended watching of disc content.
If in doubt, please make sure the disc plays according to your PARENTAL CONTROL settings before you allow children access.

REH
Loading discs
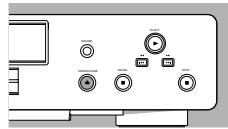
1 Press OPEN/CLOSE on the front of the player. The disc tray opens.
2 Load your chosen disc in the tray, label side up (also when a double sided DVD is inserted). Make sure it is sitting properly in the correct recess.
3 Gently push the tray, or press OPEN/CLOSE, to close the tray.
RERI appears in the status window and on the player display, and playback starts automatically.
Note: If 'Child Lock' is set to ON and the disc inserted is not in the 'child safe' list (not authorized), the 4-digit code must be entered and/or the disc must be authorized (see 'Access Control').
Playing a DVD-video disc
Playing a title

After inserting the disc and closing the tray, playback starts automatically and the status window and the player display show the type of disc loaded, as well as information about the disc's contents and playing time.
The disc may invite you to select an item from a menu. If the selections are numbered, press the appropriate numerical key; if not, use the / , keys to highlight your selection, then press OK.
The currently playing title and chapter number are displayed in the menu bar and the player display.
The elapsed playing time is shown in the status window and the player display.
- If required, you can use the Sound key to select Stereo, Dolby Surround or 3D-Sound.
Play may stop at the end of the Title, and the player may return to the DVD menu. To go on to the next title, press
- To stop play at any other time, press ■.
The default screen will appear, giving information about the current status of the player.
- You can resume play from the point at which you stopped play. Press▶; when you see the Resume icon▶ on the screen, press▶ again.
The RESUME feature applies not only to the disc in the player, but also to the last four discs you have played. Simply reload the disc and press; when you see the Resume icon on the screen, press again.
Note: Since it is usual for DVD movies to be released at different times in different regions of the world, all players have region codes. Discs can have an optional region code. If you load a disc of a different region code into your player, you will see the region code notice on the screen. The disc will not play and should be removed from the player.
Playing a Video CD

Playing a disc
- After inserting the disc and closing the tray, playback starts automatically and the status window and the player display show the type of disc loaded, as well as information about the disc's contents and playing time.
- The disc may invite you to select an item from a menu. If the selections are numbered, press the appropriate numerical key.
- The currently playing track number is displayed in the menu bar and the player display. The elapsed playing time is shown in the status window and the player display.
- If required, you can use the SOUND key to select Stereo, Dolby Surround or 3D-Sound.
- To stop play at any time, press ■.
The default screen will then appear.
- You can resume play from the point at which you stopped play. Press ; when you see the Resume icon on the screen , press again. The resume feature applies not only to the disc in the player, but also to the last four discs you have played. Simply reload the disc and press
when you see the Resume icon on the screen, press again.


General features
Note: Unless stated otherwise, all operations described are based on remote control operation. A number of operations can also be carried out via the menu bar on the screen (see 'Menu bar operation').
Moving to another title/TRACK
When a disc has more than one title or track (which you can see from both the menu bar and the player display), you can move to another title as follows:
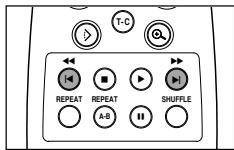
- Press T-C (title/chapter), then press briefly during play to select the next title/track.
- Press T-C (title/chapter), then press briefly during play to return to the beginning of the current title/track. Press twice briefly to step back to the previous title/track.
Moving to another chapter/index
When a title on a disc has more than one chapter or a track has more than one index (which you can see from the player display and on the menu bar), you can move to another chapter/index as follows:
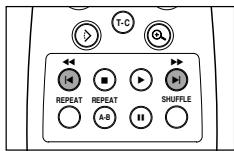
Press▶ briefly during play to select the next chapter/index.
- Press briefly during play to return to the beginning of the current chapter/index. Press twice briefly to step back to the previous chapter/index.
- To go directly to any chapter or index, select T-C (title/chapter), then enter the chapter/index number using the numerical keys (0-9).
Note: If the number has more than one digit, press the keys in rapid succession.
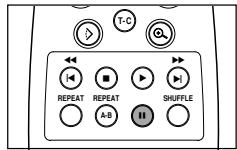
Still Picture and Frame-by-frame playback
- Select (picture by picture) in the menu bar.
- Use the key to enter the picture by picture menu. The player will now go into PAUSE mode.
- Use the cursor keys to select the previous or next picture frame.
- To exit Picture by picture mode, press or .
You can also step forward by pressing I repeatedly on the remote control.
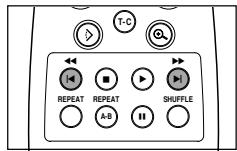
Search
- Select (Fast motion) in the menu bar.
- Use the keys to enter the Fast Motion menu.
- Use the keys to select the required speed: -32, -8 or -4 (backward), or +4, +8, +32 (forward).
- Select 1 to play at normal speed again.
- To exit Fast Motion mode, press or .
To search forward or backward through different speeds, you can also hold down or .
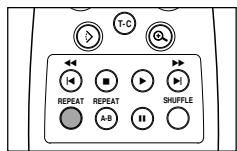
Repeat
DVD-Video Discs - Repeat chapter/title/disc
- To repeat the currently playing chapter, press REPEAT.
REPEAT CHAPTER appears on the player display.
- To repeat the title currently playing, press REPEAT a second time
- REPEAT TITLE appears on the display.
To repeat the entire disc, press REPEAT a third time
REPEAT appears on the display. - To exit Repeat mode, press REPEAT a fourth time.
Video CDs - Repeat track/disc
- To repeat the track currently playing, press REPEAT.
REPEAT TRACK appears on the player display.
- To repeat the entire disc, press REPEAT a second time.
REPEAT appears on display and screen.
- To exit Repeat mode, press REPEAT a third time.
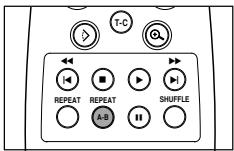
A-B REPEAT
Repeat A-B
To repeat a sequence in a title:
- Press REPEAT A-B at your chosen starting point; A- appears briefly on the screen.
- Press REPEAT A-B again at your chosen end point; A-B REPEAT appears briefly on the display, and the repeat sequence begins (A-B REPEAT is displayed on the front panel of the player).
- To exit the sequence, press REPEAT A-B.
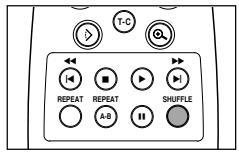
SHUFFLE
Shuffle
DVD-Video discs
This shuffles the playing order of chapters within a title, if the title has more than one.
- Press SHUFFLE during play.
SHUFFLE appears on the screen for about 2 seconds.
- To return to normal play, press SHUFFLE again.
Video CDs
This shuffles the playing order of the tracks, if the disc has more than one.
- Press SHUFFLE during play.
SHUFFLE appears on the screen for about 2 seconds. - To return to normal play, press SHUFFLE again.
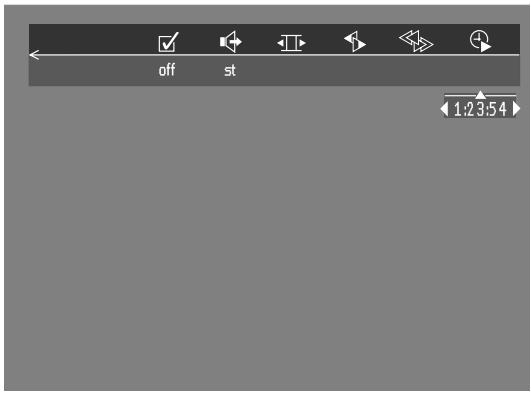
Time search
The Time Search function allows you to start playing at any chosen time on the disc.
- Select (Time Search) in the menu bar.
Press
The player will now go into PAUSE mode.
A time edit box appears on the screen, showing the elapsed playing time of the current disc.
- Use the digit keys to enter the required start time. Enter hours, minutes and seconds from left to right in the box.
Each time an item has been entered, the next item will be highlighted. - Press OK to confirm the start time.
The time edit box will disappear and play starts from the selected time position on the disc.
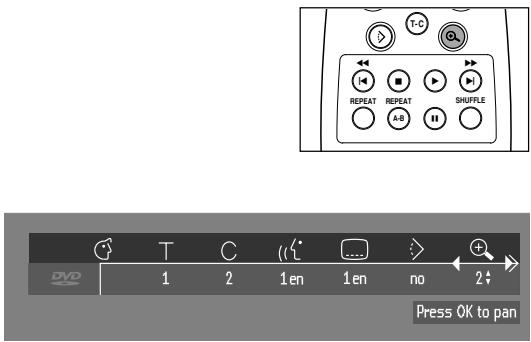
Zoom
The Zoom function allows you to enlarge the video image and to pan through the enlarged image.
- Select , (Zoom) in the menu bar.
- Press / to activate the ZOOM function and select the required zoom factor: 1.33 or 2 or 4.
The player will go into Pause mode.
The selected zoom factor appears below the Zoom icon in the menu bar and 'Press OK to pan' appears below the menu bar.
The picture will change accordingly.
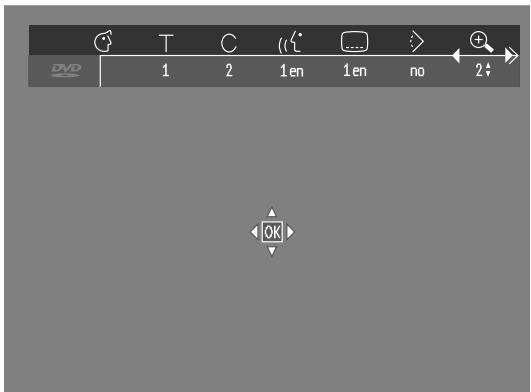
- Press OK to confirm the selection.
The panning icons appear on the screen: and OK.
Use the keys to pan across the screen.
- When OK is pressed only the zoomed picture will be shown on the screen.
- If you wish to zoom at any moment, press (Zoom) and select the required zoom factor as described above.
-
To exit Zoom mode:
-
Press
Playback will resume.
- Press STOP, SETUP OSD.
FTS-Video
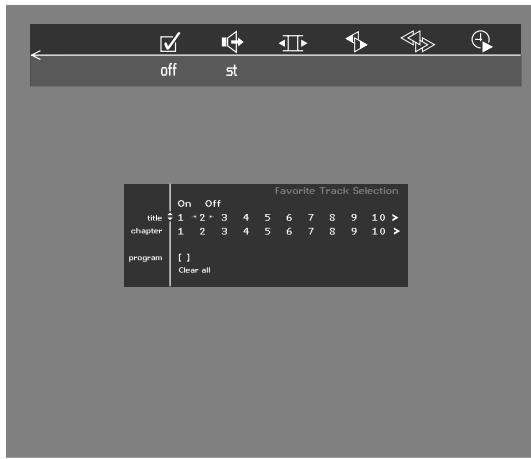
- The FTS-Video function allows you to store your favorite titles and chapters (DVD) and favorite tracks and indexes (VCD) for a particular disc in the player memory.
- Each FTS program can contain 20 items (titles, chapters).
- Each time an FTS program is played it will be placed on top of the list. When the list is full and a new program is added, the last program in the list will be removed from the list.
- The selections can be called up and played at any time.
Storing a FTS-Video Program
- In STOP mode, select Video FTS in the menu bar.
- Press to open the menu.
The Video FTS menu appears. - Press or or FTS to select ON or OFF.
Storing titles/tracks
- Press to select TITLES.
- Use or to select the required title.
- Press OK if you wish to store the entire title.
The title number will be added to the list of selections.
Storing chapters/indexes
- Press on the selected title number.
The title number will be marked and the highlight moves to the first available chapter number for this title. - Use or to select the required chapter number.
- Press OK to confirm the selection.
The title/chapter selection will be added to the list of selections. - Press SETUP OSD to exit the Video FTS menu.
Erasing a FTS-Video Program
- In STOP mode, select Video FTS in the menu bar.
Use to select PROGRAM. - Use or to select the required selection number.
- Press OK to erase the selection.
- Press SETUP OSD to exit.
If you wish to erase all selections:
- In STOP mode, select Video FTS in the menu bar.
Use to select CLEAR ALL. - Press OK.
All selections will now be erased. - Press SETUP OSD to exit.
Special DVD features
Checking the contents of DVD-Video discs: Menus
For titles and chapters, selection menus may be included on the disc. The DVD's menu feature allows you to make selections from these menus. Press the appropriate numerical key; or use the , , , keys to highlight your selection, then press OK.
Title menus
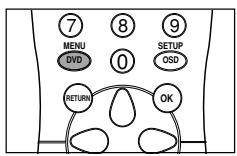
- Press MENU DVD.
If the current title has a menu, the menu will appear on the screen. If no menu is present in the title, the disc menu will be displayed.
- The menu can list camera angles, spoken language and subtitle options, and chapters for the title.
- To remove the title menu, press MENU DVD again.
Disc menu
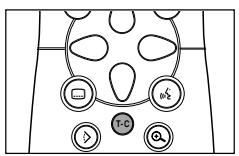
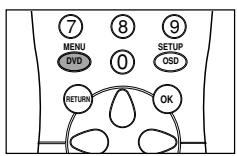
- Press T-C then press MENU DVD.
The disc menu is displayed. - To remove the disc menu, press T-C, then press MENU DVD.
Camera Angle
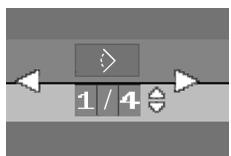
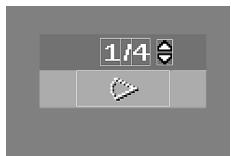
If the disc contains sequences recorded from different camera angles, the angle icon appears, showing the number of available angles and the angle being shown currently. You can then change the camera angle if you wish.
- Use the / keys to select the required angle in the angle icon.
After a small delay, play changes to the selected angle. The angle icon remains displayed until multiple angles are no longer available.
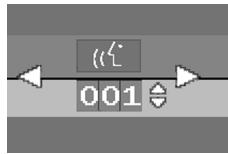
Changing the audio language
- Select (Audio) in the menu bar.
- Press ( ) or / repeatedly to see the different languages.

Subtitles
- Select (Subtitle) in the menu bar.
- Press or / repeatedly to see the different subtitles.
Special VCD-Features
Playback Control (PBC)
- Load a Video CD with PBC and press .
- Go through the menu with the keys indicated on the TV screen until your chosen passage starts to play. If a PBC menu consists of a list of titles, you can select a title directly.
- Enter your choice with the numerical keys (0-9).
- Press RETURN to go back to the previous menu.
- You may also set the PBC OFF under Personal Preferences menu.
Playing an audio CD
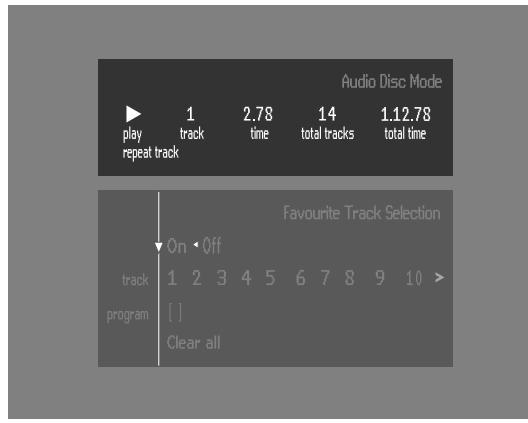
After loading the disc, playback starts automatically.
- If the TV is on, the Audio CD screen appears.
- The number of tracks and the total playing time will be shown on the screen.
- During play, the current track number and its elapsed playing time will be shown on the screen and on the player display.
- Playback will stop at the end of the disc.
- To stop play at any other time, press ■.
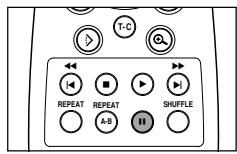
Pause
- Press II during play.
To return to play, press
Search
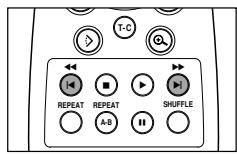
- To search forward or backward through the disc at four times normal speed, hold down or for about one second during play. Search begins, and sound is partially muted.
- To step up to eight times the normal speed, press or again. Search goes to eight times the speed, and the sound is muted.
To return to four times the normal speed, press or again. - If the TV is on, search speed and direction are indicated on the screen each time or is pressed.
- To end the search, press to resume playback or to stop.
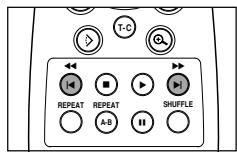
Moving to another track
- Press▶ briefly during play to go to the next track.
- Press briefly during play to return to the beginning of the current track. Press twice briefly to step back to the previous track.
- To go directly to any track, enter the track number using the numerical keys (0-9).
Shuffle
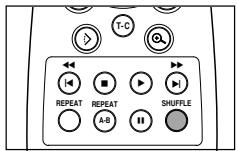
- Press SHUFFLE during play.
The order of the tracks is changed.
- To return to normal play, press SHUFFLE again.
Repeat track/disc
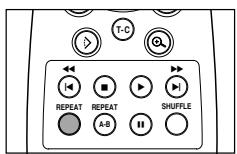
- To repeat the track currently playing, press REPEAT.
REPEAT TRACK appears on the display. - To repeat the entire disc, press REPEAT a second time.
REPEAT appears on the display. - To exit Repeat mode, press REPEAT a third time.
Repeat A-B
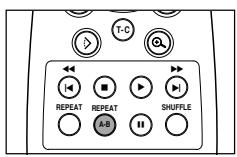
To repeat a sequence:
- Press REPEAT A-B at your chosen starting point;
A- appears on the player display. - Press REPEAT A-B again at your chosen end point;
A-B appears on the display, and the sequence begins to play repeatedly. - To exit the sequence, press REPEAT A-B again.
FTS Program
- FTS Program allows you to store your favorite tracks for a particular disc in the player memory.
- Each FTS Program can contain 20 tracks.
Storing an FTS Program
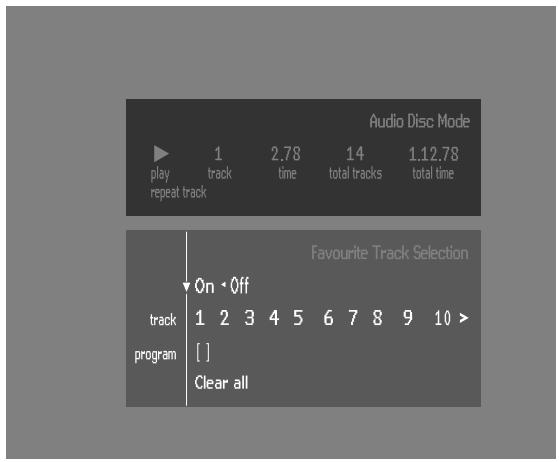
1 Load a disc and stop playback.
2 Use to go to the list of available tracks.
3 Use or to select tracks from the list.
To go directly to any track, enter the track number using the numerical keys (0-9).
4 Store each track by pressing OK.
The track numbers will be added to the list of selected tracks.
The number of tracks and the playing time of the program will be shown on the screen and the player display.
When your FTS Program is complete, press to start play, or to go back to Stop mode. In either case, the FTS Program will be automatically memorized.
Switching FTS ON/OFF
1 Use / to move to the top.
2 Use or to select either ON or OFF.
Erasing a track from an FTS Program
1 Use to go to the list of selected tracks.
2 Use or to select the track number you wish to erase.
3 Press OK.
The track number will be erased from the list of selected tracks.
Erasing the complete program
- Use to select Clear All, then press OK.
The complete FTS Program for the disc will be erased.
Before requesting service
| Symptom | Remedy |
| No power | Make sure the AC cord is properly connected. Check if there is power at the AC outlet by plugging in another appliance. |
| No picture | Check if the TV is switched on. Check the video connection. |
| Distorted picture | Check the disc for fingerprints and clean with a soft cloth, wiping from center to edge. Sometimes a small amount of picture distortion may appear .This is not a malfunction. |
| Completely distorted picture or no color with player menu. | If the picture is distorted completely or if the picture rolls vertically, make sure the NTSC/PAL setting at the DVD player matches the video signal of your television. If your TV video signal is NTSC, select the NTSC setting at the DVD player. If your video signal is PAL, select the PAL setting - see NTSC/PAL SETTINGS. |
| Distorted or Black/White picture with DVD or Video CD. | The disc format does not match your TV's video signal (PAL/NTSC). |
| No sound | Check audio connections. If you are using a amplifier, try another sound source. |
| Distorted sound from amplifier. | Check to make sure that no audio connections are made to the amplifier phono input. |
| No audio at digital output. | Check the digital connections. Check the settings menu to make sure the digital output is set to ALL or PCM. Check if the audio format of the selected audio language matches your receiver capabilities. |
| Disc can't be played. | Ensure the disc label is facing up. Clean the disc. Check if the disc is defective by trying another disc. Check to see if the disc is defective, badly scratched or warped (not flat) |
| No return to start-up screen when disc is removed. | Reset by switching the player off, then on again. Check to see if the program requires another disc to be loaded. |
| The player does not respond to the remote control. | Aim the remote control directly at the sensor on the front of the player. Remove any obstacles between the player and the remote control. Inspect or replace the batteries in the remote control. |
| Buttons do not work. | In order to completely reset the player, unplug the AC cord from the AC outlet for a few seconds. |
| Player does not respond to all operating commands during playback. | Operations are not permitted by the disc. Refer to the instructions of the disc. |
| DVD-Video player cannot read CDs/DVDs correctly. | Use a commonly available cleaning CD/DVD to clean the lens before taking the DVD-Video player to be repaired. |
Cleaning discs
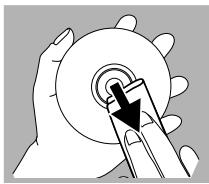
Some problems occur because the disc inside the player is dirty. To avoid these problems clean your discs regularly, in the following way:
- When a disc becomes dirty, clean it with a cleaning cloth. Wipe the disc from the center out.
Caution: Do not use solvents such as benzine, thinner, commercially available cleaners, or anti-static spray intended for analog discs.
PLAYBACK SYSTEM
DVD-Video
Video CD
CD (CD-R and CD-RW)
OPTICAL READOUT SYSTEM
| Lasertype | Semiconductor AlGaAs |
| Numerical Aperture | 0.60 (DVD) |
| 0.45 (VCD/CD) | |
| Wavelength | 650 nm (DVD) |
| 780 nm (VCD/CD) |
DVD DISC FORMAT
| Medium | Optical Disc | |
| Diameter | 12cm (8cm) | |
| Playing time (12cm) | One layer | 2.15 h* |
| Dual layer | 4 h* | |
| Two side | 4.30 h* | |
| Single layer | ||
| Two side | 8 h* | |
| Dual layer | ||
| TV STANDARD | EUROPE | USA |
| (PAL/50Hz) | (NTS | |
| Number of lines | 625 | 525 |
| Playback | Multistandard | (PAL |
VIDEO FORMAT
DA Converter 10 bits
Signal handling Components
Digital Compression MPEG2 for DVD,
MPEG1 for VCD
DVD
| Horiz. Resolution | 720 pixels** | 720 pixels** |
| Vertical Resolution | 576 lines | 480 lines |
VCD
| Horiz. Resolution | 352 pixels | 352 pixels |
| Vertical Resolution | 288 lines | 240 lines |
VIDEO PERFORMANCE
Video output 1 Vpp into 75 ohm
S-Video output Y: 1 Vpp into 75 ohm
C: 0.3 Vpp into 75 ohm
RGB output 1 Vpp into 75 ohm
Black Level Shift On/Off
Video Shift Left/Right
AUDIO FORMAT
| Digital | MPEG | Compressed Digital |
| DTS/AC-3 | ||
| PCM | 16, 20, 24 bits | |
| fs, 44.1, 48, 96 kHz |
Analog Sound Stereo
Dolby Pro Logic downmix from AC-3 multi-channel sound
3D Sound for virtual 5.1 channel sound on 2 speakers
AUDIO PERFORMANCE
| DA Converter | 24 bits | |
| DVD | fs 96 kHz | 4 Hz - 44 kHz |
| fs 48 kHz | 4 Hz - 22 kHz | |
| Video CD | fs 48 kHz | 4 Hz - 22 kHz |
| CD | fs 44.1 kHz | 4 Hz - 20 kHz |
| Signal-Noise (1kHz) | 103 dB | |
| Dynamic Range (1kHz) | 98 dB | |
| Crosstalk (1kHz) | 115 dB | |
| Distortion and Noise (1kHz) | 95 dB | |
CONNECTIONS
SCART Euroconnector 2x
S-Video Output Mini DIN, 4 pins
Video Output Cinch (yellow)
Audio L+R output Cinch (white/red)
Digital Output 1 coaxial, 1 optical
IEC958 for CDDA / LPCM
IEC1937 for MPEG1/2 ,AC-3 and DTS
CABINET
Dimensions(w x h x d) 440 x 92 x 305 mm
Weight Approx. 3.8 Kg
PACKAGE CONTENTS
DVD-Video Player
Remote Control & Batteries
AC Power cable
User Manual
SCART cable (Euroconnector)
Audio/Video cable
GENERAL FUNCTIONALITY
Stop / Play / Pause
Fast Forward / Backward
Time search
Step Forward / Backward
Slow
Title / Chapter / Track Select
Skip Next / Skip Previous
Repeat (Chapter / Title / All) or (Track / All)
A-B Repeat
Shuffle
Enhanced ease of use graphical interface
Perfect Still with digital multi-tap filter
Zoom (x1.33, x2, x4) with picture enhancement
3D Sound
Virtual jog shuttle
Audio and video bit rate indicator (only available in certain countries)
DVD FUNCTIONALITY
Multi-angle Selection
Audio Selection (1 out of max. 8 languages)
Subtitles Selection (1 out of max. 32 languages)
Aspect Ratio conversion (16:9, 4:3 Letterbox, 4:3 Pan Scan)
Parental Control and Disk Lock
Disc Menu support (Title Menu and Root Menu)
Resume (5 discs) after stop / standby
Screen Saver (Dim 75% after 15 min.)
Programming Titles/chapters with Favorite Selection
VIDEO CD FUNCTIONALITY
Playback Control for VCD 2.0 discs
Parental Control and Disc lock
Resume (5 discs) after stop / standby
Screen Saver (Dim 75% after 15 min.)
Programming Tracks with Favorite Selection
AUDIO CD FUNCTIONALITY
Time Display (Total / Track / Remaining Track Time)
Full audio functionality with remote control
Programming with Favorite Track Selection
- typical playing time for movie with 2 spoken languages and 3 subtitle languages.
** equivalent to 500 lines on your TV
Specifications subject to change without prior notice
| COUNTRY | COMPANY | ADDRESS |
| ALGERIE | Azur 2000 | 8, Lotissement Ben Hatadi, Alger, Algeria |
| ARMENIA | NGYIG Ltd. | 47 A/75 St. Lalaiants, 37500 Yerevan, Armenia |
| AUSTRALIA | Scan audio Pty. Ltd. | 4 Station Street, Thornleigh NSW 2120, Australia |
| AUSTRIA | Huber & Prohaska GmbH | Taborstraße 95 / Ladestraße 1, Gebäude Hangartner, A-1200 Wien, Austria |
| BAHREIN | Ambassador Stores | P.O. Box 237,141, Government Avenue, Manama,Bahrein |
| BANGLADESH | Target | 1078, Ramjoy Mohanja Lane Asadgonj, Chittagong 4000, Bangladesh |
| BELGIUM | Van der Heyden Audio N.V. | Brusselsbaan 278, 9320 Erembodegem, Belgium |
| BULGARIA | Ariescommerce GmbH | Makedonia Blvd. 16, 1606 Sofia, Bulgaria |
| CANADA | Lenbrook Industries Limited | 633 Granite Court, Pickering, Ontario |
| CYPRUS | Empire Hifi systems Ltd. | P.O. Box 5604, Nicosia, Cyprus |
| CZECH REPUBLIC | Audio International | Sokolska 41, 67902 Rajecko, OKR,Blansko, Czech Republic |
| DENMARK | Audio Nord | Dali Allé 1, 9610 Noerager, Denmark |
| DUBAI | V.V.& SONS | P.O. Box 105, Dubai, U.A.E. |
| EGYPT | Solimco | 9, El Attibaa St. Doki, Cairo, Egypt |
| ESTONIA | HiFi Club Estonia | Ehte 4, 90503 Haapsalu, Estonia |
| F.Y.R.O.M. | T.P. KODI | ul.Cedomir Kantargiev 21a, Skopje, Former Yugoslavian Republic of Macedonia |
| FINLAND | Audio Nord | Uudenmaankatu 4-6, Helsinki SF-00120, Finland |
| FRANCE | Marantz France | A division of Marantz Europe B.V., P.O. Box 301, 92 156 Suresnes Cedex, France |
| GERMANY | Marantz Deutschland | Hakenbusch 3, 49078 Osnabrück, Germany |
| GREECE | Adamco S.A. | 188, Hippocraticus Street, 11471 Athens, Greece |
| HEADQUARTERS EUROPE: | Marantz Europe B.V. | Building SFF-2, P.O. Box 80002, 5600 JB Eindhoven, The Netherlands |
| HONG KONG | Marantz Asia Ltd. | Unit 1706, Metrop Plaza II, 223 Hing Fong Road, Kwai Fong, N.T., Kowloon, Hong Kong |
| HUNGARY | Infovox Ltd. | Terez Krt.31, 1067 Budapest, Hungary |
| ICELAND | ID Electronics Ltd. | Armula 38, 108 Reykjavik, Iceland |
| INDIA | NOVA Audio Private | 8,Punam Co-op Society 29/30 Road#5, Union Park MUMBAI 400052, India |
| IRAN | Home Co. | 5th floor no 878 Philips Building Enghelab ave, P.O. 11365/7844 Tehran, Iran |
| IRELAND | Marantz Ireland | Clonskeagh, Dublin 14, Ireland |
| ISRAEL | Elmor Ltd. | 52 Heh Beiyar Street, Kikar Hamedina, Tel Aviv, Israel |
| ITALY | Marantz Italy | Via Casati 23, 20052 Monza (Milano), Italy, Servizio Consumatori 1678-20026,Numero Verde |
| IVORY COAST | Hifivoir | B.P. 2428, Abidjan 01, Ivory Coast |
| JAPAN | Marantz Japan Inc. | 35-1 Sagami Ohno 7-Chome, Sagamihara-shi, Kanagawa 228-8505, Japan |
| KOREA | Mk Enterprises Ltd. | 121-210, 2F Shinhan Bldg., 247-17 Seokyo-dong, Mapo-ku, Seoul, Korea |
| KUWAIT | alAlamiah Electronics Intl. | P.O. Box 8196, Salmiah 22052, Kuwait |
| LATVIA | Ace Ltd. | 61, LacPlesa Str., Riga LV 1011, Latvia |
| LEBANON | AZ Electronics S.A., 1, | P.O. Box 11 2833, Beirut, Lebanon |
| LITHUANIA | Accapella Ltd. | Ausbros, Vartu G/5, Pasazo SKG, 2001 Vilnius, Lithuania |
| MALAYSIA | Wo Kee Hong Electronics Sdn. Bhd. | 102 Jalan SS 21/35, Damansara Utama, 47400 Petaling Jaya, Selangordarul Ehsan, Malaysia |
| MALTA | Doneo Co Ltd. | 78 The Strand, Sliema SLM07, Malta |
| MAURITIUS | SKR Electronics Ltd. | P.O. Box 685, Bell Village, Port Louis, Mauritius |
| MILITARY MARKET EUROPE | PASCO GmbH | PO BOX 1280, Sandhausen 69200, Germany |
| NETHERLANDS | Marantz Domestic Sales | A division of Marantz Europe B.V., Building SFF2, P.O. Box 80002, 5600 JB Eindhoven, The Netherlands |
| NEW ZEALAND | Scan audio Pty. Ltd. | 4 Station Street, Thornleigh NSW 2120, Australia |
| NORWAY | Audio Nord | Sandkerveien 64, Oslo 0483, Norway |
| OMAN | Mustafa & Jawad Trading CO. | P.O. Box 1918, Ruwi, Oman |
| POLAND | Philips Polska Sp. z.o.o. | Al.Jerozolimskie 195b, 02 222 Warszawa, Poland |
| PORTUGAL | Core2 | Comercio de Electrónica Lda., Av. Luis Bivar, No 85 A, 1050 Lisboa, Portugal |
| PROFESSIONAL EUROPE | Marantz Professional Products | Kingsbridge House, Padbury Oaks, 575-583 Bath Road, Longford, Middlesex UB7 0EH, U.K. |
| PROFESSIONAL U.S.A. | Marantz Professional Products | Distributed by: Superscope Technologies Inc., 1000 Corporate Blvd. Ste.D, Aurora, Illino |
| QATAR | Almana & Partners W.W.L. | P.O. Box 49, Doha, Qatar |
| REUNION | Vision + | 180 Rue du Marechal Leclerc, 97400 Saint Denis, Île de la Reunion |
| ROMANIA | Nova Music Entertainment | 5, Zagazuli Str. Bl.1G.apt.18, sector 1, Bucharest, Romania |
| RUSSIA | Absolute Audio | 7/2, Montazhnaya Street, 107497 Moscow, Russia |
| SAUDI ARABIA | Adawlia Univ. Electr. ApI | P.O. Box 2154, Alkhobar 31952, Saudi Arabia |
| SINGAPORE | Forward Marketing (S) Pte. Ltd. | W Kee Hong Centre, 29 Leng Kee Road, Singapore 159099, Singapore |
| SLOVAKIA | Bis Audio s.r.o. | Nam. SNP 10, 96001 Zvolem, Slovakia |
| SLOVENIA | Bofex | Smartinska 152, HALA V/3, 61000 Ljubljana, Slovenia |
| SOUTH AFRICA | Coherent Imports (PTY) Ltd. | P.O. Box 1614, Alberton, 1450, South Africa |
| SPAIN | Marantz Spain | Martinez Villergas 2, Apartado 2065, Madrid 28027, Spain |
| SRI LANKA | The listening Room | Mezzanine Floor, The Landmark 385, Galle Road, Colombo - 3, Sri Lanka |
| SWEDEN | Audio Nord | Almedalsvagen 4, Gotenborg 402-23, Sweden |
| SWITZERLAND | Sound Company AG | Postfach, 8010 Zürich, Switzerland |
| SYRIA | Hamzeh & Partners | Hafez Ibrahim Str. No 117, Damascus Shalan, Syria |
| TAHITI | Covecolor | Av. Prince Hinoi, Cours de l'union sacré, P.O. Box 2334, Papeete, Tahiti |
| TAIWAN | Pai-Yung Co. Ltd. | 6th No 148 Sung Kiang Road, Taipei 10429, Taiwan R.O.C. |
| THAILAND | MRZ Standard Co. Ltd. | 746-750 Mahachai Road, Wangburapa, Bangkok 10200, Thailand |
| TUNESIA | Societe EDEVIG | 40, Avenue du Golfe Arabe, El Menzah, 1004, Tunisia |
| TURKEY | Türk Philips Ticaret A.S. | Yukari Dudullu Organize sanayl Bolgesi, 2.Cadde no.28, 81260 Umraniye-Istanbul, Turkey |
| U.K. | Marantz Hifi UK Ltd. | Kingsbridge House, Padbury Oaks, 575-583 Bath Road, Longford, Middlesex UB7 0EH, U.K. |
| U.S.A. | Marantz America Inc. | 440 Medinah Road, Roselle, IL 60172, U.S.A. |
| YUGOSLAVIA | ITM Company | Omladinskikh Braga 86, 11070 Belgrade, Yugoslavia |
| EXPORT | Marantz Domestic Sales | A division of Marantz Europe BV,Building SFF2, P.O. Box 80002, 5600 JB Eindhoven, The The Netherlands |
"Dolby", "AC-3", "Pro Logic" and the double-D symbol are trademarks of Dolby Laboratories.
"DTS" and "DTS Digital Surround" are trademarks of Digital Theater Systems, Inc.