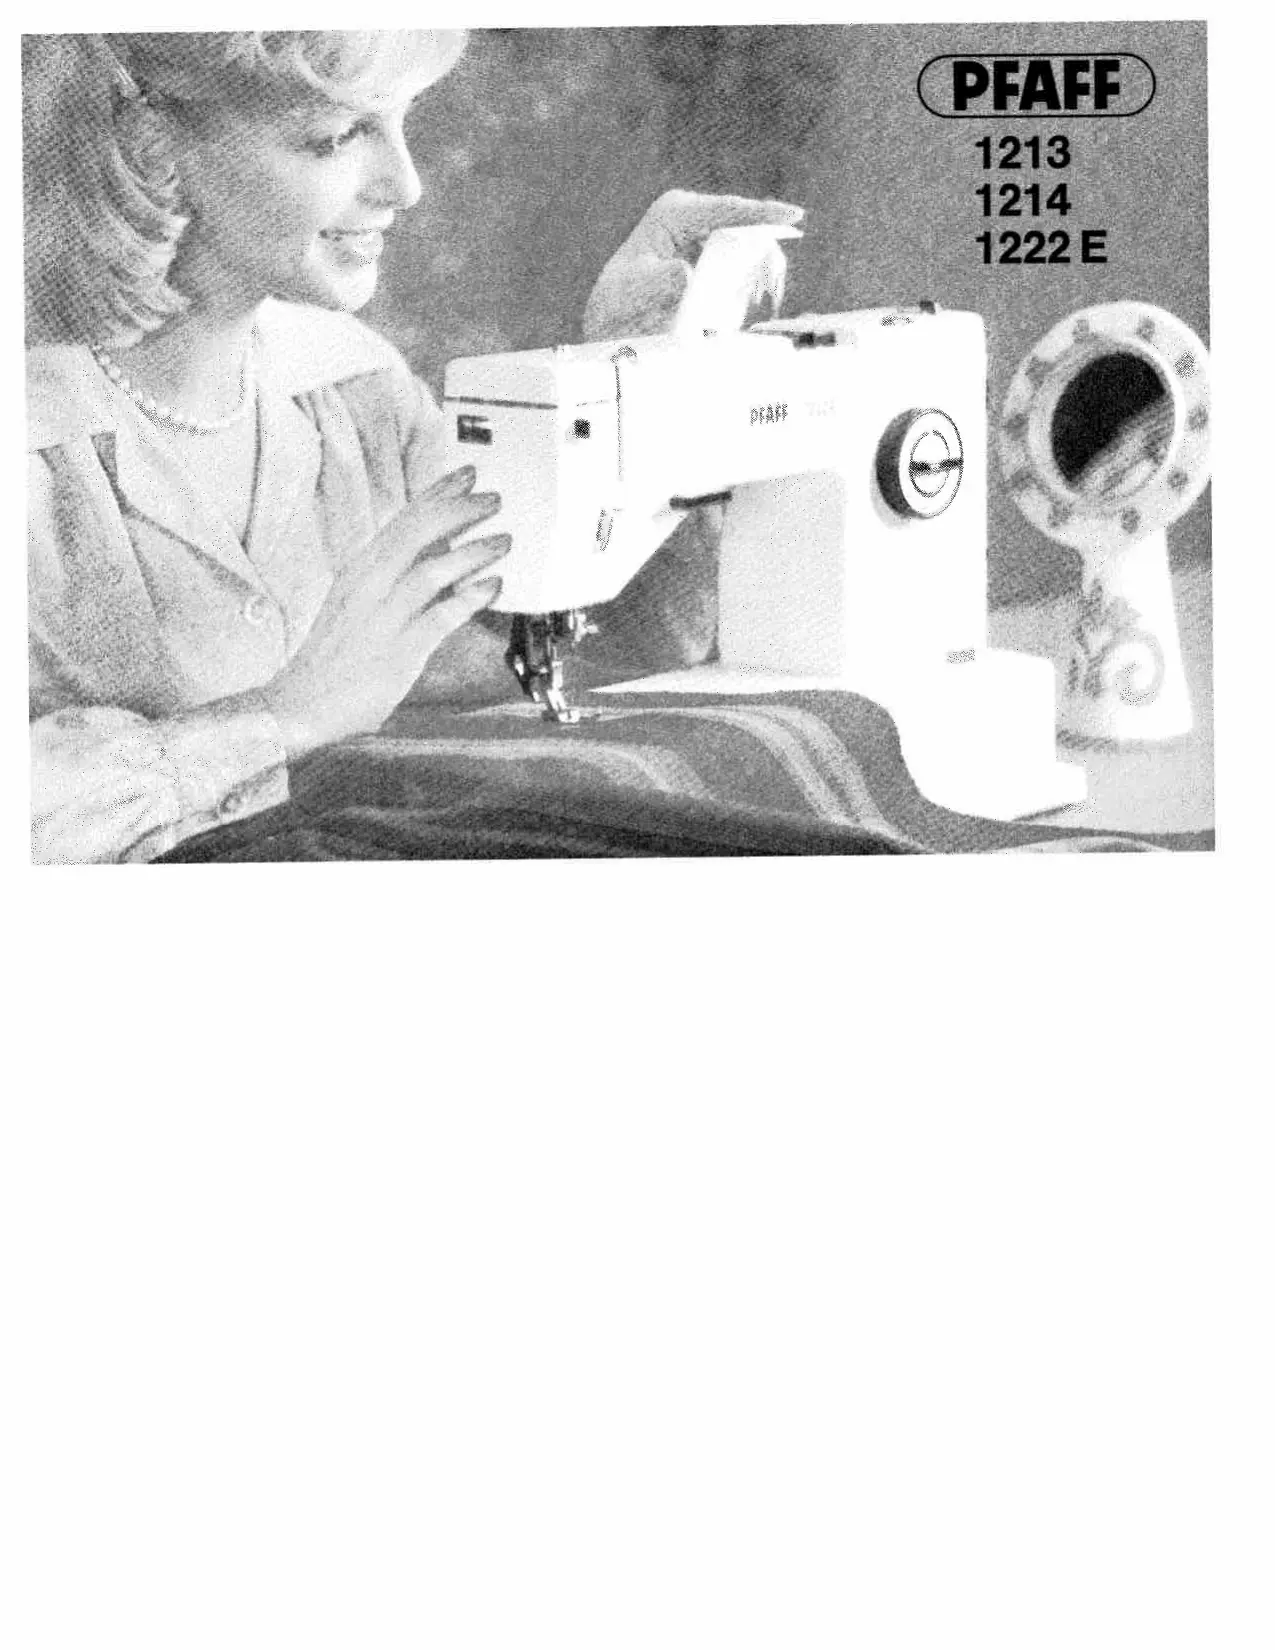
USER MANUAL 1222E PFAFF
| Contents | Page | | Page | | Page |
| Foreword | 1 | Sewing over cross seams | 19 | Eyelet embroidery | 45 |
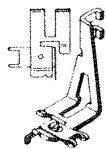
| Parts of the Pfaff 1213 | 2 | Electronic control | 19 | Utility-stitch mechanism | 46 |
| Parts of Pfaff machines | | Changing the needle | 20 | Mending hems | 48 |
| 1214 and 1222-E | 3 | Changing the sewing foot | 20 | Darning rips | 48 |
| Machine drive | 4 | Regulating the thread tensions | 21 | Sewing on elastic | 49 |
| Preparations for bobbin winding | 5 | Detachable workplate | 22 | Stitching terry cloth | 50 |
| Removing the bobbin case | 6 | Felling | 23 | Elastic triple straight stitch seam | 51 |
| Bobbin winding | 7 | Hemming | 24 | Shell edging | 52 |
| Disengaging the sewing mechanism | 7 | Zipper insertion | 25 | Blindstitching | 53 |
| Inserting the bobbin | 8 | Darning | 26 | Inserting patches | 54 |
| Inserting the bobbin case | 9 | Basting | 28 | Reinforcing edges of elastic | |
| Upper threading | 10 | Single-needle cording | 29 | woven fabrics | 55 |
| Automatic needle threadser | 11 | Shirring with filler thread | 30 | Joining elastic knitted fabrics | 55 |
| Drawing up the bobbin thread | 12 | Overcasting edges | 31 | Utility-stitch combinations | 56 |
| Thread cutter | 12 | Cording | 32 | Sewing on elastic strands | 56 |
| Before you start sewing | 13 | Inserting lace | 34 | Joining knitted and jersey fabrics | 57 |
| Ultra-Matic stitch selector | 14/15 | Elastic zigzag seam | 35 | Elastic triple zigzag stitch | 57 |
| Straight stitching | 15 | Appliqué work | 36 | Reinforcing hems in elastic fabrics | 57 |
| Zigzag stitching | 15 | Needle position control | 38 | Decorative stitch mechanism | 58 |
| Foot control | 15 | Button sewing | 39 | Ornamental stitch combinations | 60/61/62 |
| Reverse sewing | 16 | Sewing buttonholes | 40 | Needle and thread chart | 63 |
| Dropping the machine feed | 16 | Monogram embroidery | 42 | Cleaning and oiling | 64 |
| Presser bar lifter | 17 | Quilting | 43 | Changing the light bulb | 65 |
| Stopmatic control | 17 | Edge stitching | 43 | Trouble shooting | 65 |
| Dual feed | 18/19 | Darning with wool thread | 44 | Carrying case | 66 |
Valid for United Kingdom only!
The wires in this mains lead are coloured in accordance with the following code: Blue: Neutral, Brown: Live.
As the colours of the wires in the mains lead of this appliance may not correspond with the coloured markings identifying the terminals in your plug, proceed as follows:
The wire which is coloured blue must be connected to the terminal which is marked with the letter N or coloured black.
The wire which is coloured brown must be connected to the terminal which is marked with the letter L or coloured red.
Please note:
When 13 amperes plug is used a 3 amperes fuse has to be fitted.
Dear (new) Pfaff Customer:
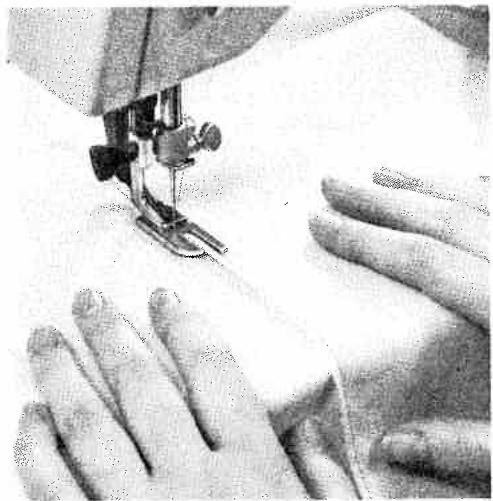
Welcome to the modern, efficient world of the Pfaff sewing machine. You are probably very anxious to try out your new machine, but we suggest that you first take the time to read this instruction booklet. Your Pfaff sewing machine is very versatile, and we would like to tell you about all the wonderful things you can create with it.
We suggest that you thumb through the booklet first and then open it at pages 2 and 3, where the most essential parts of your machine are illustrated. By identifying these parts on your machine, you will quickly familiarize yourself with your Pfaff.
We recommend that you study these sewing instructions carefully, and hope that sewing with your Pfaff will always be a pleasure.
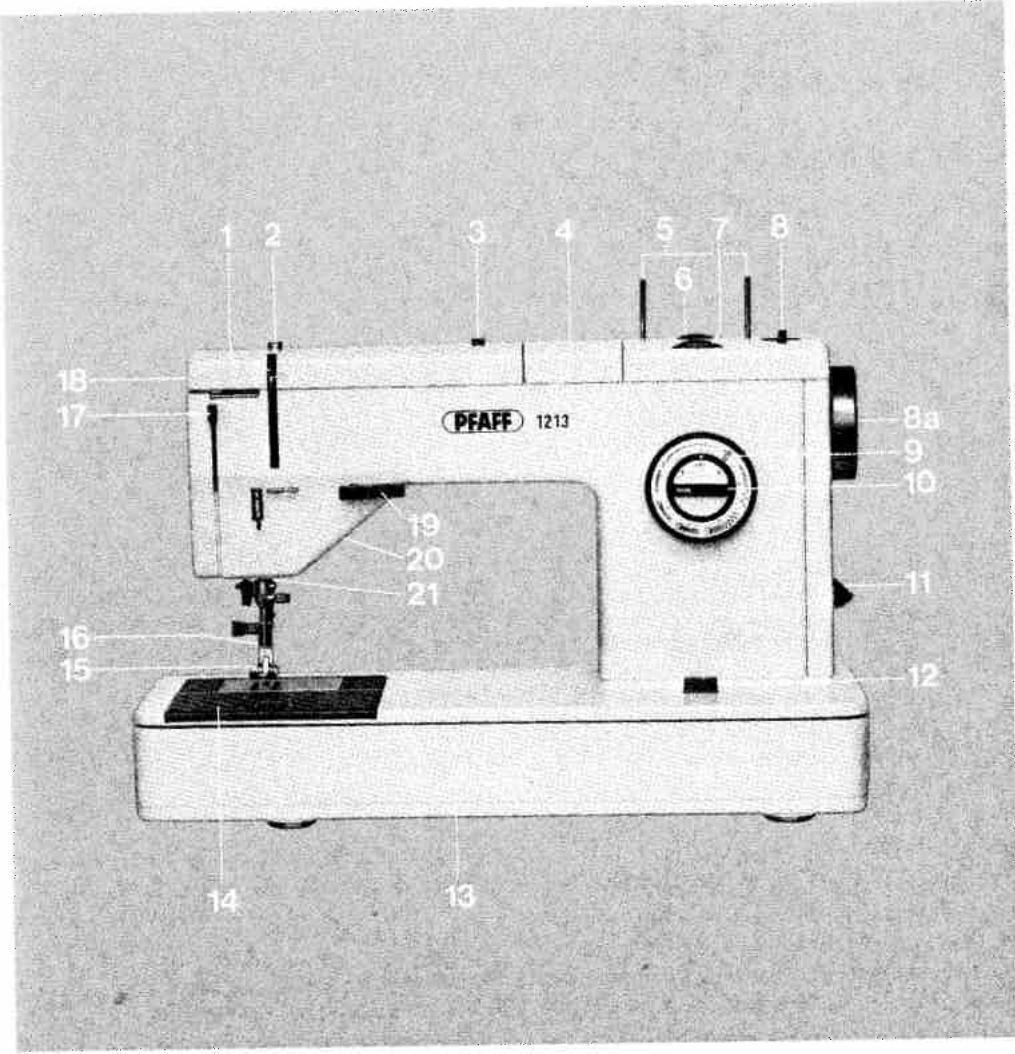
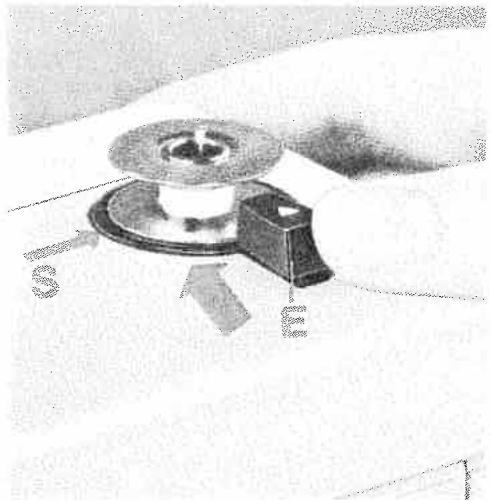
so you know which button to press, here are the most essential parts of /our Pfaff 1213:
1 Take-up lever
2 Thread retainer stud
3 Push button (K)
4 Top cover lid
5 Spool pins
6 Indicator wheel (S)
7 Pattern length wheel (E)
8 Bobbin winder
8a Balance wheel with stop motion knob
9 Ultra-Matic stitch selector
10 Needle position control (D)
11 Buttonhole control (T)
12 Master on-off switch (C)
13 Base (of portable machines)
14 Bed cover
15 Sewing foot
16 Dual feed
17 Needle threads control
18 Upper tension
19 Reverse-feed control
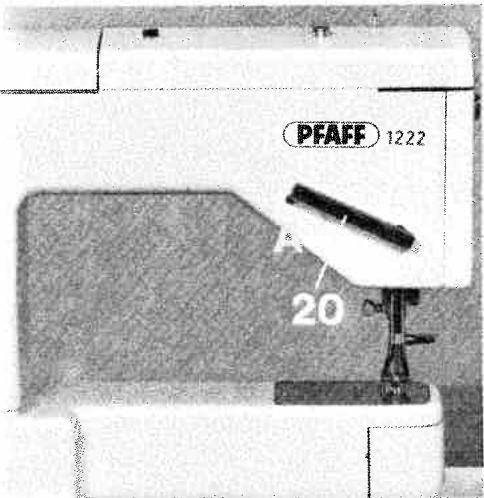
20 Presser bar lifter (on back of machine arm)
21 Thread cutter
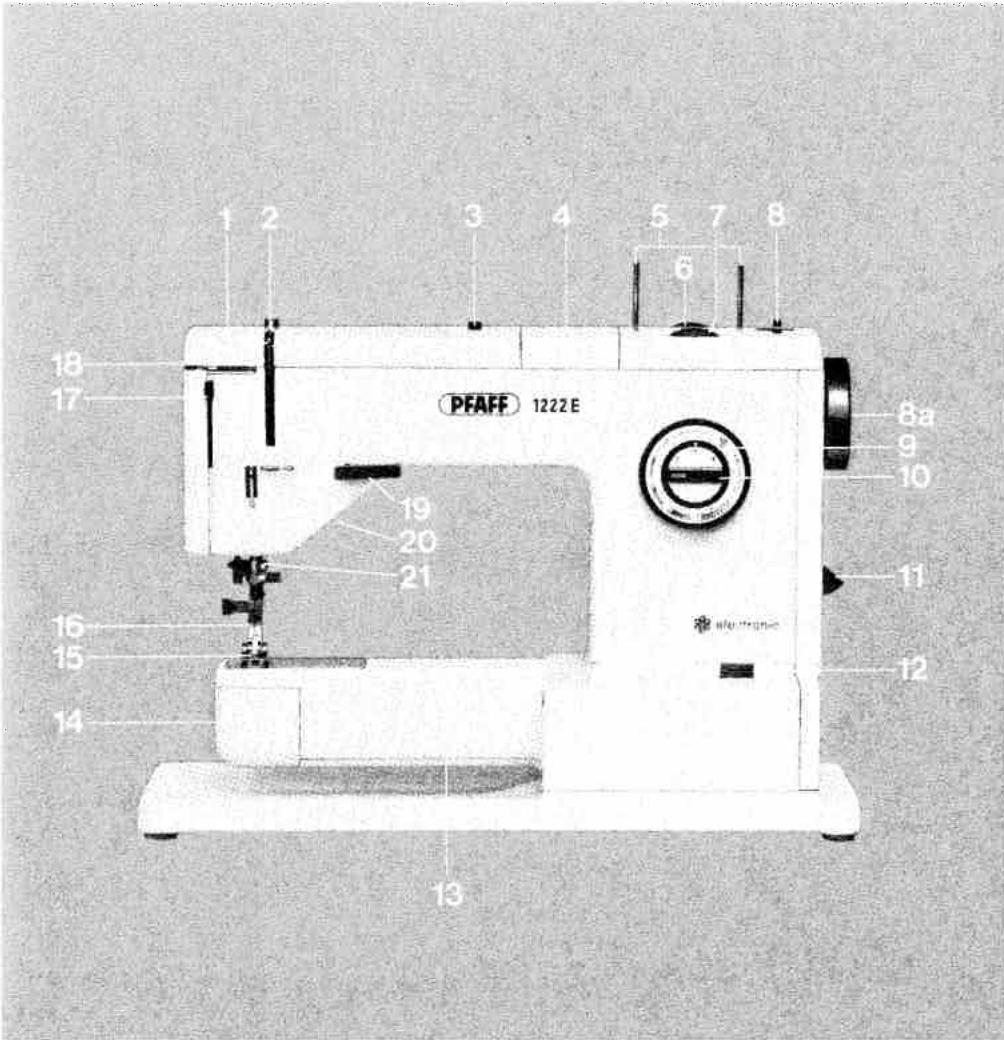
... and this is how your Pfaff 1214 or 1222-E looks:
1 Take-up lever
2 Thread retainer stud
3 Push button (K)
4 Top cover lid
5 Spool pins
6 Indicator wheel (S)
7 Pattern length wheel (E)
8 Bobbin winder
8a Balance wheel with stop motion knob (Pfaff 1214)
9 Ultra-Matic stitch selector
10 Needle position control (D)
11 Buttonhole control (T)
12 Master on-off switch (C)
13 Free arm
14 Free arm cover (enclosing the sewing hook)
15 Sewing foot
16 Dual feed
17 Needle threads control
18 Upper tension
19 Reverse-feed control
20 Presser bar lifter (on back of machine arm)
21 Thread cutter
'o start sewing right away . . .
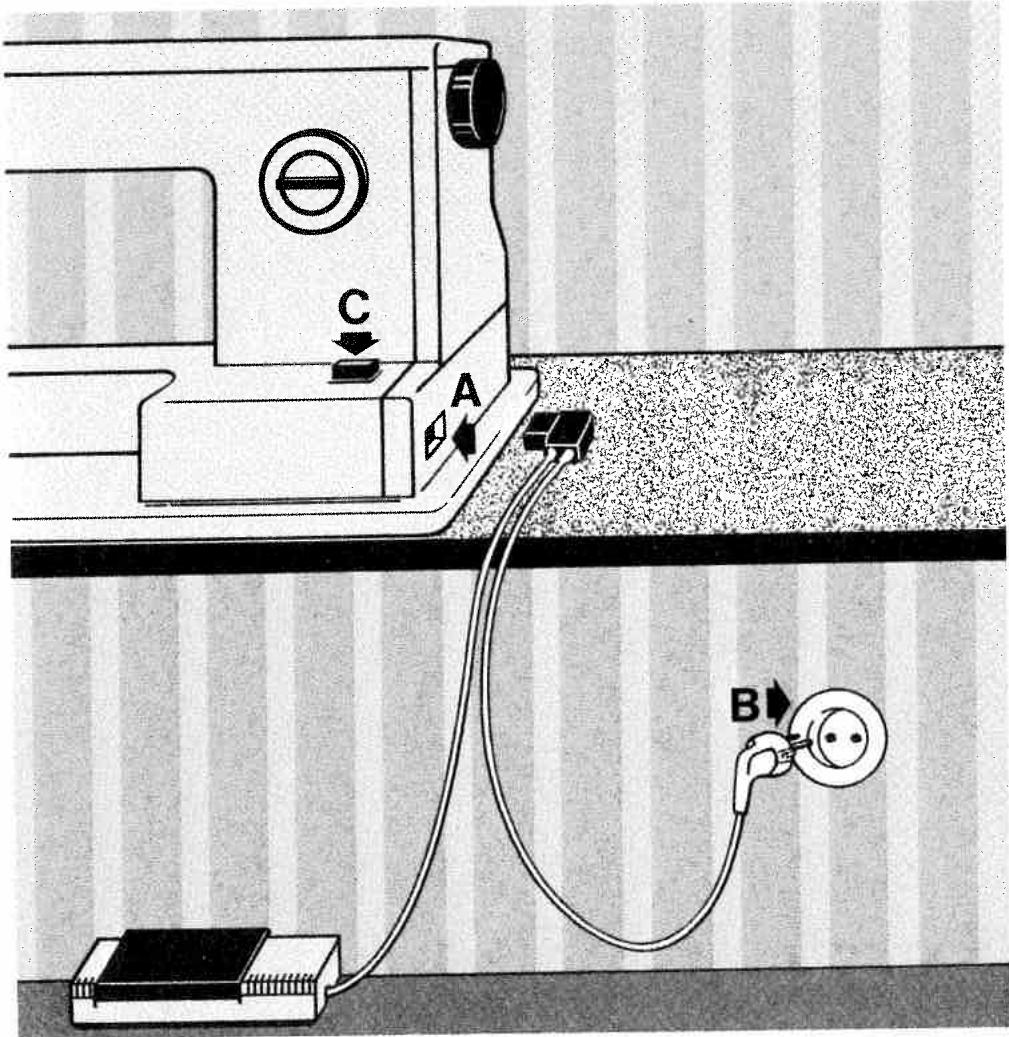
only a few simple steps are necessary. Just plug in the machine, wind the bobbin and thread the needle. Push the master plug into socket A in the machine base, and plug B into the wall socket.
Place the foot control under the table in a convenient position.
All you have to do now is push button C which is the on-off control of your machine. This button also switches on the glare-free sewing light.
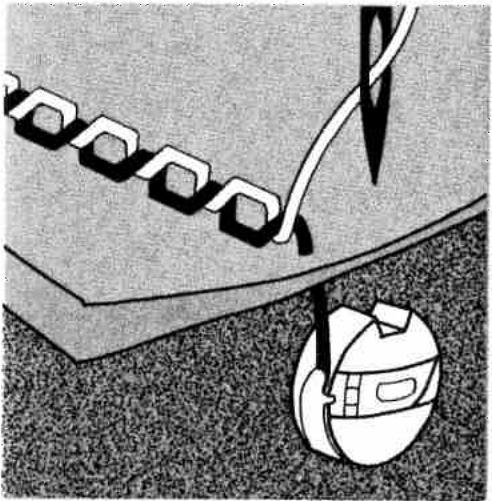
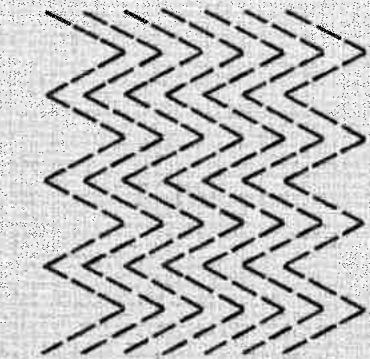
Before you start winding the bobbin
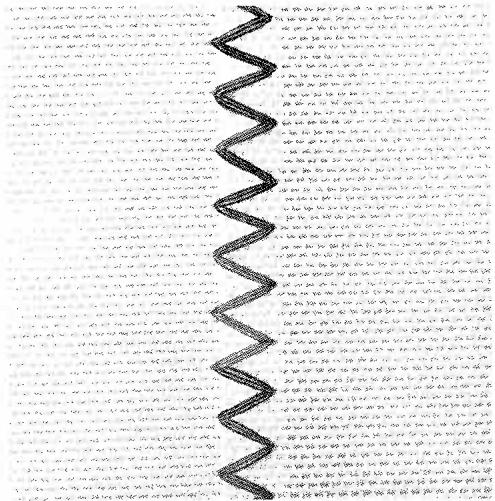
remember that you need two threads to sew a seam: an upper and a lower thread. These two threads are locked together in the middle of the fabric to form a lock stitch. The seam produced in this way is illustrated below.
If your seam doesn't look like the illustration, turn to page 21.
To wind the bobbin, turn the machine on by pushing button C (page 4). The sewing mechanism must be disengaged (see page 7).
For step-by-step bobbin winding instructions please refer to page 7.
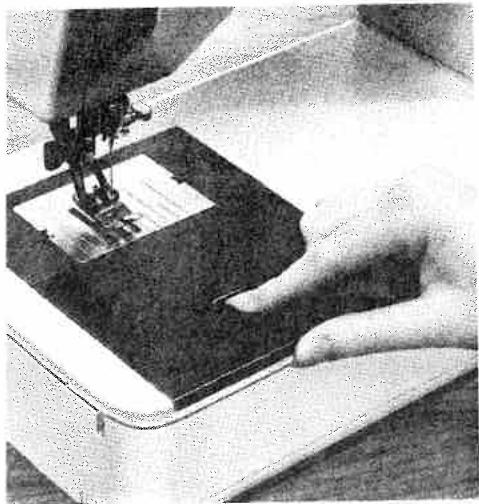
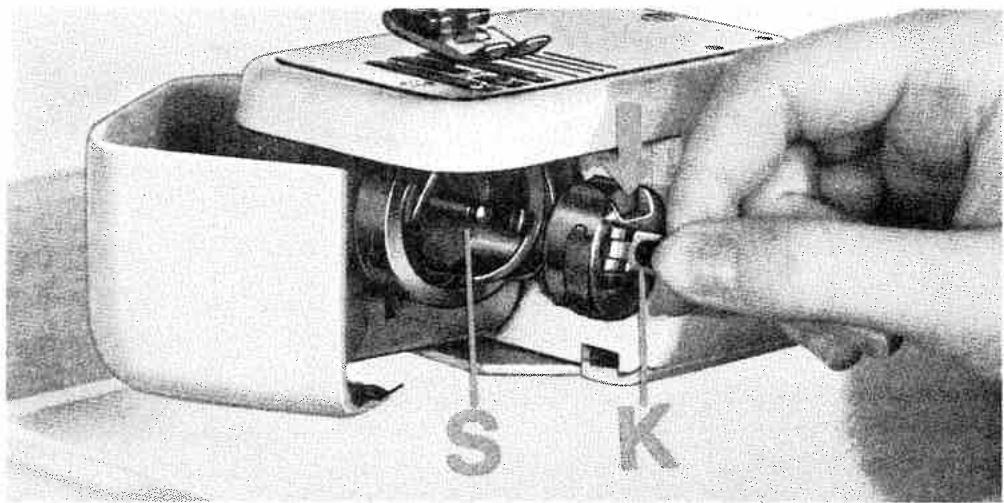
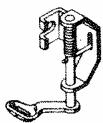
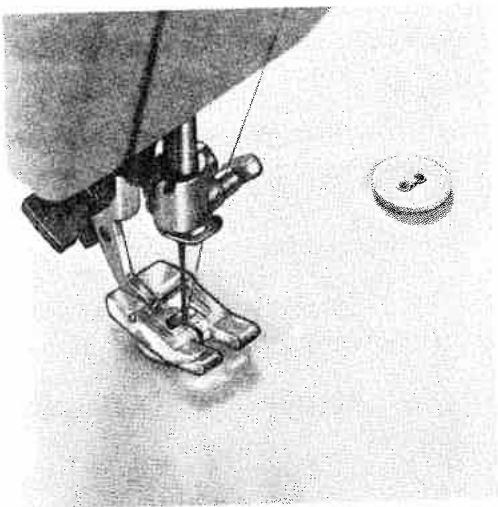
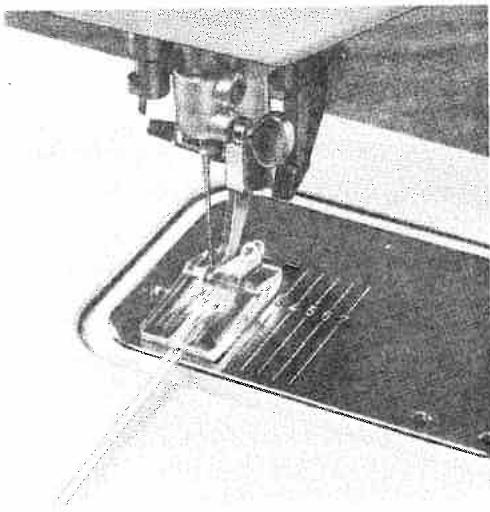
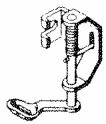
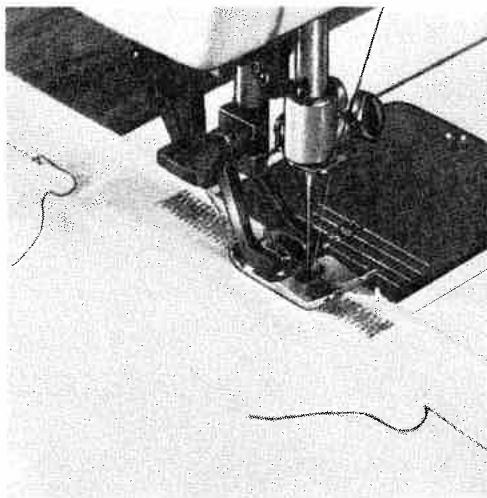
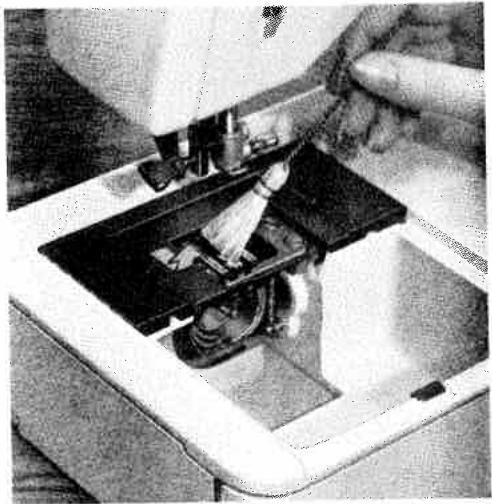
To remove the bobbin case . . .
Make sure the needle is positioned above the needle plate.
On the Pfaff 1213 remove the bed cover. Lift latch K (see ill.) and pull out the bobbin case with the bobbin.
The bobbin cannot fall out as long as you hold the bobbin case by its open latch. When you release the latch, the empty bobbin drops out.
On Pfaff machines 1214 and 1222-E open the free-arm cover and swing it toward the left. Then - just like with the Pfaff 1213 - lift latch K and pull out the bobbin case with the bobbin.
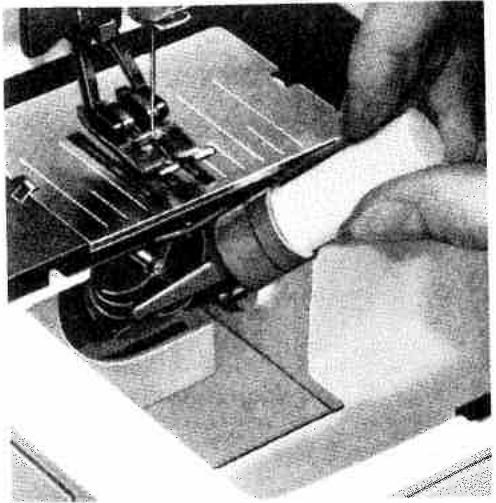
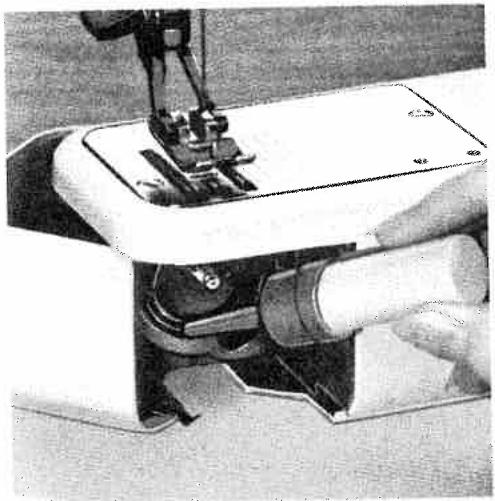
... to wind the bobbin and disengage the sewing mechanism:
Raise both spool pins and place a spool of thread on one of them. Simply place the bobbin on bobbin winder disc where it is held in position magnetically (see ill. at left).
Pass the thread from the spool to the bobbin, as shown in the above illustration.
Wind the thread clockwise around the bobbin a few times.
Push lever E against the bobbin, hold the balance wheel, and turn the stop motion knob of Pfaff machines 1213 and 1214 (8a on page 2) toward you. Start the bobbin winder by pressing down on the foot control.
The bobbin winder stops automatically when the bobbin is full.
To re-engage the sewing mechanism after bobbin winding, turn the stop motion knob away from you. The sewing mechanism is re-engaged automatically on starting the machine.
On the Pfaff 1222-E, the sewing mechanism is engaged or disengaged by the Stopmatic control. For details please refer to page 17.
to insert the bobbin into the bobbin use ...
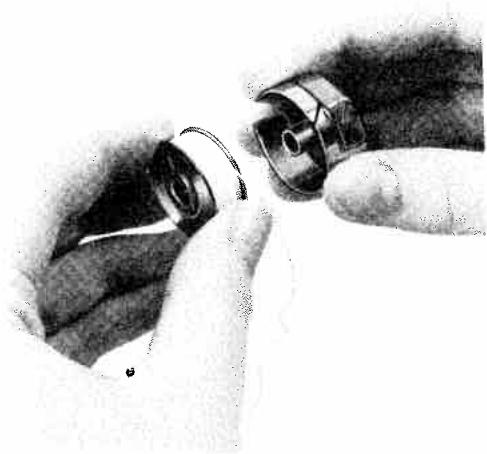
1
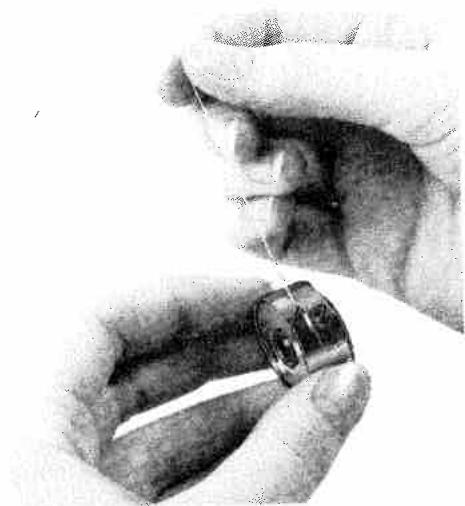
2
Fig. 1: Insert the filled bobbin into the bobbin case, making sure the thread end drops from the top down towards you.
Fig. 2: Pull the thread into the slot ...
Fig. 3: ... and under the spring. As you draw the thread, the bobbin should rotate clockwise (as indicated by an arrow). Leave about three inches of thread hanging from the bobbin case.
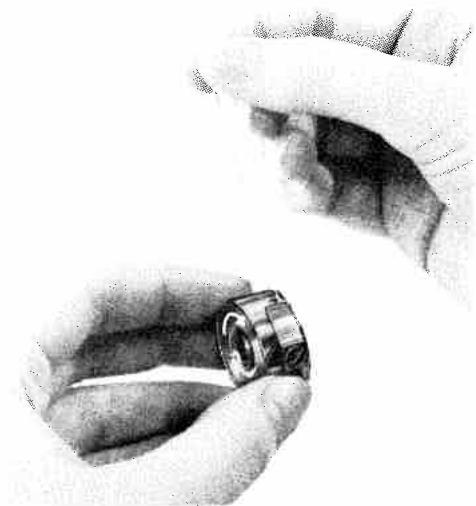
3
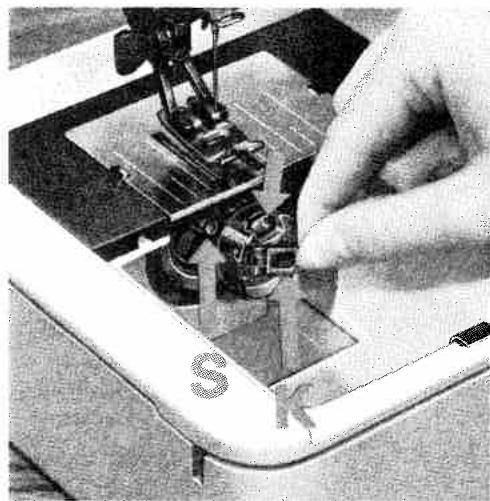
... and to replace the bobbin case in the machine
Lift latch K and push the bobbin case onto center stud S, making sure its slot (see arrow) points upwards. Release the latch and press against the bobbin case until you hear it snap into place.
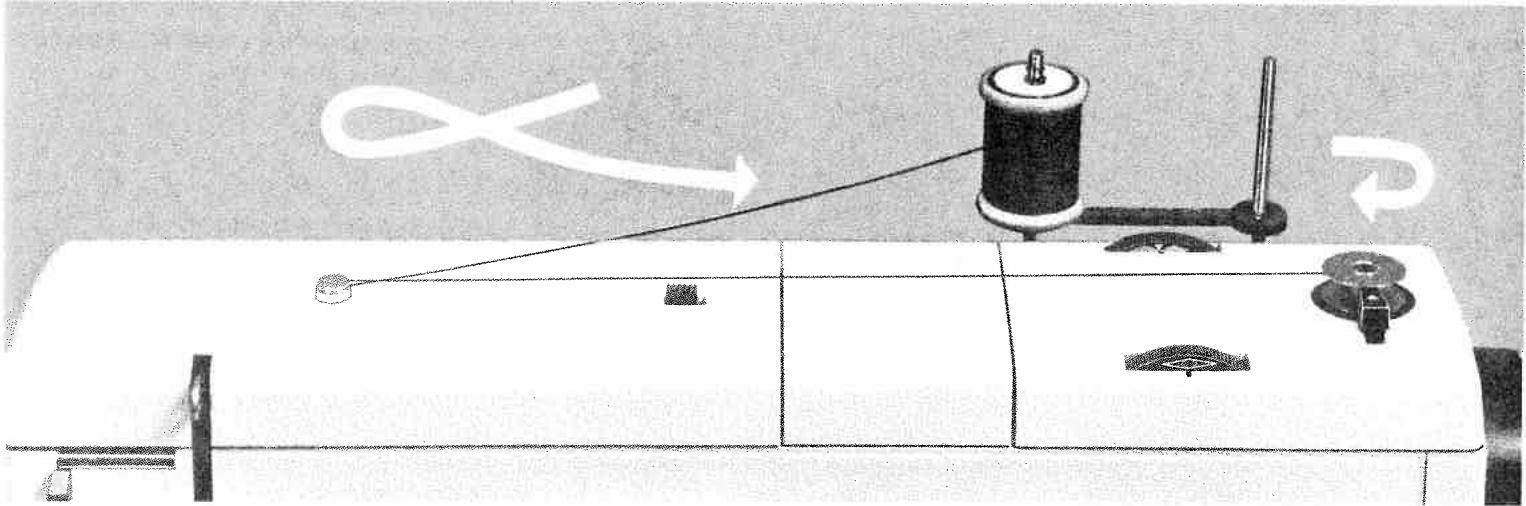
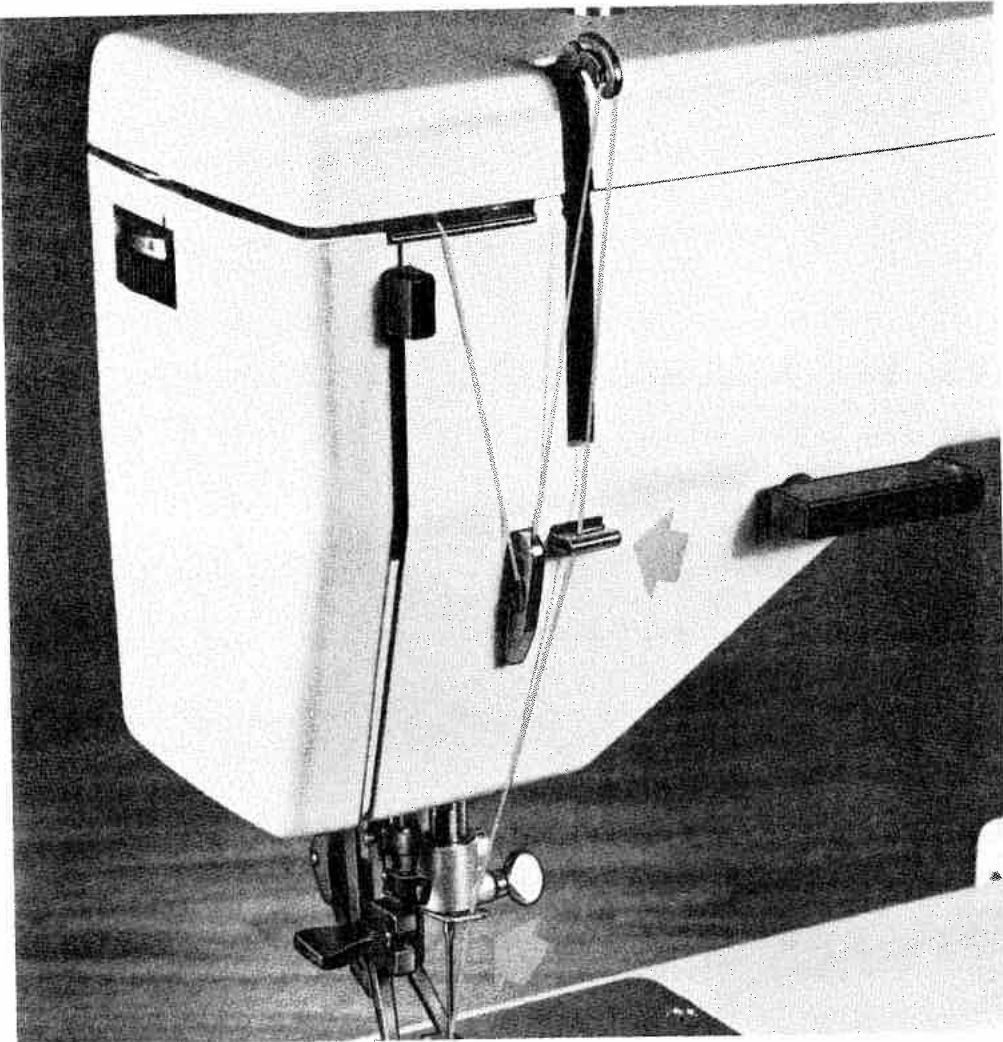
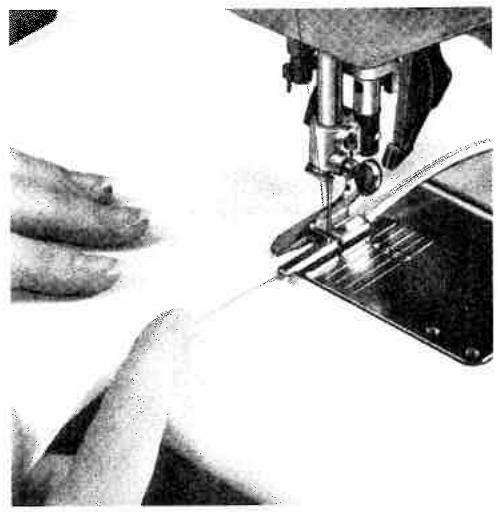
low "slot-thread" your machine
Pull the thread from the spool into the slot in the top cover of your machine. By this notion, the thread is drawn into the upperension which is enclosed in the top cover.
Pull the thread to the right and down as indicated by an arrow in the illustration below. Then continue threading as shown in the illustration at right.
The built-in Pfaff needle threads will then thread the needle for you quickly and easily.

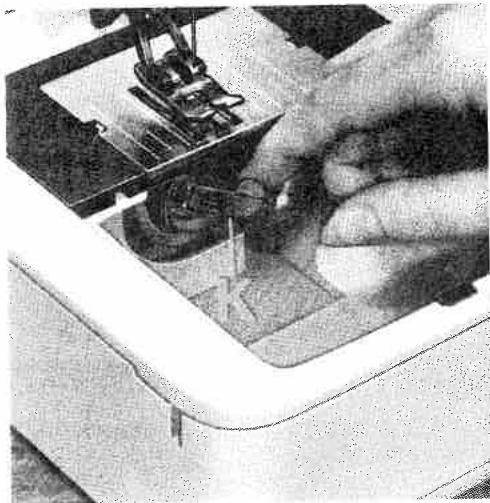
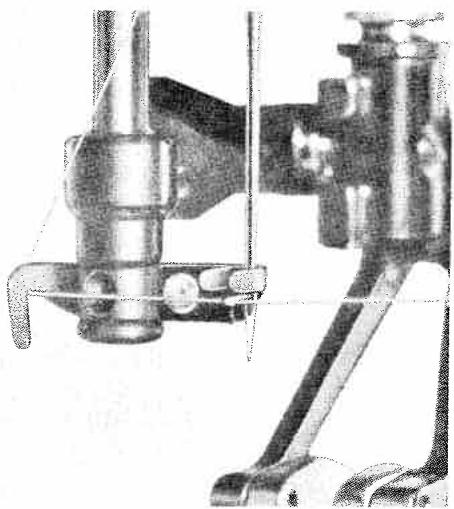
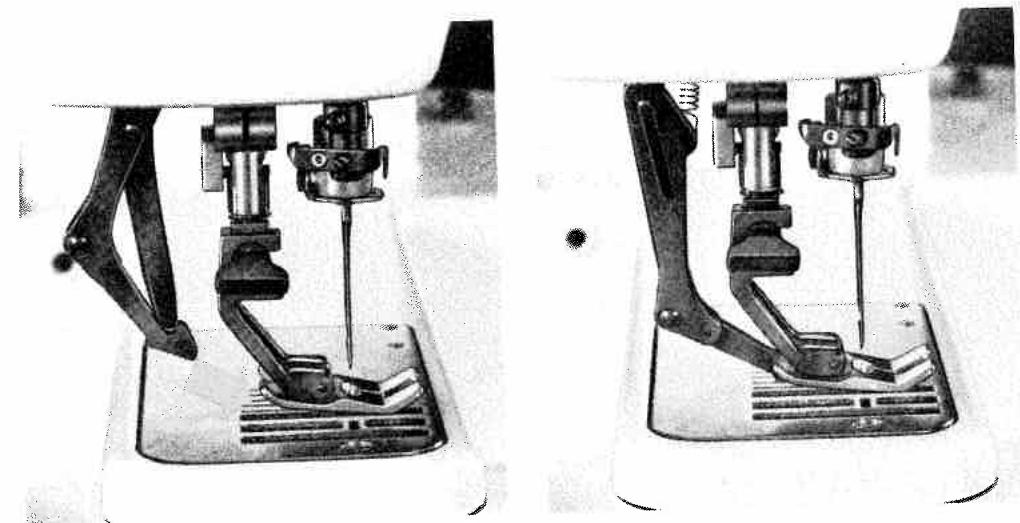
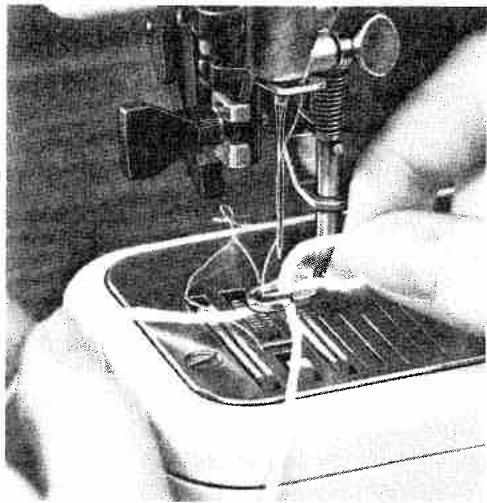
Threading the needle with the automatic Pfaff needle threads
Make sure the needle is at its highest point, i.e. on the Pfaff 1222-E the presser bar lifter at the back of the machine should be in its upper position (position A on page 17).
On Pfaff machines 1213 and 1214, turn the balance wheel until the needle is at its highest point and the take-up lever is in the position shown in the illustration.
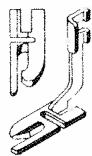
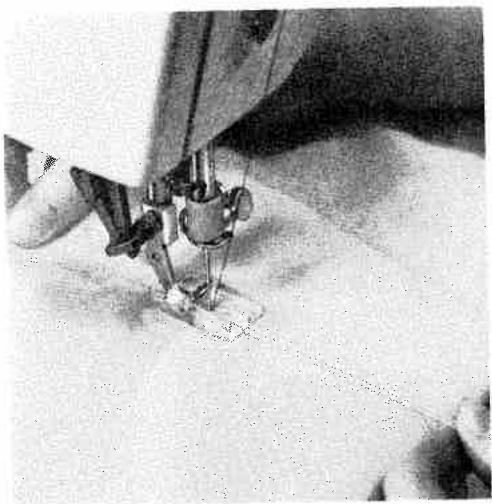
Push the needle threads control down with your left hand and at the same time place the needle thread under the hook of the needle threads (Fig. 1).
Now push the needle threads control down completely and draw the needle thread under the threads prong (Fig. 2).
Release the needle threads control slightly until the prong reverses and pulls the thread through the needle eye (Fig. 3).
Fully release the control, take hold of the thread loop and pull the thread through the needle eye completely.
On Pfaff machines 1213 and 1214, turn the balance wheel to bring the take-up lever to its highest point (Fig. page 10)
On the Pfaff 1222-E, return the presser bar lifter to its normal (horizontal) position (B on page 17).

2
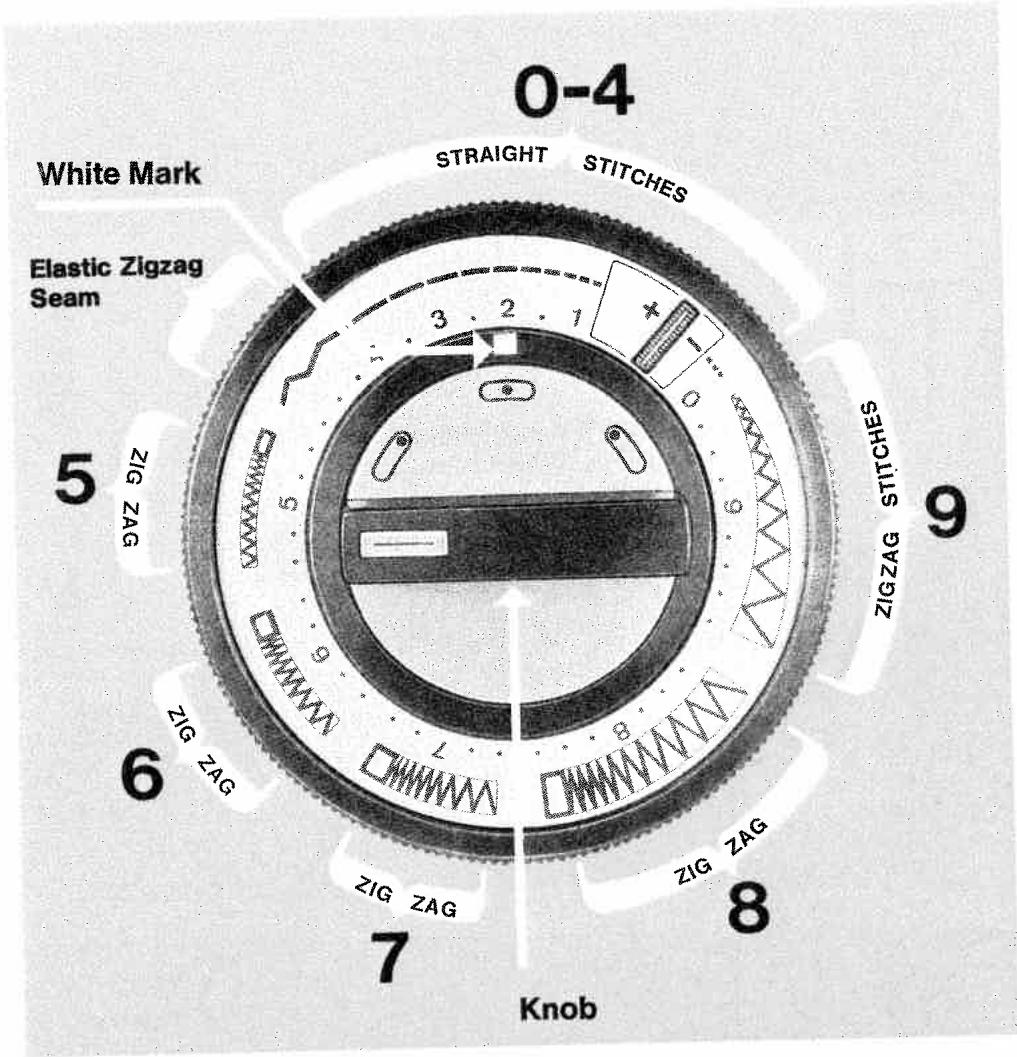
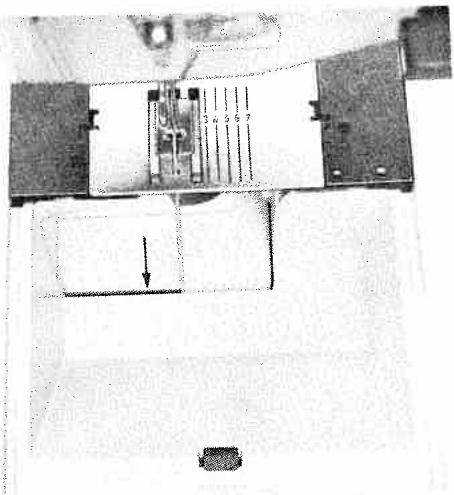
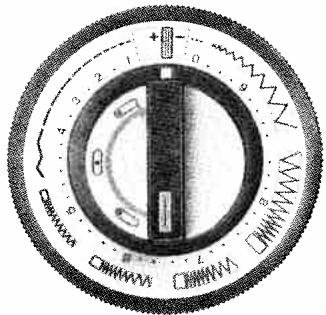
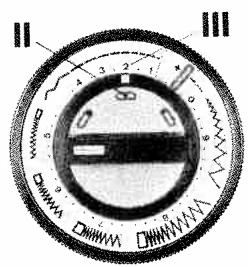
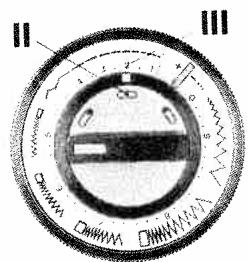
The Ultra-Matic stitch selector
The Ultra-Matic stitch selector sets your machine for straight and zigzag stitching.
The different stitch ranges are marked by numbers. For instance, the range from 0 to 4 comprises straight stitches of different lengths. Turn the outer ring of the stitch selector until the symbol of the stitch desired is opposite the white mark. In the illustration on the left, the stitch selector is set for sewing straight stitches about 2mm long (about 12 stitches per inch).
Start by making a sewing test. Press the foot control pedal, and watch your machine sew a straight-stitch seam.
Then let your Pfaff run at different speeds. The harder you press the foot control pedal, the faster your machine will run.
Now try a zigzag stitch. Zigzag stitches are shown on the Ultra-Matic stitch selector in the stitch ranges marked 5, 6, 7, 8 and 9. The zigzag stitch desired is dialed just as easily as a straight stitch.
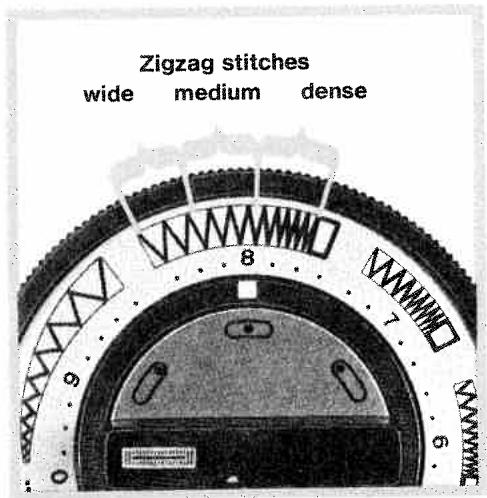
The setting of the stitch selector is indicated for every sewing operation discussed. This simplifies the operation of your machine. In the illustration on this page the stitch selector is shown set for a medium zigzag stitch in stitch range 8.
Note: The needle must never be in the material when you turn the Ultra-Matic stitch selector.
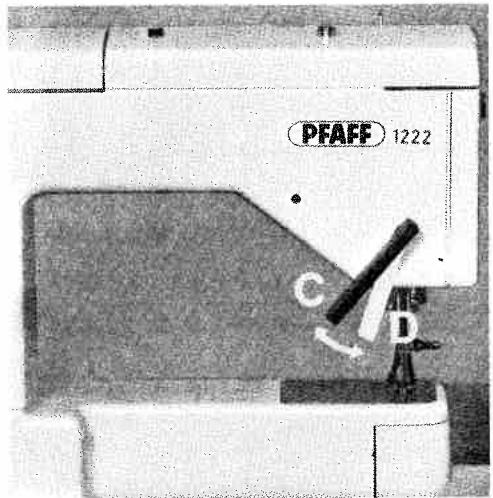
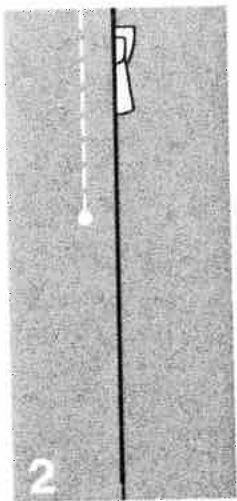
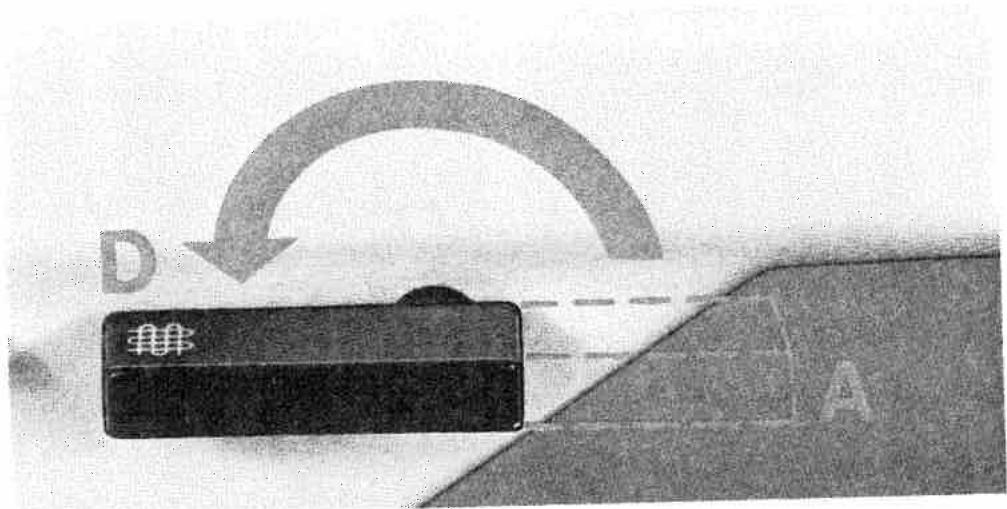
1 To sew backwards . . .
or backtack a seam, press reverse-feed control 19 on the front of your machine down, moving it from A to B. When this control is released, it returns to position A automatically (Fig. 2).
If you wish to sew a longer seam in reverse, flick the reverse-feed control to position C (vertical), as shown in Fig. 3.
2
Darning with your Pfaff is discussed on page 26.
When this control is turned to position D (Fig. 4), the darning symbol is visible, and the machine feed is disengaged.
3
4
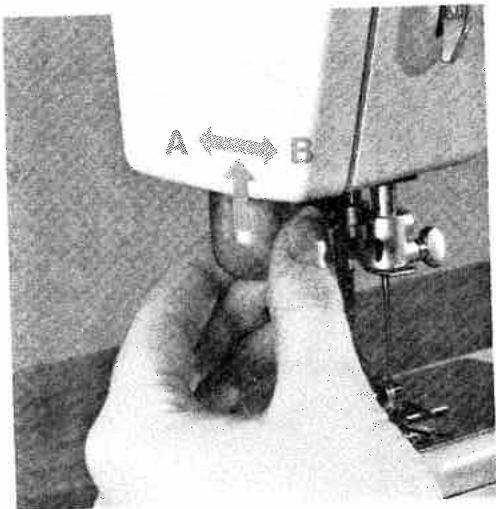
When you've finished sewing on your Pfaff 1222-E . . .
flick the presser bar lifter to its highest position. Since this lever has been mentioned repeatedly so far, we're now going to tell you how it works when set at its various positions:
- Position A (illustrated below) is used for threading the needle and removing the fabric. In this position, the sewing foot is raised and the sewing mechanism disengaged for bobbin winding. The needle is raised automatically to its highest point.
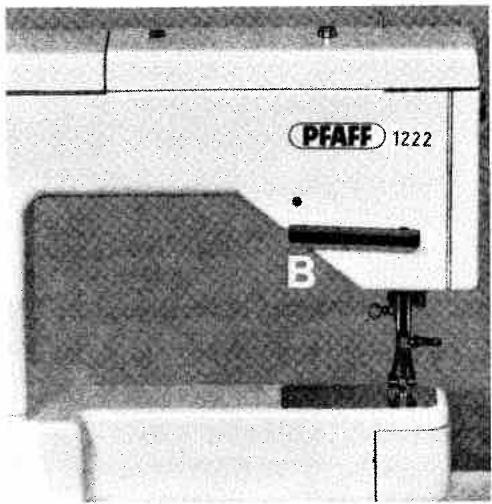
- Position C (illustrated below) means that the sewing foot is lowered. When you push the presser bar lifter to position D, the Stopmatic mechanism is engaged (as in position A). This position is used when the bobbin thread is to be drawn up, in case of seam interruptions, when the bobbin becomes empty, or when the bobbin thread breaks. Hold the presser bar lifter in its lowest position until the needle has stopped at its highest point. When this lever is released, it returns automatically to position C.
- Position B (illustrated above) is used when you need to turn the fabric. The sewing foot is raised, but the needle remains in the fabric and serves as a pivot point for turning the material.
With the models 1213/1214 the presser bar lifter can only be pushed to positions B and C.
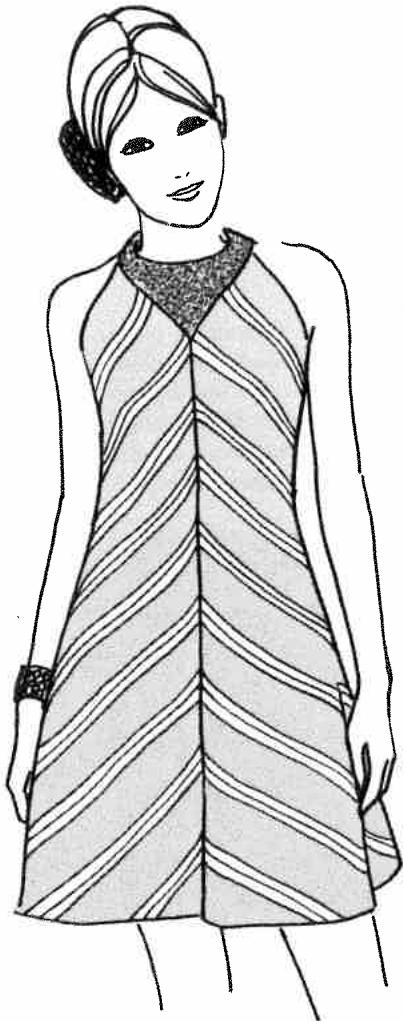
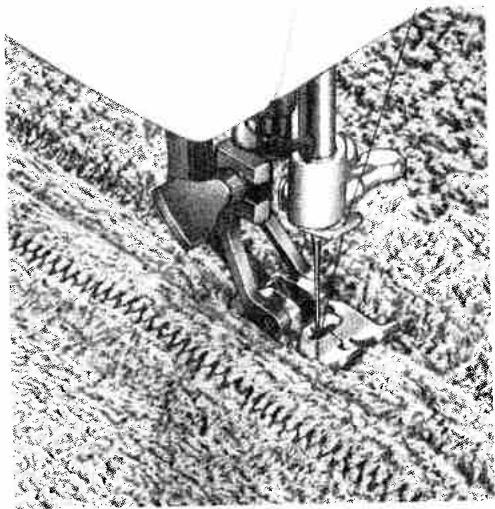
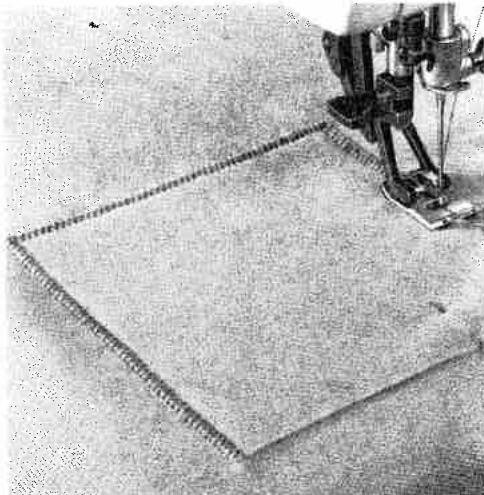
wo pieces of fabric will match perfectly, no matter how long the seam may be . . .
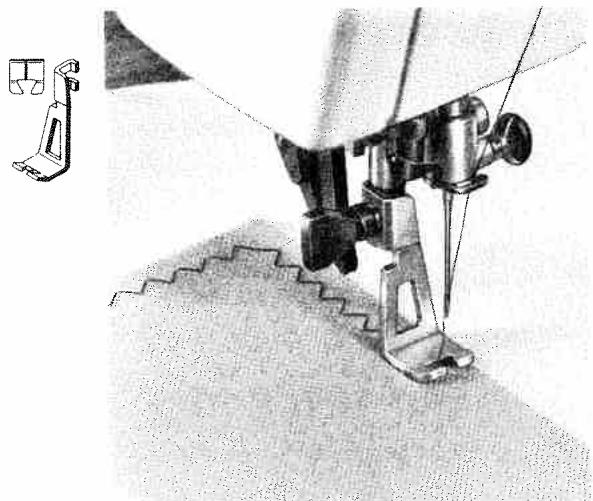
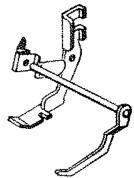
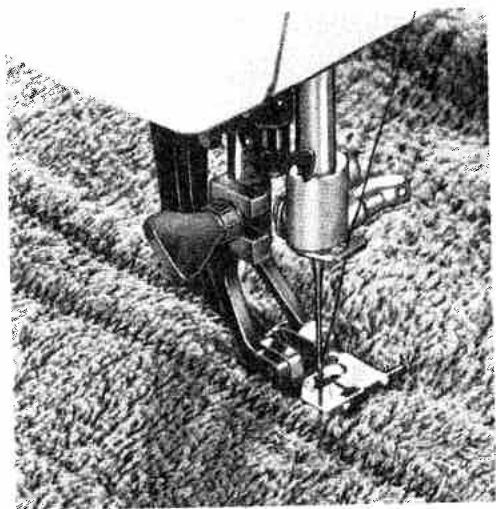
our Pfaff is the only home sewing machine in the world featuring a dual feed.
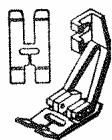
This foot is used for sewing long seams and for perfectly matching plaits, striped and patterned fabrics. The dual feed is also used for sewing over thick cross seams.
To engage the dual feed, simply push it down in the slot of the raised sewing foot until it snaps into place (see arrow in illustration at bottom left).
To disengage this foot, push it down slightly, then pull it up out of the slot in the sewing foot.
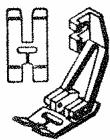
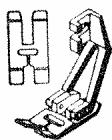
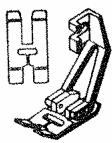
Other feet which can be used with the dual feed include the hemmer foot, blindstitch foot and felling foot.
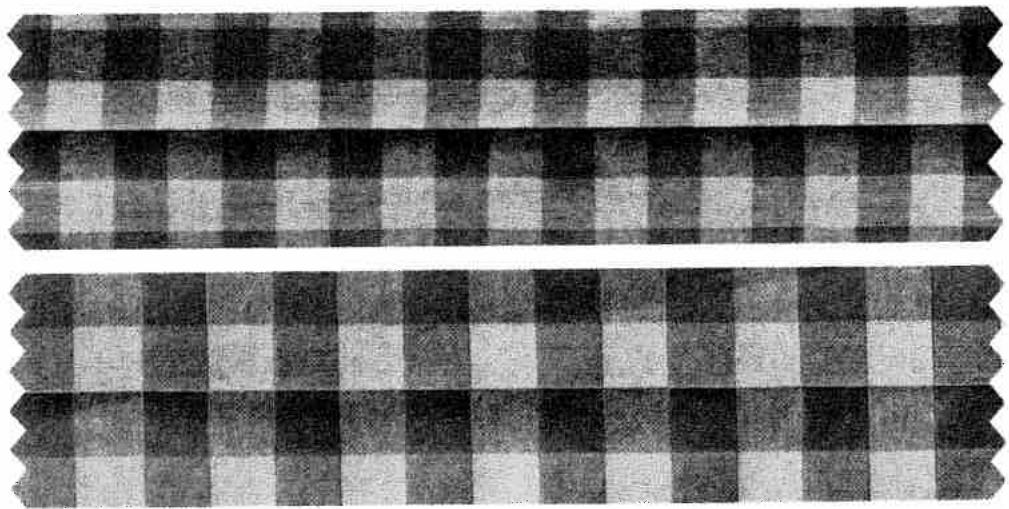
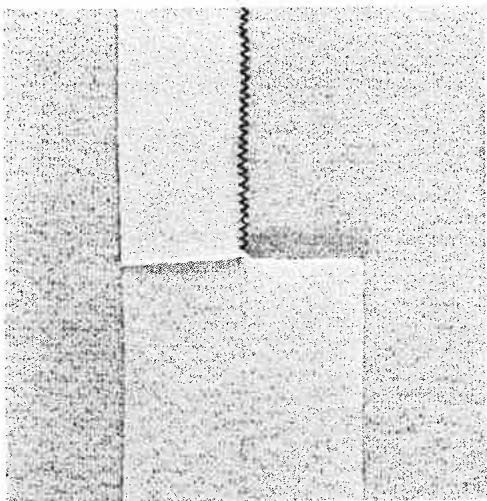
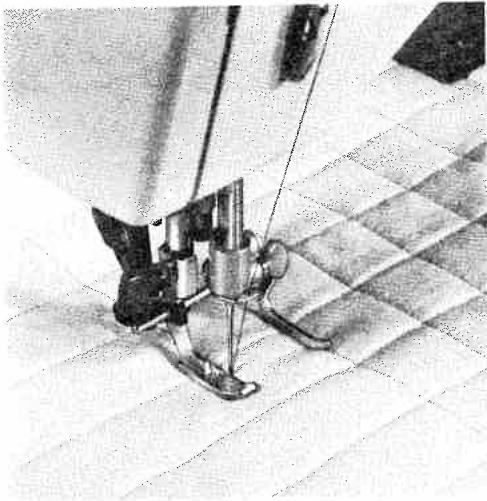
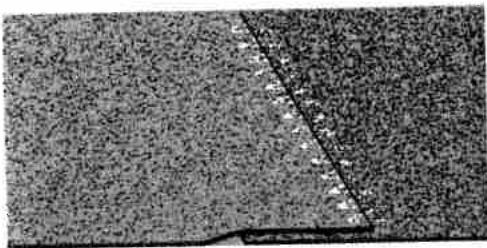
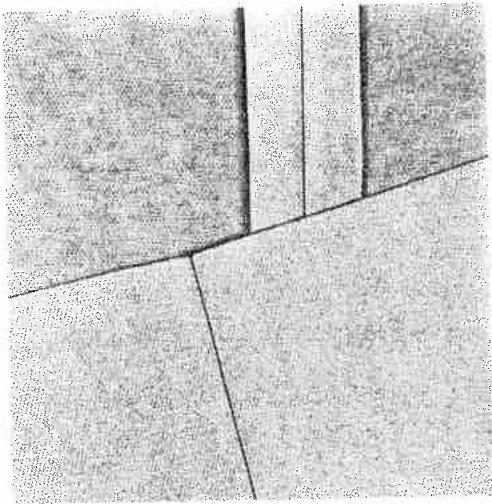
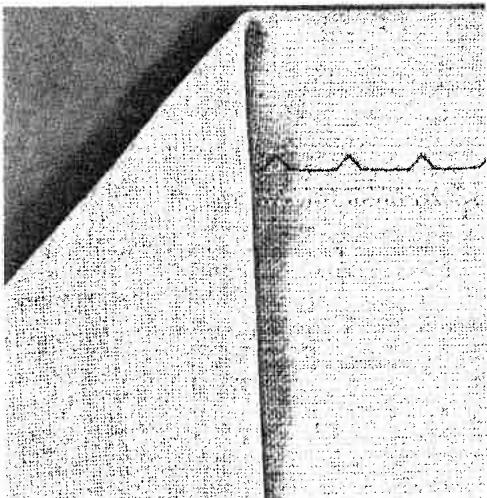
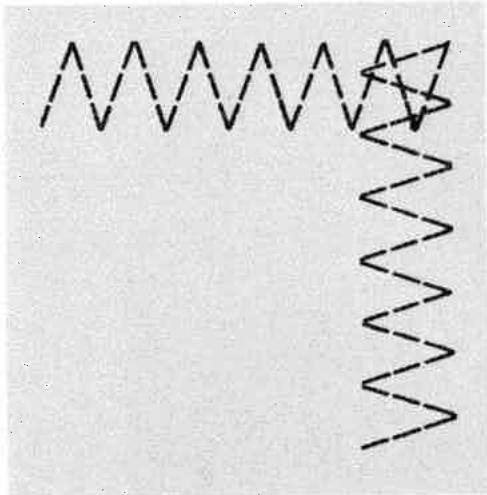
No matter how carefully you match the squares or other patterns, the result will be similar to that shown in the top illustration (below) when you sew without the dual feed.
When you join two pieces of checked material with the aid of the dual feed the squares or stripes will match exactly. (See ill. at bottom of page.)
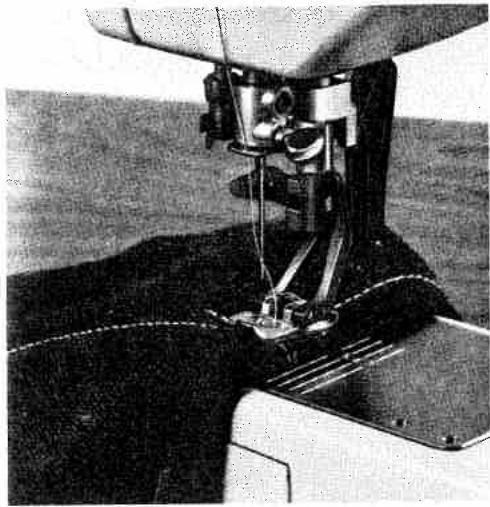
Even the thickest cross seams are no obstacle for the electronic Control of the Pfaff 1222-E.
The electronic control which operates "behind the scenes" comes to your assistance whenever you have to sew over thick seams or several layers of fabric. Just relieve the pressure on the foot control . . . and the electronic control instantly reduces the speed of your machine to slow stitch-by-stitch sewing for stitching through the thickest spots in the material.
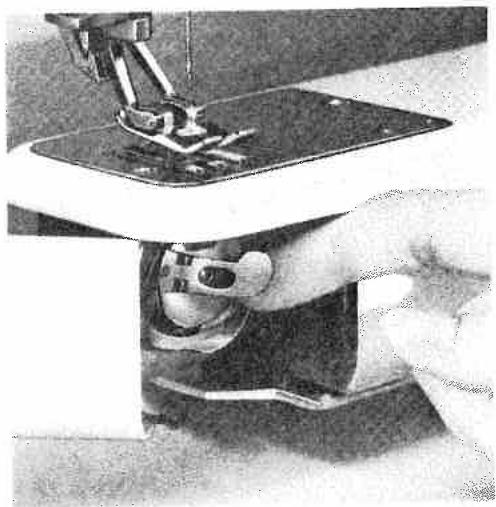
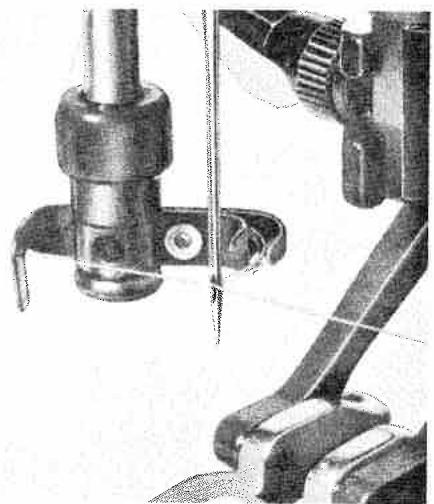
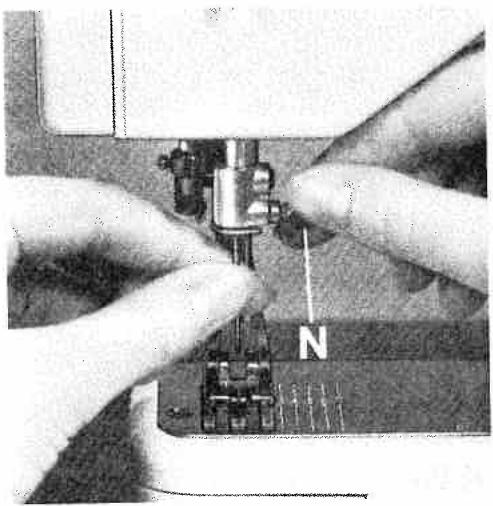
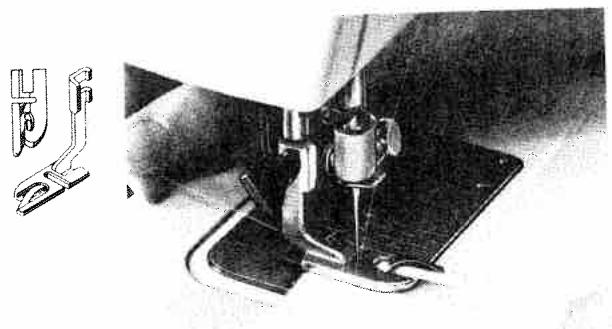
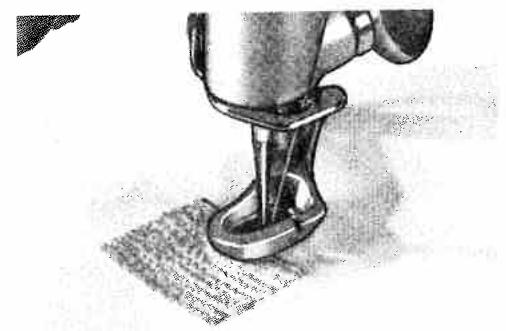
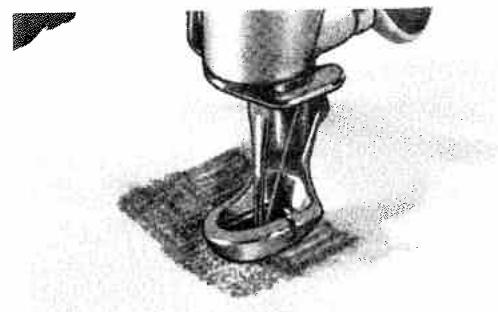
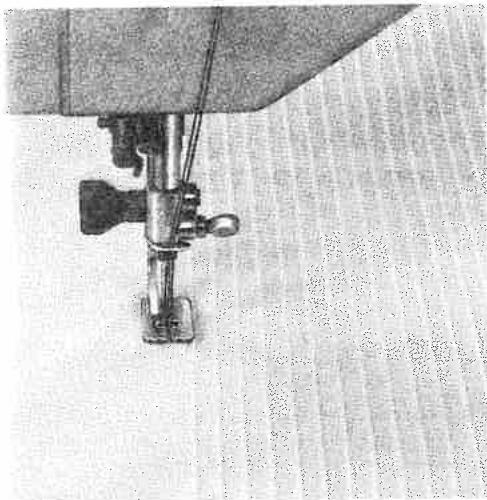
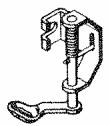
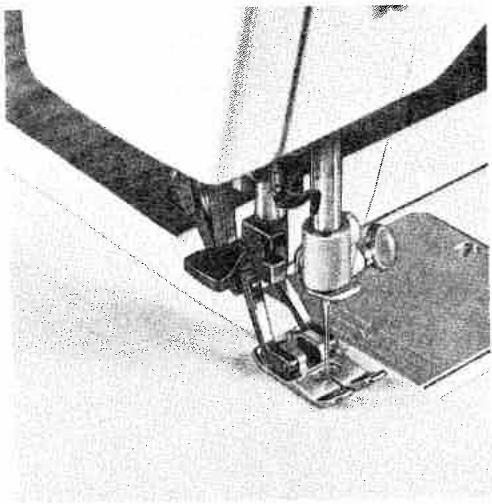
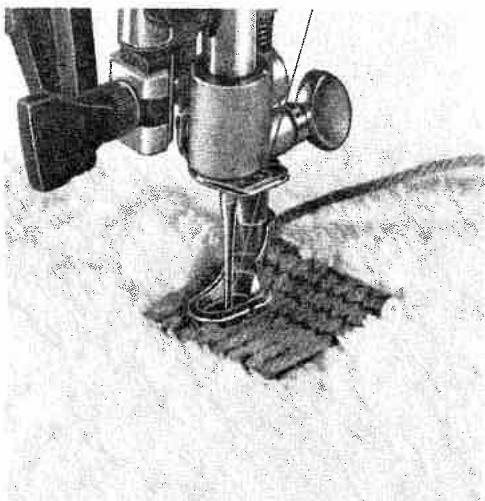
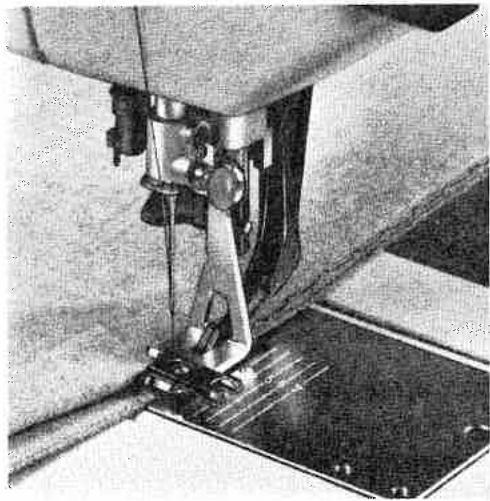
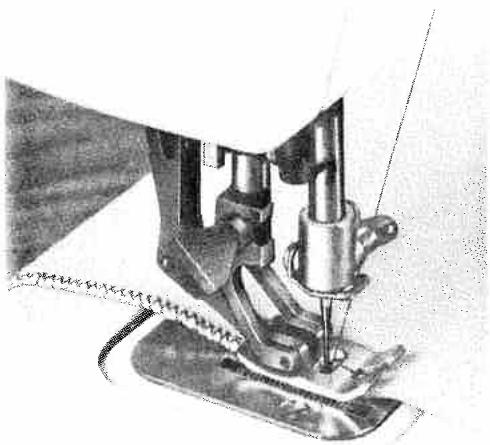
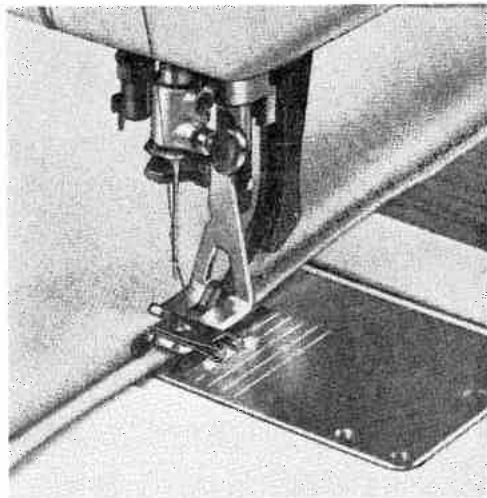
Changing the needle or sewing foot is easy . . .
Various sewing operations require different size needles or special needles. A detailed Needle and Thread Chart is shown on page 63.
To change the needle, lower the presser bar lifter and flick it to position D (see page 15). This causes the Stopmatic mechanism to bring the needle to the correct position for changing.
Loosen screw N (see ill. below) and pull the old needle out of the needle holder. Insert a new needle and push it up as far as it will go, making sure the flat side of its shank faces toward the back. Now tighten the needle screw.
Use System 130-705-H needles only.
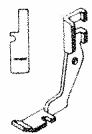
Changing the sewing foot is just as simple. The accessory box of your machine contains several special sewing feet (hemmer foot, buttonhole foot, etc.) which are used for various sewing operations. Which sewing foot to use for a specific sewing job is discussed on page 23 and the following pages.
To change the sewing foot, push the presser bar lifter to its highest position. Loosen screw B until the sewing foot can be removed, tilting it sideways or backwards. The new sewing foot is attached in the reverse order. Tighten screw B again before starting to sew.
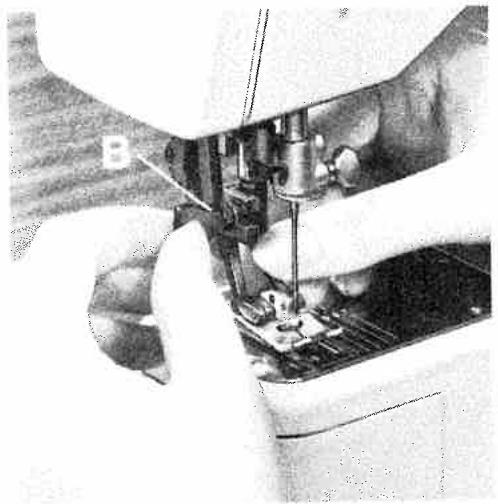
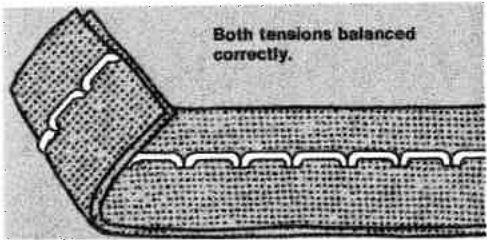
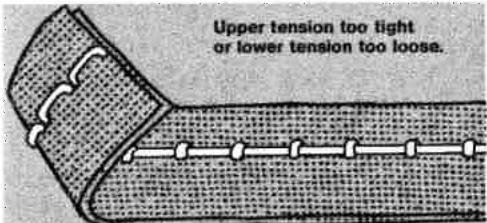
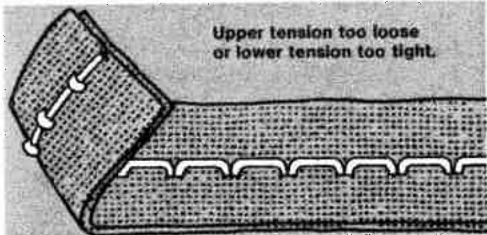
Perfect seams through properly balanced tensions
1
2
3
The thread tensions are set at our factory, using the most popular threads.
Even so, your seam may not look as the one shown in Fig. 1. In this case, check to see whether the upper or lower tension needs adjusting. Then regulate the tensions as follows:
The upper tension is located under the top cover of your machine, as was already explained on page 10. The tension dial is provided with numbers 0 to 10. The higher the number, the tighter the tension. The normal tension setting is between 3 and 5.
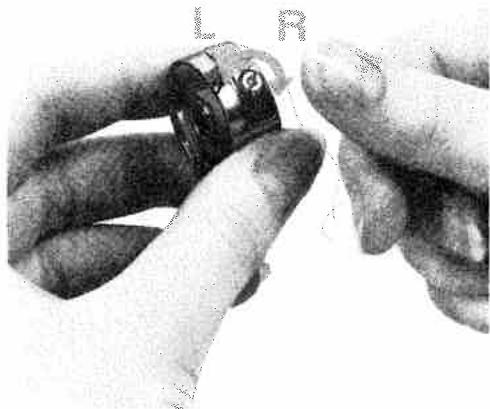
The lower tension is regulated by turning the small knurled screw on the bobbin case. Turn this screw to the right (with your thumb rather than your finger nail) for a tighter tension, or to the left for a looser tension. Right (R) and left (L) are indicated by arrows.
If you can pull the thread from the bobbin easily against little resistance, the bobbin thread tension is just right.
Always use the same size thread on the bobbin and in the needle.
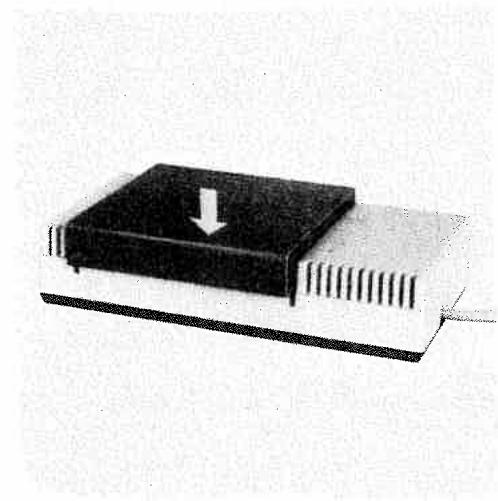
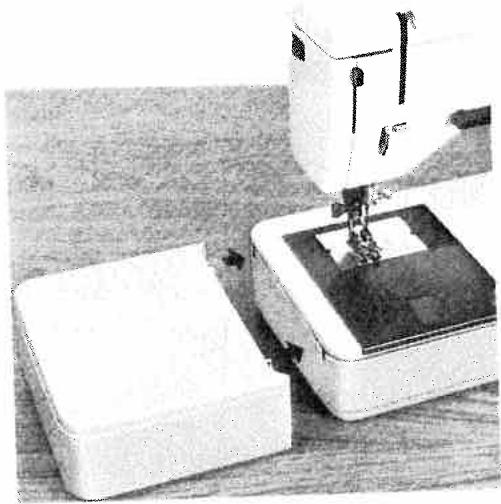
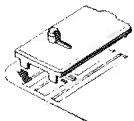
detachable workplate increases your working surface . . .
Straight-stitch and zigzag sewing work
Pfaff machines 1214 and 1222-E are supplied with a detachable workplate, as shown in the illustration below. This workplate is simply pushed over the free arm until its two guide pins enter the appropriate holes in the machine.
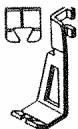
To increase the sewing area of your Pfaff 1213 Portable, attach the bedplate extension illustrated below.
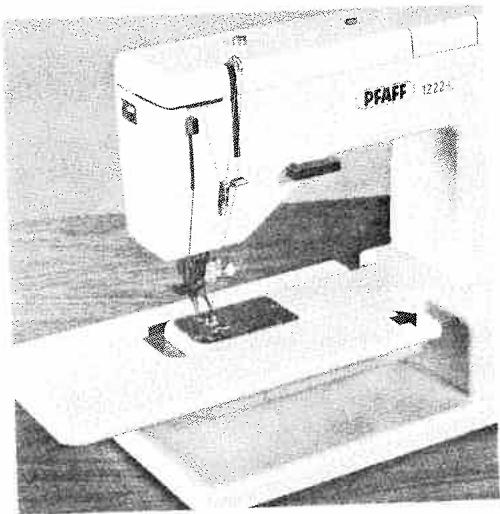
Now see for yourself what your Pfaff can do. Take advantage of the many possibilities this machine offers you in straight and zigzag stitching.
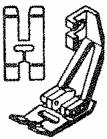
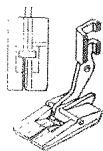
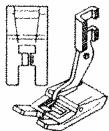
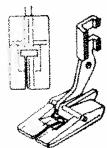
Felling
Ultra-Matic stitch selector: straight stitch
Stitch length: 1.5-2
Engage dual feed if
material requires it.
Attach felling foot
No. 93-040 938-31 (can be
obtained from your Pfaff dealer)
Felled seams are used to join two pieces of fabric. They are often used on bed linen or children's wear and are made in two operations:
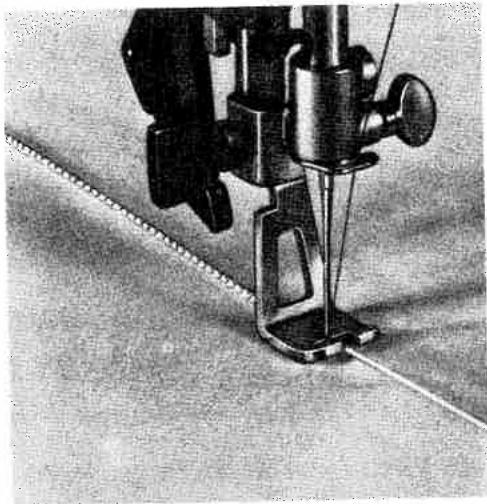
First seam: Lay the two pieces of fabric together with their right sides facing and the bottom piece protruding about 4mm(%) . Make sure the fabric enters the felling foot evenly. The bottom fabric should be folded over the edge of the top piece, but the top edge must not be folded. Open the two pieces.
Second seam: Insert the seam ridge into the felling foot. Stitch it down to the left, starting at the same end as the first seam. Lightly pull the fabric sideways to keep it taut while sewing.
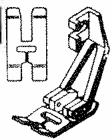
Hemming
Ultra-Matic stitch selector:
straight stitch
Stitch length: 2
Engage dual feed
Attach hemmer foot
No. 93-040 934-31.
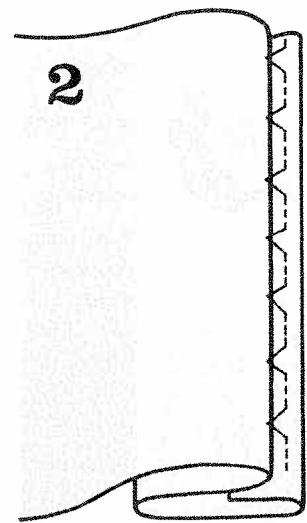
When you hem a fabric edge, you protect it against fraying and at the same time produce a neat, durable edge finish.
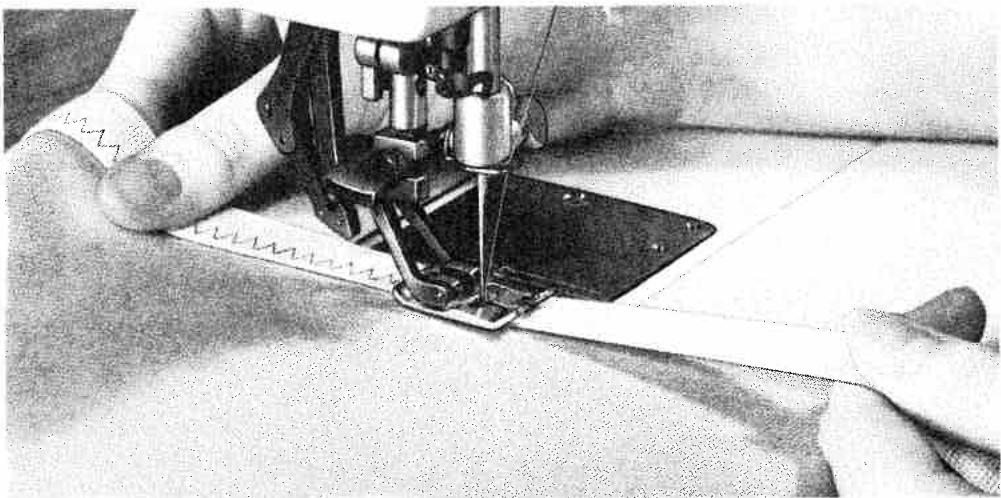
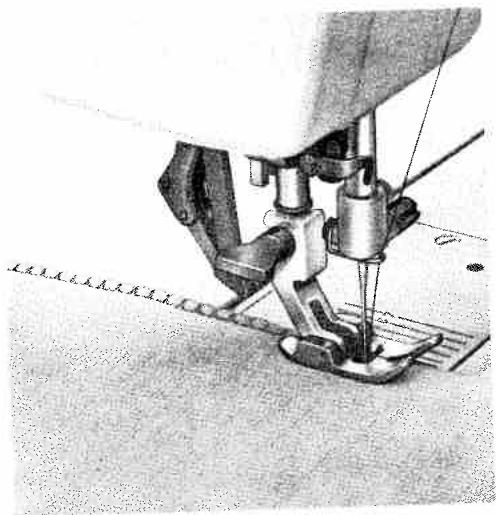
Fold the beginning of the fabric edge twice, making a hem about 3mm(18) wide and several inches long. Place the material under the hemmer foot and lower same. Stitch the folded edge down with 3 or 4 straight stitches.
Draw the fabric into the hemmer foot by pulling both threads backwards, as shown in the illustration at the top. Feed the fabric edge into the hemmer foot scroll with your right hand (see ill. at the bottom).
Make sure the fabric does not slip sideways under the right half of the foot. The scroll should be well filled with fabric so that the fabric edge is in line with the right side of the left toe.
To produce an elastic hem on soft materials, use zigzag stitches. Turn the stitch selector to the maximum stitch length in range 6 and proceed, as instructed above.

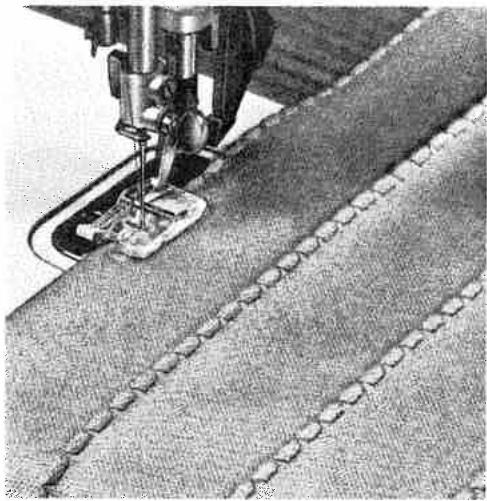
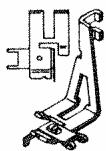
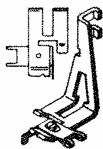
Zipper insertion
Ultra-Matic stitch selector:
straight stitch
Stitch lenght: 1.5-2
Attach zipper foot
No. 93-040 927-31.
With or without
Dual feed
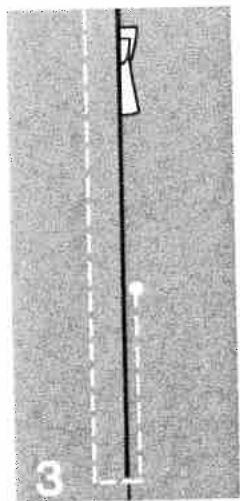
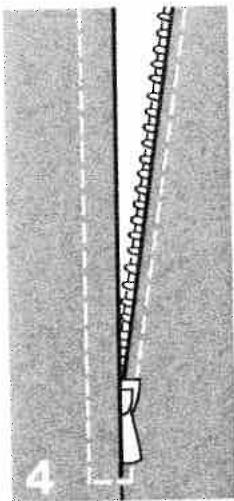
Baste the closed zipper on the fabric, then open it. Stitch close to the left edge of the zipper for about 5cm (2"), guiding the right edge of the foot along the zipper teeth (Fig. 1). Leave the needle in the material, raise the zipper foot and close the zipper. Then lower the zipper foot again (Fig. 2). Continue stitching until you reach the end of the zipper, then stitch across this end and up the other side close to the right edge of the zipper (Fig. 3).
Stop about 5cm (2") short of the end of the seam, raise the zipper foot and open the zipper. Continue sewing to the end of the zipper.
The finished zipper closure is shown in Fig. 4.

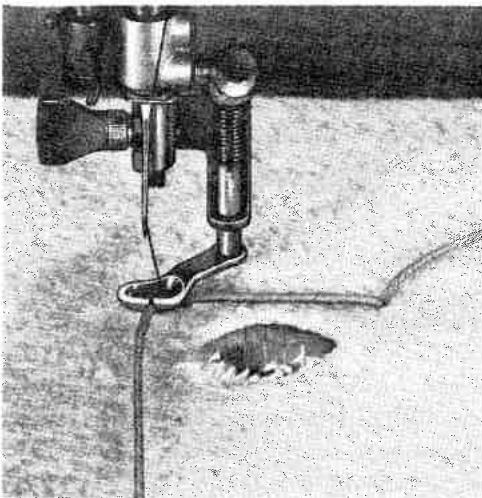
Darning
Ultra-Matic stitch selector:
straight stitch
Stitch length: 1-4
Attach darning foot
No.93-040 960-91.
For darning, the machine feed is dropped. To do this, swing the reverse-feed control to its left horizontal position so that the darning symbol is visible on its upper side. The darning foot moves up and down while darning. This motion is controlled by a built-in vibrator. When the needle enters the fabric, the darning foot presses it against the needle plate, and when the needle rises, the darning foot rises too, so that you can freely move the material under the needle by hand.
When darning a hole, you determine the stitch length. It depends on how fast you move the material under the needle and how far you depress the foot control pedal.
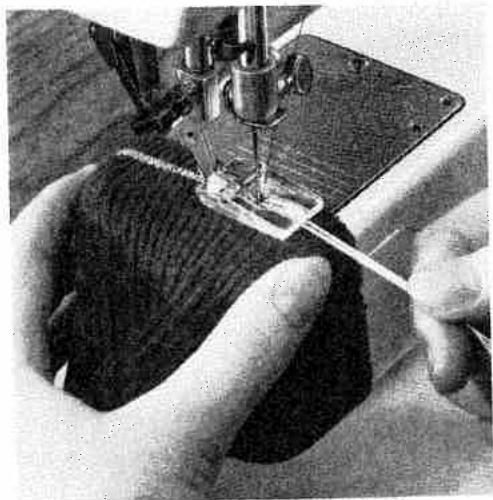
Hold the material flat with both hands. Stitch back and forth across the hole lengthwise, with the machine running at high speed. Be sure the stitches are closely spaced. Then turn the fabric at right angles and sew back and forth over the preceding work with short stitches. This anchors the threads in the unworn area around the hole.
Tubular articles, such as sleeves, trouser legs and stockings, can be easily darned on the free arm of the Pfaff 1222. Stitch back and forth across the hole, first crosswise, then lengthwise.
Triangular tears and rips are best darned with close stitches across and lengthwise.

After you have finished darning, swing the reverse-feed control back to its regular sewing position.
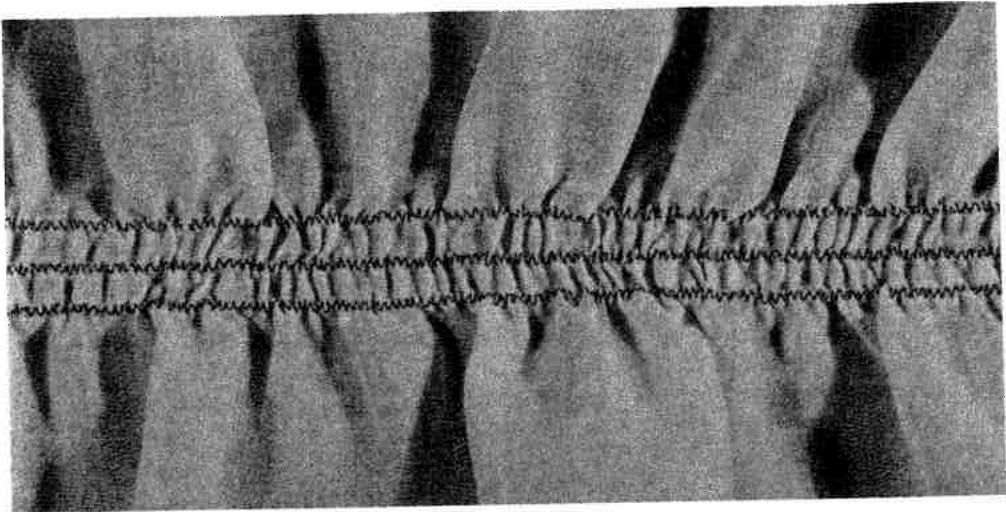
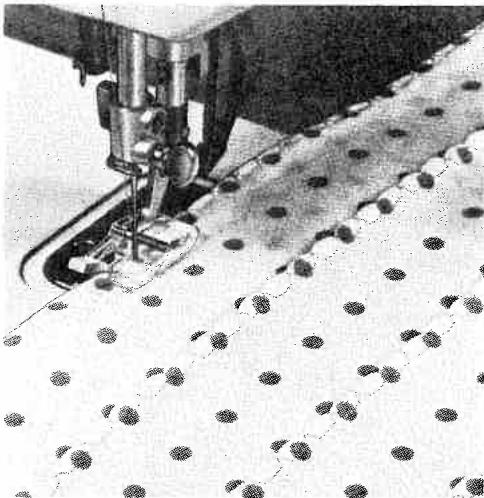
hiring with filler thread
Itra-Matic stitch selector:
- idest zigzag stitch in
titch range 5 or 6.
- ttach cording foot
lo. 93-040 915-35.
To produce a durable shirring effect, a filler thread is needed. As with single-needle cording, the thread best suited for this purpose is a cotton thread. Place the filler thread under the groove of the cording foot and sew on the wrong side of the fabric.
When you have finished the zigzag seam, slide the material along the filler thread to distribute its fullness evenly.
Inserting a filler thread in the shirring makes it more durable.
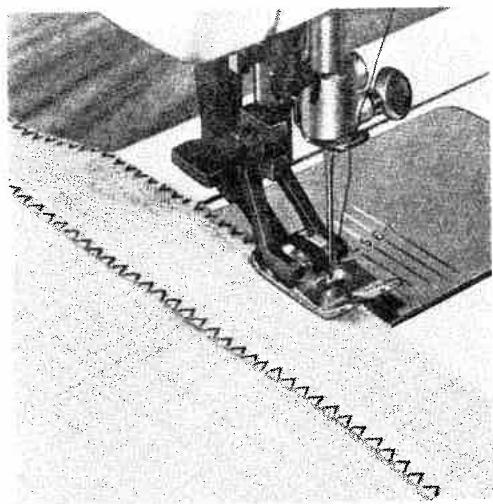
Overcasting edges
Ultra-Matic stitch selector: immediately to the left of number 8 in stitch range 8. Engage dual feed if material is cut on the bias: Attach ordinary sewing foot No.93-040 910-91.
As you sew along the fabric edge, make sure the needle takes one stitch into the fabric and the other over its edge. In this way, a neat edge finish is produced.
Cording
Ultra-Matic stitch selector:
straight stitch
Stitch length: 2
Central needle position
Insert twin needle.
Attach cording foot with grooves.
Twin needle, cording foot and cording plate can be obtained from your Pfaff dealer.
Cording is very popular as a trimming on linen goods, dresses, blouses, etc.
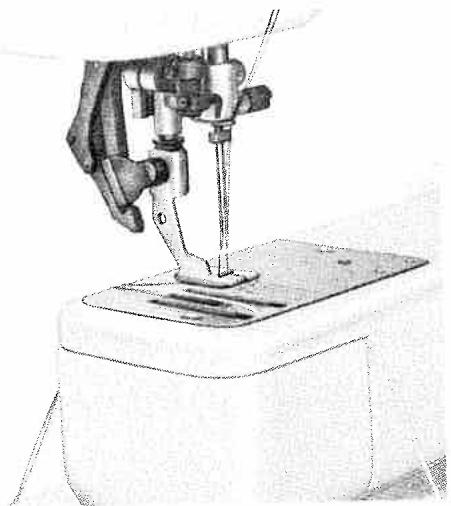
Cording is made with two needle threads, a bobbin thread and a filler cord. When threading the needles, make sure to draw one thread above and the other below the disc in the slot of the face cover (see Fig. 1).
The filler thread makes the cording more prominent. Unless you prefer a special thread, pearl thread can be used for this purpose.
Cording on woollens is best made with a wool thread. If you want to apply cording to trans
parent materials, take a filler thread in a matching color.
Select the distance between the twin needles and the size of the filler cord to suit the type of material used.
Hold the filler cord as shown in Fig. 2.
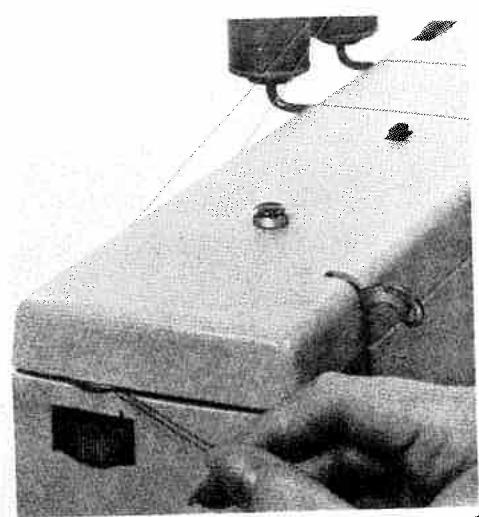
On the Pfaff 1213 Portable, pull the filler thread through the slot at the bottom of the machine base after removing the bed cover (Fig. 3).
To make different size cording, the following twin needles and cording feet can be obtained from any Pfaff dealer:
Three-row cording foot No. 93-040 948-31 which is used with twin needles set from 2.4 to 2.8mm (approx. ^3/32^'' to ^7/64^'' ) apart.
Five-row cording foot No. 93-040 950-31 which is used with twin needles set from 1.8 to 2.4mm (approx. ^1/16^'' to ^3/32^'' ) apart.
Seven-row cording foot No. 93-040 952-31 which is used with twin needles set from 1.2 to 1.8mm (approx. 364 to 116 ) apart.
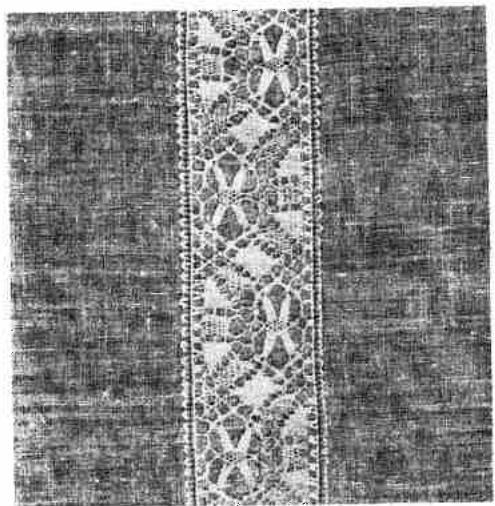
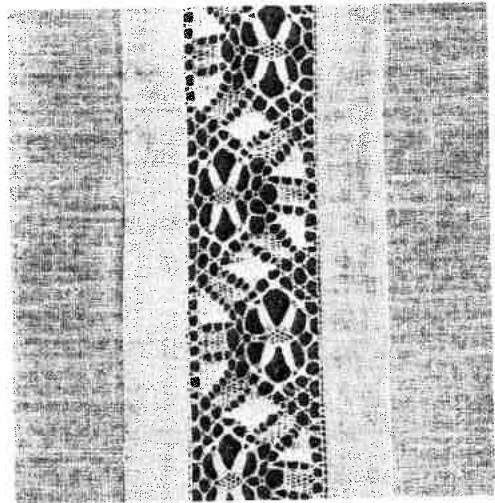
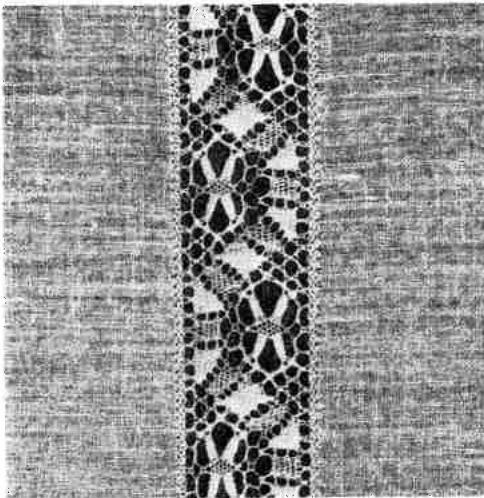
Inserting lace
Ultra-Matic stitch selector: straight stitch (initially)
Stitch length: 1
Attach ordinary sewing foot
No. 93-040 910-91.
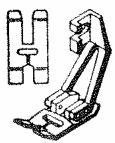
Place the lace on the right side of the material and sew it down with straight stitches on both sides (1).
Cut the fabric open under the lace insertion (2), fold the fabric edges back and iron (3).
Now turn the stitch selector to a medium-wide zigzag stitch in stitch range 6 and sew over the edges of the lace on the right side.
Trim the excess material away close to the seams on the wrong side (4).
1
3
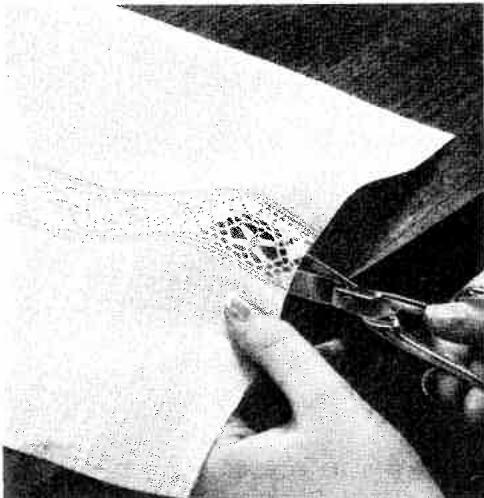
2
4
Elastic zigzag seam
Ultra-Matic stitch selector:
Turn to elastic
zigzag stitch symbol between
stitch ranges 4 and 5.
Central needle position
Attach ordinary sewing foot
No.93-040 910-91
Engage dual feed

The so-called press-open seam is particularly well suited for elastic materials, such as jersey and tricot.
Sew this elastic seam with the machine set as instructed above, then press it open.
Applique work
Ultra-Matic stitch selector:
straight stitch (initially)
Stitch length: 1
Attach cording foot
No. 93-040 915-35.
1
3
2
4
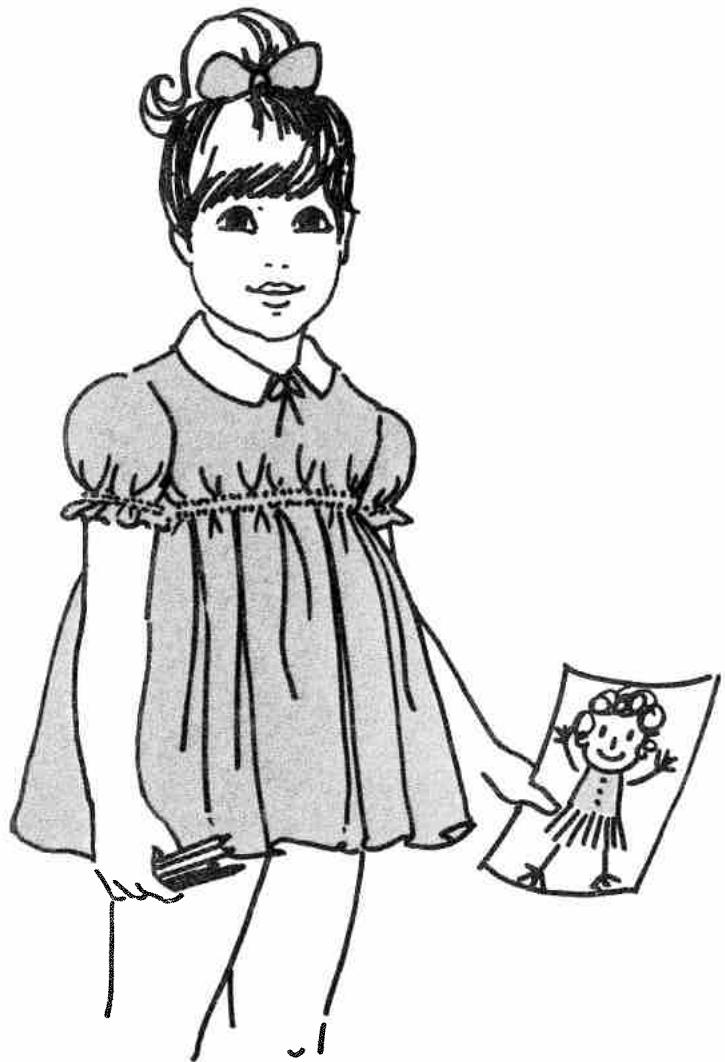
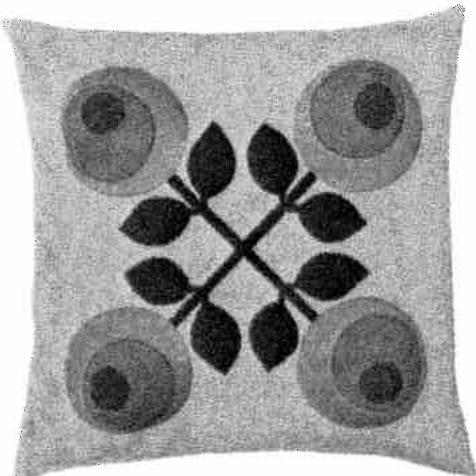
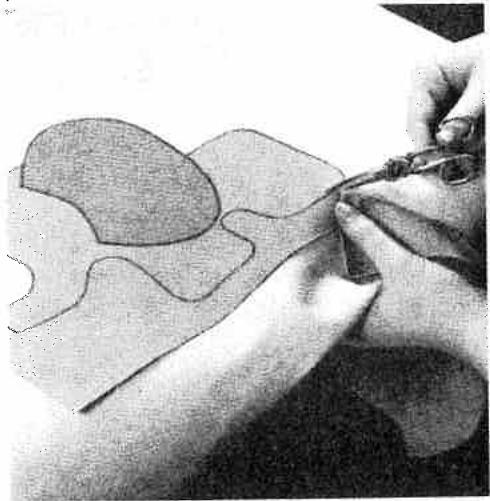
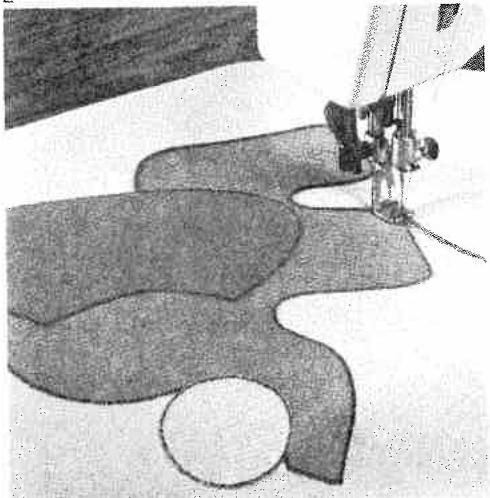
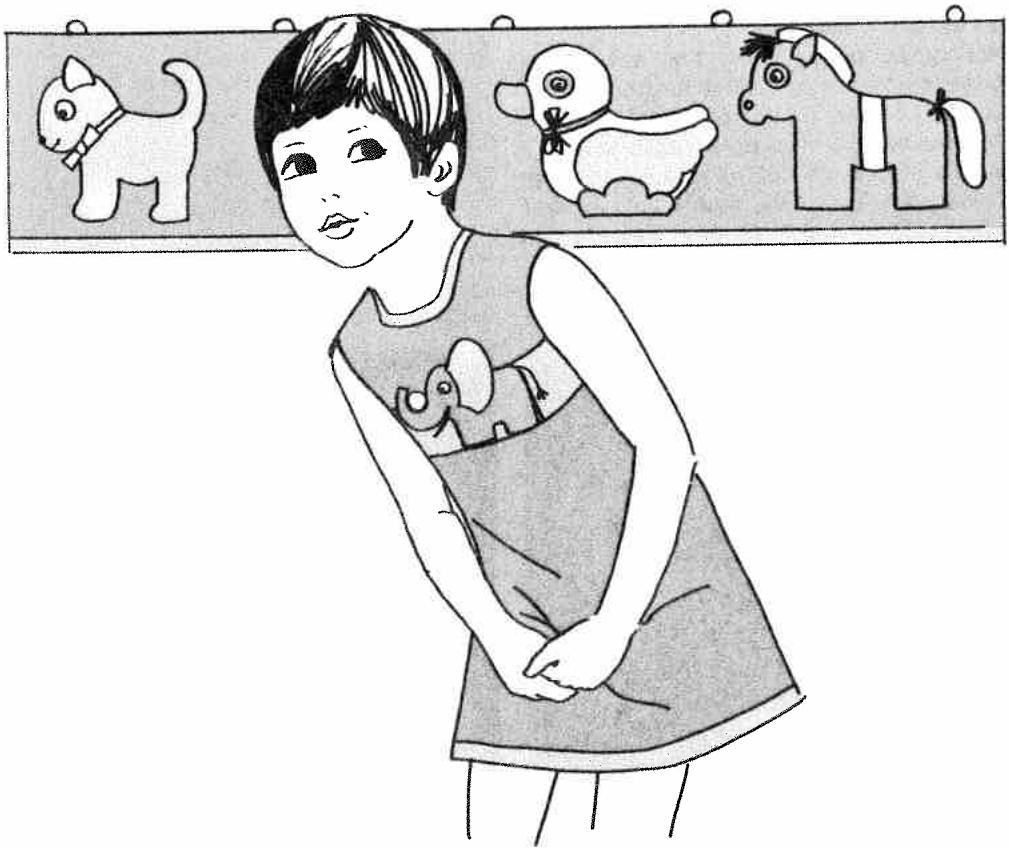
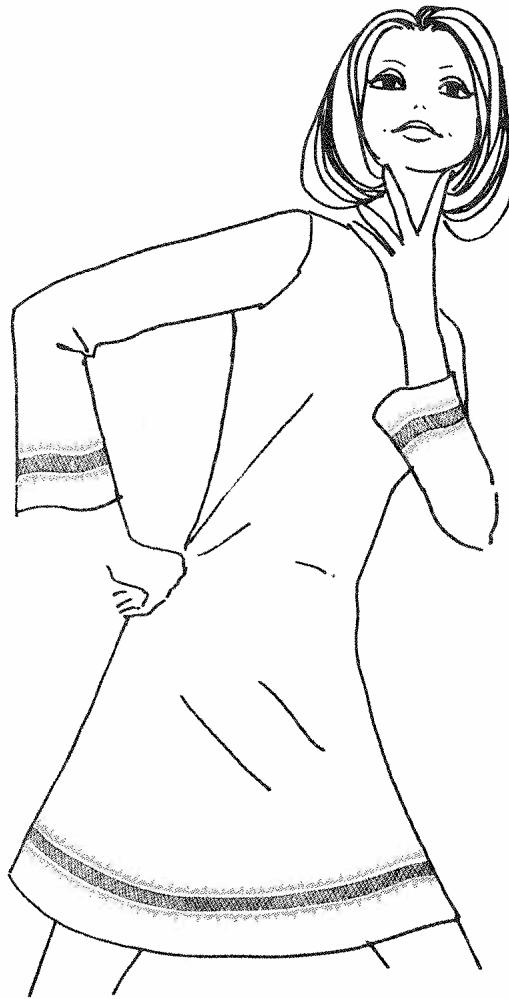
Regardless whether you create your own designs or use motifs that are ready-made... appliquéeing adds a beautiful fashion trim to articles, such as wall hangings and table cloths, napkins and aprons, children's dresses and beachwear, cushions and many other things.
Trace the design on the wrong side of the fabric.
- Turn the stitch selector to the largest zigzag stitch in stitch range 9, place the appliqué on the right side of the material so that the design traced on its wrong side is covered completely. Then stitch it down.
- Turn the stitch selector to a not-too-dense zigzag stitch in stitch range 5 and sew over the edges of the appliqué on the wrong side.
- Undo the first zigzag seam (Fig. 1) and trim the excess material close to the seam on the right side (Fig. 3).
- Turn the stitch selector to a dense zigzag stitch in stitch range 6 and sew over the raw edges of the appliqué again. To give the design a raised effect, satin-stitch over a filler cord.
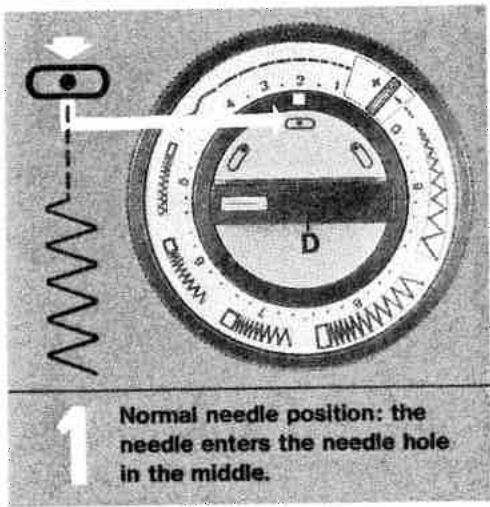
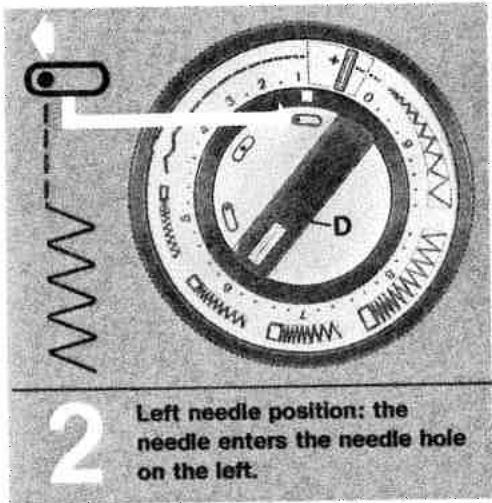
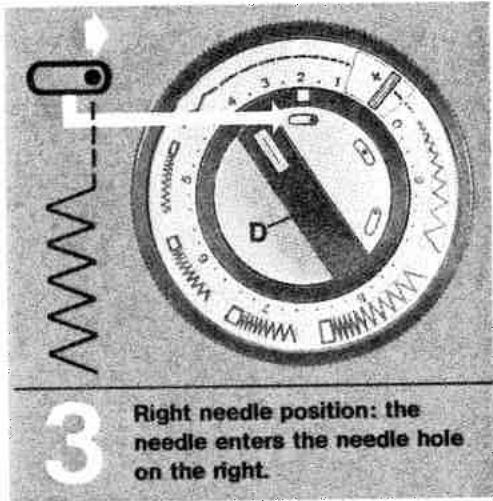
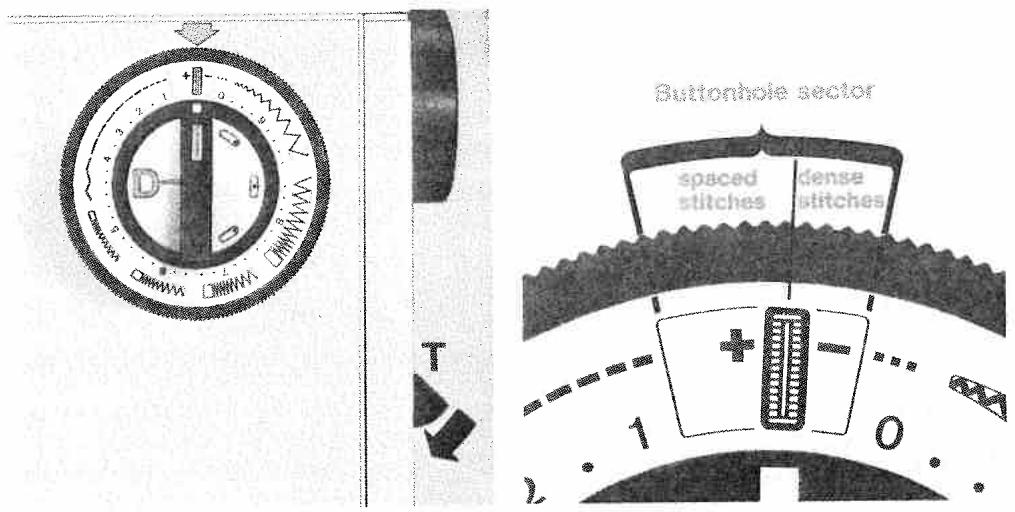
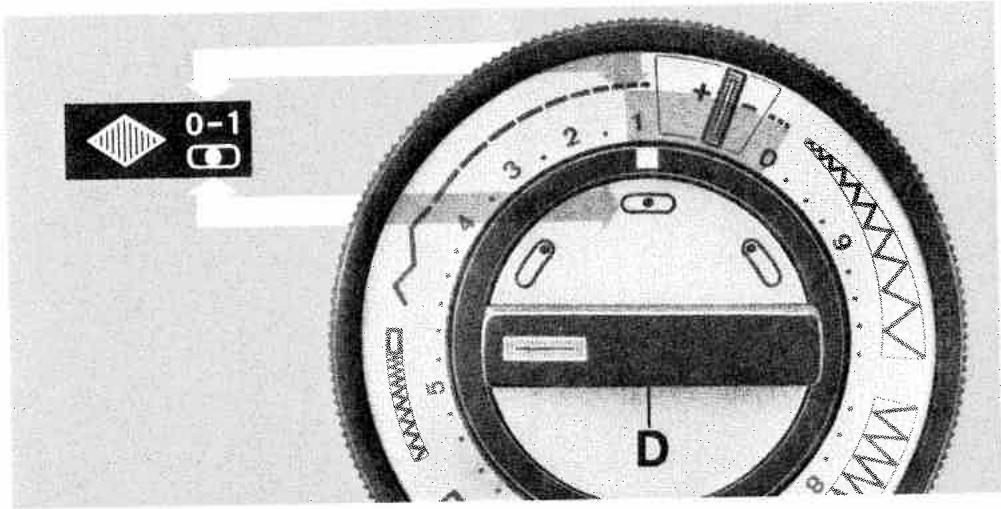
Where does the needle enter the needle hole: in the middle, at the right or left?
For most sewing operations, the needle enters the needle hole in the middle. This is achieved by turning knob D in the stitch selector to the position shown in Fig. 1. In this position, the buttonhole symbol is located on the left.
For other sewing jobs, e.g. sewing on buttons and sewing various functional-stitch seams, however, the position of the needle in the needle hole must be changed so that it enters the needle hole on the right or left. This is done by turning knob D until it snaps into position. If the needle position has to be changed for a certain sewing job, this is indicated in the instructions.
Ultra-Matic stitch selector:
straight stitch
Drop the machine feed (see pp. 16 and 26).
Right needle position (see p. 38).
Attach clear-view sewing foot No. 93-040 920-91
Place the material and the button under the sewing foot and align them so that the needle will enter the right hole in the button. Check the correct position of the button by letting the needle stitch through the hole. Sew one or two tying stitches, then raise the needle again.
Turn the stitch selector to the stitch width in stitch range 9 which corresponds exactly to the distance between the holes in the button. This selector is set correctly if the needle enters the left hole exactly as it descends for its left stitch.
Sew as many zigzag stitches as you deem necessary to fasten the button securely. Turn the stitch selector to straight stitching and sew a few tying stitches. Then trim the threads.
When sewing on four-hole buttons, repeat the above process.
Attach buttonhole foot
No. 93-040 924-91. Use No. 50 machine embroidery thread as needle and bobbin thread.
Check to make sure that all decorative and functional-stitch buttons are out (see page 13). Mark the buttonhole on the fabric.
To set the machine for programmed button-hole sewing, make sure you turn knob D clockwise only. Even when buttonhole sewing is interrupted, knob D must be turned clockwise only.
Turn knob D clockwise until its buttonhole symbol is positioned below the setting mark. Now turn the outer ring of the stitch selector so that its buttonhole symbol is above the setting mark.
The machine is thus set for a medium stitch density (see ill. above, center).
We recommend sewing a buttonhole to try out the stitch density which should be selected in accordance with the fabric and the thread being used. When you turn the stitch selector toward + , the stitches are spaced further apart; when you turn it toward - , they are packed together more closely (see ill, above, center).
Place the fabric under the buttonhole foot, pull the filler cord over the lug at the back of the foot, and place both strands under the two grooves in its sole (see ill. above, right).
Lower the foot.
Now you can sew the buttonhole in one continuous operation, as follows:
- Begin by sewing the right seam according to the buttonhole length marked.
- Push buttonhole control T down (see ill. above, left) until the machine has made a few zigzag stitches for the first bar. Then release control T again.
- The machine is thus set for sewing the left seam. Now sew this seam, making it as long as the first seam.
- Then press buttonhole control T down again to sew the second bartack.
- Release control T. Knob D now turns until it is positioned vertically. During this phase, the machine makes a few tying stitches. Pull the filler cord into the buttonhole seam completely and trim both ends.
- Cut the buttonhole open with your seam ripper.
For sewing the next buttonhole, turn knob D clockwise until it snaps into place again with its buttonhole symbol positioned under the setting mark. Repeat this for each subsequent buttonhole.
After you have sewn all buttonholes, turn knob D clockwise until the symbol for the central needle position is positioned under the white mark (normal position).

Ultimate position
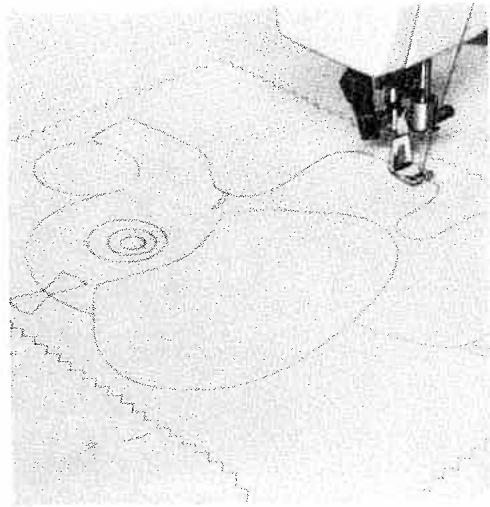
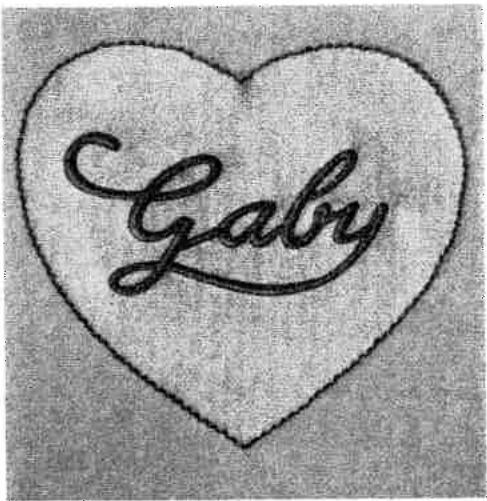
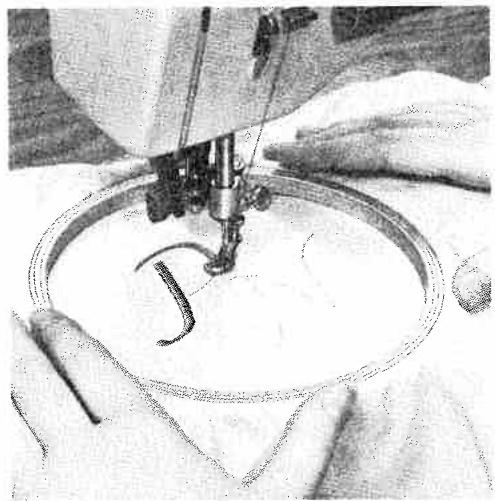
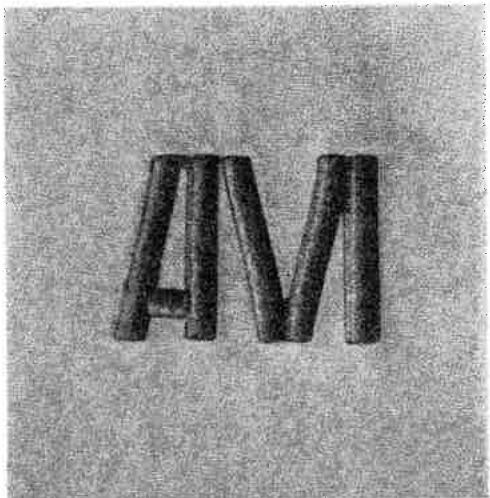
Monogram embroidery
Ultra-Matic stitch selector: zigzag stitch (depending on size of monogram desired). Drop the machine feed. Attach darning foot No.93-040 960-91.
Trace the monogram first on a piece of paper and then on the fabric. Place the material in a darning hoop and lower the presser bar lifter and draw up the bobbin thread.
Move the hoop slowly and evenly, and follow the traced outlines as if you were writing.
If you want to give your monogram dimensional quality, embroider the outlines twice, packing the stitches closely together.
Straight-lined monograms can be embroidered with the cording or clear-view sewing foot.
Once you have acquired a little practice, you will be able to embroider monograms in fabrics that are not too flimsy without using a darning hoop.
Quilting
Ultra-Matic stitch selector:
straight stitch (2) or
small zigzag stitch.
Attach zipper foot
No. 93-040 927-31 and apply the quilting gauge to the foot.
Set the gauge for the desired spacing between seams.
Mark the first seam on the fabric or guide the quilting gauge finger along the raw edge of the material.
Having completed the first seam, move the material under the zipper foot so that the gauge finger now runs along the seam previously sewn (or marked). For any subsequent seam, guide the gauge finger along the preceding line of stitches.
Edge stitching
Ultra-Matic stitch selector: straight stitch
Stitch length: 2
Attach zipper foot
No. 93-040 927-31 or ordinary
sewing foot No. 93-040 910-91.
To attach the quilting gauge place the spring on the shank of the zipper foot so that both holes are in line. Compress it until the gauge can be easily pushed through the holes. This quilting gauge can be attached to all feet which have a hole in their shank.
Guide the edge of the material along the line marking the desired stitching margin on the needle plate.
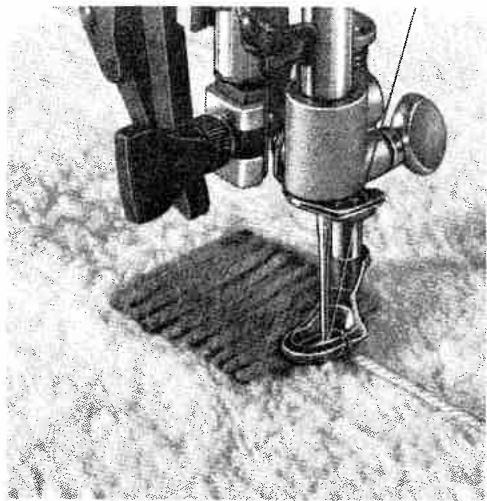
Darning with wool thread
Ultra-Matic stitch selector: zigzag stitch in stitch range 6 or 7.
Drop the machine feed.
Attach darning foot
No. 93-040 960-91.
Knitted garments and articles made of terry cloth are best darned with wool thread since spots darned with this thread are not as stiff
as those darned with thin embroidery and darning thread.
Draw the wool thread through the needle hole of the darning foot and into the slot of this foot. The wool thread must be placed under the darning foot (ill. right).
Run the machine and place the wool thread back and forth across the hole, packing the individual strands closely together. Stitch it down on the right and left of the defective area. Once the hole is covered with the wool thread, trim it. Then sew back and forth over the darned area lengthwise, using a thin darning thread. Do not space the various lines of stitching too closely since this would make the darn too hard.
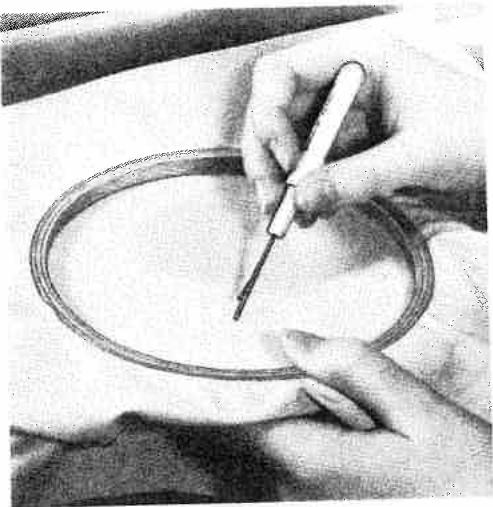
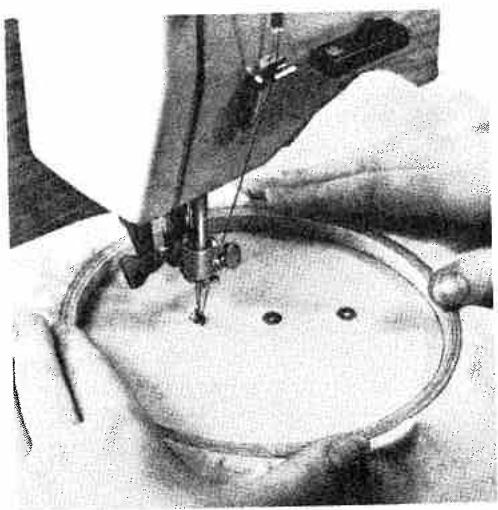
Eyelet embroidery
For eyelet embroidery you need cover plate No.93-040 946-45 which is inserted in the feed slot (see adjoining drawing). This cover plate can be obtained from your Pfaff dealer.
Mark the position of the eyelets on the fabric with dots. Place the fabric in a darning hoop and make a crosswise cut at each dot, using your seam ripper or a pointed embroidery scissors.
Push the stud of the cover plate through one of the little holes in the fabric and turn the stitch selector to a narrow zigzag stitch in stitch range 5 or 6.
Drop the machine feed.
Remove the sewing foot.
Lower the presser bar lifter and draw up the bobbin thread.
Now sew around the hole, turning the hoop by hand at a uniform rate. This is very important to obtain beautiful eyelets.
Sew around every hole twice.
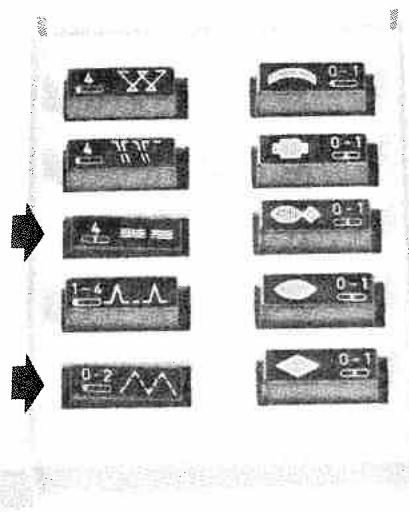
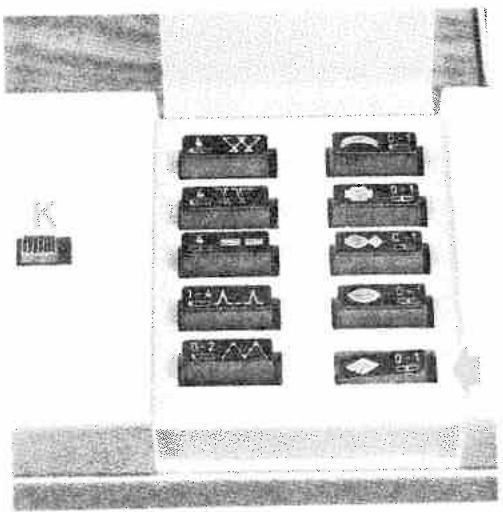
The built-in utility-stitch mechanism makes functional sewing simple
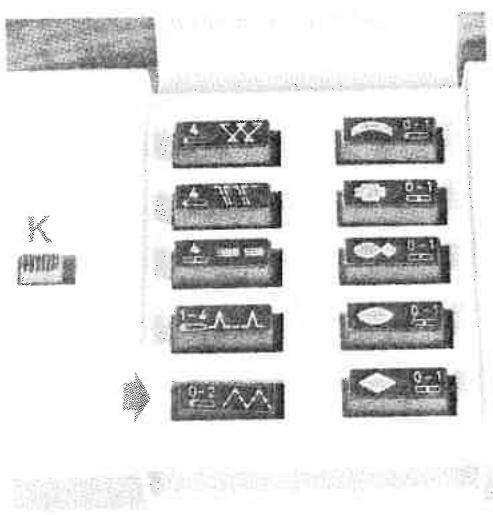
The built-in utility-stitch mechanism makes it possible to sew functional seams on all kinds of materials, no matter whether they are elastic (e.g. tricot, jersey, Helanca and stretch fabrics) or not. Simply set the machine for the utility-stitch desired by pushing a button.
To set your machine for functional stitching, open the lid in the top cover. The different utility-stitch symbols appear on the left row of buttons.
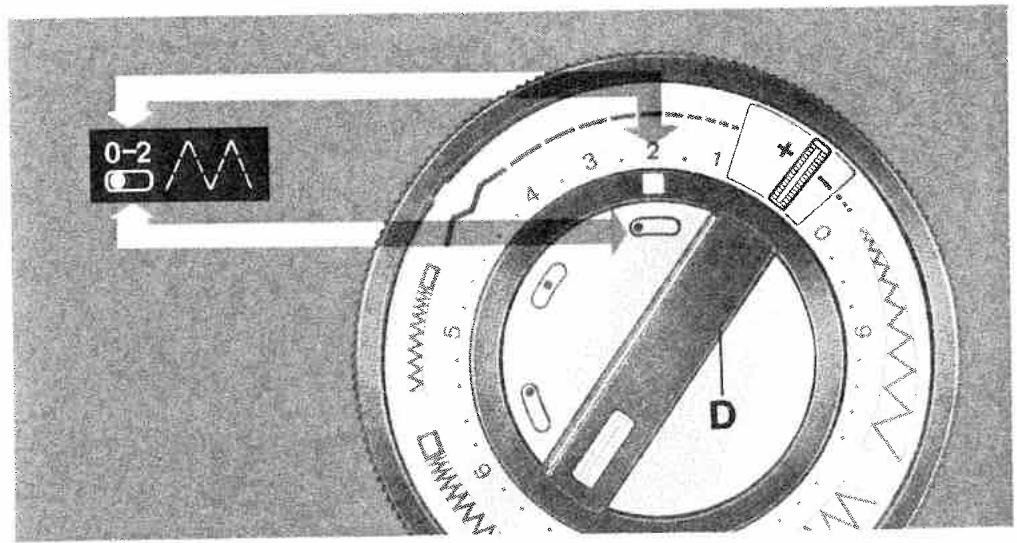
to set your machine for the desired stitch. Each button shows the symbol of the respective utility-stitch, and indicates the stitch length recommended as well as the needle position which is to be set by turning knob D. The illustration on the opposite page shows you how to set your machine.
To sew an elastic seam, push the button identified by the elastic-stitch symbol. Turn knob D until the needle position symbol indicated on the button is opposite the mark on the dial.
| 4Y | XXXX | Cross stitch | For sewing and simultaneously finishing hems and edges of elastic materials. |
| 4TT | | Overlock stitch | Special elastic seam on knitted and crot-cheted fabrics which secures the fabric edge stitches. |
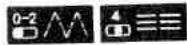
| 4E | | Elastic triple straight stitch | For seams that are pressed open later or are exposed to great stress (e.g. ski pants), and for utility-stitch combinations. |
| 1-4A | | Blind stitch | For shell edging, blindstitching, and utility-stitch combinations. |
| 0-2A | | Elastic stitch | For darning rips and worn areas, sewing on elastic, sewing terry cloth, inserting patches and for utility-stitch combinations. |
Then turn the outer ring of the stitch selector until the number indicating the desired stitch length (between 0 and 2) is opposite the mark. Now your machine is ready for sewing an elastic seam.
Before you switch over to another utility-stitch pattern by pressing another button, push button K. This button must also be pushed to disengage the utility-stitch mechanism.
These utility-stitches make sewing easy for you
Mending hems and darning rips
Elastic stitch

Stitch length: between 0 and 1
Left needle position
Ordinary sewing foot
No.93-040 910-91
Engage dual feed
Rip open the section of the hem opposite the damaged area. Take a piece of suitable material in the right size, fold it in half and press. Then insert this piece in the hem so that its folded edge is in line with the folded edge of the hem.
Sew it down with an elastic seam, so that the individual patterns overlap (see ill.).
To mend a rip, place a piece of suitable material under it and join both plies so that the individual elastic-stitch patterns overlap.
Sewing on elastic
Elastic stitch
Stitch length: 1
Left needle position
Ordinary sewing foot
No.93-040 910-91
Engage dual feed
Lay the elastic on the fabric edge, stretching it with both hands as far as possible (see ill.). Then sew the stretched elastic down with an elastic seam.
The more you stretch the elastic, the more the fabric will be gathered.
Stitching terry cloth
Elastic stitch

Stitch length: between 0 and 1
Left needle position
Ordinary sewing foot
No.93-040 910-91
Engage dual feed
(see pages 18 and 19)
Place both pieces of fabric on top of each other with their edges overlapping about 1cm([1]2) , as shown in Fig. 1. Sew down one edge with an elastic seam, then turn the fabric over, and stitch down the second edge.
If the seam is exposed to great stress, lay the two pieces of material one upon the other so
1
that their edges are in line, and join them with a straight-stitch seam taken 1.5 to 2.0cm (abt. ^1/_6 ) from the fabric edge (stitch length 1.5 to 2). Press the seam open.
Restore the elastic-seam setting and turn the stitch selector between 0 and 1. Sew both edges down one after the other (2).

2

Elastic triple straight-stitch seams which are exposed to great stress
Elastic triple straight stitch
Stitch length: 4
Central needle position
Ordinary sewing foot
No.93-040 910-91
Engage dual feed
(see pages 18 and 19)

Elastic triple straight-stitch seams (so-called press-open seams) are used for all elastic materials, especially if the seams in question are exposed to great stress (e.g. on ski pants). In addition, they are preferred for sewing bed ticks and inside leg seams on trousers.
Sew the two pieces of material together with the machine set as indicated above, then press the seam open.

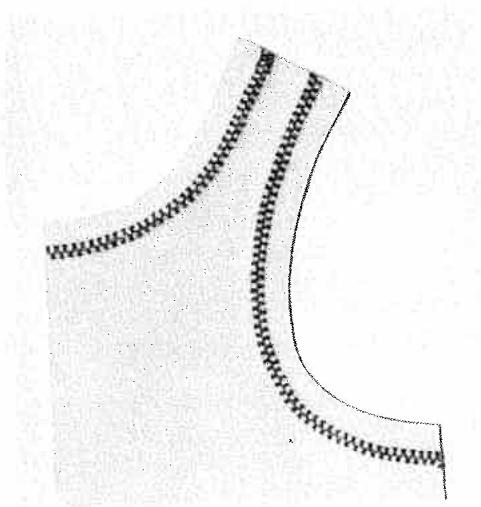
Shell edging
Blindstitch

Stitch length: 1-2
Left needle position
Clear-view sewing foot
No.93-040 920-91
Slightly increase the tension for non-elastic fabrics.
Shell edging makes a nice trimming on lingerie and garments made of sheer, soft materials or tricot.
Fold the fabric along the line which is to be trimmed by shell edging. Sew along this folded edge with the needle alternately taking one stitch into the fabric and the other over its edge. As the threads are interlocked outside the fabric, the fabric edge is drawn inward, thus producing a shell edging effect.
Blindstitching
Blind stitch
Stitch length: 3-4
Needle position: between
left and center
Blind-stitch foot
No.93-040 917-91
Engage dual feed
Elastic blind-stitch seams
Blind-stitch seam
Stitch range 9
Needle position: between
left and center
Attach blindstitch foot
No.93-040 917-91
Engage dual feed

1

Fold the hem in the desired width and baste it about 0.5cm(_32^ ) from the fabric edge (Fig. 1).
Turn the hem down so that it protrudes by about 0.5cm(^1 / _32^ ) on the right (Fig. 2).
Place the material under the blind-stitch foot so that its folded edge runs along the edge guide mounted on the sewing foot (ill. at left). With the machine set for a wide zigzag stitch, regulate the needle position by turning knob D (page 47) toward the right (from left to central needle position) so that the needle takes the left stitch exactly in the folded edge of the fabric.
To blindstitch heavy woollens, fold the hem only once (Fig. 3).
Inserting patches
Elastic stitch
Stitch length: 0 to 1
Left needle position
Ordinary sewing foot
No.93-040 910-91
Cut a patch about 2cm(1^ ) larger than the damaged area and place it over the thin spot on the right side of the fabric so that its grain matches the rest of the fabric.
Sew the patch down by stitching along its edges, sewing the corners twice.
Turn the material over and cut out the damaged area by trimming close to the seams. That's all there is to it. The patch has been inserted neatly and without impairing the elasticity of the mended spot.
Reinforcing edges of elastic woven fabrics

Cross stitch
Stitch length: 4
Left needle position
Ordinary sewing foot
No. 93-040 910-91.
Suited particularly for reinforcing edges and mending underwear.
Joining elastic knitted fabrics
Overlock stitch

Stitch length: 4
Left needle position
Ordinary sewing foot
No.93-040 910-91.
The overlock seam is a special seam used for knitted or crotched materials. It joins two pieces of fabric and simultaneously finishes their edges.
Suited particularly for attaching collars and collarettes to T shirts.
For this work, place the two pieces of fabric in the machine so that they extend to the left of the needle.
Utility-
stitch
combinations
When you push two utility-stitch buttons simultaneously, both utility-stitch patterns will be combined. This further increases the versatility of your Pfaff machine.
Sewing on elastic strands
Elastic stitch
and elastic triple
straight stitch
Stitch length: 4
Left needle position
Elastic or shirring thread
Buttonhole foot No. 93-040 924-91
If the elastic borders of knee-length stockings, socks or night gowns become worn, replace them with elastic strauds. To do this, push the elastic-stitch and elastic triple straight stitch buttons.
Place the elastic strands over the prong of the buttonhole foot and place them in its grooves. Hold them taut and stitch down. The more you stretch the elastic strands, the more the material will be shirred.
Joining knitted and jersey fabrics
Blind stitch and elastic
triple straight stitch
(pullover seam).
Ultra-Matic stitch selector:
straight stitch
Stitch length: 4
Left needle position
Attach ordinary sewing foot
No.93-040 910-91.

Place the two pieces of fabric to be joined one on top of the other with their edges in line. Insert them in the machine so that they extend to the right of the needle (see ill below).
Sew along the fabric edge so that the needle alternately stitches into the fabric and over its edge. In this way, you join both pieces and finish their edges in one operation, as was done with elastic knitted and woven fabrics.
Elastic triple zigzag stitch

Ultra-Matic stitch selector:
zigzag stitch in stitch range 9
Elastic triple zigzag stitch
Ordinary sewing foot
No.93-040 910-91
The elastic triple zigzag stitch is ideally suited for foundation garments requiring seams that are both elastic and strong. This stitch can also be used for mending damaged seam sections.
Reinforcing hems in elastic fabrics
(jersey, Lastex, etc.)

Blind stitch
Ultra-Matic stitch selector:
medium zigzag stitch
in stitch range 9.
Left needle position
Attach blindstitch foot
No. 93-040 917-91.
The procedure is the same as with blind-stitching non-elastic fabrics (see page 53).
Ornamental stitches
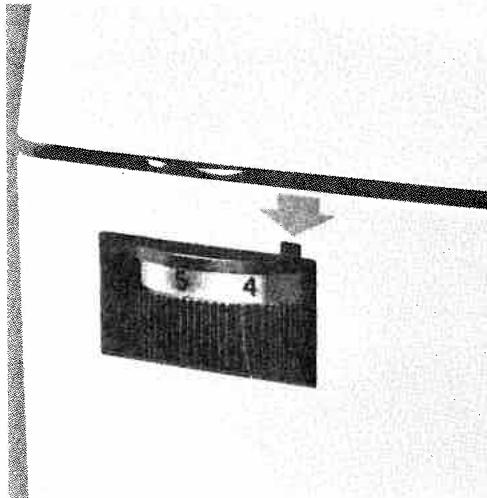
The decorative-stitch mechanism
To sew various fancy stitches, you need the decorative-stitch mechanism of your machine. You will see a row of fancy-stitch buttons right next to the row of functional-stitch buttons. The buttons in the right row are marked with the symbols of patterns which can be used for ornamental purposes only. The patterns on the left row of buttons can be used for both functional and decorative purposes.
Push the button showing the desired motif. Then turn the stitch selector to the stitch length and needle position indicated on the button next to the fancy-stitch symbol. If you want to sew the first design, for in-
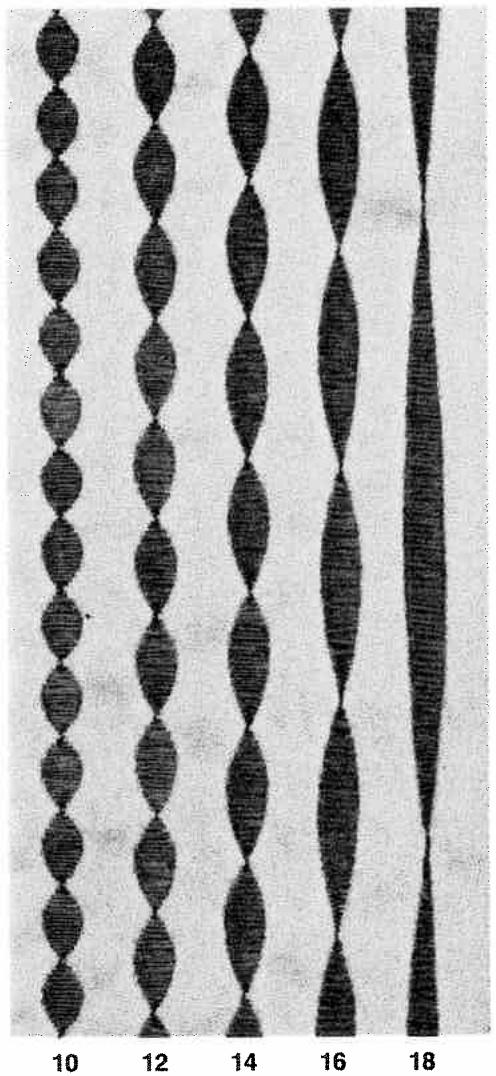
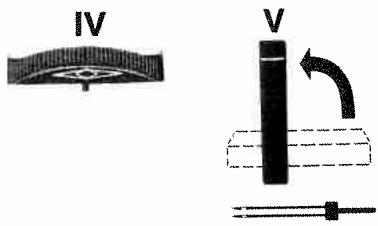
stance, push the first button. Then turn knob D in the stitch selector to the needle position symbol indicated and turn the outer ring between 0 and 1, as indicated on the button. The desired pattern length is regulated by turning wheel E. The minimum pattern length is obtained by turning wheel E to 10, the maximum length by turning it to 18 (see ill.). This is all you have to do to sew the pattern selected.
In case sewing is interrupted because the bobbin is empty or the needle thread is broken, you can easily locate the exact beginning of the pattern with the aid of indicator wheel S. Simply turn this wheel until the pattern being sewn is opposite the mark on the top cover as shown at right
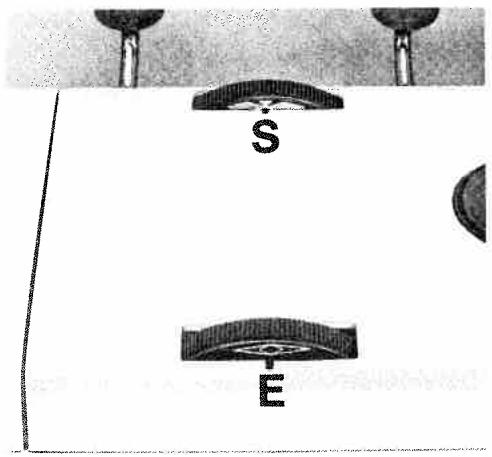
Then resume sewing at the end of the last pattern completed. If part of the next design has been sewn already, simply sew over this portion again.
After you have completed ornamental sewing, turn wheel E to the pattern length symbol thus disengaging the decorative-stitch mechanism. In addition, push button K (see page 56).
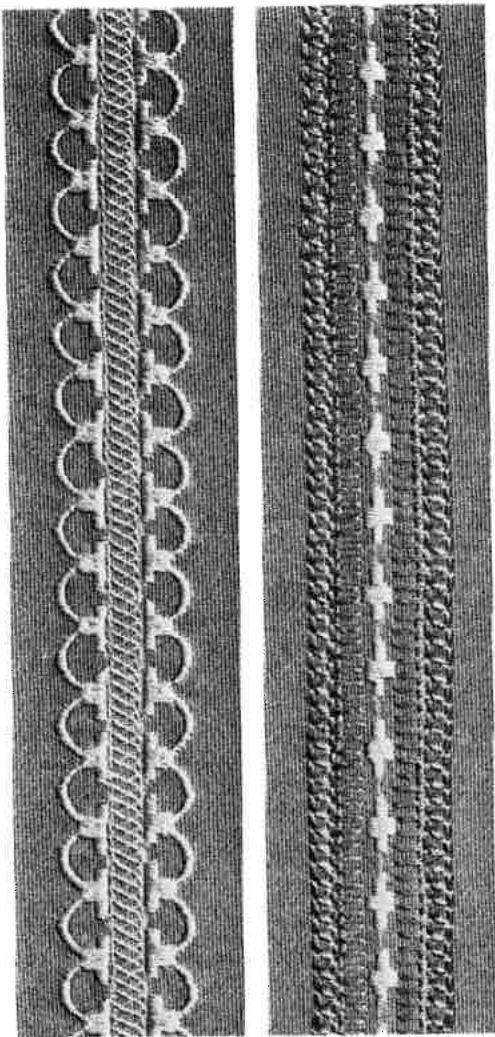
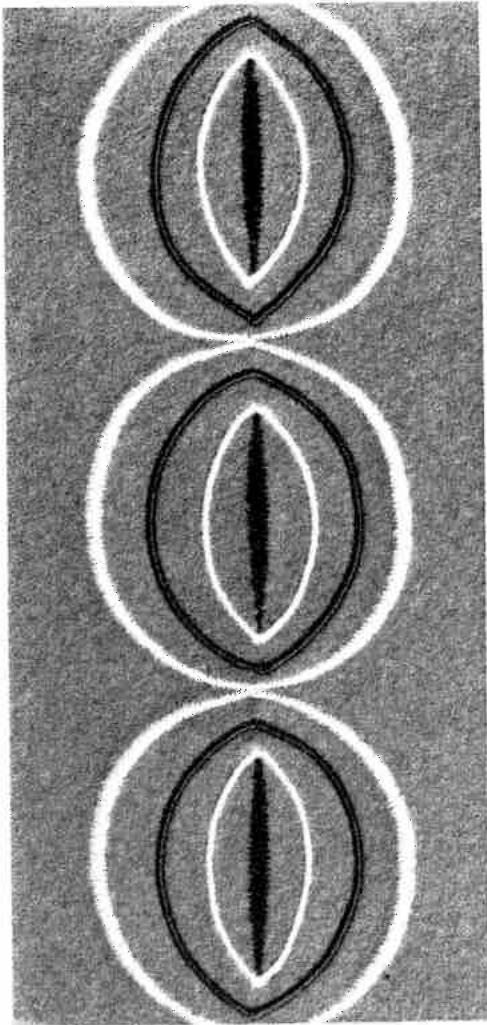
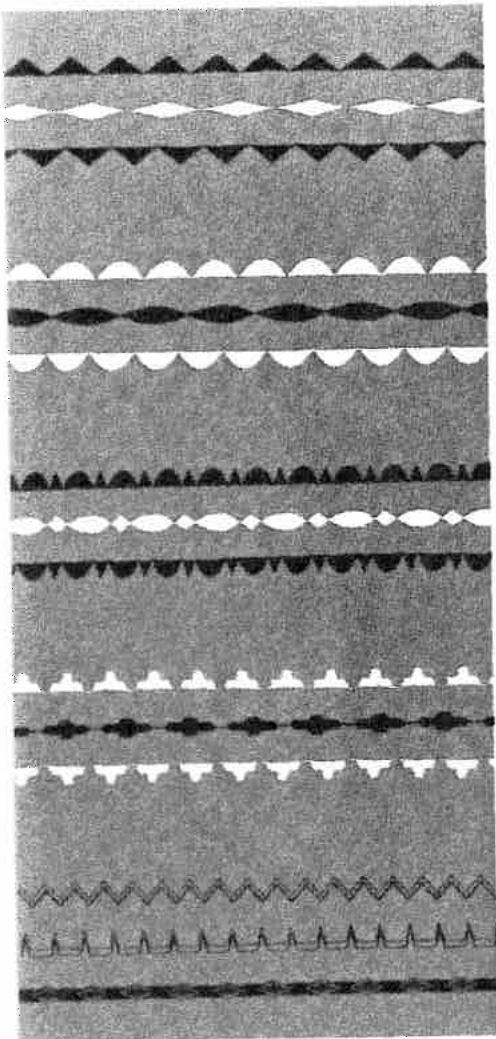
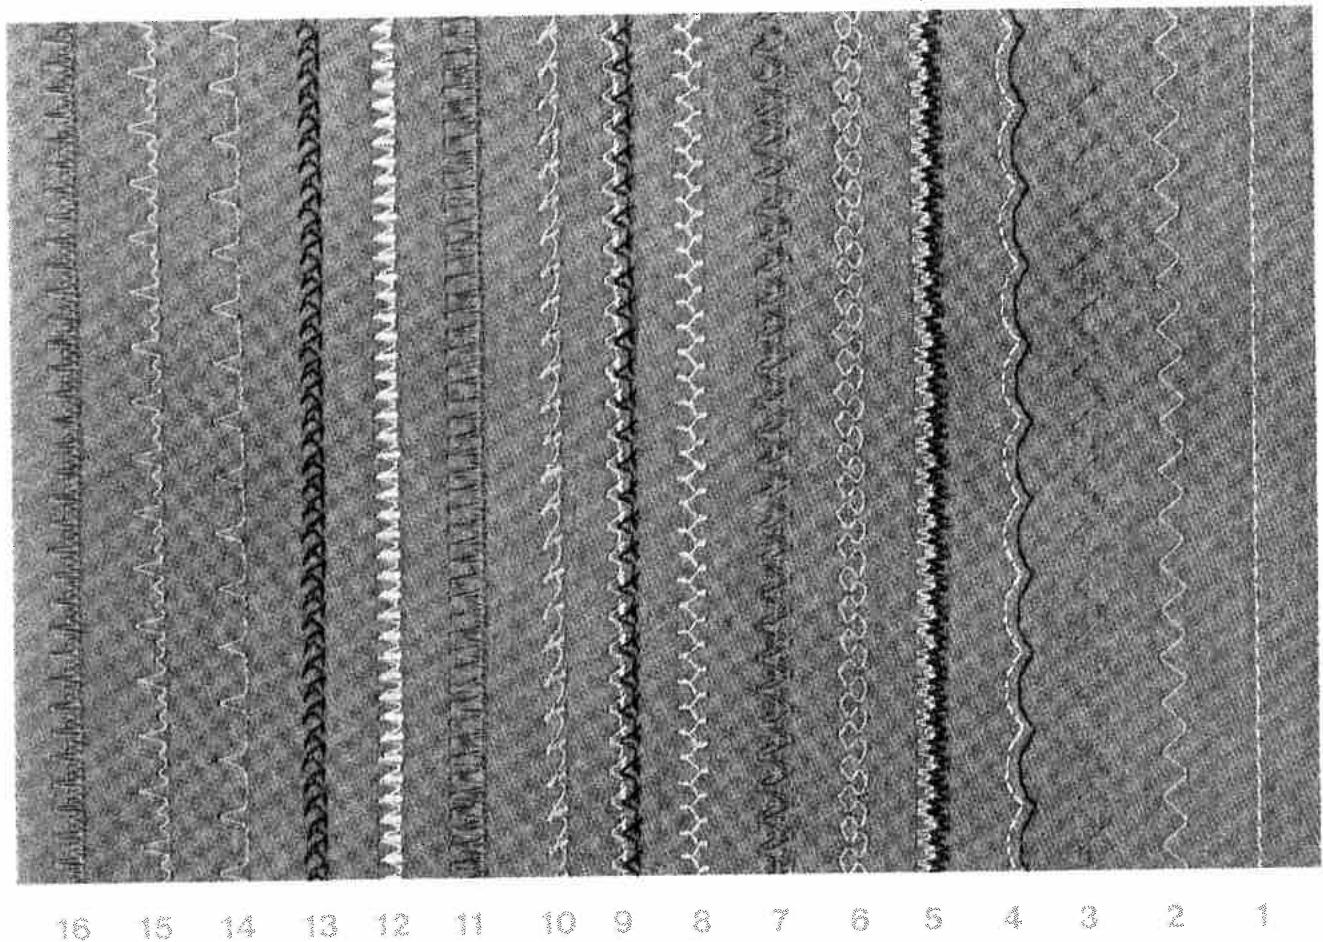
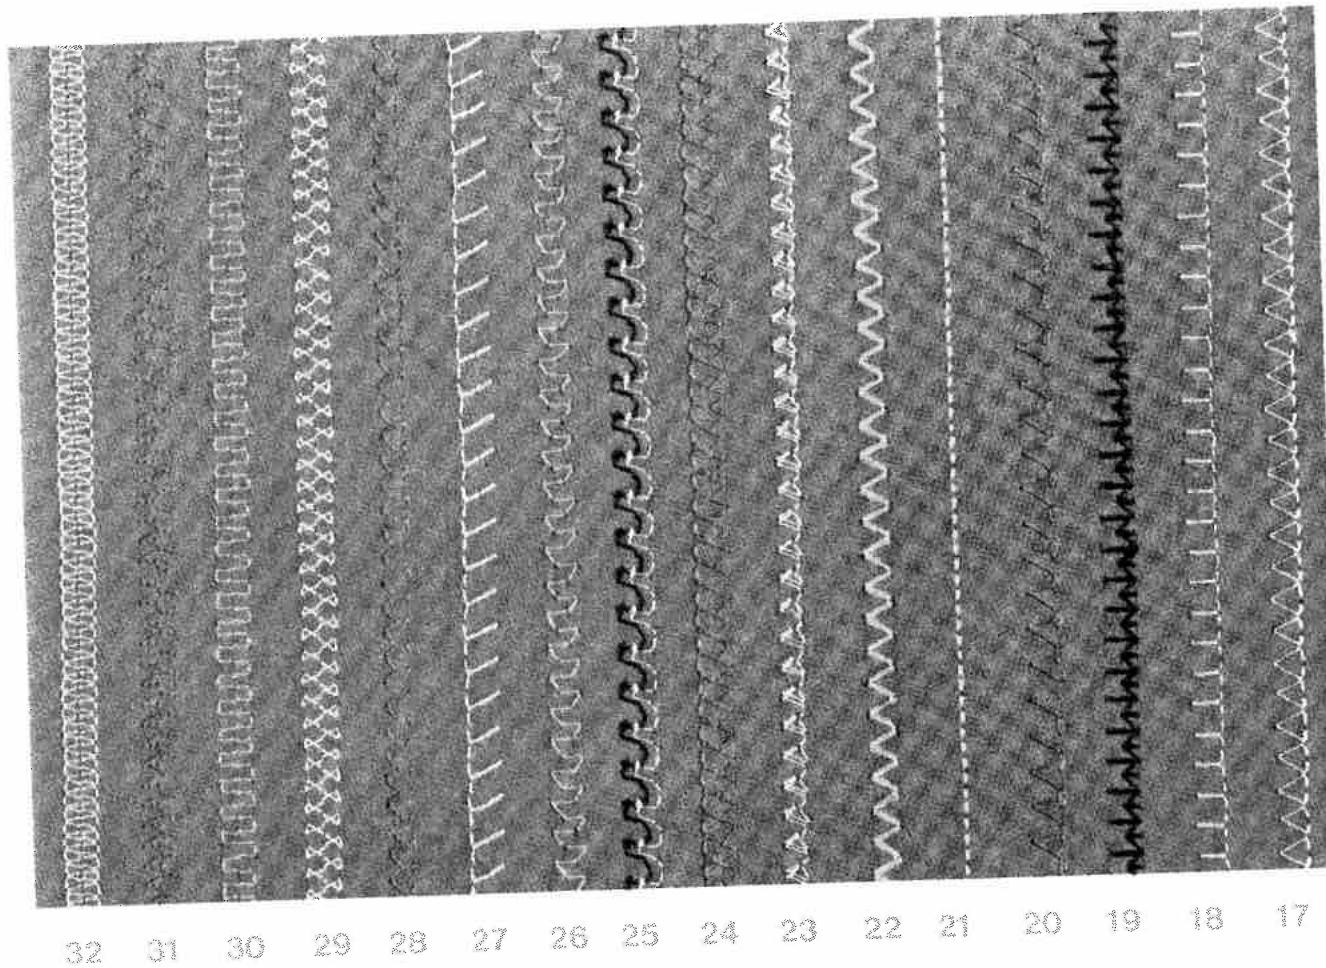
With this decorative-stitch mechanism you can make attractive borders by combining several lines of ornamental stitching according to your own imagination. Some of the designs which can be made with your Pfaff are illustrated on the next pages.
Which fancy-stitch variation do you like best?
For ornamental stitching, use clear-view sewing foot No. 93-040 920-91.
The two borders shown on this page are made as follows:
Always begin with the pattern in the middle. First border: Sew the center strip of the border with over-edge stitches.
Then push the button marked and sew along the right and left edges of the center strip, turning knob D on the stitch selector to the right and left needle positions respectively.
The outer pattern is again sewn with the needle at its left position. Make sure the scallops match the pattern sewn previously (see ill.). Before you start sewing the second row of scalloping, turn the fabric clockwise.
Second border: To sew the center strip, push the button marked Next, combine the blind stitch with the zigzag stitch (turning the stitch selector to a dense zigzag stitch in stitch range 6) and sew along one side of the center strip, turn the material, and stitch along the other side as well.
Sew the outer pattern with the built-in hem-stitching design.
Additional ornamental effects are obtained by using vari-colored threads.
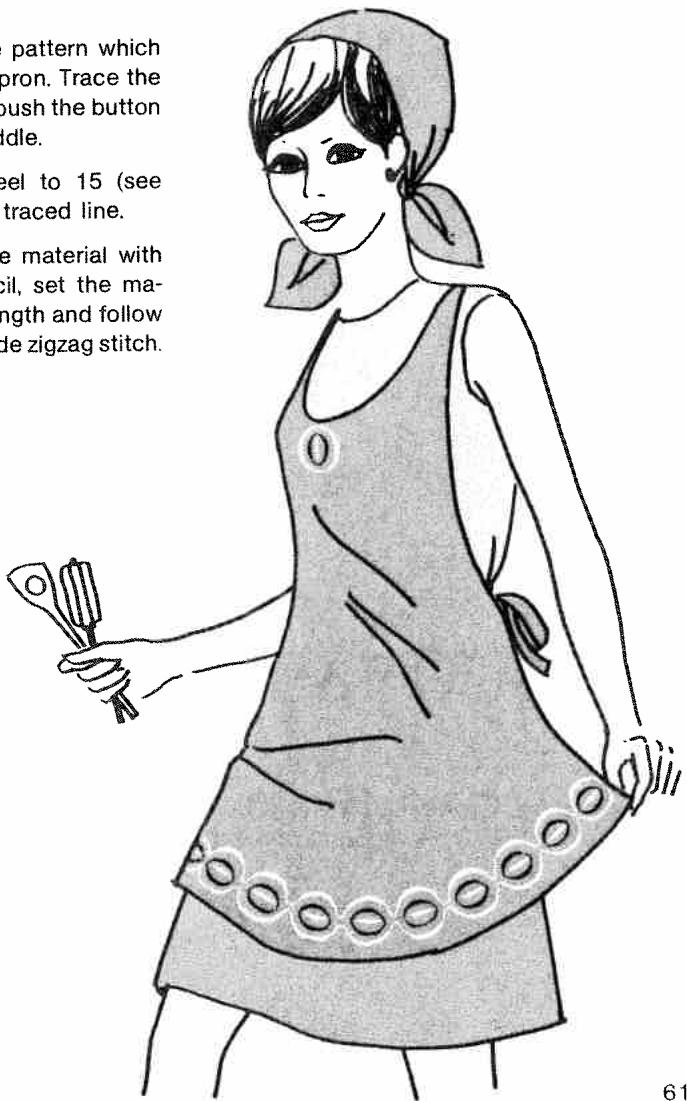
Shown on this page is a nice pattern which can be used to enhance an apron. Trace the center line of the pattern and push the button showing the design in the middle.
Turn the pattern length wheel to 15 (see page 59) and sew along the traced line.
Trace the curved lines on the material with the aid of a cardboard stencil, set the machine for a suitable pattern length and follow the outlines with a medium-wide zigzag stitch.
The four borders in the upper half of this page were made by simply varying the needle position (left, center, right).
The two designs below them were made with a functional-stitch seam sewn with two needles.
The design at the bottom was made by stitching over wool threads with one needle.
For further suggestions on how to make attractive borders by combining various stitches, please refer to the inside back cover.
| Type of Fabric | Thread
Type | Size | Needle
Size | Point Style |
| Bed linen
Fine linen
Muslin | Cotton | 50 | 80
70-80
70-80 | |
| Dress fabrics, such as brocade, satin ottoman, taffeta, georgette, crège, chiffon, batiste, blouse fabrics and poplin shirting | Silk | 50 | 70-80 | 130/705 or
130/705 H |
| Cotton or mercerized cotton | 50 |
| Suitings and mantlings | Silk | 40 | 80-90 |
| Twill, denim | Cotton | 40 | 90-100 |
| Heavy-linen | Cotton | 40 | 90-100 |
| Burlap | Cotton or linen
Linen | 40
40 | 90-100
110 |
| Terry cloth, chenille goods, knitted pile fabric for bathrobes, corduroy | Cotton | 40 | 80-90 |
| Silk | 50 |
| Cotton, rayon staple fabrics | Cotton | 50 | 70-80 |
| Jersey fabrics (synthetic) | Synthetic | 50 | 70-80 | 130/705 H |
| Cotton | 50 |
| Lastex, Helanca fabrics | Synthetic | 50 | 70-90 | 130/705 H |
| Silk | 50 |
| Foambacks | Synthetic | 50 | 70-80 | 130/705 or
130/705 H |
| Silk | 40 | 90 |
| Jersey fabrics (wool)
Woolens | Silk | 50 | 80 | 130/705 H |
| Mercerized cotton | 50 | 70-80 | 130/705 |
| Cotton curtains
Synthetic curtains | Mercerized cotton
Synthetic thread | 50
50 | 70-80
70-80 | 130 suk |
| Acella, leatherette,
oilcloth | Cotton | 40 | 90-90 | PCL |
| Elastic corsetry fabrics, firm corsetry fabrics, corset satin | Synthetic thread | 40 | 70-90 | 130/705 H |
| Cotton | 40 | 90 |
| Leather | Cotton
Linen | 40
40 | 80-100 | 130 LL |
| Decorative stitching | Embroidery thread | 30-50/80 | 80-80 | 130/705 |
| Heavy embroidery thread | | 90-100 |
| Buttonhole silk | | 90-100 |
| Embroidery and darning thread | 70 | 80 |
| Lyora, rubberized fabrics | Synthetic or cotton | 120
60-80 | 80-90 | 130/705 SKF |
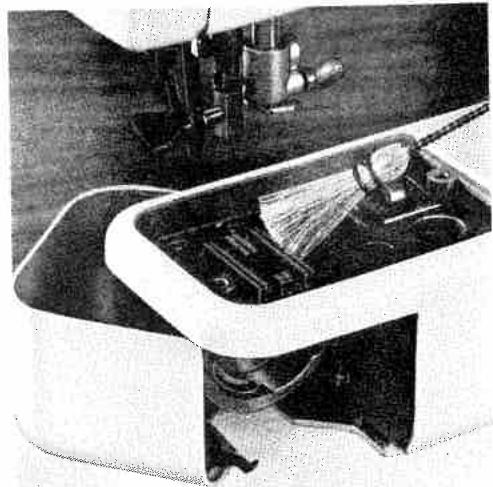
Your Pfaff needs very little attention
All you have to do to keep your machine in good operating condition is to oil the sewing hook and clean the machine feed regularly. This you can easily do yourself.
Since your Pfaff sewing machine has been made from the finest quality materials, the only part that has to be oiled occasionally is the sewing hook. Therefore, remove the bobbin case and put a drop of oil into the hook raceway every so often.
You need no expert either for cleaning the parts in the machine arm and in the vicinity of the sewing hook. You can do this yourself with the aid of the small soft brush included in the accessory kit.
For cleaning the sewing hook, remove the needle, the bobbin case and the sewing foot.
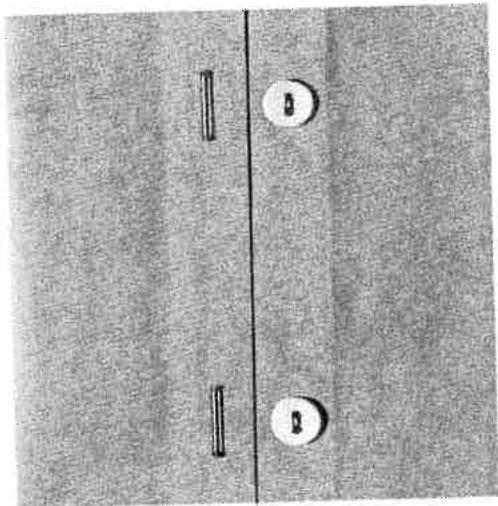
Remove the lint that accumulates in the vicinity of the machine feed with a soft brush. To do this, remove the needle plate. The needle plate of the Pfaff 1213 is simply pulled forward and lifted up (see arrow in ill. at top right). The needle plate of Pfaff machines 1214 and 1222-E must be unscrewed with the screwdriver included in the accessories.
Take care that no lint accumulates between the teeth of the machine feed. Accumulations of packed lint are best removed with a toothpick or a similar wooden object.
Changing the light bulb of your Pfaff is something you can easily do yourself
The sewing light illuminates the work in front and back of the needle without casting a shadow.
It is enclosed in the face cover of your machine. Changing the light bulb is very simple: Push the burnt-out light bulb into its socket, turn it left and pull it out (see ill.). Insert the new bulb and turn it right.
Light bulbs for your Pfaff sewing machine can be obtained from your Pfaff dealer.
Trouble shooting
When handled properly, your Pfaff will rarely develop any trouble.
Whenever you have completed sewing, be sure to restore the original setting of your machine, i.e. turn the stitch selector to straight stitching, setting it at about 2; turn the needle position control to its central position; raise the machine feed; switch your machine off by pushing the master on-off button, and see that the presser bar lifter is set horizontally.
Even if you have just sewn buttonholes or darned, we recommend that you set your machine for straight stitching again.
If trouble should occur, check the following:
Is the needle still in good condition and inserted properly? Have you selected the right needle and thread from the Needle and Thread Chart?
Are you sewing with a good quality thread?
Has the bobbin case been inserted properly?
For straight and zigzag stitching, the functional and decorative-stitch mechanism must be disengaged. To make sure it is, push the button on the top
cover of your machine.
Are both tensions correctly balanced? They have been set correctly by us and need no adjustment normally.
Does your machine feed properly? The material must be guided lightly, but must not be pulled.
Before you start sewing, again familiarize yourself with the fundamentals of machine operation until you know them. Check to see whether your sewing machine needs cleaning or oiling.
Are there pieces of thread wedged between the tension discs? To remove them, pull a narrow fabric strip between the tension discs.
Has the button with the desired functional or decorative-stitch symbol been pushed? Have the needle position and the stitch length been set accordingly?
The Pfaff rotary hook will not normally jam, even if the machine is handled improperly. If thread should happen to jam in the raceway of the sewing hook, however, put a drop of oil into the raceway and jerk the balance wheel back, then rock it back and forth, without using any force. After a short time, the trouble will disappear by itself.
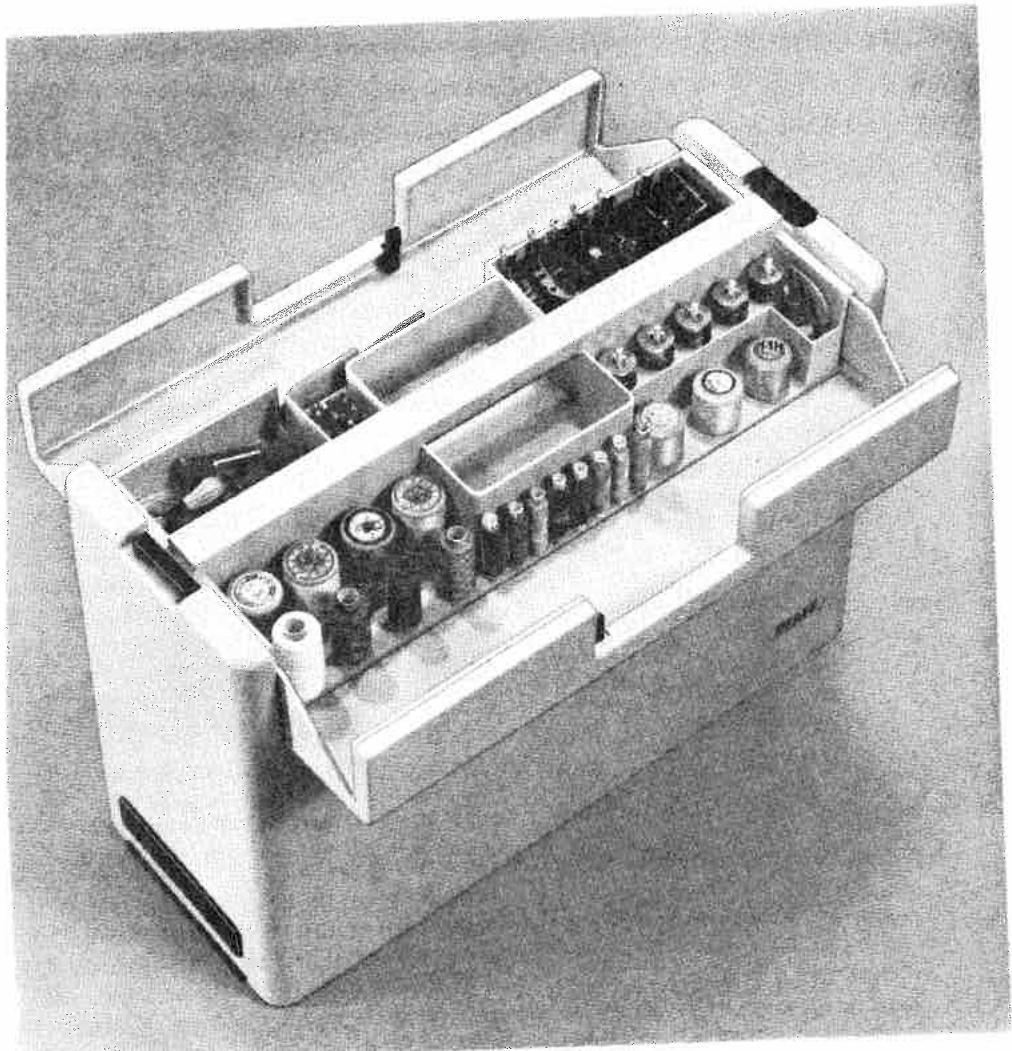
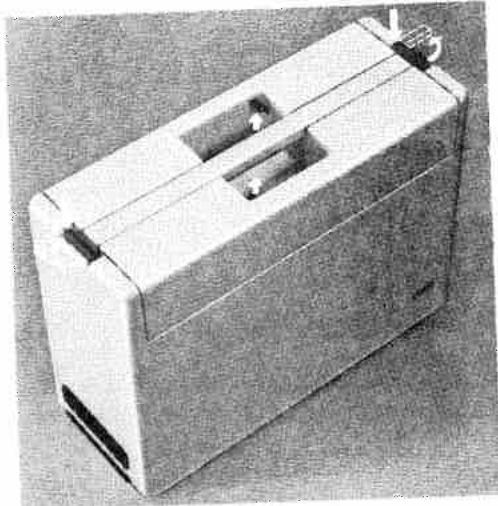
People will envy you . . .
this carrying case. It is not only attractive, but also very useful. The bottom part holds your Pfaff, while the top part holds all sewing utensils, such as spools of thread, bobbins, scissors and many other items.
To remove the cover, depress the catches on the right and left at their pivots and turn them in the direction indicated by arrows (see ill.). Now remove the cover. These two catches must be open when you place the cover over your Pfaff after you have finished sewing. Lock the catches when the cover rests on the base firmly.
The catches of the sewing box are located in the middle of the cover (see arrows).
Notice
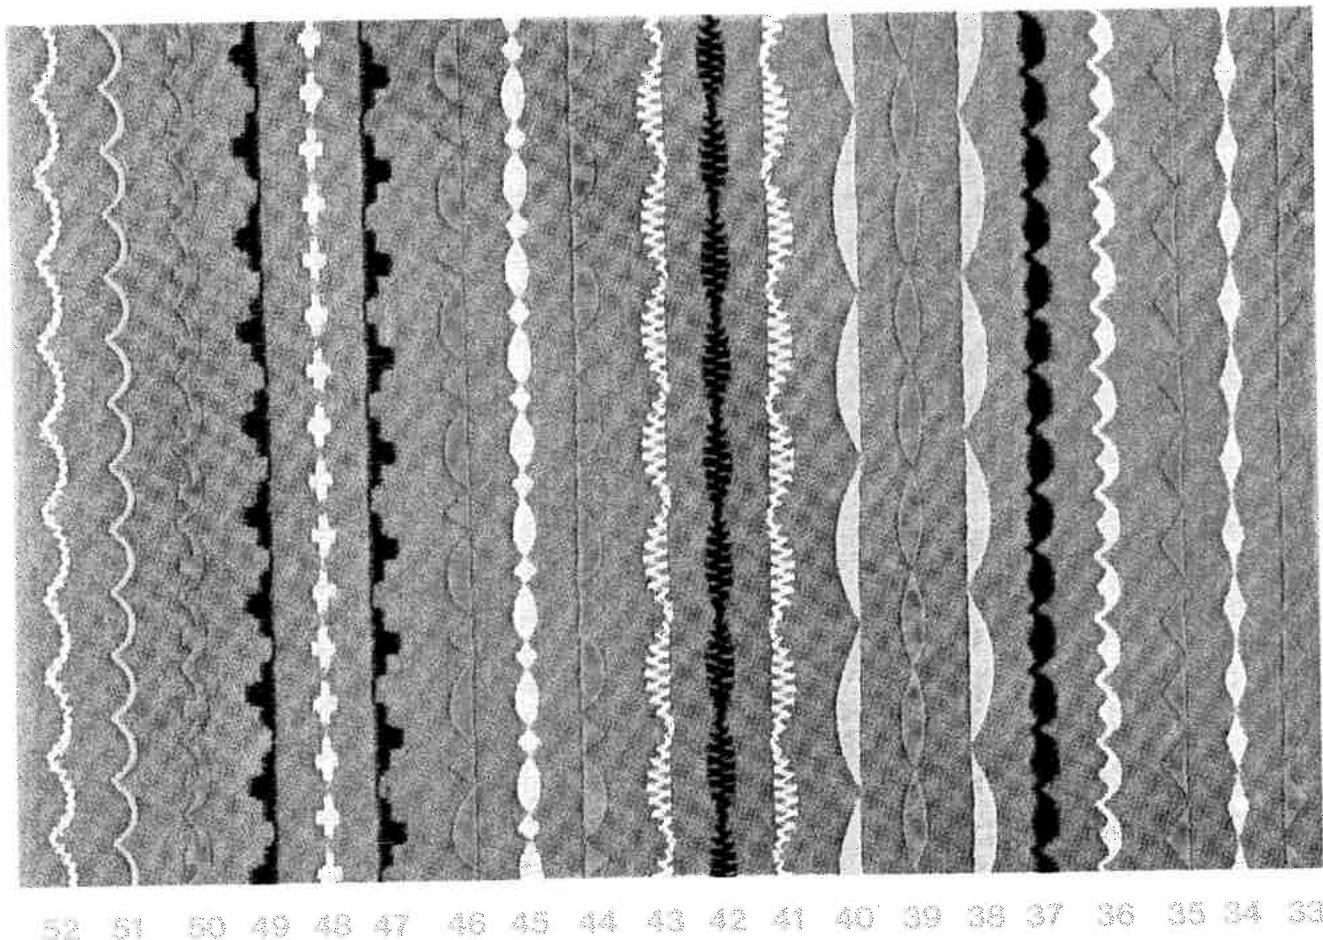
ORNAMENTAL-STITCH COMBINATIONS

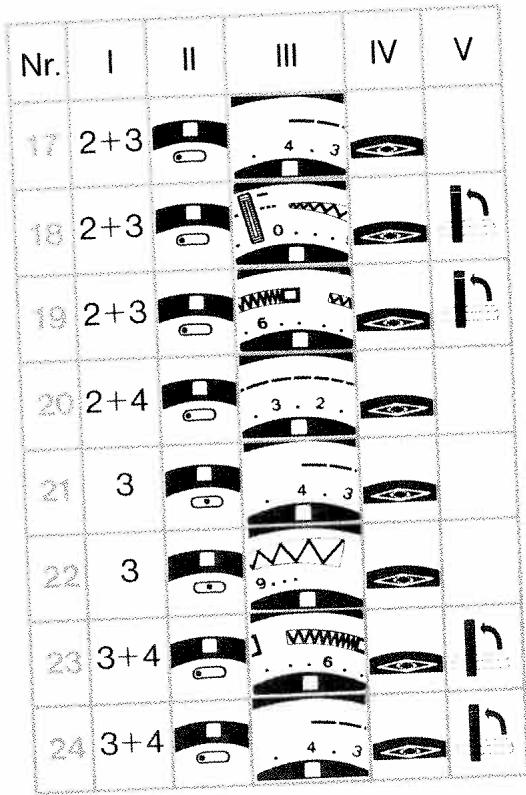
| Nr. | I | II | III | IV | V |
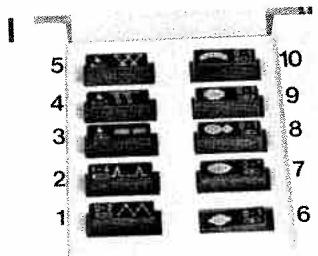
| 1 | | | | | |
| 2 | | | | | |
| 3 | 1 | | | | |
| 4 | 1 | | | | |
| 5 | 1 | | | | |
| 6 | 1+3 | | | | |
| 7 | 1+3 | | | | |
| 8 | 1+3 | | | | |
| Nr. | I | II | III | IV | V |
| 9 | 1+3 +4 | | | | |
| 10 | 1+4 | | | | |
| 11 | 1+4 | | | | |
| 12 | 1+4 | | | | |
| 13 | 1+5 | | | | |
| 14 | 2 | | | | |
| 15 | 2 | | | | |
| 16 | 2 | | | | |
ORNAMENTAL-STITCH COMBINATIONS


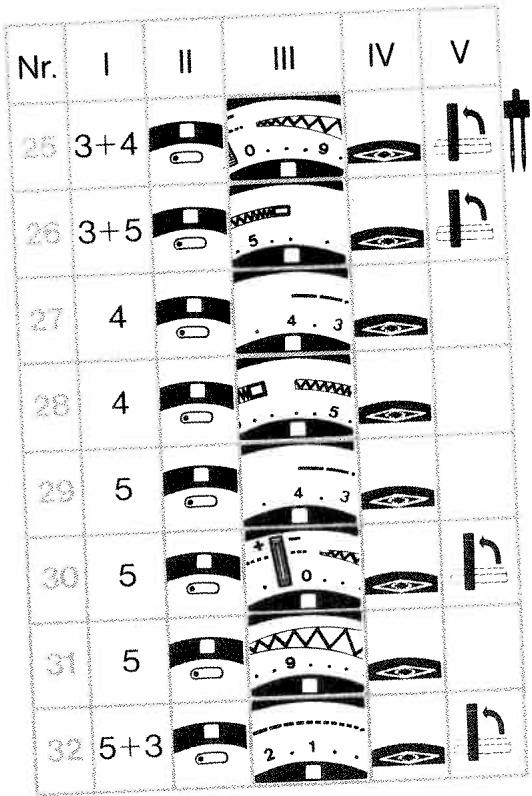
ORNAMENTAL-STITCH COMBINATIONS

| Nr. | I | II | III | IV | V |
| 33 | 6 | | | 12 | |
| 34 | 6 | | | 10 | |
| 35 | 6 | | | 12 | |
| 36 | 6+10 | | | 11 | |
| 37 | 6+7+10 | | | 11 | |
| 38 | 7 | | | 16 | |
| 39 | 7 | | | 14 | |
| 40 | 7 | | | 16 | |
| 41 | 7+3 | | | 13 | |
| 42 | 7+3 | | | 13 | |
| Nr. | I | II | III | IV | V |
| 43 | 7+3 | | | 13 | |
| 44 | 8 | | | 15 | |
| 45 | 8 | | | 13 | |
| 46 | 8 | | | 15 | |
| 47 | 9 | | | 13 | |
| 48 | 9 | | | 10 | |
| 49 | 9 | | | 13 | |
| 50 | 9+10 | | | 12 | |
| 51 | 10 | | | 11 | |
| 52 | 10+3 | | | 12 | |