
ADIXXION GC-XA1 - Action Camera JVC - Free user manual and instructions
Find the device manual for free ADIXXION GC-XA1 JVC in PDF.
User questions about ADIXXION GC-XA1 JVC
0 question about this device. Answer the ones you know or ask your own.
Ask a new question about this device
Download the instructions for your Action Camera in PDF format for free! Find your manual ADIXXION GC-XA1 - JVC and take your electronic device back in hand. On this page are published all the documents necessary for the use of your device. ADIXXION GC-XA1 by JVC.
USER MANUAL ADIXXION GC-XA1 JVC
- Before use, be sure to read "Safety Precautions" (p.2) and "Cautions" (p.3) to use the product correctly.
- Malfunction due to water immersion and other damages caused by misuse by the customer is not covered by warranty.
- Before use, be sure to read the “Detailed User Guide” in the built-in memory with the camera.
- For more details on the operations, refer to the "Detailed User Guide" in the built-in memory.
- Using WiVideo, refer to the "Detailed User Guide" in the built-in memory.
For Future Reference:
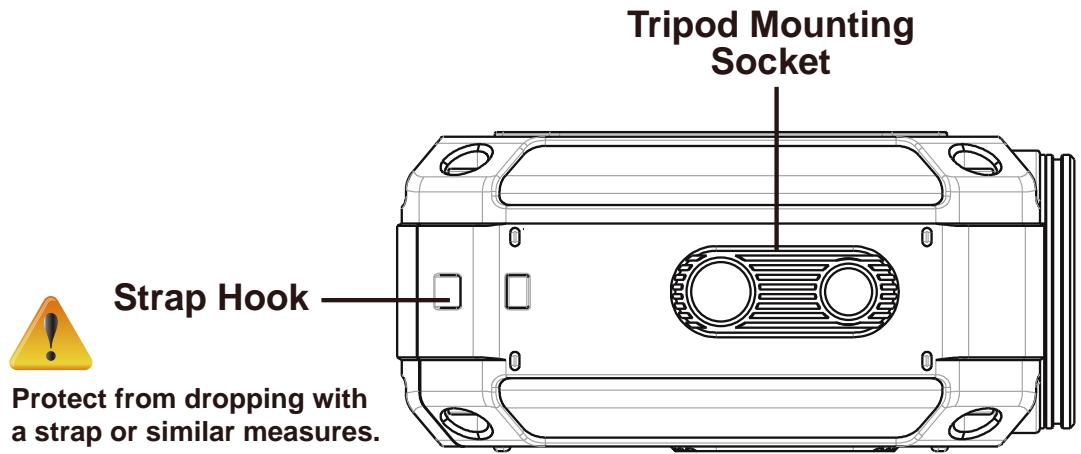
Enter the Model No. (located on the bottom of the camera) and Serial No. (located on the battery pack mount of the camera) below.
Model No.
Serial No.
ENGLISH

HOMI®
HIGH-DEFINITION MULTIMEDIA INTERFACE

Safety Precautions

CAUTION
RISK OF ELECTRIC SHOCK DO NOT OPEN

CAUTION: TO REDUCE THE RISK OF ELECTRIC SHOCK, DO NOT REMOVE COVER (OR BACK). NO USER-SERVICEABLE PARTS INSIDE. REFER SERVICING TO QUALIFIED SERVICE PERSONNEL.

The lightning flash with arrowhead symbol, within an equilateral triangle, is intended to alert the user to the presence of uninsulated "dangerous voltage" within the product's enclosure that may be of sufficient magnitude to constitute a risk of electric shock to persons.

The exclamation point within an equilateral triangle is intended to alert the user to the presence of important operating and maintenance (servicing) instructions in the literature accompanying the appliance.
NOTES:
- The serial number plate is on the battery pack mount of the camara.
CAUTION:
The main plug remains operable.
- Remove the mains plug immediately if the camcorder functions abnormally.
WARNING:
The camcorder should not be exposed to excessive heat such as direct sunshine, fire or the like.
IMPORTANT SAFETY INSTRUCTIONS
- Read these instructions.
- Keep these instructions.
- Heed all warnings.
- Follow all instructions.
- Clean only with dry cloth.
- Do not block any ventilation openings. Install in accordance with the manufacturer's instructions.
- Do not install near any heat sources such as radiators, heat registers, stoves, or other apparatus (including amplifiers) that produce heat.
- Protect the power cord from being walked on or pinched particularly at plugs, convenience receptacles, and the point where they exit from the apparatus.
- Only use attachments/accessories specified by the manufacturer.
- Unplug this apparatus during lightning storms or when unused for long periods of time.
- Refer all servicing to qualified service personnel. Servicing is required when the apparatus has been
damaged in any way, such as power-supply cord or plug is damaged, liquid has been spilled or objects have fallen into the apparatus, the apparatus has been exposed to rain or moisture, does not operate normally, or has been dropped.
If a malfunction occurs, stop using the camcorder immediately and contact www.jvc.com or by phone at 1-800-252-5722
Changes or modifications not approved by JVC could void the user's authority to operate the equipment. This equipment has been tested and found to comply with the limits for a Class B digital device, pursuant to Part 15 of the FCC Rules. These limits are designed to provide reasonable protection against harmful interference in a residential installation. This equipment generates, uses, and can radiate radio frequency energy and, if not installed and used in accordance with the instructions, may cause harmful interference to radio communications. However, there is no guarantee that interference will not occur in a particular installation. If this equipment does cause harmful interference to radio or television reception, which can be determined by turning the equipment off and on, the user is encouraged to try to correct the interference by one or more of the following measures: Reorient or relocate the receiving antenna. Increase the separation between the equipment and receiver. Connect the equipment into an outlet on a circuit different from that to which the receiver is connected. Consult the dealer or an experienced radio/TV technician for help.
Declaration of Conformity
Model Number: GC-XA1
Trade Name: JVC
Responsible party: JVC AMERICAS CORP.
Address: 1700 Valley Road Wayne, N. J. 07470
Telephone Number : 973-317-5000
This device complies with Part 15 of FCC Rules.
Operation is subject to the following two conditions:
(1) This device may not cause harmful interferen and (2) this device must accept any interference received, including interference that may cause undesired operation.
This Class B digital apparatus complies with Canadian
Cautions
— Read Before Use —
Notes on this equipment
- The camera shall not be exposed to excessive heat such as direct sunshine, fire or the like. The battery may explode if it gets heated up.
- The battery is not charged when purchased. Charge the battery before using it for the first time.
- Do not or subject it to excessive shock or vibration.
- Before recording, be sure to conduct a trial recording.
- Store the recorded data periodically on computer. JVC shall not be liable for any damage or loss of data.
- Do not press against the surface of the screen with force or subject it to strong impact. Doing so may damage or break the screens.
- When using the unit in a low temperature environment (-10^(-50^) or below), the operating time may be shortened, or it may not function properly.
Precautions on Using Wi-Fi
Cautions on Wi-Fi Function
Operation is not guaranteed on all devices
- This function is not designed for disaster or crime prevention.
- Communication may not be carried out properly near radio equipment or broadcasting stations. In this case, change the location accordingly.
- Radio wave interference by Bluetooth devices Bluetooth devices make use of the same frequency bandwidth (2.4 GHz) as that of Wi-Fi devices. Using this product near such devices may cause radio wave interference, and result in a drop in communication speed or connection failure. In this case, turn off the power of devices that are not in use.
Security of Wireless LAN
An advantage of wireless LAN is that instead of using a LAN cable, it transmits information using radio waves,
thus enabling LAN connection to be established within the area covered by the radio waves. However, as radio waves penetrate through objects (such as walls) within the range that they cover, security issues, such as interception of transmission or illegal access, may arise if security settings are not configured. Before you connect to the network in a wireless LAN environment, read through the instruction manual for the wireless LAN device in use, and configure the security settings accordingly. Failure to do so may increase the risk of personal information being intercepted, such as user names, passwords, and the content of your mails, or illegal access to the network.
- Due to the design of wireless LAN, note that security may be breached by unusual or unforeseeable means.
- For more details on wireless LAN and network security, please consult the manufacturer of your wireless LAN device
JVC shall not be liable for any security issues, troubles, damages or losses arising from the use of this feature.
Radio Waves Used by this Product
This product makes use of radio waves in the ISM band (2.4 GHz).
Although a radio station license is not required for using this product, please take note of the following.
- Do not use this product near the following places
Industrial, scientific, or medical equipment, such as microwave ovens and pacemakers
- Specified low-power radio stations (radio station license not required)
- Bluetooth devices
Equipment such as the above mentioned devices makes use of the same frequency bandwidth as that of Wi-Fi.
Using this product near the above equipment may cause radio wave interference, and result in communication failure or a drop in communication speed.
- Avoid using this product near a TV or radio set.
TV or radio sets make use of a radio wave frequency bandwidth that is different from that of Wi-Fi, and therefore has no effect on communication by this product or the TV/ radio set.
However, when a TV/radio set is placed close to a Wi-Fi product, electromagnetic waves emitted
by the Wi-Fi product may cause noise to occur in the sound or images of the TV/radio."
- Radio signals are unable to penetrate through reinforced steel, metal, or concrete.
The radio waves used by this product are unable to penetrate through reinforced steel, metal, or concrete materials.
It may difficult for communication to be established if two rooms or floors are separated by these materials.
*Communication may also get weaker when there are human subjects or parts of the body in between the Wi-Fi devices.
- Do not connect to wireless networks that you do not have authorization for.
Once connected, it may be considered as unauthorized access and legal actions can be taken against you.
- Do not use the Wi-Fi function outside the country of purchase.
Depending on the country, there may be restrictions on the use of radio waves and any violations could be punishable by law.
- Exporting/Bringing the Unit Overseas
Permission from the U.S. government may be required when bringing the unit to an export controlled country set by the U.S. government (such as Cuba, Iraq, North Korea, Iran, Rwanda, and Syria. As of November, 2011).
For more information, consult the U.S. Embassy Commercial Service.
Waterproof Function
This camera is equipped with a waterproof function.
This camera can make recordings in marine water and fresh water. We recommend to select [Blue(marine)]/ [Green(marine)] in White Balance for underwater scene. The waterproof is tested in accordance with JVC test standard and it does not assure damage-free or trouble-free operation. (Waterproof function not evaluated by UI
The waterproof cannot be guaranteed if the camera is subject to impact. Water proof Function : JIS(Japanese Industrial Standard) IPX8.
- The cover for the ports must be firmly closed.
- Do not use this product in water deeper than 5 ~m (16 ft).
- Do not use in the following locations: Place with higher water pressure than specified, in hot springs or water of 40^ ( 104^ ) or higher.
- Supplied accessories are not waterproof.
Malfunction due to water immersion (IPX8 5m 30 minutes) and other damages caused by misuse by the customer is not covered by warranty. Before use, be sure to read the "Detailed User Guide" in the built-in memory with the camera.
The product you have purchased is powered by a rechargeable battery that is recyclable. Please call 1-800-8-BATTERY for information on how to recycle this battery. (USA and Canada only)
— Maintenance After Use —
- After use in water or or a dusty environment, rinse the camera as soon as possible with still fresh water in basin.
- Always keep the lens clean and wipe the water droplets off the camera with a soft and dry cloth.
Air-dry the camera completely in a shaded area.
The waterproof of the ports are not guaranteed in all environments or conditions (IPX8 5m 30 minutes).
—CAUTION—
To maintain compliance with FCC's RF exposure guidelines, use only the supplied antenna. Unauthorized antenna, modification, or attachments could damage the transmitter and may violate FCC regulations. This device complies with Part 15 of the FCC Rules. Operation is subject to the following two conditions:
(1) This device may not cause harmful interference.
(2) This device must accept any interference received, including interference that may Cause undesired operation.
ATTENTION: The product you have purchased is powered by a rechargeable battery that is recyclable.
Please call 1-800-8-BATTERY for information on how to recycle this battery. (USA and Canada only)
If this symbol is shown, it is only valid in the European Union.
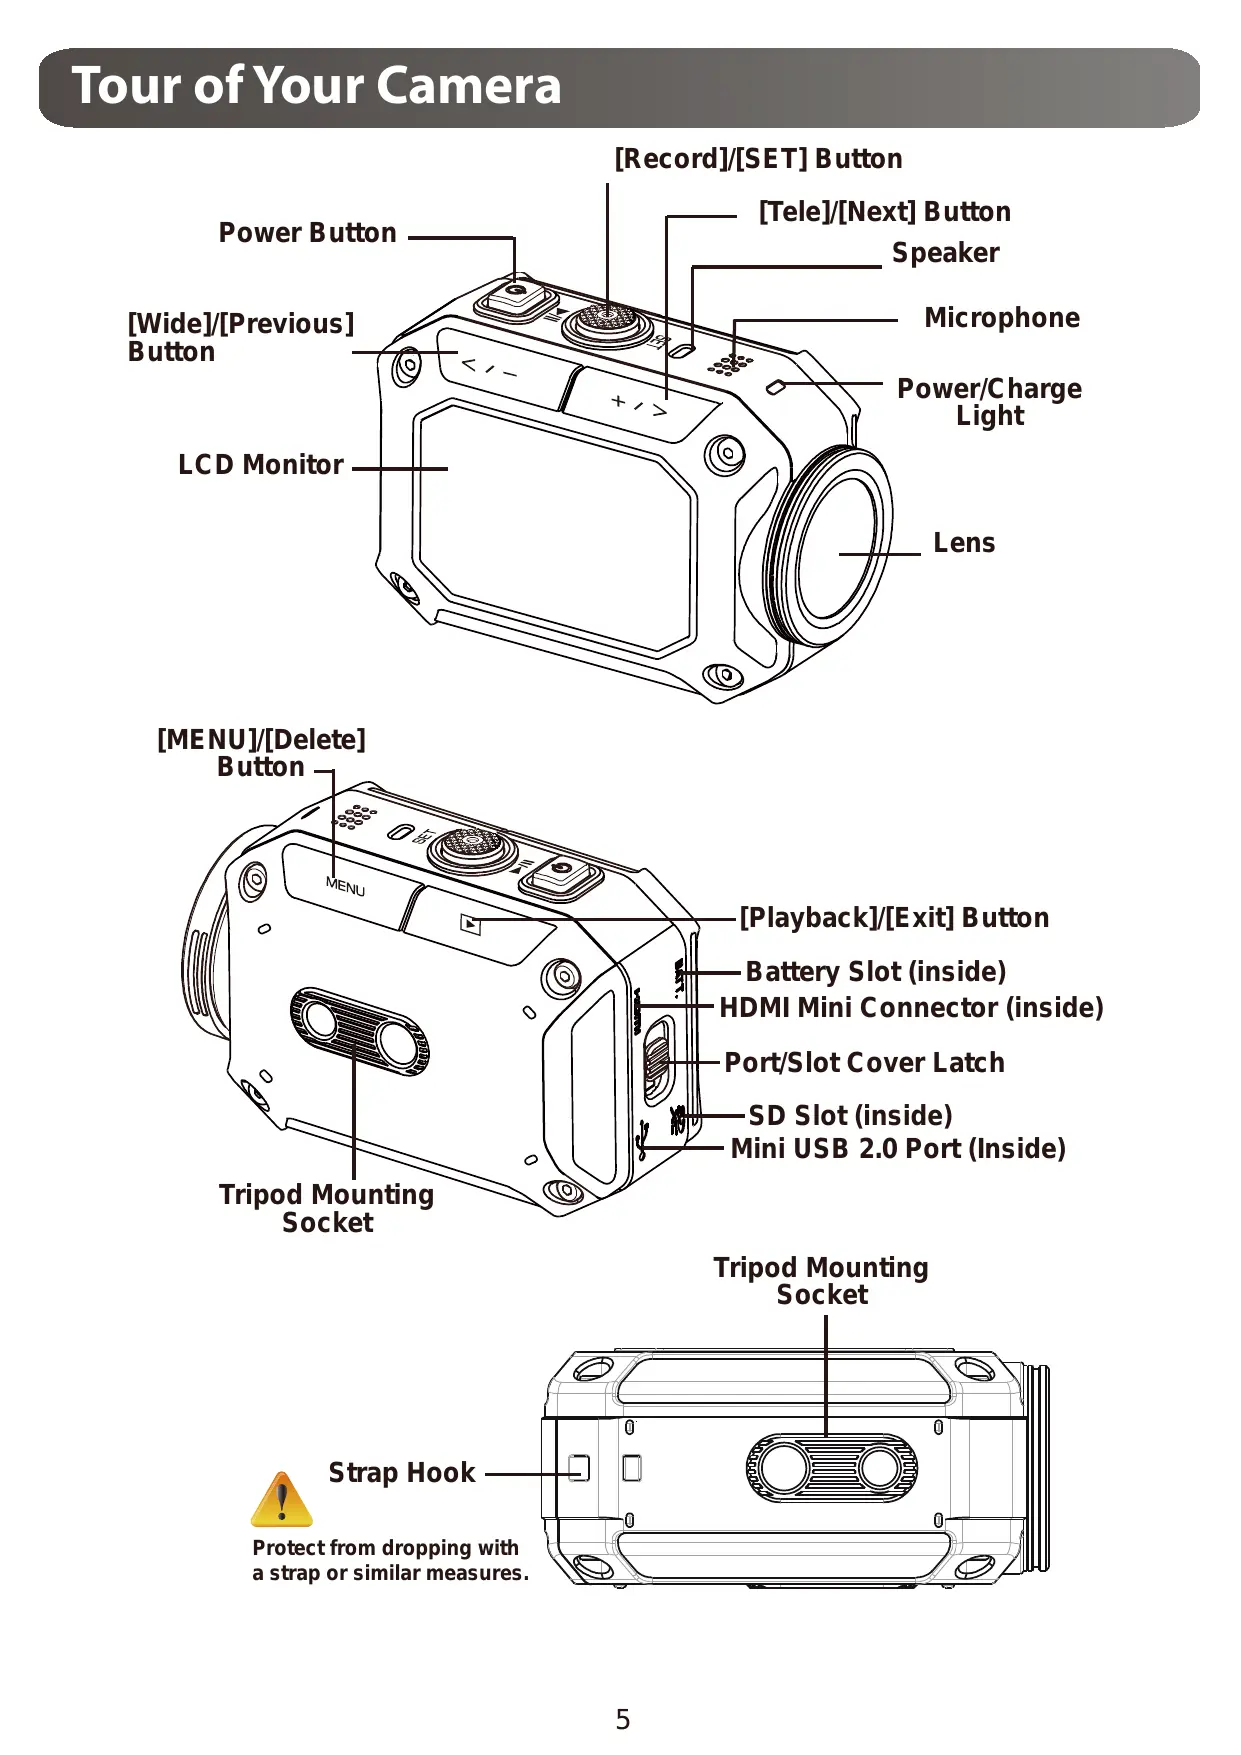
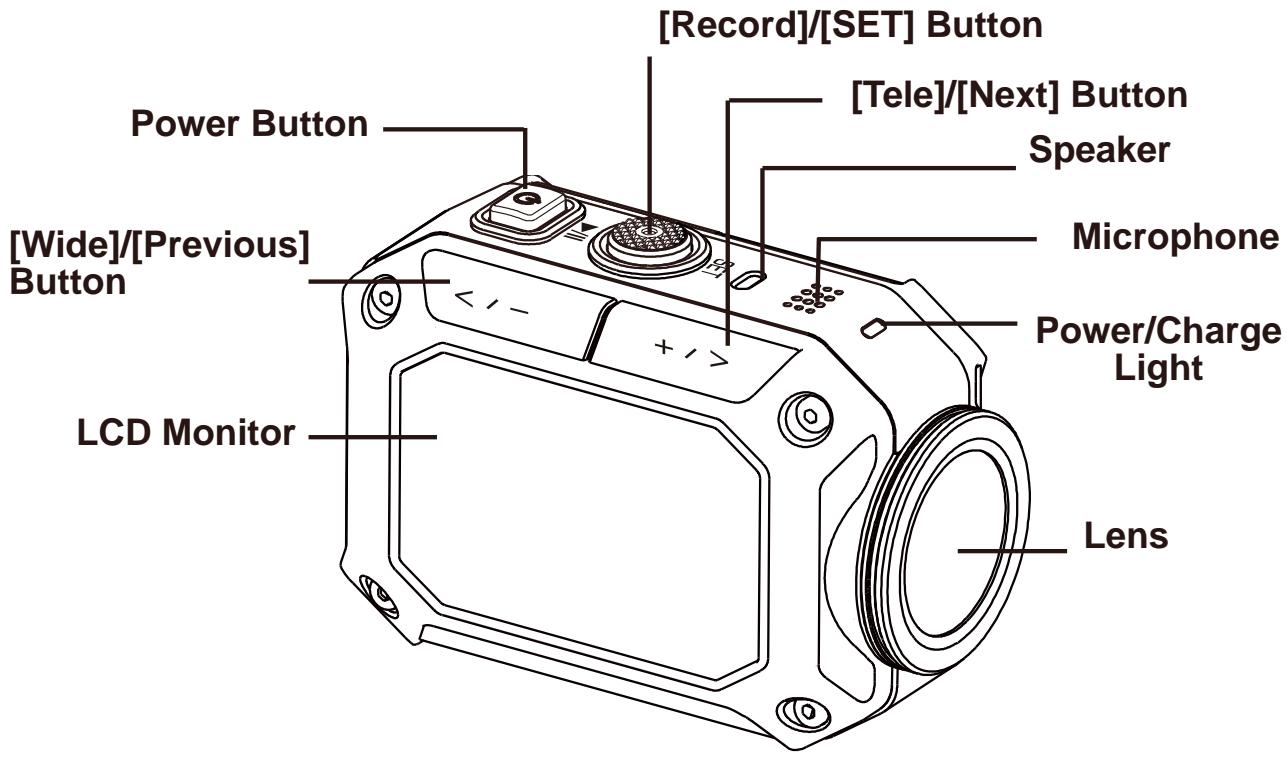
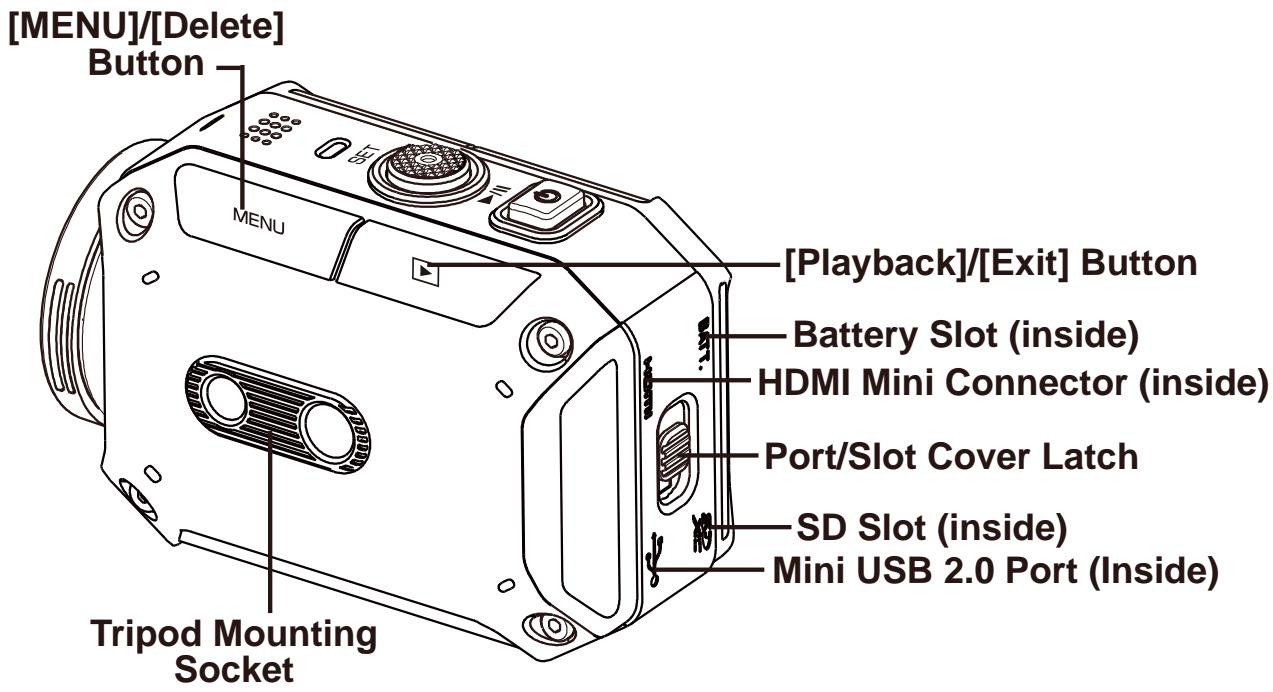
Tour of Your Camera
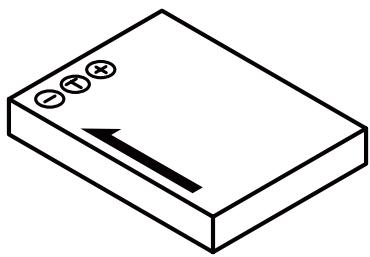
Battery
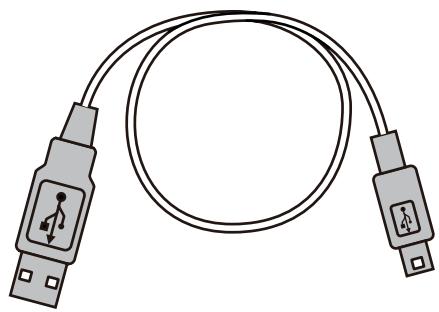
USB cable
Goggle mount
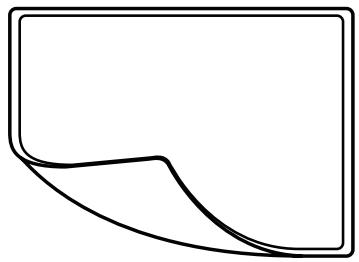
Screen Protect Film
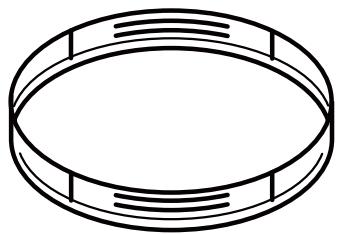
Lens cover
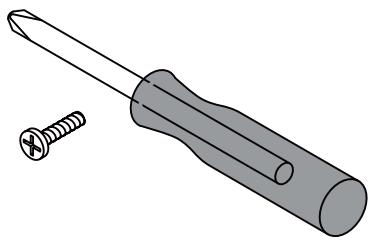
Screw and screwdriver
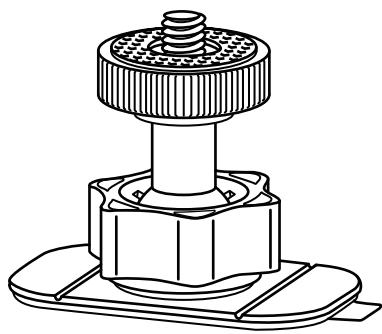
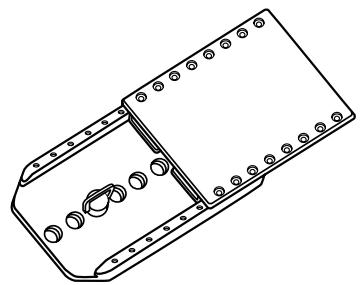
Flexible mount
Spare mount

Notice:
- Remove any dirt or moisture before attaching accessories.
- The flexible mount, once attached, cannot be removed.
Attaching goggle mount
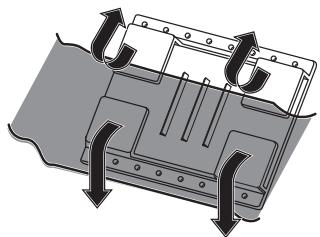
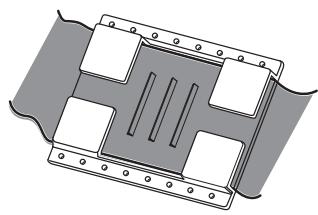
- Lift the tabs on the rubber side and insert the belt.
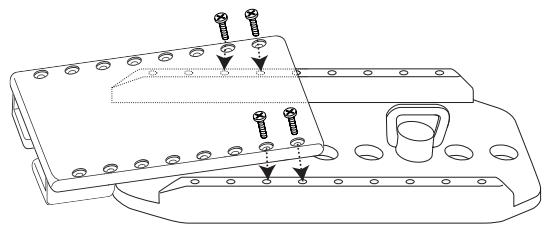
- Secure with four screws.
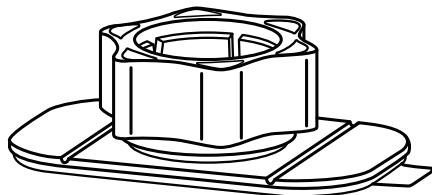
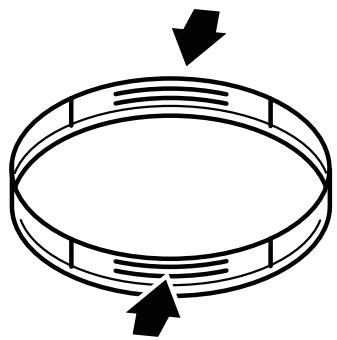
Replacing flexible mount
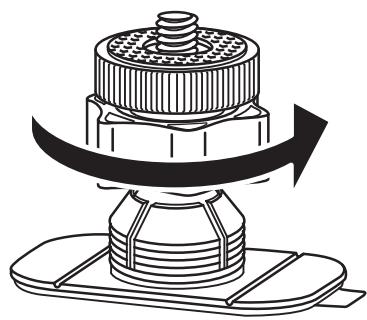
Turn the knob in the direction indicated. (Remove the mount when it is completely loose.)
Removing lens cover
Press in on the protrusions to remove the lens cover from the camera.
Getting Started
(1)
(2)
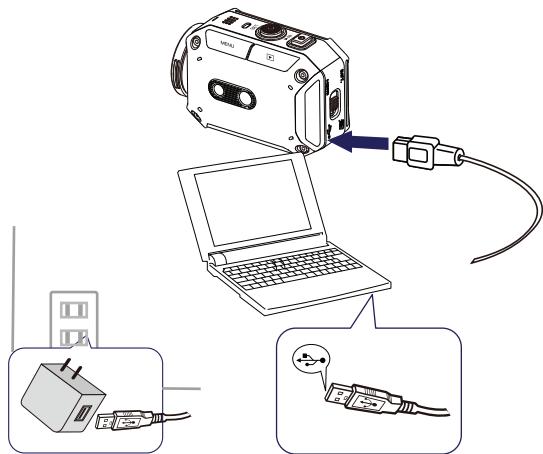
PC USB charging mode
Adapter charging mode (Please use JVC authenticated adapter AC-V10LU)

Using one with an output higher than 5V risks breakdown.
(3)
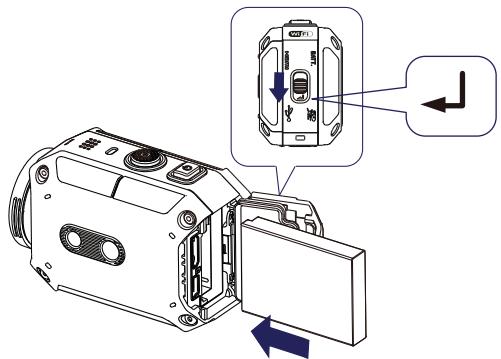
(1) Load the battery
- Slide the latch and open the cover.
- Insert the battery according to the correct polarity marks (+ or -).
- Close the cover firmly for waterproof use.
(2) Charge the Li-ion battery
- A blinking light will indicate active charging.
- In adapter charging mode, the full charging time for a depleted battery is about 5 hours and the light will turn off automatically after the charging is completed.
- In PC USB charging mode, a longer charging time is required.
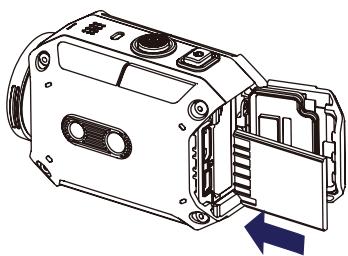
(3) Insert the memory card
- Slide the latch and open the cover.
- Insert the SD card (Optional) into the slot until it locks properly.
- To remove the SD card, press inward to release it and gently pull it out.
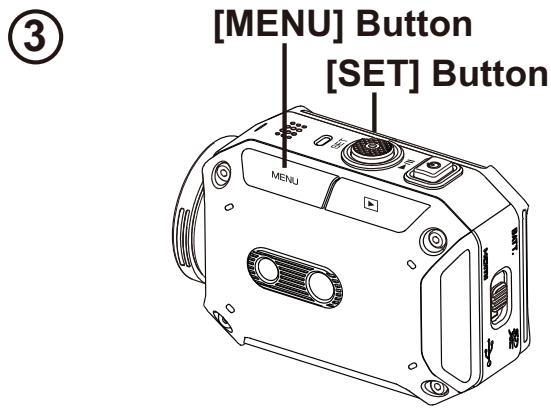
How to set the clock
- Press the MENU button
- Select [Time Setting] and then press < / - / + / > for Year, Month, Day, Hour, and Minute.
- Press [SET ] to go for next.
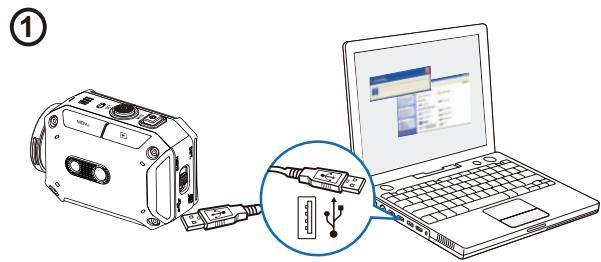
How to view the Detailed User Guide
- Connect the camera to a computer.
- Open [WiVideo ] Drive, then double click [Start.pdf]
Note: Adobe Reader must be installed to read PDF files. Get from Adobe's web site http://adobe.com/.
Supported SD card
SD/ SDHC/ SDXC (up to 64GB, class 4 or above)
- Panasonic
-TOSHIBA
-SanDisk
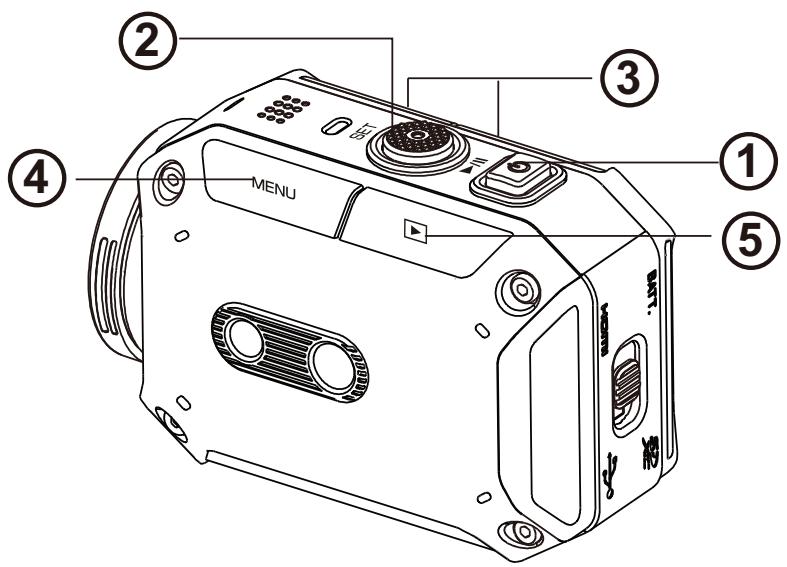
| ①To power on ·Hold it for 2 second. ·After idling for 5 minutes, the camera will turn off automatically. | MENU | ④To access menu ·Press to open the option menu. ·Use / +/- to change between the options. (e.g. VIDEO/PHOTO MODE, WIFI, RESOLUTION, WHITE BALANCE). | |
| SET | ②To record ·In Video Mode, press to take video. In Photo Mode, press to take photo. | ⑤To review videos/ photos ·Press to go to the Playback Mode. You can view or delete the recorded files. | |
| +/- | ③To zoom in or out ·+:Zoom In. -:Zoom out. |
WiVideo is the software to connect the camera with PC.
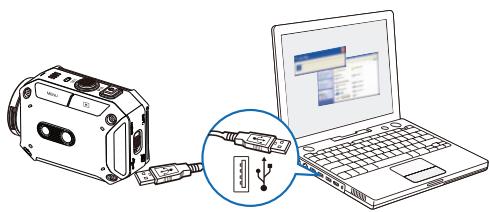
(1) PC: Install WiVideo
- Use camera to install [WiVideo] on PC by plugging USB cable. If there is no Auto-Installation, please go to [My Computer]→[WiVideo] for installation.
(2)
(3)
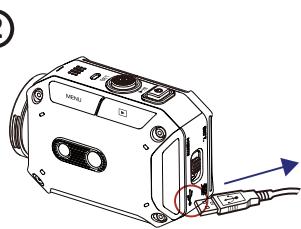
(2) PC: Unplug the USB cable
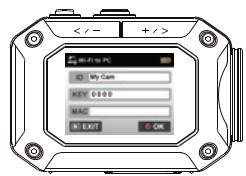
③ Camera: Enable WiFi to PC
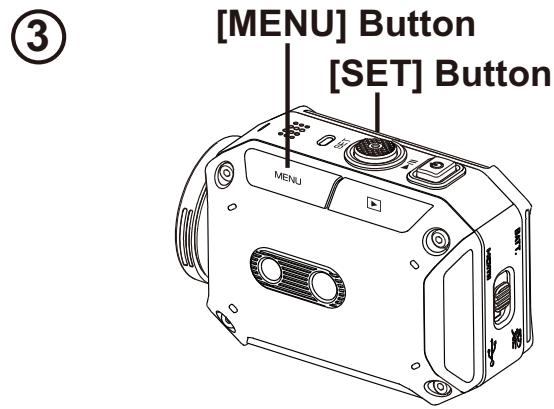
- Press [MENU] Button Select [WiFi ], then press [SET] Button to enter its menu.
- Select [WiFi to PC ] to turn on Wi-Fi. The camera screen will show the Wi-Fi ID and Password.
(The default password is 0000. Wi-Fi ID and password can be edited on WiVideo via USB connection.)
(4)
(5)
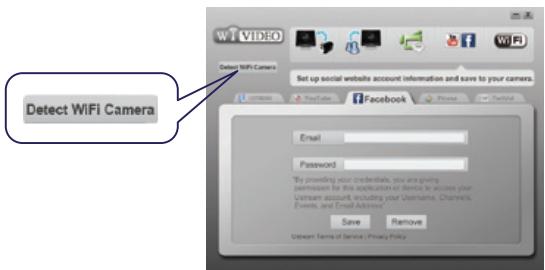
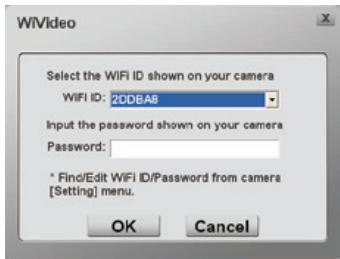
(4) PC: Connect to Camera
- Click [Detect Wi-Fi Camera] to search camera.
- Enter the Wi-Fi ID and Password shown on camera to the WiVideo window.
NOTE: WiVideo is for Windows® based systems only.
| Active Mode | Function |
| TRANSFER WiFi/USB | Manage video and photo files • Transfer files from camera to PC. • Delete files in your camera. |
| LIVE VIDEO WiFi | Watch live video • Watch live streaming from your camera on your PC. • Use this camera as a remote home monitor. |
| VIDEO CHAT WiFi | Wireless webcam for Skype/MSN • Change the video/audio setting of your Skype/MSN. • Select WiVideo Camera, which indicates your camera. (e.g. Skype) Microphone:WiVideo Camera Webcam:WiVideo Camera |
| You YouTube ACCOUNT SETUP USB | Account Setting • Set up your social website account information and save to your camera. |
| WiFi Wi-Fi SETUP USB | WiFi Setup • Configure and synchronize your WiFi profile on your camera. • Name your camera and create your security password. |
NOTE: WiVideo is for Windows® based systems only.
| System | Mode | Page |
| Android | Connect via AP | 11 |
| Connect via Mobile Hotspot | 12 | |
| iPhone/iPad | Connect via AP | 13 |
| Connect via Mobile Hotspot | 14 | |
| Connect Directly to Camera | 15 |
Note: Before proceeding any connection btween Mobile and Camera, please connect to PC via USB cable and set up Wi-Fi profile with WiVideo (Enter SSID and Password).
NOTE: WiVideo is for Windows® based systems only.
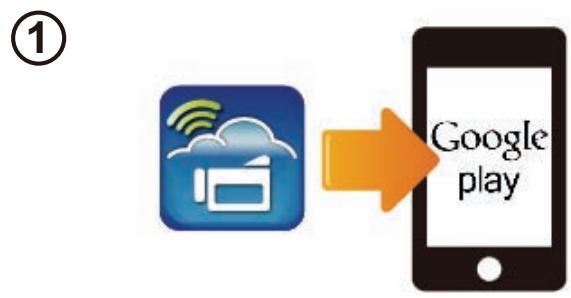

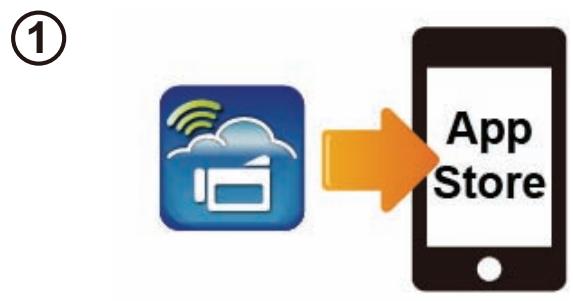
① Mobile: Install WiVideo
- WiVideo is a software to connect wireless between camera and mobile/tablet.
Download WiVideo APP from Google Play onto mobile/tablet.
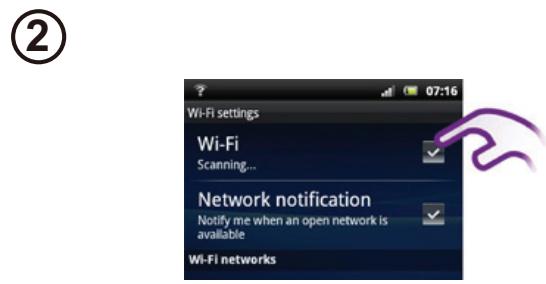
②Mobile: Connect to Access Point
- Go to [Settings] → [Wireless & network] → [Wi-Fi settings] → [Wi-Fi] (Enable WiFi and connect to AP)
(3) Camera: Connect to Same AP
- Press [MENU] select [WiFi ] choose [WiFi to Mobile ] to scan available AP connect camera to the same AP
Note: Refer to CD manual section 7 to set up hotspot password into Camera.
④ Mobile: Launch WiVideo APP
- Press [WiVideo] APP icon → detecting cameras → enter the password (The default is 0000 and it can be edited via WiVideo APP Setup) → start preview and remote control.


① Mobile: Install WiVideo
- WiVideo is a software to connect wireless between camera and mobile/tablet.
Download WiVideo APP from Google Play onto mobile/tablet.
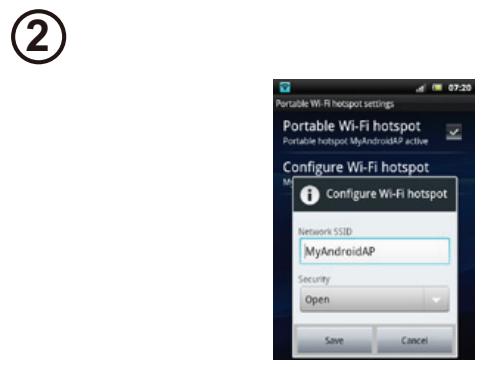
② Mobile: Enable Mobile Hotspot/AP
- Go to [Settings] → [Wireless & network] → Enable mobile hotspot/AP
Note: operation may vary, please refer to each individual model.
(3) Camera: Connect to Hotspot/AP
Press [MENU] select [WiFi ] choose [WiFi to Mobile ] to scan available AP connect camera to mobile hotspot/AP
- Note: Refer to CD manual section 7 to set up hotspot password into Camera.
④ Mobile: Launch WiVideo APP
- Press [WiVideo] APP icon → detecting cameras → enter the password (The default is 0000 and it can be edited via WiVideo APP Setup) → start preview and remote control.
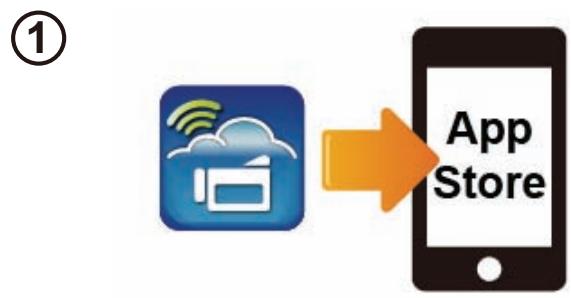
① Mobile: Install WiVideo
- WiVideo is a software to connect wireless between camera and mobile/tablet.
Download WiVideo APP from App Store onto iPhone/ iPad.
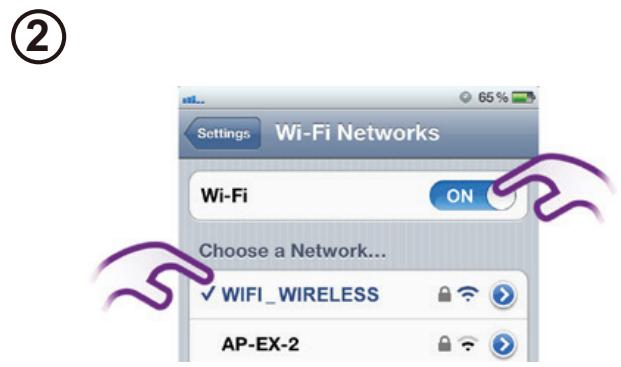
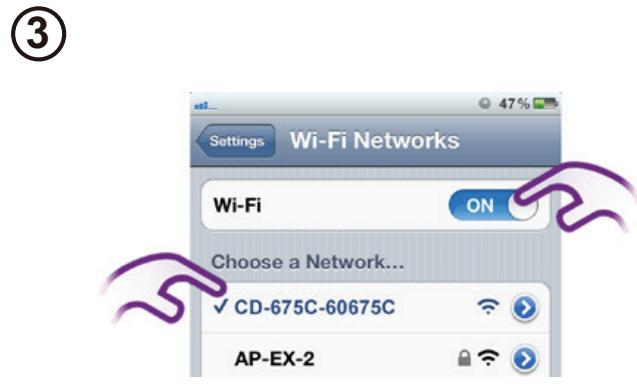
(2)Mobile: Connect to Access Point
- Go to [Settings] → [WiFi ] → Enable WiFi and connect to AP
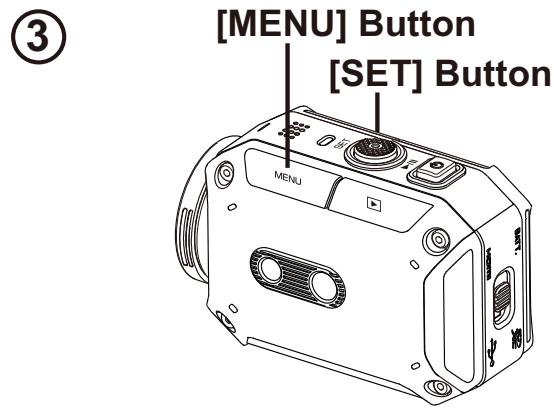
(3) Camera: Connect to Same AP
- Press [MENU] select [WiFi ] choose [WiFi to Mobile ] to scan available AP connect camera to the same AP
- Note: Refer to CD manual section 7 to set up AP password into Camera.
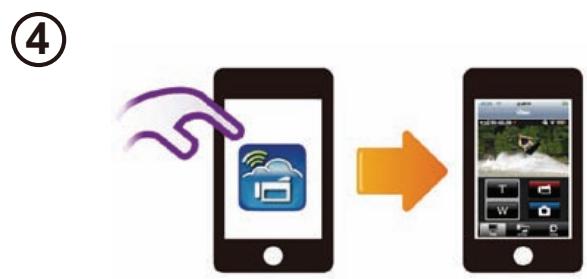
④ Mobile: Launch WiVideo APP
- Press [WiVideo] APP icon → detecting cameras → enter the password (The default is 0000 and it can be edited via WiVideo APP Setup) → start preview and remote control.


① Mobile: Install ViVideo
- WiVideo is a software to connect wireless between camera and mobile/tablet.
Download WiVideo APP from App Store onto iPhone/iPad.
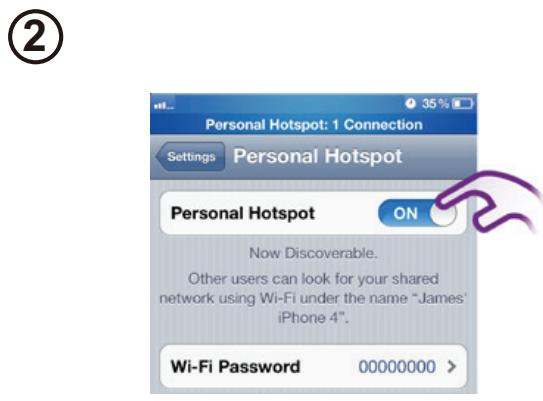
②Mobile: Enable Personal Hotspot
- Go to [Settings] → [WiFi ] → Enable [Personal Hotspot]
(3) Camera: Connect to Hotspot
- Press [MENU] select [WiFi ] choose [WiFi to Mobile ] to scan available AP connect camera to mobile hotspot/AP
Note: Refer to CD manual section 7 to set up hotspot password into Camera.
④ Mobile: Launch WiVideo APP
- Press [WiVideo] APP icon → detecting cameras → enter the password (The default is 0000 and it can be edited via WiVideo APP Setup) → start preview and remote control.


① Mobile: Install WiVideo
- WiVideo is a software to connect wireless between camera and mobile/tablet.
Download WiVideo APP from App Store onto your iPhone/ iPad.
(2) Camera: Enable Direct Mode
- Press [MENU] → select [WiFi ] → choose [WiFi to Mobile ] → select [Direct Mode]→camera ID shown on the screen
③ Mobile: Connect to Camera
- Go to [Settings] → [WiFi ] → Select camera ID to connect
④ Mobile: Remote Control Camera
- Press [WiVideo] APP icon → detecting cameras → enter the password (The default is 0000 and it can be edited via WiVideo APP Setup) → start preview and remote control.
Trouble Shooting
| Problem/Situation | Remediation/Solution |
| Cannot turn on the camera/ The power turns off suddenly. | Battery pack is weak or depleted. Recharge the battery pack. |
| Camera cannot be turned on after plugging power adapter. | Please make sure that you use the JVC original power adapter and connect it to the power outlet correctly. |
| Wi-Fi icon does not appear after activating Wi-Fi. | Battery is low. Recharge the battery pack. |
| The camera is frozen. | Please remove the battery/unplug the adapter. Then, insert the battery/plug the adapter and turn on the camera again. |
| When the camera is connected to the PC via USB cable, many Autoplay windows may pop out. They indicate the disks of the camera. | “DV” indicates the internal memory of the camera. “Removable Disk” indicates the external memory (memory card installed in the camera). “WiVideo” indicates the bundled program. Please double-click it to start installation automatically. |
| The LCD shows “Connection Failed”. | The password configuration does not match to the AP device you want to connect. |
| The camera is not in the wireless network service area or weak network signal. Please make sure the Access Point is able to access the Internet. | |
| The camera does not support the type of encryption used on the AP device. | |
| The social websites update their websites without notice. Please visit the website to update your account setting or upgrade your camera firmware. | |
| Wi-Fi connections break off. | The camera disables any Wi-Fi connection three minutes after shooting starts. Use the menu to re-enable it. Reconnect in a clear radio environment. Remember that the communication speed drops, interfering with connection, if the receiver is too far away, there is something in between blocking communications, or there is a microwave or wireless equipment in use nearby. |
| Connecting a USB cable stops photography. Photography is not possible with a USB cable connected. | Only time lapse and endless recording are available with a USB cable connected. (Endless recording is limited to 720p 30 fps.) |
| There is no HDMI output. | HDMI output is disabled during photography. |
| The thermometer icon appears. | Turn off the camera and allow it time to cool down. |