
NOTEBOOK Q7M ENTERTAINMENT XD - Laptop YAKUMO - Free user manual and instructions
Find the device manual for free NOTEBOOK Q7M ENTERTAINMENT XD YAKUMO in PDF.
| Product Type | Laptop |
| Brand | YAKUMO |
| Model | NOTEBOOK Q7M ENTERTAINMENT XD |
| Dimensions (L x W x H) | 393 x 275 x 37.5 mm |
| Weight | Approximately 2.8 kg |
| Screen Type | 15.6-inch LCD |
| Processor | Intel Pentium 4 or Celeron |
| RAM (Memory) | 512 MB DDR |
| Hard Drive | 40 GB ATA |
| Operating System | Windows XP Home Edition |
| Power Supply | AC Adapter 19 V – 3.42 A |
| Battery | Lithium-ion 6-cell, 4400 mAh |
| Connectivity | USB 2.0, VGA, Ethernet 10/100, audio jack |
| Optical Drive | DVD±RW / CD-RW Combo |
| Key Features | Office work, Internet browsing, multimedia playback |
| Maintenance and Cleaning | Clean the screen with a dry microfiber cloth; dust the ventilation grilles |
| Safety | Do not expose to moisture; use only the supplied adapter |
| Spare Parts and Repairability | Battery, adapter, hard drive, memory: user-replaceable |
| General Information | Full manual on included CD-ROM; user manual in French available |
Frequently Asked Questions - NOTEBOOK Q7M ENTERTAINMENT XD YAKUMO
User questions about NOTEBOOK Q7M ENTERTAINMENT XD YAKUMO
0 question about this device. Answer the ones you know or ask your own.
Ask a new question about this device
Download the instructions for your Laptop in PDF format for free! Find your manual NOTEBOOK Q7M ENTERTAINMENT XD - YAKUMO and take your electronic device back in hand. On this page are published all the documents necessary for the use of your device. NOTEBOOK Q7M ENTERTAINMENT XD by YAKUMO.
USER MANUAL NOTEBOOK Q7M ENTERTAINMENT XD YAKUMO
Introduction (English)
This Concise User's Guide introduces the main features of your computer. The English version of this guide begins on page 1. The expanded User's Manual is on the Device Drivers & Utilities + User's Manual CD-ROM.
Instructions for Care and Operation 3
Quick Start Guide 8
Not Included 9
System Map: Top View with LCD Panel Open 10
System Map: Front View 13
System Map: Left View 14
System Map: Right & Rear Views 15
System Map: Bottom View 16
Optional Modules 17
Video Features 19
Power Management Features 22
Driver Installation 23
Troubleshooting 30
Hyper-Threading 32
Specifications 33
Inhalt
Hinweis 37
The company reserves the right to revise this publication or to change its contents without notice. Information contained herein is for reference only and does not constitute a commitment on the part of the manufacturer or any subsequent vendor. They assume no responsibility or liability for any errors or inaccuracies that may appear in this publication nor are they in anyway responsible for any loss or damage resulting from the use (or misuse) of this publication.
This publication and any accompanying software may not, in whole or in part, be reproduced, translated, transmitted or reduced to any machine readable form without prior consent from the vendor, manufacturer or creators of this publication, except for copies kept by the user for backup purposes.
Brand and product names mentioned in this publication may or may not be copyrights and/or registered trademarks of their respective companies. They are mentioned for identification purposes only and are not intended as an endorsement of that product or its manufacturer.
©June 2003
Trademarks
This product incorporates copyright protection technology that is protected by method claims of certain U.S. patents and other intellectual property rights owned by Macrovision Corporation and other rights owners. Use of this copyright protection technology must be authorized by Macrovision Corporation, and is intended for home or other limited viewing uses only unless otherwise authorized by Macrovision Corporation. Reverse engineering or disassembly is prohibited.
Intel and Pentium are registered trademarks of Intel Corporation.
About this Concise User Guide
This quick guide is a brief introduction to getting your system started. This is a supplement, and not a substitute for the expanded User's Manual supplied with your computer. The Device Drivers & Utilities + User's Manual CD-ROM contains the drivers and utilities necessary for the proper operation of the notebook, and also contains the User's Manual in Adobe Acrobat format.
Some or all of the computer's features may already have been setup. If they aren't, or you are planning to re-configure (or re-install) portions of the system, refer to the expanded User's Manual. The Device Drivers & Utilities + User's Manual CD-ROM does not contain an operating system.
Regulatory Information
Regulatory notices and information are contained in the expanded User's Manual on the Device Drivers & Utilities + User's Manual CD-ROM.
Instructions for Care and Operation
The notebook computer is quite rugged, but it can be damaged. To prevent this, follow these suggestions:
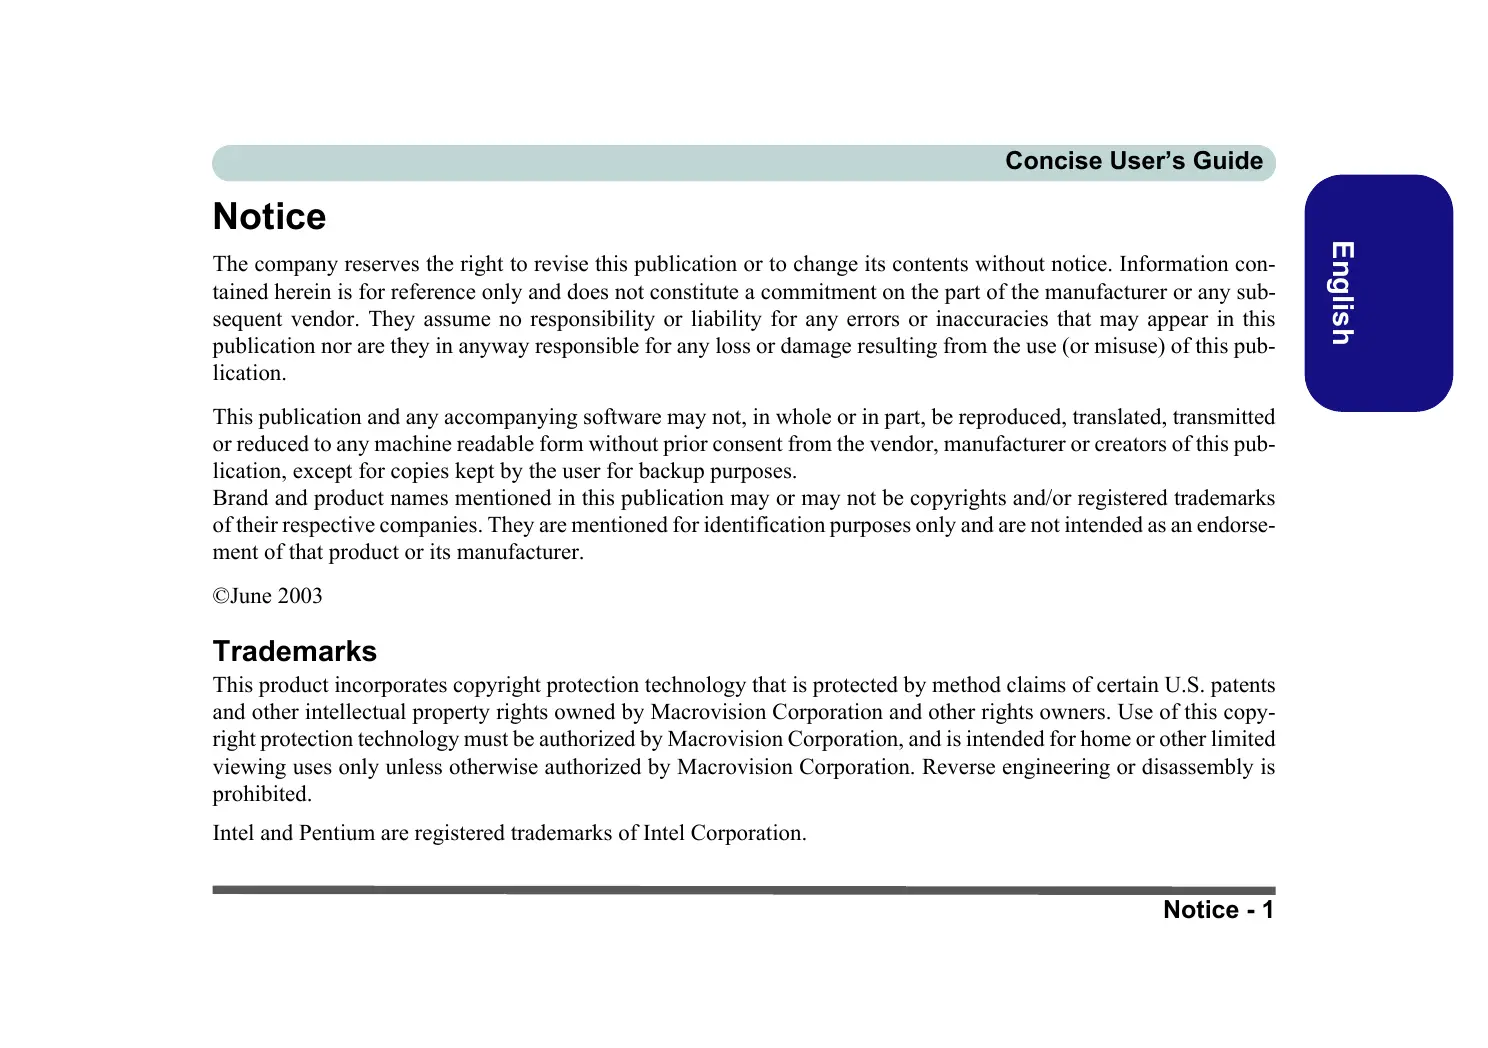
- Don't drop it, or expose it to shock. If the computer falls, the case and the components could be damaged.
Do not expose the computer to any shock or vibration.
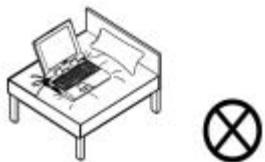
Do not place it on an unstable surface.
Do not place anything heavy on the computer.
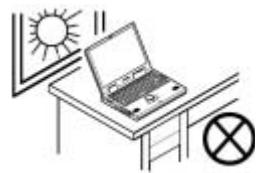
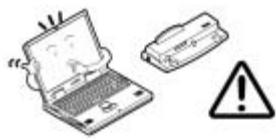
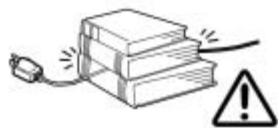
- Keep it dry, and don't overheat it. Keep the computer and power supply away from any kind of heating element. This is an electrical appliance. If water or any other liquid gets into it, the computer could be badly damaged.
Do not expose it to excessive heat or direct sunlight.
Do not leave it in a place where foreign matter or moisture may affect the system.
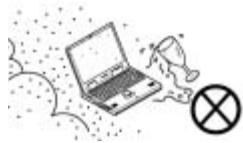
Don't use or store the computer in a humid environment.
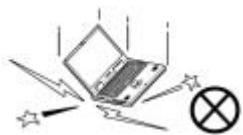
Do not place the computer on any surface which will block the vents.
Concise User's Guide
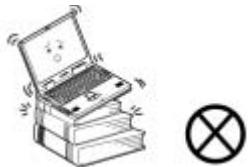
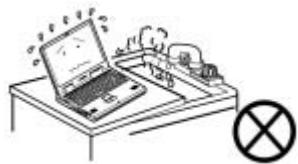
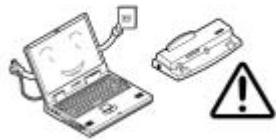
- Avoid interference. Keep the computer away from high capacity transformers, electric motors, and other strong magnetic fields. These can hinder proper performance and damage your data.
- Follow the proper working procedures for the computer. Shut the computer down properly and don't forget to save your work. Remember to periodically save your data as data may be lost if the battery is depleted.
Do not turn off the power until you properly shut down all programs.
Do not turn off any peripheral devices when the computer is on.
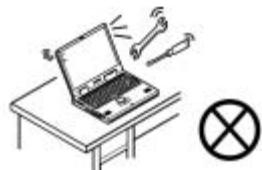
Do not disassemble the computer by yourself.
Perform routine maintenance on your computer.
- Take care when using peripheral devices.
Use only approved brands of peripherals.
Unplug the power cord before attaching peripheral devices.
Power Safety
The computer has specific power requirements:
- Only use a power adapter approved for use with this computer.
- Your AC adapter may be designed for international travel but it still requires a steady, uninterrupted power supply. If you are unsure of your local power specifications, consult your service representative or local power company.
- The power adapter may have either a 2-prong or a 3-prong grounded plug. The third prong is an important safety feature; do not defeat its purpose. If you do not have access to a compatible outlet, have a qualified electrician install one.
- When you want to unplug the power cord, be sure to disconnect it by the plug head, not by its wire.
- Make sure the socket and any extension cord(s) you use can support the total current load of all the connected devices.
- Before cleaning the computer, make sure it is disconnected from any external power supplies.
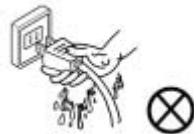
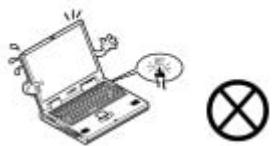
Do not plug in the power cord if you are wet.
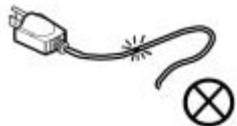
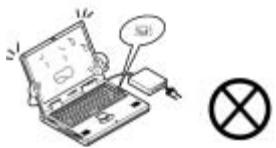
Do not use the power cord if it is broken.
Do not place heavy objects on the power cord.

Power Safety Warning
Before you undertake any upgrade procedures, make sure that you have turned off the power, and disconnected all peripherals and cables (including telephone lines). It is advisable to also remove your battery in order to prevent accidentally turning the machine on.
Battery Precautions
- Only use batteries designed for this computer. The wrong battery type may explode, leak or damage the computer.
- Recharge the batteries using the notebook's system. Incorrect recharging may make the battery explode.
- Do not try to repair a battery pack. Refer any battery pack repair or replacement to your service representative or qualified service personnel.
- Keep children away from, and promptly dispose of a damaged battery. Always dispose of batteries carefully. Batteries may explode or leak if exposed to fire, or improperly handled or discarded.
- Keep the battery away from metal appliances.
- Affix tape to the battery contacts before disposing of the battery.
- Do not touch the battery contacts with your hands or metal objects.

Battery Disposal
The product that you have purchased contains a rechargeable battery. The battery is recyclable. At the end of its useful life, under various state and local laws, it may be illegal to dispose of this battery into the municipal waste stream. Check with your local solid waste officials for details in your area for recycling options or proper disposal.
Caution
Danger of explosion if battery is incorrectly replaced. Replace only with the same or equivalent type recommended by the manufacturer. Discard used battery according to the manufacturer's instructions.
Cleaning
- Do not apply cleaner directly to the computer, use a soft clean cloth.
- Do not use volatile (petroleum distillates) or abrasive cleaners on any part of the computer.
Servicing
Do not attempt to service the computer yourself. Doing so may violate your warranty and expose you and the computer to electric shock. Refer all servicing to authorized service personnel. Unplug the computer from the power supply. Refer servicing to qualified service personnel under any of the following conditions:
- When the power cord is damaged or frayed.
If the computer has been exposed to rain or other liquids. - If the computer does not work normally when you follow the operating instructions.
If the computer has been dropped or damaged (do not touch the poisonous liquid if the LCD panel breaks).
If there is an unusual odor, heat or smoke coming from your computer.
Concise User's Guide
Quick Start Guide
This guide assumes that you are already familiar with computers and can tell at a glance what and where all the key components are. If you are not that comfortable with this type of device, then please refer to the following pages, which give an overview of the system. You can review these steps, before taking any action.
- Remove all packing materials, CDs/DVDs, floppy disks, and any PC Cards.
- Securely attach any peripherals you want to use with the notebook (e.g. keyboard and mouse) to their ports.
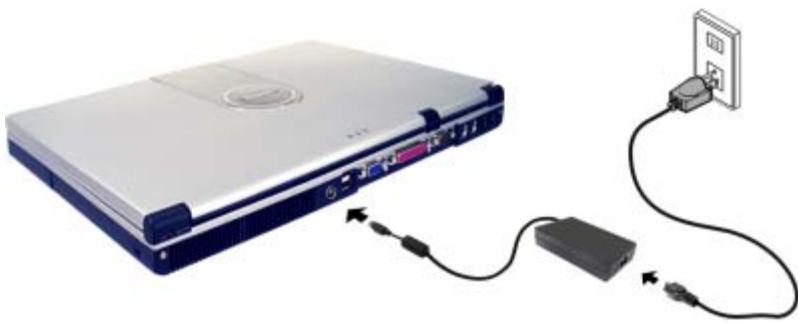
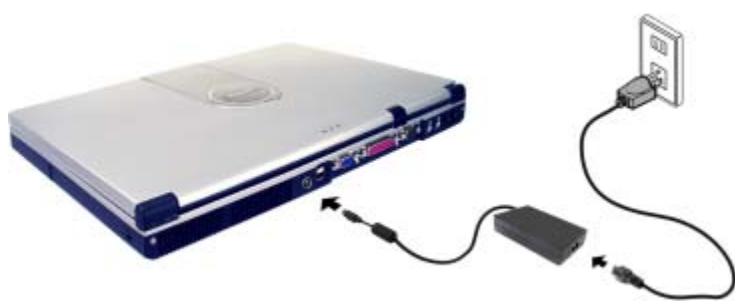
- Attach the AC adapter to the DC-In jack at the rear of the computer (see "Rear View" on page 15), then plug the AC power cord into an outlet, and connect the AC power cord to the AC adapter.
- Raise the lid/LCD to a comfortable viewing angle.
- Press the power button to turn "on".

Peripheral Devices
Please note that peripherals (printers, digital cameras, etc.) which attach to your computer by either USB or Mini-IEEE 1394 ports may be connected after Windows is up and running. All other peripherals must be connected before you turn on the system.
Not Included
Operating Systems (e.g. Windows XP) have their own manuals as do applications (e.g. word processing, spreadsheet and database programs). If you have questions about the operating systems or programs then please consult the appropriate manuals.
System Software
Your computer may already come with system software pre-installed. Where this is not the case, or where you are reconfiguring your computer for a different system, you will find this manual refers to the Microsoft Windows XP operating system. Further information on installing the drivers and utilities is available in Chapters 4 & 7 of the expanded User's Manual on the Device Drivers & Utilities + User's Manual CD-ROM.
System Map: Top View with LCD Panel Open
The following pages are a general map of the system's features. Detailed descriptions of the functions, setup and system controls are covered in the expanded User's Manual.
- Optional PC Camera
- LCD Panel
- Built-In Microphone
- LED Power & Communication Indicators
- LED Status Indicators
- Hot-Key Buttons
- Close Cover Switch
- Power Button
- Keyboard
- TouchPad and Buttons
- Built-In Speakers
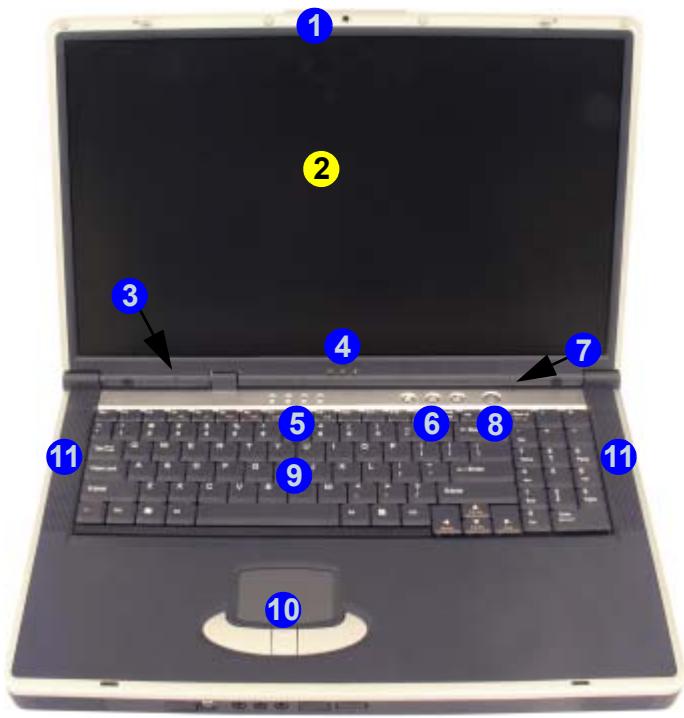
Figure 1 Top View with LCD Panel Open
LED Power & Communication Indicators
| Icon | Color | Description |
| D:/U | Green | The computer is on. |
| Blinking Green | The computer is in Standby mode. | |
| ○ | Orange | The battery is being charged. |
| Green | The battery is fully charged. | |
| Blinking Orange | The battery has reached critically low power status. | |
| Blinking Half Orange/ Half Green | The battery has a serious problem. | |
| ○ | Blinking Green | New mail has arrived. |
| Fast Blinking Green | New mail has arrived from users defined in the Special Group in Auto Mail Checker. | |
| Green | The (optional) Wireless LAN module is On. | |
| Orange | The (optional) Bluetooth module is On. | |
| Half Orange/Half Green | Both the (optional) Wireless LAN and Bluetooth modules are On. |
LED Status Indicators
| Icon | Color | Description |
| Green | The floppy/hard disk/CD device is in use. | |
| Green | The numeric keypad is enabled. | |
| Green | Caps Lock is activated. | |
| Green | Scroll Lock is activated. (to activate press Fn & Scr Lk) |
Function Keys & Numeric Keypad
Function Keys
On the bottom-left of the keyboard is the Fn key or Function key. The Fn key allows you to change operational features instantly. To use the functions press and hold the Fn key, then press the appropriate function key (F3 - F9 etc.) located on your keyboard.
Numeric Keypad
The keyboard includes a numerical keypad (on the right side of the keyboard) for easy numeric data input. Activate the Number Lock feature by pressing the Num Lk key at the top right of the keyboard.
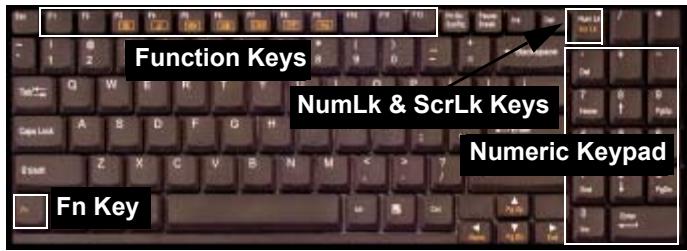
Figure 2 - Function Keys & Numeric Keypad
| Keys | Description |
| Fn | Function Key |
| Fn + F3 | Mute Toggle |
| Fn + F4 | Sleep/Resume Toggle |
| Fn + F5 | Decrease Audio Volume |
| Fn + F6 | Increase Audio Volume |
| Fn + F7 | Display Toggle |
| Fn + F8 | Decrease LCD Brightness |
| Fn + F9 | Increase LCD Brightness |
| Fn + F12 | Multiple Wireless Modules Toggle |
| Fn + Scr Lk | Scroll Lock Toggle |
Hot-Key Buttons
| Hot-Key | Function |
| \(\mathbf{\Theta}\) | Activate the default e-mail program. |
| \(\mathbf{\Psi}\) | Activate the default Internet browser. |
| \(\mathbf{\Lambda}\) | Activate the user specified application e.g. Microsoft Word or Excel. |
System Map: Front View


Wireless Device Operation Aboard Aircraft
The use of any portable electronic transmission devices aboard aircraft is usually prohibited. Make sure the modules are OFF if you are using the computer aboard aircraft.
Communication Conflict
Do not try to use the 802.11b Wireless LAN module and the Bluetooth module at the same time, as this may cause a communication conflict.

Infrared Communication
The Infrared transceiver operates on a "Line of Sight". Make sure nothing is blocking the "Line of Sight" between your system's transceiver and the destination's transceiver.
IEEE 1394
The Mini-IEEE 1394 port only supports SELF POWERED IEEE 1394 devices.
Figure 3
Front View
- LCD Latches
- Consumer Infrared Transceiver (functions with the optional TV Tuner)
- Mini-IEEE 1394 Port
- S/PDIF Out Port
- Microphone-In Jack
- Headphone-Out Jack
- Infrared Transceiver
- Wireless Module ON/OFF Switch
- Built-In Speakers
System Map: Left View
Figure 4 Left View
- CD Device Bay
- Emergency Eject Hole
- USB 2.0/1.1 Port
- Floppy Disk Drive
- PC Card Slot
- PC Card Slot Eject Button

Media Warning
Don't try to remove a floppy disk/CD while the system is accessing it. This may cause the system to "crash".


CD Emergency Eject
If you need to manually eject a CD/DVD (e.g. due to an unexpected power interruption) you may push the end of a straightened paper clip into the emergency eject hole. Do not use a sharpened pencil or similar object that may break and become lodged in the hole.
DVD Regional Codes
DVD region detection is device dependent, not OS-dependent. You can select your module's region code 5 times. The fifth selection is permanent. This cannot be altered even if you change your operating system or you use the module in another computer.
System Map: Right & Rear Views

Figure 5 Right View
- Security Lock Slot

Figure 6 Rear View

Overheating
To prevent your computer from overheating make sure nothing blocks the vent/fan outlet while the computer is in use.
- Vent
- DC-In Jack
- 2^* USB 2.0/1.1 Ports
- External Monitor (CRT) Port
- Parallel Port
- Serial Port
- S-Video-Out Port
- PS/2 Type Port
- RJ-11 Phone Jack
- RJ-45 LAN Jack
System Map: Bottom View
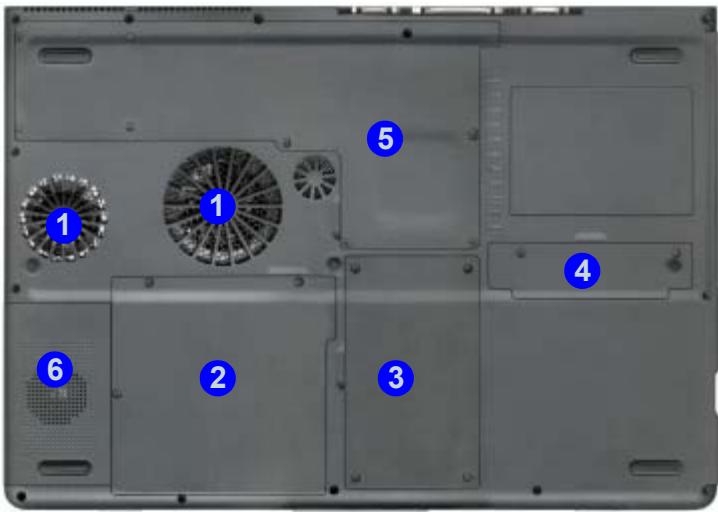
Figure 7 Bottom View
- Vent/Fan Outlets
- Battery Cover
- Hard Disk Cover
- Bluetooth Module Cover
- CPU & Memory Socket Cover
- Optional Module Cover (Sub Woofer or TV Tuner or 6-in-1 Flash Card Reader)
Note: The RAM and optional Wireless LAN module are located under the CPU Cover.

CPU
The CPU is not a user serviceable part. Opening this compartment, or accessing the CPU in any way, may violate your warranty.

Drive Warning
Don't try to remove the hard disk (HDD) while the system is on. This could cause data loss or damage. Unauthorized removal or tampering with the HDD may violate your warranty. If you are in doubt, consult your service representative.
Optional Modules
You may have one or more of the following optional modules included in your purchase.
- Wireless LAN (network) module
- Bluetooth module
- PC Camera module
- Sub woofer module
- TV Tuner module
- 6-in-1 Flash Card reader module
(Note: The Bluetooth module is not offered as an option if a subwoofer, or TV tuner, or card reader is included.)
Wireless LAN (Network) Module
The mini PCI 802.11b Wireless LAN module's antenna and other components are not externally visible (please check with your service representative). If your configuration includes the Wireless LAN module, make sure to install the driver (see page 28).
Bluetooth Module
The Bluetooth module's antenna and other components are not externally visible (please check with your service representative). If your configuration includes the Bluetooth module, make sure to install the software (see page 28).
PC Camera
The PC Camera will allow you to capture video files to .avi format. Make sure you install the driver and software (see page 26) then run the software by selecting the AMCAP program.
Concise User's Guide
Sub Woofer Module
The sub woofer module enhances the audio output with a deep precise bass sound.
6-in-1 Flash Card Reader Module
The card reader allows you to use the most popular digital storage cards. The formats which can be read include:
MMC (MultiMedia Card)
- SD (Secure Digital Card)
MS (Memory Stick)
SM (SmartMedia Card)
- CF (CompactFlash Card)
- IBM Microdrive
TV Tuner Module
With the TV tuner installed you can watch TV, video conference and capture still and video images on your computer. The TV tuner comes with a remote control unit and quick start guide. Consult the guides for full instructions on how to use the TV tuner and software. The TV tuner includes an S-Video-In port for video input to the computer, and a line-in jack for playing external audio sources through your computer's speakers.
Video Features
Video Driver Controls
The video interface lets you change the screen resolution and color output. You can switch display devices from the Display control panel in Windows as long as the video driver is installed.
- Click Start, point to Settings and click Control Panel.
- Double-click Display (icon).
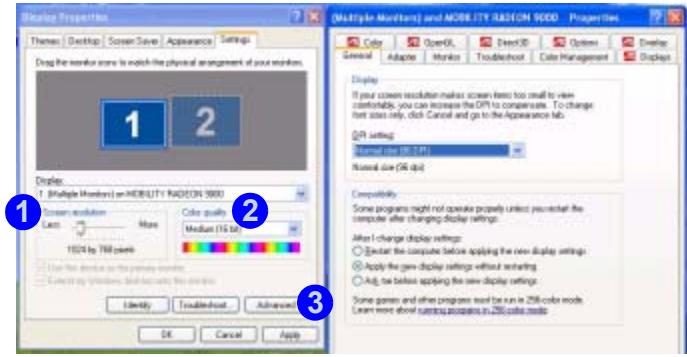
- In the Display Properties dialog box, click Settings (tab).
- In Screen resolution, move the slider to the preferred setting for resolution 1.
-
In Color quality, click the arrow and scroll to the preferred setting for color depth ②. Or
-
Right-click the ATI icon in the taskbar.
- Point to Settings and click Display Settings, then click the Settings (tab).
You can also get access to Help or Troubleshooting from the ATI menu.
Click Advanced in Display Properties to bring up the options tabs.
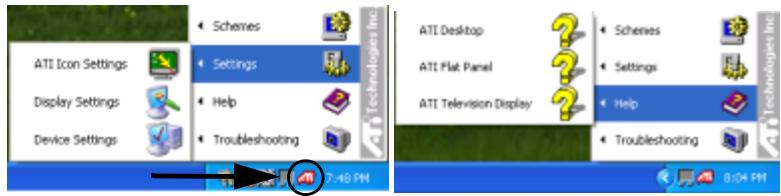
Figure 8 ATI Display Settings/Advanced Display Properties
Display Options
Besides the built-in LCD, you can also use an external VGA monitor (CRT) or TV as your display device. A VGA monitor connects to the external monitor (CRT) port, a TV to the S-Video-Out port. The display options are below:
Table 1 - Display Options
| Display Mode | Windows XP | Windows 2000 |
| Single | ✓ | ✓ |
| Multiple - Clone Mode | ✓ | ✓ |
| Multiple - Extended Desktop Mode | ✓ | Not Available |
| Single - Either the LCD, CRT or TV as a display device. Multiple (Clone) - The LCD, CRT or TV outputting the same view (you can apply different display modes with different resolutions and refresh rates). Multiple (Extended Desktop) -The LCD, CRT or TV outputting a different view (In Windows XP only - not available in Windows 2000). | ||
Clone Mode and Extended Desktop Mode
Clone mode simply shows an exact copy of the Primary display desktop on the other display(s). This mode will drive multiple displays with the same content. The system supports Extended Desktop mode (the LCD and a CRT showing different views) in multiple display environments in Windows XP, but this mode is NOT supported in Windows 2000. An Extended Desktop creates a desktop spanning multiple displays and acts as a large workspace.
Enabling Other Displays & Extended Desktop Mode
Attach a monitor or TV to the appropriate port. In the Advanced ATI Mobility Radeon Properties (Figure 8 on page 19) click on Displays to get the other display options, including those for TV (different OS's will appear with different options). Click the enable/disable button for the display device you wish to use. Select ONE display as Primary, the remaining as the Clone (the Clone may operate in either Clone Mode, or Extended Desktop Mode).
Enabling Extended Desktop Display Mode
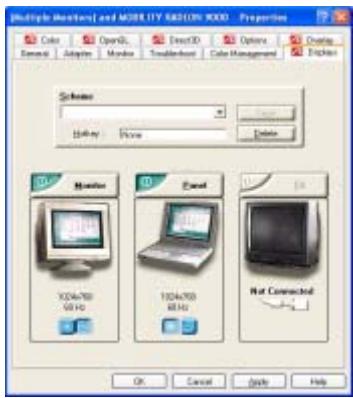
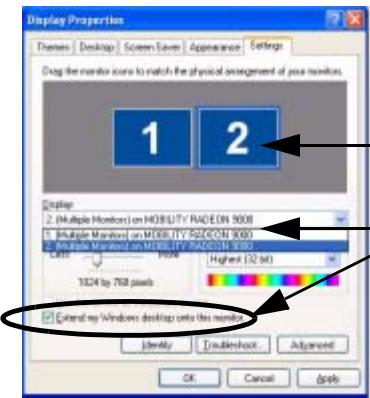
Figure 9 - Enabling Other Displays & Extended Desktop
Click either the Display pop-up menu, or click the icon for the appropriate display. Then click the tick box to extend the primary display's desktop to it.
- Enable the display as above.
- Use the Display Properties window to select the second monitor by clicking on the icon, or by selecting it from the "Display:" pop-up menu.
- Click "Extend my Windows desktop onto this monitor."
- Click Apply (click Yes to keep the settings if prompted).
With the Extended Desktop Mode enabled, drag any icons or windows across to the other display desktop. It is therefore possible to have one program visible in one of the monitors, and a different program visible in the other monitor.
Power Management Features
The Power Options control panel in Windows allows you to configure power management features for your computer. You may conserve power through individual components such as the monitor or hard disk, or you may use either Standby or Hibernate mode to conserve power throughout the system (enable Hibernate support from the Control Panel as pictured in Figure 10).
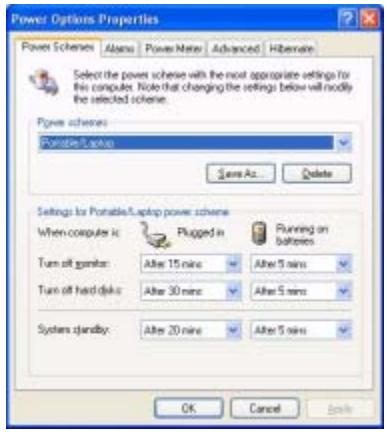

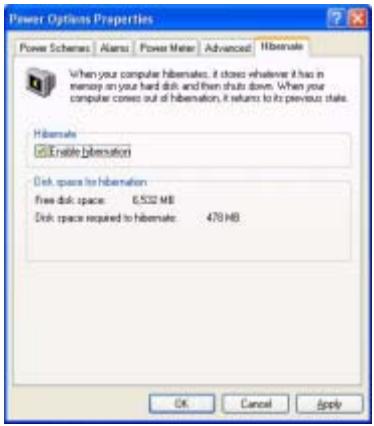
Figure 10 - Power Options
The computer's power button, sleep button (Fn + F4 key combination), and close cover switch may be set to send the computer in to either Standby or Hibernate mode.
22 - Power Management Features
Driver Installation
The Device Drivers & Utilities + User's Manual CD-ROM contains the drivers and utilities necessary for the proper operation of the computer. Table 2 lists what you need to install. It is very important that the drivers are installed in the order indicated in the table.
Optional Module Drivers
If your purchase does not include any of the optional modules (PC Camera, Wireless LAN or Bluetooth), DO NOT install the drivers for them. The optional TV Tuner software is included on the CD-ROM provided with the module (see "TV Tuner Module" on page 18).
New Hardware Found
If you see the message "New Hardware Found" (Found New Hardware Wizard) for the Universal Serial Bus (USB) Controller during the installation procedure, click Cancel to close the window, and follow the installation procedure as directed.
Table 2 - Install Procedure
| Feature | Windows XP |
| Audio | page 24 |
| Modem | page 24 |
| Network (LAN) | page 25 |
| Video | page 25 |
| USB 2.0 | Install Windows XP Service Pack 1 to get USB 2.0 Support. |
| PC Card/PCMCIA | page 25 |
| PC Camera (optional) | page 26 |
| Hot-Key | page 26 |
| TouchPad | page 27 |
| Wireless LAN (optional) | page 28 |
| Bluetooth (optional) | page 28 |
| Auto Mail | page 29 |

Windows XP Service Pack 1
Make sure that you install Windows XP Service Pack 1 after installing all the drivers (if your Windows XP version includes Service Pack 1 you can skip this step).
Wireless Module ON/OFF Switch
While installing the drivers make sure that the Wireless Module ON/OFF switch is turned OFF, until you come to install the drivers for the 802.11b Wireless LAN or Bluetooth modules. Before installing the 802.11b Wireless LAN or Bluetooth drivers turn the switch ON. If you have both the 802.11b Wireless LAN and Bluetooth modules, use the Fn + F12 key combination to toggle the power to the module(s). If the Found New Hardware Wizard appears at any time (other than outlined in the driver install procedure), click Cancel.
Driver Installation and Multi Language Options
Make sure you have not enabled any of the Multi language options in the Regional and Language Options control panel before installing the drivers. Some of these language options will interfere with the driver installation process for the Audio driver. After you have installed all the drivers you may then configure the language options.
Audio (WinXP)
- Click Start (menu) > Run...
- Navigate (Browse...) to D:\Drivers\Audio\Setup.exe and click OK > Next.
- Click Finish to restart your computer.
- You can click the AC97 Audio Configuration icon in the taskbar for further configuration options.
Modem (WinXP)
- Click Start (menu) > Run...
- Navigate (Browse...) to D:\Drivers\MODEM\WINXP\Setup.exe and click OK.
- The driver will install and quit the installer menu automatically. The modem is ready for dial-up configuration.

Modem Country Selection
You can change the modem country selection in the control panel (Control Panel > Phone and Modem Options (icon)).
LAN (WinXP)
- Click Start (menu) > Run...
- Navigate (Browse...) to D:\Drivers\Lan\Setup.exe and click OK.
- To continue click Next.
- Click Finish, then restart the computer.
- The network settings can now be configured.
Video (WinXP)
- Click Start (menu) > Run...
- Navigate (Browse...) to D:\Drivers\Vga\Setup.exe and click OK.
- To continue click Next > Yes > Express.
- Click Finish to restart the computer.
USB 2.0 (WinXP)

Install Windows XP Service Pack 1
Install Windows XP Service Pack 1 after installing all the drivers to get support for USB 2.0.
PC Card/PCMCIA (WinXP)
- If you can see the My Computer icon on your desktop (if you cannot see the My Computer icon go to step 2) click on it once to select it, then right-click it to make the submenu appear and scroll down to Properties and click on it (go to step 3).
- If you cannot see the My Computer icon click Start (menu), then point to (but don't click just highlight it) My Computer. Right-click it to make the sub-menu appear and scroll down to Properties and click on it (go to step 3).
- Click the Hardware (tab), then click Device Manager (button).
- Click “+” next to PCMCIA Adapters (if its sub-items are not shown).
- Double-click Generic Cardbus Controller and click Driver (tab).
- Click Update Driver (button).
- When the Hardware Update Wizard appears, click "Install from a list or specific location (Advanced)" then click Next.
- Select "Search for the best driver in these locations." and select ONLY "Include this location in the search:".
Concise User's Guide
- Navigate (Browse...) to D:\Drivers\PCMCIA\WinXp and click OK > Next.
- Click Finish and close the open windows.
- Restart your computer.
PC Camera (WinXP)
- Insert the PC Camera CD-ROM into the CD Drive.
- Click Start (menu) > Run...
- Navigate (Browse...) to D:\Default setting_60Hz\Setup.exe and click OK.
- Click Next (click Continue Anyway if asked if you want to continue at any time).
- Click Finish.
- Restart the computer.
- After restart the computer will bring up the Found New Hardware Wizard for the USB PC Camera 301P (if you see the Found New Hardware Wizard for the Universal Serial Bus (USB) Controller appear first, click Cancel to close the window).
- Click "Install from a list or specific location (Advanced)" then click Next.
-
Select "Search for the best driver in these locations." and select ONLY "Include this location in the search:".
-
Navigate (Browse...) to D:\Default setting_60Hz and click OK > Next > Finish (click Continue Anyway if asked if you want to continue).
- Wait for the System Settings Change window to appear, then click Yes to restart the computer.
- To run the application software go to the PC Camera 301P USB Camera item in the Start > Programs/All Programs menu, and select the AMCAP program.
Hot-Key (WinXP)
- Click Start (menu) > Run...
- Navigate (Browse...) to D:\Drivers\Hotkey\Setup.exe and click OK.
- Choose the language you prefer, and click OK.
- Click Next.
- Click Finish to restart your computer.
TouchPad (WinXP)
- If you can see the My Computer icon on your desktop (if you cannot see the My Computer icon go to step 2) click on it once to select it, then right-click it to make the submenu appear and scroll down to Properties and click on it (go to step 3).
- If you cannot see the My Computer icon click Start (menu), then point to (but don't click just highlight it) My Computer. Right-click it to make the sub-menu appear and scroll down to Properties and click on it (go to step 3).
- Click the Hardware (tab), then click Device Manager (button).
- Click "+" next to Mice and other pointing devices (if its sub-items are not shown).
- Double-click PS/2 Compatible Mouse and click Driver (tab).
- Click Update Driver (button).
- When the Hardware Update Wizard appears, click "Install from a list or specific location (Advanced)" then click Next.
- Select "Don't search I will choose the driver to install." then click Next.
-
Click Have Disk (button).
-
Navigate (Browse...) to D:\Drivers\touchpad\winxp and click Open > OK > Next (click Continue Anyway if asked if you want to continue).
- Click Finish and close the open windows.
- Click Yes to restart your computer.
Concise User's Guide
Wireless LAN (WinXP)
- Turn the Wireless Module ON/OFF switch ON.
- If you only have the Wireless LAN module go straight to step 3. If you have two wireless modules, you may need to use the key combination Fn + F12 to enable the Wireless LAN module (the Mail LED indicator will be green - see "LED Power & Communication Indicators" on page 11).
- If the Found New Hardware Wizard appears, click Cancel.
- Insert the Wireless LAN CD-ROM into the CD drive.
- The program will run automatically.
- Click Next > Next > Yes > Next > Next.
- Click Yes if you wish to add a shortcut to the WLAN utility on the desktop.
- Follow the instructions to install the Adobe Acrobat Reader (if you do not already have Adobe Acrobat Reader installed) and click Continue Anyway if asked if you want to continue.
- Click Finish and restart the computer.
The Wireless LAN User Manual is in Adobe .pdf format (Start menu and point to Programs/All Programs > IEEE 802.11b WLAN Utility(USB) then select User Manual).
Bluetooth (WinXP)
- Turn the Wireless Module ON/OFF switch ON.
- If you only have the Bluetooth module go straight to step 3. If you have two wireless modules, you may need to use the key combination Fn + F12 to enable the Bluetooth module (the Mail LED indicator will be orange - see "LED Power & Communication Indicators" on page 11).
- If the Found New Hardware Wizard appears, click Cancel.
- Insert the Bluetooth CD-ROM into the CD drive.
- The program will run automatically.
- Click Install Drivers and Application Software and click Next.
- Click the button to accept the license agreement, then click Next.
- Click Next > Install (click OK if asked if you want to continue).
- When the Found New Hardware Wizard appears select "Install from a list or specific location (Advanced)" then click Next.
-
Select "Search for the best driver in these locations." and select ONLY "Include this location in the search:".
-
Navigate (Browse...) to the top level of the CD D:\ and click OK > Next > Finish (click Continue Anyway if asked if you want to continue), then restart the computer.
- You can configure the settings in the Bluetooth Configuration control panel (Start menu and point to Settings and click Control Panel then double-click the Bluetooth Configuration icon).
The Bluetooth User's guide (Manual) is on the Bluetooth CD-ROM in the Userguide folder (click Browse this CD when you insert the Bluetooth CD-ROM). It is in .html format.
Auto Mail (WinXP)
- Click Start (menu) > Run...
- Navigate (Browse...) to D:\Drivers\AutoMail\SETUP.EXE and click OK.
- To continue click Next > Next.
- Click Finish, then restart your computer.
- Run the program from the Start menu (point to Programs/All Programs > Auto Mail Checker and click Auto Mail Checker).
- Double-click the taskbar icon to access the settings menus.
You may now go to the Microsoft web site to download and install Service Pack 1 for Windows XP.
Troubleshooting
| Problem | Possible Cause - Solution |
| The Battery LED power indicator , is blinking orange. | Low Battery. Plug in the AC power source. If the computer doesn't start up immediately, turn it off then on again. |
| The notebook feels too hot. | Make sure the notebook is properly ventilated and the fan port is not blocked. If this doesn't cool it down, put the system into Hibernate mode or turn it off for an hour. Make sure the vents aren't blocked and the computer isn't sitting on a thermal surface. Make sure you're using the correct adapter. |
| The computer takes longer during Startup. | Data saved on the hard disk drive may be lost or damaged. Operate the scan disk or disk defragmenter to check for any lost or damaged data. The computer is waking up from the Hibernate mode. |
| You forget the boot password. | If you forget the password, you may have to discharge the battery of the CMOS. Contact your service representative for help. |
| The compact disc tray will not open when there is a disc in the tray. | The compact disc is not correctly placed in the tray. Gently try to remove the disc using the eject hole. See “CD Emergency Eject” on page 14. |
| The DVD regional codes can no longer be changed. | The code has been changed the maximum 5 times. See “DVD Regional Codes” on page 14. |
| Unwelcome numbers appear when typing. | If the LED is lit, then Number Lock is turned ON. Press and release the Fn + NumLk key combination. |
| I have installed a new external keyboard or mouse but cannot use all of the listed functions. | You have not installed the driver to enable any extra functions. Make sure you read the documentation which comes with any new external device, and make sure you install the driver for it as this will allow you to access any extra functions which come with your device. |
| The Wireless LAN or Bluetooth module cannot be detected/ configured. | The ON/OFF switch has not been switched ON. Make sure you have set the ON/OFF switch to ON in order to enable the module. The ON/OFF switch has been switched ON, but you have both the Wireless LAN and Bluetooth modules in your computer. Use the Fn + F12 key combination to toggle power to the modules. DO NOT enable power and attempt to use both modules at the same time as this may cause a conflict. The driver(s) for the module(s) have not been installed. Make sure you have installed the driver for the appropriate module. |
Hyper-Threading
You can enable (the default setting is "Disabled") Hyper-Threading from the Advanced Menu in the BIOS Setup Utility. Hyper-Threading is only supported in computers with 3.06GHz processors. If you do not have this Processor the menu option will not appear.
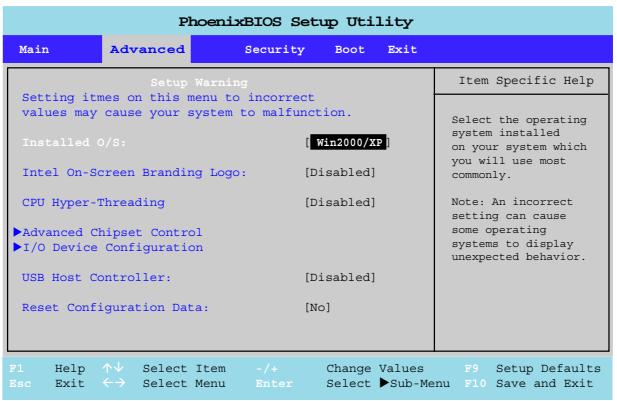
Figure 11 - Advanced BIOS Menu
To Enable the Hyper-Threading Option
- To enter Setup, turn on the computer and press F2 during the startup process.
- Use the arrow keys to get to the Advanced menu, and to select the CPU Hyper-Threading item.
- Enable the CPU Hyper-Threading option.
- Press F10 to save and exit the BIOS Setup.
- Pay careful attention to the notes below.
Hyper-Threading is only supported in Windows XP, so DO NOT enable this option if you are using Windows 2000.
If you have updated the Flash ROM BIOS from a previous version, which did not have the CPU Hyper-Threading option, you must reinstall Windows XP after the BIOS update. Once you have enabled Hyper-Threading, DO NOT disable the option or the computer may not startup (returning to the BIOS and enabling the option will correct this in case of accidental disabling of the option). If you are changing the processor from a CPU which supports Hyper-Threading, to one which does not, you will need to reinstall your OS.
Specifications
Processor
Intel Pentium 4 Processor - FCPGA2 package (478-pin)
( 0.13) 0.13 Micron Process Technology, 512KB L2 Cache &
400MHz FSB
- 2.0/2.2/2.4/2.5/2.6GHz
( 0.13) 0.13 Micron Process Technology, 512KB L2 Cache &
533MHz FSB
- 2.26/2.4/2.53/2.66/2.8/3.06*
GHz
- Only notebooks with Pentium 4 processors of 3.06GHz support Hyper-Threading (see "Hyper-Threading" on page 32).
Core Logic
SIS M645DX + 962 Chipset + M9-P
Structure
PC99 compliant
Security
- Security (Kensington® Type) Lock Slot
BIOS Password
Memory
- Two 200-pin DDR SODIMM sockets, supporting DDR SDRAM SODIMM (2.5V) - DDR 200/DDR 266/DDR 333 compliant
Memory expandable up to 1024MB (128/256/512MB SODIMM Modules)
BIOS
One 512KB Flash ROM
Phoenix BIOS
LCD
17.0" WXGA TFT (1440*900)
Concise User's Guide
Display
- ATI Mobility Radeon 9000 high performance chip
Supports AGPTM 4X - Integrated 128-bit 2D / 3D Graphics Accelerator
- Advanced HW accelerator for DVD playback
- Fully DirectX 8.0 compliant graphics engine
- External memory 64MB DDR SGRAM on board
- Dual-View display monitor
Storage Devices
3.5" 3-mode Floppy Disk Drive
- Easy changeable 2.5" 9.5 mm (h)
Hard Disk Drive
Supports Master mode IDE, PIO mode 4, ATA-33/66/100/133 (Ultra DMA)
- 12.7mm(h) Device Bay for ONE of the following drive configuration options:
CD-ROM
DVD-ROM
CD-RW
Combination CD-RW/DVD-ROM
DVD-RW
- Optional 6-in-1 card reader for the following formats:
MMC (MultiMedia Card)
SD (Secure Digital Card)
MS (Memory Stick)
SM (SmartMedia Card)
CF (CompactFlash Card)
IBM Microdrive
Audio
- AC'97 2.1 compliant interface
3D stereo enhanced sound system - Compatible with Sound-Blaster PRO™
S/PDIF Digital output (5.1 CH) for DVD content and stereo audio - Microphone-in jack
- Headphone-out jack
Built-in microphone
4 built-in speakers - Optional sub woofer
Keyboard
"Win Key" keyboard
Pointing Device
- Built-in TouchPad (scrolling key functionality integrated)
Interface
- Three USB 2.0 ports
One Mini-IEEE 1394 port - One serial port
- One S-Video-Out port for TV output
- One parallel port (LPT1), supporting ECP / EPP
- One infrared transceiver supporting IrDA 1.1/FIR/SIR/ASKIR
- One consumer infrared transceiver which functions with the optional TV Tuner
- One external monitor (CRT) port
- One external keyboard/mouse (through Y cable) PS/2 port
- One speaker-out/headphone-out jack
- One microphone-in jack
- One RJ-11 jack for modem
-
One RJ-45 jack for 100M/10MLAN
One S/PDIF out port
One DC-In jack -
One-S-Video-In port with optional TV Tuner
- One Line-In jack for audio input with optional TV Tuner
PC Card
- One type II PCMCIA 3.3V/5V socket supporting CardBus
Communication
Wireless Infrared transfer, IrDA 1.1 compliant, 1cm - 1M operating distance, 115.2K bps SIR/4Mbps FIR
Built-in 10/100Mb Ethernet LAN
- 56K MDC modem V.90 & V.92 compliant
802.11b wireless LAN module (available as a factory option)
- Bluetooth module (available as a factory option)
- PC Camera module (available as a factory option)
Power Management
Supports ACPI v1.0b
Supports Hhbnate mode
Supports Standby mode
Supports battery low sleep
Supports resume from modem ring
Power
Full range AC adapter AC Input: 100 240V 50 60Hz DC Output: 20V,6A (120W)
Supports one removable Smart Li-ion battery
Environmental Spec
- Temperature
- Operating: 5^ 35^ - Non-Operating: -20^ 60^
- Relative Humidity Operating: 20% 80% Non-Operating: 10% 90%
Concise User's Guide
Physical Dimensions
3.85kg with battery
Optional
DVD-ROM Drive
- CD-RW Drive
- Combination Drive
DVD-RW Drive
- Software DVD player
- Wireless LAN module
- Bluetooth module
- PC Camera module
- 6-in-1 Flash Card Reader module
- TV-Tuner module
- Sub Woofer module