
LT-H90LAN : LINKTHEATERHD NETWORK MEDIA PLAYER - Network media player BUFFALO - Free user manual and instructions
Find the device manual for free LT-H90LAN : LINKTHEATERHD NETWORK MEDIA PLAYER BUFFALO in PDF.

| Product Type | Network Media Player |
| Brand | BUFFALO |
| Model | LT-H90LAN |
| Dimensions (L x H x D) | 210 x 50 x 210 mm |
| Weight | 1.2 kg |
| Power supply | 100-240 V, 50/60 Hz, max. power consumption 19 W |
| Wired network connectivity | RJ-45 Ethernet 10/100 Mbps (IEEE 802.3/802.3u) |
| Wireless network connectivity | No (wired model only; LT-H90WN offers Wi-Fi) |
| Video connectors | Composite (RCA), Component (YUV), D4, HDMI |
| Audio connectors | Stereo RCA audio, digital optical Toslink output (Dolby Digital/DTS) |
| USB interface | 1 front USB 2.0/1.1 port, 1 rear USB port for backup |
| Supported video formats | MPEG1, MPEG2, MPEG4, XviD, WMV9, H.264 |
| Supported audio formats | MP3, WAV, WMA, M4A (AAC) |
| Supported image formats | JPG, BMP, PNG, GIF |
| Video modes | 480i, 480p, 720p, 1080i |
| Main functions | Network media playback (DLNA/UPnP), file sharing, automatic camcorder/camera backup via USB |
| Included accessories | Remote control with batteries, Ethernet cable, RCA AV cable, power adapter, CD-ROM, manual |
| Maintenance and cleaning | Clean with a soft, dry cloth. Do not use liquids or aerosols. Disconnect before cleaning. |
| Safety | Use a surge-protected power strip. Do not expose to moisture. Do not open the casing. |
| Spare parts and repairability | Contact BUFFALO technical support or an authorized dealer. No spare parts available to the general public. |
| Warranty | 1 year limited |
| Menu languages | English, German, French, Italian, Spanish |
Frequently Asked Questions - LT-H90LAN : LINKTHEATERHD NETWORK MEDIA PLAYER BUFFALO
User questions about LT-H90LAN : LINKTHEATERHD NETWORK MEDIA PLAYER BUFFALO
0 question about this device. Answer the ones you know or ask your own.
Ask a new question about this device
Download the instructions for your Network media player in PDF format for free! Find your manual LT-H90LAN : LINKTHEATERHD NETWORK MEDIA PLAYER - BUFFALO and take your electronic device back in hand. On this page are published all the documents necessary for the use of your device. LT-H90LAN : LINKTHEATERHD NETWORK MEDIA PLAYER by BUFFALO.
USER MANUAL LT-H90LAN : LINKTHEATERHD NETWORK MEDIA PLAYER BUFFALO
LinkTheater LT-H90 Media Player Series
LT-H90LAN
LT-H90WN
Introduction 3
Product Diagram 4
Connect Your Cables 6
Wireless Connection 8
Remote Control 13
Getting Started 16
Using the LinkTheater with Windows 23
Using the LinkTheater with Mac OS X 28
Settings 40
Display Settings 46
Configuring Windows Media Player 48
Transcoder 52
Specifications 54
Warranty 56
Europe - EU Declaration of Conformity 57
Contact 58
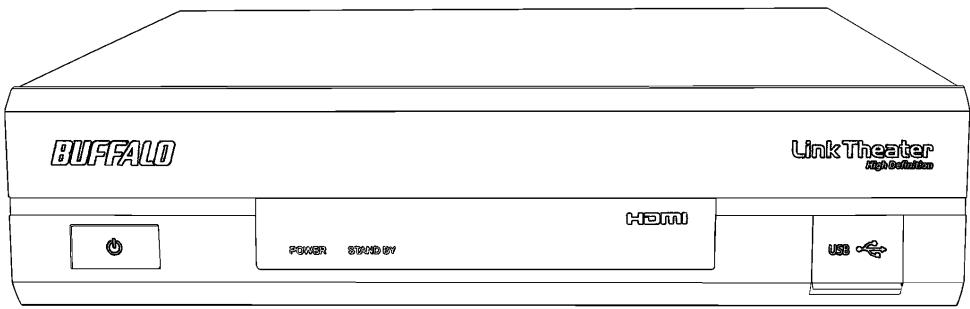
Introduction
Thank you for choosing LinkTheater! This manual should help you configure and use your new LinkTheater.
Buffalo Technology's LinkTheater LT-H90 Network Media Player Series is the missing link between your TV, home entertainment center, and computer network. Now, you can play the movies, music, and photos stored on your computers from the comfort of your living room, through your TV and home entertainment center.
The LinkTheater connects to your local network with an RJ-45 Ethernet port. The LT-H90WN model provides additional functionality, allowing you to connect to your network wirelessly.
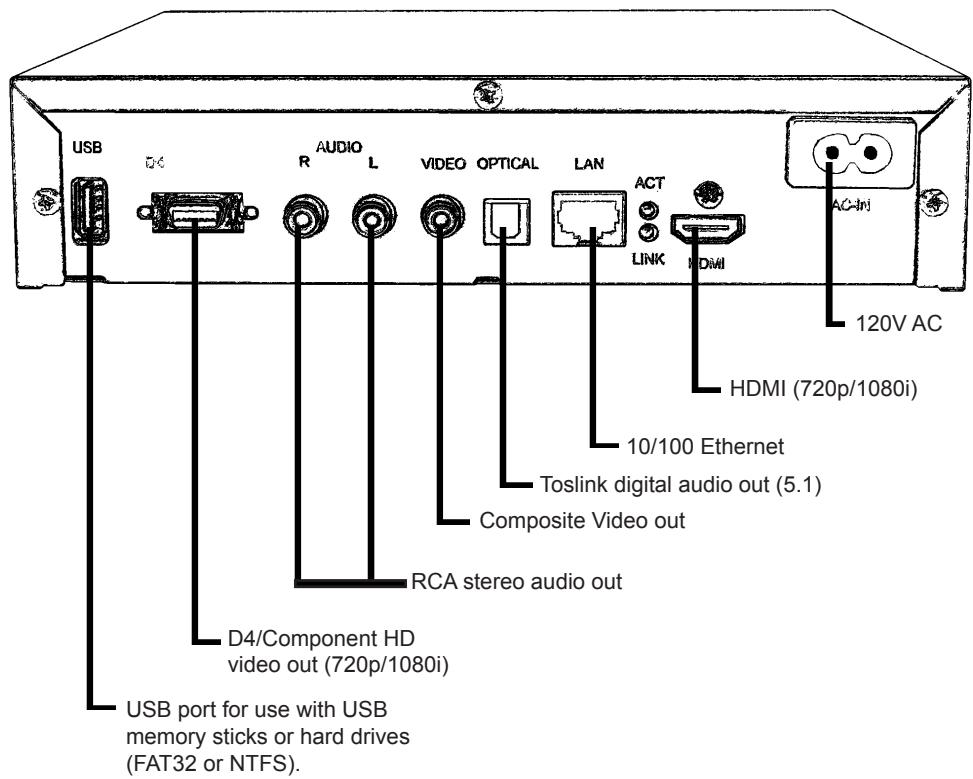
The LinkTheater has a wide variety of AV connections on the back, including High-Definition compatible video connectors as well as digital Dolby™ 5.1* and DTS compatible audio connectors. LinkTheater also supports Universal Plug & Play for easy installation.
LinkTheater plays back most popular video, image, and audio formats. See the Specifications page for a list of supported file types.
Prepare to experience one of the highest quality, most versatile media players available! Buffalo Technology's LinkTheater will provide seamless access to your multimedia archives.
Please check our web site (www.buffalotech.com) for updates and additional support for this product.
Package Contents:
- LinkTheater Media Player
- Ethernet Cable
- Remote Control with Batteries
- AC Power Cable
- LinkTheater CD-ROM
- User Manual (this guide)
- Standard A/V Cable (Red, White, and Yellow RCAs)
If any items are missing from your package, please contact Buffalo Technology's Technical Support or contact the place you purchased your product from.
Preparation:
The LinkTheater connects to a TV or video monitor with composite (RCA), HDMI, D4, or component style video connectors.
Find an appropriate place to install the LinkTheater. It should be:
- within visible site of the primary seating area. This device uses an IR remote control and requires line of sight.
- conveniently located near your TV and Hi-Fi.
- on a flat surface or cabinet. We do NOT recommend placing it on top of a warm-running audio/video component, due to potential overheating concerns.
Connect your cables:
The LinkTheater must be connected to a TV or monitor. Although the LinkTheater plays mp3s and other popular music formats, a TV or monitor is required to navigate and configure options on the LinkTheater.
There are many ways to connect the audio and video output of the LinkTheater to a TV or home theater. The following directions describe connecting your LinkTheater to your TV or monitor with the standard yellow analog composite video connector, which almost any TV will have. This cable is included in your LinkTheater package and will work with most TVs.
Here's a simple way to connect your LinkTheater directly to a TV:
1 - Attach the included analog video cable to your TV or monitor. Most TVs will have the connections color-coded: Yellow for video, red for right-audio, and white for left-audio.
2 - Connect the other end of the analog video cable to the associated ports on the LinkTheater. The ports are also color coded: red for right audio, white for left audio, and yellow for video.
3 - For a wired connection, connect the CAT-5 Ethernet cable into the Ethernet port on the back of the LinkTheater and connect the other end to a router, hub, or switch on your network. The LTH90WN provides added functionality allowing you to connect to your network wirelessly. Please refer to the Wireless Connection section for setup instructions.
4 - Plug the power cable into an AC power outlet. Buffalo recommends connecting the AC adapter to a power-strip with a surge protector to protect it from power surges caused by lightning.
5 - Plug the power connector from the AC adapter into the back of the LinkTheater. The 'Power' and 'Standby' lights on the front of the LinkTheater will blink and then turn on. You do not need to press the power button on the front of the LinkTheater. If the lights don't come on within a few seconds, check that the proper AC adapter is plugged in and seated correctly. Also, check that your power-strip or surge protector is on.
6 - Once the 'Power' and 'Standby' lights on the front of the LinkTheater are on, the device has properly powered up and is ready for use. At this point, please turn on your TV or monitor. Change your TV or monitor's source setting to correspond to the input that you plugged the LinkTheater into. Once the LinkTheater's menu appears, your LinkTheater's video is properly connected.
Note: These instructions are for a simple setup, where the LinkTheater is connected directly to a TV with RCA connections. Many other ways to connect are possible. For instance, if you seek the best overall performance available, you might connect the audio to an AV Receiver with a toslink digital connector and the video to your monitor with a D4-to-component or HDMI cable. If the toslink 5.1 digital audio output is used, you'll need to enable it in Settings before using it. Additional cables (not included with the LinkTheater) will be necessary for any of these alternate configurations.
Wireless Connection
Wireless Settings (LT-H90WN model only)
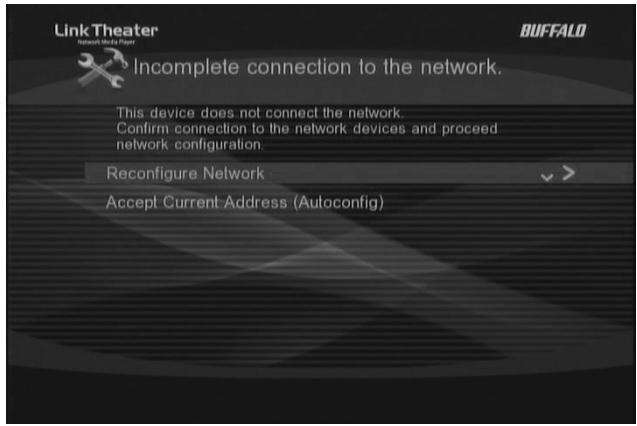
After bootup, select the language and time zone you wish to use and press enter on "Apply". A screen will display the message "Incomplete connection to the Network". Select the "Reconfigure Network" option by pressing "Enter" or "Right" on your remote.
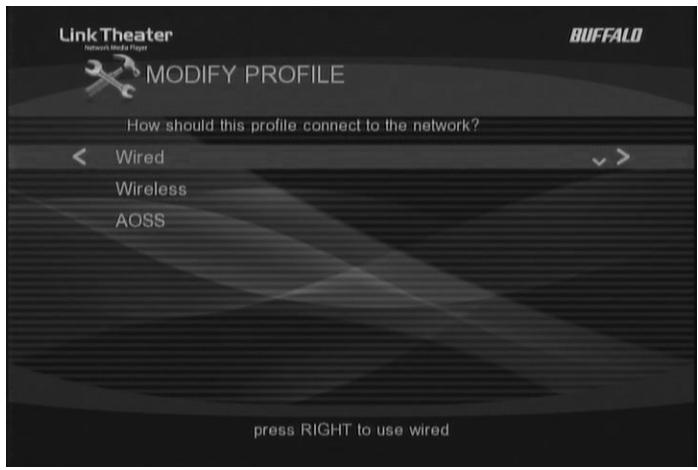
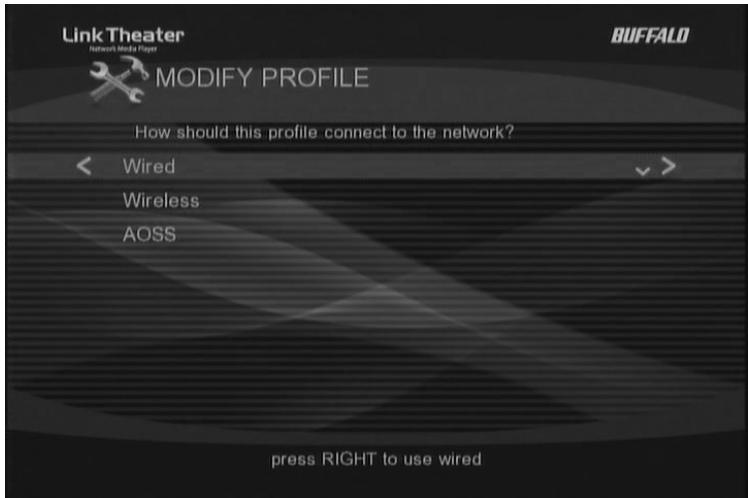
In the "Modify Profile" screen, select the option you would like to use to connect to your network - Wireless or AOSS.
Wireless Connection
Select Wireless and press "Enter" or "Right" on your remote control.
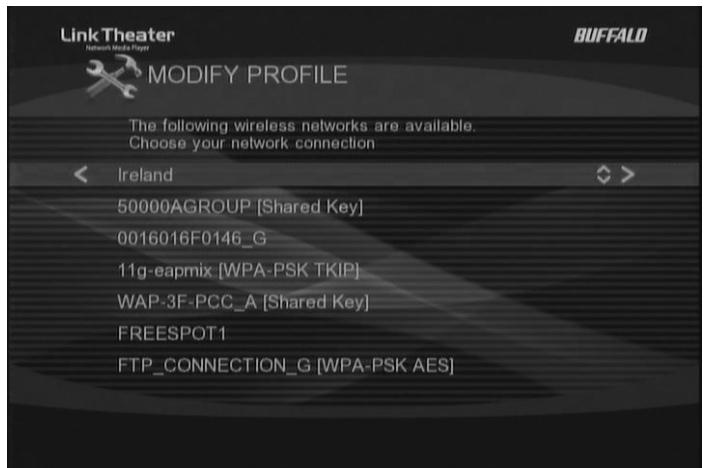
The Link Theater will now scan for wireless networks and display the results on the screen. Select the network which will be used and press "Enter" or "Right" on your remote control.
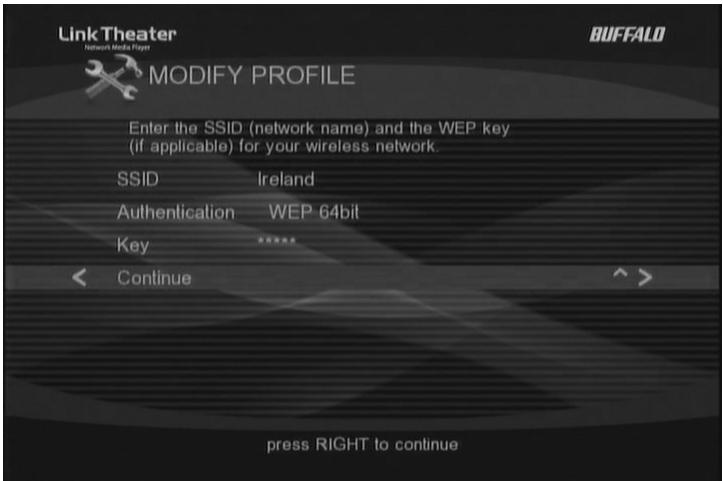
Select the authentication method that is used by the network and then type the key into the "Key" field. Once entered, press "Enter", or "Right" on Continue, to proceed.
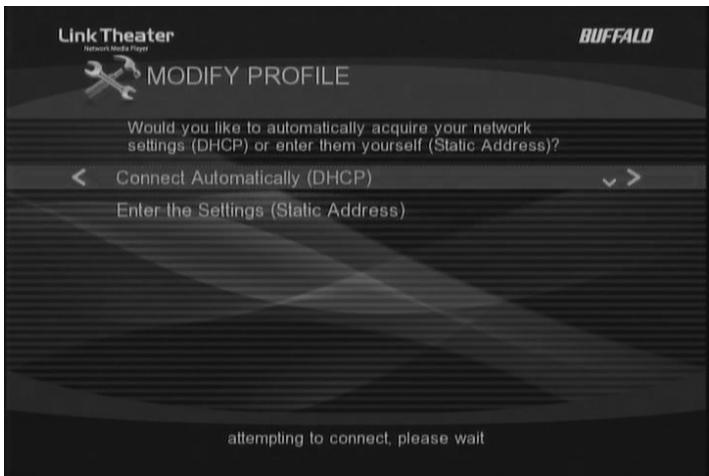
Press "Enter" or "Right" on the option to "Connect Automatically (DHCP)". This will assign an IP address automatically to the Link Theater.
A Screen will appear saying "Profile Creation Successful". Press "Enter" or "Right" on the "Continue" option.
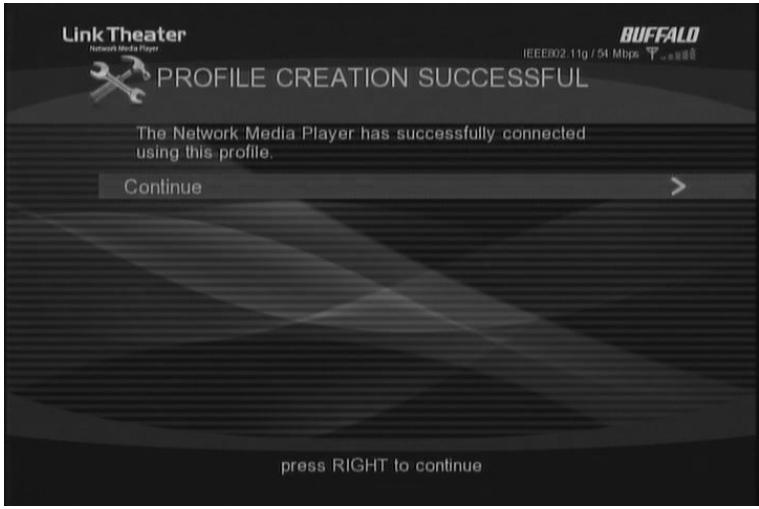
The IP address and Net Mask information will be displayed at the bottom right of the screen. Press "Enter" or "Right" on the "Continue" option to complete the connection.
AOSS
Please note that your router must support AOSS to use this connection method. Press "Enter" or "Right" on the AOSS option.
When instructed, press the AOSS button on your router.
When the connection is established, press "Enter" on Finish.
The Link Theater will now be connected to your network and the IP Address and Gateway information will be displayed on the bottom right of the screen. Press "Enter" on the "Finish" option to complete the connection.
Remote Control
The LinkTheater's navigation and settings are all done via the included remote control.
To navigate through the menus, use the up, down, left and right arrows. To make a selection, press the 'Enter' key. Also, the left and right arrows can be used to navigate forward and back through the menus.
Info - The info button will bring up information regarding the file that is currently being played back. This includes file name info, format info, and in the case of movies and music, how long the file has been playing.
Setup - The setup button will instantly take you to the System Settings area.
Refresh - The refresh button will automatically refresh what is on the screen. For example, if recent files have been added to a media server, pressing the refresh button may display the new files. Some DLNA servers may need to be refreshed at the server level.
Repeat – The repeat button will simply repeat a video or music file that's being played back.
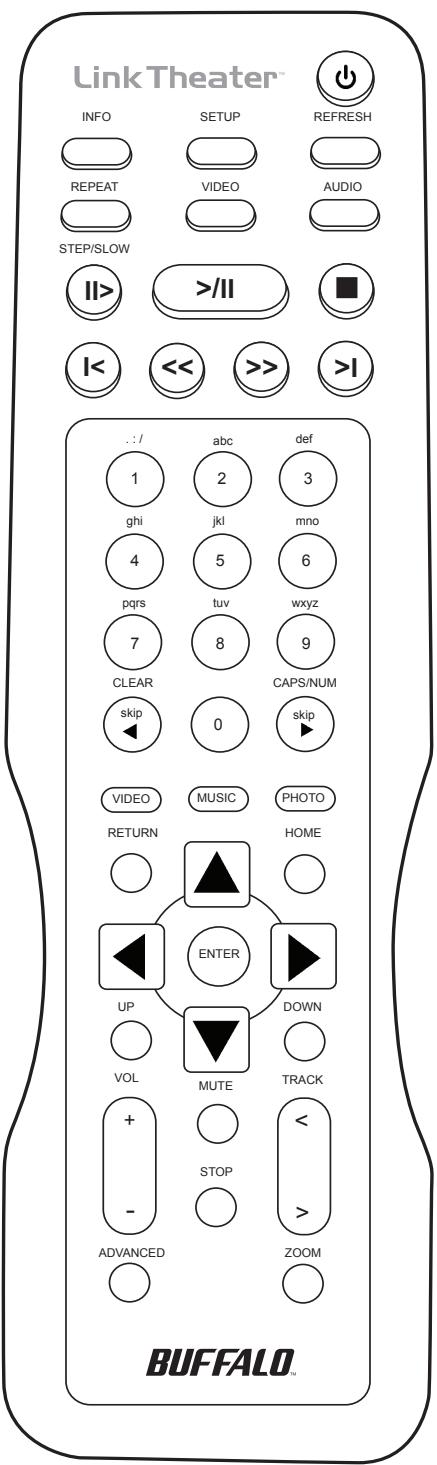
Video – The video button will cycle through the four supported video modes. CAUTION:
Using this improperly could result in losing video display. In that event, continue to cycle through the video modes by pressing the VIDEO button until the display returns.
Audio - Audio is used to select different sound track options that may be available in video files.
Playback Controls - The playback controls work similarly to that of a VCR or DVD player. > ll begins and pauses playback, ■ stops playback, is fast forward, > goes to the next song, etc.
Video, Music, Photo - The three video, music, and photo buttons can be used while navigating a media source. Pressing one of these buttons will instantly change your viewing to the file types that correspond with the button pushed. For example, if you're browsing video and press the music button, you'll instantly be browsing music instead.
Home - The home button will return you to the main navigation hub.
Up and Down – The up and down buttons work like Page Up and Page Down does on a computer. This is a quick way to browse through folders that have a lot of media.
Volume and Mute – The LinkTheater has its own independent volume control that can be used along with or as an alternative to your TV or sound system's remote control. This allows you to quickly mute or raise/lower the volume without having to necessarily use the TV or sound system's remote control.
Stop – The stop key will temporarily pause a slideshow that's in progress.
Track - The track button will skip forward or back to the next video, music, or picture file.
Getting Started
Linking your LinkTheater to your media files.
The LinkTheater is designed to play media files that are located on computers and NAS devices. Where do you keep your movies, music, and pictures? If they're on Windows PCs, then turn to the next page and begin installing software on your PC.
If your media files are on an Apple Mac, turn to page 20 for instructions on configuring your Mac and LinkTheater to work together.
If your media files are stored on a NAS device like the Buffalo TeraStation or LinkStation, then you may not need to install software at all. Turn to page 32 to start using your LinkTheater immediately!
Installing the Buffalo Media software for Windows::
Please follow the install steps below if you wish to use the LinkTheater to access media files on a Windows PC:
- Insert the LinkTheater CD-ROM into your PC's CD-ROM drive. The program will run automatically.
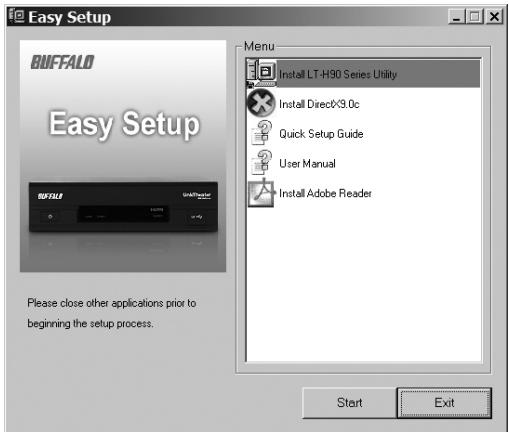
- Press the 'Start' button.
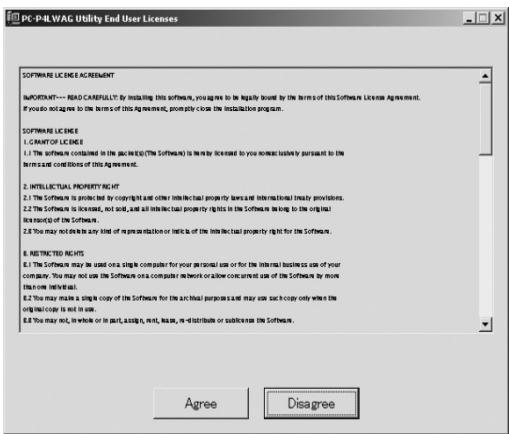
- Agree to the End User License.
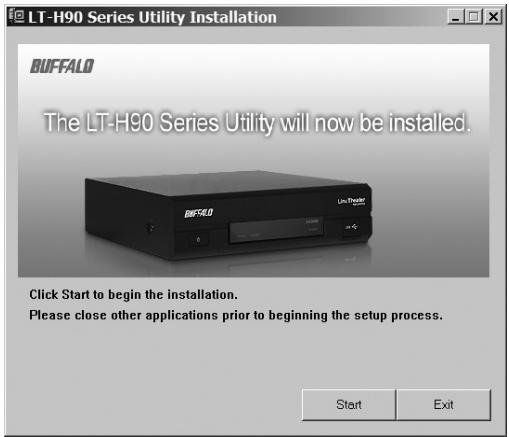
4. Press 'Start'.
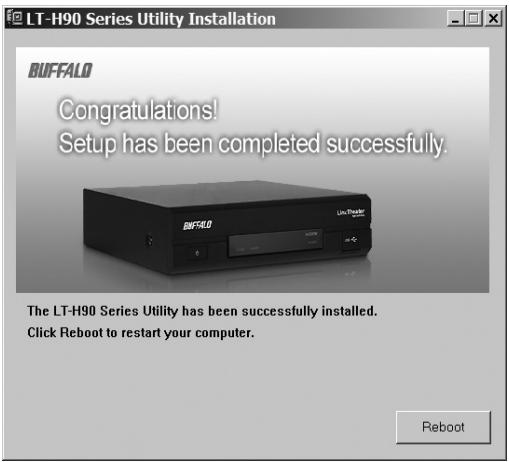
5. Click Reboot to finish the installation and restart your PC.
- After the reboot, please launch the 'Media Server' program from the start menu.
Configuring the Buffalo Media Server:
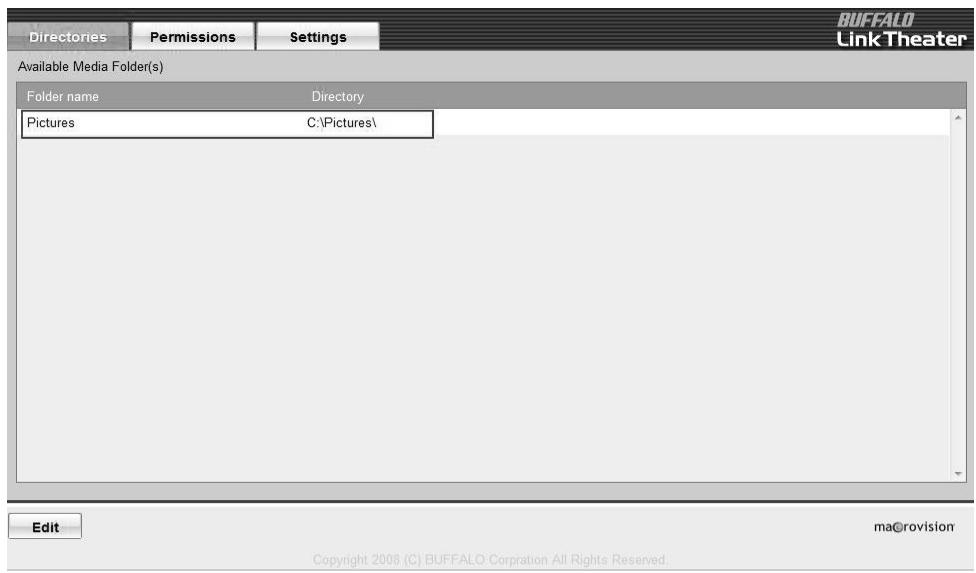
Directory
To play content from your PC on the LinkTheater, you must first select the folders you wish to use (The default folder setting is "Documents"). To add folders, Select the [Directories] tab, and click [Edit].

Select the folders you wish to share with your LinkTheater and click [Apply].
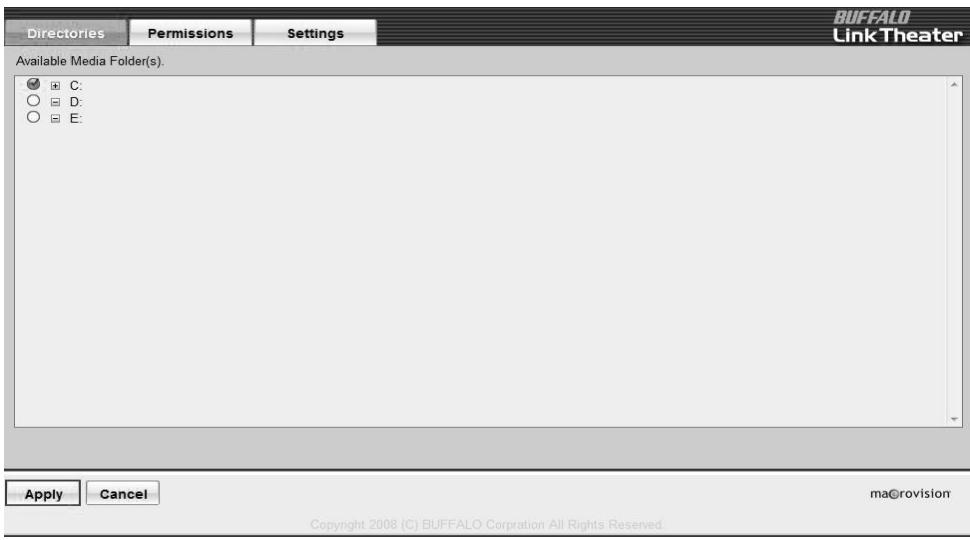
The list of folders you have chosen will now be shown.
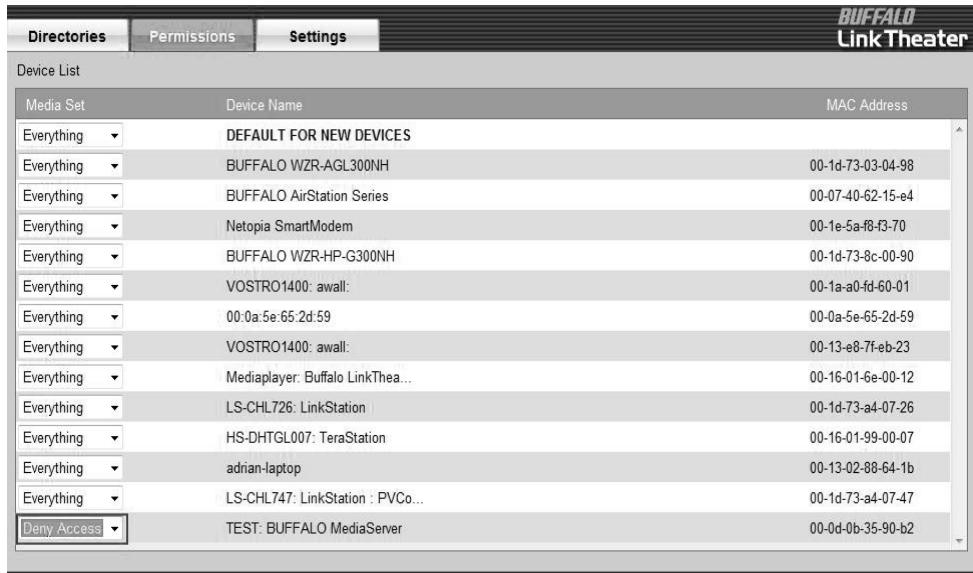
Permissions
You may want to control user access to prevent certain devices from accessing your media content. This is particularly important if there are multiple LinkTheaters or other DLNA playback devices on your network.
Select the [Permissions] tab and choose [Deny Access] in the Media Set column. When the option is set to [Everything] full access is automatically given.

macrovision
Copyright 2008 (C) BUFFALO Corporation All Rights Reserved
Settings
To enable permissions, choose [Yes] for [Turn on Access Control].
If you'd like to share media content with DLNA clients, choose [Yes] for the [Media Server is opened to the DLNA client] option. To save your changes, click [Apply].
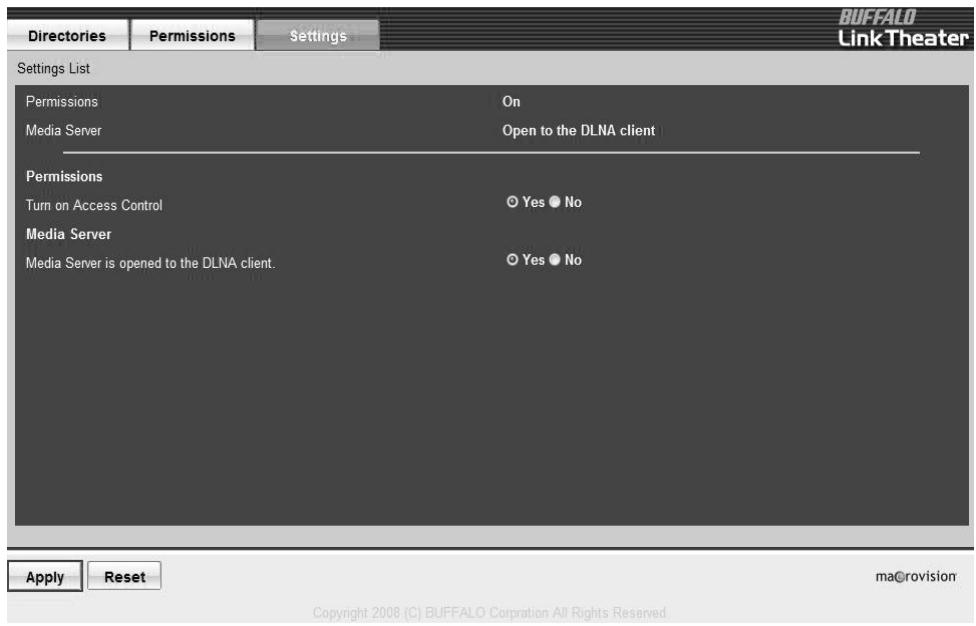
For more detailed information, please refer to the MediaServer2 Help file installed with the software.
Using the LinkTheater with Windows
Use the remote to choose and play your media files.
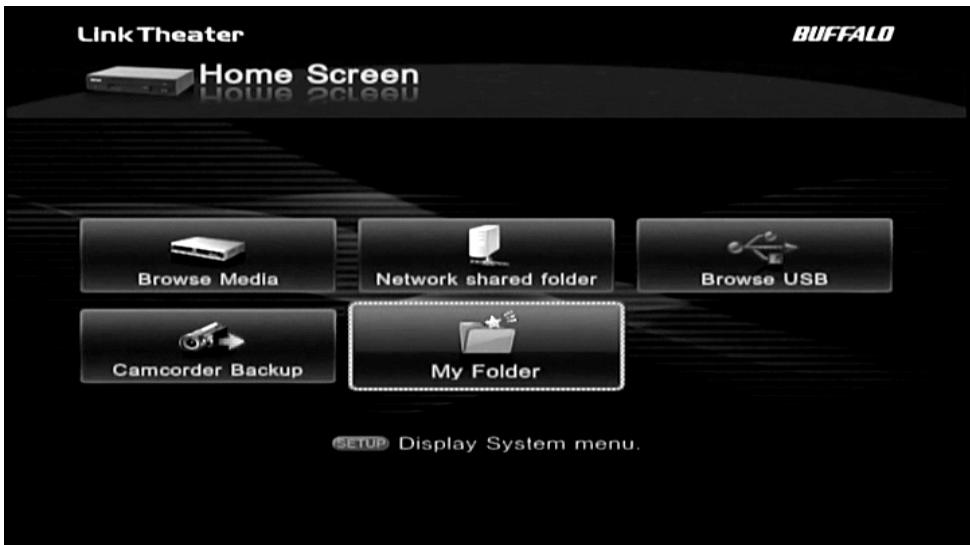
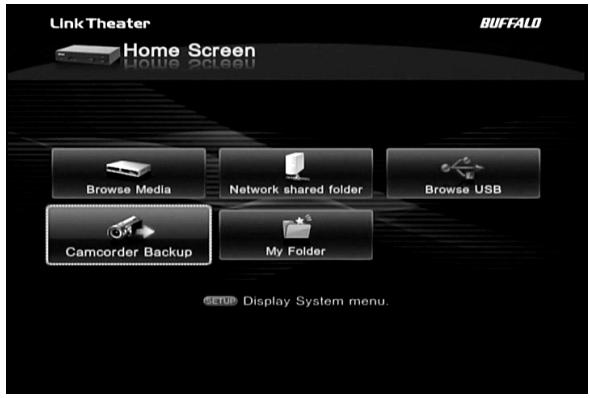
When the LinkTheater first turns on, select the language and time zone you wish to use and press enter on "Apply". Then, the Home Screen will appear.
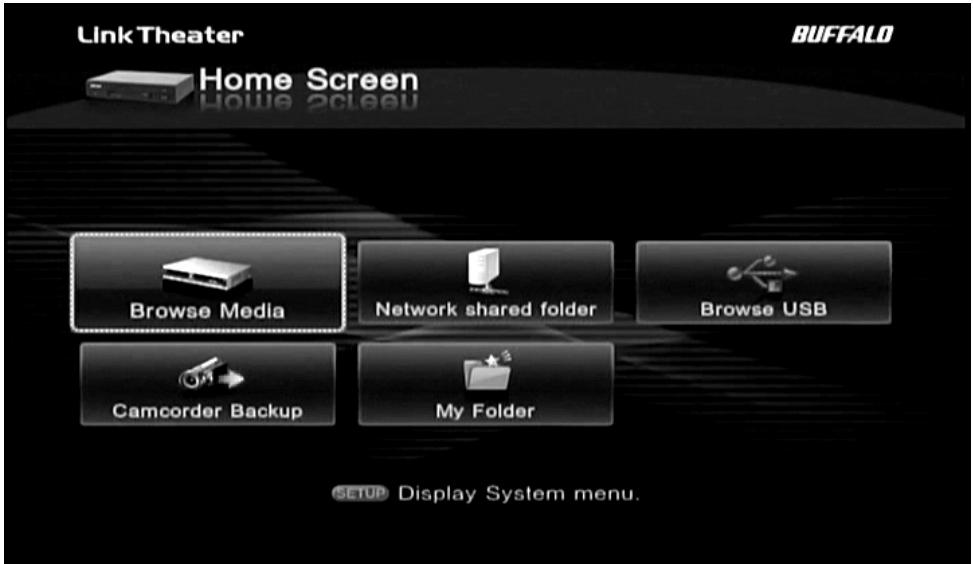
Use the up and down arrows on your remote control to highlight your choice, and then press enter to open it.
Browse Media will access any of the following media devices:
DLNA Media Servers
- Buffalo Media Server that came with your LinkTheater
- Buffalo's DLNA Home Server NAS products (LinkStation Home Server and TeraStation Home Server)
- 3^rd party DLNA servers like TwonkyVision (www.twonkyvision.com)
- Microsoft® Windows® Media Connect
- Microsoft® Windows® Media Player 11
- 3^rd party UPnP A/V Servers
Highlight one and click the right arrow to browse content.
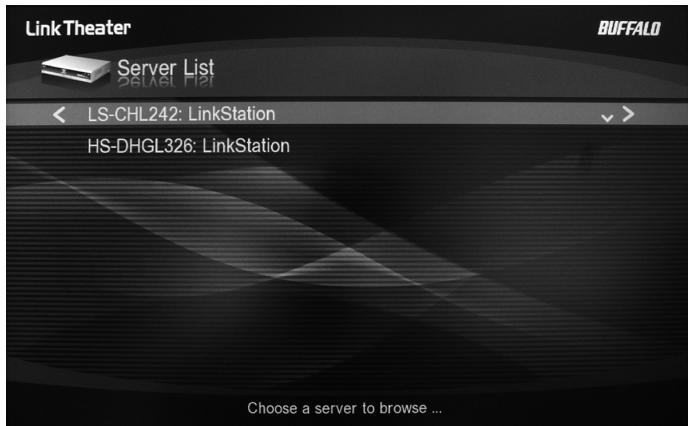
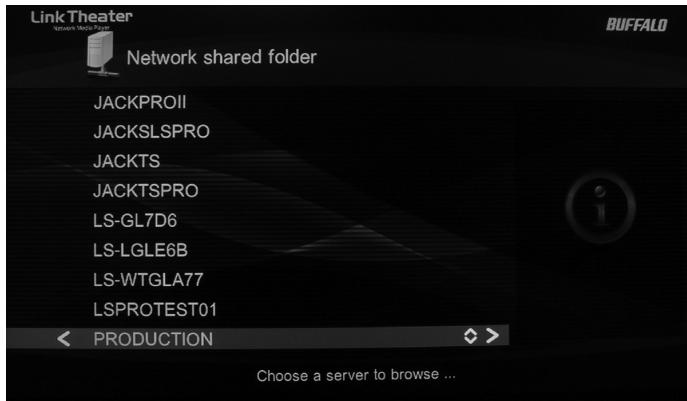
Network Shared Folder shows NAS devices on the local network. Highlight one and click the right arrow to browse content.
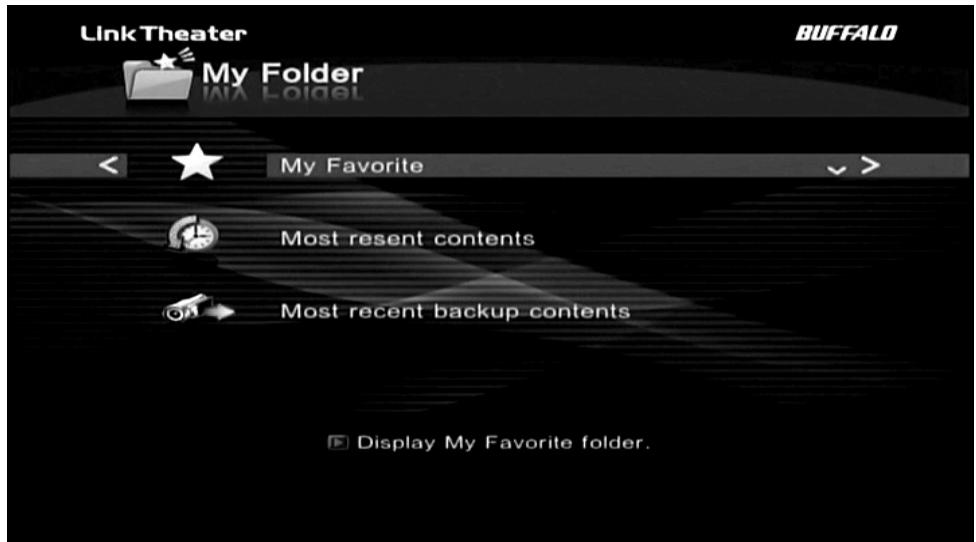
My Folder shows favorites and recently accessed content.
My Favorite is a list of files that you've added to the favorites list. Most recent contents is a list of media files that you have accessed recently. Most recent backup contents is a list of files that you've backed up recently.
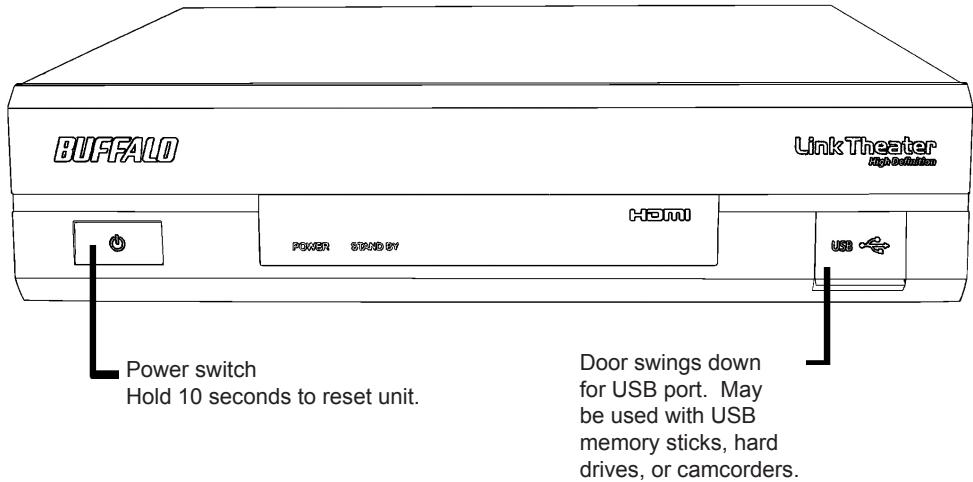
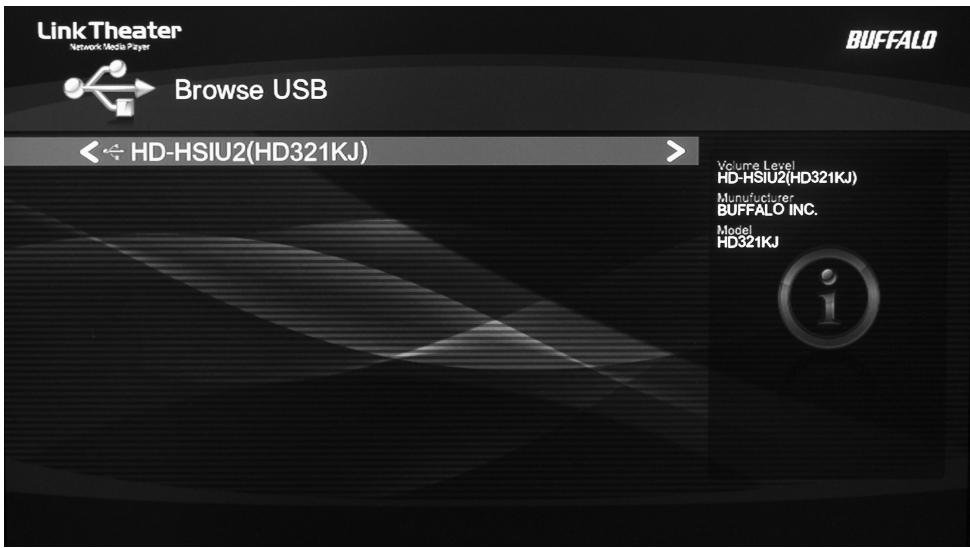
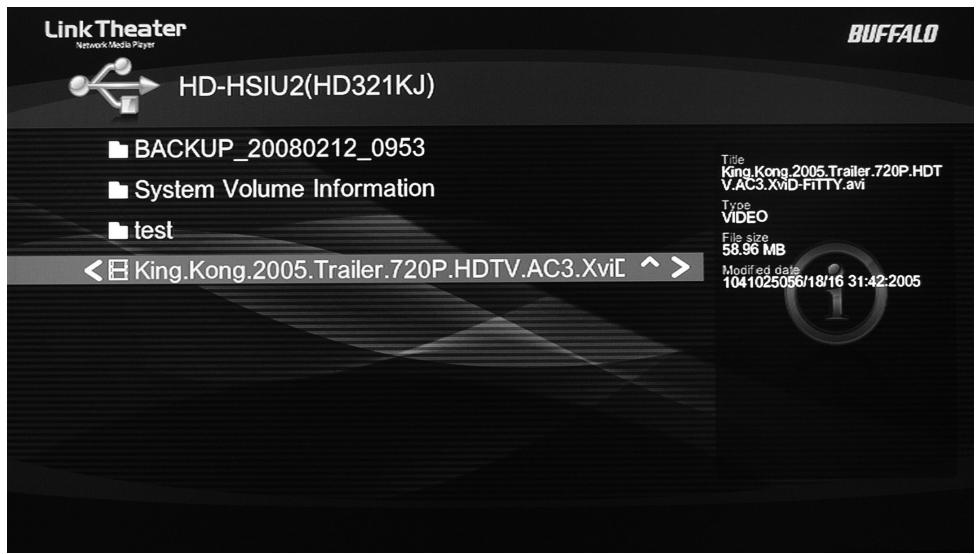
Browse USB shows USB storage devices connected directly to the LinkTheater. Highlight one and click the right arrow to browse content.
To play a media file, just highlight it and press Enter on the remote. As it plays, you can use the fast-forward and rewind buttons on the remote to navigate through the file.
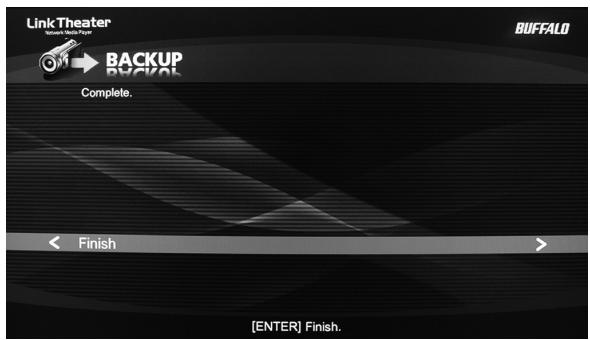
Camcorder Backup will back up your digital camcorder or digital camera to a USB hard drive automatically. Connect your FAT32 USB hard drive to the rear panel of the LinkTheater and your digital camcorder or digital camera to the front-panel USB port.
The LinkTheater will back up your media files automatically.

When the backup is complete, the Complete screen will appear. You can now access the files on the USB drive from Browse USB. Confirm that the files have been copied successfully before deleting the original files!
Using the LinkTheater with OS X
The procedure is slightly different for each version of OS X.
OS X 10.5.x
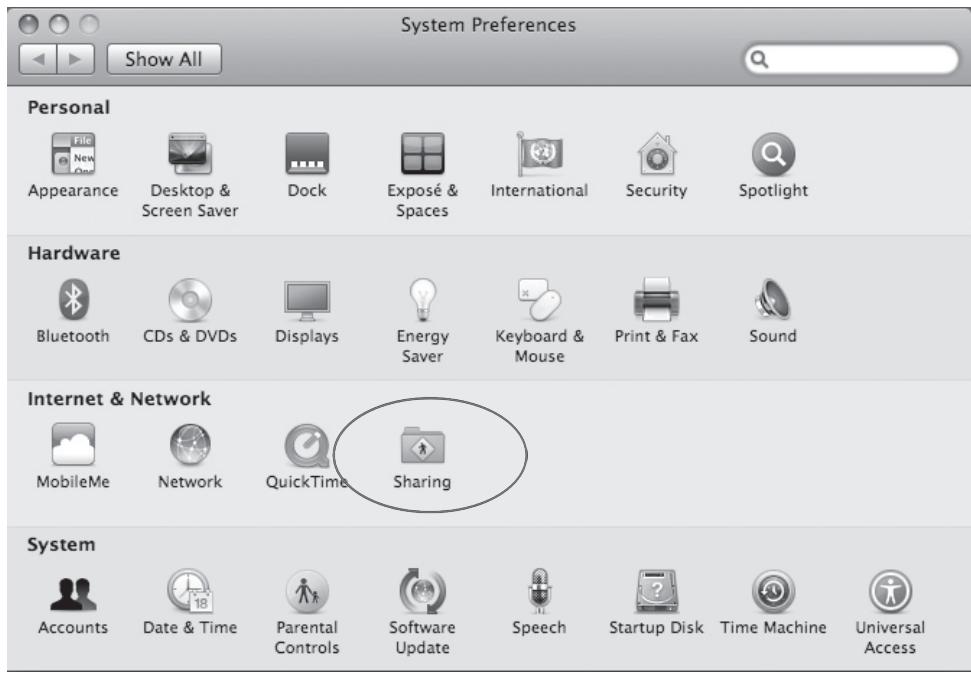
Open System Preferences and click on Sharing.
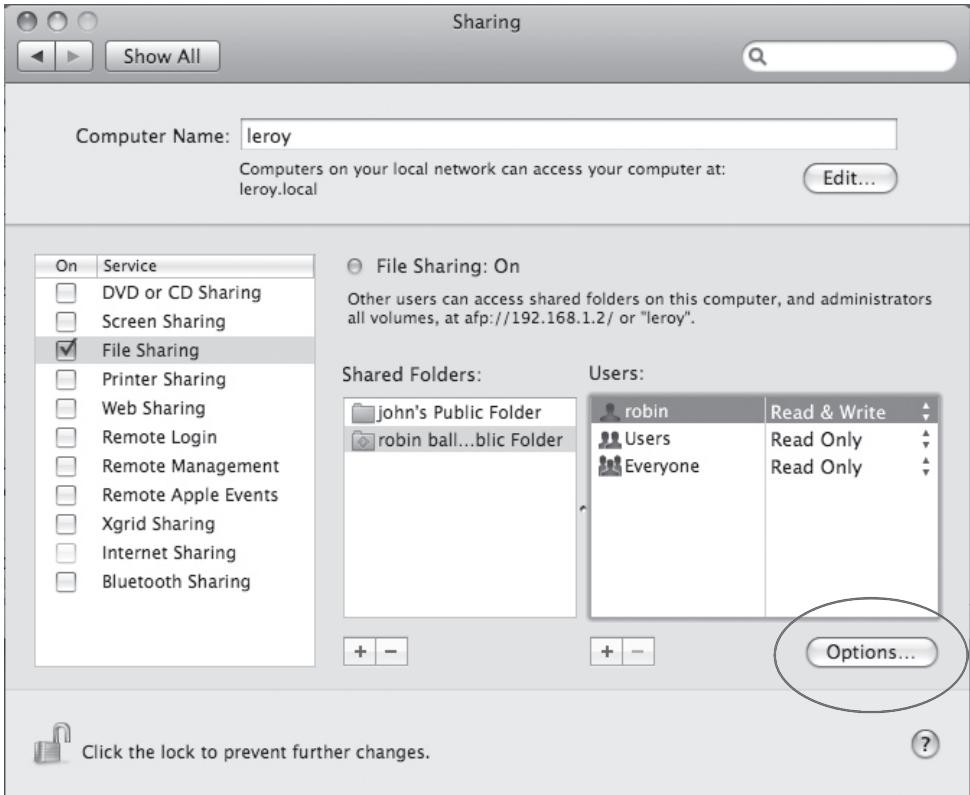
Put a check next to File Sharing and click on Options at the bottom right.
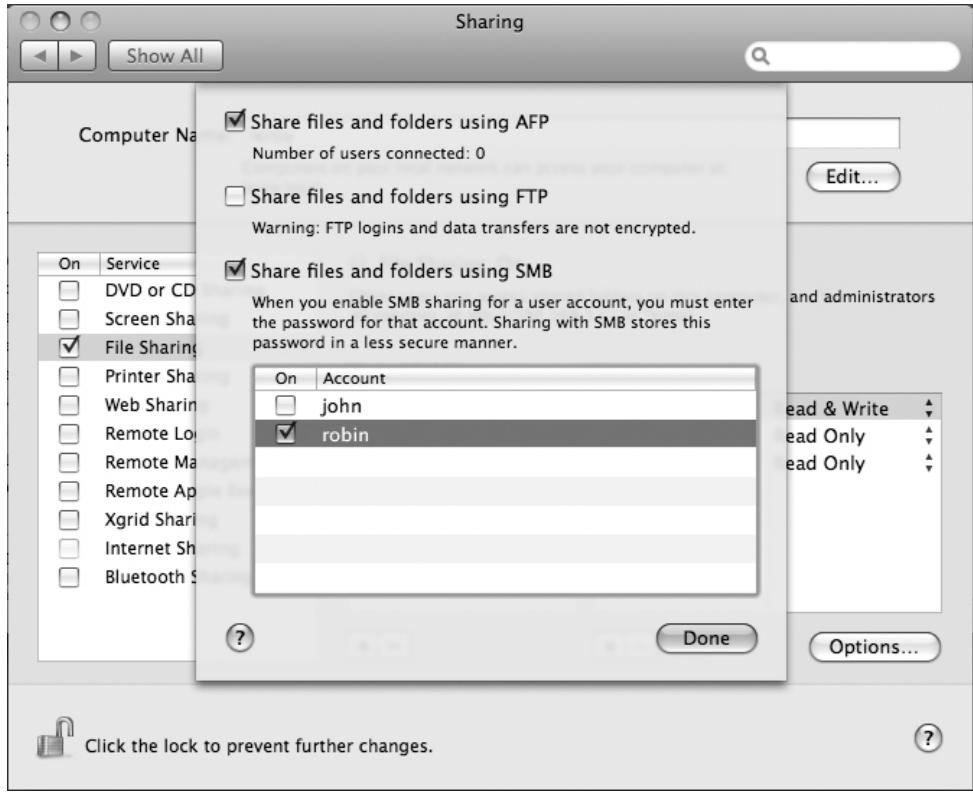
Put checks next to Share files and folders using SMB and your user account. Enter the password for your user account if required. Click on Done at the bottom right.
Turn to page 28 to set up your LinkTheater to work with the Mac.
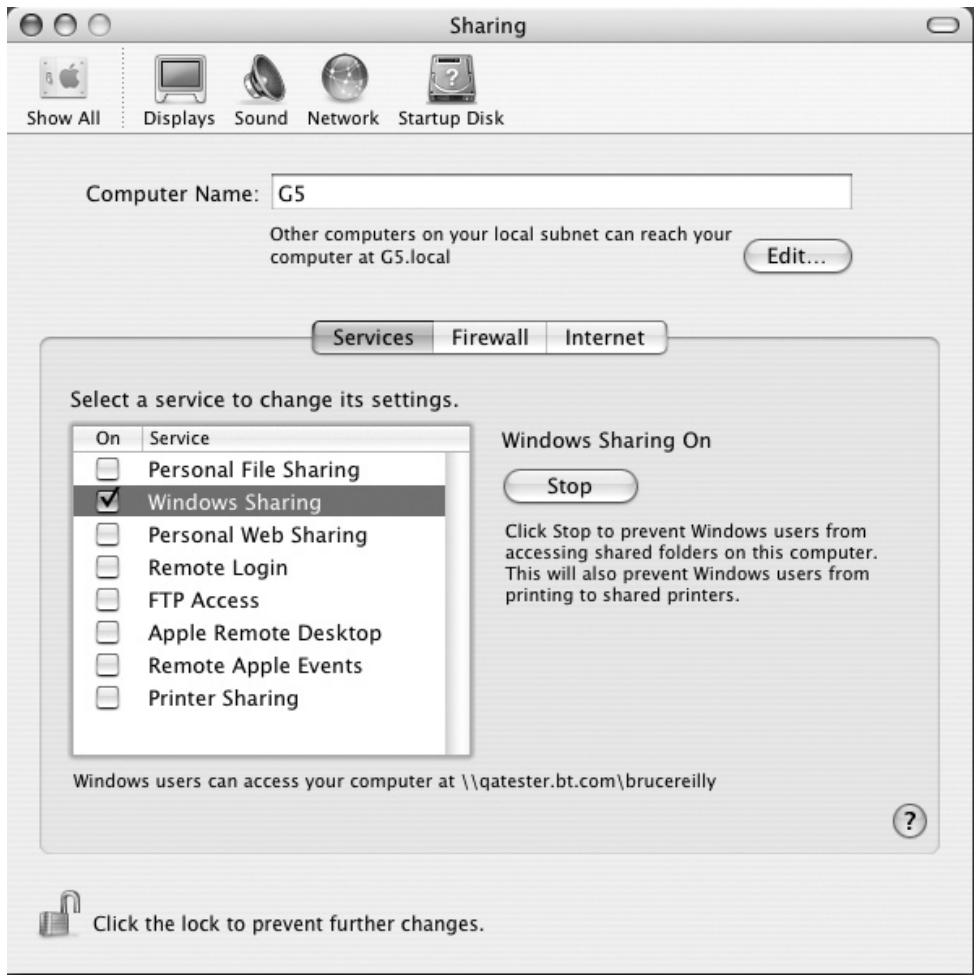
OS X 10.4.x

In System Preferences, select Sharing.
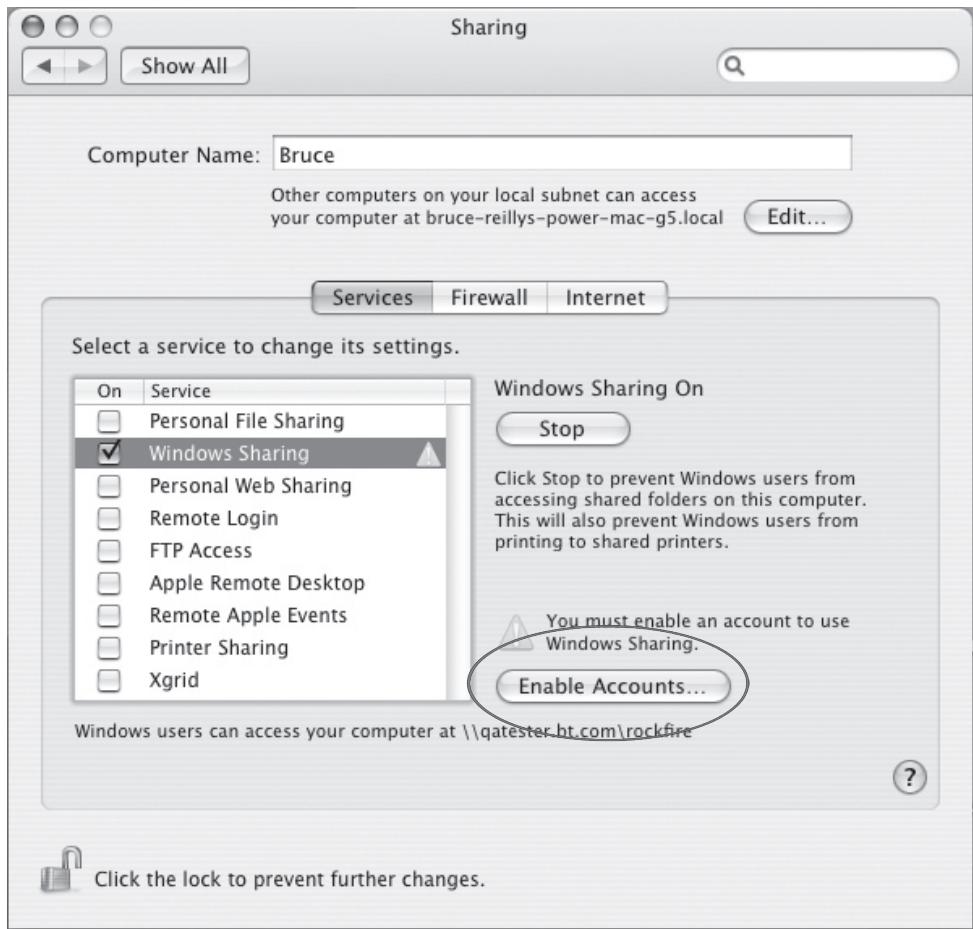
Check Windows Sharing and click on Enable Accounts.
Sharing with Windows computers requires storing your password in a less secure manner. You must enter the password for each account that you want to enable.
On Account
Bruce Reilly
Done
Check the box to the left of your account, enter your password, and then click Done.
Turn to page 28 to set up your LinkTheater to work with the Mac.
OS X 10.3.9
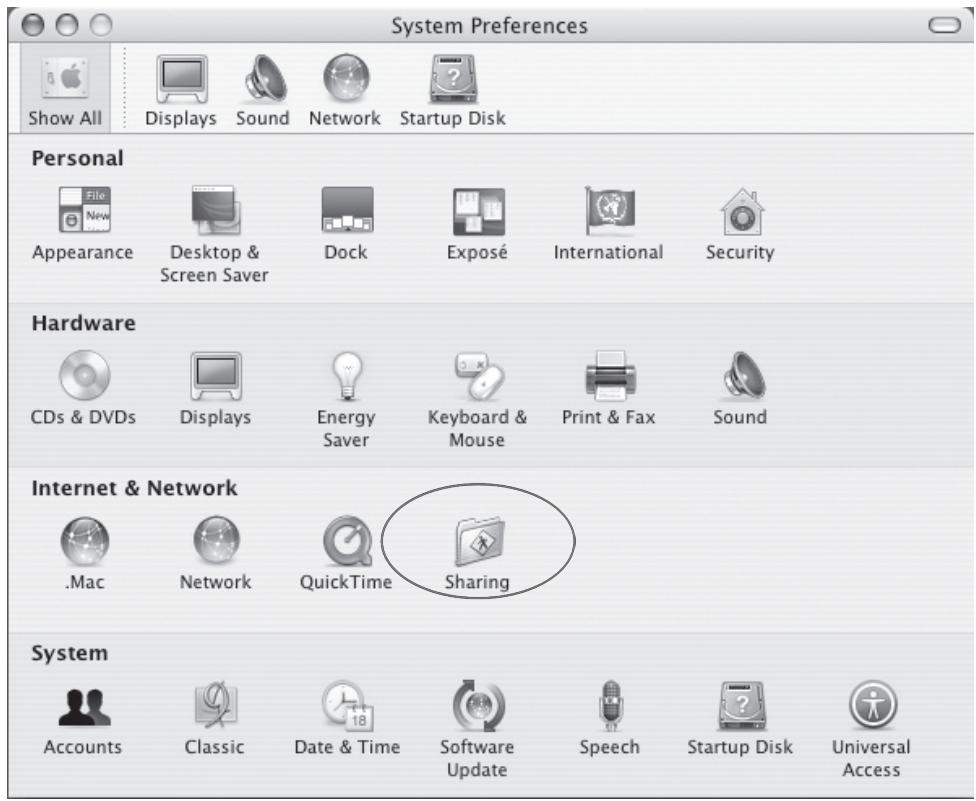
In System Preferences, select Sharing.
Check Windows Sharing.
Turn to page 28 to configure your LinkTheater to work with the Mac.
Configure LinkTheater to work with OS X
After configuring your Mac for sharing (pages 20 - 27), you can add it to the server list on your LinkStation. Then, you'll be able to access the media files on the Mac from your LinkTheater.
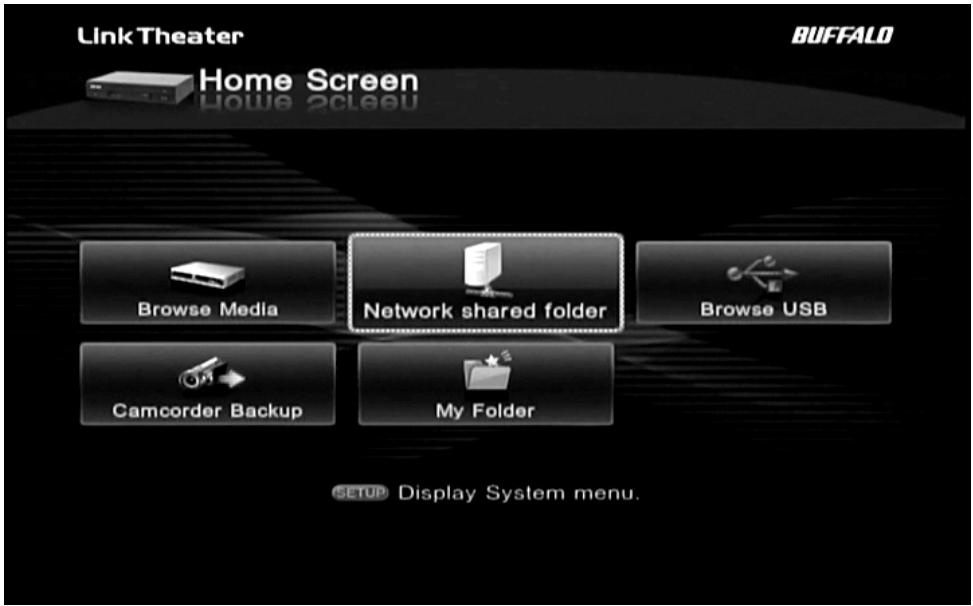
From the Home screen, select Network shared folder.
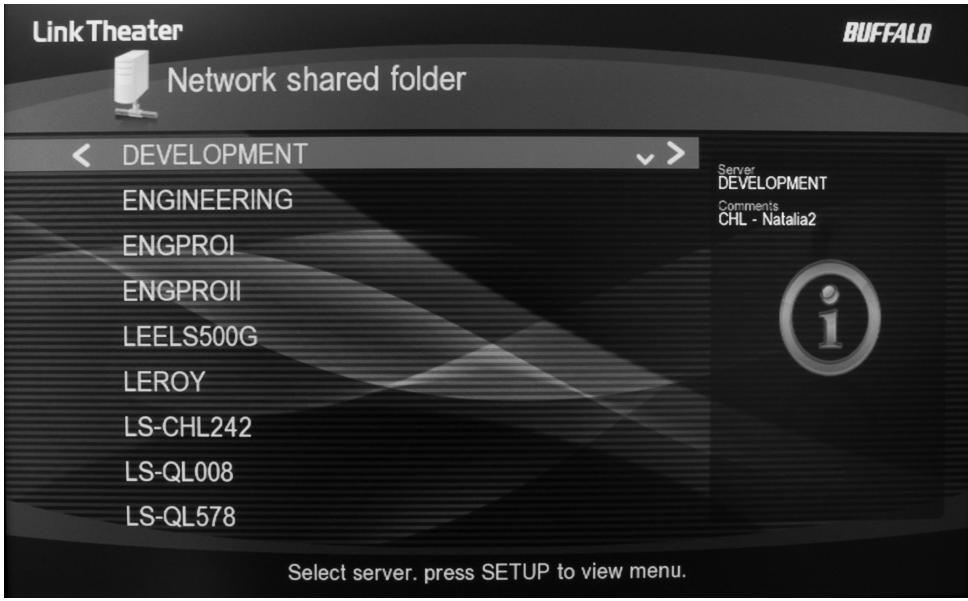
Press the Setup button on the LinkTheater's remote control.
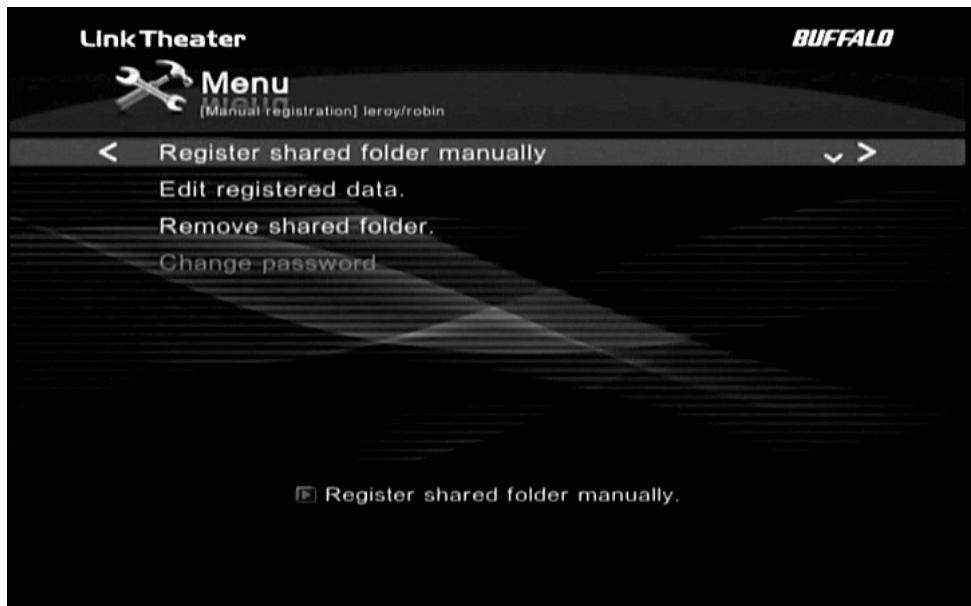
Select Register shared folder manually.
Link Theater
BUFFALO

Register shared folder.
Server name leroy
Folder name robin
```bash User name robin ballard
Password ★★★★★★★

Register data.
Use the alphanumeric buttons on the remote to enter the login information for your Mac's shared folder.
For Server name, enter the Mac's "Computer Name", which you can get from its Sharing page in System Preferences.
For Folder name, enter the name of your share folder on the Mac. This will be the same as the name you entered for your "UserID" during the initial Mac setup.
For User name , enter your name from the list under "Users" in the Sharing page in System Preferences.
For Password, enter the password that you use to log in to your Mac.
Select Register when done and press the Enter button on your LinkTheater's remote control.

The Network shared folder list will now show your Mac at the top of the list, with the name "[Manual registration]computer_name/user_name. To browse the media files on your Mac, highlight this line and press the right-arrow button on your remote.
That's it, your LinkTheater is configured to work with your Mac!
Settings
Optimise the LinkTheater for your home theater.
Right out of the box, your LinkTheater's basic configuration works well for many users. However, you have the option to modify many of its settings to give the best match with your other equipment. The Setup button on the remote gives access to different settings depending on where you are in the LinkTheater's menu. To access System menu, press the Setup button from the Home page of the menu.

System menu are divided into four categories.

Select Setup to change various settings of the LinkTheater.

General Settings include such settings as the delay times for the screenshot and slideshow, LED brightness, and whether or not to enable the digital audio output. Select Setup to access General Settings.

Screen Saver Delay - Adjust idle time (from 15 seconds to 10 minutes) before the screen saver comes up.
Slideshowhow delay - Adjust duration of time which each picture is on screen.
Key click sound - Adjust click sound (loud, medium, quiet, off) of remote control operation.
S/PDIF Passthrough - Dolby Digital and/or AC3 files may be transmitted to the S/PDIF outputs without transcoding to PCM.

Network Settings contains settings that affect your LinkTheater's network connection. For LT-H90LAN all settings relate to your wired connection. For LT-H90WN, you also have the option to connect wirelessly or via AOSS.

Current Network Status - Shows current status of the network to which LinkTheater is connected.
Network connection - Configure network connection setting.
DHCP may be used to automatically assign an IP address, or you may manually enter an IP address and subnet mask.
Proxy Settings - Enter proxy server's IP address and port.

Display Settings lets you toggle between various video output modes. This is where you adjust the picture to display properly on your 16x9 HD monitor. Press the Enter button on your remote to toggle through the available modes.

Display Settings:
The LinkTheater supports four display modes. Changing the display modes could result in your LinkTheater not operating properly so please make sure you know which modes your TV or monitor supports:
Composite 480i 4x3 – This is the standard mode. It utilized the standard RCA (yellow) video cable or to transmit video data. 480i means the picture is displayed at the resolution 640x480 interlaced.
Component 480p 4x3 – This mode requires a TV or monitor with HDMI, D-Terminal, or component video. It uses 640x480 progressive resolution. This is the same resolution that a progressive scan DVD player would use. If your TV or monitor doesn’t support 480p than this mode will NOT work.
Component 720p 16x9 – This mode is the native format for many common HDTVs. It's broadcast over the HDMI and D4/component video connectors. Most widescreen HDTVs should support this mode. It uses 1280x720 progressive resolution. If your TV or monitor doesn't support 720p then this mode will NOT work.
Component 1080i 16x9 – This is the best, highest resolution mode available from the LinkTheater. If your TV or monitor can display 1080i images, then this is the mode to use. The HD image is transmitted over the D4/component and HDMI video connectors. Use of this mode with 720p monitors is not recommended. Even if they can display it, they’d look better in their native 720p. Only use this mode with HD TVs that natively display 1080i resolution.
Please check with your TV or monitor's documentation and specifications to determine which mode you should use.
Note: The LinkTheater can only transmit D4/component and HDMI video simultaneously. It cannot transmit on D4/component and composite or HDMI and composite simultaneously.

Reset System Settings will return all settings to their factory defaults. Any changes you've made will be lost.

Configuring Windows Media Player:
With Windows Media Player 11, a PC can stream media files to the LinkTheater. If you've already installed the Buffalo Media Server utility, then using Windows Media Player 11 may not be necessary. Windows Media Player 11 replaces the Windows Media Connect 2.0 software that was available within previous versions of Windows XP. If you still have Windows Media Connect 2.0 software on your computer, it will continue to work with your LinkTheater, but upgrading to Windows Media Player 11 or later is recommended.
You can get the latest version of Windows Media Player from Microsoft's Window's Update (http://windowsupdate.microsoft.com).
In Windows Media Player, click Tools and choose Options.


From the Library tab, choose Configure Sharing.
Make sure that you have a check next to "Share my media to:" If your LinkStation is powered on and connected to the network, it will appear in the window as an "Unknown Device" with a yellow triangle and an explanation point.

Highlight the new "Unknown Device" and click Allow.
Note: If more than one device is listed then multiple media players are available on your network; in this case either add all of them or determine which one is your LinkTheater by turning it on and off and seeing how the list is affected.

Click Settings to specify what media files to share with your LinkTheater.

Change settings as desired. Click OK when done.
Transcoder
Transcoder software lets you play even more types of files.
To play files created by older utilities such as Windows Media player 7 or 8, you'll need to use transcoder software to convert the files to playable formats. To do this, click Start - Programs - BUFFALO - MediaServer - Transcoder.

Click Add to add files to the transcode list, and then Start to convert them.
For best results, Windows computers streaming media to your LinkTheater should be running DirectX9.0c. You may install DirectX9.0c from the Buffalo software disk.

An electronic copy of the LinkStation user manual (this guide) is available on the disk.

The electronic copy of the manual is in PDF format. To read it, you will need a PDF reader like Adobe's Acrobat, included on the disk for your convenience.

Specifications
LT-H90LAN, LT-H90WN LinkTheater
Supported Multimedia Formats*
Video Formats MPEG1, MPEG2, MPEG4, XviD**, wmy 9, H.264
Audio Formats MP3,WAV,WMA,M4A(AAC)
Image Formats JPG,BMP,PNG,GIF
Video Modes 480i, 480p, 720p, and 1080i
Wired LAN Interface
Interface IEEE 802.3 (10BASE-T), IEEE 802.3u (100BASE-TX)
Transmission Speed 10/100 Mbps
Connector Type RJ-45
Access Method CSMA/CD
Wireless LAN Interface (LT-H90WN model only):
Standard Compliance IEEE802.11a, IEEE802.11bIEEE802.11n Draft 2.0, IEEE802.11g
Frequency Range 2,412 - 2,462 MHz, 5,180 - 5,320 MHz
Wireless Security 128/64-bit WEP, AOSSWPA2-PSK (AES, TKIP), WPA-PSK (AES, TKIP)
Antenna 2 (external)
USB Interface
Interface USB2.0/1.1
Data Transfer Speed 480 Mbps
Other
Supported OS Windows® 2000 (with SP4+), XP, Vista®, OS X 10.3.9+
Product Voltage 50/60 Hz, 100 - 240 V
Power Consumption Max. 19 W
Dimensions W 210 x H 50 x D 210 mm
Weight 1.2 Kg
Supported Language English, German, French, Italian, Spanish
Multimedia Product Warranty
Buffalo Technology (Buffalo Inc.) products come with a one-year limited warranty from the date of purchase. If the Buffalo product malfunctions during the warranty period, Buffalo Technology will replace the unit, provided the unit has not been subjected to misuse, abuse, or non-Buffalo technology authorized alteration, modifications or repair.
All expressed and implied warranties for the Buffalo Technology product line including, but not limited to, the warranties of merchantability and fitness of a particular purpose are limited in duration to the above period.
Under no circumstances shall Buffalo Technology be liable in any way to the user for damages, including any lost profits, lost savings or other incidental or consequential damages arising out of the use of, or inability to use the Buffalo products.
In no event shall Buffalo Technology's liability exceed the price paid for the product from direct, indirect, special, incidental, or consequential damages resulting from the use of the product, its accompanying software, or its documentation. Buffalo Technology/(Buffalo Inc.) does not offer refunds for any product.
Technical Support and firmware upgrades for Buffalo Technology products are restricted to the country/region of purchase.
Please have your proof of purchase receipt to get warranty support. All defective products shall be returned with a copy of proof of purchase. In no event shall Buffalo Technology's liability exceed the price paid for the product from direct, indirect, special, incidental, or consequential damages resulting from the use of the product, its accompanying software, or its documentation. Buffalo Technology does not offer refunds for any product.
All rights reserved. Buffalo devices are designed for home or office use. Buffalo cannot be made liable for any damages, loss of data or damage following thereof (including, without limitation, damages for loss of business profits, business interruption, loss of business information, or other pecuniary loss) arising out of the use of or inability to use this Buffalo product, even if Buffalo has been advised of the possibility of such damages.
We reserve the right to upgrade our products in keeping with technological advances.
To protect against power surges and power outages, we strongly recommend that you use power surge protection and UPS solutions suitable for your situation.
This warranty is void if:
The product was operated/stored in abnormal use or maintenance conditions;
The product is repaired, modified or altered
- The product was subjected to abuse, neglect, electrical fault, improper packaging, accident or acts of nature;
The product was installed improperly;
The serial number of the product is defaced or missing;
The tamper seal on the casing is broken.
Europe - EU Declaration of Conformity
This device complies with the essential requirements of the R&TTE Directive 1999/5/EC. The following test methods have been applied in order to prove presumption of conformity with the essential requirements of the R&TTE Directive 1999/5/EC:
- EN60950-1:2001 A11:2004
Safety of Information Technology Equipment

- EN50385 : (2002-08)
Product standard to demonstrate the compliance of radio base stations and fixed terminal stations for wireless telecommunication systems with the basic restrictions or the reference levels related to human exposure to radio frequency electromagnetic fields (110MHz - 40 GHz) - General public
- EN 300 328 V1.7.1: (2006-10)
Electromagnetic compatibility and Radio spectrum Matters (ERM); Wideband Transmission systems; Data transmission equipment operating in the 2,4 GHz ISM band and using spread spectrum modulation techniques; Harmonized EN covering essential requirements under article 3.2 of the R&TE Directive
- EN 301 893 V1.4.1: (2007-07)
Broadband Radio Access Networks (BRAN);5 GHz high performance RLAN; Harmonized EN covering essential requirements of article 3.2 of the R&TTE Directive
- EN 301 489-1 V1.6.1: (2005-09)
Electromagnetic compatibility and Radio Spectrum Matters (ERM); Electromagnetic Compatibility (EMC) standard for radio equipment and services; Part 1: Common technical requirements
- EN 301489-17 V1.2.1 (2002-08)
Electromagnetic compatibility and Radio spectrum Matters (ERM); Electromagnetic Compatibility (EMC) standard for radio equipment and services; Part 17: Specific conditions for 2,4 GHz wideband transmission systems and 5 GHz high performance WLAN equipment
This device is a 2.4 GHz wideband transmission system (transceiver), intended for use in all EU member states and EFTA countries, except in France, Italy and Belgium where restrictive use applies.
France - This device may not be used for setting up outdoor radio links in France and in some areas the RF output power may be limited to 10mW EIRP in the frequency range of 2454 - 2483.5 MHz. For detailed information, the end-user should contact the national spectrum authority in France.
Italy - In Italy the end-user should apply for a license at the national spectrum authorities in order to obtain authorisation to use the device for setting up outdoor radio links and/or for supplying public access to telecommunications and/or network services.
Belgium - In Belgium there is a restriction in outdoor use. The frequency range in which outdoor operation is permitted is 2460 - 2483.5 MHz. The BIPT Institute must be notified of any outdoor wireless link having a range exceeding 300 metres.
Česky [Czech] Buffalo Inc. tímtro prohlausej, Že tento Ethernet Converter je ve shodě se základními požadavky a dalási mólne príslužnám iustanoveními směrnice 1999/5/ES. Dansk [Danish] Undertegnede Buffalo Inc. erklærer herved, at følgende udstyr Ethernet Converter overholder de væsentlige krav og øvrige relevante krav i direktiv 1999/5/EF. Deutsch [German] Hiermit erklärrt Buffalo Inc., dass sich das Gerät Ethernet Converter in Übereinstimmung mit den grundlegenden Anforderungen und den übrigen einschlögigen Bestimmungen der Richtlinie 1999/5/EG befindet. Eesti
[Estonian] Käesolevaga kinnitab Buffalo Inc. seadme Ethernet Converter vastavust direktiivi 1999/5/EÜ põhinóuetele ja nimetatud direktiivist tulenevatele teistele asjakohastele sätetele. English Hereby, Buffalo Inc., declares that this Ethernet Converter is in compliance with the essential requirements and other relevant provisions of Directive 1999/5/EC. Espanol
[Spanish] Por medio de la presente Buffalo Inc. declara que el Ethernet Converter cumple con los requisitos esenciales y cualesquiera除外as dispositions aplicables o exigibles de la Directiva 1999/5/CE. Éληνική
[Greek] MET HN ΠΑΝΟΥΣΑ Buffalo Inc. ΔΗΛΟNEI OTI Ethernet Converter ΣΥΜΜΟΦΟΝΕΤΑ ΠΙΝΟΣ TΙΣ OΥΣΙΩΔΕΙΣ ΑΠΑΙΤΗΣΕΙΚAI TΙΣ ΑΟΙΝΕΣ ΕΧΕΤΙΚΕ ΣΙΑΤΑΕΙΣ THΣ ΕΟΗΓΙΑΣ 1999/5/EK. François [French] Par laprésente Buffalo Inc. déclare que l'appareil Ethernet Converter est conforme aux exigences essentielles et aux autres dispositions pertinentes de la directive 1999/5/CE. Italiano [Italian] Con la presente Buffalo Inc. dichiarare che dato Ethernet Converter è conforme ai requisiti essenziali ed alle altre disposizioni pertinenti stabilite alla direttiva 1999/5/CE. Latviski [Latvian] Ar šо Buffalo Inc. deklare, ka Ethernet Converter atbilst Direktivas 1999/5/EK butiskajām prasibām un citiem ar to saistitajiem noteikumiem. Lietuvić
[Lithuanian] Šiuo Buffalo Inc. deklaruoja, kad šis Ethernet Converter atitinka esminius reikalavimus ir kitas 1999/5/EB Direktyvos nuostatas. Nederlands
[Dutch] Hierbij verkaart Buffalo Inc. dat het toestel Ethernet Converter in overeenstemming is met de essentiële eisen en de andere relevante bepalingen van richtlijn 1999/5/EG. Malti [Maltese] Hawnhekk, Buffalo Inc., jiddikjara li dan Ethernet Converter jikkonforma mal-htigijiet essenzjali u ma provvedimenti ohrajn relevanti li hemm fid-Dirrettiva 1999/5/EC. Magyar
[Hungarian] Aluliörett, Buffalo Inc. nyilatkozem, hagy a Ethernet Converter megfelel a vonatkoź alapvető követelményeknek és az 1999/5/EC irányelv égyéb elóirásainak. Polski
[Polish] Niniejszym Buffalo Inc. oswiadza, ze Ethernet Converter jest zgodny z zasadniczymi wymogami oraz pozostalymi stosownymi postanowieniami Dyrektywy 1999/5/EC. Portugués
[Portuguese] Buffalo Inc. declara que este Ethernet Converter está conforme com os requisitos essenciais e除外as dispositions da Directiva 1999/5/CE. Slovensko
[Slovenian] Buffalo Inc. izjavljá, da je ta Ethernet Converter v skladu z bistvenimi zahtevami in ostalimi relevantnimi dolocili direktive 1999/5/ES. Slovensky [Slovak] [Meno vyrobcu] týmto vyhlasujé, ze Ethernet Converter splína základné požiadavyká a větky príslušné ustanovenia Smernice 1999/5/ES. Suomi [Finnish] Buffalo Inc. vakuuttaa täten että Ethernet Converter typpinen laite on direktiivin 1999/5/EY oleellisten vaatimusten ja sită koskevien direktiivin muiden ehtojen mukainen. Svenska [Swedish] Härmed intygär Buffalo Inc. attenna Ethernet Converter stål överensstammelse med de väsentliga eigenskapskrav och örvia relevanta bestämmlser som framgår av direktiv 1999/5/EG.
Environmental Information
The equipment that you have purchased has required the extraction and use of natural resources for its production.
- The equipment may contain hazardous substances that could impact health and the environment.
- In order to avoid the dissemination of those substances in our environment and to diminish the pressure on the natural resources, we encourage you to use the appropriate take-back systems.
- The take-back systems will reuse or recycle most of the materials of your end life equipment in a sound way.
- The crossed-out wheeled bin symbol invites you to use those systems.
- If you need more information on the collection, reuse and recycling systems, please contact your local or regional waste administration.

Contact Information
Europe:
Buffalo Technology UK Ltd.
2 Bracknell Beeches,
Old Bracknell Lane,
Bracknell,
Berkshire, RG12 7BW
United Kingdom
General Inquiries:
Email: sales@buffalo-technology.com
Technical Support:
European technical support is provided in English, French, German, Italian, and Spanish. For opening hours and relevant phone numbers, go to www.buffalo-technology.com/contact.
BUFFALO ™
Settings
Optimise the LinkTheater for your home theater. Right out of the box, your LinkTheater's basic configuration works well for many users. However, you have the option to modify many of its settings to give the best match with your other equipment. The Setup button on the remote gives access to different settings depending on where you are in the LinkTheater's menu. To access System menu, press the Setup button from the Home page of the menu.  System menu are divided into four categories.  Select Setup to change various settings of the LinkTheater.  General Settings include such settings as the delay times for the screenshot and slideshow, LED brightness, and whether or not to enable the digital audio output. Select Setup to access General Settings.  Screen Saver Delay - Adjust idle time (from 15 seconds to 10 minutes) before the screen saver comes up. Slideshowhow delay - Adjust duration of time which each picture is on screen. Key click sound - Adjust click sound (loud, medium, quiet, off) of remote control operation. S/PDIF Passthrough - Dolby Digital and/or AC3 files may be transmitted to the S/PDIF outputs without transcoding to PCM.  Network Settings contains settings that affect your LinkTheater's network connection. For LT-H90LAN all settings relate to your wired connection. For LT-H90WN, you also have the option to connect wirelessly or via AOSS.  Current Network Status - Shows current status of the network to which LinkTheater is connected. Network connection - Configure network connection setting. DHCP may be used to automatically assign an IP address, or you may manually enter an IP address and subnet mask. Proxy Settings - Enter proxy server's IP address and port.  Display Settings lets you toggle between various video output modes. This is where you adjust the picture to display properly on your 16x9 HD monitor. Press the Enter button on your remote to toggle through the available modes. Display Settings:
The LinkTheater supports four display modes. Changing the display modes could result in your LinkTheater not operating properly so please make sure you know which modes your TV or monitor supports: Composite 480i 4x3 – This is the standard mode. It utilized the standard RCA (yellow) video cable or to transmit video data. 480i means the picture is displayed at the resolution 640x480 interlaced. Component 480p 4x3 – This mode requires a TV or monitor with HDMI, D-Terminal, or component video. It uses 640x480 progressive resolution. This is the same resolution that a progressive scan DVD player would use. If your TV or monitor doesn’t support 480p than this mode will NOT work. Component 720p 16x9 – This mode is the native format for many common HDTVs. It's broadcast over the HDMI and D4/component video connectors. Most widescreen HDTVs should support this mode. It uses 1280x720 progressive resolution. If your TV or monitor doesn't support 720p then this mode will NOT work. Component 1080i 16x9 – This is the best, highest resolution mode available from the LinkTheater. If your TV or monitor can display 1080i images, then this is the mode to use. The HD image is transmitted over the D4/component and HDMI video connectors. Use of this mode with 720p monitors is not recommended. Even if they can display it, they’d look better in their native 720p. Only use this mode with HD TVs that natively display 1080i resolution. Please check with your TV or monitor's documentation and specifications to determine which mode you should use. Note: The LinkTheater can only transmit D4/component and HDMI video simultaneously. It cannot transmit on D4/component and composite or HDMI and composite simultaneously.  Reset System Settings will return all settings to their factory defaults. Any changes you've made will be lost. Configuring Windows Media Player:
With Windows Media Player 11, a PC can stream media files to the LinkTheater. If you've already installed the Buffalo Media Server utility, then using Windows Media Player 11 may not be necessary. Windows Media Player 11 replaces the Windows Media Connect 2.0 software that was available within previous versions of Windows XP. If you still have Windows Media Connect 2.0 software on your computer, it will continue to work with your LinkTheater, but upgrading to Windows Media Player 11 or later is recommended. You can get the latest version of Windows Media Player from Microsoft's Window's Update (http://windowsupdate.microsoft.com).In Windows Media Player, click Tools and choose Options.
  From the Library tab, choose Configure Sharing. Make sure that you have a check next to "Share my media to:" If your LinkStation is powered on and connected to the network, it will appear in the window as an "Unknown Device" with a yellow triangle and an explanation point.  Highlight the new "Unknown Device" and click Allow. Note: If more than one device is listed then multiple media players are available on your network; in this case either add all of them or determine which one is your LinkTheater by turning it on and off and seeing how the list is affected.  Click Settings to specify what media files to share with your LinkTheater.  Change settings as desired. Click OK when done.Transcoder
Transcoder software lets you play even more types of files. To play files created by older utilities such as Windows Media player 7 or 8, you'll need to use transcoder software to convert the files to playable formats. To do this, click Start - Programs - BUFFALO - MediaServer - Transcoder.  Click Add to add files to the transcode list, and then Start to convert them. For best results, Windows computers streaming media to your LinkTheater should be running DirectX9.0c. You may install DirectX9.0c from the Buffalo software disk.  An electronic copy of the LinkStation user manual (this guide) is available on the disk.  The electronic copy of the manual is in PDF format. To read it, you will need a PDF reader like Adobe's Acrobat, included on the disk for your convenience. Specifications
LT-H90LAN, LT-H90WN LinkTheaterSupported Multimedia Formats*
Video Formats MPEG1, MPEG2, MPEG4, XviD**, wmy 9, H.264 Audio Formats MP3,WAV,WMA,M4A(AAC) Image Formats JPG,BMP,PNG,GIF Video Modes 480i, 480p, 720p, and 1080iWired LAN Interface
Interface IEEE 802.3 (10BASE-T), IEEE 802.3u (100BASE-TX) Transmission Speed 10/100 Mbps Connector Type RJ-45 Access Method CSMA/CDWireless LAN Interface (LT-H90WN model only):
Standard Compliance IEEE802.11a, IEEE802.11bIEEE802.11n Draft 2.0, IEEE802.11g Frequency Range 2,412 - 2,462 MHz, 5,180 - 5,320 MHz Wireless Security 128/64-bit WEP, AOSSWPA2-PSK (AES, TKIP), WPA-PSK (AES, TKIP) Antenna 2 (external)USB Interface
Interface USB2.0/1.1 Data Transfer Speed 480 MbpsOther
Supported OS Windows® 2000 (with SP4+), XP, Vista®, OS X 10.3.9+ Product Voltage 50/60 Hz, 100 - 240 V Power Consumption Max. 19 W Dimensions W 210 x H 50 x D 210 mm Weight 1.2 Kg Supported Language English, German, French, Italian, SpanishMultimedia Product Warranty
Buffalo Technology (Buffalo Inc.) products come with a one-year limited warranty from the date of purchase. If the Buffalo product malfunctions during the warranty period, Buffalo Technology will replace the unit, provided the unit has not been subjected to misuse, abuse, or non-Buffalo technology authorized alteration, modifications or repair. All expressed and implied warranties for the Buffalo Technology product line including, but not limited to, the warranties of merchantability and fitness of a particular purpose are limited in duration to the above period. Under no circumstances shall Buffalo Technology be liable in any way to the user for damages, including any lost profits, lost savings or other incidental or consequential damages arising out of the use of, or inability to use the Buffalo products. In no event shall Buffalo Technology's liability exceed the price paid for the product from direct, indirect, special, incidental, or consequential damages resulting from the use of the product, its accompanying software, or its documentation. Buffalo Technology/(Buffalo Inc.) does not offer refunds for any product. Technical Support and firmware upgrades for Buffalo Technology products are restricted to the country/region of purchase. Please have your proof of purchase receipt to get warranty support. All defective products shall be returned with a copy of proof of purchase. In no event shall Buffalo Technology's liability exceed the price paid for the product from direct, indirect, special, incidental, or consequential damages resulting from the use of the product, its accompanying software, or its documentation. Buffalo Technology does not offer refunds for any product. All rights reserved. Buffalo devices are designed for home or office use. Buffalo cannot be made liable for any damages, loss of data or damage following thereof (including, without limitation, damages for loss of business profits, business interruption, loss of business information, or other pecuniary loss) arising out of the use of or inability to use this Buffalo product, even if Buffalo has been advised of the possibility of such damages. We reserve the right to upgrade our products in keeping with technological advances. To protect against power surges and power outages, we strongly recommend that you use power surge protection and UPS solutions suitable for your situation. This warranty is void if: The product was operated/stored in abnormal use or maintenance conditions; The product is repaired, modified or altered - The product was subjected to abuse, neglect, electrical fault, improper packaging, accident or acts of nature; The product was installed improperly; The serial number of the product is defaced or missing; The tamper seal on the casing is broken.Europe - EU Declaration of Conformity
This device complies with the essential requirements of the R&TTE Directive 1999/5/EC. The following test methods have been applied in order to prove presumption of conformity with the essential requirements of the R&TTE Directive 1999/5/EC:- EN60950-1:2001 A11:2004
Safety of Information Technology Equipment - EN50385 : (2002-08)
Product standard to demonstrate the compliance of radio base stations and fixed terminal stations for wireless telecommunication systems with the basic restrictions or the reference levels related to human exposure to radio frequency electromagnetic fields (110MHz - 40 GHz) - General public- EN 300 328 V1.7.1: (2006-10)
Electromagnetic compatibility and Radio spectrum Matters (ERM); Wideband Transmission systems; Data transmission equipment operating in the 2,4 GHz ISM band and using spread spectrum modulation techniques; Harmonized EN covering essential requirements under article 3.2 of the R&TE Directive- EN 301 893 V1.4.1: (2007-07)
Broadband Radio Access Networks (BRAN);5 GHz high performance RLAN; Harmonized EN covering essential requirements of article 3.2 of the R&TTE Directive- EN 301 489-1 V1.6.1: (2005-09)
Electromagnetic compatibility and Radio Spectrum Matters (ERM); Electromagnetic Compatibility (EMC) standard for radio equipment and services; Part 1: Common technical requirements- EN 301489-17 V1.2.1 (2002-08)
Electromagnetic compatibility and Radio spectrum Matters (ERM); Electromagnetic Compatibility (EMC) standard for radio equipment and services; Part 17: Specific conditions for 2,4 GHz wideband transmission systems and 5 GHz high performance WLAN equipment This device is a 2.4 GHz wideband transmission system (transceiver), intended for use in all EU member states and EFTA countries, except in France, Italy and Belgium where restrictive use applies. France - This device may not be used for setting up outdoor radio links in France and in some areas the RF output power may be limited to 10mW EIRP in the frequency range of 2454 - 2483.5 MHz. For detailed information, the end-user should contact the national spectrum authority in France. Italy - In Italy the end-user should apply for a license at the national spectrum authorities in order to obtain authorisation to use the device for setting up outdoor radio links and/or for supplying public access to telecommunications and/or network services. Belgium - In Belgium there is a restriction in outdoor use. The frequency range in which outdoor operation is permitted is 2460 - 2483.5 MHz. The BIPT Institute must be notified of any outdoor wireless link having a range exceeding 300 metres.| Česky [Czech] | Buffalo Inc. tímtro prohlausej, Že tento Ethernet Converter je ve shodě se základními požadavky a dalási mólne príslužnám iustanoveními směrnice 1999/5/ES. |
| Dansk [Danish] | Undertegnede Buffalo Inc. erklærer herved, at følgende udstyr Ethernet Converter overholder de væsentlige krav og øvrige relevante krav i direktiv 1999/5/EF. |
| Deutsch [German] | Hiermit erklärrt Buffalo Inc., dass sich das Gerät Ethernet Converter in Übereinstimmung mit den grundlegenden Anforderungen und den übrigen einschlögigen Bestimmungen der Richtlinie 1999/5/EG befindet. |
| Eesti [Estonian] | Käesolevaga kinnitab Buffalo Inc. seadme Ethernet Converter vastavust direktiivi 1999/5/EÜ põhinóuetele ja nimetatud direktiivist tulenevatele teistele asjakohastele sätetele. |
| English | Hereby, Buffalo Inc., declares that this Ethernet Converter is in compliance with the essential requirements and other relevant provisions of Directive 1999/5/EC. |
| Espanol [Spanish] | Por medio de la presente Buffalo Inc. declara que el Ethernet Converter cumple con los requisitos esenciales y cualesquiera除外as dispositions aplicables o exigibles de la Directiva 1999/5/CE. |
| Éληνική [Greek] | MET HN ΠΑΝΟΥΣΑ Buffalo Inc. ΔΗΛΟNEI OTI Ethernet Converter ΣΥΜΜΟΦΟΝΕΤΑ ΠΙΝΟΣ TΙΣ OΥΣΙΩΔΕΙΣ ΑΠΑΙΤΗΣΕΙΚAI TΙΣ ΑΟΙΝΕΣ ΕΧΕΤΙΚΕ ΣΙΑΤΑΕΙΣ THΣ ΕΟΗΓΙΑΣ 1999/5/EK. |
| François [French] | Par laprésente Buffalo Inc. déclare que l'appareil Ethernet Converter est conforme aux exigences essentielles et aux autres dispositions pertinentes de la directive 1999/5/CE. |
| Italiano [Italian] | Con la presente Buffalo Inc. dichiarare che dato Ethernet Converter è conforme ai requisiti essenziali ed alle altre disposizioni pertinenti stabilite alla direttiva 1999/5/CE. |
| Latviski [Latvian] | Ar šо Buffalo Inc. deklare, ka Ethernet Converter atbilst Direktivas 1999/5/EK butiskajām prasibām un citiem ar to saistitajiem noteikumiem. |
| Lietuvić [Lithuanian] | Šiuo Buffalo Inc. deklaruoja, kad šis Ethernet Converter atitinka esminius reikalavimus ir kitas 1999/5/EB Direktyvos nuostatas. |
| Nederlands [Dutch] | Hierbij verkaart Buffalo Inc. dat het toestel Ethernet Converter in overeenstemming is met de essentiële eisen en de andere relevante bepalingen van richtlijn 1999/5/EG. |
| Malti [Maltese] | Hawnhekk, Buffalo Inc., jiddikjara li dan Ethernet Converter jikkonforma mal-htigijiet essenzjali u ma provvedimenti ohrajn relevanti li hemm fid-Dirrettiva 1999/5/EC. |
| Magyar [Hungarian] | Aluliörett, Buffalo Inc. nyilatkozem, hagy a Ethernet Converter megfelel a vonatkoź alapvető követelményeknek és az 1999/5/EC irányelv égyéb elóirásainak. |
| Polski [Polish] | Niniejszym Buffalo Inc. oswiadza, ze Ethernet Converter jest zgodny z zasadniczymi wymogami oraz pozostalymi stosownymi postanowieniami Dyrektywy 1999/5/EC. |
| Portugués [Portuguese] | Buffalo Inc. declara que este Ethernet Converter está conforme com os requisitos essenciais e除外as dispositions da Directiva 1999/5/CE. |
| Slovensko [Slovenian] | Buffalo Inc. izjavljá, da je ta Ethernet Converter v skladu z bistvenimi zahtevami in ostalimi relevantnimi dolocili direktive 1999/5/ES. |
| Slovensky [Slovak] | [Meno vyrobcu] týmto vyhlasujé, ze Ethernet Converter splína základné požiadavyká a větky príslušné ustanovenia Smernice 1999/5/ES. |
| Suomi [Finnish] | Buffalo Inc. vakuuttaa täten että Ethernet Converter typpinen laite on direktiivin 1999/5/EY oleellisten vaatimusten ja sită koskevien direktiivin muiden ehtojen mukainen. |
| Svenska [Swedish] | Härmed intygär Buffalo Inc. attenna Ethernet Converter stål överensstammelse med de väsentliga eigenskapskrav och örvia relevanta bestämmlser som framgår av direktiv 1999/5/EG. |