NOXON2 - Digital radio receiver TERRATEC - Free user manual and instructions
Find the device manual for free NOXON2 TERRATEC in PDF.


User questions about NOXON2 TERRATEC
0 question about this device. Answer the ones you know or ask your own.
Ask a new question about this device
Download the instructions for your Digital radio receiver in PDF format for free! Find your manual NOXON2 - TERRATEC and take your electronic device back in hand. On this page are published all the documents necessary for the use of your device. NOXON2 by TERRATEC.
USER MANUAL NOXON2 TERRATEC
hereby declare that the product:
NOXON 2 audio (Wireless audio adapter)
to which this declaration refers is in compliance with the following standards or standardizing documents:
EN 55022:1994 + A1:1995 + A2:1997, CLASS B
EN301489-1 (2002-08)
EN 301 489-17 (2002-08)
EN 60950:2000
EN 300 328-1 (2001-12)
EN 300 328-2 (2001-12)
This device may only be used in the following environments and operating conditions: residential, commercial and industrial environments, as well as small businesses. The basic protective requirements of EMC Directive 89/336/EEC are thus fulfilled. CE conformity has been demonstrated. As stipulated in R&TTE Directive (1999/5/EC), this device corresponds to a Class 1 radio system (Commission Decision 2000/299/EC). This declaration is based on:
Test report(s) of the EMC testing laboratory

The information in this document is subject to change without notice and shall not be deemed as a warranty by the seller. No warranties, express or implied, are made with regard to the quality, suitability or accuracy of this document. The manufacturer reserves the right to change the contents of this document and/or the associated products at any time without the provision of prior notice to specific persons or organizations. The manufacturer shall not be held liable for damages of any kind arising from the use, or the inability to use this product or its documentation, even if the possibility of such damage is known. The information in this document is subject to copyright. All rights are reserved. No part of this manual may be reproduced or transmitted in any form or for any purpose without the express written permission of the copyright holders. Product and brand names contained in this document are used for identification purposes only. All registered trademarks, product designations or brand names used in this document are the registered property of their respective owners.
©TerraTec® Electronic GmbH, 1994 - 2006. All rights reserved (1/24/2006).
Copyright notice.
This product is protected by certain intellectual property rights of NEMS. Use or distribution of such technology outside of this product is prohibited without a license from NEMS or an authorized NEMS subsidiary.
"This product is protected by certain intellectual property rights of Microsoft Corporation. Use or distribution of such technology outside of this product is prohibited without a license from Microsoft or an authorized Microsoft subsidiary.
MPEG Layer-3 audio decoding technology licensed from Fraunhofer IIS and Thomson multimedia.
Content
Welcome. 5
Setup, safety and care information. 7
From opening the package to installation 8
Overview. 9
The connectors of the NOXON 2 audio. 10
WLAN antenna connector. 10
The analog audio output 10
The digital audio output. 10
A small reset button 11
The network port 11
The power adapter socket 12
The USB port 12
The headache output. 12
Networking 13
Wired connection (LAN) 13
Wireless connection (WLAN) 14
Network miscellanea 18
The first time: switching on the NOXON 20
Configuring the NOXON to the network 20
Scenario 1 - the wired connection 21
Scenario 2 - the wireless connection. 23
Network profiles 25
Playback options. 26
Playing MP3/WMA files from the local network 26
Playback from a USB storage device 29
Receiving Internet radio 29
The vTuner Premium Service 30
The remote control and the buttons on the NOXON 31
Buttons and their functions. 31
33
SMS navigation 33
The configuration menu. 34
Your own music server. 35
Installation 35
The web interface 37
Additional music server info 38
Playing DRM-protected media 39
Introduction 39
Windows Media Connect 40
UPnP servers and Macintosh? 41
UPnP media server alternatives. 41
The DMP Installer 41
Configuring devices via the DMP Installer. 43
Updating the firmware. 43
Appendix. 46
Geeks only-building your own Favorites from links 46
Tough network problems? Here are the details. 48
A number of known issues 49
FAQ—frequently-asked questions and their answers. 51
Technical glossary 55
Service at TerraTec. 57
Welcome.
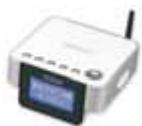
We're pleased that you've chosen a TerraTec product and would like to congratulate you on your decision. The NOXON 2 audio provides convenient access to audio libraries within your home network, to a vast number of online radio stations on the Internet, and even external USB storage – be it a hard drive, MemoryStick or other flash memory.
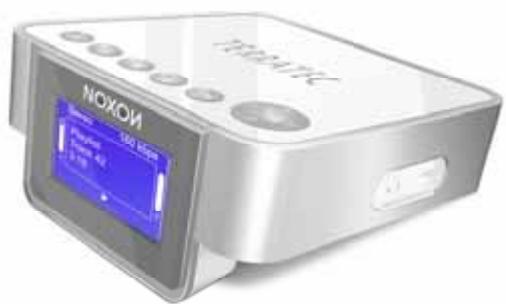
The NOXON 2 audio
We would like to start by exciting your imagination a bit and introducing the central features of your new device.
Access your media library. The device integrates into your existing network with ease using a wireless (WLAN or Wifi) or cable (Ethernet, LAN) connection. Simply add a media server to your network and your complete collection of MP3 and WMA audio files will be available anywhere in your home. Needless to say, the more powerful the transmitter performance of your router, the greater the range will be. Alternatively, place your files on an external USB2 hard drive and connect it to the USB port of the NOXON 2 for access to all of your audio treasures.
Always online. The NOXON 2 is an ideal complement to your DSL or other broadband Internet connection. With a flat-rate connection, you can use the NOXON 2 to enjoy the wide selection of radio stations on the Internet (regardless of whether you access the Internet via your desktop, laptop or router). And to make sure you never lose your overview, choose the hottest stations from the convenient, up-to-date list by the VTuner Premium Service.
Hand and glove. The NOXON 2 not only has a fixed MAC address, but it also supports WEP/WPA encryption and proxy servers to ensure a long and happy integration in your network. Don't worry if some of these terms don't mean anything to you right now—we'll walk you through the setup on the following pages so that you'll be up and running in no time, even as a network newbie.
Premium audio without noise. We have provided the NOXON 2 audio with an optical (TOS link) digital output, letting you transfer the signal to high-quality HiFi environments without losses. But please remember that the playback can only be as good as the source material. A great number of the tracks out there on the Internet cannot satisfy very high quality demands due to their low bit rates. As a rule, a data rate of at least 128 Kbps and a stereo signal are essential for painless listening. But we will tell you more about this later ...
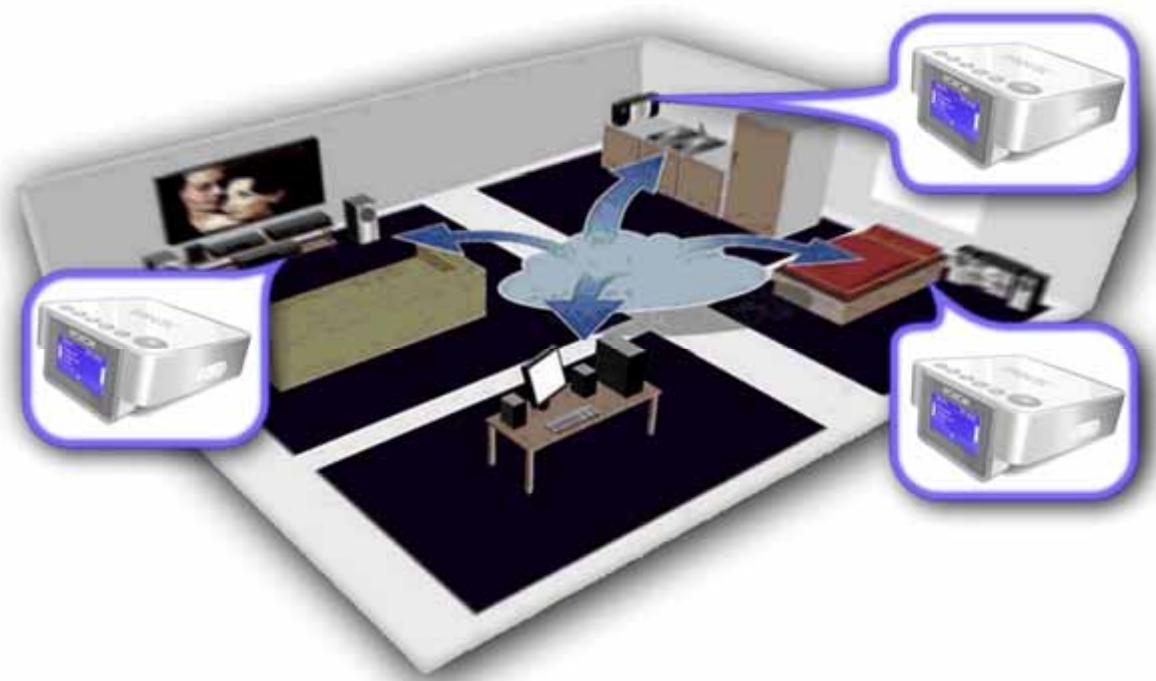
Last but not least. As you've probably noticed, we can't help but praise our silver friend at every opportunity. We hope you enjoy your NOXON 2 audio as much as we do, and would like to suggest that you browse this manual in detail when you get the chance. In addition to the important information about the use of its technology, we have outlined a number of typical applications wherever appropriate. We're convinced that even experienced users will profit from this guide.
Thank you very much.
...your TerraTec Team
You need to be aware of some basic information before you start ...
Setup, safety and care information.
- Please place the device on an even, dry surface to prevent fire and electrical shock hazards as well as possible damage to the player itself.
- Keep it away from radiators and ensure that the player is at a safe distance from other (HiFi) devices to prevent overheating.
- Do not stack (HiFi) devices without feet on top of the player and be especially careful not to place objects filled with liquids such as vases or bottles on it—the slope would make that especially adventurous.
- Be sure that the voltage is correct before connecting the power supply. (Details are printed on the power supply itself.)
- If you are not going to use the device for an extended period, disconnect it from the power supply. To avoid short circuits, never pull on the cable itself.
- In addition, be sure to unplug the device from the AC outlet in the event of a thunderstorm.
- If the device has been exposed to extreme differences in temperature, allow it to adjust to the room temperature for one hour before plugging it in. Condensation may have formed inside the device which impairs its functionality.
- Use a dry or slightly moistened, lint-free cloth to clean the NOXON. Do not use cleaning products as they may damage the finish of the unit.
To put it simply, just use the device sensibly. The warranty does not cover deliberate damage to the device, of course. Thank you.
From opening the package to installation
Start by making sure that the contents of the package are complete. The NOXON package should contain at least the following items:
The NOXON 2 audio receiver module, ...
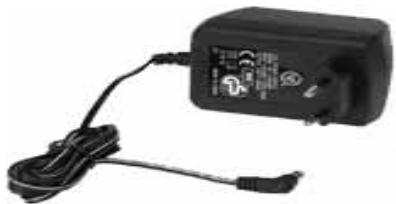
a device-specific power supply,
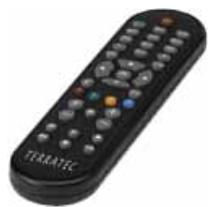
... an infrared remote control including batteries, as well as:
2 software CDs,
this manual,
- a service request form,
and a TerraTec registration card with the serial number.
So, before you put your NOXON 2 audio into operation, please check the configuration of your system and network to ensure that they correspond to the minimum requirements listed on the package. We cannot guarantee its correct operation if your environment does not meet these requirements.
Unfortunately, it's impossible to cover the topic of networking without juggling the occasional bit of cryptic terminology. That's why we've included a glossary on page 55, as well as a FAQ with the answers to the most common questions.
Overview.
After taking the NOXON 2 audio out of its packaging material, take a moment to get to know its connectors and controls.
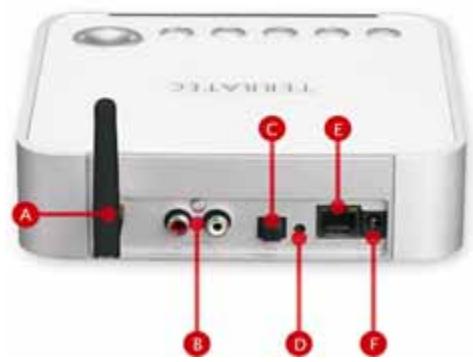
A | WLAN antenna connector
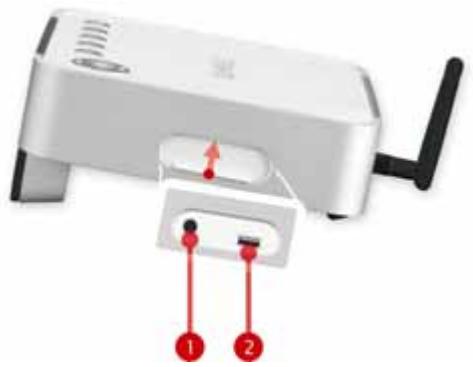
1 | Headphone output
$$ (1 / 4" j a c k) $$
2 USB port (Master/Type A)
B | Analog audio output (RCA)
C Digital audio output (TOS link)
D Reset button
E | Network port (RJ-45)
F | Connection for power supply
The buttons of the control panel on the top of the NOXON are probably already familiar to you. For more information, please see “The remote control and the buttons on the NOXON” on page 31. OK, on we go...
The connectors of the NOXON 2 audio
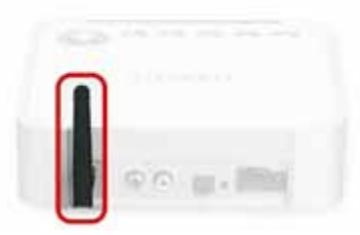
WLAN antenna connector
Attach the included antenna to this threaded connector. Place the antenna on the connector and screw it firmly into place. If possible, please ensure that the antenna is set to a vertical position to ensure the best possible reception.
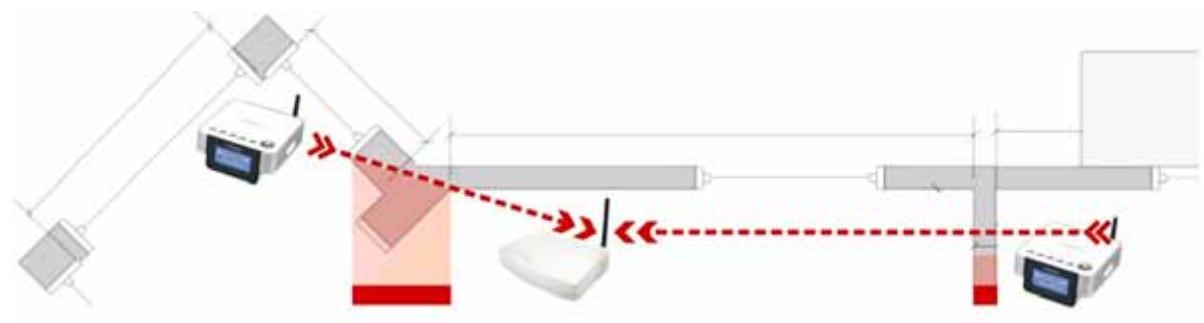
Note: A wireless signal always travels along a direct point-to-point, i.e. antenna-to-antenna, path. The quality of a wireless connection thus stands or falls with the obstacles in the line of sight from the NOXON to the opposite network device. Setting the device up in some locations may therefore result in a poorer signal, even if the actual distance is shorter. For example, if a large amount of masonry or sources of interference are located between the devices, the signal quality will decrease despite the short distance.
The analog audio output
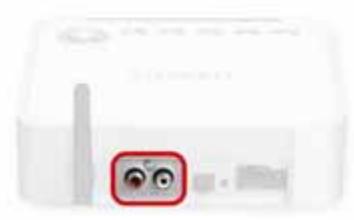
The Line output is located on the rear panel of the device. This output is intended to be connected to the Line input of a HiFi amplifier or a pair of active speakers, i.e. speakers with built-in amplifiers. The output is designed for a voltage level of 2 VRMS. Before making the audio connection to your amplifier, please make sure the volume is at a suitable level to prevent damage to your hardware or your ears.
The digital audio output
Use this output to connect a digital amplifier using an optical cable (also known as an optical waveguide or TOS link). One of the advantages of digital transmission of the audio signal
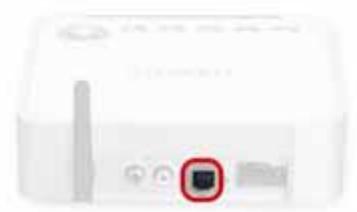
to the amplifier is that interference cannot affect the signal and reduce the quality as can occur with analog transmission. You can also connect the optical input of a minidisk recorder to this output to save the playback on MD.
The output uses the S/PDIF (Sony / Philips Digital Interface) protocol. If this term does not mean anything to you, don't worry; it is THE standard protocol for digital transmission of audio signals and almost all devices with digital interfaces support it.
Before making the audio connection to your amplifier, please make sure the volume is at a suitable level to prevent damage to your hardware or your ears.
Note: in its DRM license agreement, Microsoft stipulates that the digital output must be disabled when playing content with DRM protection. That's not very nice, but there's nothing we can do about it. Fortunately, there is still the MP3 format...
A small reset button
Use the tip of a ballpoint pen to press this button. If the NOXON ever freezes unexpectedly, use this button to reboot the device.
To reset the device to its factory defaults, press and hold the reset button for at least three seconds and unplug the power supply. Reconnect the NOXON and it will be back in its original state.
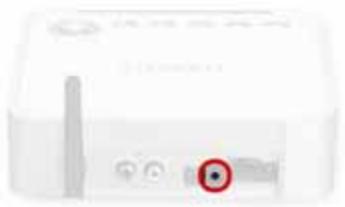
NOTE: the reset will discard all user settings such as network keys, making it necessary to perform a complete installation process.
Before making such a drastic move, try a soft reset first: press and hold the POWER button on the remote control for several seconds to trigger the soft reset.
The network port
Use this port if you would like to integrate the NOXON 2 audio into your network via a wired connection. To distinguish it from the wireless or WLAN connection, it is frequently referred to as a LAN or Ethernet port. The port supports data rates of 10 and 100 Mbps. To connect the NOXON to your router in this manner, use a standard network cable (twisted pair with RJ45
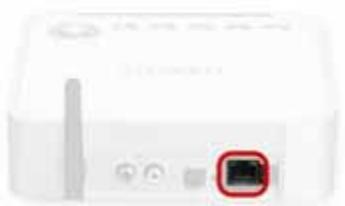
plugs). To connect the NOXON "directly" to your desktop PC or laptop, either use a network switch (also known as a bridge) or a hub. To connect the NOXON without any intermediate devices, use a crossover cable instead of a standard network cable. This probably would not make much sense, however—in most cases, a sufficiently long audio cable will be cheaper, if not as well shielded. But to each his own.
Two LEDs near the port show the status of the link: (orange) indicates a live connection to the node; network traffic is signaled by a (green) LED (usually flickering).
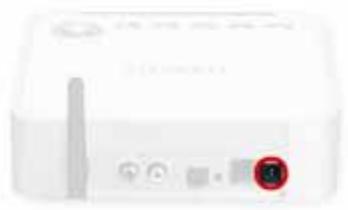
The power adapter socket
Plug the—Surprise!—power adapter in here. Please use the supplied adapter. While some universal power adapters feature the same plugs and voltage, their amperage is not sufficient. Should you need a replacement, please contact our service, see page 57
The USB port
This USB master port is designed for USB storage media such as MemorySticks or external hard drives. The NOXON 2 audio supports USB 1.x and USB 2.0 storage devices. Please note that not all USB devices can be used on this port: keyboards and mice are not supported, nor are external MP3 storage devices with additional functions (USB hub, data encryption,
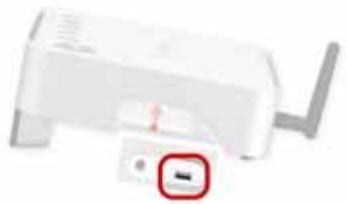
etc.). Some MP3 players encrypt the files stored on them and thus also cannot be read.

While it is not very common or well-known, USB devices are sometimes classified as OTG, or On The Go. These devices are capable of exchanging data with other OTG devices.
Practical experience has shown, however, that any external storage device that supports read and write operations like a normal hard drive under Windows can be used. The first time they are connected to a Windows PC, these devices appear in the Device Manager with names such as USB Mass Storage Device or Pendrive.
FAT16 (sometimes referred to simply as FAT) and FAT32 file systems are supported. FAT12, NTFS, the Macintosh file system and others will not work. For more information on playing music files on external storage devices, please see page 29 under Playback from a USB storage device.
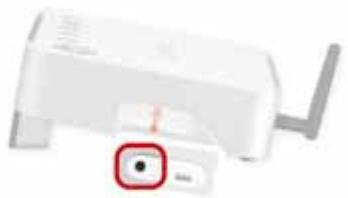
The headphone output.
You probably already guessed it, and it's true--this socket is intended for a 3.5mm headphone jack.
Plugging headphones into this socket automatically disables the Line and S/PDIF outputs, a feature known from many older cassette recorders. To adjust the volume, use the remote control as usual.
Networking
In addition to files on USB devices, the is designed to NOXON play files located on a network: either the great, wide Internet or the cozy confines of your home network. Two options are available for integrating the device into a network:
Via a wired connection (Ethernet, LAN)
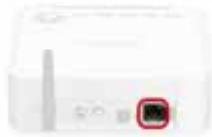
A network cable is used to connect the device to a router, switch or hub in this case.
Via a wireless connection (WLAN, WiFi)
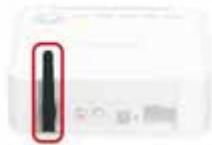
A wireless connection uses a radio link to an access point, router or computer.
Wired or not, faster is better. Well, in most situations, anyway, but certainly when it comes to networks. To ensure reliable playback without interruptions, the NOXON 2 audio automatically selects the fastest connection when powering up. If a network cable is plugged in and a link is available (orange LED lit), the NOXON will always favor it over the wireless link. To switch from Ethernet to WLAN, switch the NOXON 2 audio off, unplug the power cable, take a deep breath or two, reconnect the power adapter and switch the power back on. If a profile for a WLAN connection is already available, it will be used automatically. Otherwise, the setup wizard for a new network connection will be launched. For more information, see page 23 under Scenario 2 – the wireless connection.
Wired connection (LAN)
As you may already know from other wired network devices, establishing a link essentially just involves plugging in the cable. Please ensure that a sound physical connection is present (link LED lit orange). If that is the case and a connection is still not available, then the problem will be either the settings of your gateway (the computer in your network that manages the connection to the Internet) or those of your router. The description of the network port on page 5 already brought up this topic, but please also see Network miscellanea on page 18 for more information. As is often the case in life, it helps to be on good terms with your favorite administrator. Heartfelt thanks and a charming smile often goes a long way.
Wireless connection (WLAN)
In comparison to wired networks, a wireless link provides considerable additional freedom, but also requires a bit more attention—especially if you do not want to completely neglect security aspects. Before we actually start setting up the NOXON 2 audio, we have to make a distinction between two different types of wireless connection.
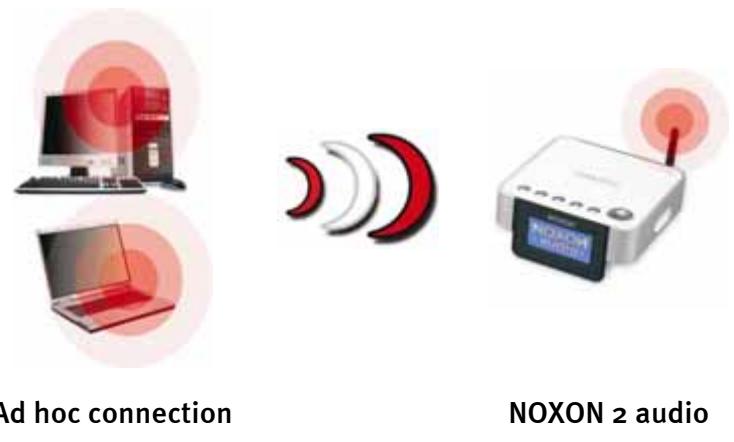
A - direct communication. On one hand, you may wish to set up the NOXON 2 audio to communicate directly with your desktop or laptop PC, from device to device without an access point (AP). A wireless device-to-device connection is known as an ad hoc network, from Latin: "for this purpose only".
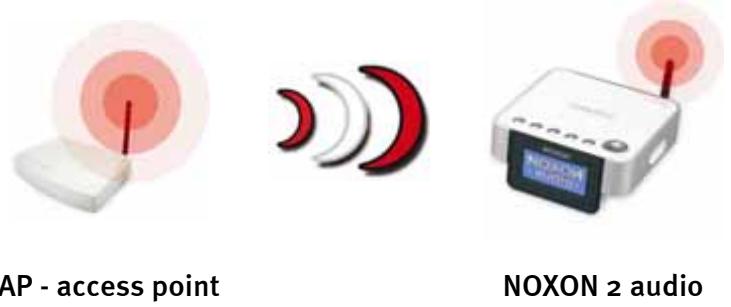
B - via the router (infrastructure). The other type of connection can already be deduced clearly from the first—not direct, but via special access points (APs). In general, these points are routers, which may also be wireless. While exact figures are not available, one can nevertheless safely assume that this is currently the most common way to use broadband Internet access and share it locally among several users. The NOXON 2 audio is also the most fun to use this way, as you can receive radio from the Internet or music from other computers in your home network without necessarily having your own computer running at the time. On the following pages, we will be giving you the information you need to integrate your NOXON in either of these ways.
Setting up a direct (ad hoc) radio connection to your PC.
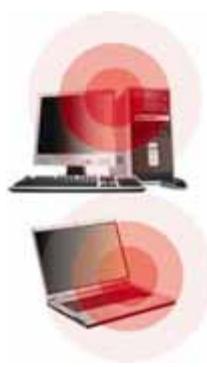
To establish a direct connection to a computer—in most cases a notebook with an integrated wireless network adapter—let's first have a look at how to set up a Windows PC for an ad hoc network so that the NOXON can access it.
A wireless network adapter can only be set up for direct device-to-device (ad hoc) communication, OR for communication with a network access point (infrastructure). Selecting one mode will automatically disable the other.
Please disconnect or disable all network connections other than the wireless one during the setup to eliminate possible sources of danger. This
will ensure that Windows will not attempt to communicate with the NOXON by any other way.
LAN or High-Speed Internet
1394 Connection
Enabled
1394 Net Adapter
Wireless Network Connection 3 Wireless connection unavailable Avaya Wireless PC Card
Local Area Connection
Network cable unplugged
Intel 8255x-based PCI Ethern...
Avaya Wireless PC Card
Network connections. To do so, click "Start", open the "Control Panel" and "Network Connections". This will display an overview of all available network resources. Disable all of the entries other than your wireless adapter by right-clicking them to open their context menus and selecting "Disable". Everything but wireless.
Some systems will also display a "Network Bridge" here. Do not disable or bypass this until all other attempts fail.
Unfortunately, experience has shown that Windows occasionally develops a completely inscrutable life of its own that cannot be dealt with effectively using esoteric methods. If the idea doesn't bother you too much, simply use the crude but effective approach and pull the plug of the network cable to support our efforts.
Open the overview of network connections as described above and follow the instructions below...
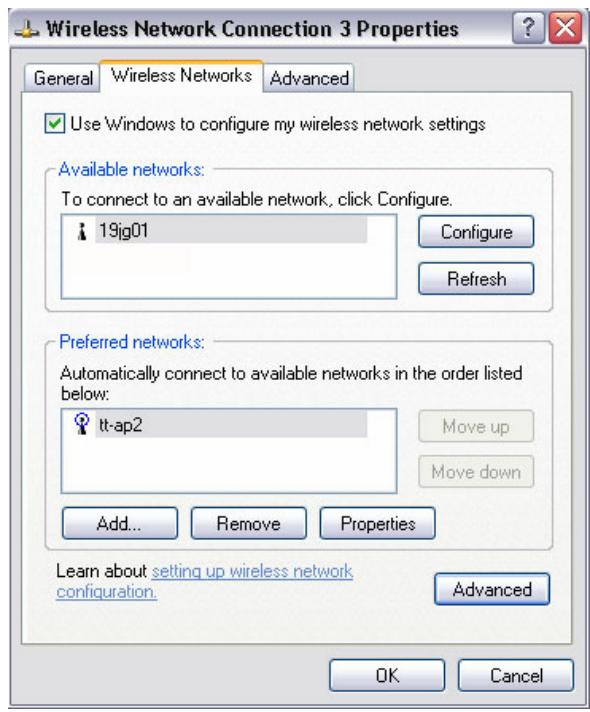
Double-click the network connection you will be using, followed by "Properties" to open its settings.
Go to the "Wireless Networks" tab for an overview similar to the one shown here.
Some wireless adapters provide these functions via their own software, in which case you should find comparable instructions in its documentation.
Alternatively, you can put a check next to "Use Windows to configure my wireless network settings"—if you know what you're doing.
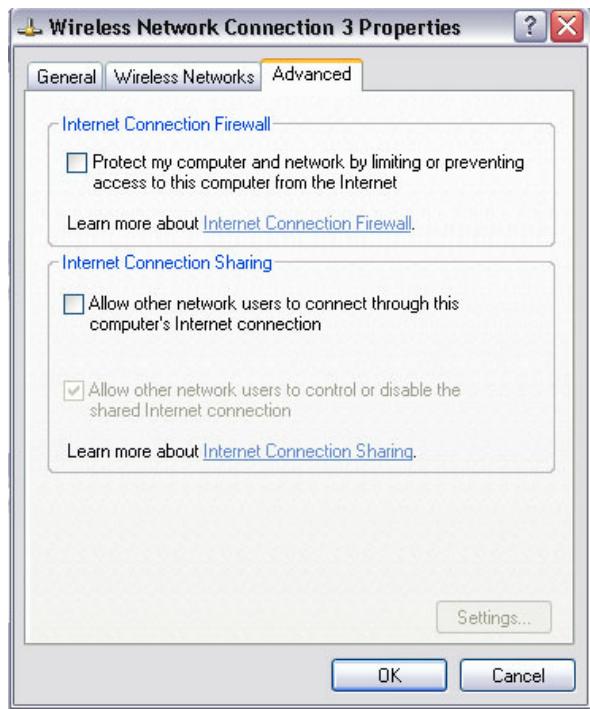
Switch to the "Advanced" tab (not the "Advanced" button, we'll come to it later) and ensure that your settings are as they are shown here.
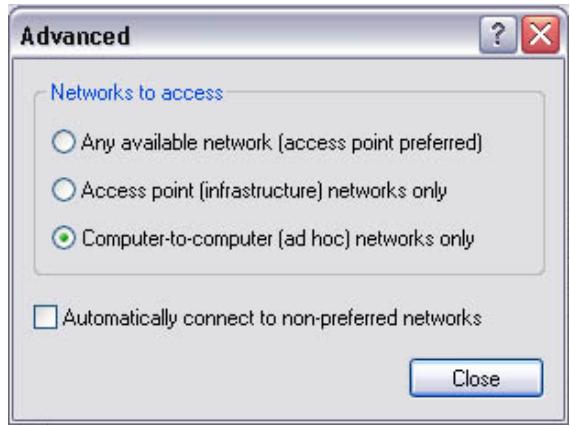
Switch back to the "Wireless Networks" tab and click the "Advanced" button. The dialog box shown here will open. Choose "Computer-to-computer (ad hoc) networks only" and click "Close" to exit the dialog box.
In the already-familiar window, click "Add..." to assign a variety of parameters to your ad hoc network.
First enter the name of the network, also known as the SSID (Service Set Identifier). The other options shown would work with the NOXON and can be selected. You can also use a WEP (Wired Equivalent Privacy) key by specifying it later during the further configuration of the device.
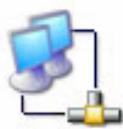
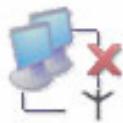
After a few moments, the dialog box should look similar to this one. The icon in front of the network indicates that it is active. A red X there indicates a problem. The computer may be still trying to locate its own network, however, so please be patient.
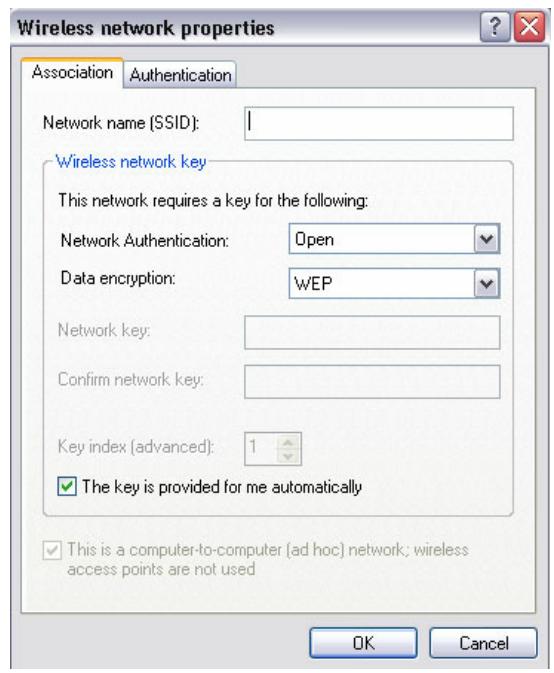
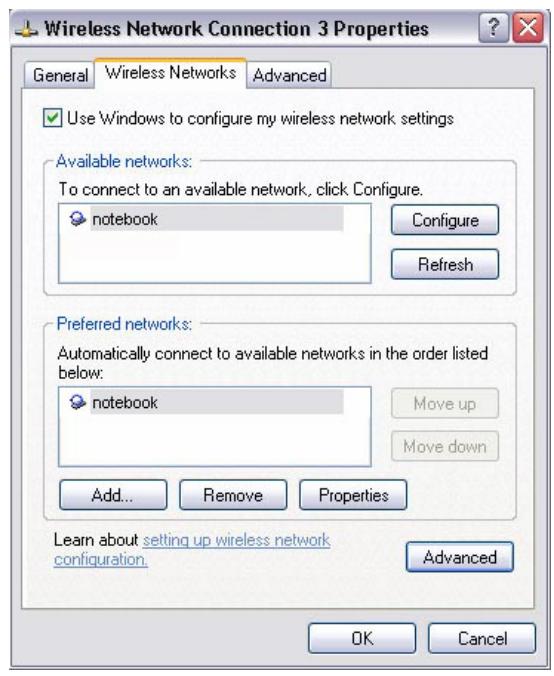
Some WLAN network adapters do not apply these settings immediately. To ensure that the network settings you have configured are actually used, disable and re-enable the selected wireless network connection one more time.
The network connection is now set up on the computer side. To enjoy your music, you now need an audio server. We will show you just how easy it is to set one up using the included TwonkyVision UPnP Media Server. For details, please see 35, "Your own music server". And it goes without saying that we have to configure the NOXON 2 audio for your network environment. For instructions, please turn to page 20, "Configuring the NOXON to the network".
Connecting to a router
Using the NOXON with a router generally does not require any configuration work on the router itself. This, however, depends on the extent to which the network has been set up with an eye toward security.
As the media have frequently reported, it's not very advisable to use a router exclusively with its default settings, as that leaves the network wide
open for intrusion or misuse of the Internet connection. The advantage of using the router with its default settings is naturally the simplicity with which devices accessing the router can be configured. However, since the need for a basic level of network security has generally been accepted, we will be covering a number of points in the next chapter that may be of importance for your custom network configuration.
Network miscellanea
In the following measures, it is no longer worth distinguishing between wired and wireless connections, as a number of the topics (such as encryption) are only relevant for wireless networks, while others, such as the restriction of authorized devices (MAC address filter), apply to both network types. Just concentrate on whatever is relevant for you...
Setting up the router options
For this purpose, you must be sufficiently familiar with the router—or its administrator—to change its configuration and understand its overall handling. Normally, these devices use Web interfaces for their administration. In other words, you only need to enter a specific address (e.g. 192.168.0.1) in your Web browser for it to display a convenient user interface giving you access to all of the router's options.
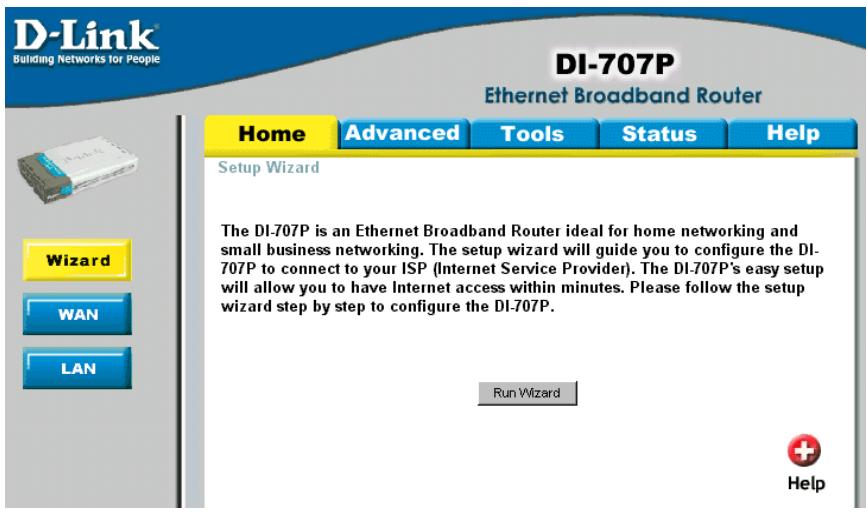
A somewhat dated administration interface of a D-Link router.
Hello, here we are: SSID broadcast (WLAN).
As explained in the technical glossary, the abbreviation SSID stands for the network name sent out to all wireless network devices within range, informing them of the presence of a network with this identification. Some routers, however, have an option to suppress the
broadcast of the network name. The option is a toggle that is usually called SSID Broadcast. If the broadcast is disabled, you must know the name in order to enter it manually when setting up the NOXON 2 audio.
To identify or not to identify: the MAC address.
The so-called MAC address is a unique identifier assigned to all network devices. The MAC address is permanently assigned to the device and cannot be modified. They can therefore be used to configure routers to permit only devices with specific MAC addresses to access the network or the Internet. In such a case, it will be necessary to configure the router with the NOXON's MAC address so that it will be able to establish a network connection. The address can be found on a label on the bottom of the NOXON 2 audio.
Sometimes required: a fixed IP.
Under certain circumstances, it can be useful for a device to always have the same address. Most networks these days are set up to assign the so-called IP address—the identifier for the TCP/IP protocol—dynamically. In other words, the first time a device connects, the so-called DHCP server assigns it a valid IP address which the device will keep as long as the address is not needed elsewhere. This occurs completely automatically, without the user's knowledge. If a network is based on static IPs—i.e. fixed addresses, rather than dynamically assigned ones—there will generally be a precise set of rules governing the addresses that can be assigned. And our friend the NOXON 2 audio also has such an IP address. If the network requires a fixed address, the rules for assigning them must be known. But once again, a fixed IP is really the exception; generally, everything happens automatically.
The first time: switching on the NOXON.
To start the NOXON for the first time, press the ON/OFF button on the NOXON itself marked with the attractive icon.
If you have just connected the power adapter and are now trying to turn the device on, don't get nervous if nothing happens. It takes around 30 seconds before the NOXON can be switched on after it has been connected to an AC power source.
When switching the device on for the first time, it will display a language selection dialog. The selection applies to the menus and operating system messages of the NOXON 2 audio; the Internet radio database will remain in English.
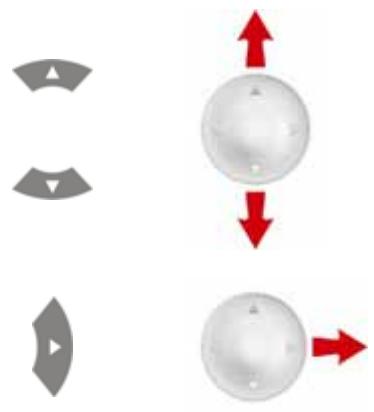
To control the highlight bar, use the navigation buttons on the remote control or on the top of the device.
Press the right navigation arrow to confirm your selection.
Use this simple, convenient method to navigate through all of the NOXON 2 audio's menus and lists and make your selections.
Configuring the NOXON to the network
As the device does not yet contain any information regarding possible network environments, it will now automatically start the network configuration wizard.
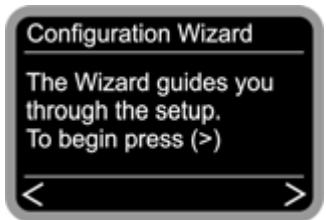
During the course of the configuration, confirm your entries by pressing the right navigation button on the remote control or on the device, or press the left button to go back.
But first, we would once again like to make the distinction between the two connection types. For information on switching between wired and wireless connections, please see Networking on page 13.
Scenario 1 – the wired connection
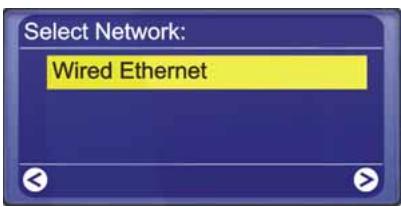
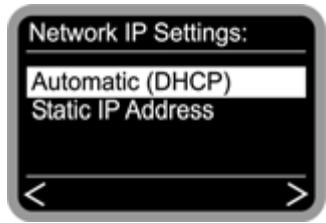
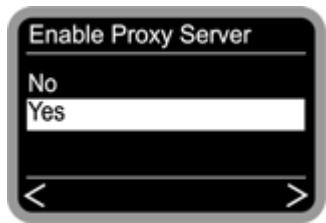
As we are dealing with a wired connection, 'Wired Ethernet' will be all that is available.
At this point, select the method by which the NOXON 2 audio obtains its IP address in the network. Every device in the network must have such an identifier to ensure that the IP packets arrive in the right place. The address is normally generated automatically via the DHCP protocol, but in rare cases, static IP addresses are assigned—for more information, have a word with your network administrator.
Some networks—especially large corporate ones—use proxy servers to minimize the data volume requested continuously or by multiple users. They act as a kind of storage buffer between the Internet and the users in the local network. Check the Internet settings of the Internet Explorer to see whether your network is using a proxy server. Most home environments do not use such a server, however. (The following section is framed and can be skipped if not required)
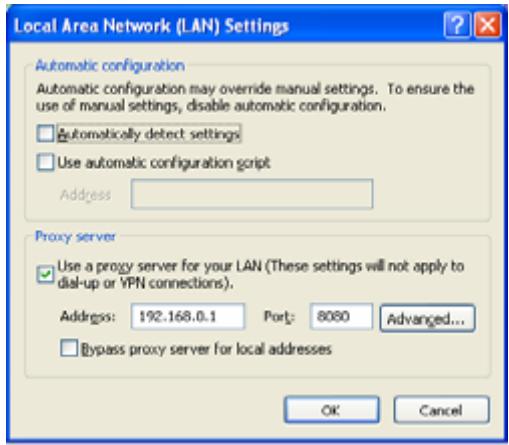
Open the Internet Explorer, select "Internet Options" from the "Tools" menu and select the "Connections" tab. On the bottom third of the tab, you'll find the "LAN Settings..." button. Press the button to open the dialog box shown here. If a proxy server is specified here, please also use it for the NOXON—assuming that your desktop PC and the NOXON will be using the same Internet access.
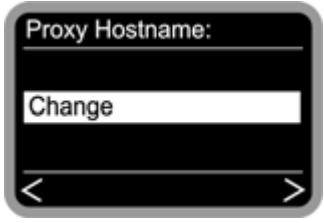
Select "Change",
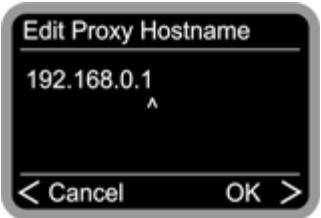
and enter the name ("proxyinternet") or the IP address, confirm,
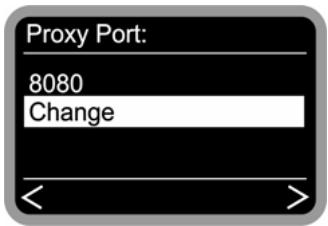
enter the correct port—8080 is very common—and the proxy is set up. Again, if you have any doubts about the parameters, please check with your network admin.
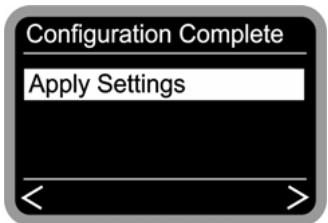
Now simply select "Apply Settings",
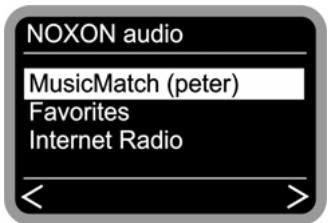
and after a successful reboot, you will be able to listen to and enjoy the inner beauty of your network and—with a suitable connection—the world of Internet radio.
Congratulations.
Scenario 2 – the wireless connection
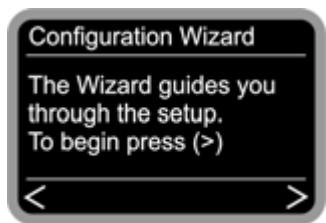
While still in its factory default state, the NOXON will start the configuration wizard to complete the integration in your network.
During the course of the configuration, confirm your entries by pressing the right navigation button on the remote control, or press the left button to go back.
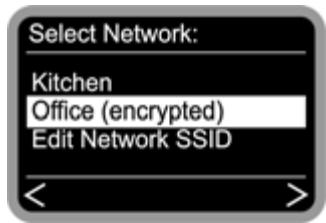
The names of the receivable access points (routers) and existing ad hoc networks are shown here.
If you know of a name that should be on the list but is missing, start by checking the distance to the router or computer. Go ahead and place the NOXON 2 audio right next to it to exclude distance as a possible source of errors.
As mentioned above, SSID broadcasting may be disabled on the router, in which case it will not be visible on the list. If that's the case, select "Edit Network SSID" and enter the name manually.
In this case and others, it will be necessary to enter letters using the numerical keypad of the remote control. For more information, please see the "The remote control and the buttons on the NOXON" chapter on page 31 for detailed instructions on making such entries. But let's get back on track:
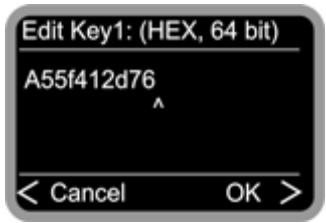
When selecting a network protected by WEP encryption, you will be prompted to enter the appropriate key. Your network administrator will be able to give you this information. The information in parentheses does not appear until the number of characters you have entered corresponds to a valid key.
If you are using WPA encryption in your network, the screen will be the same except for the title bar and the fact that you can use a string of characters containing at least eight letters. While a technically skilled person with the proper equipment can crack this encryption, WPA is clearly more secure than WEP. Unfortunately, older wireless network equipment frequently does not support it.
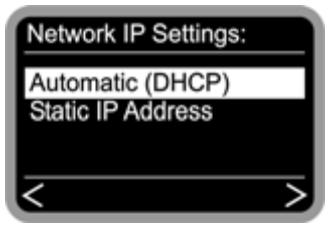
At this point, select the method by which the NOXON 2 audio obtains its IP address in the network. Every device in the network must have such an identifier to ensure that the IP packets arrive in the right place. The address is normally generated automatically via the DHCP protocol, but in rare cases, static IP addresses are assigned—for more information, have a word with your network administrator.
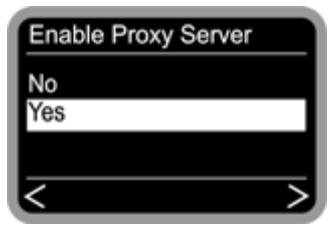
Some networks—especially large corporate ones—use proxy servers to minimize the data volume requested continuously or by multiple users. They act as a kind of storage buffer between the Internet and the users in the local network. Check the Internet settings of the Internet Explorer to see whether your network is using a proxy server. Most home environments do not use such a server, however.

Open the Internet Explorer, select "Internet Options" from the "Tools" menu and select the "Connections" tab. On the bottom third of the tab, you'll find the "LAN Settings..." button. Press the button to open the dialog box shown here. If a proxy server is specified here, please also use it for the NOXON—assuming that your desktop PC and the NOXON will be using the same Internet access.
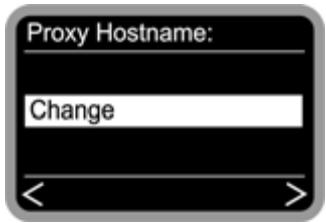
Select "Change",
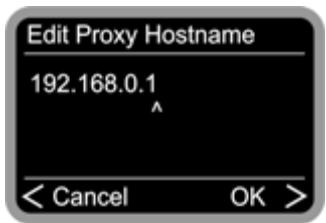
and enter the name ("proxyinternet") or the IP address, confirm,
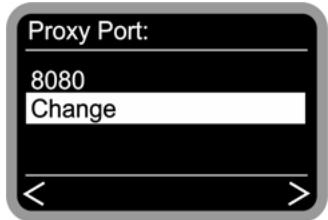
enter the correct port—8080 is very common—and the proxy is set up. Again, if you have any doubts about the parameters, please check with your network admin.
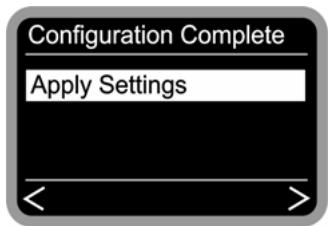
Now simply select "Apply Settings",
and after a successful reboot, you will be able to listen to and enjoy the inner beauty of your network and—with a suitable connection—the world of Internet radio.
That wasn't so hard, was it?
Network profiles
The NOXON 2 audio lets you permanently store up to three network profiles—that way you don't have to enter a full set of parameters every time you move the NOXON to a different network. These profiles can be managed and edited most conveniently using a PC application, the DMP Installer. Naturally, you can also use the configuration menu on the device itself to switch profiles or to create and edit them using a wizard. For more information, see page 41, The DMP Installer.
Playback options.
Before we cover the two playback modes, MP3/WMA files and Internet radio, let's have a look at the playback window of the NOXON, which remains the same in both cases.
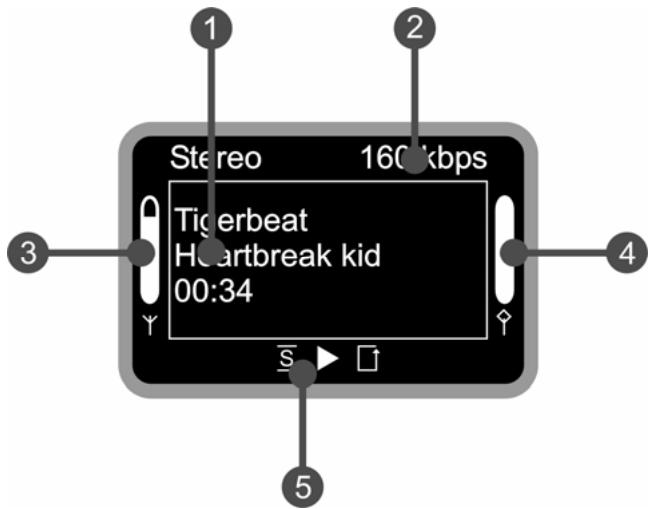
- Information on the current track or station. Title information on the current MP3/WMA file or additional information on the current radio program is displayed here.
- The details of the current playback mode, mono/stereo and the data rate.
- The signal strength of the wireless network is indicated here—a peaked bar indicates excellent strength.
- The playback buffer status is shown here. If the bar is at zero, the connection is about to break.
- The is displayed when shuffle mode (random selection of audio files) is activated. It corresponds to the icon on the remote control used to activate shuffle mode. The small triangle indicates that playback is currently active—it is also retained in the menu. is the familiar repeat icon and refers to the current title, or to the entire playlist when followed by "all".
Playing MP3/WMA files from the local network.

MP3 / WMA file

UPnP



UPnP server
Computer in network
NOXON audio
You can share music files for playback in your network using special server software running on a computer or other device. The NOXON 2 audio requires a UPnP-compatible server to provide it with files. A simple Windows file share is not readable. Thanks to the included
software, however, it will not be necessary for you to give up on the folder structure that you may have spent years setting up.
Unlike inflexible static file shares, the NOXON uses a UPnP media server to take advantage of a flexible database structure that improves the flexibility of your collection—a track can be found via the artist, genre, album or the folder structure. And don't worry, "setting up a server" is not as much work as it was just a few short years ago. To keep it brief, just launch TwonkyVision TwonkyMusic and you're done. For more information, see page 35 in Your own music server..
Naturally, it's not absolutely necessary for the computer to be connected directly to the NOXON 2 audio via WLAN. It's sufficient to have a UPnP server active on a computer anywhere in your network—and multiple servers are not only possible, but fun. So there's no need for Dad to listen to his kids' tunes—to each his own server! Servers for all! Make music, not war!
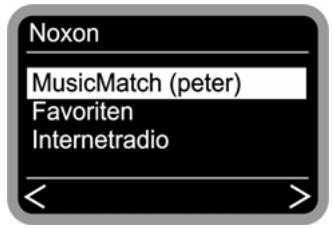
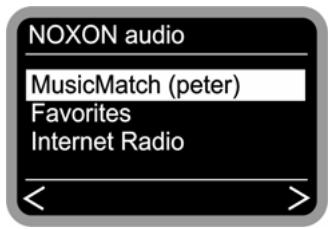
For example, if you have a Music server running in your network, you'll be shown the following selection screen when you press the button. In the default settings of TwonkyVision TwonkyMusic, the computer name or network ID of the computer on which the server is running will be displayed in parenthesis.
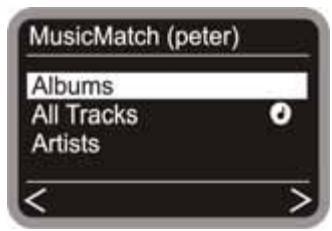
Navigate to the right and you will be shown this overview of available tracks. The entries are generated by MusicServer based on the title information of the MP3 and WMA files. The so-called ID3 tags of files in well-organized collections contain information about the artist, album, title, genre, year released and so on. The display may look completely different when using a different UPnP server application, as this data is only received by the NOXON, not generated by it. If we stay with our valued TwonkyVision MusicServer, the following selections will be available...
Albums Contains a list of all available albums in the library.
All Tracks Here you can find a list of all of the tracks available on the server. Shuffling really comes into its own here.
Genre Blues, Pop, Funk and Soul are possible genre entries. Select a genre to display a list of all tracks of the genre.
Genre Index Blues, Pop, Funk and Soul are possible genre entries. Select a genre to display a list of all tracks of the genre.
Genre/Artist Blues, Pop, Funk and Soul are possible genre entries. Select a genre to display a list of all tracks of the genre.
Artist Contains a list of all available albums of all artists. Select an album to display all of the tracks it contains.
Artist Index Artists are available here in name groups: ABC, EFG and so on.
Artist Albums Artists are available here in name groups: ABC, EFG and so on.
Year/Artist Artists are available here in name groups: ABC, EFG and so on.
Folder Use this option to navigate directly in the file system. In other words, folder and file names will be displayed instead of title information (ID tag entries).
Tip: if you are not happy with the other display options, you can naturally create and use your own system by intelligently renaming the folders and files.
Playlists Surprise: here you have access to stored playlists. In other words, all found *.m3u files or other files containing playlists will be available here.
The – Last Played – entry selects the last playlist used, while – Most Played – selects the list most played since the server was set up.
Use the usual buttons on the remote control to navigate. Once you've reached the item you were looking for, just press Play and off you go. Press and hold the navigation buttons when scrolling through long lists to enlarge the navigation increments. We would also like to once again point out the search function; see SMS navigation on page 33.
You can also mark songs or appreciated playlists as favorites. You can open the Favorites list quickly and easily by pressing the button. Here's how to create a list: An example:
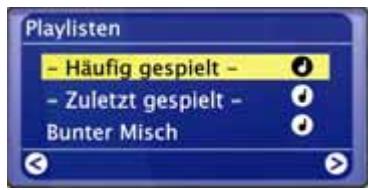
To add this playlist to your Favorites, press that's all there is to it. To remove an item from your Favorites, press You guessed it.
If you make a selection during playback, the current track will be added to the favorites, not the entire playlist.
Tip: The presets are available as well as the Favorites list, and while both work with files and radio stations, the idea is to use the presets for radio stations and the Favorites for individual tracks, albums and playlists. You can handle them any way you please, however. More information will be available in the chapter after next.
Playback from a USB storage device
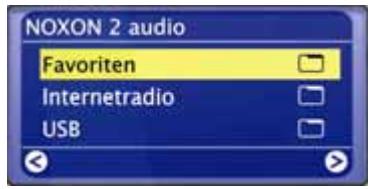
An entry for USB will appear in the HOME folder of the NOXON 2 audio whenever a compatible USB storage device is connected. Selecting this entry will display a selection of compatible partitions. If only one is available, "Volume 1" is all that will be shown. Once you have made your selection, the folder structure will be displayed 1:1. Next, use the usual navigation to select and play a track.
When connecting a USB hard drive, it may take a moment or two for the NOXON 2 audio to read the folder tree. After that, the navigation should work as usual.
Receiving Internet radio.
Internet radio

Router

NOXON
There are places on this planet of ours where FM radio reception emulates little more than the wind in the trees, but broadband Internet access is the rule. Internet radio not only comes into its own in these remote locations, but elsewhere as well, and the NOXON 2 audio is your trusty worldwide receiver. Thanks to our partner vTuner, a wide range of stations have been categorized in the NOXON and are just waiting to be enjoyed.
To access the list of radio stations, press the station button and zap through hundreds of stations with the usual navigation buttons. If you find something you like, press the preset storage button and a number button ... to store the station there and access it by pressing that number button in the future.
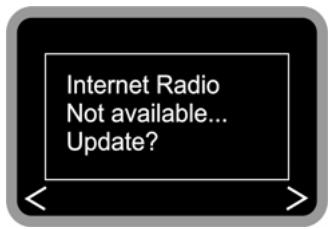
The NOXON will not have a station list until the first time you use it for Internet radio reception. Before you get started, the list has to be downloaded from vTuner, the NOXON radio list provider. For more information on how to edit this list or expand it, see the next chapter.
Caution—transfer volume. Please keep in mind that constantly listening to Internet radio stations will result in the transfer of an enormous data volume over the course of a month. Your contract with your Internet service provider may be subject to a volume limit. Exceeding this limit can result in massive extra charges. We therefore recommend using an Internet access plan without volume restrictions. On the other hand, the actual bandwidth used varies strongly from one station to the next. As you already know from MP3 files, the bit rate is decisive for sound quality—a higher bit rate results in better sound, but also in a greater data volume.
The vTuner Premium Service
The list of radio stations stored in the RSDB (Radio Service Database) is provided by vTuner as mentioned in the previous chapter and is transferred to your NOXON via the network. So far so good. The premium aspect of this service is that you can expand and edit the list to suit your tastes via a URL. Here's how:
- Open your browser and go to http://www-radio567.com
- Enter the MAC address of your NOXON in the field at the lower left of the page. You can find the MAC address on the underside of the device. It generally has a format such as 00-11-F5-7B-E5-70. It is not necessary to enter the hyphens, so 0011f57be570 will be fine. Just to be perfectly clear: MAC addresses have a hexadecimal format—in other words, they consist only of the letters A through F and numbers o through g.
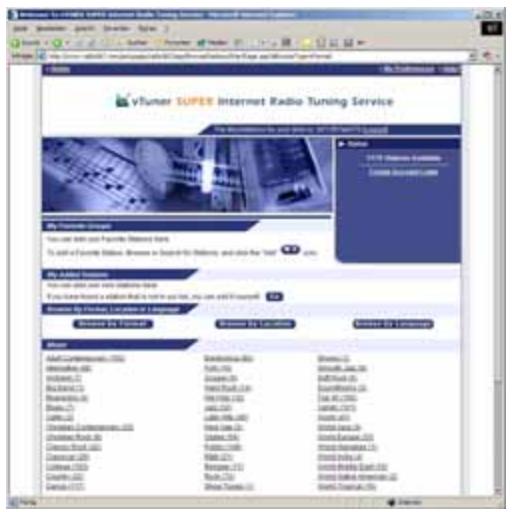
- Click Go
You should now be seeing something like this. Registration is required before you can truly take advantage of the service, however.
Click the link at the top right, "Create Account Login". On the following page, enter your e-mail address and a password. If you do not want to receive consumer information, remove the check next to "Receive program updates and special offers", then click Login and you're finished.
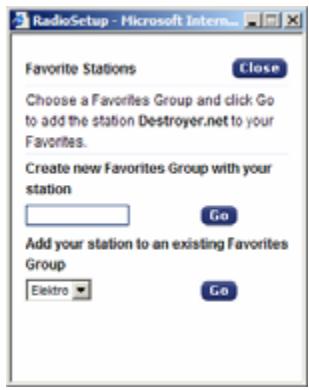
Next, select a genre (e.g. Electronica) and a station (e.g. Destroyer.net) to play by clicking Play. Click the button to choose a group of favorites (e.g. After Hours) or create a new one. The station will then appear in that location the next time you update your Internet radio database.
A shortcut: here's the fast way to trigger an update:

The remote control and the buttons on the NOXON
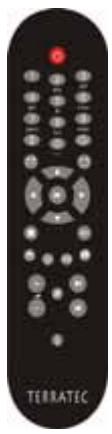
Here it is—your infrared calorie saver. Most of the controls will probably be familiar from other products from the world of consumer electronics. A selection of controls corresponding to those on the remote control are located on the top of the NOXON 2 audio, as you have probably already discovered on the left.
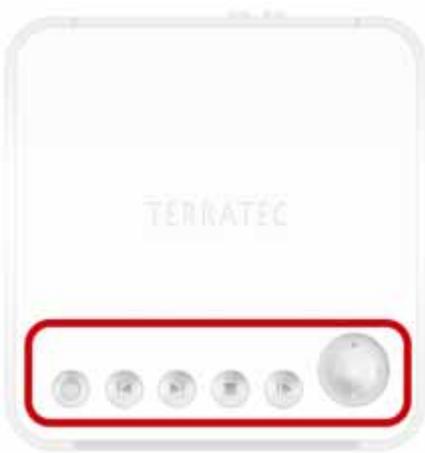
Buttons and their functions.
| Button on NOXON | Remote control | Description |
| Here's where you turn the NOXON 2 audio on and off. | ||
| Use the number buttons together with the Save Preset button to store and recall radio stations. The buttons are also labeled with letters for text entries as described in the following |
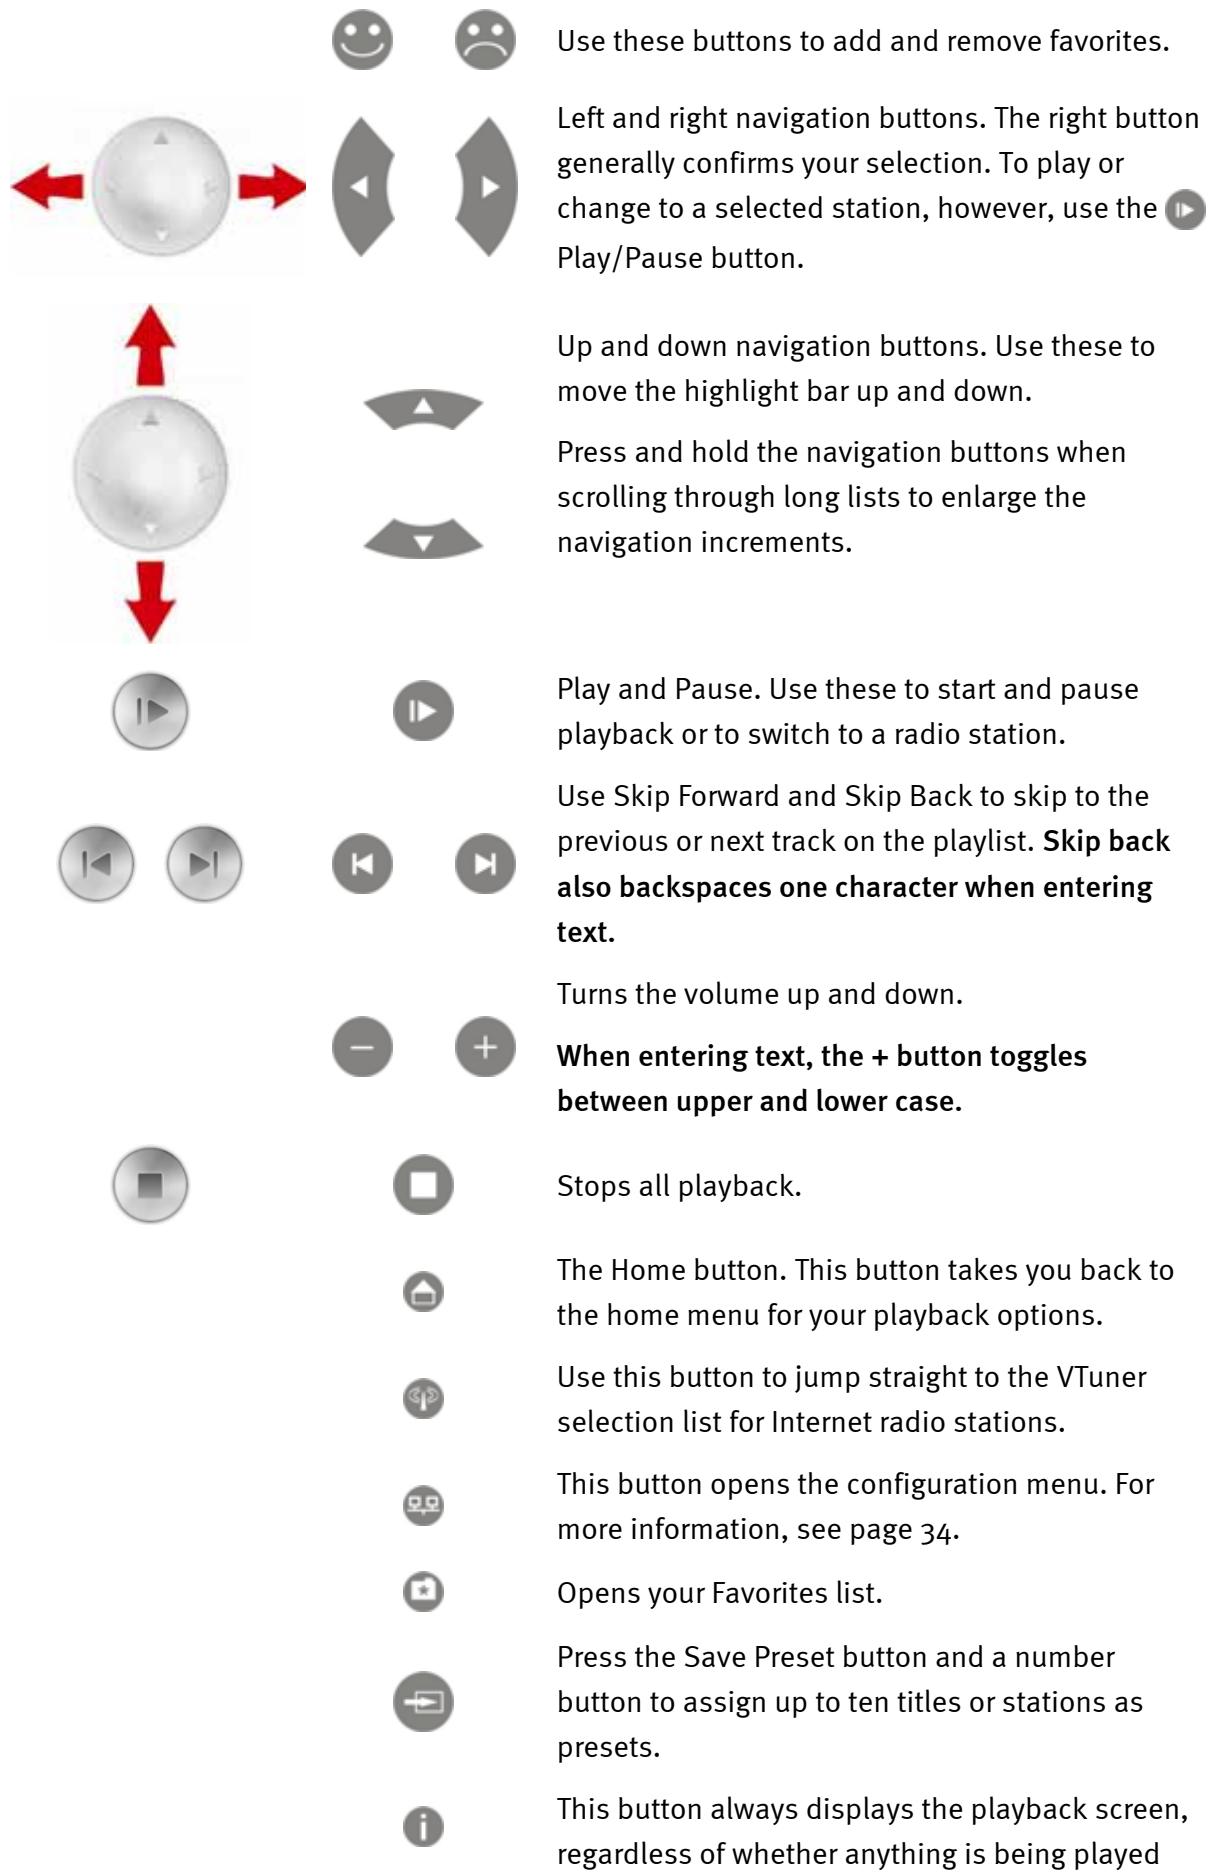
back or not.
Entering letters
Letters can be entered into the NOXON 2 audio via the numerical keypad in the same way you would with a cellphone keypad when writing an SMS. This can be useful when configuring the device or changing the device's name. Here's how text entry works, using the word NOXON as an example.
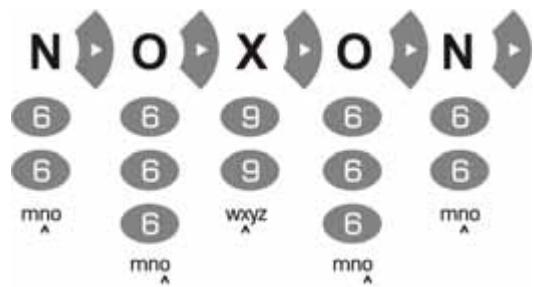
Pressing a button several times in a row switches through the row of available letters. Once you have finished entering your text, press the right arrow button once more to confirm your entry. If you have made a typo, press to delete the character over the cursor. You can also use the navigation buttons to move the cursor to the left and right through text you have already entered. In addition, you can enter the following special characters via the o and 1 buttons:
*# \~ and space
1 .,?!-&
SMS navigation
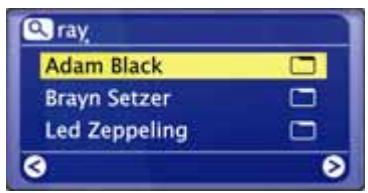
We have integrated a quick-search function that you will probably be familiar with from cell phones (address book) to save your fingers and your nerves when navigating lists with many entries. When in a list, press the zero (o) button and a text entry field will appear at the top. Now enter the beginning of the
item you want to find using the numerical pad of the remote control as shown above. Confirm your entries with the right arrow, cancel with the left arrow.
Note: if you search at precisely the moment in which the TwonkyVision MusicServer is rescanning its database, you may get hits that are actually misses. While this may help you rediscover the occasional bit of buried treasure, it's not really the point of the exercise. Such occurrences are quite rare, however.
The configuration menu
Use the configuration menu to access the advanced settings of the NOXON 2 audio. To open the menu, press on your remote control. There you will find the following entries ...
| Configuration menu |
| Device status |
| Internet radio (RSDB) |
| Wizard |
| Language |
| Configuration |
| Profile selection |
Here you can view current parameters such as the device's current IP address.
Here you can open the submenu for Internet radio settings; RSDB stands for Radio Service Database.
The wizard mentioned earlier can be launched manually here.
Select a language for the menus here.
Opens the Options submenu
Use this menu item to select a different profile.
Most of the points are self-explanatory. Nevertheless, here are a few details on a number of submenus...
| Internet radio (RSDB) |
| RSDB version |
| Auto update |
| Update RSDB |
Displays the current version of the Internet radio database and the version of the VTuner service, PREMIUM.
If this option is enabled, the list will be updated automatically whenever a new one is available.
Launch a manual update here.
| Configuration |
| Profile management |
| Key management |
| Device name |
With the profile management activated, another profile is selected automatically any time the connection is lost.
If more than one key has been stored, the key management will attempt to use them to maintain contact to the network access point.
Here you can choose your own name for the device, as you would with the DMP Installer.
Your own music server.
As explained in the appendix, several NOXON 2 audio-compatible alternative music servers are available, most of which are not free of charge. However, we have determined that working with TwonkyVision TwonkyMusic was the least complicated and caused the fewest problems with files that could not be found, or with abstract interpretations of special characters and umlauts in entries. After all, a few Björk or The Libertines tracks are essential to any collection.
Another advantage is that you are not dependent on perfectly groomed ID tags--you can also navigate using folders and file names. The ID tag is a part of an MP3 file that contains information on the artist, album, etc. But we will have a practical example for that later...
Installation
We will be describing the Windows installation below. The included CD also contains versions for other operating systems.
Insert the software CD in your CD drive. An autoposter will appear with a menu from which you can launch the TwonkyMusic MusicServer setup. If it does not, go to Start, select Run..., click Browse... and in Look in: select the drive containing the CD. Go to the \Software\TwonkyVision\Windows folder, select TwonkyMusicSetup.exe and click Open.
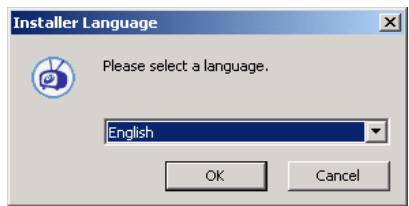
When the setup routine starts, select your language and click [OK].
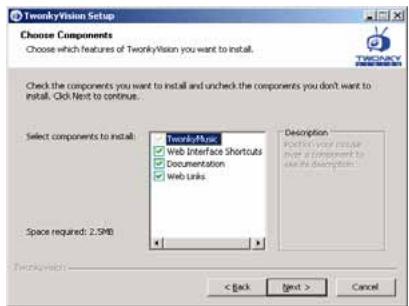
Once you have accepted the license agreement, you will have the opportunity to select the optional components for installation.
- TwonkyMusic
No way around this one—it's what we're here for, after all.
- Web interface shortcuts
Shortcuts in the Programs group to the web interface—certainly advisable.
- Documentation
Extremely comprehensive music server documentation.
Web links
Links to the TwonkyVision website.
Select the options you would like to install and click [
Next ].
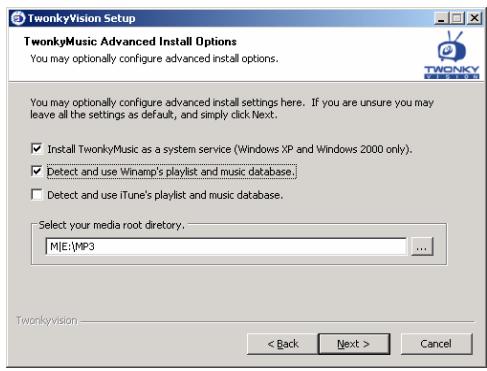
You can already take care of some of the basic configuration at this point to get you started as quickly as possible.
Install TwonkyMusic as a system service. This option keeps the music server in memory continuously and starts it every time Windows starts.
Detect and use Winamp's playlist music database. If you manage your files in the Winamp media library, you can also use it for the music server by selecting this option.
Detect and use iTunes's playlist and music database. Same thing, just for iTunes.
Select your media root directory. Enter the root folder of your music collection here. This folder will be used as the starting point for indexing your media files when starting the server.
Next, select the program group and folder, click “Next” a couple of times and you're done. To start the server, click “Start TwonkyMusic” in the new program group, and your music server will start indexing your music files.
Caution: firewall. If you are running a firewall on the same system as the music server, you may have to set it up to explicitly allow the music server and the sharing of your music files. Once again, please have a word with your network administrator for more information.
The web interface
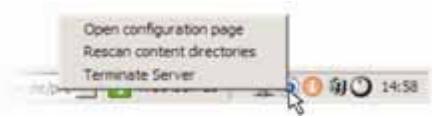
The web interface is designed to let you configure the various settings of your TwonkyMusic UPnP server. To access the web interface, either use the TwonkyMusic Web Configuration entry in the TwonkyVision program group of the Start menu, or by double-clicking the Twonky icon in the system tray. Either way, your favorite Internet browser will open and display the web interface.
We will not be covering every minute detail of the web interface at this point, as the comprehensive documentation on the CD does a good job of that. We
would like to show you a few configuration examples and their effects, however. Off we go...
Web interface - Status
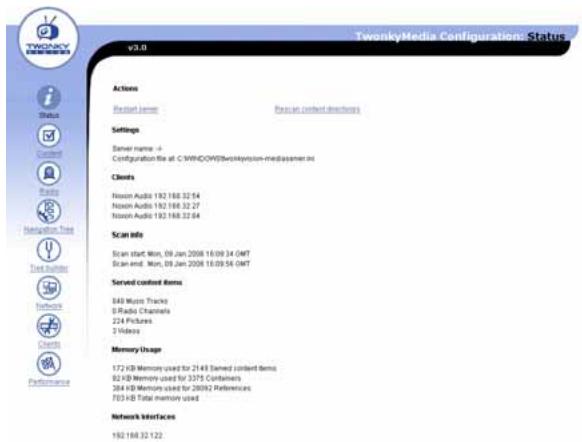
When opening the web interface, the first thing you will see is the welcome screen with the music server's current status information.
A few explanations...
Restart server is useful if anything ever gets stuck.
Rescan content directories manually launches a rescan of your media files to include new material, for example.
The IP of your NOXON client and other information is also shown.
Web interface - Content
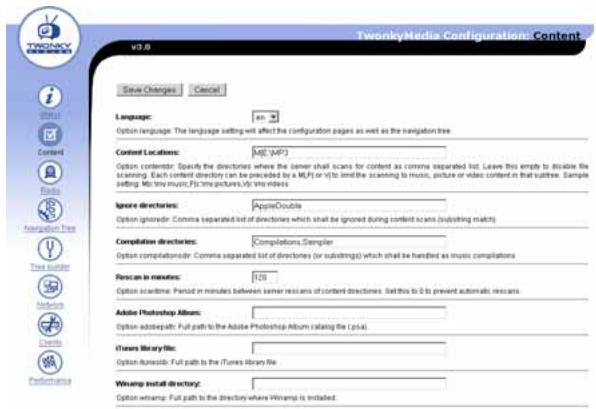
Switch to the Content section to access the following options:
Content locations specifies the folders to be read. When entering multiple folders, separate them with commas.
Rescan in minutes specifies the intervals at which the server should automatically scan for new music files.
Additional music server info
A number of things have already been pointed out, but here's a nice snappy overview:
Detailed documentation for the TwonkyVision MediaServer can be found in the TwonkyVision program group of the Start menu, and on the CD.
- The CD also contains versions of the server for other operating systems.
- If you would like to share other file types (videos, photos, etc.) for other UPnP devices, we recommend checking out the music server's big brother, TwonkyMedia—he can handle it.
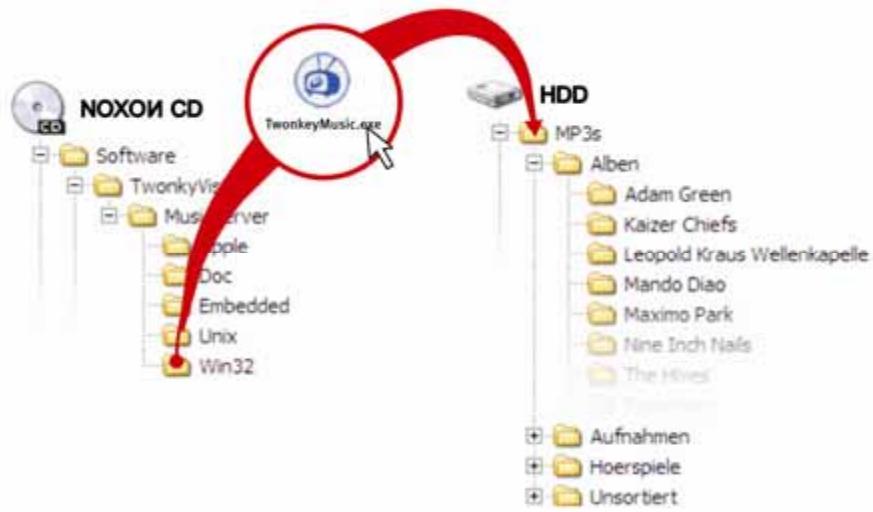
- For a quickie—say, when dropping in on a special friend with your flash drive, NOXON and some choice party tracks—just copy TwonkyMusic.exe from the flash drive or CD into the MP3 folder, launch the file, and your server is off and running...
Playing DRM-protected media
Introduction
Illegal copying and developments related to the protection of digital content have been issues associated with compressed music since the outset. For a long time, the available solutions either did not convince the industry or were hacked shortly after their release. This is one of many reasons for the sluggish adoption of the Internet as a distribution channel by the major labels.
What is DRM? After a number of often painful compromises with regard to consumer-friendliness, the market is tending toward a single system, Microsoft Digital Rights Management, or DRM. It specifies the number of times a track can be burnt onto a CD or copied to an external medium, or in the worst case, how long you can listen to a track. Portals such as Musicload (musicload.de) or the napster subscription service (napster.com) use this form of protection.
Who is responsible for it? As so often in the world of computers, the ladies and gentlemen in Redmond were able to assert themselves on the market with their ideas. Perhaps it was not in everyone's best interests to have Microsoft assume a dominant position in this field as well, but there are a number of advantages for the customer: better interoperability between devices and greater competition between content platforms. In the end, every standardization has its advantages and disadvantages—but anyone who thinks that things are going too far can still work with MP3 format.
And now? How does DRM work with the NOXON? We should mention at this point that the NOXON is well-equipped to deal with protected content with its support for version 10 of the most common DRM standard, namely Microsoft Windows Media DRM 10. As you might suspect, using the NOXON with DRMed content requires a server application capable of the following:
verifying that the tracks were legitimately purchased and the licenses are valid
- providing tracks for playback on DRM-enabled devices
- managing the capabilities and rights of the playback devices
As the strengths of TwonkyMusic lie elsewhere and digital rights management has not been implemented in it, we would like to introduce Windows Media Connect, Microsoft's free UPnP server with DRM technology.
Windows Media Connect
Microsoft is kind enough to offer the Windows Media Connect free of charge at present via the following link:
http://www.microsoft.com/windows/windowsmedia/devices/wmconnect/
If the link does not work, use the Windows Update function to install the software. Once the installation is complete, you can find it under Start / Programs / Accessories / Entertainment / Windows Media Connect.
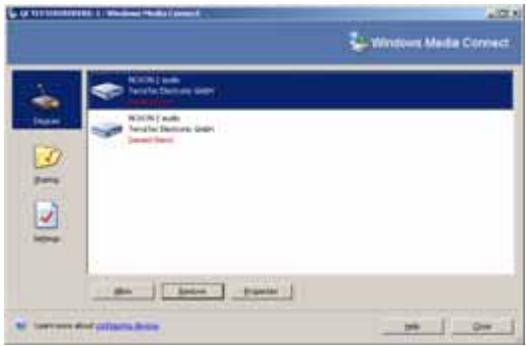
This window should be displayed the first time you open it with the NOXON turned on. This view shows all media players found in your network. By default, Windows Media Connect denies access. To enable your NOXON 2 audio, select it in the list and click the Allow button.
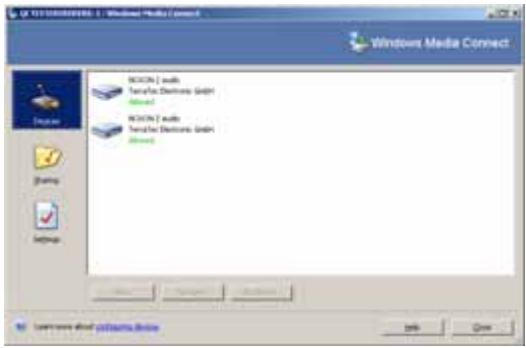
The window should now look something like this.
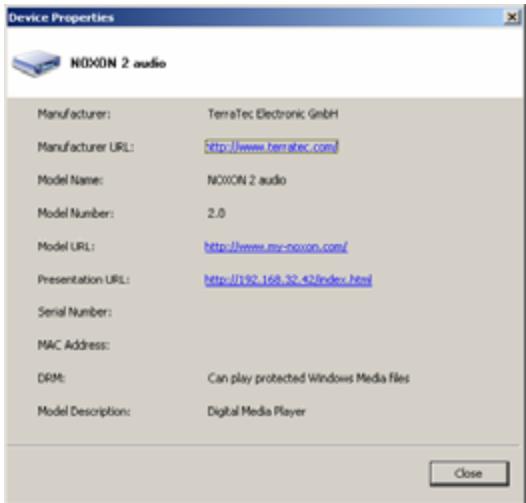
Click Properties for detailed information on your network player.
Note: The DRM entry is important here. If it does not state that the NOXON 2 audio can access protected content, please contact our support team. For more information, please see the last pages of this documentation.
For more information on how to use and manage content, please see the online help. Have fun with your music shopping!
UPnP servers and Macintosh?
We recommend the included Elgato EyeConnect application when using the NOXON 2 audio in a Mac environment. The documentation for EyeConnect can be found on the included CD or at the Elgato website:
http://www.elgato.com
UPnP media server alternatives.
It's very possible that some people really don't like TwonkyVision TwonkyMusic or Media Connect and feel more at home with a different media application. That's why we would like to introduce a number of alternatives.
| Comment | Vendor | |
| musicmatchMUSIC | Unproblematic in terms of setup and operation, but not exactly easy on resources. Much more than actually necessary, especially in comparison to TwonkyVision. | Musicmatch Jukebox http://www.musicmatch.com |
| neros | A media server is also available as a part of the well-known burner tool. Doesn't get along with umlauts very well, but permits the file types to be displayed by the NOXON 2 audio to be specified precisely. | Ahead Nero MediaHome, a component of Nero Reloaded http://www.ahead.de/ |
The DMP Installer
The DMP Installer lets you conveniently check the status of NOXON devices in your network, manage their profiles, and update the operating system of the NOXON 2 audio—from any PC in your network.
To set up the application, launch the installation routine via the link on the autostart screen that appears automatically when you insert the NOXON 2 audio software CD.
If the autoposter does not appear automatically, you can launch the installation manually by right-clicking the "Start" button and selecting Explorer from the context menu to open the Windows Explorer. On the folder tree in the left-hand pane of the Explorer, select your CD-ROM drive, open the "CD:Software\DMP Installer" folder and double-click "DMPInstaller.msi" in the right-hand pane.
System update. The installation routine may inform you that some of your system files are out of date. If so, click "OK" to update them and restart the computer when prompted to do so.

If you followed all of the instructions to the letter, you will now be able to launch the software by clicking Start/Programs/DMP Installer.
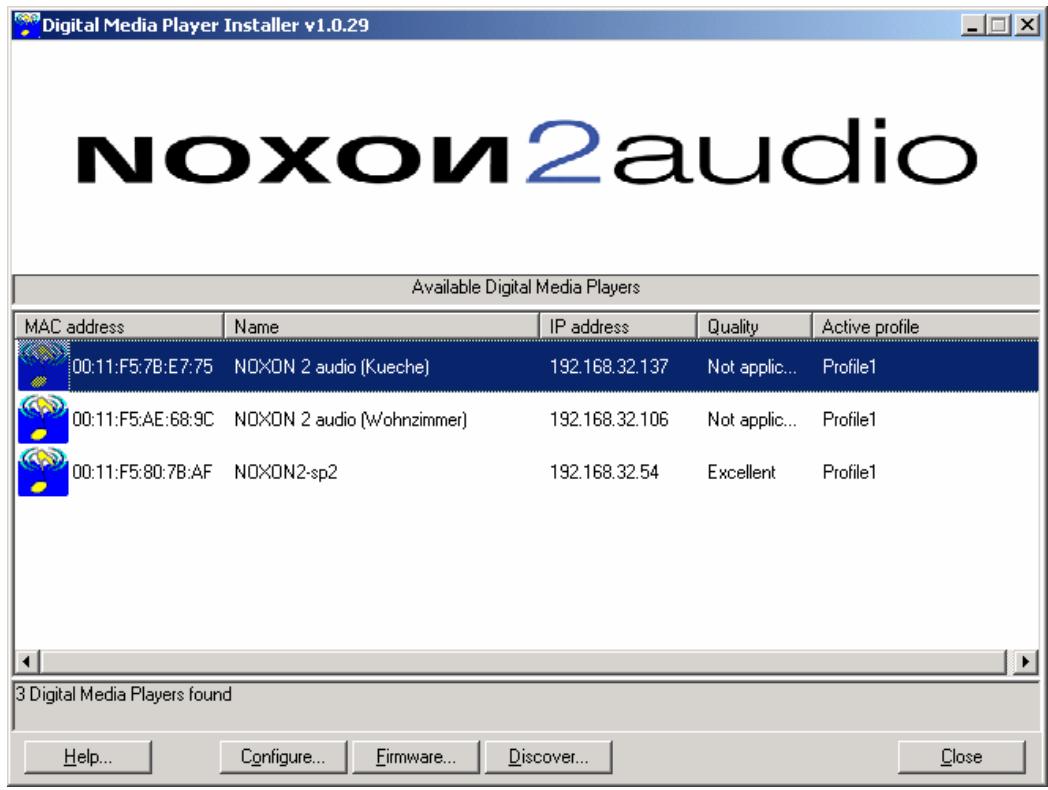
After launching the program and browsing your network for compatible devices, you will be shown an overview similar to the one above—all devices will be listed with their MAC addresses (hardware IDs), names (default: "NOXON 2 audio"), current IP addresses, quality of their wireless connections, and current profiles.
Adding or removing a device will not immediately affect the overview—click “Discover...” to refresh the list.
Configuring devices via the DMP Installer.
With your NOXON in your network and the NOXON Manager application installed, click the "Configure..." button in the main window to open a convenient configuration dialog to manage the network profiles from your PC.
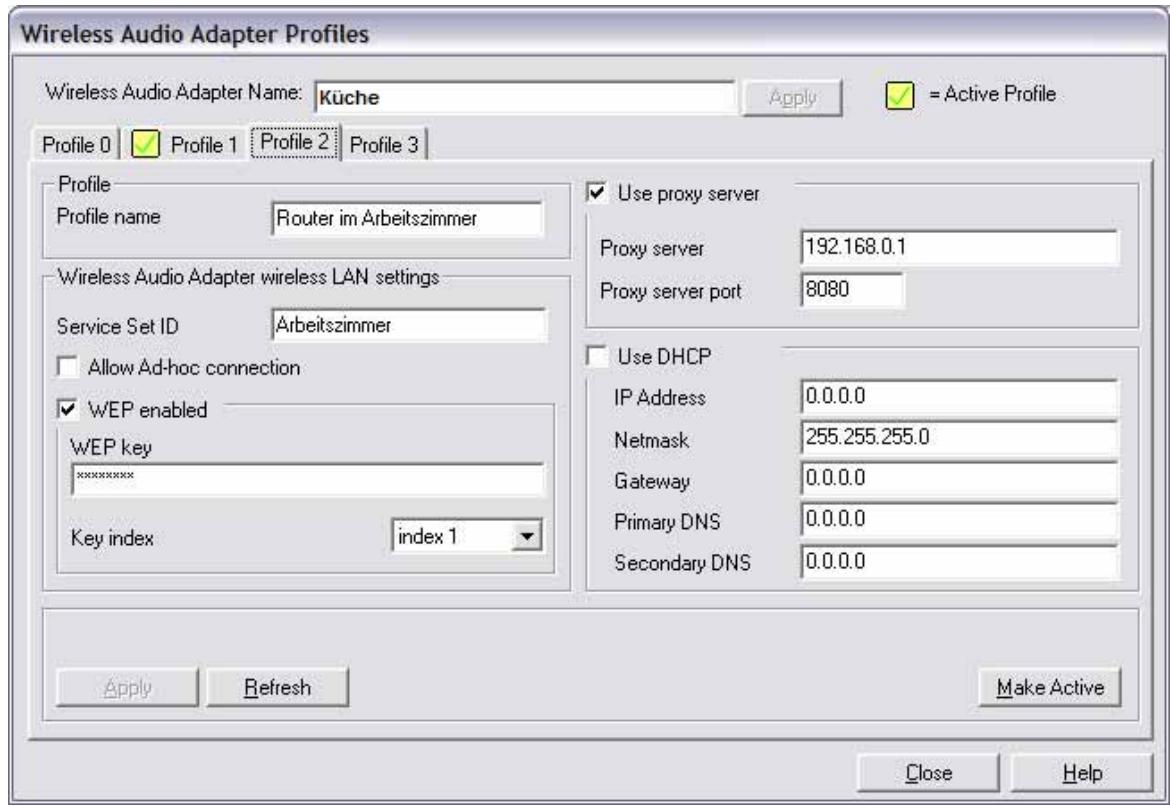
Profile 2 is being edited here. It is also possible to assign the profile a different name using this application. You can also modify all of the network parameters. To save the changes, click "Apply" at the bottom of the dialog box. Another "Apply" button is located at the top of the dialog box to save changes to the profile name. The yellow box with the check mark indicates the current profile—any changes made to this profile will require rebooting the NOXON for them to take effect. If the changes you make result in the NOXON losing its connection to the network, you will have to fix the configuration directly in the NOXON itself. So, please take care with the current profile.
Updating the firmware.
The operating system of the NOXON 2 audio can also be modified via the DMP Installer. For the latest firmware, please visit the Service area in the NOXON 2 audio section of the TerraTec website. In the opening screen of the DMP Installer, click the "Firmware..." button to launch a wizard to walk you through the firmware upgrade.
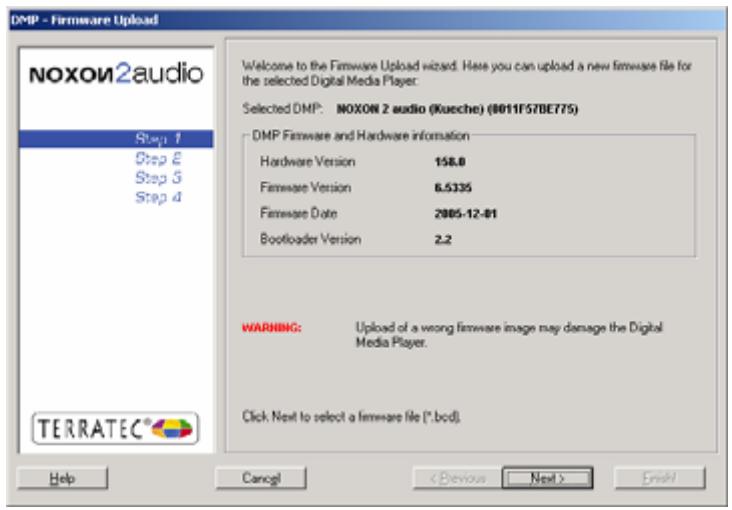
Step 1.
The current settings of the selected NOXON are displayed initially.
Now click "Next >".
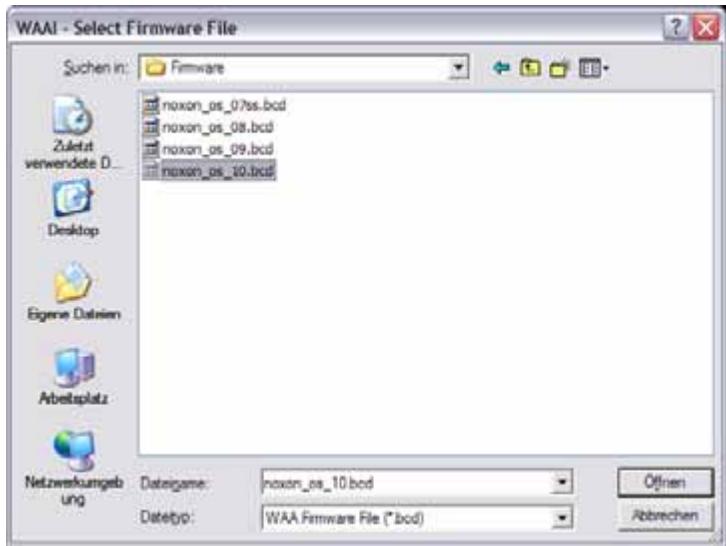
This will open a dialog in which you can select the firmware file.
Select the correct *.bcd file and click "Open".
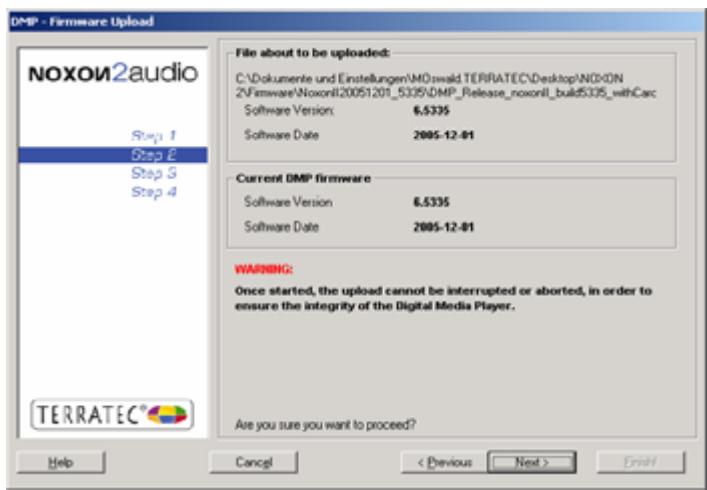
Step 2.
Here you can compare the version numbers of the installed firmware and of the file you just selected to see whether an upgrade is necessary.
If so, click "Next".
Step 3.
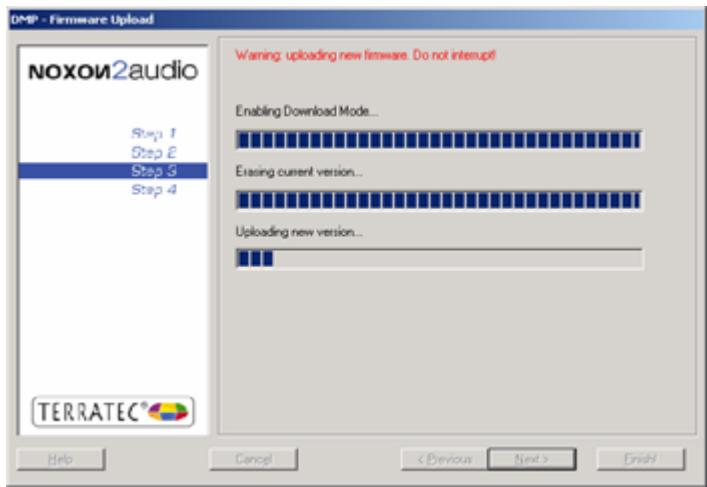
The existing OS will now be deleted and replaced with the new one. This process must not be interrupted under any circumstances, as this may result in such severe damage to the NOXON that you will have to return it to us for repairs. It's best to just sit verry quietly.
Step 4.
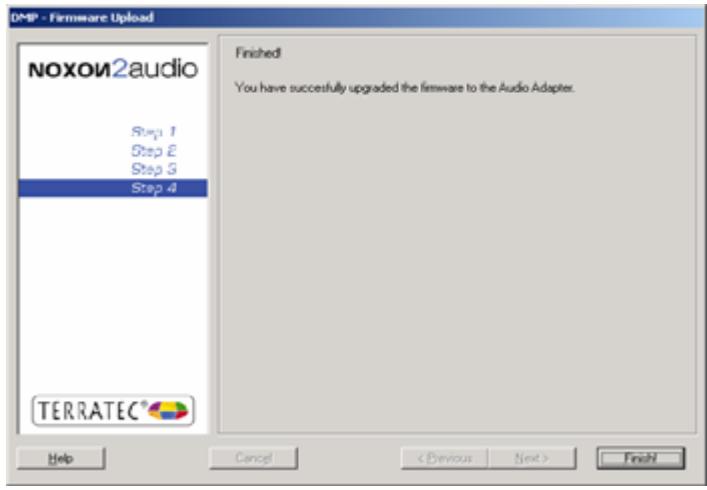
Done!
As you will have noticed, the NOXON rebooted itself and is now available with its fresh firmware.
Wonderful.
If you are experiencing difficulties with installation or operation, please review the relevant chapter in this manual carefully. If you are still having problems, please call our service hotline. The telephone number and operating hours of the hotline are on the included customer service card.
Please fill out and return the registration card to us at your earliest convenience or register online at http://www.terratec.com/register.htm. This is important for support and hotline services.
Appendix.
Geeks only—building your own Favorites from links
The web interface
Before we get started, we really should point out that the Web interface is not supported by our customer service. You'll surely be able to imagine why after reading the following section.
Something we haven't mentioned until now—as average users are unlikely to be interested in it—is the possibility to access the NOXON directly via its Web interface to insert links of your own. To access the NOXON's Web interface, simply enter its current IP address in your Internet Explorer. To determine the address, open the NOXON's status screen. Here's how:
Current NOXON IP address:

+


+8x
Entering the IP address—in this case, 192.168.0.225—into your Web browser and clicking " Favorites" will bring up the following screen:
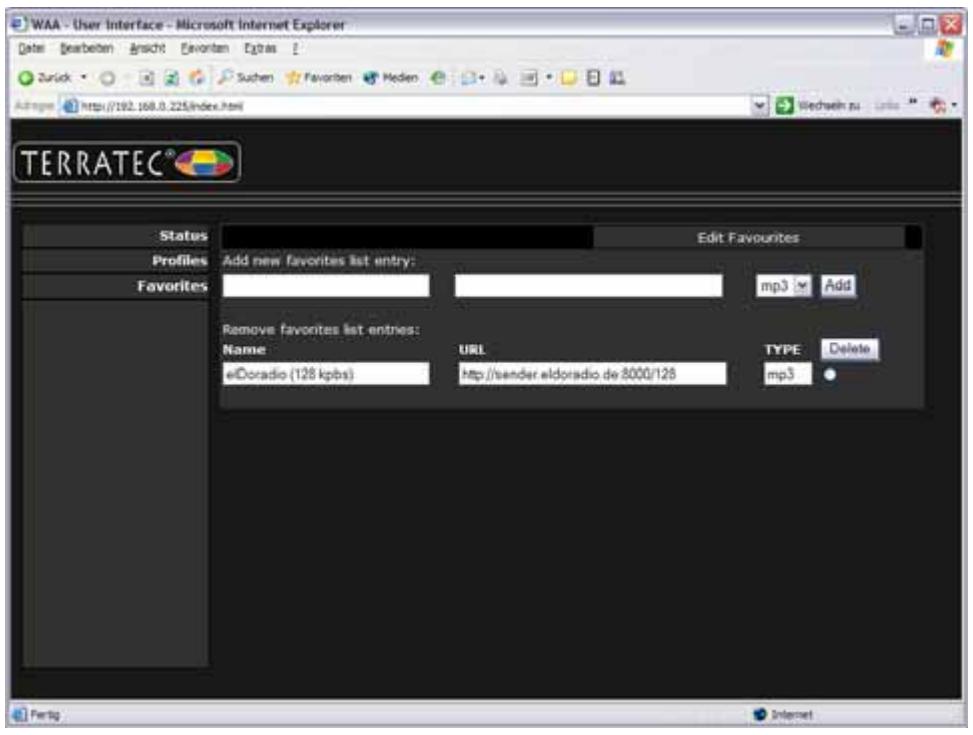
Despite the breathtaking selection of radio stations provided by vTuner, you may find from time to time that a station is missing, or that its broadcast quality is inadequate. In such cases, manually adding favorites via the interface described above can be a solution.
The structure
Unfortunately, time and again the endings of links for MP3 radio streams refer to specific formats that are not actually available, so a bit of experimentation may be unavoidable. An example:
At TerraTec, we're big fans of the college station elDoradio at www.eldoradio.de, which provides the following link for its 128 Kbps stream:
One could, without suspecting anything, enter it in the interface as PLS, but that would not be successful. It won't work until you enter
http://sender.eldoradio.de:8000/128
and set the selection box to MP3.
Unfortunately, it would go too far to list all of the eventualities, definitions and format descriptions you might encounter at this point, so we'll just have to leave you to rely fully on your play instincts. Experience has shown, however, that the vast majority of stations listed on
http://www.shoutcast.com
can be whipped into shape for the NOXON favorites like this:
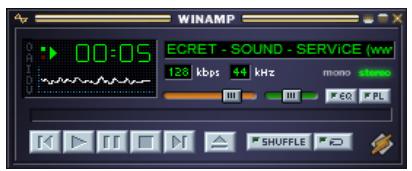
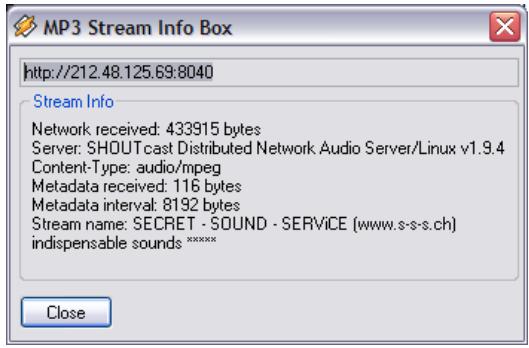
Open the link listed under "Tune In" with Winamp, and while the station is playing, press ALT+3 (or 'View file info...'). The following info window contains details on the data stream—and the first line contains the link that we need to enter in the Web interface mentioned above.
A couple of screenshots:
[ALT + 3] >
Tough network problems? Here are the details.
Time to get technical! At this point we will be taking a closer look at what happens when establishing a connection between the NOXON and the media or music server. While it might seem a bit dry and obscure for the layman, possessing this knowledge will make a definite impression in certain circles. But of course, it would be even
better if it were to help you get to the bottom of any communication problems between the server and the NOXON. Unfortunately, from time to time it may be impossible to establish a connection to the media server. Problems that cannot be solved with the information provided earlier tend to be nontrivial, but a systematic approach can nevertheless pinpoint them fairly quickly. Performing the troubleshooting work takes basic knowledge of network technology and an understanding of some specialized terminology.
My type, your type. As a rule, the current version of the Internet protocol (IPv4) distinguishes between A, B, C and MC networks. With the exception of the MC network, they are very similar technically and roughly describe the size and scope of the network (number of computers per network). The smallest network type, the C network for a maximum of 254 computers, is generally used in home environments. As described above, most computers have addresses such as 192.168.0.100 or 192.168.0.55; all of the addresses have the first three blocks in common: 192.168.0.??. A so-called broadcast address is used to reach all of the computers in the network: 192.168.0.255. A slight modification of this technique is used by our NOXON. If you have set everything up correctly, the NOXON will be located in the same network address range as the music server. Let's have a closer look at the connection process.
The music server starts and sends a broadcast ("Hello, I'm a music server and this is my address!") to the address 239.255.255.250. This address is in the MC or multicast range (a broadcast address like the one above, but one that reaches all lower-level networks at the same time) and will be received by all devices, including the NOXON. The remote destination port, also known as the remote UDP port, is 1900. This is the standard port used for the SSDP (Simple Service Discovery Protocol).
Note: The SSDP service is used by Windows to detect Universal Plug & Play components such as our NOXON. The service is enabled by default in Windows XP and searches in the background for suitable devices.
The NOXON, on the other hand, sends a normal TCP/IP connection request to the target port 8080 (HTTP), transmitting its so-called client description to the music server. This description contains information on the NOXON and what it can play.
The server in turn sends a detailed description of itself (server, version and available services) to the NOXON. Everything you can now see on the NOXON—the various search functions such as All Artists, Genres and Folders—are not components of the NOXON user interface, but are provided by the music server and thus vary with its type and version. If you decide to sort by ARTIST, for example, the NOXON will send a query to the server (“Send me a list of all of the artists you have stored!”). The server will
then send the contents of the directory, in this case the ARTIST list according to the filter rules transmitted by the NOXON.

Select a track to play and the music server will transfer it. This is performed over one of 1024 ports which changes during the transmission.
A number of known issues
Now that we have had a closer look at the technology, let's keep what we have learned in the backs of our heads while considering the most frequent problems.
CASE [1] No radio link between the server and NOXON
The fact that an MC broadcast is used for the first connection attempt between the client and server makes this initial connection relatively vulnerable. Depending on the network adapter, the MC range is often not routed at all in ad hoc networks, especially when using wireless adapters. A number of local packet filters (such as firewall programs) see this form of communication as an attack on the system and thus filter it. Most better-quality firewall programs initially reject these broadcasts, but can be set up to permit unrestricted communication by entering the NOXON as a so-called trusted host. If this option is not available, disable local packet filtering for the NOXON's IP address. In this case it's of course advisable to assign a fixed IP address to the NOXON to ensure that the rule does not need to be edited continually. You should also perform a check to determine whether MC broadcasts are even possible. A variety of scenarios are conceivable here depending on the network adapter, especially in the case of Windows-based ad hoc wireless networks.You should also determine whether communication with the NOXON is possible at the most basic level by pinging it.
- Open the configuration of the NOXON, select Status and scroll to the IP Address item. If "being configured" is displayed here, then the device has not yet found a connection to the DHCP server, or a DHCP server is not available. In this case, check your network configuration before proceeding.
- Now, ping the NOXON from the computer running the music server. Open the command prompt (Start > Run > and enter “CMD”) and enter “ping 192.168.1.157”, using the actual IP address of your NOXON, of course. If you receive replies to your ping (the time in milliseconds until the reply was received will be displayed), then basic communication is possible. If that is not the case (“host unreachable”), then carefully check your communication—especially with regard to encryption and IP addresses.
In summary, use the following checklist:
Is the music server running correctly?
Are all of the configuration files correct and does the server appear in the Processes list (CTRL + SHIFT+ ESC)? If it is not listed, check your server-side configuration.
Is there a conflict with your filter or firewall rules?
The firewall can be disabled completely as an extreme measure when running Windows, or its functionality should not be extended to cover the NOXON. Disabling it briefly for the test can be useful when hunting down the problem.
Is any form of communication with the NOXON possible?
A ping to the NOXON's IP address as described above will clarify this question. If the NOXON doesn't respond to your ping, it certainly won't be able to communicate via UPnP. If you are not successful here, then you have a different network problem which can range from a typo in the encryption key to massive configuration errors.
Does the network adapter support broadcasts in the MC range?
A number of wireless network adapters do not support MC broadcasts while in ad hoc mode. That, however, prevents a fundamental part of the connection establishment. Please contact the vendor of your network adapter for more information.
CASE [2] The connection fails after several minutes.
This points toward one of the fundamental weaknesses of the UPnP standard. The useful communication begins on one of 1024 ports and changes regularly during operation. Unfortunately, this change takes place in such a manner that an ESTABLISHED/RELATED rule cannot take effect in most firewalls. The only solution in this case is to disable any filtering of communication with the NOXON.
CASE [3] No connection after configuration, or connection fails after turning device off
The NOXON returns the message "no network connection" after being switched off--after successful configuration and normal operation. This problem occurs only when using the NOXON with access points that use the 802.11g standard. The NOXON is an 802.11b device, and so the access point must switch standards to communicate with it. After switching the NOXON off, the access point may switch back, making communication impossible. The problem can be solved by performing a soft reset on the NOXON by pressing and holding the Power button on the remote control for several seconds. We are currently working on a firmware upgrade to correct this issue.
FAQ—frequently-asked questions and their answers.
The current FAQ (Frequently Asked Questions) for initial problem-solving can be found on the Internet at http://www.terratec.de/support.

The NOXON finds my access point, but not my computer.
- Please ensure that a UPnP server is installed on your system and that this is enabled. Depending on the distance and software, it may take several seconds before your selection is listed in the NOXON.
- You may have MAC address filtering enabled in your router. If so, enter the MAC address of the NOXON in your router configuration. The address can be found on the back of the NOXON.
- Your router may be configured to use fixed IPs. If so, enter an IP address in both the NOXON and your router.
My access point (SSID) is not listed.
- The NOXON can only find your access point if it is within range. Reduce the distance to the access point and try again.
Depending on the configuration of your router, your SSID may be hidden. If so, you must enter the SSID in the NOXON configuration menu manually.
My NOXON sees several unknown access points.
If multiple access points are within range—those of your neighbors, for example—the NOXON will list them. Select your own access point and continue with the installation.
My NOXON indicates that my network is encrypted.
Your network uses WEP encryption as protection against intruders. Enter your WEP key in the NOXON so that your network will recognize it as a user.
Where can I find my WEP key?
If you set the network up, you will have specified it yourself. Otherwise, contact your network administrator.
I can't receive radio streams, or the update fails.
- Your network may be using a proxy server that you have not entered in the configuration of your NOXON.
- You cannot connect to the Internet. Your router must be configured so that you can establish a connection to the Internet.
- If you are using the NOXON with an ad hoc connection, your local computer must be connected to the Internet and must have Internet connection sharing enabled.
I'm playing a music file, but I can't hear anything.
Either the NOXON is muted, or the volume is so low that you can't hear anything. Turn up the volume and/or press the Mute button. Ensure that the connected stereo or speaker system is powered up.
The radio stream is interrupted suddenly.
You may have a throughput problem with your Internet connection. Sometimes the problem is also with the station itself. Switch to a different station and try again.
Playback stops abruptly.
This may be due to a communication problem. It can be the result of radio interference, being out of range, or problems with your server or router. Reboot your system and try again.
My computer/NOXON has found an unknown ad hoc network.
An additional ad hoc network is in operation in your vicinity. Should you have problems with your configuration, please ensure that the option to automatically connect with non-preferred networks is disabled in the network settings. Disable and re-enable your network connection.
My computer cannot be found when switching from ad hoc to network mode (or back).
Restart the Musicmatch music server and your NOXON. Your computer will then be recognized again.
How can I make subsequent changes to my configurations?
Press the network button on your remote control to open the configuration menu, in which you can modify a wide range of settings.
How should I proceed with a manual IP configuration?
Press the "Network" button to open the configuration menu. Launch the wizard, select "Next" and select your access point as usual. The "Static IP address" option must be selected in the IP settings. In the next step, enter the IP address. Finish the setup with the proxy settings as usual and apply them.
Can I check all of my settings?
Yes, by selecting "Status" in the configuration menu. The full range of information and settings related to your current configuration is displayed here.
I would like to set up another profile for a different location. Is that possible?
Yes, the "Profile selection" item is located in the configuration menu. You can create three personal profiles here that will be stored in the NOXON and which can be selected whenever you need them.
What's the maximum range?
Outdoors, the range is around 300 m. Walls and furniture reduce the range significantly indoors. The weather and barometric pressure is a further factor. The alignment of the antenna of your access point or network adapter is also important. Taking all of these factors into account, a range of 30-100 m should be possible indoors.
Which file types does the NOXON support?
NOXON plays MP3 and WMA files and supports M3U and PLS playlists.
Is the data communication truly secure? Does the NOXON represent a security risk for my network?
If your network is WPA-encrypted, data communication between it and the router will be just as secure as with any other client. The NOXON therefore does not represent a potential point of attack for hackers.
Is it possible to read or view other data on my hard drive?
No, the NOXON can only access data shared by the UPnP server. This is the sole route the NOXON can use for accessing your files, so nothing else on your computer will be visible or transferred.
Which communication standards does the NOXON support?
NOXON 2 audio supports IEEE 802.11b networks at 11 Mbps as well as IEEE 802.11g at 54 Mbps.
What are the NOXON's power requirements?
The NOXON requires an operating voltage of +9V DC at 1000mA—which corresponds to the included power adapter.
Is wireless data communication a health hazard?
Due to its very low power levels, WLAN data communication is less critical than the radiation from cellphones. As it does with cellphone radiation, however, the density of the radiation and the nature of the room also play a role in this respect.
Technical glossary
Access point (AP) — An access point is a network component that WLAN clients (terminal devices) connect to in order to exchange data with the Internet or other clients. It is identified via itsSSID. The NOXON can connect with an AP in order to obtain files from computers in the local network or audio streams from the Internet.
Ad hoc network — Ad hoc network (ad hoc: Latin, literally “for this purpose”) refers to a wireless network topology between two or more mobile devices without a fixed infrastructure. An access point is not required. The NOXON can also be used in ad hoc mode. You merely need a local computer with a WLAN adapter and your NOXON.
DHCP - The abbreviation for Dynamic Host Configuration Protocol. This protocol permits IP addresses and configuration parameters to be allocated to computers dynamically. DHCP permits the integration of additional network components without configuration. The NOXON configuration wizard supports DHCP, so no further configuration parameters need to be specified.
IEEE 802.11b/ IEEE 802.11g — Industry standards for wireless networks issued by the Institute of Electrical and Electronics Engineers. The b standard refers to a maximum bandwidth of 11 Mbps, whereas g supports 54 Mbps. Our NOXON supports both IEEE 802.11b and IEEE 802.11g networks.
IP (IP address) — (Internet Protocol) refers to a common communication protocol for computer networks. Each client has its own IP address consisting of four groups of digits separated by dots (e.g. 127.80.1.34). IP addresses are allocated automatically when using DHCP. The IP address can also be entered manually if the NOXON is not configured via DHCP.
LAN — A LAN (Local Area Network) is a computer network in a limited geographical area. Not only computers in the WLAN, but also those in a LAN linked to the WLAN via a router can be used as servers for the NOXON.
MAC address — (Media Access Control address) is the hardware address that serves as a unique identifier for every hardware component in a network. The MAC address is fixed and can not be modified. As the NOXON is a network component, it also has a fixed MAC address. It can be found on the back of the device.
Peer-to-peer connection (P2P) — This describes communication among devices of an equal rank. All partners have the same status and identical functions. In an ad hoc network, the NOXON and your local PC represent a P2P connection.
Proxy server — A proxy server stores static Web content so that it does not need to be downloaded again the next time the page is requested. If you have a proxy server in your system, enter its settings in the NOXON to prevent any complications.
Router — A router is a piece of communication hardware that ensures that data packets sent through a network arrive at the correct destination computer (client). In many cases, routers interconnect networks such as LANs and WLANs. The NOXON is also a client that receives data packets in this manner.
SSID (ESSID) — The Service Set Identifier (SSID) or network name is the identifier for IEEE 802.11-based wireless networks. Every wireless LAN has a configurable SSID or ESSID (Extended Service Set IDentifier) as its unambiguous identifier. Essentially, the SSID is the name of the network. The NOXON recognizes all found networks automatically and also supports the manual entry of SSIDs.
UPnP — This abbreviation stands for Universal Plug and Play, which is based on a number of standardized network protocols and is designed to provide cross-vendor control of devices (stereos, printers, routers, household systems) via IP-based networks. The NOXON is a UPnP device capable of receiving files from a suitable application.
WEP encryption — WEP (Wired Equivalent Privacy) describes a type of encryption for WLANs. Naturally, NOXON can also receive and interpret WEP-encrypted data.
WiFi - A certificate for WLAN products that comply with IEEE802.11 standards and are compatible with other products. The NOXON also fulfills the technical standards of the WiFi consortium.
WLAN — Also Wireless LAN or Wireless Local Area Network. The NOXON connects to your network via WLAN. It receives data via the local wireless network, processes them and plays it in the form of audio files.
WPA encryption — Like WEP, WPA is an encryption and authentication standard. WPA was developed to eliminate the fundamental weaknesses of WEP encryption. WPA can thus be seen as the secure successor to WEP.
Service at TerraTec.
"Rien ne va plus—Nothing's working" can happen to the best systems. If this happens to you, the TerraTec team is happy to offer its service and support.
Hotline and Internet
In case of a serious problem—where you can neither solve the problem on your own nor with the guided help found in this manual, nor with the help of your dealer—please contact us directly.
If possible, try our Internet support system first: under http://www.terratec.com/ you will always find current answers to frequently asked questions (FAQ) and the latest drivers.
If these options do not provide the necessary help, please contact our phone helpline or contact us online at http://supportde.terratec.net/
In addition, it would be helpful to our technicians if you are at your computer during the phone call so that you can carry out our tips and tricks directly. Please do not forget to write down the name of the respective support technician if you contact our Support Team. You will need this name if a defect is present and your device needs to be mailed to us.
Broken?!
Before you send your device back, be sure to contact us! Make a note of the name of your support contact and follow these simple instructions:
- Please fill out the service request form provided with your card clearly and completely. The more clearly and detailed you describe the problem, the faster we will be able to help. Cards sent in without a description of the problem cannot be processed and will be returned to you at your expense.
- Be sure to include a copy of your purchase receipt (not the original) with the package. If we do not receive a copy of a receipt, we will assume that the warranty for the product has expired and will bill you for the repair.
- Please use a sufficiently strong and padded mailing package. We recommend using the original package. Remember that the card is a sensitive electronic component.
- Be sure to include enough postage—we will cover for the postage for the return to you.
General terms and conditions of service
1. General
By purchasing and receiving the goods, you accept our general terms and conditions of service.
2. Proof of guarantee
We will require a copy of the purchase receipt or delivery slip as proof of warranty. If you do not supply proof of warranty, we will charge for repairing the goods.
3. Description of problem
Shipments that do not include a description of the fault or an insufficient description ('defective' or 'for repair' is insufficient) will be returned for a processing fee, because this makes repair more difficult and could have been avoided.
4. Invalid returns
In the event of an unfounded complaint (no fault could be detected, probable operating error), we will return the goods and a processing fee will be charged.
5. Packaging
If possible, please use the original packaging for return shipment. Any warranty claim will be jeopardized by improper packaging. The warranty will not apply to damage caused by improper packaging.
6. Foreign manufactured products
Devices that are not manufactured or distributed by TerraTec Electronic GmbH will be returned and a processing fee will be charged.
7. Repairs liable to your expense
Repairs out of the warranty period are liable to your expense.
8. Transportation costs
The dispatcher pays all costs associated with shipping and insurance for the goods for repair to TerraTec Electronic GmbH. If the goods are covered by warranty, TerraTec Electronic GmbH will pay the shipping costs for returning repaired goods. COD shipments will not be accepted for organizational reasons.
9. Final regulation
TerraTec Electronic GmbH reserves the right to change or supplement the general terms and conditions of service at any time.
Otherwise the General Terms and Conditions of Business of TerraTec Electronic GmbH are considered to be accepted.