
TVGO DVB-T02Q MCE - Digital TV Receiver GENIUS - Free user manual and instructions
Find the device manual for free TVGO DVB-T02Q MCE GENIUS in PDF.
| Product type | USB digital TV receiver for PC |
| Brand | Genius |
| Model | TVGO DVB-T02Q MCE |
| Connectivity | USB 2.0 (compatible with USB 1.1) |
| Power supply | Via USB port |
| Reception | HD and SD DTT (DVB-T) |
| Main functions | Timeshift, real-time and scheduled recording, screenshot, EPG, teletext, remote control |
| Included antenna | Portable VHF/UHF antenna + IEC-MMXC adapter |
| Included software | Drivers and playback/recording application |
| Required operating system | Windows 2000 SP4, XP SP1/SP2, XP MCE 2005 |
| Minimum SD configuration | Processor 1.7 GHz, 256 MB RAM, 100 MB free disk space |
| Minimum HD configuration | Processor 2.4 GHz, 256 MB RAM, 100 MB free disk space |
| Disk space for recording | ~3 GB per hour |
| Dimensions (estimated) | Approximately 10 x 3 x 1 cm (USB dongle) |
| Weight (estimated) | Approximately 50 g |
| Included accessories | Receiver dongle, remote control with battery, antenna, adapter, USB cable, software CD, quick guide |
| Warranty | Not specified (refer to manufacturer) |
Frequently Asked Questions - TVGO DVB-T02Q MCE GENIUS
User questions about TVGO DVB-T02Q MCE GENIUS
0 question about this device. Answer the ones you know or ask your own.
Ask a new question about this device
Download the instructions for your Digital TV Receiver in PDF format for free! Find your manual TVGO DVB-T02Q MCE - GENIUS and take your electronic device back in hand. On this page are published all the documents necessary for the use of your device. TVGO DVB-T02Q MCE by GENIUS.
USER MANUAL TVGO DVB-T02Q MCE GENIUS
Chapter 1 Introduction of TVGo DVB-T02Q MCE
1.1 Introduction
The TVGo DVB-T02Q MCE can turn your notebook or desktop PC into a personal digital TV and let you watch high definition free-to-air DVB-T TV on your notebook or desktop PC. The compact size design makes it easy for you to take it anywhere and real-time record the TV programs to DVD disc in DVD format. With the remote controller, you can easily to watch TV and record, also playback high quality digital video programs on your NB or PC and channel preview. These functions supported by TVGo DVB-T02Q MCE make this a product you don't want to miss.
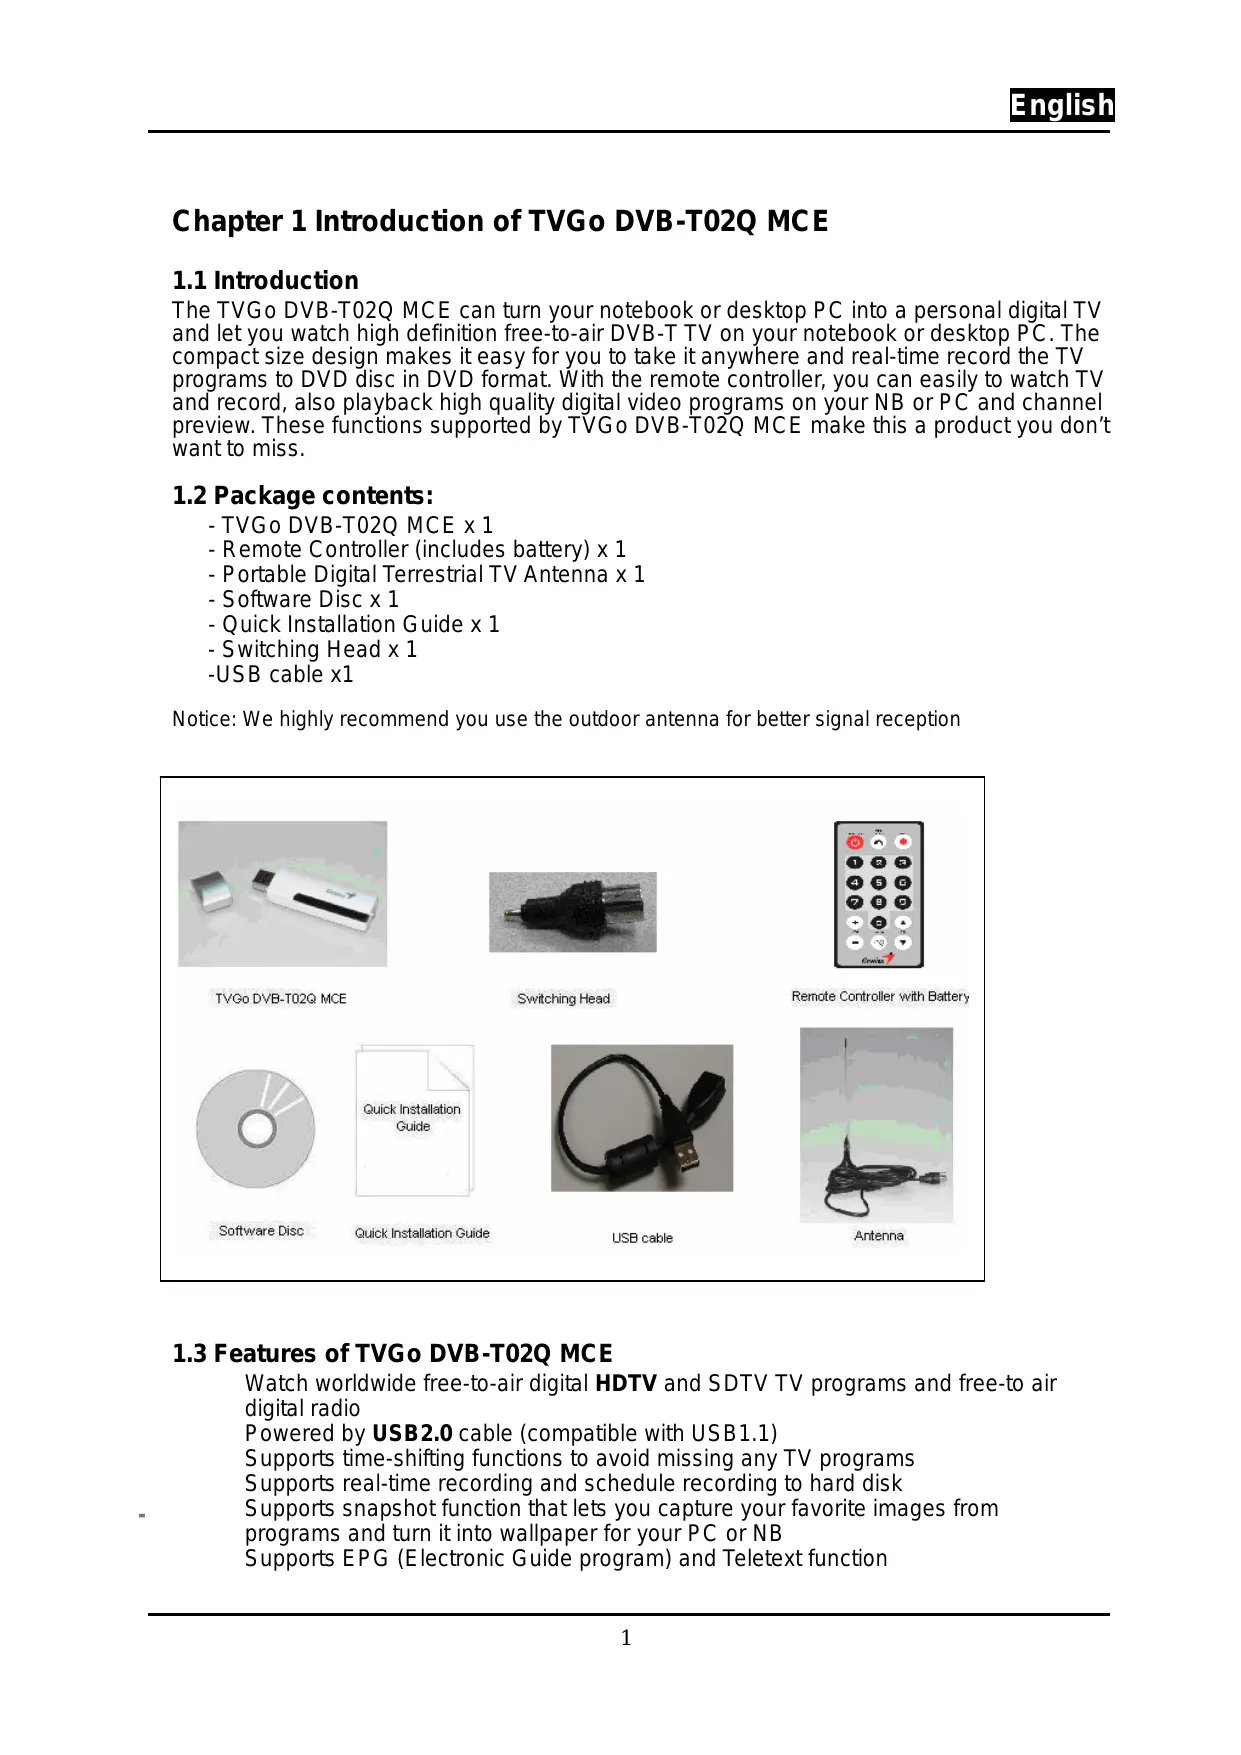
1.2 Package contents:
- TVGo DVB-T02Q MCE x 1
- Remote Controller (includes battery) x 1
- Portable Digital Terrestrial TV Antenna x 1
- Software Disc x 1
- Quick Installation Guide x 1
- Switching Head x 1
-USB cable x1
Notice: We highly recommend you use the outdoor antenna for better signal reception
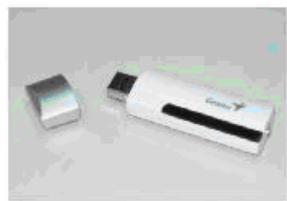
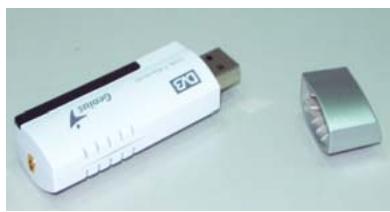
TVGo DVB-T02G MCE
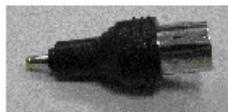
Switching Head
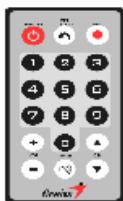
Remote Controller with Battery
Software Disc
Quick Installation Guide
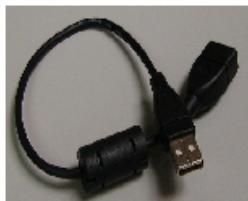
USB cable
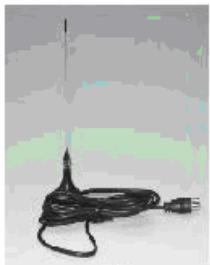
Antenna
1.3 Features of TVGo DVB-T02Q MCE
Watch worldwide free-to-air digital HDTV and SDTV TV programs and free-to air digital radio
Powered by USB2.0 cable (compatible with USB1.1)
Supports time-shifting functions to avoid missing any TV programs
Supports real-time recording and schedule recording to hard disk
Supports snapshot function that lets you capture your favorite images from
programs and turn it into wallpaper for your PC or NB
Supports EPG (Electronic Guide program) and Teletext function
1.4. Minimum system requirements:
SDTV
- PIII 1.7 GHz or above for watching SDTV TV program
- P4 2.4 GHz or above for watching SDTV TV program and recording
HDTV
- P4 2.4 GHz or above for watching HDTV TV program
-
P4 3.0 GHz or above for watching HDTV TV program and recording
-
256MB system memory size
- Microsoft Windows 2000 SP4, Windows XP SP1/SP2 operating system, or Windows XP Media Center Edition 2005
- Microsoft DirectX version should be 9.0c or later
- 100MB available hard disk space (used by the driver and software),
- 3GB disk space per hour needed for TV program recording
Chapter 2 Installation
You can install the TVGo DVB-T02Q MCE easily after reading this chapter. The following sections will provide you detailed information how to install the TVGo DVB-T02Q MCE to your PC or NB.
2.1 Brief introduction on hardware installation
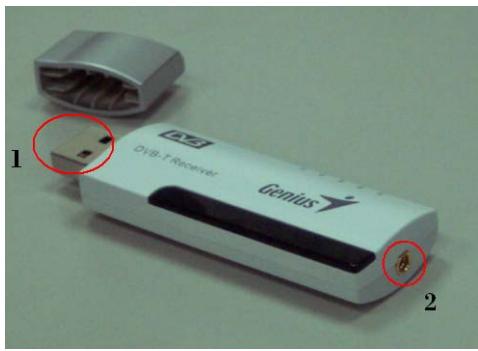
1 : USB Interface for USB port used to connect TV pen driver and PC / NB.
2: Antenna RF-In to connect to terrestrial antenna.
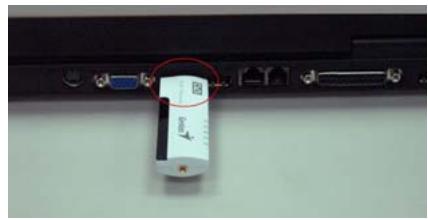
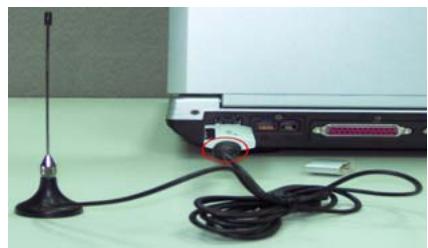
Step 1. USB connection
Connect the USB port and the TVGo DVB-T02Q MCE as shown below.

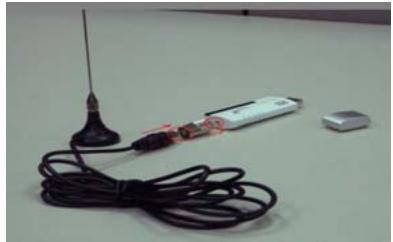
Step 2. Connect the antenna signal line
First connect the TV antenna signal line to the IEC-MMXC switch head. Second, connect the IEC-MMXC switch head to TVGo DVB-T02Q MCE RF-IN as shown below.

Notice: 1. When the hardware is connected, you can start the software installation.
2. We highly recommend you use an outdoor antenna for better reception
2.2 Software installation
The TVGo DVB-T02Q MCE installation includes the application and driver; just follow the sections below to install the software.
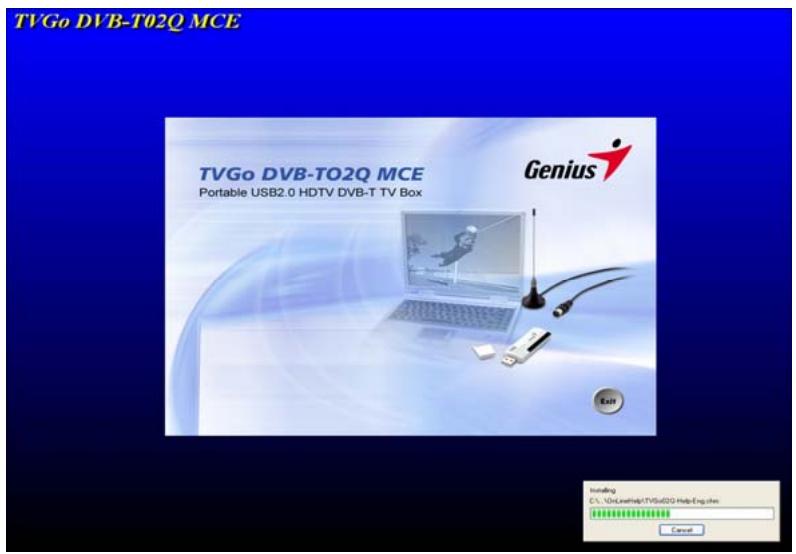
- After the computer and TVGo DVB-T02Q MCE MCE are connected, the following window appears. Click on "Cancel" to install the driver later.

- Please put into the software disc into your CD-ROM drive. The following window will pop up automatically.
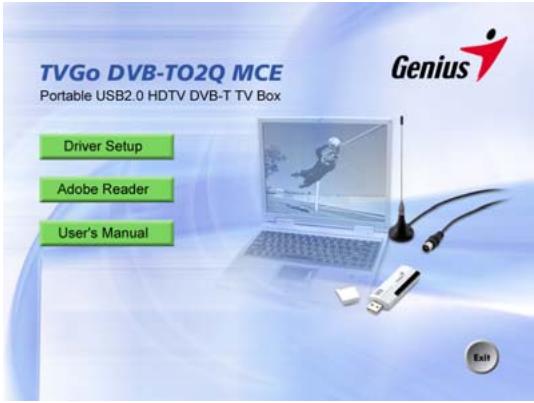
If you do not see this window above, please manually run setup.exe " from the software disc.
- After entering WINDOWS, select Driver Setup to install driver and application. Then the following window will pop up.

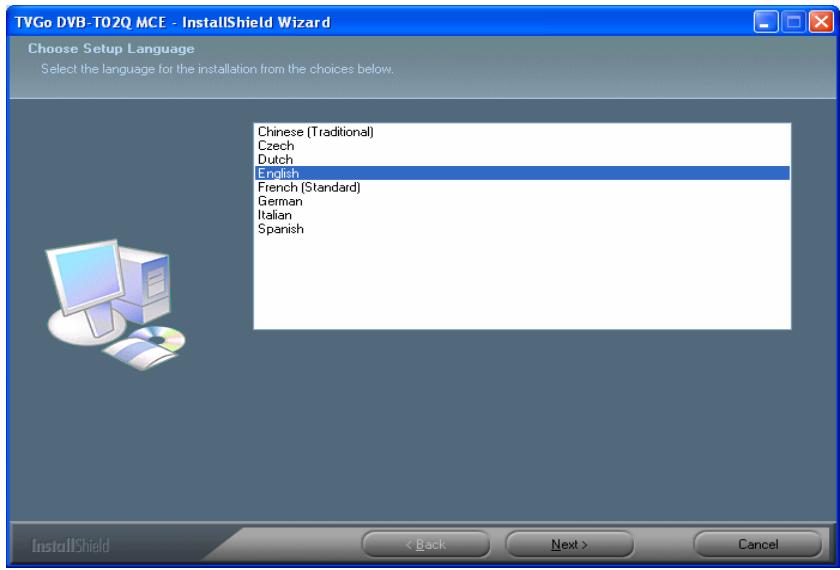
- After entering InstallShield menu, please choose the languages installed, then continue installing according to the instructions.
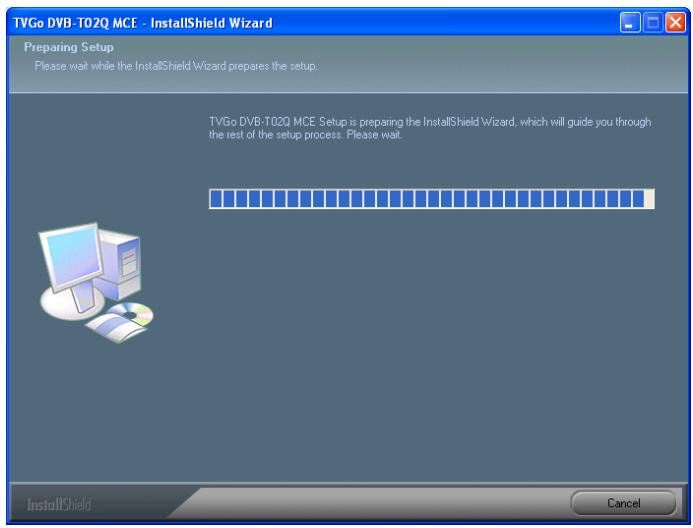
- The installation procedure will copy the driver and application software to your PC or NB. You can choose "Cancel" to stop the installation procedure.
- Please select "Next" to continue installing and choose the desired file folder to install and go to next step.
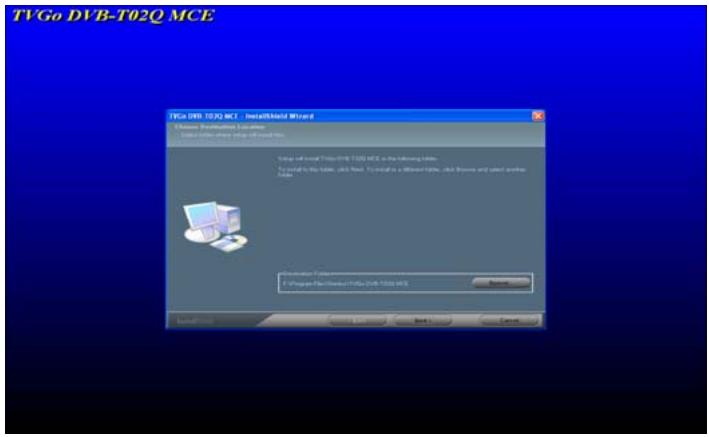
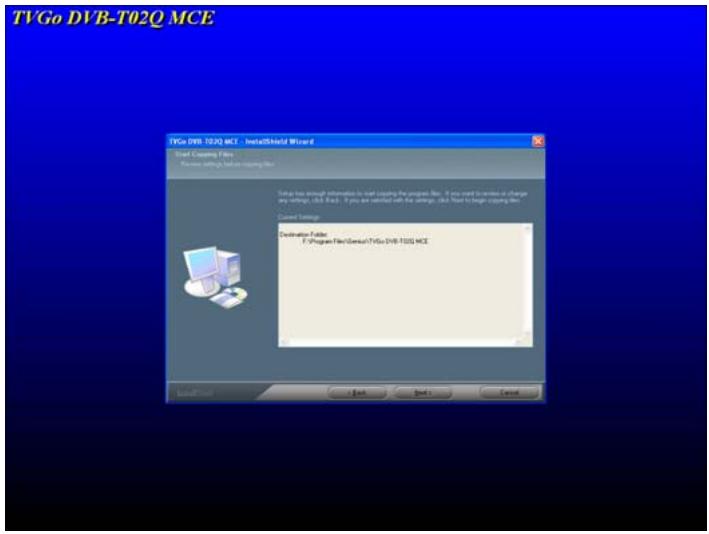
- Please choose "Next" to continue installing according to the instruction, or "Back" to return to the last step and choose the suitable file folder to install. Or choose "Cancel" to stop the installation.
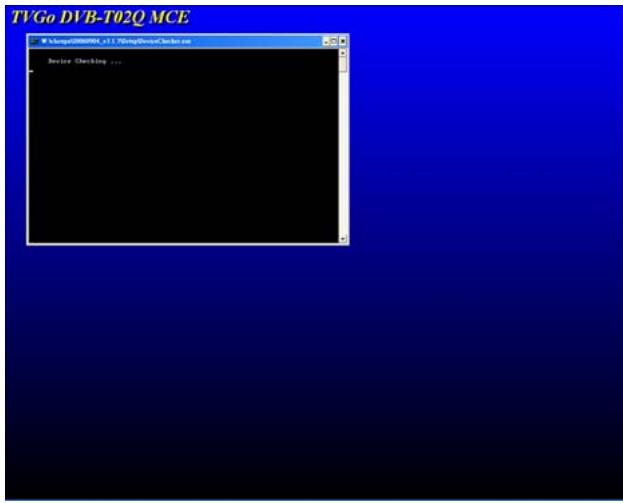
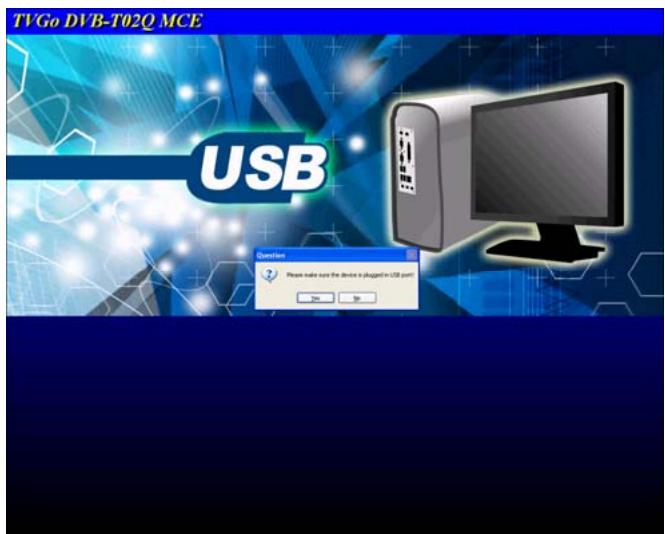
- The setup is checking the USB device. You need to plug TVGo DVB-T02Q MCE to continue or cancel the installation.
- The setup program will copy the data and install DirectX 9.0c automatically.
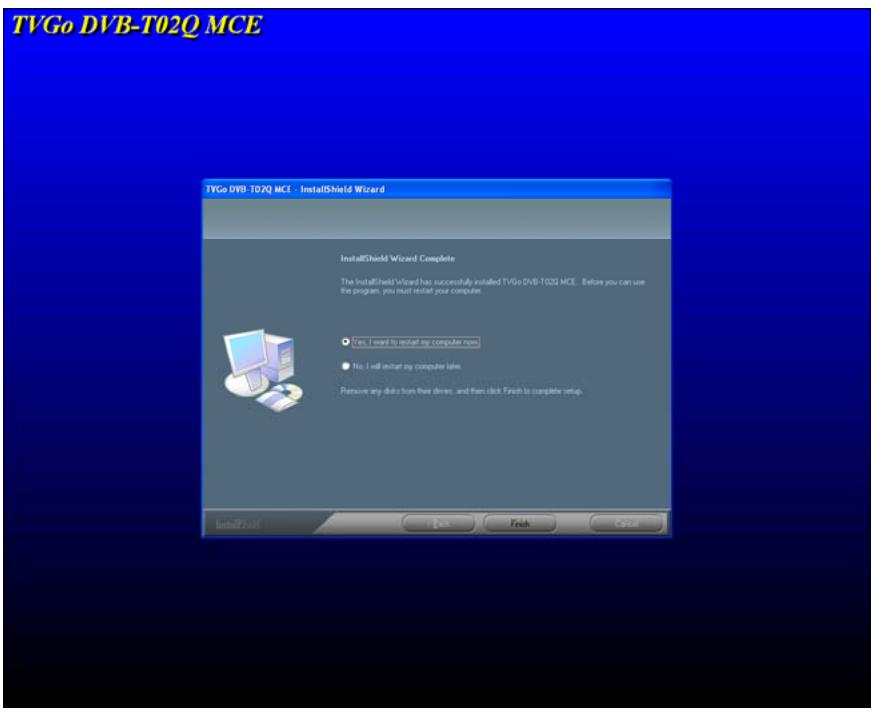
- After the installation is done, click on "Yes, I want to restart my computer now." Then click and select "Finish"to complete the installation procedure.
Chapter 3 Introduction of the software
It offers the strong and exhaustive function for one high-level digital TV player. Through it, you can enjoy exciting high-resolution, high-quality video and audio TV play back.
3.1 Control panel
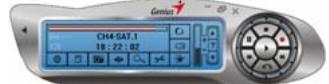
Control Panel without Numerical Keypad
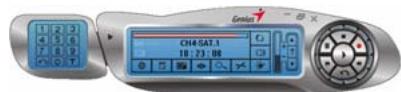
Control Panel with Numerical Keypad
| Icon | Function description |
| × | Close the TV player |
| E | Full screen / normal screen switch |
| - | Minimize the TVGo DVB-T02Q MCE player |
| Genius | Show the information of the TVGo DVB-T02Q MCE player |
| Fast forward the playback movie | |
| Fast backward the playback movie | |
| Stop the playback movie | |
| Pause the playback movie | |
| Play the previous television channel | |
| Record the TV program | |
| Choose the movie file to play | |
| Switch the TV channel up | |
| ? | On-line help |
| Switch the TV channel down | |
| + | Increase volume level |
| - | Decrease volume level |
| Volume level status display and adjustment | |
| Open EPG (Electronic Program Guide) of TV program | |
| Open or close the sound | |
| Watch the TV program | |
| TVGo DVB-T02Q MCE player system setting | |
| Channel preview of TV program | |
| Start-up timeshift | |
| Capture a picture of the movie | |
| Establish the schedule of TV recording | |
| Switch between bilingual | |
| Turn on the numerical keypad | |
| Shut off the numerical keypad | |
| ~ | Choose the television channel |
| T | Open teletext window of TV program |
| Play the previous television channel | |
| Status display of intensity of the terrestrial TV signal | |
| Mute status display | |
| STARED | Stereo status display |
3.2 Brief introduction of basic function
Intensity index of free-to-air terrestrial TV signal
This will show the status display strength of your television channel signal automatically.
18:00:59
Clock: The clock will show the time of your computer automatically
CH13-CTS IQ
Channel name: The channel names broadcast at present time is shown automatically
Toggle for audio mute function
You can click icon to turn the mute on or off. This icon represents mute -

Live TV recording: Record the TV program you are watching now.
Be careful! You can record to DVD disc directly if you have a DVD writer. Please check the Q&A for the list of the DVD writer support.

Schedule TV recording: Set the TV recording schedule.

System configuration: Scan TV channel, change video attribute, or set the file path of recording and capturing.

Bilingual support : If the TV program supports bilingual , you can click the icon on the control panel.
Note: This function depends on whether the TV program offers bilingual programming.

Frame capture: Capture a picture from the video playback or a live TV program 。
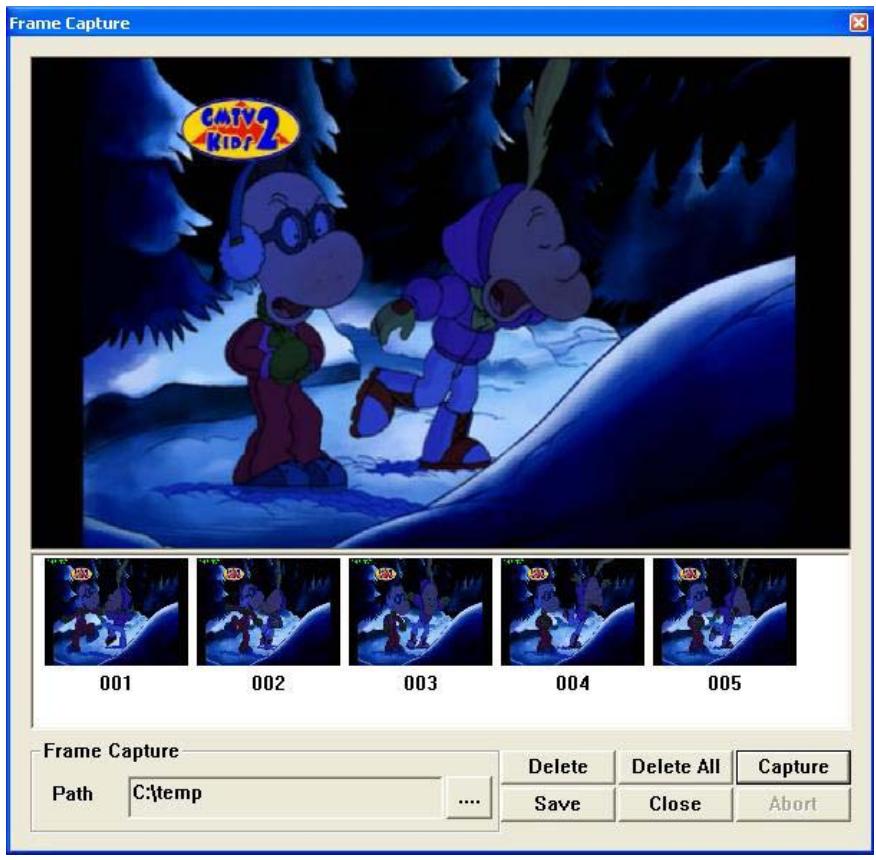
You can click "Capture" again to capture another frames.
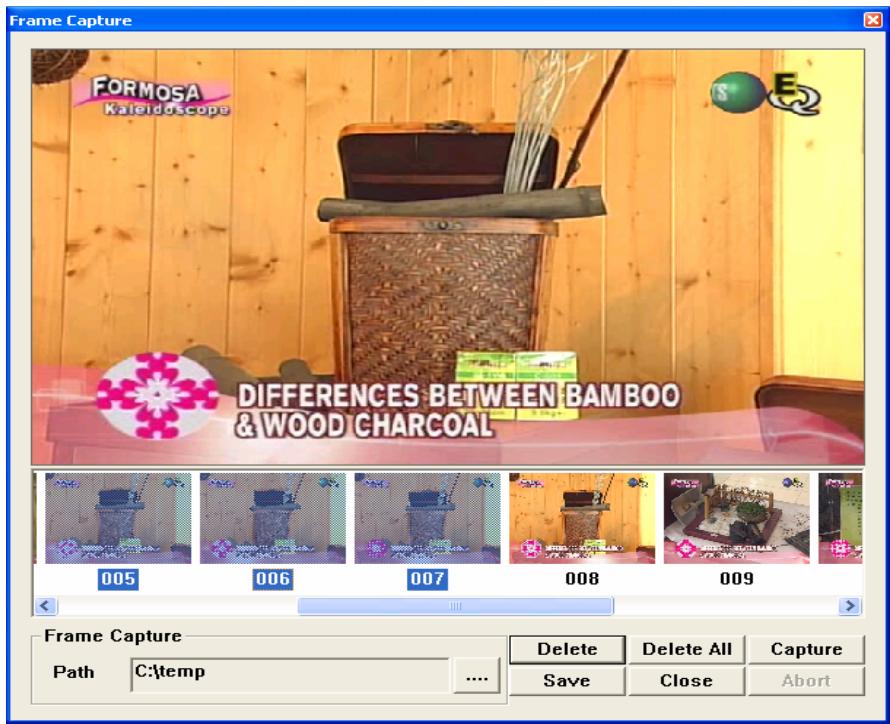
You can select frames by using left button of mouse to do individual selection. Then, you can delete the selected frames by click "Delete". Or, you can use "Delete All" to delete all the frames you capture. Once you finish the selection, you can click "Save" to save the capture frames or "Close" without saving.
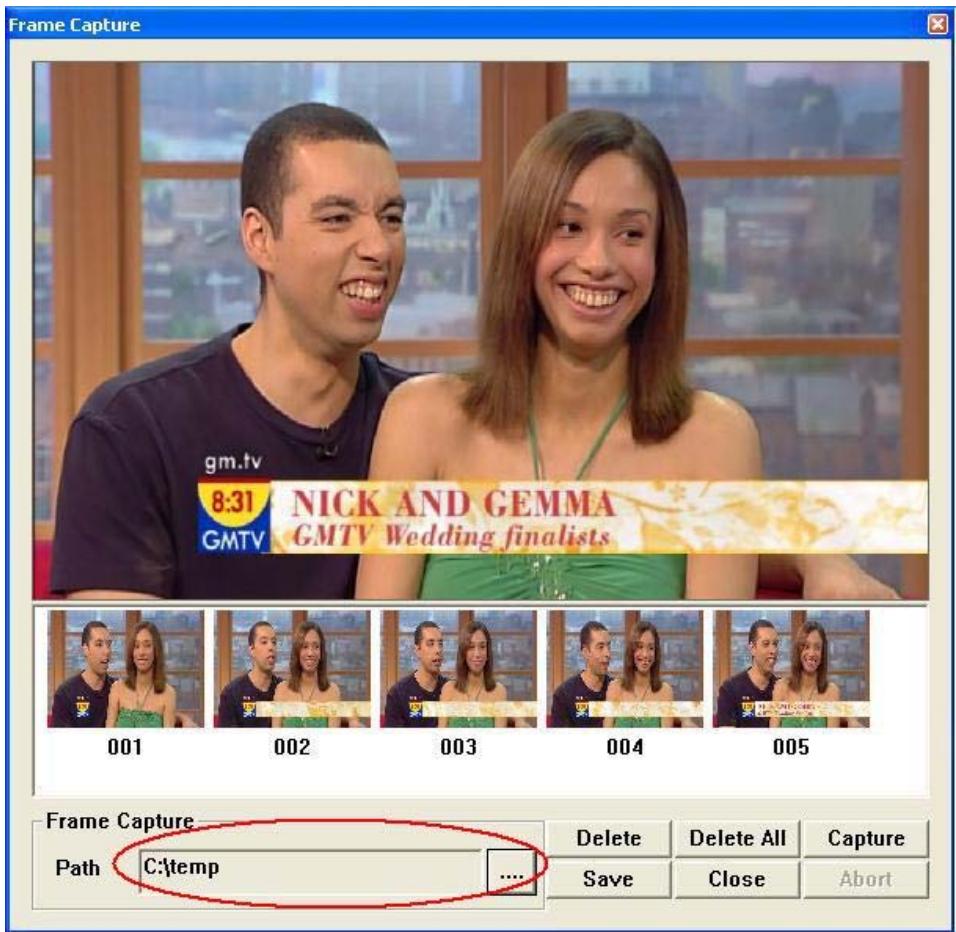
You can also change the images saving path by using the "Path" entry field section.
Electronic Program Guide
Note: It depends on whether the TV channel offers this function or not.
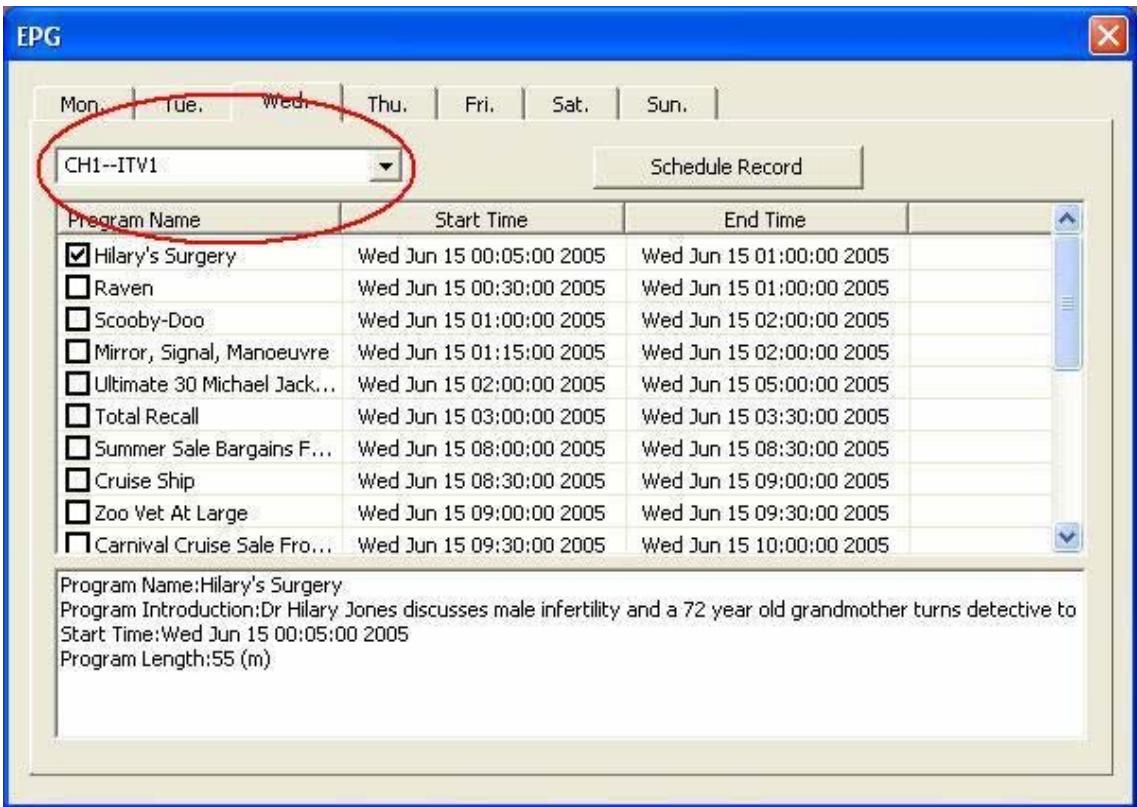
You can choose the different program by pulling down the sub-menu and do the selection.
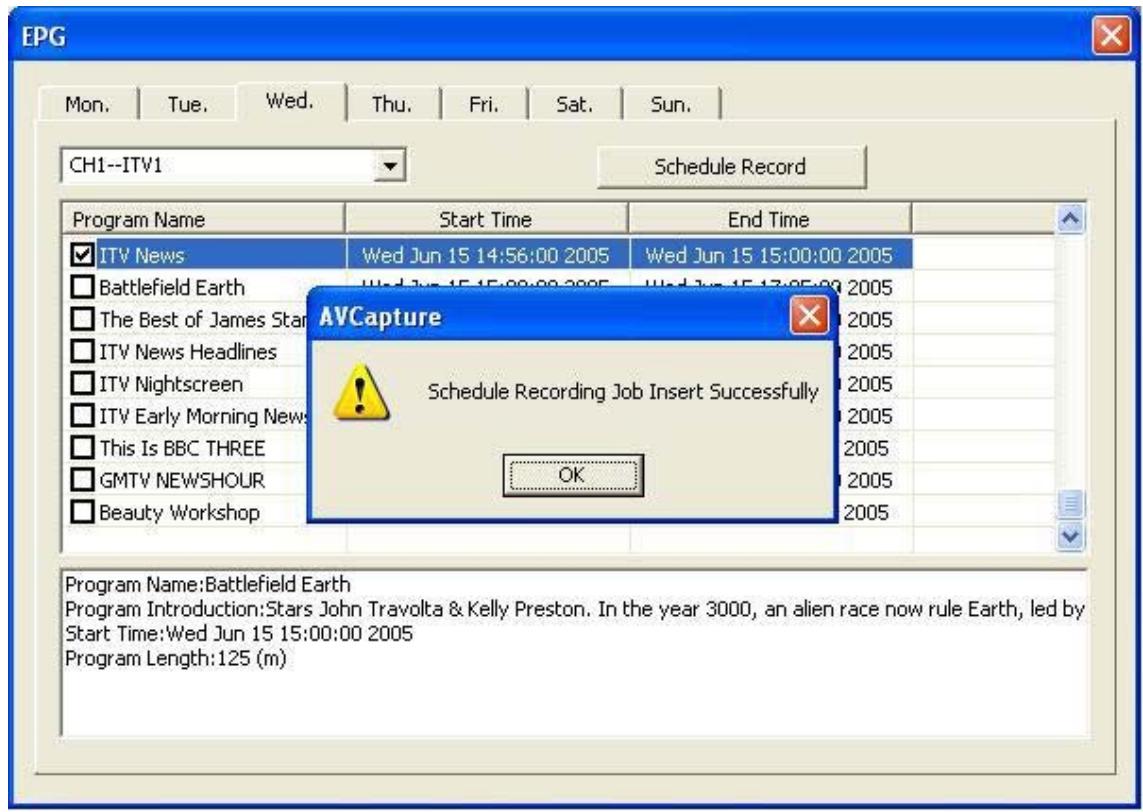
You can also check the programs you like to add into schedule recording.
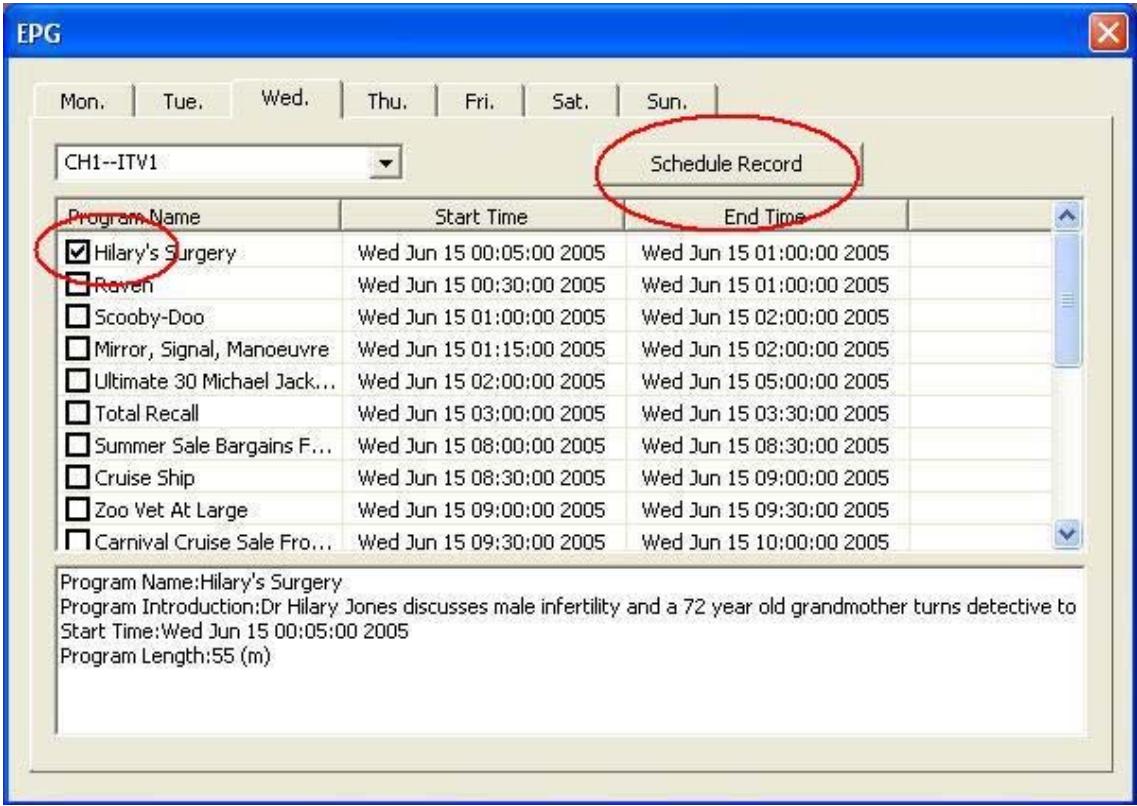
After click the "Schedule Record", system will pop up a message if the jobs insert successfully.

Timeshift : You can use this function if you are interrupted while you are watching TV, you can reverse the TV to the point where you were interrupted 。
Teletext
Note: This depends on whether the TV channel offers this information or not.
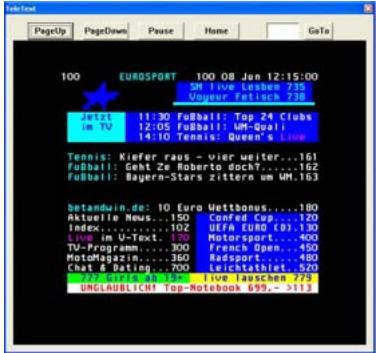
You can click PageUp or PageDown to go up or down one page. Just click Pause to hold the current page. You can also click Home to jump to page 100 or fill the page number into GoTo field to select page.
3.3 The multi-functional remote controller
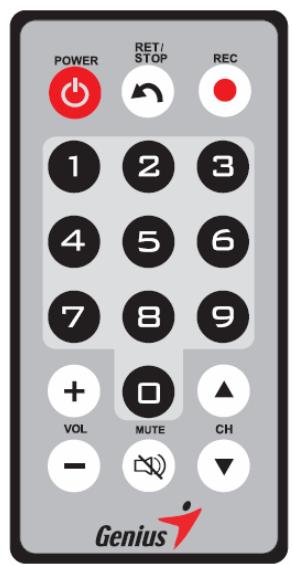
| ICON | Explanation |
| POWER | Start/Close the TV |
| REC | Record the TV program |
| 0-9 | Choose the television channel |
| VOL +/- | Increase/Decrease the volume levels |
| CH ▲/▼ | Switch up/down the TV channel |
| RET/STOP | Back to previous TV channel/ Stop Recording/ Deactivate Timeshift |
| MUTE | Sound On/Off |
3.4 Functions supported by mouse
Click the right button of the mouse and you will see the following menu pop up.
| Function | Function description |
| Channel up | TV channel up |
| Channel down | TV channel down |
| Channel return | Play the previous TV channel |
| Play | Choose the movie file to play |
| Stop | Stop the playback movie |
| Pause | Pause the playback movie |
| Forward | Fast forward the playback movie |
| Backward | Fast backward the playback movie |
| Recording | Record TV programs |
| Time-shift | Start-up time-shift |
| Mute | Open or close the sound |
| Zoom | Full screen / normal screen switch |
| About | Show the information of the TVGo DVB-T02Q MCE player |
| Exit | Close the TV player |
3.5 Hot keys function table
After TVGo DVB-T02Q MCE Player is working, you can also use the following keys.
| Function | Fast key |
| Close the TV player | ALT + P |
| Play recorded movie | ALT + S |
| Stop movie playing | ALT + S |
| Fast forward | ALT + F |
| Fast backward | ALT + B |
| Pause | ALT + S |
| Video recording | ALT + R |
| Stop recording | ALT + S |
| Capture picture | ALT + C |
| Time-shift | ALT + T |
| Full screen | ALT + X |
| Normal screen | ALT + X |
| Increase volume level | ALT + V |
| Decrease volume level | ALT + L |
| Mute | ALT + M |
| Up channel | ALT + U |
| Down channel | ALT + D |
| Channel selection | XX (X:1234567890) |
| Previous channel | ALT + J |
| On-line help | F1 |
Chapter 4 System Configuration
You can use some of the same settings when watching and recording TV. The sections in this chapter are based on their priority.
Please select and click the pattern - on the control panel to enter the configuration page.
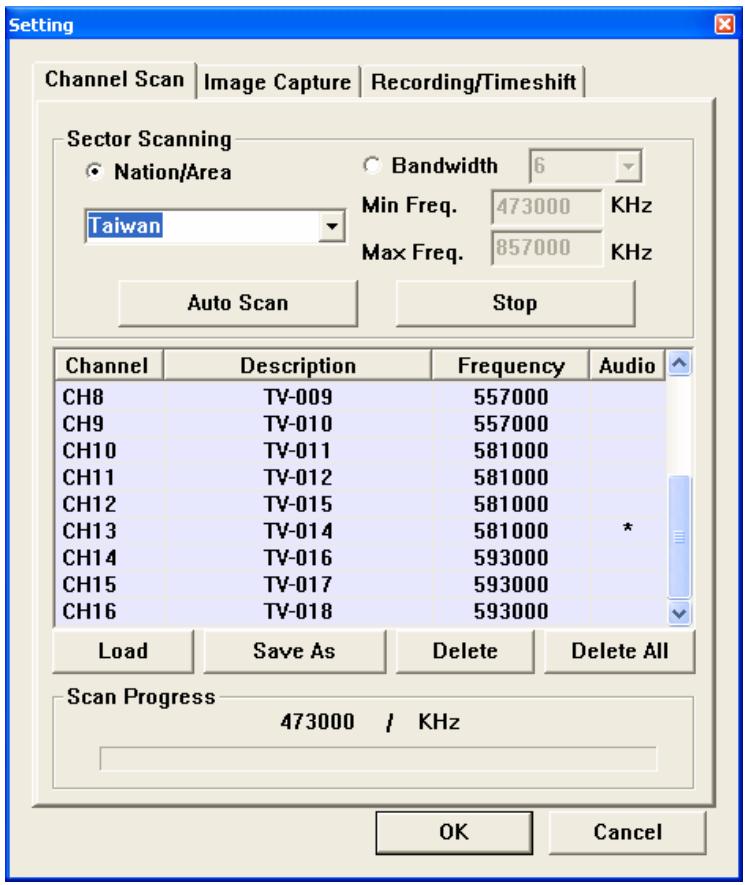
4.1 Channel Scan
You can select and click "Load" to load the channel table, or select some specific channels and select "Delete" to delete these specific channels, or select and click "Delete All" to delete all channels. Then you can select "OK" to store all changes. Or you can select "Cancel" to give up all changes and exit.
Notice:
- The digital TV has a characteristic called cliff effect. If the receiving free-to-air terrestrial signal is bad, you will not see the video image at all. This is unlike analog TV, for analog TV you can still watch TV in unclear video image. If the signal in your area is bad, you need to have an external outdoor antenna. Please see the details on how to fix this issue from Q&A in chapter 6.
- The free-to-air terrestrial signal coverage status and the TV program broadcasting status can be found at the web site WWW.DVB.ORG
4.1.1 Scan channels by area
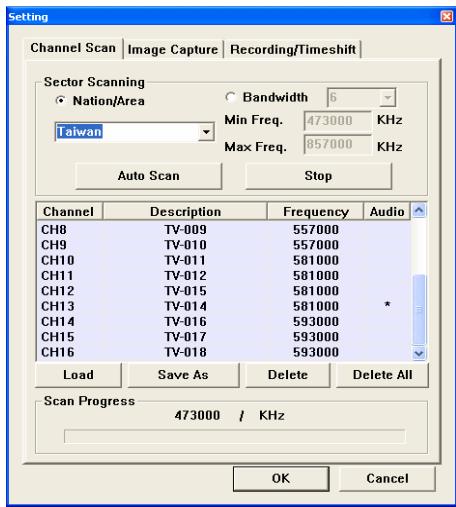
- Please click and select Nation/Area under the "Sector Scanning" section.
- Please choose your nation or area.
- Please click and select the Auto Scan?
- After the channel scanning is finished, you can click and select "OK" to save and exit, or select "Save As to store the new channel table and exit.
Note: If you are unable to scan any TV channels using your nation or area, please choose option item?, 7, 8?under "Bandwidth?field and do the auto scan again.
4.1.2 Scan channels by single frequency
- Please click and select "Bandwidth".
- You can select the bandwidth you want to scan. (" 6 ", or " 7 ", or " 8 ", or " 7, 8 ", or " 6, 7, 8 ")
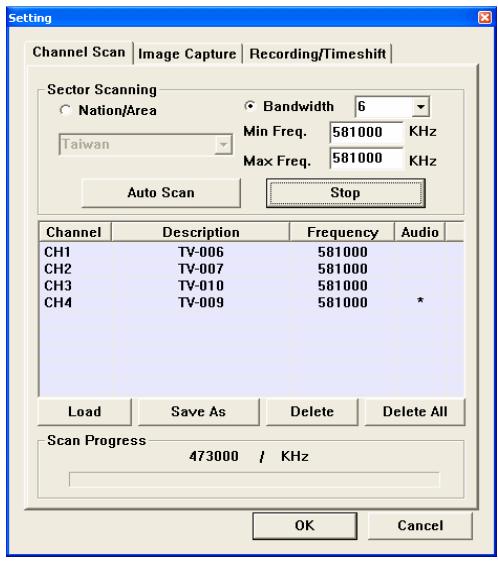
- Please fill in the desired frequency you want to scan under "Min Freq." field.
- Please fill in desired frequency you want to scan under "Max Freq." field.
- Please click and select "Auto Scan to begin the channel scanning.
- After the channel scanning is finished, you can click and select "OK" to save and exit, or select "Save As to store the new channel table and exit.
4.1.3 Scan channels by frequency range
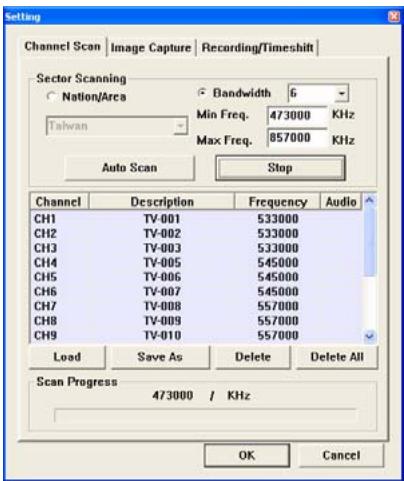
- Please click and select "Bandwidth".
- You can select the bandwidth you want to scan. (" 6 ", or " 7 ", or " 8 ", or " 7, 8 ", or " 6, 7, 8 ")
- Please fill in initial frequency you want to scan under "Min Freq." field.
- Please fill in ending frequency you want to scan under "Max Freq." field.
- Please click and select "Auto Scan?to begin the channel scanning.
- After the channel scanning is finished, you can click and select "OK" to save and exit, or select "Save As" to store the new channel table and exit.
4.2 Image Capture
This configuration page allows you to set the frames per capture and interval between each frame.
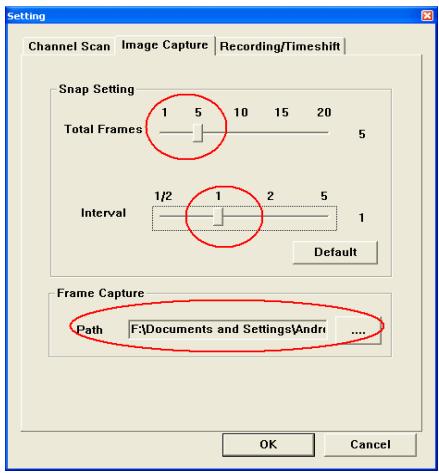
Total Frames: You can use left button of mouse to change the frames you want to capture each time.
Interval: You can use left button of mouse to change the capture interval (seconds) of each frame.
Default: You can click this button to restore the default value stored on the system.
Frame Capture Path: You need to specify your location to store the captured frames in this field.
If the settings of image capture are correct, you can click "OK" to save your setting and exit. Or click "Cancel button to give up all the changes you made and exit.
4.3 Configuration for Record / Time shift
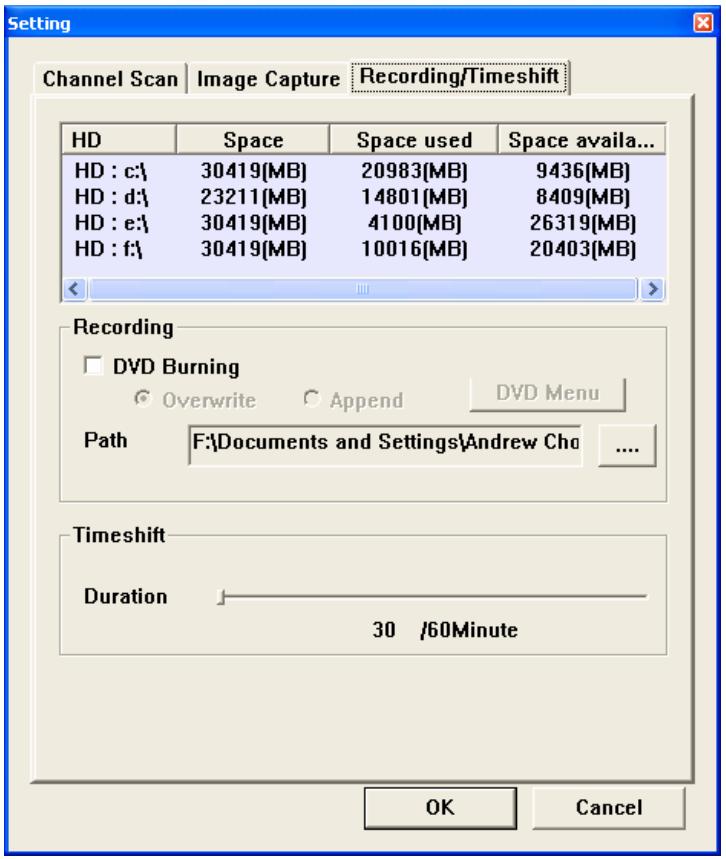
RecordingPath
Please choose the data file path for the video recording into hard disk.
Timeshift Duration
The maximum period of "Time shift" you allow. You can choose from 30 to 60 minutes, and this field is restricted by the hard disk space on your system.
If you need to leave temporarily for some reason when watching a TV program, you can use this function to store the program at this moment and playback when you return.
4.4 Configuration of schedule recording
To configure the schedule recording, please select and click the icon on the control panel

. The following setting page will pop up.
Basic Setting
Job Title: You can type in a name for the video recording
Action After / Recording: There are three actions you can select after the schedule recording. Here are the options:
Exit: Click this and the application will exit after schedule recording.
Enter Highbenate State: Select this and the system will go into hibernation after the schedule recording.
No Action: Click this and the application will stay alive after the schedule recording.
Recording Setting
Channel: You can type in the TV channel name for the schedule recording you want.
Note: You cannot record TV programs from different channels at the same time.
Mute Duration Recording: Select this and the system will be mute during schedule recording.
Minimize while Recording: Select this and the system will be minimized during schedule recording.
Date / Time Setting
Starting Date: You can choose to make an appointment to make video recording by filling in the starting date here.
Note: You cannot type in a date and time in the past.
Starting Time: You can choose to make an appointment to make video recording by filling in the starting time here.
Note: You must type in a time, which is ahead more than one minute from the present time.
Recording Period: You can type in the recording length here.
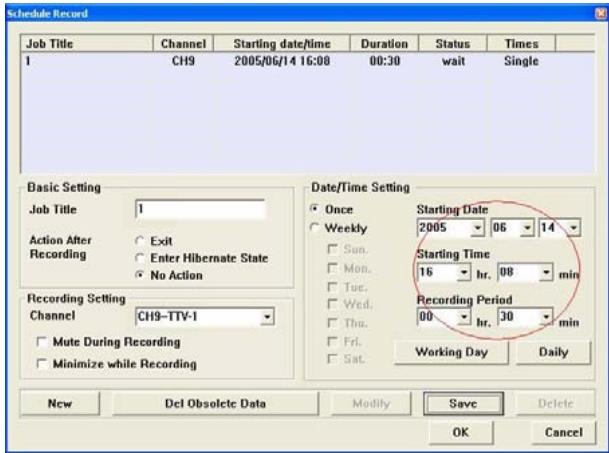
Once: Select this if you want to establish a video recording reservation just this time.
Weekly: Click on this to establish the video recording reservation the same time every week.
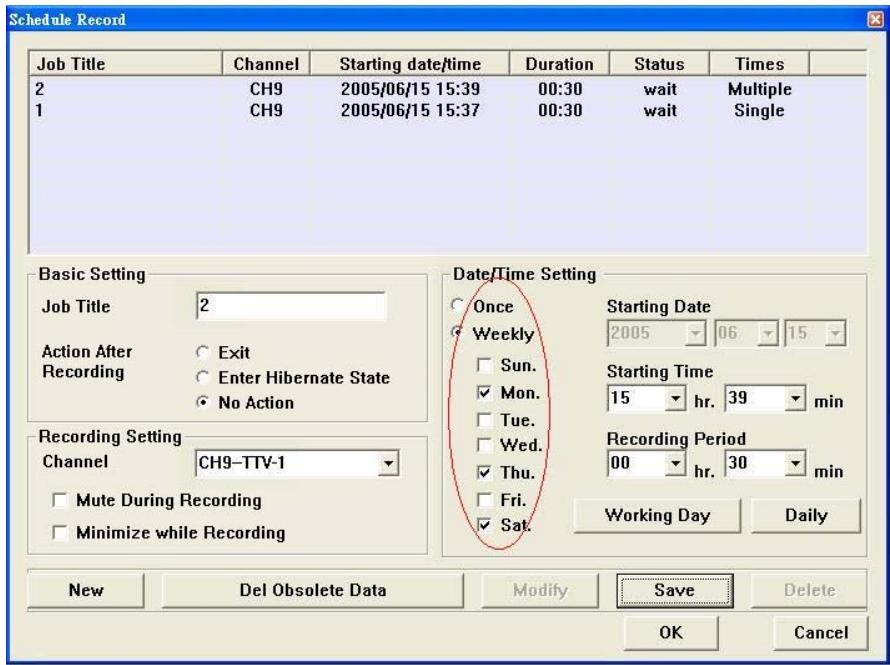
Working Day: Click this button to make a video recording reservation from Monday to Friday.
Daily: Click this button to make a video recording reservation each day.
New: Select this button to add a new video recording reservation.
Delete: Select this button to delete a pre-arranged schedule-recording job.
Del Obsolete Data: Click this button to delete all obsolete pre-arranged schedule recording jobs.
Modify: Select this button to modify a pre-arranged schedule-recording job.
Save: Click this button to save the newly added or modified job.
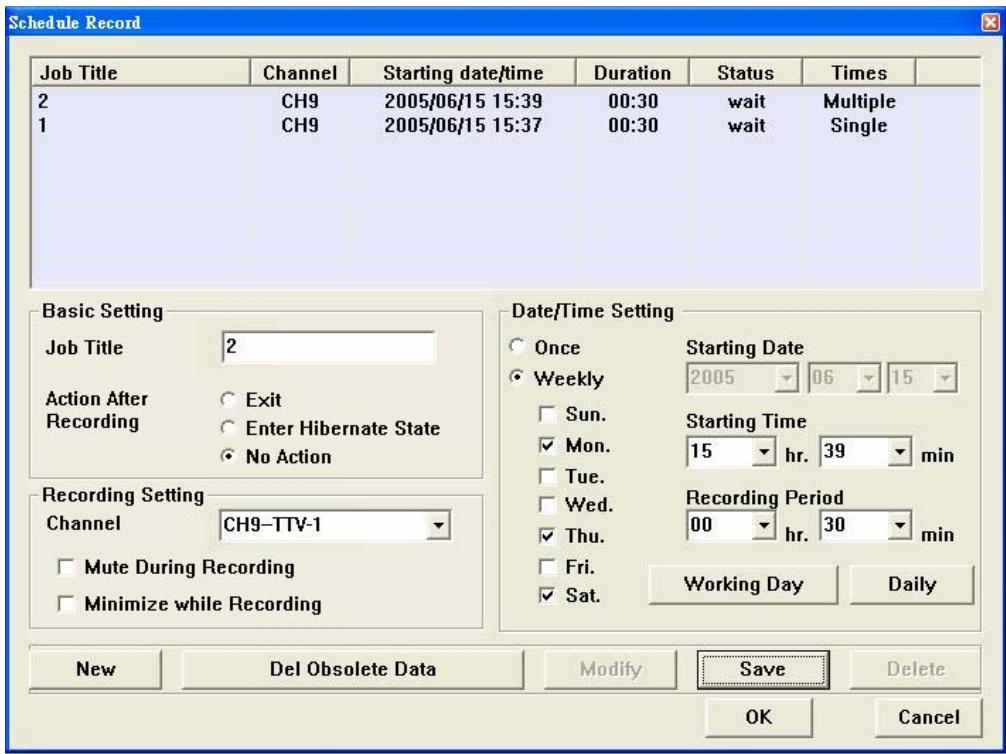
After you click "Add" button, you can set a new schedule-recording job. Once all the data is filled in correctly, you can click the "Save" button. The following window will pop up to show you the status of these jobs.
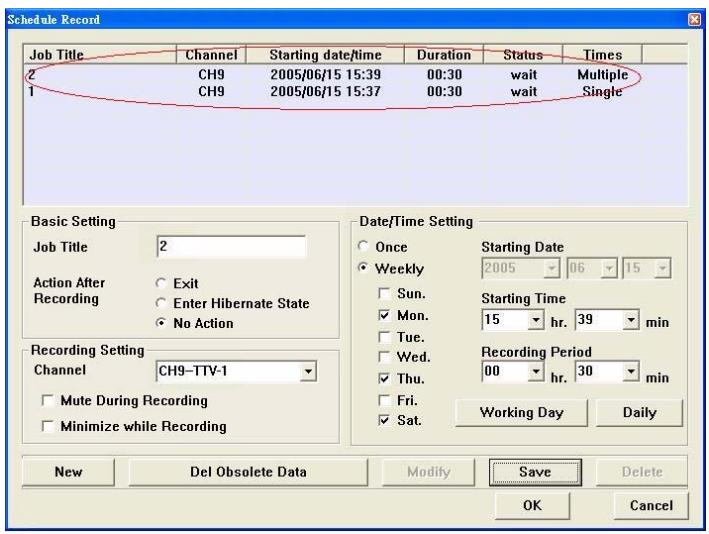
Job title: Displays the name of the schedule-recording job.
Channel: Displays the TV channel to be recorded in this schedule-recording job.
Starting date/time: Shows the starting date and time of this schedule-recording job.
Duration: The recording period of this schedule-recording job.
Status: The state (wait / finished) of this schedule-recording job.
Times : It displays how many times this schedule-recording job will take (Single/Multiple)
If the settings of all schedule-recording jobs are correct, you can click "OK" button to save all the changes and exit. Or click "Cancel" button to give up all the changes you made and exit.
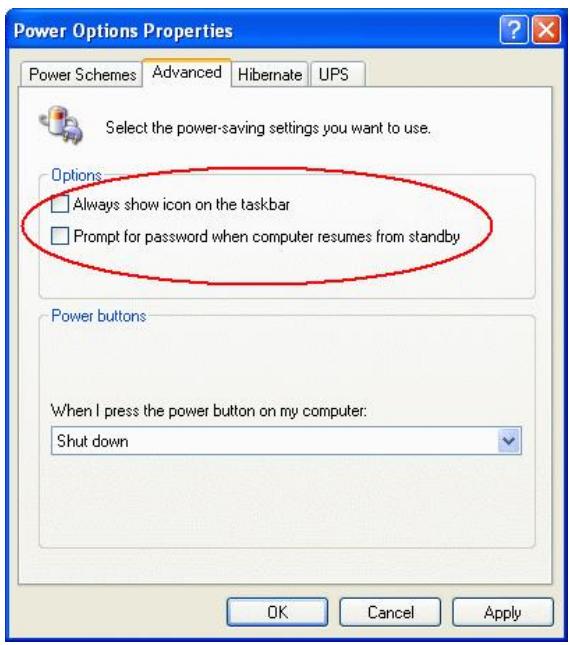
Be careful! TVGo DVB-T02Q MCE supports the wake up system from hibernation when the schedule recording time is up. The system can start recording the TV program according to the recording time you set. If you want to enable this function, please make sure the following items are done:
- Please do not check the box of "Prompt for password when the computer resumes from standby" under the "Advanced" section from "Power Options Properties".
- Please check the Enable hibernation box under the Hibernate section from Power Options Properties.
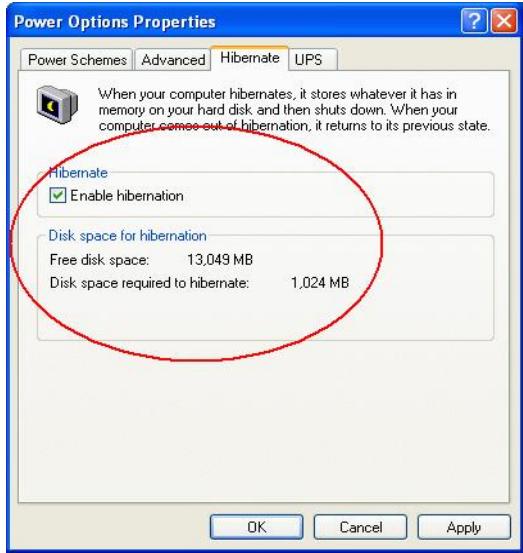
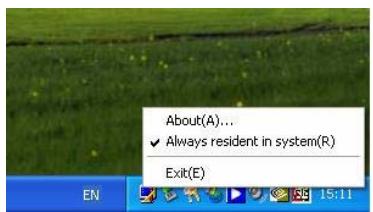
- Please make sure that the application "TVGo DVB-T02Q MCE Monitor" is running now.
Chapter 5 Uninstall TVGo DVB-T02Q MCE
- Please put the software disc of TVGo DVB-T02Q MCE into your CD-ROM drive. You will see this window appear automatically after you put in the disc.

Starting InstallShield Wizard...
If you do not see this window, please find "setup.exe" from driver.
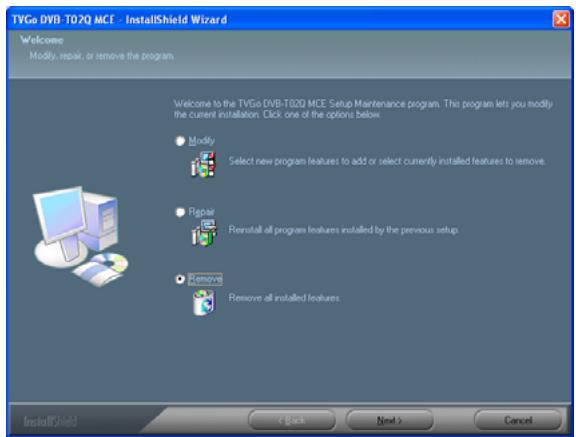
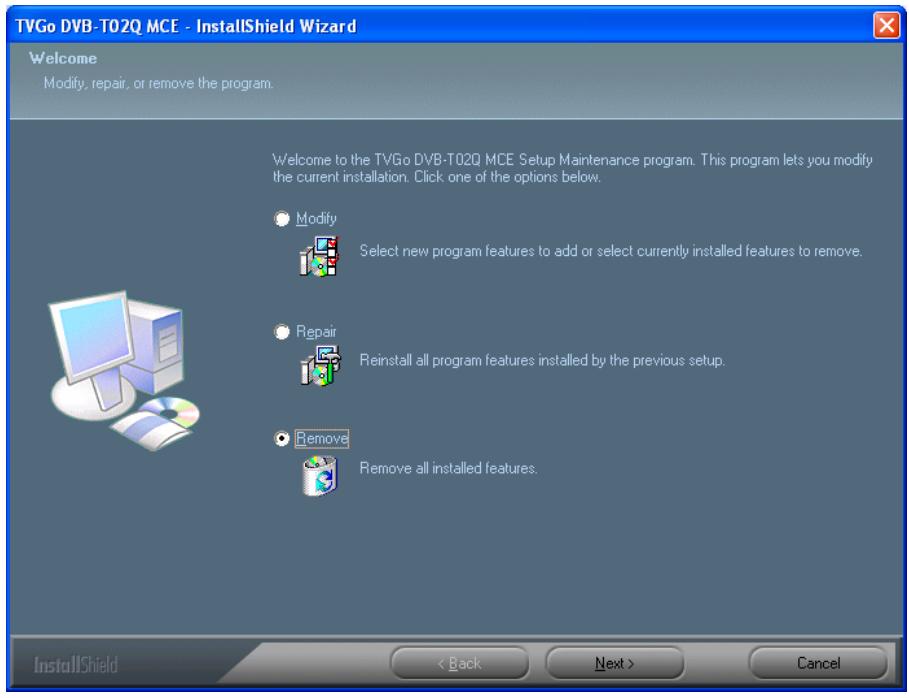
- Click "Remove", then click "Next". The InstallShield will uninstall TVGo DVB-T02Q MCE from your system.
- Please select and click the button "Yes (Y)".
TVGo DVB-T02Q MCE - InstallShield Wizard
Do you want to completely remove the selected application and all of its features?


- After the uninstallation is done, please select "Yes, I want to restart my computer now." Then click "Finish" to complete the uninstallation procedure.
- You can also use "Uninstall" utility from "TVGo DVB-T02Q MCE" program group to do the uninstallation.
Chapter 6 Q&A
In this chapter, we list some questions that you might have during installation and using TVGo DVB-T02Q MCE. Please look through these questions before you contact your retailer or us.
- If you use Windows XP SP1, please go to the following website to download the patch program for USB.
http://support.microsoft.com/kb/822603/
- Windows is unable to find TVGo DVB-T02Q MCE hardware.
a. Make sure the connection for TVGo DVB-T02Q MCE and USB cable to the PC is correct.
b. Wait for system to look for the hardware when you plug the TVGo DVB-T02Q MCE into your system.
c. Restart your computer.
d. If there is still a problem, manually use the control panel to add/remove TVGo DVB-T02Q MCE. This way you can make sure the installation is correct.
e. Remove and insert the USB cable that connects TVGo DVB-T02Q MCE and computer again. (The duration between the pullout and plug-in of TVGo DVB-T02Q MCE should be at least 5 seconds.)
f. Please try to use another USB port.
- Windows is unable to install the driver of TVGo DVB-T02Q MCE.
a. While installing the driver, please confirm TVGo DVB-T02Q MCE installation disc is put correctly in your disc drive.
b. While you manually install the driver, make sure the path to the driver files is correct.
- How do I Install the application software?
You have two ways to start the installation procedure.
a. Install the disc, the system will carry out the installation procedure automatically to install the software and driver.
b. Install the Setup.exe in the disc manually.
- There is no channel found after channel scanning.
a. Make sure that you click the confirm button each time you make the channel scan.
b. Confirm the correct installation of the TVGo DVB-T02Q MCE and system.
c. Check whether the connection between TVGo DVB-T02Q MCE and the antenna is correct.
- When I watch TV, the screen shows nothing or an error message.
a. This could be because the signal is too weak in intensity, it is unable to display the TV program correctly. Please change the antenna location or use an external antenna.
b. Check whether the line between TVGo DVB-T02Q MCE and the antenna is correct.
c. Make sure the VGA card driver is installed correctly.
d. Please confirm the edition of your operating system is Windows 2000 (SP4) or Window XP (SP1/SP2)
e. Please confirm that you have already installed Microsoft DirectX 9.0c
- I can see the image, but cannot hear any sound.
a. Make sure the hardware and driver of the sound card is correct on your computer.
b. Check that the volume is not mute.
- Why can't I start the application?
a. Your system needs to have the sound card and driver installed.
Note: Whether you want to have sound or not, your sound card and driver must be installed correctly.
b. Please check the TV station signal quality and intensity.
- While I watch the TV program, the sound is normal, but the screen is black, why is this?
a. Please make sure your display card driver and Microsoft DirectX 9.0c are installed correctly.
- When I playback video files stored on the notebook computer, why it is always not smooth?
a. Please check the power management on your notebook computer. This power management function will reduce the operation frequency of the CPU, so un-check the power saving box.
- There is an error message on the screen that shows "Hardware error!"
a. The driver is not installed correctly. Install the driver again.
- When watching TV, the video is not smooth when I am using the remote controller.
a. Because USB has bandwidth restriction, when you are broadcasting the TV program and using the remote controller at the same time, the data transfer will be influenced and interrupted.
- How can I find out the terrestrial TV signal coverage in the area I live?
a. If you want to know whether you can watch free-to-air terrestrial digital TV in your location, you can go to the web site below to get the information. http://www.dvo.org.tw/e-wave/cts/search.asp
(For other area than Taiwan, please check the web site accordingly.)
- Why is the free-to-air terrestrial TV signal bad? How to solve it?
a. There are a lot of reasons for this issue. For example, there is no broadcasting station in your residence area; there is a building or mountain that blocks the signal, etc. Check the web site of Digital Information Industry of the Economic department first. You can watch the information of the free-to-air terrestrial TV station in your location. Second, if the signal is blocked by a building or mountain, you need to consider using an external outdoor antenna for the antenna enclosed is a small-scale indoor reception antenna. It is an antenna considered by general environment. For special environment, and the fact that the signal is bad, you might need to use an external outdoor antenna. So we advise you to purchase an outdoor UHF (Ultra High Frequency) antenna so you can get better quality to receive the digital TV program.