HS-04U - Headphones GENIUS - Free user manual and instructions
Find the device manual for free HS-04U GENIUS in PDF.

| Product Type | Wired Headset |
| Brand | GENIUS |
| Model | HS-04U |
| Dimensions | 180 mm x 160 mm x 50 mm |
| Weight | 150 g |
| Power Supply | Via 3.5mm jack (no battery) |
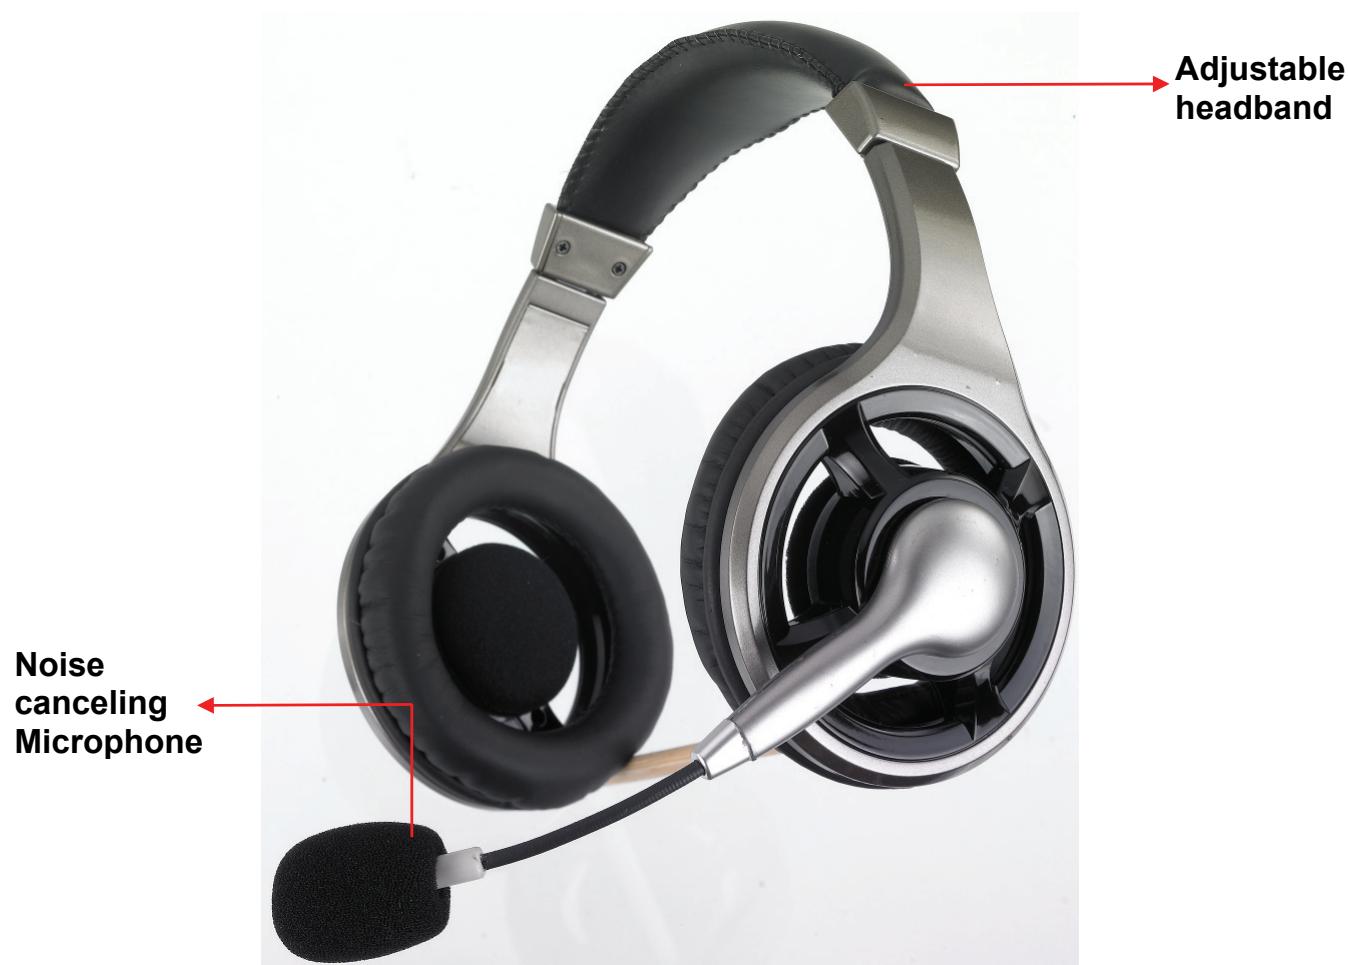
| Main Functions | Stereo earphones, built-in microphone, volume control on cable |
| Connectivity | Gold-plated 3.5mm male jack cable |
| Frequency Response | 20 Hz - 20 kHz |
| Impedance | 32 Ω |
| Sensitivity | 105 dB SPL/mW |
| Cable Length | 2 m |
| Care and Cleaning | Clean with a soft dry cloth. Do not use chemical products. |
| Safety | Use at moderate volume to avoid hearing damage. Keep out of reach of children. |
| Spare Parts and Repairability | Not applicable (sealed product, no spare parts available) |
| General Information | GENIUS brand headset, model HS-04U. Comes with user manual. Compliant with European standards. |
| Warranty | 2 years |
Frequently Asked Questions - HS-04U GENIUS
User questions about HS-04U GENIUS
0 question about this device. Answer the ones you know or ask your own.
Ask a new question about this device
Download the instructions for your Headphones in PDF format for free! Find your manual HS-04U - GENIUS and take your electronic device back in hand. On this page are published all the documents necessary for the use of your device. HS-04U by GENIUS.
USER MANUAL HS-04U GENIUS
HS-04U User's Manual
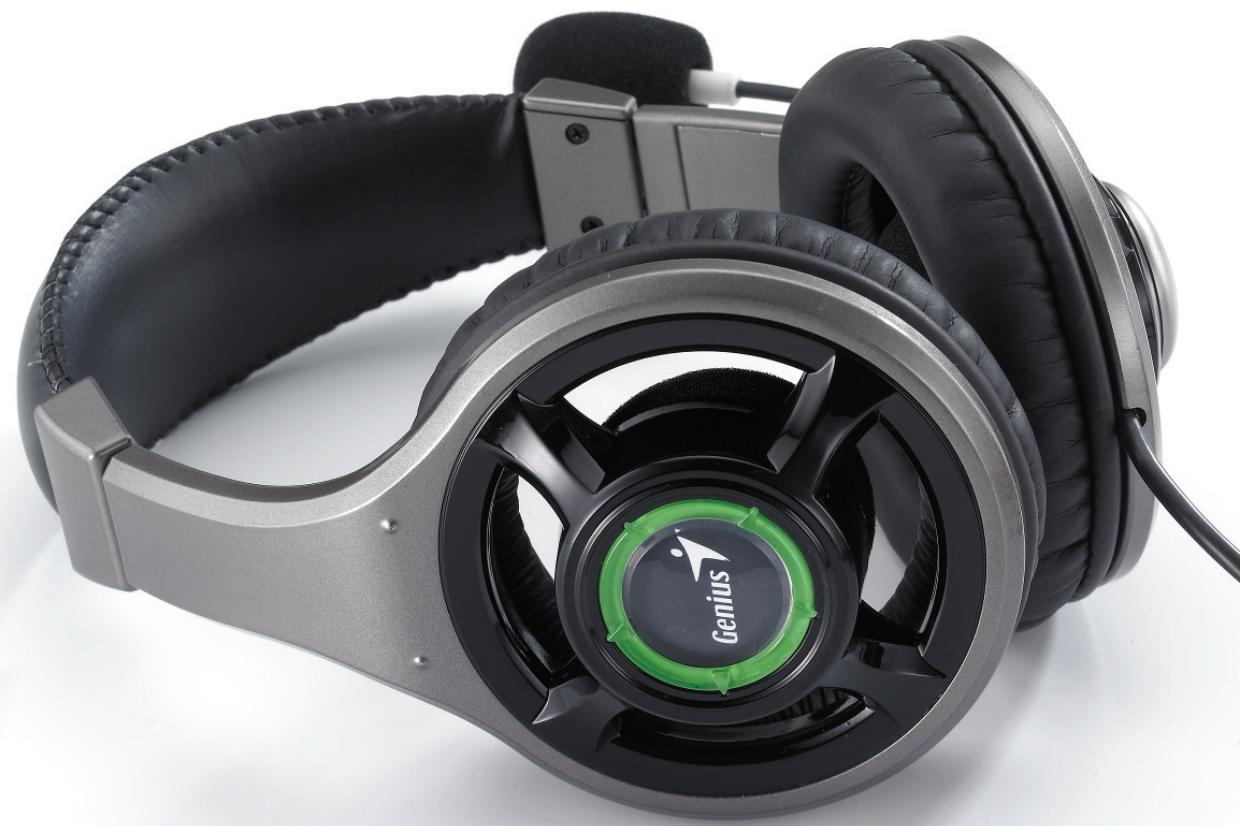
Table of Content
1 HS-04U introduction. 3
2 Introducing Xear 3D Sound Technology. 4
3 Function Structure and Overview 5
4 System Requirement and Installation. 6
5 User Interface and Function Control 9
1. HS-04U introduction
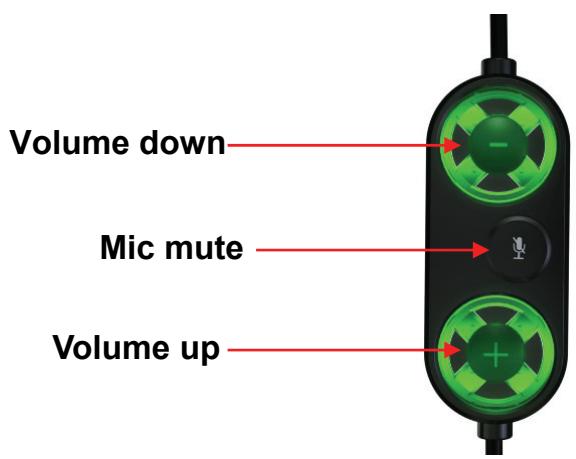
Plug the USB into your computer and system will search the USB device automatically. In the original, the volume will show green light, once Microphone mute on, the volume button will show red light.
2. Introducing Year 3D Sound Technology
This guide will help you to understand how to use the new generation USB Digital Audio with exclusive Xear 3D^TM sound technology. All kinds of applications can get maximum support. You can quickly take advantage of these great features to enjoy amazing sound effects even better than consumer electronics devices. Xear 3D^TM Sound Technology is a unique and innovative total audio solution. This patented 3D sound technology not only supports real-time 3D gaming and industry-standard 5.1CH or 7.1CH DVD, but also offers an immersive virtual 5.1Ch and 7.1CH sound field to the users regardless of what type of output device is actually utilized. Thanks to Xear 3D^TM Sound Technology, even if you are using a pair of earphones or 2CH speakers, you can still get a better virtual 5.1CH or 7.1CH environment capable only by Xear 3D^TM Sound Technology. Better yet, all audio formats can be converted to thrilling 3-dimensional audio by this technology. Personalized and optimum 5.1CH/7.1CH listening environment and experience is thus achieved.
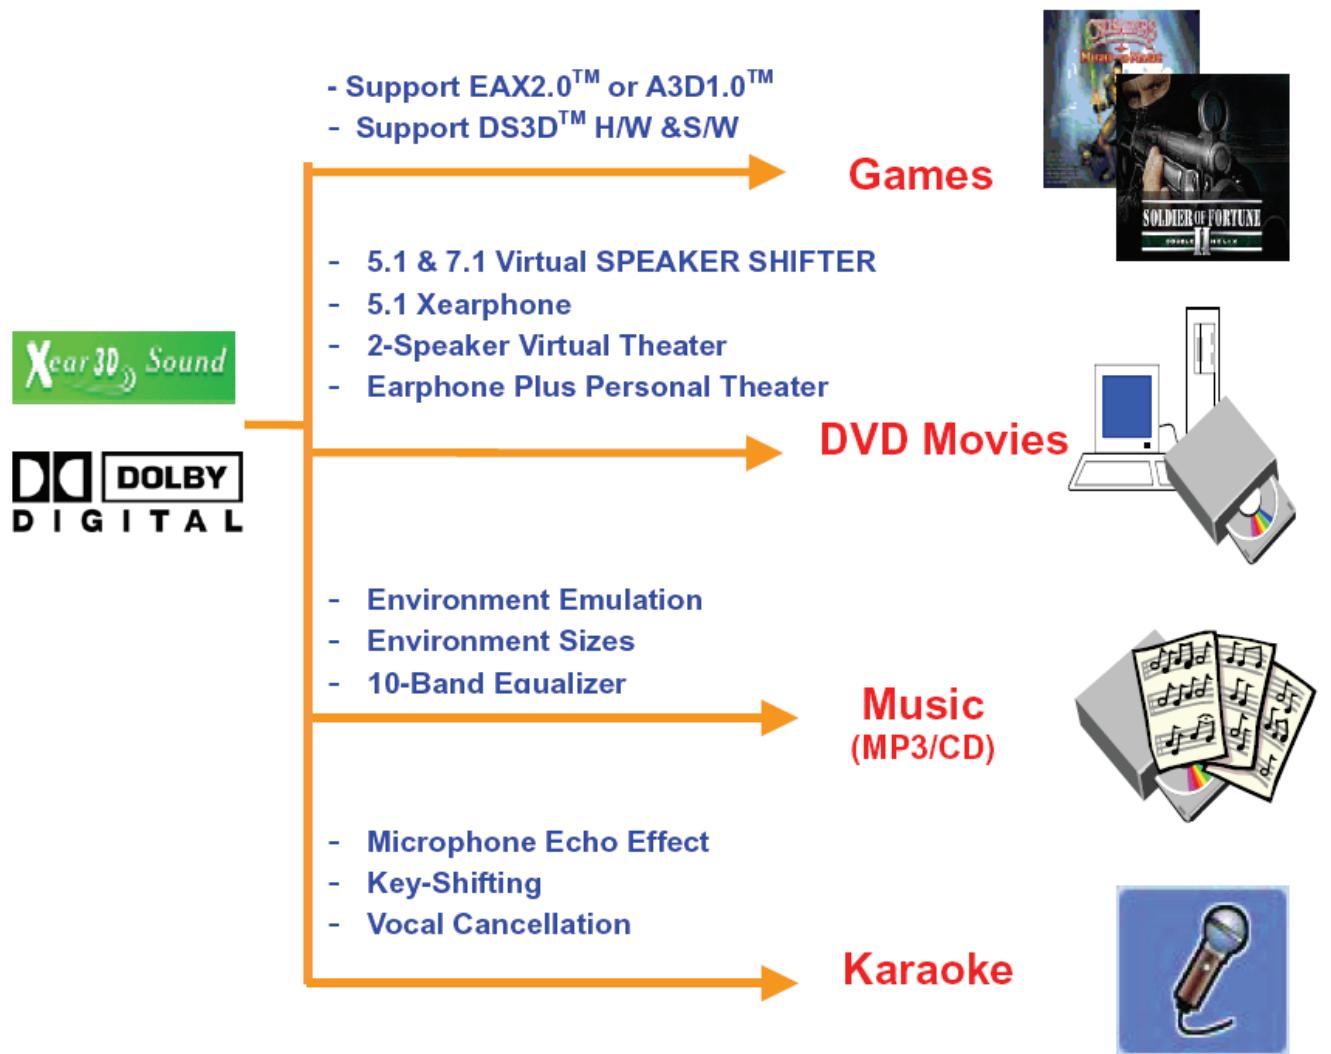
Year 3D Sound Features for All Applications
3. Function Structure and Overview
The following shows the function overview of the driver. Optional features mean optional offers decided by system manufacturers.
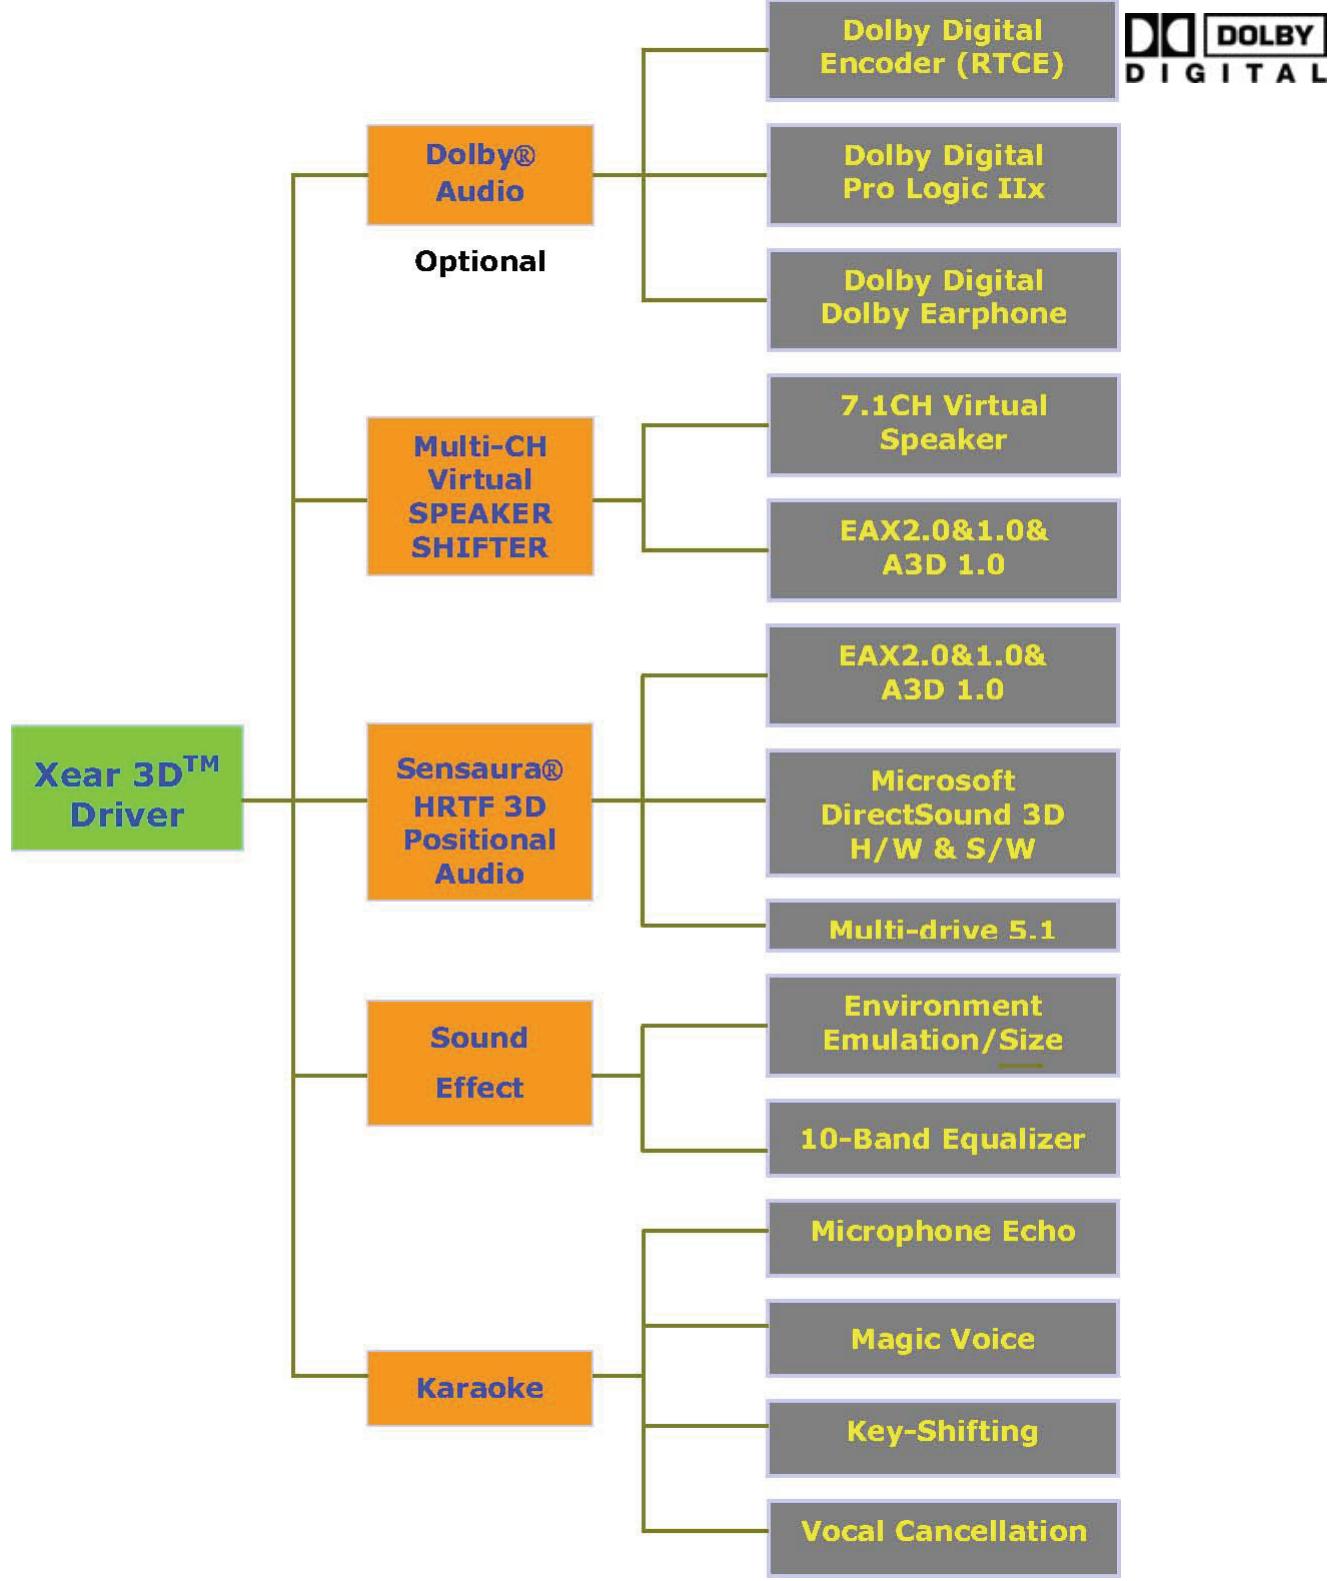
Year 3D Driver Function Diagram
4. System Requirement and Installation
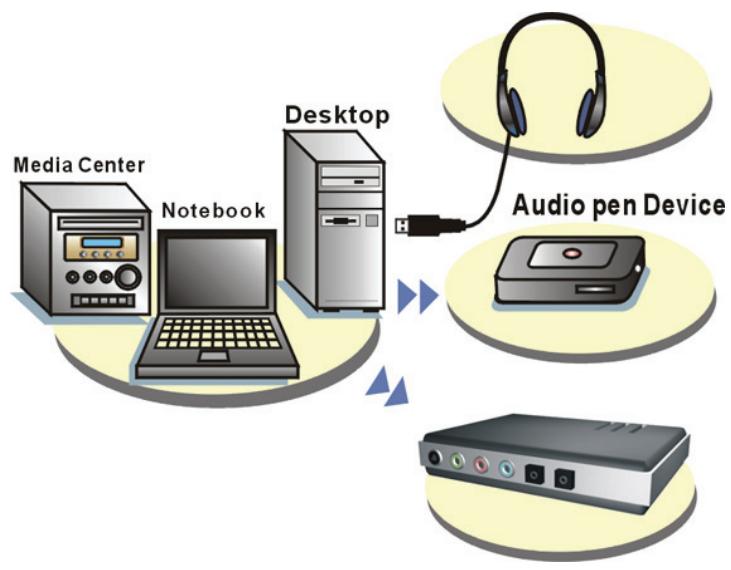
This device must be applied on USB specification products. You should confirm your PC operation USB function, USB 1.1 or 2.0.
Case 1--No external driver installed :
- OS Support: Win98SE, WinME, Win2000, WinXP, Mac OS 9.0 and 10.1
- System recommended: use Intel Pentium III or AMD K6 500 CPU above
- At least 256MB RAM
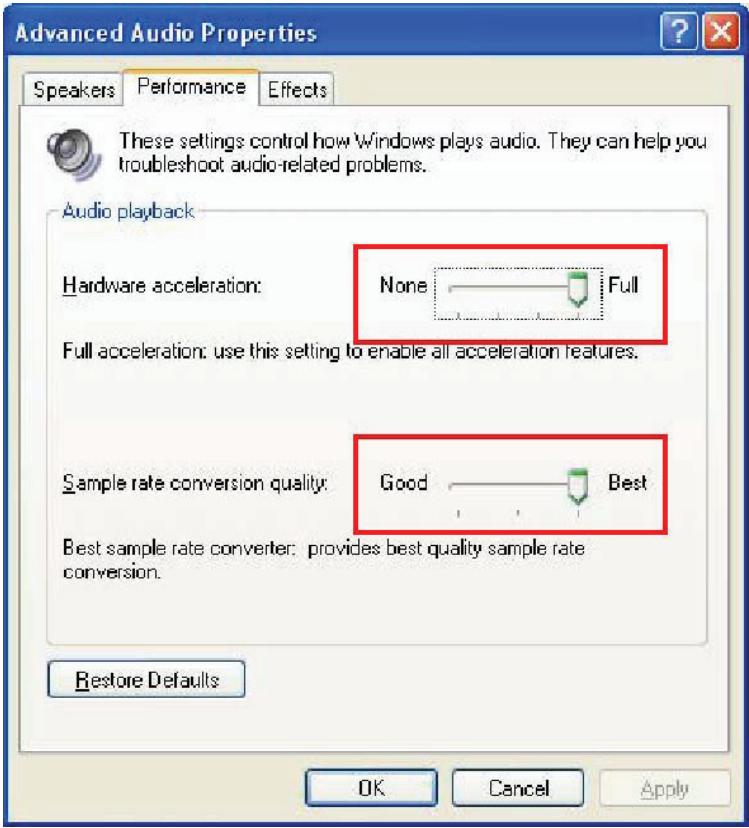
- At least 50 MB hard disk space For good sound quality, please adjust your system's H/W acceleration and Sample rate conversion quality to Full and Best.
Note: Some USB Host Controllers may have problem with data stream package loss, this will influence output audio data and make some discontinuous sound. But this is very rare. Sometimes, if you plug a USB Personal Multi-media Device on PC system and OS cannot auto change audio device to USB audio, please switch the audio device to USB audio sound and audio devices properties in control panel.
Case 2--Install Year 3D technology driver:
- OS Support: Win98SE, WinME, Win2000, WinXP
- System recommended: use Intel Pentium III or AMD K6 500 CPU above
- At least 512MB RAM
- At least 50 MB hard disk space
Supports direct sound 3D
Note: Windows OS has default USB driver support, but does not support HRTF 3D, EAX, Virtual Multi-channel sound effect and Dolby Digital sound DSP function. If you want to enjoy these fancy features, you must install the Xear 3D sound audio driver.
Before you install the Xear 3D sound audio driver, you must make sure that the USB Multi-media Sound Device is already connected to the PC system already.
If your PC system has more than one USB connecting port, please remember which one is connected for installation, and when the next time when you plug this USB Multi-media Sound Device to a PC, you have to plug it into the same port.
Year 3D Sound Audio Driver Installation Step:
Turn on the PC system and connect the USB Multi-media Sound Device to the PC system.
Insert Installation CD on your CD/ DVD ROM, it will pop up auto run information.
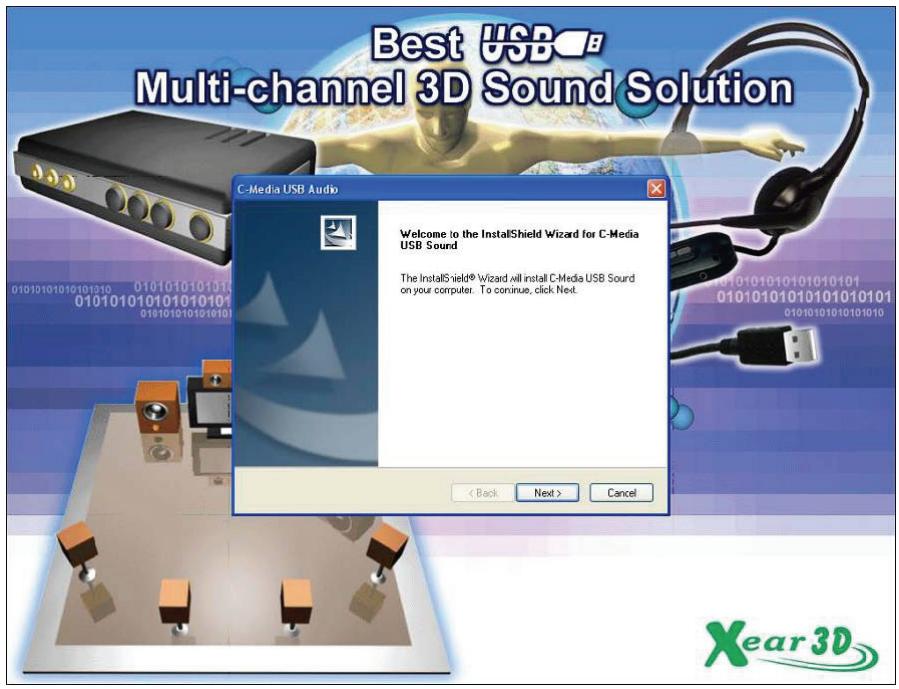
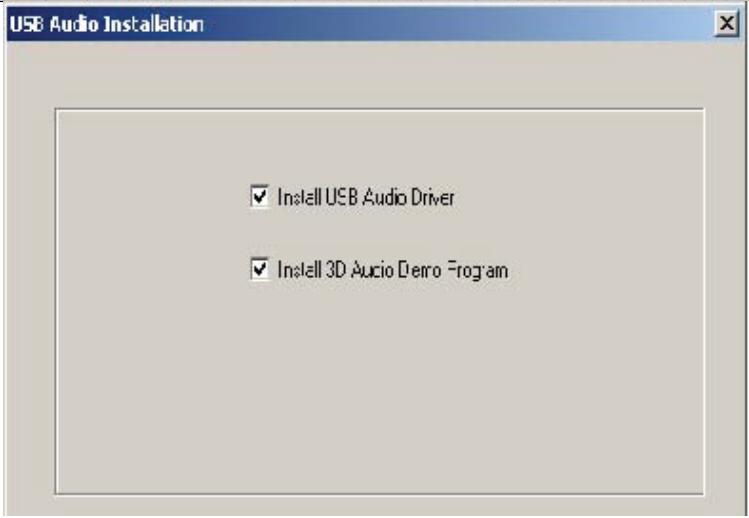
Select install driver only or both driver and demo program then click "Next" to continue the installation. The demo program includes a simple helicopter and rock shooting for 3D sound.
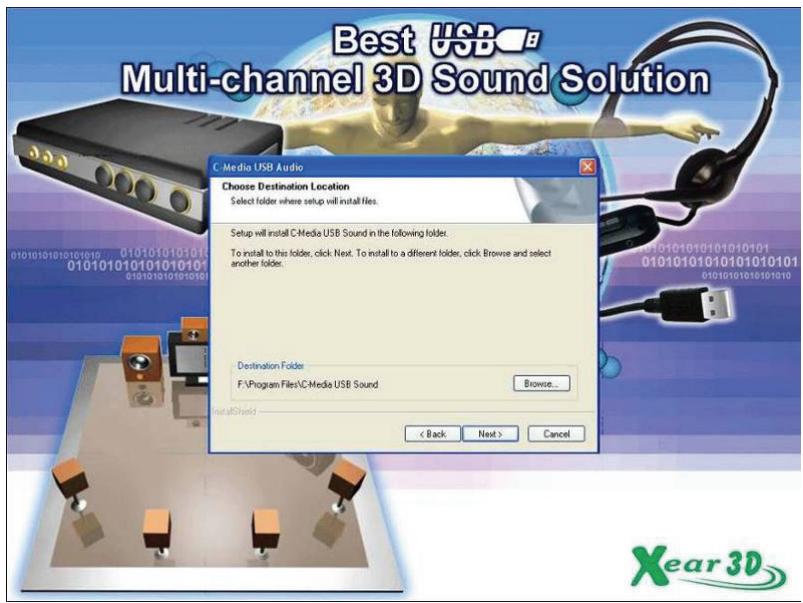
Set up will install USB audio kit to default path and folder.
When set up program complete installation system will need to restart to initialize the driver. After you reboot and the system is running up again, you will see a small icon in the lower right of the screen. You can click it to open the Xear 3D Sound driver functions. If your PC system has more than one USB port, you can just plug the USB Personal Multimedia Device to any USB port. If it connects properly, the driver will detect which port is correct.
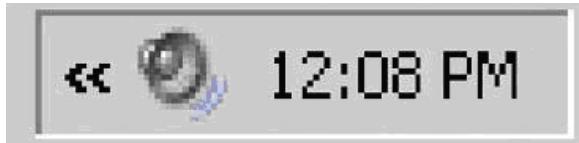

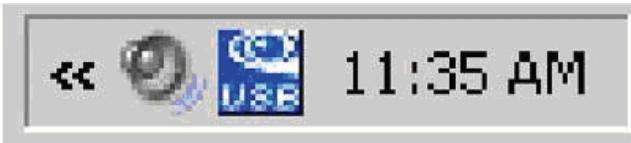
When the USB sound icon is showing, it means the Xear3D sound driver was initialized and is working now. If you have more than one USB port and you forgot which one was installed with the Xear 3D sound driver, this icon will show you are connected to the right port.
5. User Interface and Function Control
Using Analog Output or Digital S/PDIF-Out
- Analog Output channels Mode: Earphone, 2CH, 4CH, 6Ch and 8CH for selection.
2.Digital Output: Turn on this button to select SPDIF Out data format.
3.Digital Output Mode: Select Dolby RTCE or PCM.
4.Audio Jack Connected Display
5.DSP Mode: Click to change different DSP Mode. (Default supports Year 3D) - Virtual SPEAKER SHifter: can open SPEAKER SHIFTER windows for control. (See next page for more information)
7.Dolby Headphone: Open Dolby Headphone environment effectively.
8.Digital Volume Control: Open each channel to adjust digital volume. (See next page for more information) - Channel Display & Speaker Test: Shows analog output channel status and directly click speaker graphic for sound testing.
10.Auto Sound Test: Auto test every channel for sound effect. - Stop Auto Sound Test: Stop auto testing.
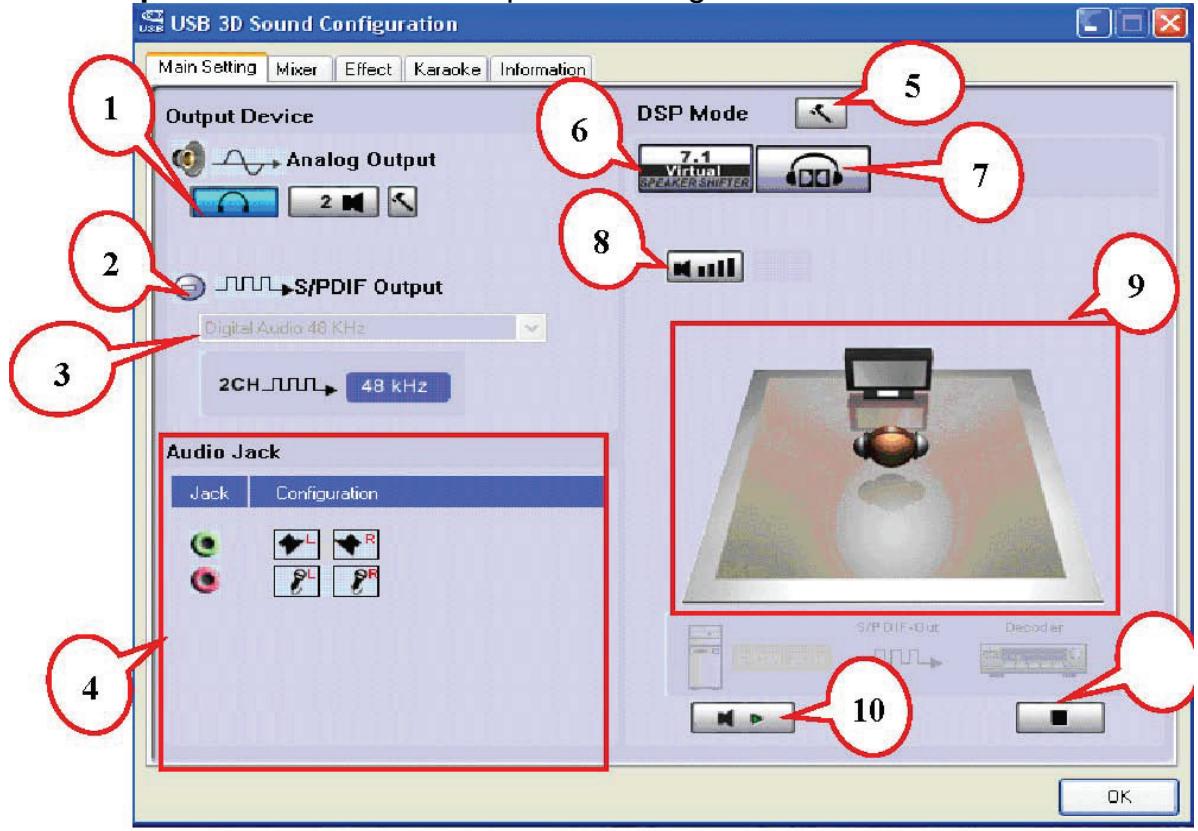
Main Setting :
Virtual SPEAKER SHifter
| 1.Volume Up Control |
| 2.Volume Down Control |
| 3.Clockwise |
| 4.Counter Clockwise |
| 5/manual Rotation |
| 6/manual Shifter |
| 7.Rest |
| 8.Shifter Drag |
Dolby Headphone Sound Effect
| 1.Reference Room |
| 2.Living Room |
| 3.Larger Room |
Digital Volume Control
- Reset Volume
Mixer :
Playback Volume Control
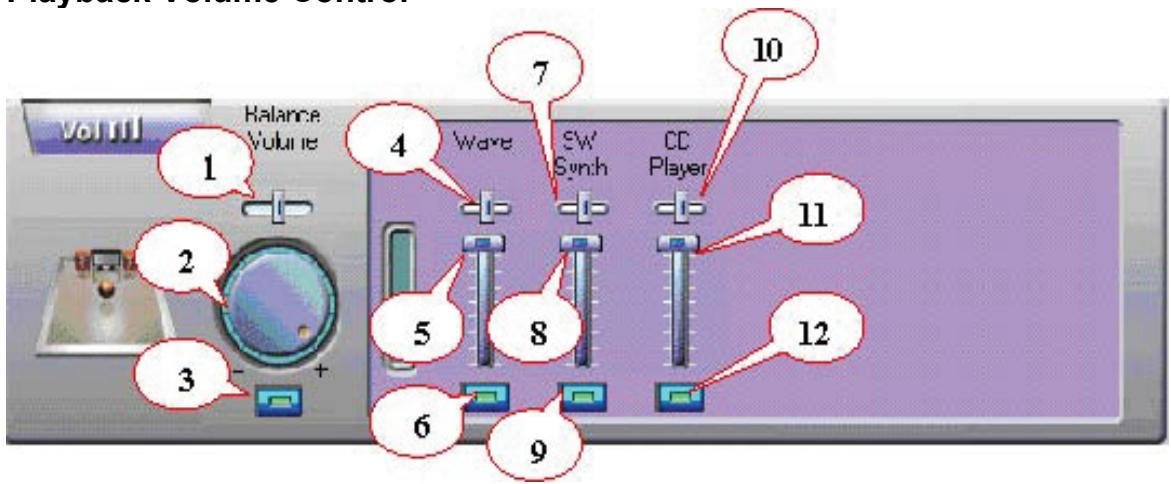
| 1.Balance Control | 7.SW Synth Volume Balance |
| 2.Volume Up/Down Control | 8. SW Synth Volume Control |
| 3.Master Volume On/Off | 9. SW Synth Volume On/Off |
| 4.Wave Volume Balance | 10.CD Volume Balance |
| 5.Wave Volume Control | 11.CD Volume Control |
| 6.Wave Volume On/Off | 12.CD Volume On/Off |
Recording Volume Control
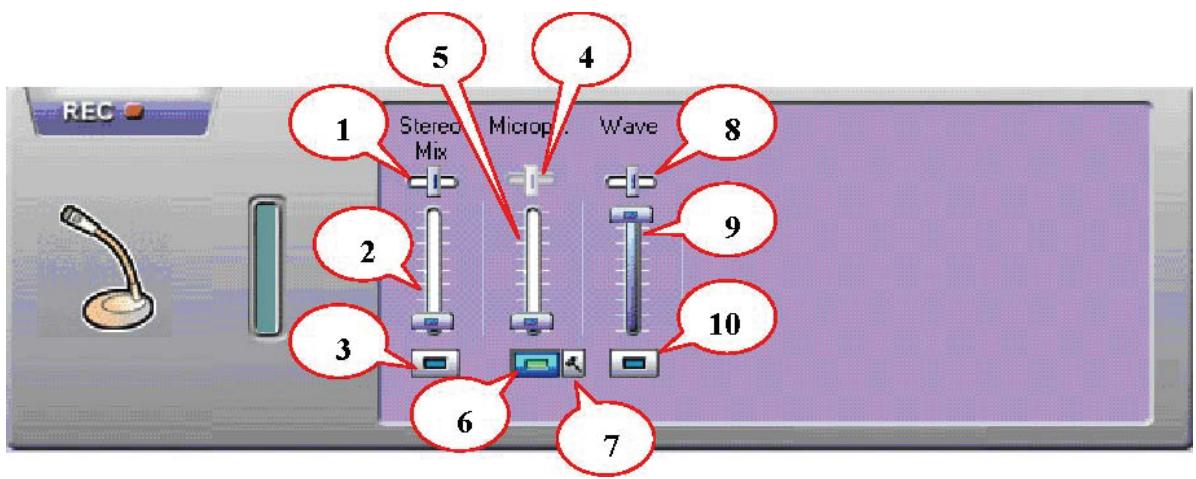
| 1.Stereo Mixer Balance | 6.Microphone Record Volume On/Off |
| 2.Stereo Mixer Control | 7.Microphone Record Advanced Setting |
| 3.Stereo Mixer On/Off | 8.Wave Volume Balance |
| 4.Microphone Record Balance | 9.Wave Volume Control |
| 5.Microphone Record Volume Control | 10. Wave Volume On/Off |
Effects :
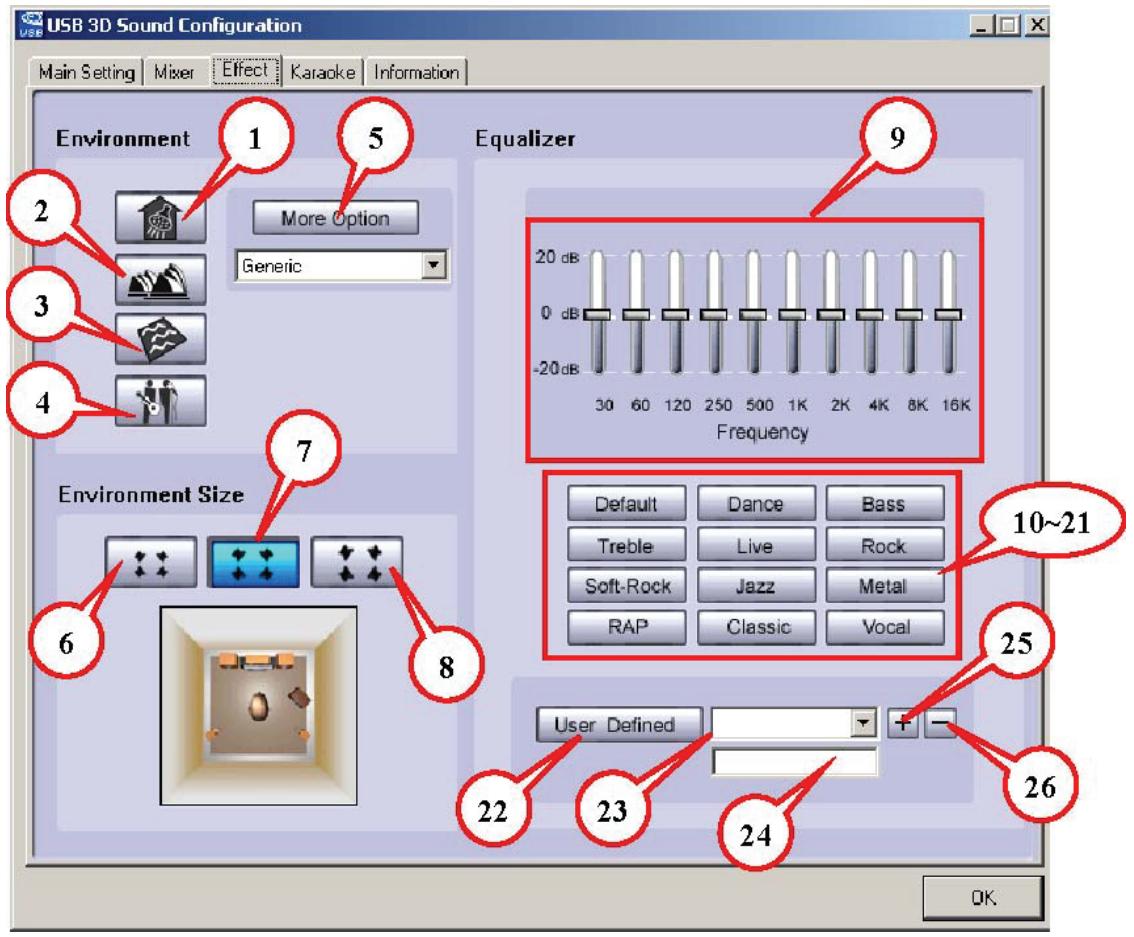
| Environment | Environment Size |
| 1.Bathroom | 6.Large |
| 2.Concert hall | 7.Middle |
| 3.Underwater | 8.Small |
| 4.Music Pub | |
| 5.More option: 27 mode for selected |
| Equalizer | |
| 9.Ten Band Equalizer Adjust | 18.Pre-Set Mode (Metal) |
| 10.Pre-Set Mode (Default) | 19.Pre-Set Mode (RAP) |
| 11.Pre-Set Mode (Dance) | 20.Pre-Set Mode (Classic) |
| 12.Pre-Set Mode (Bass) | 21.Pre-Set Mode (Vocal) |
| 13.Pre-Set Mode (Treble) | 22EQUALizer User Define On/Off |
| 14.Pre-Set Mode (Live) | 23.Pull to select user define mode |
| 15.Pre-Set Mode (Rock) | 24.User Define naming key in |
| 16.Pre-Set Mode (Soft-Rock) | 25.Add new user define mode |
| 17.Pre-Set Mode (Jazz) | 26.Del user define mode |
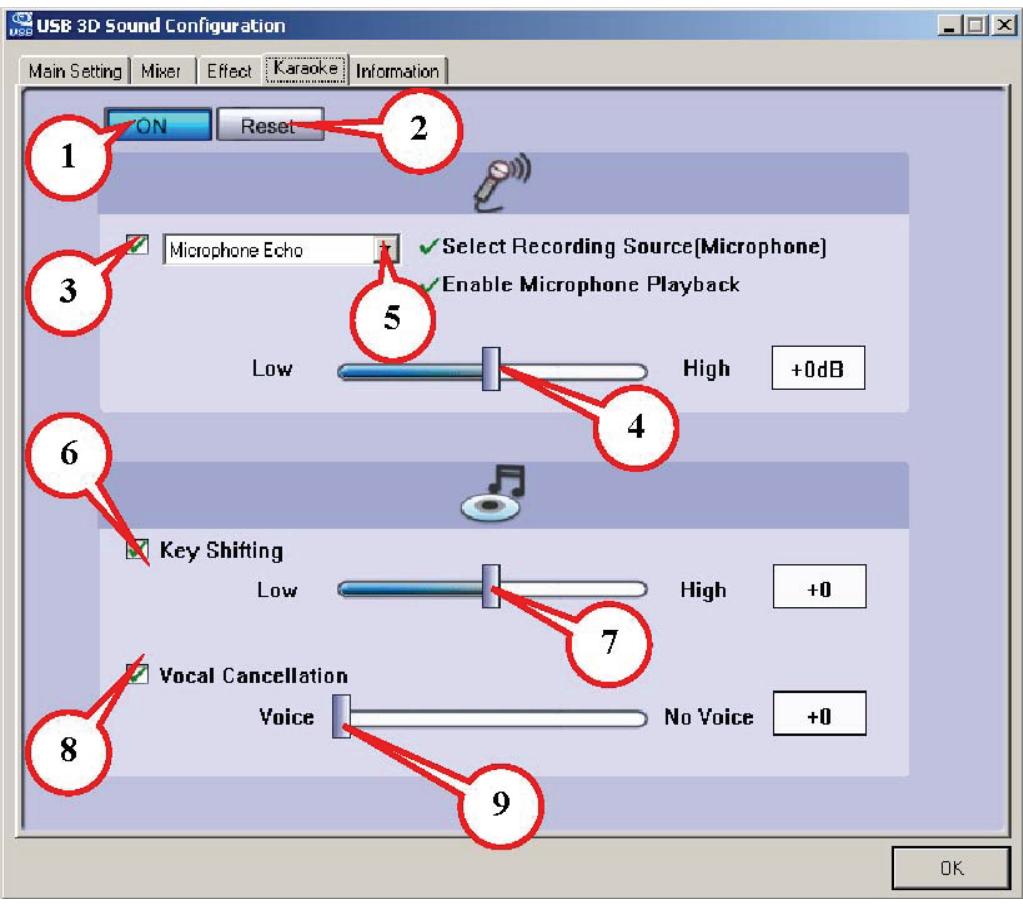
Karaoke :
| 1. On | Click this button to control all karaoke functions |
| 2. Reset | Can reset all settings to default value |
| 3. Start Microphone Echo Function | Select this button to pop up a dialog box to enable microphone function. Click “OK” button to select recording source and enable microphone |
| 4. Echo Low/High Control Bar | Adjust echo low/high |
| 5. Magic Voice Function (Optional) | This function only supported in multi-channel audio products. When you enable microphone echo then can pull down the menu to select magic voice. Magic voice provides 5 different effects. |
| 6. Start Key Shifting Function | Select this button to enable key shifting function and control. |
| 7. Key Shifting Low/High Control Bar | This function can adjust tune of background music to fit your singing. |
| 8. Start Vocal Cancellation Function | Select this button to enable vocal cancellation function and control. |
| 9. Vocal Canceling Control Bar | This function can control singer's vocal of background music and cancel it as possible. |
WEEE NOTICE :
Symbol for Separate Collection in European Countries
This symbol indicates that this product is to be collected separately. The following apply only to users in European countries:
- This product is designated for separate collection at an appropriate collection point. Do not dispose of as household waste.
- For more information, contact the retailer or the local authorities in charge of waste management.