
MP-400 - Portable music player TEAC - Free user manual and instructions
Find the device manual for free MP-400 TEAC in PDF.


| Product type | Portable music player |
| Brand | TEAC |
| Model | MP-400 |
| Dimensions | 60 mm x 38 mm x 17 mm |
| Weight | Approx. 40 g |
| Power supply | Built-in polymer battery, battery life approx. 14 hours |
| Display | 0.96-inch color LCD screen (65K colors), 96x64 resolution |
| Built-in memory | 512 MB or 1 GB (non-expandable) |
| Supported audio formats | MP3, WMA, OGG |
| Supported video formats | MP4 (via conversion) |
| Image formats | JPEG |
| FM radio | FM tuner with preset memory and recording (earphones serve as antenna) |
| Voice recording | Yes, in WMA format (adjustable quality) |
| Line-in recording | Yes, in WMA format (adjustable quality) |
| PC connectivity | High-speed USB 2.0, compatible with Windows 98SE/Me/2000/XP and Mac OS 9.0+ |
| Equalizer | Presets (Normal, Rock, Jazz, Classic, Pop) and user EQ |
| 3D sound effects | Mex Lite, Mex Bass, Mex Pro, Rex Mild, Rex Wide, Rex Live |
| Speed control | Adjustable from 75% to 130% |
| Repeat and play modes | Modes: normal, track once, track/folder/all repeat, shuffle, intro, bookmark |
| Firmware update | Yes, via download |
| Package contents | Player, earphones, USB cable, Line-in cable, USB power adapter, wrist strap, installation CD |
| Care and cleaning | Clean with a soft, dry cloth. Avoid moisture and shocks. |
| Safety | Do not expose to water. Use only supplied accessories. Recycle according to local regulations. |
| Reparability and spare parts | Contact TEAC customer service. Do not open the device. |
| General information | Limited manufacturer's warranty. Register the serial number. |
Frequently Asked Questions - MP-400 TEAC
User questions about MP-400 TEAC
0 question about this device. Answer the ones you know or ask your own.
Ask a new question about this device
Download the instructions for your Portable music player in PDF format for free! Find your manual MP-400 - TEAC and take your electronic device back in hand. On this page are published all the documents necessary for the use of your device. MP-400 by TEAC.
USER MANUAL MP-400 TEAC
To ensure the smooth handling of your warranty please write the serial number of your device into the box. In the case of warranty you are expected to send it together with a copy of your invoice to your nearest TEAC sales representative.
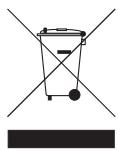
Disposing of the Product
Your device should not be placed in municipal waste. Please check local regulations for disposal of electronic products.
- Changes in specifications and features may be made without notice or obligation.
Copyright © 2005, TEAC Corporation. All rights reserved. Edition: August 2005 - Company and product names provided herein are trademarks of their respective companies.
Contents
NAME OF EACH PART 6
Top 6
Bottom 6
Left/Right 7
Front 7
CONTENT OF PACKAGE 8
BASIC OPERATION 8
Connect to PC 8
Download File in Windows Me, 2000, XP, Macintosh 9
Download File in Window98SE 9
Install Win98SE Driver 10
Firmware Upgrade 16
Reset 17
Charging 17
Power On/Off 18
Volume Up/Down 18
HOLD On/Off 18
MODE 19
Mode Selection 20
MUSIC 22
Select Music mode 22
Listening to Music 23
Track Forward/Track Back 23
Fast Forward/Rewind 23
Using Music Menu 24
Play Menu 25
Equalizer 25
3D Sound 26
User EQ 27
Repeat Mode 28
Display Menu 29
ID3 Tag 29
Language 30
Speed Menu 31
Speed 31
Set Speed 32
File Menu 33
File Info 33
DeleteBookmark 34
Creating aBookmark 35
Navigation Mode 36
Navigation 36
Delete File 37
Copy File 38
Repeat Section (A<-B) 39
VOICE RECORD 40
Select Voice Record Mode 40
Voice Record 41
Voice Record Quality 42
FM RADIO 43
Select FM Radio Mode 43
Manual Mode 44
Selecting Station Manually in Manual Mode 44
FM Radio CH Auto Scan in Manual Mode. 44
FM Radio CH Auto Save in Manual Mode. 44
Preset Mode 45
Saving CH 45
FM Radio Menu 46
Using FM Radio Menu 46
FM Band 47
Set Sensitivity 48
Mode Select 49
Shift Between Manual Mode and Preset Mode 49
CH List 50
CHDelete 51
CH Delete by the Easy Way 51
FM Radio Record 52
LINE IN RECORD 53
Select Line in Record Mode 53
Connect Devices 54
Line In Record 55
Using Line in Record Menu 56
Quality 57
CD Sync 58
VIEW 59
Select View Mode 59
Seeing Image 60
Seeing Motion Picture 61
MP4 Converter 62
Install MP4 Converter 62
Converter to MP4 file 64
MP4 Player 66
SYSTEM MANAGER 68
Select System Manager Mode 68
Control Menu 69
Memory info 69
Version 69
Format 70
Screen Saver 70
Reset 71
LCD Color Menu 72
LCD Color 72
Timer menu 73
Power Save 73
Sleep 73
TROUBLESHOOTING 74
SPECIFICATIONS 75
Specifications (continued) 76
NAME OF EACH PART
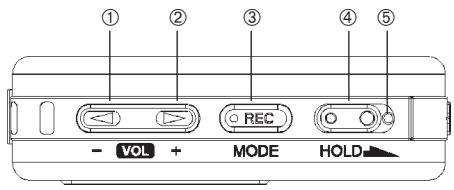
Top
Bottom
- VOL- Volume down
- VOL+ Volume up
- REC/MODE Recording/Mode selection
- HOLD (lock/unlock key)
- Reset
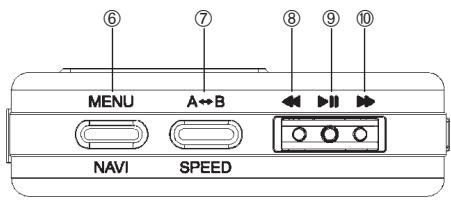
- MENU/NAVI (Menu key/Navigation key)
- A-B/SPEED Repeat/Set playback speed
- previous song, REW, back
9.▶Power ON/OFF/Play/Pause/Confirm selection - next song, FF, next
Left / Right
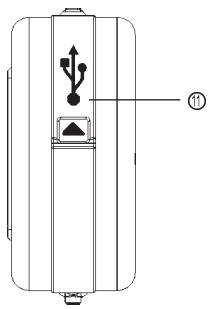
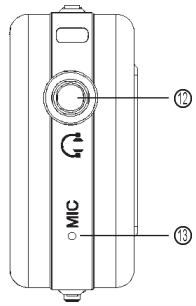
- USB connector
- Connectearphone jack/ConnectLine in jack
- Microphone
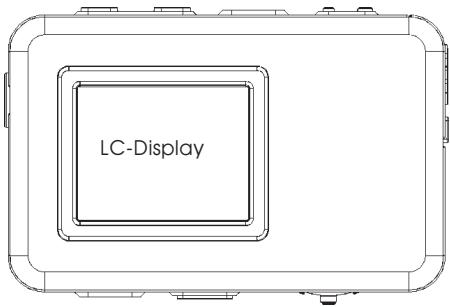
Front
CONTENT OF PACKAGE
- MP3 player MP-400
- Earphone
- USB cable
Line-In cable -
USB charging adapter
-
Neck strap
- Installation CD
Operation overview - User's manual (on CD)
BASIC OPERATION
Connect to PC
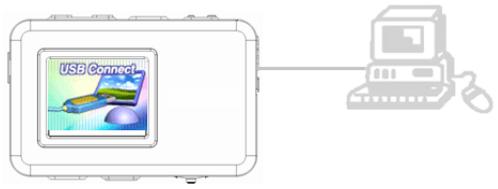
- Connect player to PC with USB Cable.
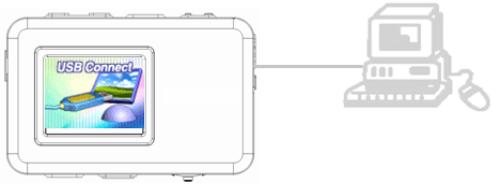
- The below image can be displayed if player is connected when it is powered on.
- If you connect the product without power on, the USB connect image won't display.
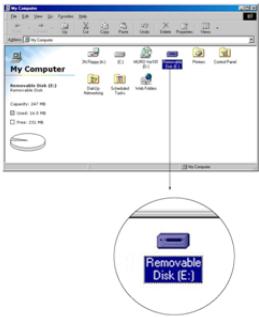
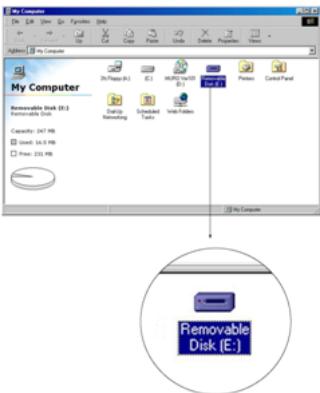
- The player can be recognized as a removable disk.
- Its name can be verified as PC system.
Download File in Windows Me, 2000, XP, Macintosh
- Copy the files you want to download in your PC and paste them in the removable disk.
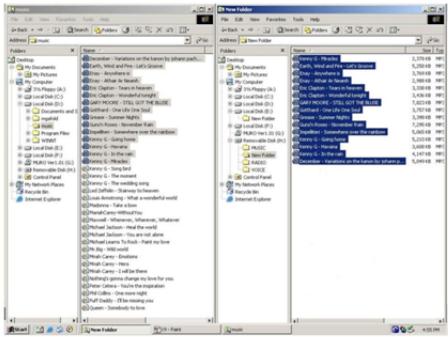
Download File in Window98SE
- If your PC window system is Window98SE, please install MP400 Installer in your PC. Installer program is contained in the bundled CD.
Install Win98SE Driver
- Put the bundled CD in your PC. The CD is executed automatically.
- Choose Win98SE driver by double click.
- The below image appears and starts install.
- Click "Next".
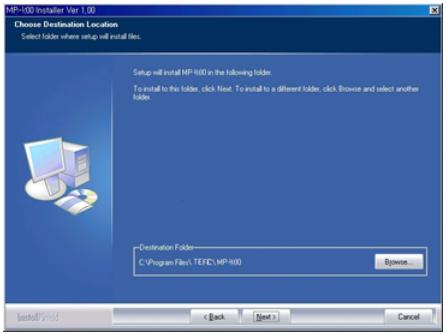
- Click "Next".

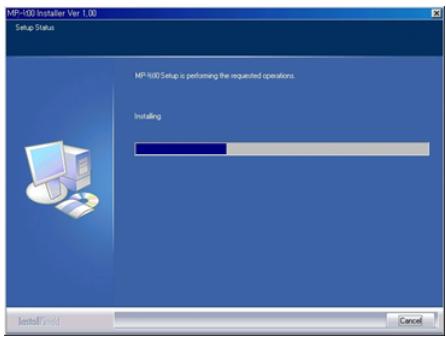
- Driver Installs.
- Choose "Yes" and click "Finish".
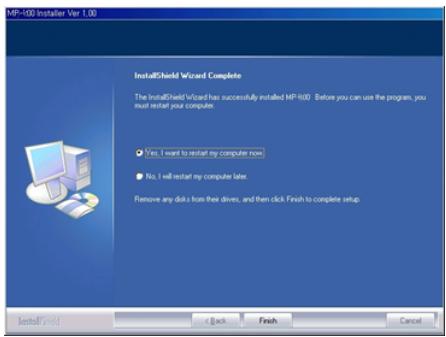
- Your PC will re-boot.
-
After re-booting, connect the player to the PC with USB.
-
After re-booting connect player to PC with USB
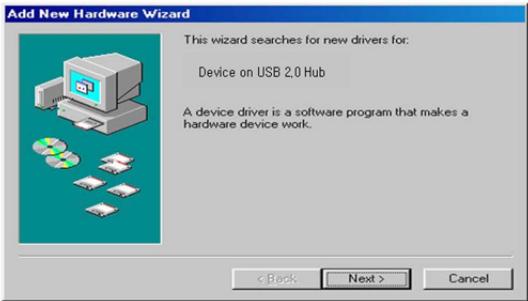
- Click "Next" after the below window appears.
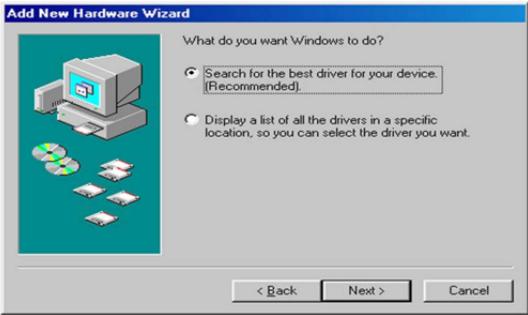
- The below window is for the choice of the driver searching path.
- Choose the first one and click "Next".
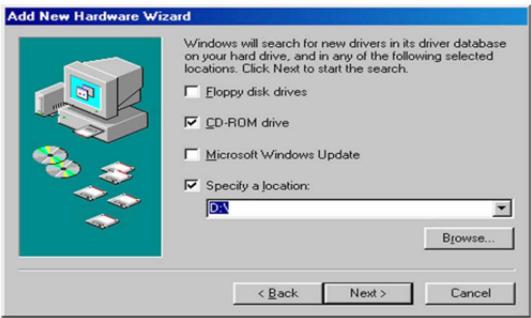
- Choose "designation of the location to be searched" and click "Search".
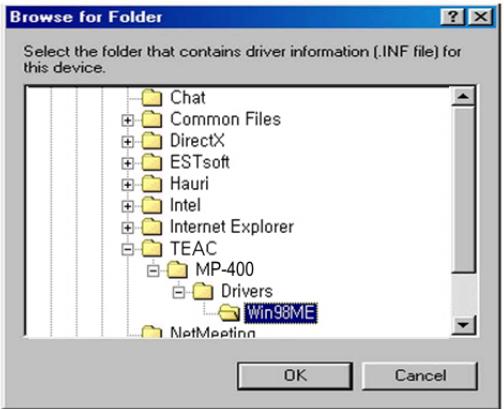
- As you can see the below, the dialogue box appears to tell you that the driver has been located.
- Start the driver installation by clicking "Next".
Add New Hardware Wizard
Windows driver file search for the device:
TeleChips USB Driver
Windows is now ready to install the best driver for this time. Click Back to select a different driver, or click Next to continue.
Location of driver:

C:WPROGRA~1W TEAC WMP-400WDRIVERSWWI
<Back
Next>
Cancel
- You will see the dialogue box which says that the driver has been properly set up.
- Click "Finish" and end the driver installation.
Add New Hardware Wizard

TEAC MP-400
Windows has finished installing the software that your new hardware device requires.
<Back
Finish
Cancel
- The player is recognized as a removable disk.
Firmware Upgrade
- Firmware is the operating system for the unit.
- The product's features can be easily upgraded using the firmware download. By doing so, you can keep your product always updated and abreast with.
- Go to our support website, and download the newest firmware version of the product.
- Firmware file shouldn't be saved on any folder of the product.
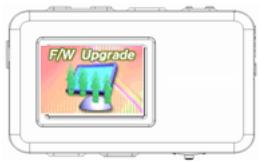
- Save firmware file on Home (Root) of the product.
- Remove the USB Cable and power on. Automatically firmware upgrade starts.
Reset
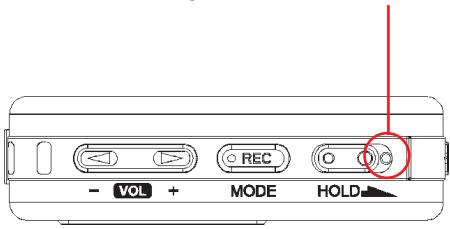
- If the product is frozen by any shock, you can forcibly power off and power on again.
- Insert a cylindrical pin into the reset hole and push the reset button. Then power on again.
Charging
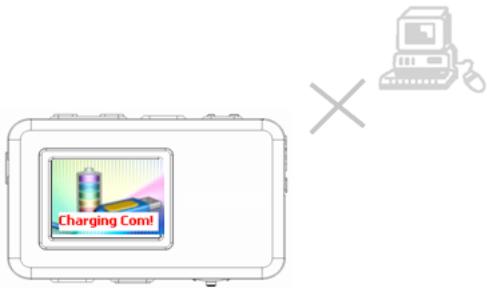
- When the product is connected with PC, it can be charged automatically.
- For a longer life time, disconnect the product from the PC, after "Charging Com! (Charging Completed)" message appears.
Power On/Off
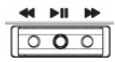
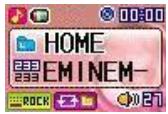
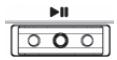
- Hold down (▶II) to power On / Off.

Volume Up/Down
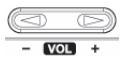
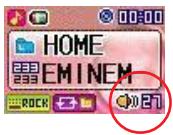
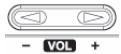
Push Vol+/Vol- to set volume.
Volume range is 0 40
HOLD On/Off
HOLD Off

HOLD On
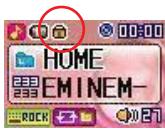
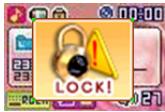
- If you set "HOLD On", LOCK icon will be displayed if any button is pressed.
MODE
- This product have 6 kinds of mode as shown below.

- Music mode

Voice record mode
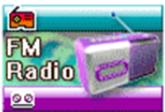
FM radio mode (optional available under www.teac.de)

Line in record mode

-Viewermode

- System Manager mode
Mode Selection
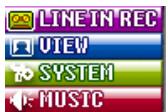
- You can change to mode which you want to move to.
- Hold down (MODE) button and mode selection menu displays.

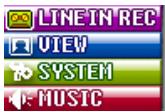
- Push REW( ) / FF() and set the mode bar which you want on the top.
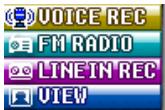
- Click (▶) to enter the selected mode.
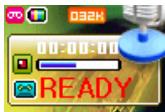
The below is another way of mode selection.
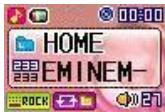
- Hold down (MODE) and the current mode image displays.

- Click (MODE) and the current mode image displays.


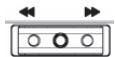
- Push REW( ) / FF() to shift by every mode.


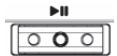
- Click (▶II) and you can enter the selected mode.
MUSIC
Select Music mode
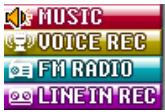
- Hold down (MODE) button and mode selection displays.

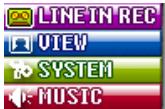
- Push REW(↔)/FF(►) and set music mode bar on the top.
- Click (▶II) to enter music mode.
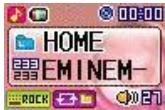
Listening to Music
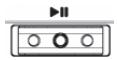
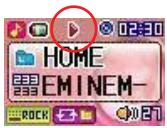
- Click (▶II) to start music playback.
- Default music folder is set to Home.
Track Forward/Track Back
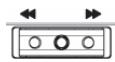
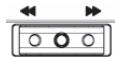
- Push REW( /FF( ) . to move to previous or next by one track.
Fast Forward/Rewind
- Hold down REW( ) / FF() in play file.
- Navigate within the music file that is being played.
Using Music Menu
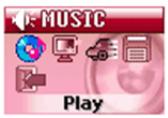
- Music menu is for the detail setting of music mode.
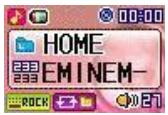
- Click (MENU) button in music mode and enter music menu mode.

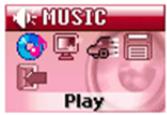
- Push REW(↔)/FF(►) to move to the menu you want to select.
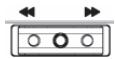
- Push Vol+/Vol- to move upper level menu or sub level menu.
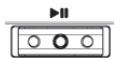
- Click (▶II) to set the menu at each step after you move.
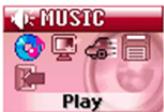
Play Menu
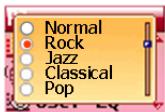
Equalizer
-
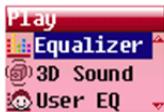
The equalizer features allow you to play your music in one of the following music styles.
-
Normal / Rock / Jazz / Classical / Pop / User EQ
-
Equalizer cant be set if 3D sound is selected.
- Click (MENU) button in Music mode and enter music menu mode.
- Push REW(↔)/FF(►) to move to the menu you want to select.
- Click (▶II) to set the menu at each step after you move.

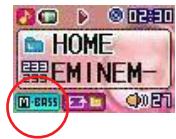
3D Sound
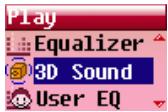
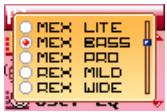
- Mex Lite / Mex Bass / Mex Pro / Rex Mild / Rex Wide / Rex Live
- You can hear the various 3D sound effects when playing your music.
- Click (MENU) button in music mode and enter music menu mode.
- Push REW(↔)/FF(►) to move to the menu you want to select.
- Click (▶II) to set the menu at each step after you move.
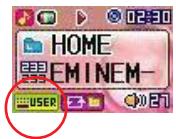
User EQ
-
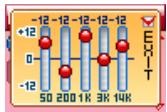
50/200/1K/3K/14K
-
You can adjust and tune EQ settings based on your preference.
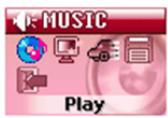
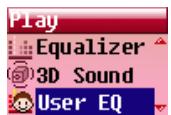
- Click (MENU) button in music mode and enter music menu mode.
- Push REW(↔)/FF(►) to move to the menu you want to select.
- Click () to set the menu at each step after you move.
- Push Vol+/Vol- to move between each EQ level.
- Push REW( ) / FF() to adjust level height.
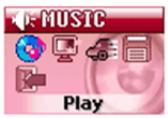
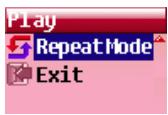
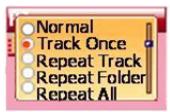
Repeat Mode
-
Normal / Track Once / Repeat Track / Repeat Folder / Repeat All/ Shuffle Once / Shuffle Folder / Shuffle Repeat / Intro / B-Mark/ B-Mark Repeat
-
You can set the playback type of your music.
- Click (MENU) button in music mode and enter music menu mode.
- Push REW(↔)/FF(►) to move to the menu you want to select.
- Click (▶II) to set the menu at each step after you move.
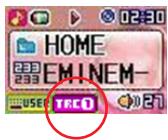
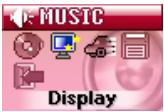
Display Menu
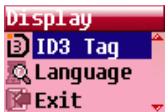
ID3 Tag
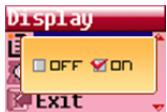
OFF/ON
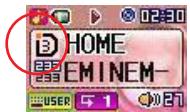
- You can display the ID3 information of your file.
- If you set ID3 Tag on, the name of Artist and Song display.
-
Display type is "File Name" - "Artist Name" - "Song Name".
-
Click (MENU) button in music mode and enter music menu mode.
- Push REW(↔)/FF(►) to move to the menu you want to select.
- Click (▶II) to set the menu at each step after you move.
Language
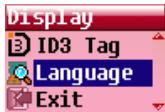
- English / German / Spanish / French / Italian / Russian/ Chinese Tr. / Chinese Si. / Japanese / Portuguese / Danish/ Norwegian / Swedish / Finnish / Korean
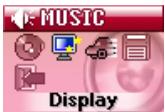
Language is for the correct display of ID3 Tag information.
- If ID3 information display has some error, check whether the language is the same as ID3 tag.
- Click (MENU) button in music mode and enter music menu mode.
- Push REW(↔)/FF(►) to move to the menu you want to select.
- Click () to set the menu at each step after you move.

Speed Menu
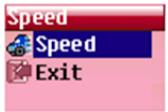
Speed
-
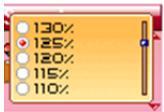
130% / 125% / 120% / 115% / 110% / 105% / 100% / 95% / 90% - 85% / 80% / 75%
-
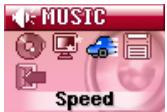
You can either speed up or slow down playback.
- 130% 105% : Faster than normal speed.
- 95% 75% : Slower than normal speed.
- Click (MENU) button in music mode and enter music menu mode.
- Push REW(↔)/FF(►) to move to the menu you want to select.
- Click (▶II) to set the menu at each step after you move.
Set Speed
- You should set (SPEED) button to activate the speed you set.
- You cannot set the speed if the player isn't playing music.
- Hold down (SPEED) button and the speed which you set displays.

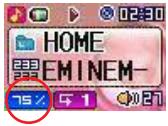
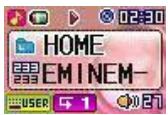
- Hold down (SPEED) button to play music by normal speed (100%) .

File Menu
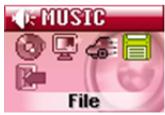
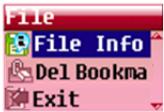
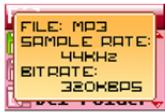
File Info
-
FILE / SAMPLE RATE / BIT RATE
-
You can display the file information of the active music file.
- Click (MENU) button in music mode and enter music menu mode.
- Push REW(↔)/FF(►) to move to the menu you want to select.
- Click (▶II) to set the menu at each step after you move.
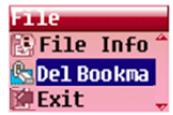
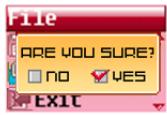
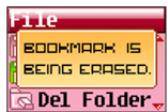
DeleteBookmark
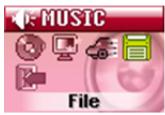
NO/YES
- You can remove Bookmarks set on songs.
- Click (MENU) button in music mode and enter music menu mode.
- Push REW(↔)/FF(►) to move to the menu you want to select.
- Click (▶II) to set the menu at each step after you move.
Creating aBookmark
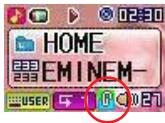
Music can be selected into Bookmark.
- You can select up to 20 tracks in Bookmark.
- It is just made when the song is being played.
- Click (REC) to save the song into Bookmark.
-Bookmark icon displays.

Navigation Mode
Navigation
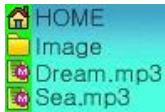
- Hold down (NAVI) in music mode to enter navigation mode.
- The highest file on the folder which the music being played is located should be selected.
- In the music mode, just "mp3, wma, ogg" file are displayed.
- In the viewer mode, just "mp4.jpg" file are displayed.

- Push REW(↔)/FF(►) to search file or folder.
- Push Vol+/Vol- to move to Upper Folder lever or Sub-Folder Level.
- Click (▶) to play the selected song.
Delete File
- Search the file which you want to delete in navigation.
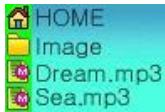
- Click (MENU) button and window appears to delete.

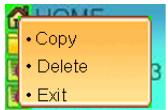
- Click (▶I) after selecting "Delete" and select "YES".
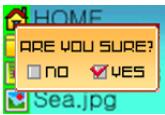
- Click (▶II) to set complete.
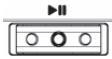
Copy File
- Search the file which you want to copy.
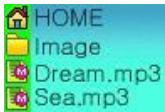
- Click (MENU) button and the pop up window displays.

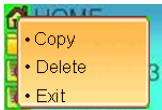
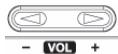
- Push Vol+/Vol- to select "Copy" and click (▶II).
- Push Vol+/Vol- to search the position where you want to patch it.

- Click (▶II) to set complete.
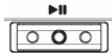

Repeat Section (A <-> B)
- You can repeat sections of a song. Creating a loop effect.
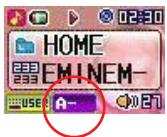
- Click (A-B) at the section start point.
(A-) icon appear and starts section save.

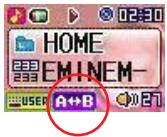
- Click (A-B) at the section ending point.
(A-B) icon appears and start section repeat.

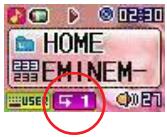
- The repeat section is released when (A-B) key is pressed again.
- Normal playing resumes and the icon disappears from the display.

VOICE RECORD
Select Voice Record Mode
- Hold down (MODE) button and mode selection menu displays.

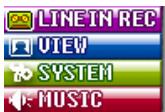
- Push REW(↔)/FF(►) and to set voice record mode bar on the top.
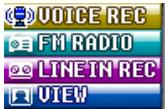
- Click (▶II) to enter voice record mode.
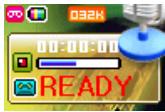
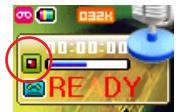
Voice Record
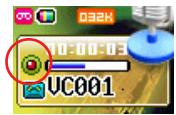
- Click (REC) to start voice record.
- Recording time and icon displays.
Progress bar displays the remained memory.

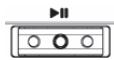
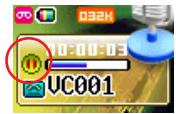
- Click (▶II) to pause recording.
- Recording Time blinks.
- Click (REC) to stop recording.
- Recorded File is automatically saved on "RECORD" folder.

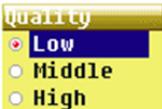
Voice Record Quality
- Low: 44KHz, 32Kbps, Mono
- Middle: 44KHz, 64Kbps, Stereo
-
High: 44KHz, 96Kbps, Stereo
-
You can adjust the voice recording bit rate quality.
- Click (MENU) button in voice record mode and enter voice record menu mode.


- Push REW(↔)/FF(►) to move to any menu you want to select.
- Click (▶II) to select the menu.
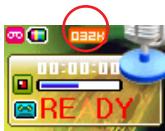
FM RADIO
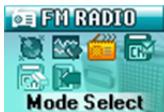
Select FM Radio Mode
- Hold down (MODE) button and mode selection menu displays.

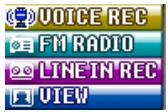
- Push REW(↔)/FF(►) and to set FM radio mode bar on the top.
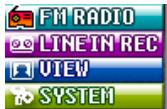
- Click (▶II) to enter FM radio mode.
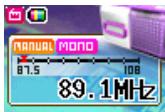
Manual Mode
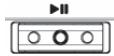
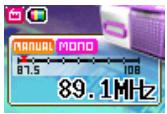
- Move between the set step by every REW( ) / FF() .
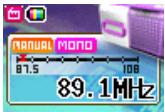
Selecting Station Manually in Manual Mode
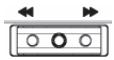
- Push REW(«) / FF(») and select a specific frequency.
FM Radio CH Auto Scan in Manual Mode.
- Hold down REW( ) / FF() to search the next available channel.
FM Radio CH Auto Save in Manual Mode.
- Hold down (A-B) and automatically search the available channel and save it in CH list.


Preset Mode
- You can manually save your favorite radio stations as preset.
- Move between the stored CH by every REW( ) / FF() .
Saving CH
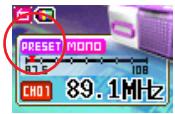
- Click (▶II) and CH number and CH saved icon blinks, after searching the frequency you want.
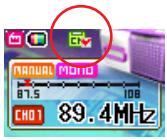
- Push REW(▲)/FF(▲) to change CH number which you want to save.
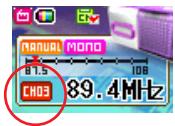
- Click (▶) to set complete.
FM Radio Menu
Using FM Radio Menu
- Music menu is for the detail setting of FM radio mode.
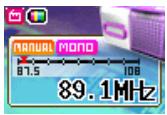
- Click (MENU) button button in FM radio mode and enter FM radio mode.

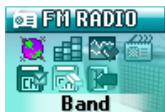
- Push REW(↔)/FF(►) to move to the menu you want to select.
- Push Vol+/Vol- to move upper level menu or sub level menu.
- Click (▶) to set the menu at each step after you move.
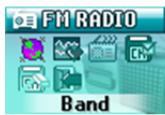
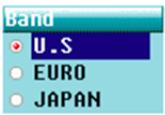
FM Band
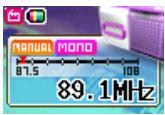
US: 87.5 ~ 108.0 MHz
EURO: 87.5 ~ 108.0 MHz
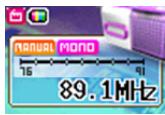
JAPAN: 76.0 ~ 91.0 MHz
- You can set FM radio band depending on which region you are in.
- Click (MENU) button in FM radio mode and enter FM radio menu.
- Push REW(↔)/FF(►) to move to the menu you want to select.
- Click (▶II) to set the menu at each step after you move.
US
- Europe
- Japan
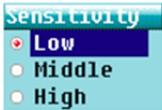
Set Sensitivity
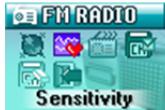
- Low: Scan for all channels with low reception sensitivity
Middle: Scan for channels with middle reception sensitivity
High: Scan for the channels with high reception sensitivity.
- You can adjust the reception sensitivity for auto scan.
- Click (MENU) button in FM radio mode and enter FM radio menu.
- Push REW(↔)/FF(►) to move to the menu you want to select.
- Click (▶II) to set the menu at each step after you move.
Mode Select
-
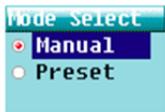
Manual / Preset
-
In Menu mode of FM radio, you can select Manual mode or Preset mode.
- Click (MENU) button in FM radio mode and enter FM radio menu.
- Push REW(↔)/FF(►) to move to the menu you want to select.
- Click (▶) to set the menu at each step after you move.
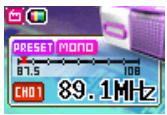
Shift Between Manual Mode and Preset Mode
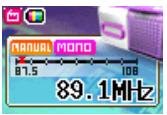
- Click (A-B) button to shift easily between Manual and Preset mode.

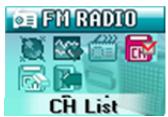
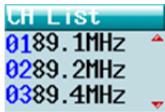
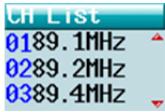
CH List
CH1\~CH20
- You can check the saved CH in CH List in menu mode.
- Click (MENU) button in FM radio mode and enter FM radio menu.
- Push REW(↔)/FF(►) to move to the menu you want to select.
- Click (▶II) to set the menu at each step after you move.
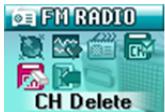
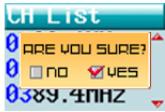
CH Delete
NO/YES
- You can delete the saved CH in menu mode.
- Click (MENU) button in FM radio mode and enter FM radio menu.
- Push REW(↔)/FF(►) to move to the menu you want to select.
- Click (▶II) to set the menu at each step after you move.
CH Delete by the Easy Way
- You can delete the saved CH easily.
- Hold down (A-B) button and CH delete window display.

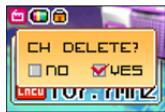
- Push REW(FF) to select "YES".
- Click (▶II) to set complete.
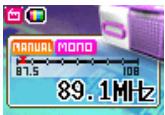
FM Radio Record
- Click (REC) button in FM radio mode.
- Recording time displays.

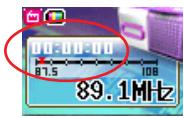
- Click () to pause recording.
- Recording time blinks.
- Click (REC) to stop recording and back to normal FM radio mode.
- Recorded file is automatically saved on "RECORD" folder.

LINE IN RECORD
Select Line in Record Mode
- Hold down (MODE) button and mode selection menu displays.

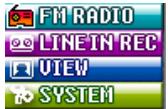
- Push REW(↔)/FF(►) and to set Line in record mode bar on the top.
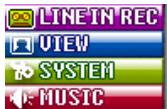
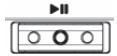
- Click (▶I) to enter Line in record mode.
Connect Devices
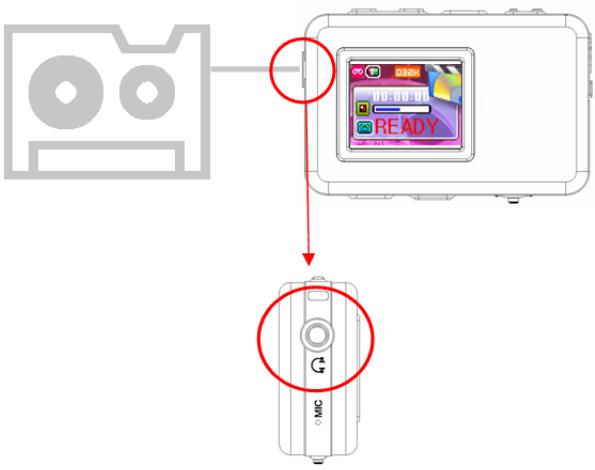
- Line in recording can record the sound from an outside source.
- The recorded file is saved as WMA file.
- Connect the bundled line in cable between line in jack hole and the line out jack hole of the external audio product.
Line In Record
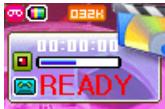
- Click (REC) button to start line in record.
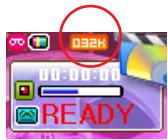
Progress bar displays the remained memory. - Recording time and icon displays.

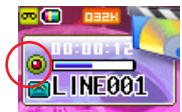
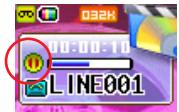
- Click (▶II) to pause Recording.
- Recording Time blinks.
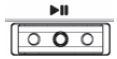
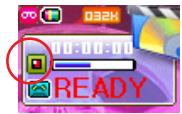
- Click (REC) to stop Recording.
- Recorded file is automatically saved on "RECORD" folder.
- File is recorded with WMA file type.

Using Line in Record Menu
- Line in record menu is for the detail setting of line in record mode.
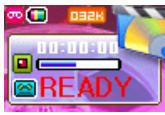
- Click (MENU) button in Line in record mode to enter line in record menu.

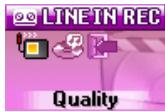
- Push REW(↔)/FF(►) to move to the menu you want to select.
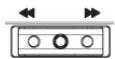
- Click (▶II) to set the menu at each step after you move.
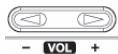
- Push Vol+/Vol- to move upper level menu orsub level menu.
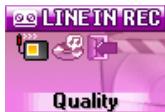
Quality
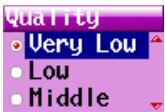
- Very Low: Very low quality of recording (32kbps)
Low: Slightly low quality of recording (48kbps)
Middle: Normal Quality of recording (64kbps)
High: High quality of recording (96kbps)
Very High: Very high quality recording (128kbps)
- To determine the recording quality the files in line in recording.
- The quality of recording you choose will determine the memory size of the file being created.
- Click (MENU) button in line in record mode and enter line in record menu.
- Push REW(↔)/FF(►) to move to the menu you want to select.
- Click (▶II) to set the menu at each step after you move.
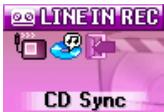
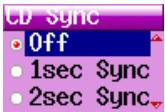
CD Sync
- OFF: To record all the music playing from the external source into a single file.
1 Sec Sync: If there is no sound for 1 sec, the file is recorded separating each track.
2 Sec Sync: If there is no sound for 2 sec, the file is recorded separating each track.
- Sync will determine whether to make a separate file when the period of no sound exists.
- Click (MENU) button in line in record mode and enter FM radio menu.
- Push REW(↔)/FF(►) to move to the menu you want to select.
- Click (▶II) to set the menu at each step after you move.
VIEW
Select View Mode
- Hold down (MODE) button and mode selection menu displays.

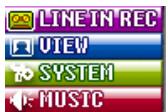
- Push REW( ) / FF() and set view mode bar on the top.

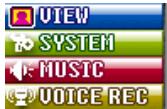
- Click (▶) to enter view mode.
Seeing Image
- You can see JPEG file in JPEG Viewer.
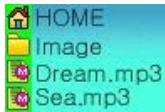
- In view mode, "JPG" and "MP4" files can be searched by navigation.
- Hold down (NAV) button to search what you want to see in navigation.

- Click () to display the selected file.

- You can hear music when you can seeJPEG image.
Seeing Motion Picture
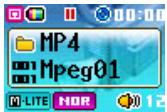
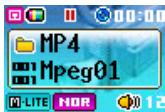
- The product can playback MP4 file, so you can see motion picture file.
- If your motion picture file type is not MP4, you can change the file type with the MP4 converter program in the bundled CD.
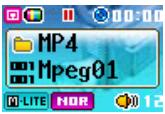
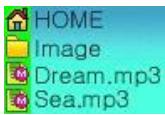
- Hold down (NAV) button to search what you want to see in navigation.
- In View mode, "JPG" and "MP4" files can be searched by navigation.

- Click (▶) to playback the selected file.

- If you are hearing music, the music stops and the selected motion pictures playbacks.
MP4 Converter
Install MP4 Converter
- Put the bundled CD in your PC. The CD is executed automatically.
- Choose MP4 Converter by double click.
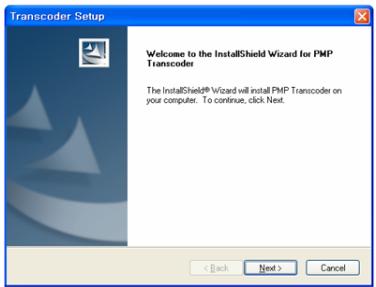
- The below image appears and starts install.
- Click "Next".
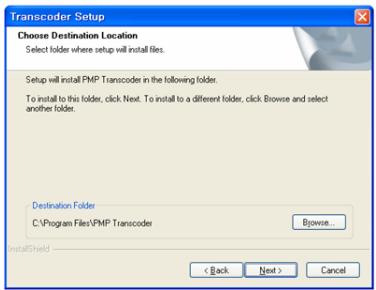
- Choose "Destination Location" after click "Browse...".
- Click "Next".
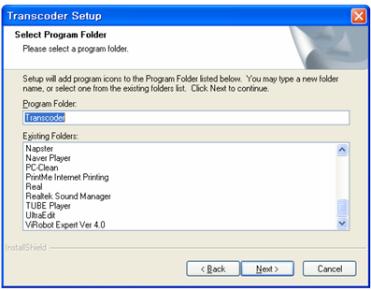
- Check the program folder where it is added and click "Next".
- After wait the progress bar completed and click "Finish".
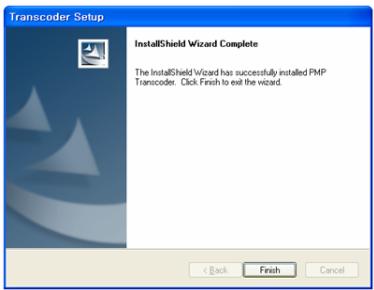
- After install, its icon will appear.

Transcoder
Converter to MP4 file
- Start "PMP transcoder (MP4 converter)" by double clicking Icon.

Transcoder
- Click "Open" and select what you want to change to MP4. ("avi,mpg,mpeg,wmv,asf" file type available)
- Click "Save as" and select the location where you want to save.
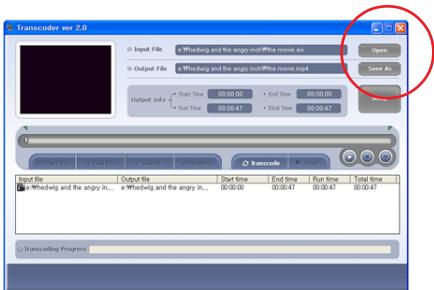
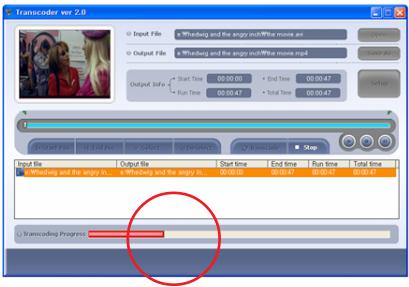
- Click "Transcode".

- The conversion process starts.
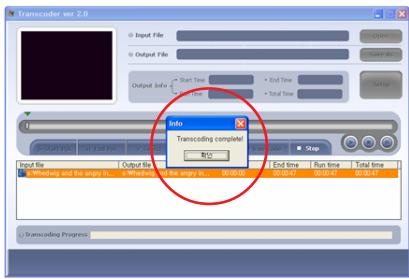
- You can see the complete message after finishing.
MP4 Player
- If you install MP4 Converter, the MP4 Player will be installed automatically.
- You can see the MP4 file with this player in your PC.
- Start MP4 player by clicking player icon.

Player
- MP4 Player window appears.
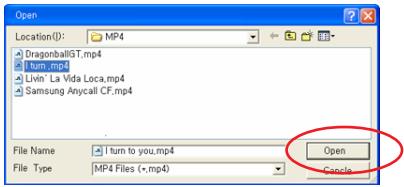
- Click (▲) and select the file which you want to playback.
- Click "Open".
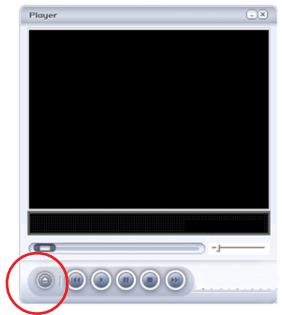
- Click (▶) to play the selected file.
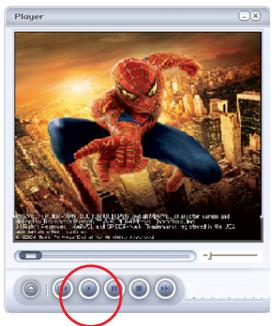
- It offers the buttons below.

- Pause

- Stop

-REW

-FF
SYSTEM MANAGER
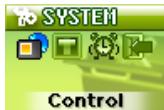
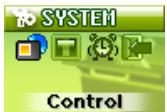
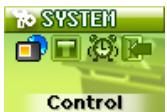
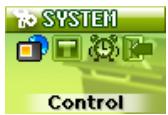
Select System Manager Mode
- Hold down (MODE) button and mode selection displays.


- Push REW(↔)/FF(►) and set System Manager mode bar on the top.
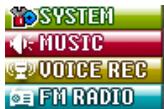
- Click (▶II) to enter System Manager mode.
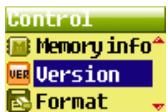
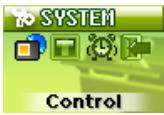
Control Menu
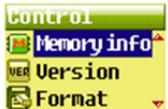
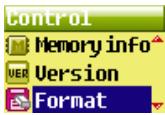
Memory info
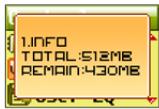
- TOTAL: Total memory of the product
REMAIN: The remaining available memory of this product.
- You can see the amount of total memory and available in your product.
- Click (MENU) button in system mode and enter system menu.
- Push REW(↔)/FF(►) to move to the menu you want to select.
- Click (▶II) to set the menu at each step after you move.
Version
-
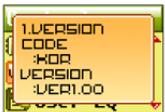
CODE / VERSION
-
You can see the version of the product.
- Click (MENU) button in system mode and enter system menu.
- Push REW(↔)/FF(►) to move to the menu you want to select.
- Click (▶II) to set the menu at each step after you move.
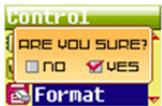
Format
NO/YES
- You can format the flash memory to erase all stored files.
- Click (MENU) button in system mode and enter system menu.
- Push REW(↔)/FF(►) to move to the menu you want to select.
- Click (▶II) to set the menu at each step after you move.
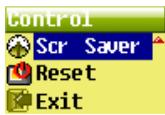
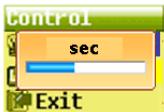
Screen Saver
Sec: 0 sec ~ 60 sec
- You can set the amount of time the backlight time stays on after a key press.
- Click (MENU) button in system mode and enter system menu.
- Push REW(↔)/FF(►) to move to the menu you want to select.
- Click (▶II) to set the menu at each step after you move.
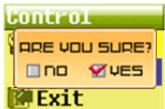
Reset
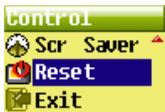
NO/YES
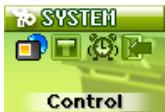
- Reset means all of the product setting what user have made turns to the default as the product was launched.
- Select Reset, the product will automatically power off.
- For example, Reset make the volume 15 as it's the default.
- But the saved data is not deleted.
- Click (MENU) button in system mode and enter system menu.
- Push REW(↔)/FF(►) to move to the menu you want to select.
- Click (▶II) to set the menu at each step after you move.
LCD Color Menu
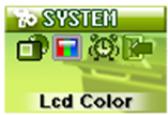
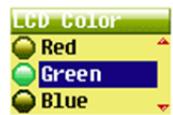
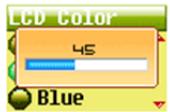
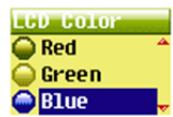
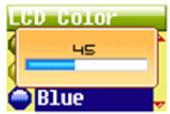
LCD Color
-
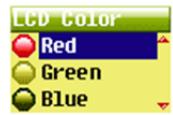
RED / GREEN / BLUE
-
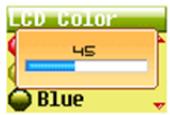
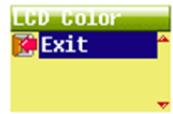
You can adjust LCD Color each as red, green, blue part.
- Click (MENU) button in system mode and enter system menu.
- Push REW(↔)/FF(►) to move to the menu you want to select.
- Click (▶II) to set the menu at each step after you move.
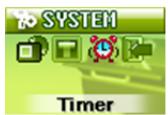
Timer menu
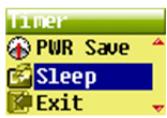
Power Save
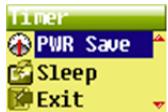
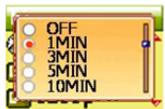
OFF/1MIN/3MIN/5MIN/10MIN
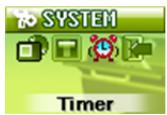
- You can set the player to automatically turn off if the player isn't playing any music.
- It is just for music mode.
- Click (MENU) button in system mode and enter system menu.
- Push REW(↔)/FF(►) to move to the menu you want to select.
- Click (▶II) to set the menu at each step after you move.
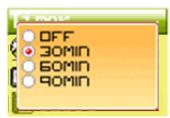
Sleep
OFF/30MIN/60MIN/90MIN
- You can set the player to sleep automatically.
- The music will turn off even if the player is playing off.
- Click (MENU) button in system mode and enter system menu.
- Push REW(↔)/FF(►) to move to the menu you want to select.
- Click (▶II) to set the menu at each step after you move.
TROUBLE SHOOTING
-
In case of no sound
-
Check if there are any files that can be played in the memory.
- Check if the volume is set to "0".
- Check if the connection of the earphone has failed.
-
Check if the hold button is "ON".
-
Download failure
-
Check if LCD displays "USB connect" image.
- For the users of Windows 98SE, be sure to install the driver provided in the package onto your PC. Otherwise your PC won't recognize the device.
-
Check if the memory is full.
-
LCD Display failure
-
Check if "Screen saver" menu is not off.
-
MP4 Player failure
-
As you can see the notice, user have to install "Multi Media Codec". Without the codec, some files can't be played. Users can download "K-lite codec pack" from "www.freecodecs.com".
-
No action without any display on LCD
-
Check the battery status.
-
Push the "Reset button" (see page 17), and power on again.
-
Firmware Failure
-
Check if the firmware file is downloaded in any folder.
-
Firmware file have to be downloaded in "Home (Root)".
-
FM Radio performance failure
-
Check if the earphone is connected with the product. Earphone works as an antenna.
SPECIFICATIONS
| Body | Dimension | 60mm * 38mm * 17mm |
| Weight | appr. 40g | |
| Features | Multi Codec Sound Player | MP3, MP4, WMA, OGG |
| FM Tuner & Record (optional) | Encode WMA | |
| Voice Record | Encode WMA | |
| Line in Recording | Encode WMA | |
| Data File Storage | ||
| Memory | Built In Memory | 512MB, 1GB |
| Expandable Memory | None | |
| Power | Power | Built In Polymer Battery |
| Life Time | appr. 14 Hours | |
| Display | LCD | 0.96" 65K Color LCD |
| LCD Size | 96 * 64 | |
| Display | Motion Picture | |
| JPEG Image | ||
| ID3 Tag | ||
| Multi Language | ||
Specifications (continued)
| Sound | Sound | Wolfson DAC Codec |
| Earphone Output | 10mW (Left 5mW + Right 5mW), 16Ohm | |
| Music Play | Sound Effect | 3D Sound |
| Support File Format | MP3, MP4, WMA, OGG | |
| SNR | Over than 85dB A weight | |
| Bit Rate Supported | MP3: 8Kbps ~ 320Kbps, Support VBR | |
| WMA: 32Kbps ~ 192Kbps | ||
| PC Connection | Support PC system | Win98SE, WinMe, Win2000, WinXP, MAC 9.0 or newer |
| Interface | USB2.0 High Speed | |
| U/I | Colorful Smart Graphic U/I | |
| Firmware Upgradeable | Yes |
Owner's name
Serial No.
MP-400

Address
| Dealer's name | Date of purchase |
| Dealer's address |
Warranty Period
This warranty may be enforced only by the original retail purchaser.
What We Will Pay For
We will pay an additional and material expenses for items covered by the warranty. Payment of shipping and insurance charge is discussed in the next section of this warranty.
How You Can Get Warranty Service
1. If your unit needs service during the warranty period, please contact the local authorized distributor for more information. This will enable to locate such a distributor, please contact your TEAC facility at the address indicated below.
2. After identifying the nearest authorized service station for this product the product or any parts believed to be defective must be checked freight and insurance as per such service station as the
with a copy of this warranty certificate and a copy of your sales receipt, showing the date of purchase. Please ensure to fill out the warranty certificate correctly (do not forget the serial number of the
product). TEAC reserves the right to refuse the guarantee service if the documents are missing or incomplete in the understanding of this terms.
If the necessary repairs are covered by the warranty, and if you have sent the product or parts of it to the nearest authorized service station, the return freight and insurance charges will be prepaid.
RMA form)!
Limitations of Liability and Exclusion of Implied Warranties
Unless considered unenforceable or unlawful under the applicable national law: 1. TEAC's liability for any defective product is limited to repair or replacement of the product, at TEAC's request, with reasonable and reasonable costs.
stations. No one is authorized to assume any greater liability on TEACs behalf. TEAC shall not be liable for any damage to any other properties independent of their individual or real nature, especially those
is no liability for any damage to any kind of software and/or any kind of databases caused by TEAC products. Furthermore, TEAC is not liable for damage arising out of use of one, loss of revenue or
profits, or any other damages, wether incidental, consequential, or otherwise. 2. All implied warranties or conditions, including but not limited to warranty or conditions of membership
and fitness for a particular purpose, hereby are excluded. These warranty terms do not apply any statutory rights of consumers which were granted by the speci
TEAC Europe GmbH
DSPD
Bahnstraße 12
65205 Wiesbaden-Erbenheim
Germany
TEAC Europe GmbH, DSPD:
TEAC Service Center: TEAC Service Centre Europe
EAC Serv Hessenring
64546 Mofelden-Walldorf, Ge
www.teac.de/rma
Hotline:
+49 1805 55 83 79
- Disposing of the Product
- Contents
- NAME OF EACH PART
- Left / Right
- Front
- CONTENT OF PACKAGE
- BASIC OPERATION
- Connect to PC
- Download File in Windows Me, 2000, XP, Macintosh
- Download File in Window98SE
- Install Win98SE Driver
- Add New Hardware Wizard
- Firmware Upgrade
- Reset
- Charging
- Power On/Off
- Volume Up/Down
- HOLD On/Off
- ← HOLD Off
- → HOLD On
- MODE
- Mode Selection
- MUSIC
- Select Music mode
- Listening to Music
- Track Forward/Track Back
- Fast Forward/Rewind
- Using Music Menu
- Play Menu
- Equalizer
- 3D Sound
- User EQ
- Repeat Mode
- Display Menu
- ID3 Tag
- Language
- Speed Menu
- Speed
- Set Speed
- File Menu
- File Info
- DeleteBookmark
- Creating aBookmark
- Navigation Mode
- Navigation
- Delete File
- Copy File
- Repeat Section (A <-> B)
- VOICE RECORD
- Select Voice Record Mode
- Voice Record Quality
- FM RADIO
- Select FM Radio Mode
- Manual Mode
- Selecting Station Manually in Manual Mode
- FM Radio CH Auto Scan in Manual Mode.
- FM Radio CH Auto Save in Manual Mode.
- Preset Mode
- Saving CH
- FM Radio Menu
- Using FM Radio Menu
- FM Band
- Set Sensitivity
- Mode Select
- Shift Between Manual Mode and Preset Mode
- CH List
- CH Delete
- CH Delete by the Easy Way
- FM Radio Record
- LINE IN RECORD
- Select Line in Record Mode
- Connect Devices
- Using Line in Record Menu
- Quality
- CD Sync
- VIEW
- Select View Mode
- Seeing Image
- Seeing Motion Picture
- MP4 Converter
- Install MP4 Converter
- Converter to MP4 file
- MP4 Player
- SYSTEM MANAGER
- Select System Manager Mode
- Control Menu
- Memory info
- Version
- Format
- Screen Saver
- LCD Color Menu
- LCD Color
- Timer menu
- Power Save
- Sleep
- TROUBLE SHOOTING
- SPECIFICATIONS
- Specifications (continued)
- Owner's name
- MP-400
- Address
- Warranty Period
- TEAC Europe GmbH
Brand : TEAC
Model : MP-400
Category : Portable music player